- Отображение времени в 24-часовом формате в английской Windows
- Описание проблемы
- Для новых версий Windows 10
- Для старых версий Windows
- Switch Calendar views between a 12-hour clock and 24-hour clock
- Change the time settings in Windows
- How To Change the Windows 7 Clock from 12-Hour to 24-Hour Format
- How to Enable the Windows 7 24 Hour Clock
- Summary – How to use a 24 hour clock in Windows 7
- Share this:
- Related
- Change 24 Hour Clock to 12 Hour Clock in Windows 10
- Change 24 Hour Clock to 12 Hour Clock in Windows 10
- 1. Change 24 Hour Clock to 12 Hour Using Settings
- 2. Change 12 Hour Clock to 24 Hour Clock
- What is Short and Long Time in Windows 10?
- Change Time To 24 Hour Format In Windows 10
- Set time format to 24 hour in Windows 10
 Отображение времени в 24-часовом формате в английской Windows
 Отображение времени в 24-часовом формате в английской Windows
Описание проблемы
Одной из неприятных особенностей английской версии Windows может стать отображение времени в 12-часовом формате. Ниже подробная инструкция, как настроить Windows показывать время в 24-часовом формате.
Для новых версий Windows 10
Нажимаем правой кнопкой по времени в трее, и выбираем пункт «Adjust date/time».

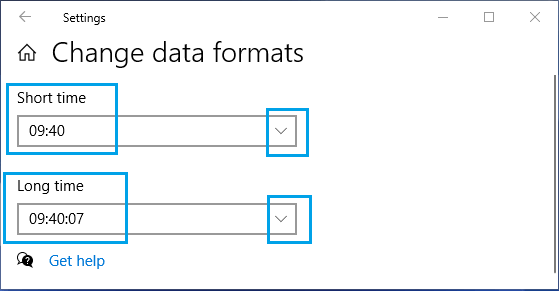
Откроется окно с параметрами даты и времени. В самом низу, находим пункт «Formats» и нажимаем на надпись «Change data and time formats».

В следующем окне выставляем значения у параметров «Short time» — «HH:mm», и «Long time» — «HH:mm:ss». После этого время примет более привычный для жителя России вид.

Для старых версий Windows
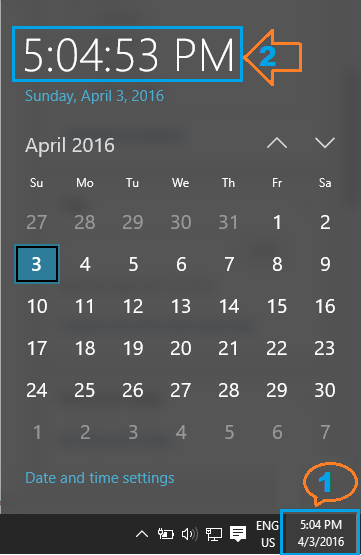
Нажимаем левой кнопкой мыши в трее по времени, и в отобразившемся окошке календаря выбираем «Change date and time settings. «

В появившемся меню выбираем «Change date and time. « 
Далее выбираем Change calendar settings

Теперь ищем наверху появившегося окошка вкладку «Time».

В ней есть пункт «Time formats» и по умолчанию там написано следующее:

Нам нужно заменить «h:mm tt» на «HH:mm», а «h:mm:ss tt» на «HH:mm:ss», чтобы в итоге этот пункт выглядит следующим образом:

Теперь можно смело нажать ОК во всех открытых окнах, и время станет показываться в 24-часовом формате.
Switch Calendar views between a 12-hour clock and 24-hour clock
Microsoft Outlook uses the country/region settings for your computer to determine how the times appear.
For example, in Calendar in the month view, if you are using the default settings for the United States, Outlook displays a 12-hour clock. After 12:59 P.M., the time is displayed as 1 P.M. Other countries/regions use a 24-hour clock.
You can change how the clock appears in your display. However, changing this display is an option provided by the operating system, not Outlook.
Change the time settings in Windows
- Which version of Windows are you using?
- Windows 10
- Windows 8
- Windows 7
- Windows Vista
Start Control Panel, and then under Clock, Language, and Region, click Change date, time or number formats.
On the Formats tab, under Date and time formats, do one of the following:
To change to 24-hour format, on the Short time drop-down list, select HH:mm and on the Long time drop-down list, select HH:mm:ss.
To change to 12-hour format, on the Short time drop-down list, select h:mm:tt and on the Long time drop-down list, select h:mm:ss:tt.
Click Apply and then click OK.
In Windows, click the Start  button.
Click Control Panel, and then click Clock, Language, and Region.
Under Regional and Language, click Change the date, time, or number format.
On the Format tab, under Date and time formats, do one of the following:
To change to 24-hour format, on the Short time drop-down list, select HH:mm and on the Long time drop-down list, select HH:mm:ss.
To change to 12-hour format, on the Short time drop-down list, select h:mm:tt and on the Long time drop-down list, select h:mm:ss:tt.
Click Apply and then click OK.
In Windows, click the Start button.
Click Control Panel, and then click Clock, Language, and Region.
Note: If you are using Control Panel in Classic View, double-click Regional and Language Options, and then skip to step 3.
Click Regional and Language Options.
Click Customize this format.
On the Time tab, do one of the following:
Change Time format to HH:mm:ss for a 24-hour clock.
Change Time format to hh:mm:ss tt for a 12-hour clock.
How To Change the Windows 7 Clock from 12-Hour to 24-Hour Format
Last updated: February 24, 2017
The clock on your Windows 7 computer can be adjusted in a couple of different ways. One of those available adjustments includes the option to specify the format of the clock, which means that it is possible to have a Windows 7 24 hour clock.
Whether your job, background or geographic location has led you to prefer using the 24-hour clock format over the 12-hour format that Windows uses by default, it is possible to change this setting if you desire. So continue below to see how you can start using a 24-hour clock on your Windows 7 computer.
How to Enable the Windows 7 24 Hour Clock
This setting can be adjusted at any time. If you find that it is not as helpful as you had hoped, or if you were simply testing out a clock format change, you can always follow these steps again in the future if you would like to return to the default 12 hour clock format.
Step 1: Click the “Windows” button at the bottom-left corner of your screen, then click “Control Panel” at the right side of the menu.

Step 2: Click the green “Clock, Language and Region” link.

Step 3: Click the blue “Change date, time or number format” link under “Region and Language.”

Step 4: Click the drop-down menu to the right of “Short Time,” then click the “HH:mm” option.

Step 5: Click the drop-down menu to the right of “Long Time,” then click the “HH:mm:ss” option.

Step 6: Click the “Apply” button at the bottom of the window, then click the “OK” button.

Summary – How to use a 24 hour clock in Windows 7
- Click the Start button.
- Click Control Panel.
- Click Clock, Language and Region.
- Click the Change date, time or number format link.
- Click the Short Time dropdown menu, then click the HH:mm option.
- Click the Long Time dropdown menu, then click the HH:mm:ss option.
- Click the Apply button, then click OK.
Would you like to open a specific folder when you click the folder icon in your taskbar? Learn how to change the default Windows Explorer folder in Windows 7 and select any other folder location on your computer.
Share this:
Related

Disclaimer: Most of the pages on the internet include affiliate links, including some on this site.
Change 24 Hour Clock to 12 Hour Clock in Windows 10
By: Waseem Patwegar
In this article we are taking a look at the steps to Change 24 Hour Clock to 12 Hour Clock format or vice versa on a Windows 10 computer.
Change 24 Hour Clock to 12 Hour Clock in Windows 10
Depending on your preference, you can make your computer show time in either 12 Hour format or 24 Hour time format.
In earlier versions of Windows, change in Date and Time Settings could only be done from the Control Panel.
Currently, the preferred method to Change Time Format in Windows 10 is by going to Settings on your computer.
1. Change 24 Hour Clock to 12 Hour Using Settings
As mentioned above, you can easily change the time format on your computer from 24 to 12 hours by going to “Time and Language” Settings on your computer.
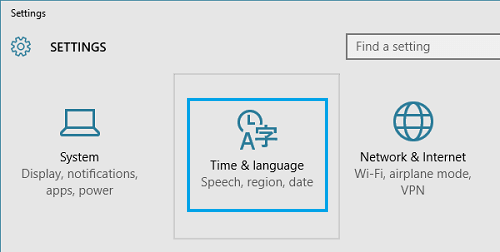
1. Open Settings > click on Time and Language .
2. On the next screen, click on Region in the left pane. In the right-pane, scroll down and click on Change Data Formats link, located under ‘Regional Format Data’ section.
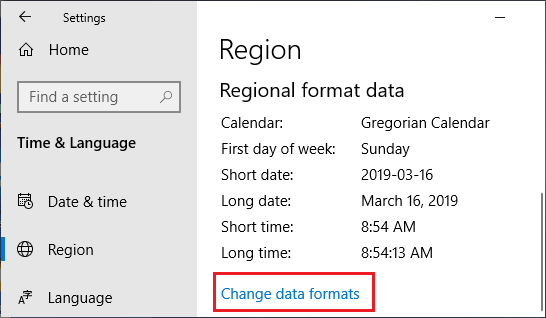
3. On the next screen, use the Down-Arrow to select time with AM/PM suffix for Long Time and Short Time .

The change in the time format will be immediate and you should now find your computer displaying the time in 12 Hour format.

2. Change 12 Hour Clock to 24 Hour Clock
You can follow the steps below to change the time on your computer from 12 hours to 24 hours format.
1. Go to Settings > Time and Language . > click on Region in the left pane. In the right-pane, scroll down and click on Change Data Formats link.
2. On the next screen, use the Down-Arrow to select time without AM/PM suffix for Long Time and Short Time .
The change in the time format will be immediate and you should now find your computer displaying the time in 24 Hour format.
What is Short and Long Time in Windows 10?
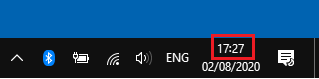
Windows 10 displays the Date and Time at two locations on your computer. The first location of time can be found at the bottom right corner of your screen.
This location, which is the most visible location of time on a computer is known as the Short Time.
The second clock (Long Time) is hidden on Windows 10 Calendar and can only be accessed by clicking on the first location.
Hope this has helped you in changing the time format on your computer from 12 to 24 hours or from 24 to 12 hours, as required.
Change Time To 24 Hour Format In Windows 10
Last Updated on November 13, 2018 by admin 2 Comments
Like its predecessors, Windows 10 also displays date and clock on the right side of the taskbar. With default settings, the clock shows time in 12-hour format, which many people don’t like to see for their own reasons.

If you would like to see the clock in 24-hour format, you can configure the clock to the display the time in 24-hour format. The new Settings app doesn’t offer a way to switch between 12 and 24-hour format. We have to use the classic Control Panel to make these changes.
Set time format to 24 hour in Windows 10
Here is how to change the taskbar time to 24-hour format in Windows 10.
Step 1: Open the Control Panel. Change the view to small icons.
Step 2: Click on the Region link to open Region dialog. Here, under the Formats tab, click on the Additional settings button.

Step 3: Switch to the Time tab. In the Time formats section, replace the “h” in short time and long time fields to “H” to switch to the 24 hour format.

Since you have switched to the 24-hour format, you no longer need AM and PM next to the time. To remove AM and PM, remove “tt” from the short time and long time boxes.

Click on the Apply button to see the new 24-hour in action.


