- 7 Best Tips To Fix Windows 10 Slow Startup/Slow Bootup And Restart Issue | 2018 Edition
- How to Speed up Windows 10 Slow Startup?
- 1. Check Last Bios Time
- 2. Disable Windows 10 Fast Startup
- 3. Disable Windows 10 Automatic Maintenance
- 4. Disable Startup Services and Startup Programs
- 5. Disable Windows 10 Services
- 6. Update Graphics Drivers
- 7. Install latest Windows 10 updates
- Windows 10 Slow Restart/ Slow Startup Fix
- How To Fix Slow Boot problem in Windows 10
- Methods to Speed Up Boot Speed in Windows 10-
- #1- Disable Startup items-
- #2- Turn off Linux terminal-
- #3- Clean Boot PC to Speed Up Boot in Windows 10-
- #4- Disable Fast Startup in Windows 10
- #5- Update Windows to Fix Slow Boot Speed
- #6- Update Graphics card driver-
- #7- Carry Out Disk Defragmentation
- #8- Set Virtual Memory to Speed Up Boot Speed in Windows 10
- #9- Antivirus and Malware Scan
- #10- Reset Windows to Speed Up Boot in Windows 10
- In the end,
7 Best Tips To Fix Windows 10 Slow Startup/Slow Bootup And Restart Issue | 2018 Edition
I t’s been almost three years since Microsoft released their greatest and latest operating system. Being touted as the next best thing, Windows 10 was indeed not the best regarding the user expectations. Actually Far from it. Nagged by the forceful updates, slow startup problems, slow restart bugs, Windows 10 didn’t have the best of starts that Redmond hoped to have.
Microsoft’s Windows 10 has been improving since then at a rapid pace, but some issues like the slow Startup and Slow Restart issue have persisted even with the new Windows 10 update for some. Here, we look to provide the best tips that we came across to fix the Slow booting of Windows 10. So, let’s get started —
How to Speed up Windows 10 Slow Startup?
1. Check Last Bios Time
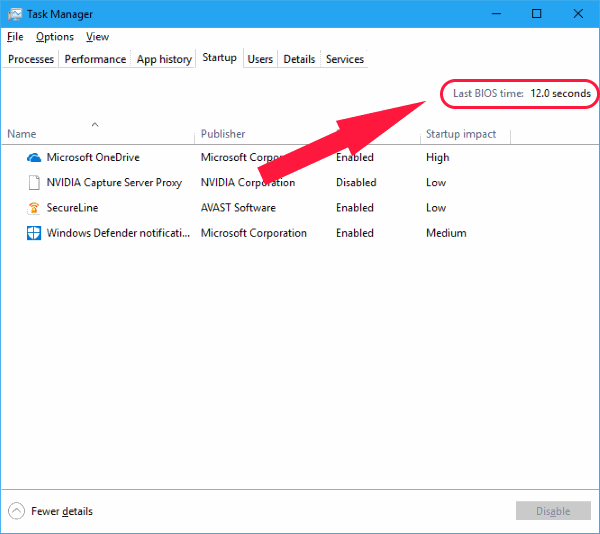
The first thing you should check for is your Windows 10 Last Bios Time. Basically, this is the Time taken by the UEFI firmware to initialize your hardware before Windows 10 starts booting. Typically, this would only take a few seconds. You should check out our guide on Last BIOS Time Tweaks.
Also Read: How To Fix High RAM and CPU Usage of Windows 10
2. Disable Windows 10 Fast Startup
The fast startup feature in Windows 10 is the highly talked about feature for all the wrong reasons. Since Windows 10 first appeared, Fast Startup feature has caused so many issues and many users reported the slow startups and slow restarts to be among them. Make sure that this is the first fix that you attempt when your Windows 10 boots slow.
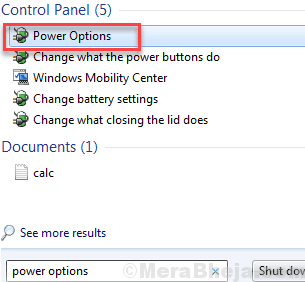
- Open Control Panel and select Power Options.
- Click Choose what the power buttons do.
- Now click Change settings that are currently unavailable.
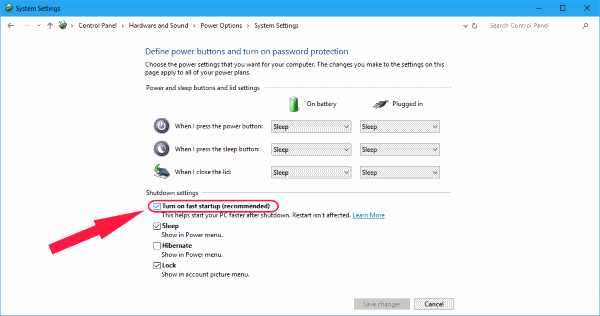
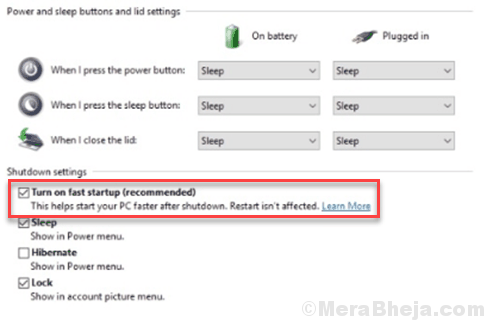
- Under Shutdown Settings, disable fast startup.
Note: Try disabling and enabling Fast startup in Windows 10 while restarting after each change to know if the Fast booting feature is the problem.
3. Disable Windows 10 Automatic Maintenance
This Windows 10 slow startup fix might be unheard of for most users. The reason being this has not been widely reported to be an issue. But for users facing the slow spinning dots when restarting or booting up Windows 10, this might just be the fix that you may be searching for. With some of the tests that I attempted, Automatic Maintenance in Windows 10 leads issues resulting in the dreaded spinning dots for ages. This is especially true for PC and Laptops with Dual graphics cards.
If you want to give this peculiar fix a try,
- Launch the registry editor by typing regedit in the search box or Run.
- Navigate to the following Key:
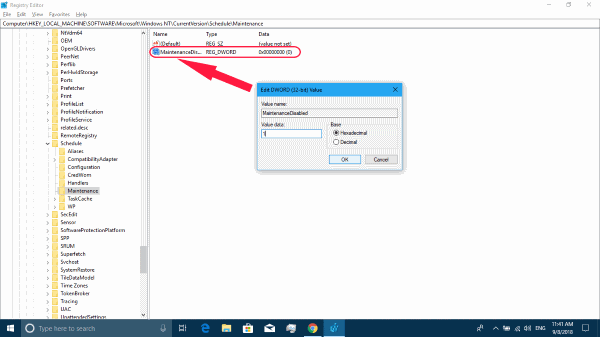
- In the right pane, there will be a 32-Bit DWORD value of the name MaintenanceDisabled. In case if there is no such value, create it yourself by right-clicking on the blank space in the right pane, then New > DWORD (32-bit) value.
- Note that irrespective of your CPU architect, still a 32-bit keyword is required.
- Now double click the key to see its value. Set the value to 1 to disable Automatic maintenance in Windows 10.
That’s it, and your Automatic Maintenance in Windows 10 is now disabled.
However, if you find this fix not working for you or if you would like to re-enable the feature, just delete the key or set the value to 0.
4. Disable Startup Services and Startup Programs
Windows 10 handles startup programs and others the same way as the older ones (Windows 8 and Windows 8.1) did. If you want to see your startup services and startup applications,
- Launch the Task Manager by right clicking on the start menu and selecting Task Manager or using the Cntrl + Alt + Del shortcut.
- Head over to Start-up and select the performance hogging programs and disable them.
Now for the services,
- Right-click the start menu and select Run or press Windows key + R.
- This will open the Run Window and from here, type in msconfig.
- In the forthcoming System Configuration window, head over to the Services Tab.
- Now you can pick and choose the ones which are essential and the services which you do not need to start up alongside the OS.
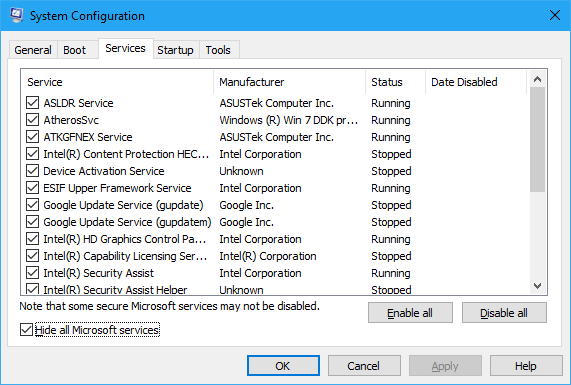
- Keep in mind to hide all the Microsoft services to be on the safe side. Microsoft services might be essential so try disabling other services to fix the Windows 10 Slow Startup issue.
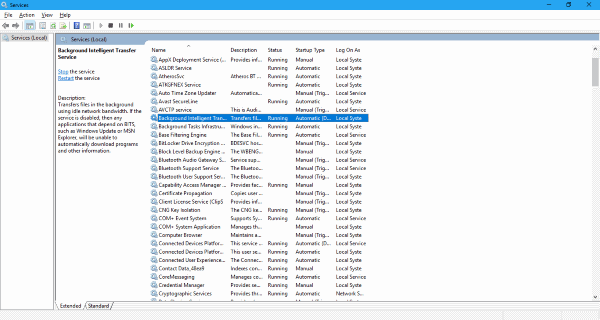
5. Disable Windows 10 Services
This should come as no surprise as most people would recommend disabling some of your Local services to fix Windows 10 Slow restart and Bootup issues. But be cautioned because the first thing that you need to know when doing this is that some services are critical for your programs. Disabling some essential services of the new Windows 10 Latest update versions can break things.
For better References, we can give you the usual culprits for this Windows 10 issue. Try turning off BITS( Background Intelligence Transfer Service), Connected User Experiences and Telemetry, Windows Search. To do these mentioned actions,
- Head over to Services by entering the services.msc command in Run.
- Locate each of these mentioned services.
- Right-click each of them and select properties.
- Click Stop and change the startup type to Disabled.
Additionally, you might have come across a service called Superfetch. Most online tips would suggest turning Superfetch and Prefetch services to be disabled for making Windows 10 faster. But in fact, this can be counterproductive especially if you have anything better than 2 GB of Ram Size.
Superfetch in windows has been the Windows service that helps you to efficiently pre-load your frequently used programs. Moreover, it brings out the best of your machine’s capabilities by using your free and available RAM in the best way possible. Don’t let the occasional task manager spikes fool you into thinking that disabling Superfetch Service will make Windows 10 run magically faster. Besides, you didn’t buy all of that RAM capacity just so that it could sit there doing nothing.
6. Update Graphics Drivers
For some PCs and laptops running on dual graphics (Intel HD Graphics alongside the dedicated AMD and Nvidia cards), switching between them can cause issues like Black screens for a long time. Apparently, there are a couple of fixes that you can try depending on whether you are using an AMD or Nvidia Graphics card.
For Nvidia users, we suggest updating your graphic drivers to the latest version. You can do this from the Nvidia Control panel. Also, install the latest Nvidia driver version by going to the official driver download page. Use the official tool to find your graphics card or Manually select the model automatically.

For AMD users, other than installing the latest version, there is another step that you could have a look at. First of all, AMD graphic drivers have something called the ULPS which works by automatically disabling the secondary GPU when not in use. Although this seems fine, it can be buggy. As a result, this might cause slow startup issues.
To disable ULPS,
- Launch the Registry editor.
- Find the key called EnableULPS using the Find tool.
- Change the key value to 0.
ULPS feature is now disabled. Windows 10 updates have a habit of resetting this feature back to enabled. Furthermore, If something of that sorts happen, make sure to disable it once again.
7. Install latest Windows 10 updates
Another obvious fix that you should attempt to try is to update your Windows 10 with the latest updates. This might include important driver updates and cumulative updates. To check for updates,
- Go to Settings > Updates & Security.
- Click Check for updates.
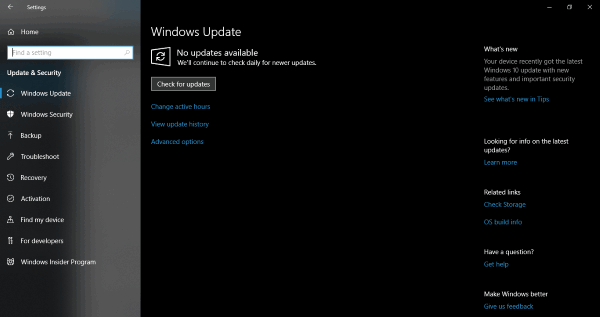
Windows will now check for updates and install them automatically.
Also, issues can also arise during the updating process are when the update files are corrupt and get piled up. So the best thing that you could do to start over and save some storage space in the process.
Windows 10 Slow Restart/ Slow Startup Fix
Finally, if all fails, we always have the Reset PC feature so that you can have a fresh Windows 10 experience altogether.
If you are having slow performance issues in your Windows 10 device, you can also check out our posts on 19 Tips & Tricks To Speed Up Windows 10.
So before you start pulling your hair or slapping your PC till it is booting and waking up, make sure to check out these recommended fixes for your machine. We hope our solutions were of some help to you guys. As always, let us know if these were helpful or if there are things that we missed. Adios!
How To Fix Slow Boot problem in Windows 10
A PC runs and startup really fast in the beginning, but as you continue to use it, various issues show up. One of the most common of such issues faced by Windows 10 users is Slow Boot Speed. The boot speed gets slower over time and may go unnoticed for quite a while. Slow boot in Windows 10 is not something that is uncommon or unnatural. There could be several reasons to it, thus while you go on to speed up boot speed in Windows 10 PC, you need to take a holistic approach.
The reasons leading to slow boot speed in Windows 10 could be:
- Some trouble with Windows 10 update
- Too many programs starting up with Windows
- Issues with Hard Drive
- Virus or Malware attack, and more.
In the following article, we look at several methods to fix slow boot speed and Speed up boot in Windows 10. Let’s start.
Methods to Speed Up Boot Speed in Windows 10-
#1- Disable Startup items-
Startup items significantly affect the booting time of your computer. Disable any unnecessary automated startup times to lower the booting time.
1. Press Ctrl+Shift+Enter to open the Task Manager window.
2. In Task Manager, go to the “Startup” tab.
3. Now, right click on any unnecessary startup item and then click on “Disable” to disable it.
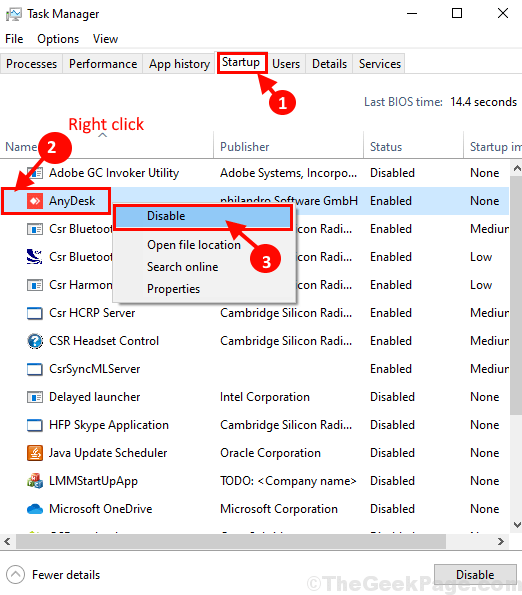
Now, repeat the same feat for any unnecessary startup items in the Task Manager window to disable them one-by-one
Once you have disabled all unnecessary tasks, close Task Manager window.
Reboot your computer and check the booting.
#2- Turn off Linux terminal-
For many users Linux terminal has slowed down their computes. Turning it ‘off’ may on your computer may work out for you.
1. Press Windows key+R to open Run window.
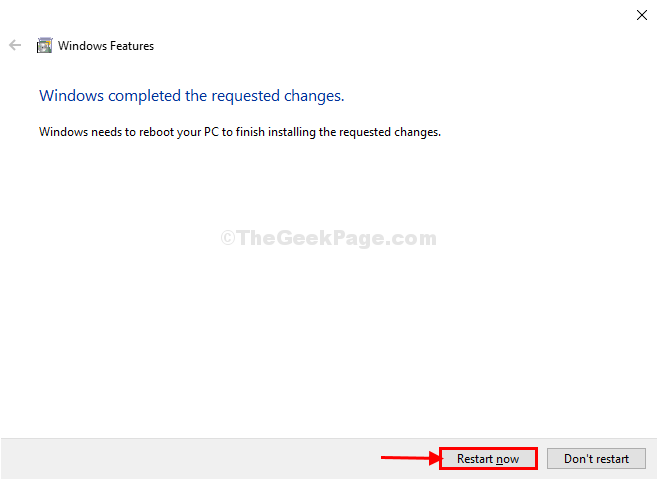
2. In Run window, type “optionalfeatures” and then hit Enter.

3. In Windows Features window, scroll down and then make sure “Windows Subsystem for Linux” options is unchecked .
4. Now, click on “OK” to save the changes on your computer.

5. Windows Features will disable this feature in a moment.
6. Now, click on “Restart Now” to restart your computer to save this settings.
Your computer will be restarted and the feature will be disabled.
Now, reboot and again check the loading time for your computer.
#3- Clean Boot PC to Speed Up Boot in Windows 10-
A Clean boot can be really helpful to fix slow boot speed in Windows 10. What a clean boot does? It only starts the essential programs that are required for Windows to boot. The rest of the programs and drivers will start as you need them while you operate your computer. This boosts the startup speed of Windows to a great extent and one of the top methods to fix slow boot speed in Windows 10.
Follow this article to Clean Boot Windows 10.
If a clean boot didn’t solve your issue, try the next method.
#4- Disable Fast Startup in Windows 10
Windows 10 comes loaded with a Fast Startup option in its Control Panel. Although it is supposed to help your PC to boot fast, it has been reported by users to do the opposite of it. In this solution, you will need to switch off Fast Startup in order to speed up boot in Windows 10. On the other hand, if the Fast Startup is disabled on your PC, you can try to switch it on to see if that works for you.
Follow these steps:
Step 1: Open the Start menu and in the Start menu search box, type Power Options.
Step 2: The Power Options window that opens up. Click on the Choose what the power buttons do option available on the left panel.
Step 3: Below on the new window that opens, see if the Turn on fast startup option is selected or not. If it is selected, deselect the option then click on Save Changes. If it is not selected, you can try selecting the option, then save the settings.
After saving the Power Settings, give your PC a restart. Notice the boot speed if your PC boots faster than earlier. If not, go to the next method.
#5- Update Windows to Fix Slow Boot Speed
One of the things that you should make sure of is your Windows 10 version is updated to the latest version. Microsoft is constantly working on fixing things up for Windows 10. An older version or a troublesome version of Windows 10 could be the reason for your computer to act up slow. Checking for a Windows 10 update and updating it manually is a fairly easy task.
Here is a descriptive article which will tell you how to Update Windows 10 manually.
After you have updated your Windows 10 check if it helped to speed up boot in Windows 10. If your Windows is already updated or the method did not work, check out the next method.
#6- Update Graphics card driver-
Updating your graphics card driver will resolve this issue.
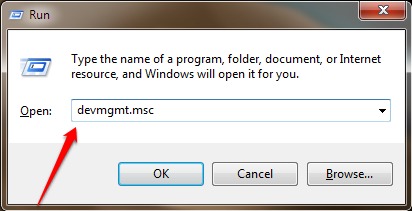
1. Press Windows key+R to open Run window.
2. In Run window, type “devmgmt.msc” and hit Enter to open Device Manager window.
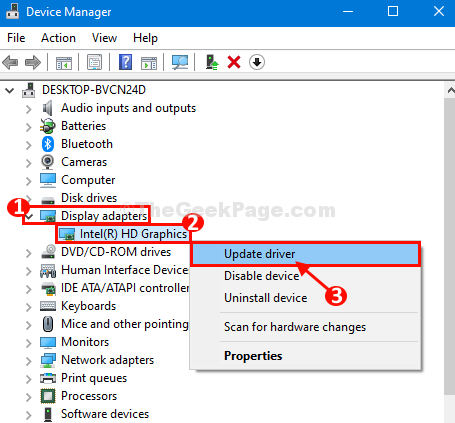
3. In Device Manager window, expand “Display adapters”.
4. Expand “Intel(R) HD Graphics” and then right click on “Update driver“.
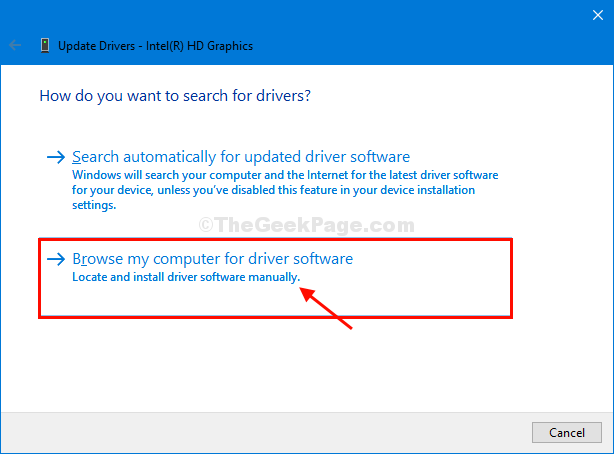
5. When you will asked ‘How do you want to search for drivers?‘, click on “Browse my computer for driver software“.
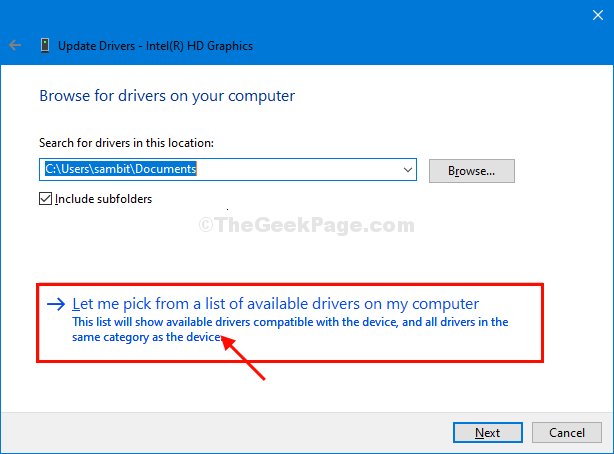
6. Now, click on “Let me pick from a list of available drivers on my computer“.
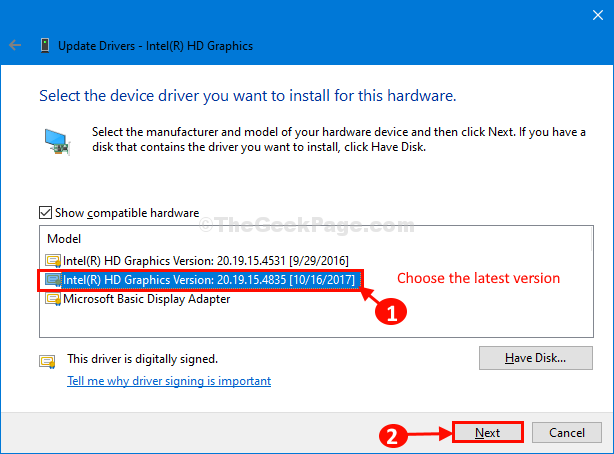
7. Now, in this window you will notice several graphics drivers, choose the latest graphics driver.
8. Now, click on “Next” to install the latest driver.
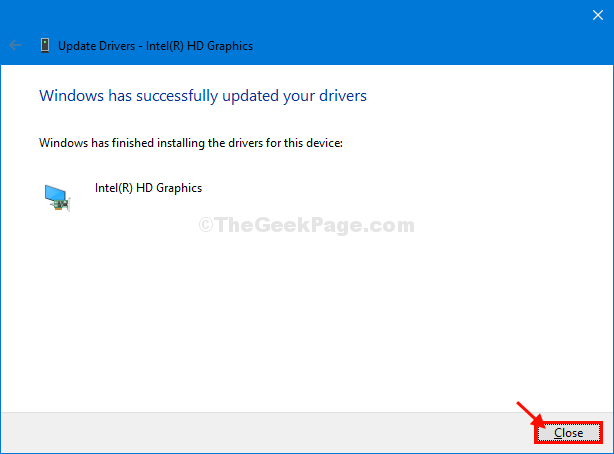
Wait for a while as the graphics driver will be installed on your computer.
10. Click on “Close” to close the update driver window.
Now, close Device Manager window.
#7- Carry Out Disk Defragmentation
Disk Defragmentation is a process that can also affect your PC’s boot speed. Over a period of time, so many data gets saved on your PC’s hard drive and gets deleted as well. The process has a certain pattern to it, and because of this, some of the fragments of your hard drive stays empty and is not utilized unless you carry out a disk defrag. When these empty spots increase in number, may cause your computer to slow down. Which in turn will slow boot speed in Windows 10.
Here check out this stepwise guide to carry out Disk Defragmentation in Windows 10.
Note: The Disk Defragmentation process takes some time to complete, so it is suggested to be patient while you are at it.
#8- Set Virtual Memory to Speed Up Boot Speed in Windows 10
Windows comes with a Virtual Memory feature, which uses some memory space from your PC’s hard disk to use as a Virtual RAM. This is used when there is an unexpected load on the actual RAM. You can increase the size of the Virtual Memory allocated on your PC to fix slow computer. Here’s how to do it:
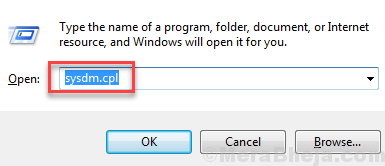
Step 1: Press Windows + R keys. In the Run box that will open, type sysdm.cpl and press Enter.
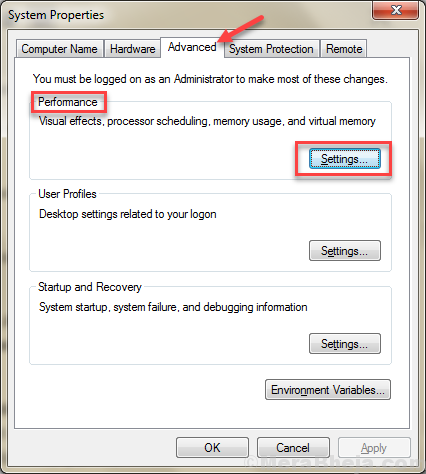
Step 2: The System Properties will open. Here, go to the Advanced tab. In the Performance section here, you will find a Settings button; click on it.
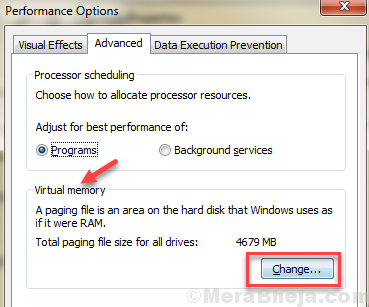
Step 3: In the Performance Options window that appears, go to the Advanced tab. Press the Change button in the Virtual Memory section.
Step 4: In the new window that opens, deselect the Automatically manage paging file size for all drivers. After that, click on Custom size option. Enter virtual RAM values in the Initial size and the Maximum size fields (guide provided below).
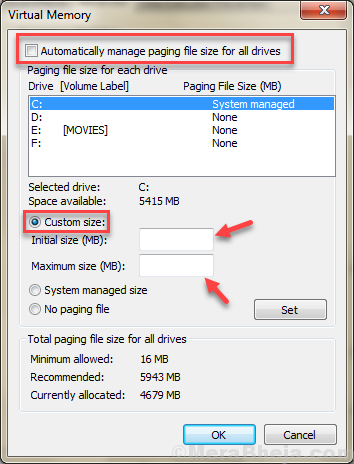
What should you enter in Initial size and Maximum size fields?
A Currently Allocated value is available at the bottom of the window. The Initial size box will need a higher value than Currently allocated value. In the Maximum size box, put the following value: 3 x value of your PC’s actual RAM (max).
Note: Enter the values in MB (1 GB = 100 MB).
When done, click on the Ok button. After that, reboot your PC and see if this fix boot speed. If not, try the next method.
#9- Antivirus and Malware Scan
Carrying out an Antivirus and Malware scan is important to Speed Up Boot of PC. If you already have an Antivirus and Antimalware installed, try to install another and check for threats. Here is a list of best Antivirus for Windows 10.
#10- Reset Windows to Speed Up Boot in Windows 10
If none of the above methods work, you can start fresh by resetting Windows. This basically means reinstalling Windows on your PC without deleting personal files.
In order to fix slow boot in Windows 10, check out this brief article to Reset Windows 10 without losing Personal Files.
Additional Tips-
1. Purchase a Solid State Drive (SSD) for your computer and load Windows 10 onto the drive. This will reduce the booting time significantly, will make the computer a lot faster than before.
2. Reduce unnecessary clutter of icons from the desktop. Your computer will boot up way faster with less number of icons present in the desktop.
In the end,
let us know which one of the above methods helped your speed up boot speed of your PC. Also, let us know if you have any questions; you will hear back from us.


