Useful 7zip command line examples for terminal
7zip is a powerful and user-friendly package manager offering support for most popular file archives including ZIP, RAR, TAR, GZIP, 7z, and more. If you like you can also use the software without the GUI and access all features directly from the terminal. Discover best 7zip command line examples.
7z.exe is the command-line tool version of 7-Zip software allowing you to execute popular commands from system terminal. Use this app to compress, extract, test, rename, list, add, update archive files. This version works only with Windows. p7zip is the command line version of 7-Zip for Linux and Unix.
7z format provides a high compression ratio, open architecture, strong AES-256 encryption, option to use any compression or encryption method, supports files with sizes up to 16000000k GB, and Unicode file names. Integrated compression methods include LZMA, BCJ, Bzip2, Deflate, and PPMD.
The default compression method used by 7z format is LZMA. It features high compression ratio, variable dictionary size (up to 4 GB), small memory requirements for decompressing, support for multi-threading and P4’s hyper-threading, and fas compression and decompression speeds.
7z.exe offers access to over 10 commands for file operations. Moreover, there are also switches that can be used with commands to set password, type of archive, create SFX, update files, etc.
7zip command line examples
7-Zip command line add files to archive:
Compress folder Program Files to c:\filename.7z
7-Zip command line compress:
Compress folder, and subfolders in Program to c:\filename.7z
7-Zip command line pack all files:
Compress all JPG files in folder and subfolders from folder1
7zip command line extract:
Extract all files from archive.zip
7zip command to extract specific file type:
Extract all .doc files from archive.zip to folder c:/kuba
7-Zip command line to calculate a hash (CRC32, CRC64, SHA1, SHA256, BLAKE2sp):
Calculate SHA256 hash value for file.iso.
7-Zip command line benchmark:
7-Zip command line list:
Show list of all files in the archive.
7-Zip command line rename:
7-zip commandline
I’m creating a backup utility that zips all the files listed in a text file. I am using MS ACCESS as my front-end and 7-Zip for compression. These are the commands I am using:
All the files are compressed without their path. Is there a way to include the path for each file in the zip file? Then when backup.zip is extracted the files would be restored to their original folder structure.
7 Answers 7
In this 7-zip forum thread, in which many people express their desire for this feature, 7-zip’s developer Igor points to the FAQ question titled «How can I store full path of file in archive?» to achieve a similar outcome.
- separate files by volume (one list for files on C:\ , one for D:\ , etc)
- then for each volume’s list of files,
- chdir to the root directory of the appropriate volume (eg, cd /d C:\ )
- create a file listing with paths relative to the volume’s root directory (eg, C:\Foo\Bar becomes Foo\Bar )
- perform 7z a archive.7z @filelist as before with this new file list
- when extracting with full paths, make sure to chdir to the appropriate volume’s root directory first
The command-line program for 7-Zip is 7z or 7za. Here’s a helpful post on the options available. The -r (recurse) option stores paths.
I’ve not looked into this but shooting from the hip I’d say that they dropped command line support in the portable. The reason people don’t do much command line stuff in portable applications is that the OS (windows in your case) requires that executables be added to the %path% inclusion list.
If that requirement is not met using command line utilities is rather tedious.
d:\portable\z7\z7 -a c:\to\archive\folder*.*
Typing that out for everything is why GUI’s make sense with things like portable apps it (the app) can remember it’s own location and handle that stuff for you and if you can’t run it you know it’s not attached.
If you really want the portable app to contain that though you can always install the full version and pull the required 7z.exe out and put it into the portable folder making sure it’s in with the required dll’s.
You’ll have to set your path when you hit the shell after making sure it’s attached.
http://www.redfernplace.com/software-projects/patheditor/ — a good path editor (down) usefull if you have lots of path information 20+ get’s hard to read.
It’s not advisable to modify your system path for temproary «portable» drives though manualy do that by:
The other answers address other problems better I’m not going to try..
PS: sorry for the necro but I figured it needed a more direct answer to why (even if it’s just speculative).
7-Zip command to create and extract a password-protected ZIP file on Windows?
On Mac/Linux to zip/unzip password protected zip files, I use: Zip:
What are the equivalent command on Windows on the command line (assuming that 7zip has been installed)?
I have been doing research and found that it is not possible to password encrypt using the Java zip4j library. Also Windows does not have a zip command prompt like Mac/Linux
4 Answers 4
Then provide the SECRET password
Note: If the password contains spaces or special characters, then enclose it with single quotes

General Syntax:
Check your 7-Zip dir. Depending on the release you have, 7z may be replaced with 7za in the syntax.
Parameters:
- -p encrypt and prompt for PW.
- -pPUT_PASSWORD_HERE (this replaces -p) if you want to preset the PW with no prompt.
- -mhe=on to hide file structure, otherwise file structure and names will be visible by default.
Eg. This will prompt for a PW and hide file structures:
Eg. No prompt, visible file structure:
And so on. If you leave target blank, 7z will assume * in current directory and it will recurs directories by default.

To fully script-automate:
Create:
Unzip:
(Depending, you might need to: Set Path=C:\Program Files\7-Zip;%Path% )

I’m maybe a little bit late but I’m currently trying to develop a program which can brute force a password protected zip archive. First I tried all commands I found in the internet to extract it through cmd. But it never worked. Every time I tried it, the cmd output said, that the key was wrong but it was right. I think they just disenabled this function in a current version.
What I’ve done to Solve the problem was to download an older 7zip version(4.?) and to use this for extracting through cmd.
This is the command: «C:/Program Files (86)/old7-zip/7z.exe» x -pKey «C:/YOURE_ZIP_PATH»
The first value(«C:/Program Files (86)/old7-zip/7z.exe») has to be the path where you have installed the old 7zip to. The x is for extract and the -p For you’re password. Make sure you put your password without any spaces behind the -p! The last value is your zip archive to extract. The destination where the zip is extracted to will be the current path of cmd. You can change it with: cd YOURE_PATH
Now I let execute this command through java with my password trys. Then I check the error output stream of cmd and if it is null-> then the password is right!
Использование 7zip для бэкапа данных
Для наступления полного и тотального счастья в плане бэкапов информации на рабочем сервере решил отказаться от Acronis True Image в пользу обычной архивации данных с помощью 7-Zip.
Для выполнения поставленной задачи естественно использовал консольную версию архиватора.
После непродолжительного курения манов комманда приняла следующий вид:
7za.exe a -tzip -ssw -mx7 -r0 -x@exclusions.txt full_path_for_the_archive working_dir
Поподробней об использованных ключах:
-tzip формат архива установлен в zip, без этого ключа умолчальный формат 7z;
-ssw принудительная упаковка файлов, которые в данный момент открыты для записи (мало ли кто-то засиделся на работе и что-то там правит);
-mx7 высокая степень сжатия (7), можно поставить и 5 (нормальное сжатие), тогда процесс пойдет побыстрее;
-r0 (это ноль, а не буква О) исключения, которые будут прописаны дальше обрабатываются только в рабочем каталоге;
-x@exclusions.txt это собственно говоря файл со списком исключений, которые не будем архивировать. Каждая строка файла — новое исключение. Можно использовать маски типа *.ext и т.п. Если исключение не много, то можно обойтись и без файла, в таком случае ключ примет следующий вид: -x!*.ext;
full_path_for_the_archive это соответственно путь и имя нового архива;
working_dir это папка, которая подлежит упаковке.
Для пущего удобства можно использовать в имени архива %date%.
В связи с тем, что архивировать нужно разные папки в разные архивы, объемами 10-15 гигов, то резонно использовать последовательность команд, дабы не создавать кучу правил в планировщике и не думать сколько времени займет весь этот процесс. Соответственно для этих целей использую объединение команд с помощью &&. Если использовать &, то все команды будут выполняться одновременно, что меня никак не устраивает, с && — последовательно при удачном завершении предыдущей команды.
Помимо всего прочего желательно иметь логи, чтоб быть в курсе, а не случилось ли чего. Это можно легко реализовать с помощью инструкции ‘>>’, которая сохраняет вывод в консоль в текстовый файл. Однако проблема в том, что 7zip вываливает в консоль кучу информации, в том числе и об архивации каждого нового файла. Очевидно, что на объемах в несколько тысяч файлов вся эта инфа в логах нужна как мертвому припарок. Соответственно требуется исключить все ненужные строки, оставив те, где есть информация о названии создаваемого архива, результат архивации и информацию об ошибках, коли таковые появятся.
Тут на помощь приходит команда FINDSTR. В моем случае она принимает следующий вид:
findstr /P /I /V «Compressing 7-Zip»
Сначала пара слов об использованных ключах:
/P пропускает строки, содержащие непечатные символы;
/I на всякий случай игнорирую регистр букв;
/V » « непосредственно перечень слов для поиска в строках и последующего исключения этих строк.
В итоге на выходе этой команды имеем 3 строки:
Creating archive archive_name
Everything is Ok
А потом закатываю все в текстовый файл, для последующего изучения:
findstr /P /I /V «Compressing 7-Zip» >> log_file
Теперь дело за малым. Нужно зафутболить все три блока в одну последовательность команд:
7-Zip Command-Line Examples
7-Zip is an effective compression program.
The 7za.exe program is used to compress, extract and update files through the command line. It provides superior compression. It is open-source. This makes it easy to obtain and use.
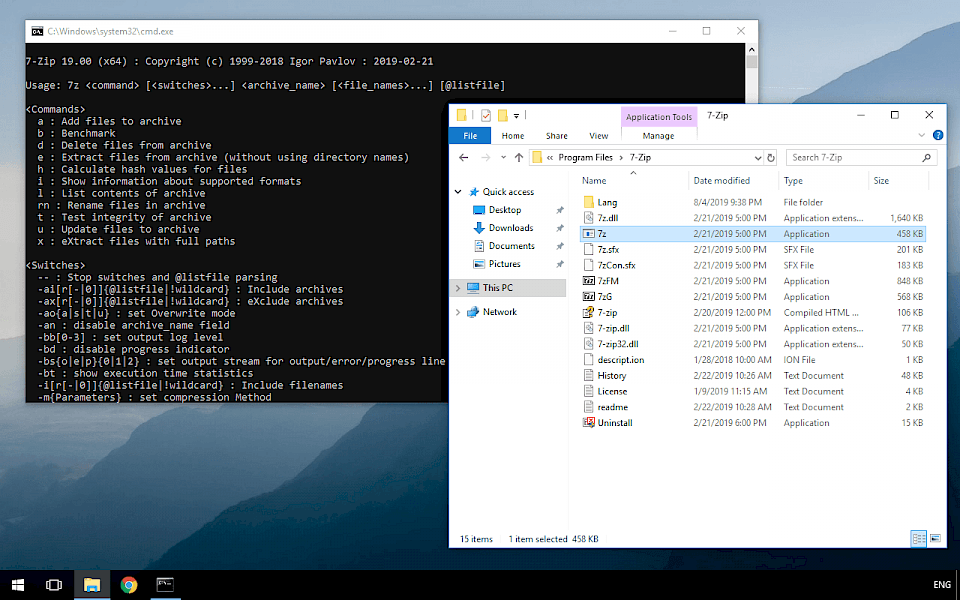
Start. First you need to download the 7-Zip command line executable, 7za.exe. This is the exe you will use to run commands on archives. Please go to 7-zip.org and get the command line version.
Tip: For convenience and so you don’t need to change environment paths, put the 7za.exe file in your user directory.
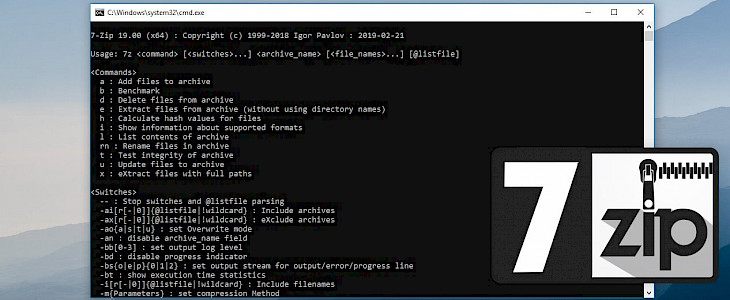
Next: Open the Windows console and test the 7za.exe program out with a few commands. Type in the exe name 7za and this will display.

We see the grammar we need to use with 7za.exe. The «command» is the main verb. Then you specify optional switches, the archive name (either source or destination archives) and files. My user directory is «C:\Users\Sam\».
Command a. You can use the «a» command with the single letter a. This command stands for «archive» or «add.» Use it to put files in an archive. You have to specify the destination archive, and the source files (in that order).
On the test system, the directory C:\Users\Sam contains two files (file1.txt and file2.txt). The command puts those two files in an archive, and you need to type it into the command prompt.

Tip: To open your archive, right click on it and select 7-Zip -> Open archive. The screenshot shows the files compressed in files.7z.
Command d. Here we see an example of the «d» command in 7-Zip command lines. This stands for ‘delete’ and is used much less often. It allows you to remove a certain file (or set of files) from inside an archive.
Note: You will need this if you use huge archives and need to save time. This is from the manual.

Tip: You can also remove a single file from an archive with «d». This is more useful when you do not have a solid archive.
Command e. Here we use the «e» command in your console window. The «e» stands for extract, and it means to unzip or expand an archive. You must specify the source archive always, and may also specify a destination.
Info: The «e» command extracts everything to a specified directory. Another command «x» can preserve directory structures in archives.

Overwrite prompts: 7-Zip will always prompt you if there is a file it needs to overwrite to extract the new file.
However: This can be problematic if you are scripting or embedding 7za.exe. In that case, see the -y switch.
Command l. We next use the single-letter «l» (lowercase letter ell) command. The lowercase L is used to list the contents of archives and you probably will not need to use it often. I thought I would test it and show an example.
Next: This shows the listing of a solid archive. The originals are 27216 bytes and 3888 bytes. They compress down to 1030 bytes.

Command t. Here we use the «t» command in the 7z program. This command allows you to test the integrity of archives. It stands for ‘test’ and is much less useful than the «-t» switch. Don’t confuse the two. This one is used for diagnostics.
Command u. The «u» command in 7-Zip stands for update. This is a useful command and is great when you want to replace old files in your archive with newer files. This prevents needing to decompress and recompress the entire archive.
Warning: The «u» command doesn’t work with solid archives. A solid archive is one where all the files are compressed together.
So: You cannot update specific files in solid archives with the «u» command. Solid archives are limited.
Switch m. We can change the optimization settings in 7-Zip on the command line. This is the most important and useful option you can use. It specifies the method of compression. Here I will show a bunch of options, and also some examples.
Switch m, advanced. Here are advanced compression method (-m) switches. The first three are usually of limited use, but you might benefit from tweaking them. My experience is that manual optimizations to these options doesn’t produce big benefits.
Switch -mfb: Specifies number of fast bytes. Sometimes helps with «sparse» files. Don’t bother.
Switch -mpass: Number of passes for deflate compression. Don’t bother with this. Automatically set with levels.
Switch -md: This specifies dictionary size. It is automatically set, so don’t bother.
Switch -mmt: Enable multithreading. Use if you have quad-core and a huge archive. Specify «on» or «off». This may be enabled by default.
Command x. This command is like «e» except it preserves the full paths. If you have an elaborate or important directory structure, use this option. This would be most useful for system backups or really big backups. Here’s the example syntax.
Switch t type. Here I show how to specify the precise archive type you want to create. Note that you can specify any filename you want for any type. But some extensions are recommended—they are standard.
Also, the 7-Zip manual provides some useful examples for type switches. It shows the -tiso and -tudf switches. These are not the most common. Almost all of the examples in this document use -t switches.
Solid archives. 7z is the only file format in 7-Zip that you can specify whether the archive is solid or not. Solid means all the files are compressed as one. It makes it impossible to use the «u» command to update individual files.
Switch -ms=on: Enable solid mode. This is the default so you won’t often need to specify it.
Switch -ms=off: Disable solid mode. Useful when you need to update individual files. Will reduce compression ratios normally.
7z archives. You can change many values and switches on 7z archives, with endless permutations. Some things you can change are dictionary sizes, FastBytes values, MatchFinder values, and filters. Normally you don’t need to deal with these.
PPMd. With the 7z format, you can specify the algorithm. PPMd is fast and effective for compressing plain text files. It is ideal for large collections of Word documents. PPMd does not perform as well on files containing binary data.
PPMd switch -mmem=24b, -mmem=24k, -mmem=24m: These control the amount of memory you use. They are useful and higher is normally better.
PPMd switch -mo=2, -mo=32: These specify the model order in PPMd. They are not normally useful.
When should I use PPMd? You should use PPMd when you have a large corpus (body) of text. This could include HTML or other formatting, but plain text should dominate. It can improve ratios by around 30% on some datasets.
Example commands. Here I show the example compression commands from the 7-Zip manual. I demonstrated simple ones at the start of this document. These are more complex. We use more features of the 7-Zip command line.
Example of 7z format. This next command line shows how to create a solid 7z archive of program files (executables). It uses multithreading mode, which means it will be fast on a dual core machine.
Create PPMd archive. PPMd is an extraordinary algorithm for compressing text and is relatively new. Here I show a command in the 7-Zip manual that compresses all the text files in the working directory. It creates a PPMd archive.
Tip: The command is useful because you will normally want to only compress text files with PPMd.
Switch o. We show the «o» switch on the 7-Zip command line. Sometimes you do not want to extract to the current directory. This is where -o can come in handy. Use this to set the destination directory.
Switch p. We can use the «-p» switch, which refers to the word «password». This is really helpful when security and encryption is involved. You can specify a password on the command line. The syntax is a bit funky.
Opening password-protected archives. This next console output shows what happens when you try to open the password-protected archive. The password here is SECRET, which will allow the archive to be extracted.
Header encryption: Add -mhe to encrypt headers. The password command will automatically deal with encrypted headers.
Tip: Remember, encrypted headers will hide the names of the files in your archive.
More switches. Here we take a closer look at more switches that are of limited use. They are useful to know, however, if you ever need to use them. Usually you can do better just by using the defaults that are slightly adjusted for your requirement.
Switch -ssc: Specify case-sensitive mode. The default is -ssc- on Windows (insensitive). The default is -scc on Linux (sensitive).
Switch -ssw: Compress locked files. You can try this if you have problems opening files.
Switch -w: Set working directory. You can use this when you want to specify temp folders.
Case-sensitive. We can use case-insensitive file names in the 7-Zip command line. For those of you who use both Linux and Windows, the case-sensitive option is useful. I will show my own example here with some explanation.
Switch v. You can use the «v» switch on the command line. In data compression, a volume is a segment of a data set that is a certain number of bytes long. The volume switch specifies the exact size in bytes, kilobytes or megabytes.
Also: You can specify sequential volumes with the «v» switch on the 7za.exe command line.
Switch ao. The «ao» switch allows you to specify whether you want to overwrite old files. Be careful—you cannot restore an overwritten file normally. It takes another argument. Back up your data by copying the files in your file manager first.
Switch -aoa: This switch overwrites all destination files. Use it when the new versions are preferred.
Switch -aos: Skip over existing files without overwriting. Use this for files where the earliest version is most important.
Switch -aou: Avoid name collisions. New files extracted will have a number appending to their names. You will have to deal with them later.
Switch -aot: Rename existing files. This will not rename the new files, just the old ones already there.
Multiple files. This section addresses adding multiple files to an archive. To add many files to one archive, please use the «a» command and the wildcard * symbol. Specify the name of the destination archive file and the source files afterwards.
Tip: Please read more in the section covering the «a» command, found in the previous part of this page.
How do I add many files with a specific extension? Use the «a» command and the wildcard * symbol, but specify the extension after the wildcard. For example, *.txt means all text files. You can use the wildcard anywhere.
How can I add many files from an entire subdirectory? Specify just the directory name. You do not need to use a wildcard. The 7-Zip manual helpfully shows this example. It specifies an entire directory called «subdir».
Formats. This section answers questions about choosing formats. First, to use GZip compression, please specify the «-tgzip» option for the type switch. This makes a great way to compress files on your web server for HTTP compression.
How do I use BZip2? You can use BZip2 by specifying the «-tbzip2» switch. This can be combined with any compression level in the above charts. The different modes in 7-Zip automatically use many different settings.
How do I use 7z format? By specifying the «-t7z» switch for type. Or you can simply omit the type switch and that will default to 7z. This format offers the greatest compression ratios, but it does not work in all places.
Prompts. You can stop 7-Zip from displaying prompts. Please use the -y switch. This will assume a yes answer to all prompts. Use this only when you are confident that you are not going to lose any data.
Questions. There are many more possibilities and usages of the 7-Zip program on the command line in both Windows and Linux. This section answers some questions I had when doing this research, and also some questions that you may have.
Why can’t I update my archive? It is probably a solid archive. 7z archives are by default solid archives—all the files are compressed together. Change the archive not to be solid if you want to update it. Search this page for «solid».
Can I specify the output directory? Yes—please use the «e» command and combine it with the -o switch. The syntax with -o is a bit funny so I will show the example from the 7-Zip help file. Here’s how it works.
How can I see what’s inside an archive? Use the «l» command as shown above. You might want to use «l» in a utility that you run from a command line to make sure your batch archiving properly works.
How can I exclude certain files? Near the start we saw how to add files based on filters, but sometimes you want to manually exclude certain files. Use the -x switch, followed immediately with an exclamation mark and then the filename.
So: If you want to exclude «file1.txt», use the switch «-x!file1.txt». Please include the hyphen and exclamation.
How can I replace files already on disk with new files? By using the -ao switch, described above. There are other options, and it is usually a better idea to use one of the renaming options (-aou or -aot).
Can I ignore extracting files already on disk? Yes—please specify the -aos option, which means «skip overwriting files.» This will cause 7za.exe to not copy the newer files out of the archive.
Note: Use -aos if your files don’t change over time and overwriting would just be a waste.
Embed. You can embed 7-Zip in a Windows .NET program using the tutorial in my article about .NET 7-Zip. This yields the same great compression but in your own GUI. The link shows some compression ratios.
Internal settings. You can change internal settings. You do not need to do this normally, as they are set automatically. I recommend just using the mx=0 (and 3, 5, 7, 9) settings. An in-depth study would be fascinating.
What values can I change in the internals? You can change compression filters, which change behaviors on executable files such as *.exe and *.dll. You can enable header compression and encryption (-mhc=on and -mhe=on).
Tip: Header compression is by default enabled. Encryption must be explicitly enabled.
AdvanceCOMP. You can use AdvanceCOMP to improve compression ratios. The improvement is often small, less than 1%. 7-Zip and AdvanceCOMP use the same Deflate encoder, but AdvanceCOMP has more options and is more fine-grained.
Summary. 7-Zip can be used on the command line. This provides superior compression with an open-source tool. We created new archives, added to existing archives, used different formats for compression, and used various strengths of compression.


