- Ошибка 80246013 при обновлении Windows 8/8.1: способы решения
- Способы решения ошибки 80246013
- Способ №1 Сброс компонентов Центра обновления Windows
- Способ №2 Перезапуск служб Центра обновления Windows
- [SOLVED] [Server2012r2] Windows update error 80246013
- taxi01
- Sysnative Windows Update
- taxi01
- Sysnative Windows Update
- taxi01
- Sysnative Windows Update
- Attachments
- taxi01
- Fix: Windows Update error 80246013
- Method 1: Reset Windows Update Components
- Method 2: Restart Update Services
- Что делать с ошибкой 0x80246010 при обновлении Windows 8.1 и 10?
- Решаем ошибку 0x80246010
- Метод №1 Запуск средства устранения неполадок
- Метод №2 Установка обновление вручную
- Метод №3 Включение всех важных для WU служб
- Метод №4 Сброс компонентов Центра обновления
Ошибка 80246013 при обновлении Windows 8/8.1: способы решения
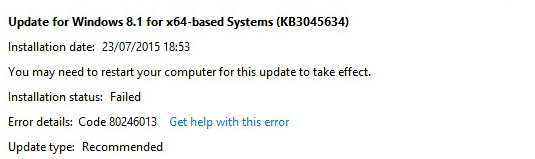
При очередном автоматическом обновлении операционной системы Windows 8/8.1, вы можете наткнуться на ошибку 80246013. Ошибки при обновления ОС – это уже дело достаточно привычное и когда ты устанавливаешь его, то всегда в голове появляется мысль о том, что вот сейчас что-то будет.
Итак, для этой ошибки существует огромное количество причин, по которым та может возникать на вашем компьютере. Однако, наиболее часто она проявляет себя по причине поврежденных файлов или проблем с определенными разрешениями.
Так или иначе давайте сразу же перейдем к возможным способам решения ошибки 80246013. Всего их в этой статье будет два: перезапуск Службы обновления Windows и сброс компонентов Центра обновления Windows.
Способы решения ошибки 80246013

Способ №1 Сброс компонентов Центра обновления Windows
- Нажмите правой кнопкой мыши на Пуск и выберите «Командная строка(администратор)».
- Далее вам понадобиться ввести в командную строку следующие команды для приостановления работы служб BITS и ЦО(Центра обновления) Windows:
- net stop bits
- net stop wuauserv
- net stop appidsvc
- net stop cryptsvc
- Теперь вам нужно удалить файл qmgr*.dat. Введите в командной строке команду Del “%ALLUSERSPROFILE%\Application Data\Microsoft\Network\Downloader\qmgr*.dat” и нажмите Enter.
- Далее нам нужно выполнить переименование папок SoftwareDistribution и catroot2. Просто введите в командную строку две следующие команды: Ren %systemroot%\SoftwareDistribution SoftwareDistribution.bak и Ren %systemroot%\system32\catroot2 catroot2.bak.
- Следующим шагом станет сброс службы BITS и Центра обновления Windows. Впишите в командную строку следующие команды:
- exe sdset bits D:(A;;CCLCSWRPWPDTLOCRRC;;;SY)(A;;CCDCLCSWRPWPDTLOCRSDRCWDWO;;;BA)(A;;CCLCSWLOCRRC;;;AU)(A;;CCLCSWRPWPDTLOCRRC;;;PU)
- exe sdset wuauserv D:(A;;CCLCSWRPWPDTLOCRRC;;;SY)(A;;CCDCLCSWRPWPDTLOCRSDRCWDWO;;;BA)(A;;CCLCSWLOCRRC;;;AU)(A;;CCLCSWRPWPDTLOCRRC;;;PU)
- Затем впишите в командную строку cd /d %windir%\system32 и нажмите Enter.
- Теперь вам нужно провести перерегистрацию компонентов BITS и Центра обновления Windows. Для этого введите команды:
- regsvr32.exe atl.dll
- regsvr32.exe urlmon.dll
- regsvr32.exe mshtml.dll
- regsvr32.exe shdocvw.dll
- regsvr32.exe browseui.dll
- regsvr32.exe jscript.dll
- regsvr32.exe vbscript.dll
- regsvr32.exe scrrun.dll
- regsvr32.exe msxml.dll
- regsvr32.exe msxml3.dll
- regsvr32.exe msxml6.dll
- regsvr32.exe actxprxy.dll
- regsvr32.exe softpub.dll
- regsvr32.exe wintrust.dll
- regsvr32.exe dssenh.dll
- regsvr32.exe rsaenh.dll
- regsvr32.exe gpkcsp.dll
- regsvr32.exe sccbase.dll
- regsvr32.exe slbcsp.dll
- regsvr32.exe cryptdlg.dll
- regsvr32.exe oleaut32.dll
- regsvr32.exe ole32.dll
- regsvr32.exe shell32.dll
- regsvr32.exe initpki.dll
- regsvr32.exe wuapi.dll
- regsvr32.exe wuaueng.dll
- regsvr32.exe wuaueng1.dll
- regsvr32.exe wucltui.dll
- regsvr32.exe wups.dll
- regsvr32.exe wups2.dll
- regsvr32.exe wuweb.dll
- regsvr32.exe qmgr.dll
- regsvr32.exe qmgrprxy.dll
- regsvr32.exe wucltux.dll
- regsvr32.exe muweb.dll
- regsvr32.exe wuwebv.dll
- После выполненной перерегистрации, вам нужно удалить с Реестра Windows поврежденные записи. Для этого сделайте следующее:
- Нажмите Win+R и выполните regedit.
- Пройдите с помощью левой панели в раздел HKEY_LOCAL_MACHINE\COMPONENTS
- Удалите PendingXmlIdentifier, NextQueueEntryIndex и AdvancedInstallersNeedResolving, а затем перезагрузите свой компьютер.
- Переходим к сбросу Winsock. Для этого введите в командную строку netsh winsock reset и нажмите Enter.
- Теперь нужно снова запустить ранее остановленные службы BITS и ЦО Windows. Впишите в командную строку команды:
- net start bits
- net start wuauserv
- net start appidsvc
- net start cryptsvc
Способ №2 Перезапуск служб Центра обновления Windows
- Нажмите Win+R и выполните services.msc.
- Найдите в списке службу BIST и Центра обновления Windows, и кликните дважды каждой из них.
- Проверьте, запущены ли эти службы. Если нет, то нажмите на кнопку «Запустить», а также выберите настройку «Тип запуска – Автоматически».
Вот и все. Данные способы являются уже широко известными и их можно найти в очень большом количестве различных статей, в которых описывается проблематика похожая на ошибку 80246013. Проще говоря, номера ошибок может и разные, но решения для них практически одинаковы.
[SOLVED] [Server2012r2] Windows update error 80246013
taxi01
Contributor
I have been trying to run Windows update with the following errors.
Windows update error 80070490 when trying to update KB4088785
Windows update error 80246013 when trying to add KB4088876
CBS log attached Download CBS.zip from Sendspace.com — send big files the easy way
I am wondering if you can again give me a helping hand?
Thanks.
Sysnative Windows Update
Inactive
taxi01
Contributor
Sysnative Windows Update
Inactive
taxi01
Contributor
Sysnative Windows Update
Inactive
Let’s start with these.
Warning: this fix is specific to the user in this thread. No one else should follow these instructions as it may cause more harm than good. If you are after assistance, please start a thread of your own.
- Download SFCFix.exe (by niemiro) and save this to your Desktop.
- Download the attached file, SFCFixScript.txt, and save this to your Desktop. Ensure that this file is named SFCFixScript.txt — do not rename it .
- Save any open documents and close all open windows.
- On your Desktop, you should see two files: SFCFix.exe and SFCFixScript.txt.
- Drag the file SFCFixScript.txt onto the file SFCFix.exe and release it.
- SFCFix will now process the script.
- Upon completion, a log should be created on your Desktop: SFCFix.txt.
- Copy (Ctrl+C) and Paste (Ctrl+V) the contents of this into your next post for me to analyse please — put [CODE][/CODE] tags around the log to break up the text.
Attachments
taxi01
Contributor
Done, results as below:
SFCFix version 3.0.0.0 by niemiro.
Start time: 2018-04-07 00:43:23.397
Microsoft Windows Server 2012 R2 Update 3 — amd64
Using .txt script file at C:\Users\Administrator\Desktop\SFCFixScript.txt [0]
RegistryScript::
Successfully took ownership and permissions for registry key HKEY_LOCAL_MACHINE\COMPONENTS\DerivedData\Components\amd64_7619646c335506bdd2b74d0d032a9a5a_31bf3856ad364e35_6.3.9600.18298_none_df969a2f384b0a86.
Successfully took ownership and permissions for registry key HKEY_LOCAL_MACHINE\COMPONENTS\DerivedData\Components\amd64_a0c6864648da4650e530477e91823eed_31bf3856ad364e35_6.3.9600.18298_none_5097011883f8e13c.
Successfully imported registry key HKEY_LOCAL_MACHINE\COMPONENTS\DerivedData\Components\amd64_7619646c335506bdd2b74d0d032a9a5a_31bf3856ad364e35_6.3.9600.18298_none_df969a2f384b0a86.
Successfully imported registry key HKEY_LOCAL_MACHINE\COMPONENTS\DerivedData\Components\amd64_a0c6864648da4650e530477e91823eed_31bf3856ad364e35_6.3.9600.18298_none_5097011883f8e13c.
Successfully restored ownership and permissions for registry key HKEY_LOCAL_MACHINE\COMPONENTS\DerivedData\Components\amd64_7619646c335506bdd2b74d0d032a9a5a_31bf3856ad364e35_6.3.9600.18298_none_df969a2f384b0a86.
Successfully restored ownership and permissions for registry key HKEY_LOCAL_MACHINE\COMPONENTS\DerivedData\Components\amd64_a0c6864648da4650e530477e91823eed_31bf3856ad364e35_6.3.9600.18298_none_5097011883f8e13c.
RegistryScript:: directive completed successfully.
Successfully processed all directives.
SFCFix version 3.0.0.0 by niemiro has completed.
Currently storing 417 datablocks.
Finish time: 2018-04-07 00:43:27.538
Script hash: E2Uv/ZkOE4nCQSa9kcMseeJ6xG5p0tNmqaf5YKnFz7Q=
———————-EOF————————
Fix: Windows Update error 80246013
This error comes up when the automatic updates fail, i have usually seen this error on Windows 8 and 8.1. There are various reasons for the error to come up and most common of them all is the corrupt data and permissions issue which doesn’t allow the update to install itself.
In this guide; i will list down the steps you can take to fix this issue. There are a two methods listed here, one of them should work for you.
Method 1: Reset Windows Update Components
1. Click Here to download the Windows Update Diagnostics utility.
2. Run the downloaded file; follow any prompts on screen and wait for it to finish.
3. After it has finished, reboot your computer and test if you can now run update.
If the issue exists, move to Method 2:
Method 2: Restart Update Services
1. Tap or press Windows Key + R, type services.msc and then press Enter.
2. If you are prompted for an administrator password or for a confirmation, type the password or click Continue.
3. Locate Background Intelligent Transfer Service and check the Status.
4. If the Status is Stopped, right-click Background Intelligent Transfer Services, and then click Start in the menu.
5. Locate Windows Update and check the Status.
6. If the Status is Stopped, right-click Windows Update, and then click Start in the menu.
6. Close Services.
After the service has been restarted, re-do the steps and then test to see if the issue has been resolved.
Что делать с ошибкой 0x80246010 при обновлении Windows 8.1 и 10?
Во время установки одного или нескольких обновлений для Windows 8.1 и 10 можно наткнуться на ошибку 0x80246010. Как правило, данная ошибка возникает по следующим причинам:
- баг в работе Центра обновления Windows;
- службы, участвующие в процессе обновления системы, не работают;
- повреждение системных файлов.
В сегодняшней статье мы во всех подробностях расскажем вам, как избавиться от ошибки 0x80246010 и нормально обновить свою Windows.
Решаем ошибку 0x80246010
Метод №1 Запуск средства устранения неполадок
Первым делом вам необходимо запустить в своей Windows системное средство устранения неполадок Центра обновления. Верно, некоторые из вас могут знать, что данное средство срабатывает не в каждом случае, но попробовать определенно нужно.
Нажмите правой кнопкой мыши на Пуск и выберите пункт «Параметры». Далее откройте раздел «Обновление и безопасность», а затем перейдите в подраздел «Устранение неполадок». Найдите в предоставленном списке Центр обновления Windows, выберите его и нажмите на кнопку «Запустить средство устранения неполадок».
Подождите, пока средство просканирует ваш ПК на наличие неполадок с Центром обновления, а затем нажмите на кнопку «Применить это исправление» либо следуйте другим инструкциям, чтобы попытаться разрешить ошибку 0x80246010.
Метод №2 Установка обновление вручную
Вы всегда можете исключить Центр обновления (WU) из процесса обновления системы, установив проблемный апдейт собственноручно. Для начала вам нужно понять, при установке какого обновления возникает ошибка.
Откройте параметры системы, а затем перейдите в: Обновление и безопасность→Центр обновления Windows. Теперь кликните на строчку «Просмотр журнала обновлений». Внимательно осмотрите журнал и найдите обновление, возле которого «красуется» ошибка 0x80246010.
Копируйте название обновления и его номер куда в удобное место на компьютере, например, в текстовый файл на Рабочем столе, после чего перейдите по этой ссылке на страничку Каталога Центра обновления Майкрософт.
Впишите номер обновления в поисковую строку на сайте и кликните на кнопку «Найти». Выберите подходящий апдейт и списка найденных обновлений и нажмите «Загрузить». Все, что вам остается — это запустить скачанный MSU-файл и следовать инструкциям на экране (если они будут), чтобы установить обновление.
Метод №3 Включение всех важных для WU служб
Бывает и такое, что некоторые службы, активно участвующие в процессе обновления Windows, перестают по той или иной причине работать в системе. Вам нужно подкорректировать настройки этих служб, а затем перезагрузить компьютер.
Нажмите ПКМ на Пуск и выберите «Командная строка (администратор)». Теперь выполните в ней следующий набор команд:
- SC config trustedinstaller start=auto
- SC config bits start=auto
- SC config cryptsvc start=auto
Как только закончите с вводом команд, закройте окошко и перезагрузите компьютер. Попытайтесь еще раз обновить Windows и посмотрите, была ли устранена ошибка 0x80246010.
Метод №4 Сброс компонентов Центра обновления
Если ничего из вышеуказанного вам не помогло, то пора переходить в «тяжелой артиллерии». Сейчас мы займемся с вами сбросом всех компонентов Центра обновления Windows. Некоторые пользователи проводят данный процесс вручную, но рекомендуем воспользоваться удобным BAT-файлом.
Итак, создайте у себя на Рабочем столе обычный текстовый файл, после чего вставьте в него весь список команд:
:: Run the reset Windows Update components.
:: void components();
:: /*************************************************************************************/
:components
:: —– Stopping the Windows Update services —–
call :print Stopping the Windows Update services.
net stop bits
call :print Stopping the Windows Update services.
net stop wuauserv
call :print Stopping the Windows Update services.
net stop appidsvc
call :print Stopping the Windows Update services.
net stop cryptsvc
call :print Canceling the Windows Update process.
taskkill /im wuauclt.exe /f
:: —– Checking the services status —–
call :print Checking the services status.
sc query bits | findstr /I /C:”STOPPED”
if %errorlevel% NEQ 0 (
echo. Failed to stop the BITS service.
echo.
echo.Press any key to continue . . .
pause>nul
goto :eof
)
call :print Checking the services status.
sc query wuauserv | findstr /I /C:”STOPPED”
if %errorlevel% NEQ 0 (
echo. Failed to stop the Windows Update service.
echo.
echo.Press any key to continue . . .
pause>nul
goto :eof
)
call :print Checking the services status.
sc query appidsvc | findstr /I /C:”STOPPED”
if %errorlevel% NEQ 0 (
sc query appidsvc | findstr /I /C:”OpenService FAILED 1060″
if %errorlevel% NEQ 0 (
echo. Failed to stop the Application Identity service.
echo.
echo.Press any key to continue . . .
pause>nul
if %family% NEQ 6 goto :eof
)
)
call :print Checking the services status.
sc query cryptsvc | findstr /I /C:”STOPPED”
if %errorlevel% NEQ 0 (
echo. Failed to stop the Cryptographic Services service.
echo.
echo.Press any key to continue . . .
pause>nul
goto :eof
)
:: —– Delete the qmgr*.dat files —–
call :print Deleting the qmgr*.dat files.
del /s /q /f “%ALLUSERSPROFILE%\Application Data\Microsoft\Network\Downloader\qmgr*.dat”
del /s /q /f “%ALLUSERSPROFILE%\Microsoft\Network\Downloader\qmgr*.dat”
:: —– Renaming the softare distribution folders backup copies —–
call :print Deleting the old software distribution backup copies.
cd /d %SYSTEMROOT%
if exist “%SYSTEMROOT%\winsxs\pending.xml.bak” (
del /s /q /f “%SYSTEMROOT%\winsxs\pending.xml.bak”
)
if exist “%SYSTEMROOT%\SoftwareDistribution.bak” (
rmdir /s /q “%SYSTEMROOT%\SoftwareDistribution.bak”
)
if exist “%SYSTEMROOT%\system32\Catroot2.bak” (
rmdir /s /q “%SYSTEMROOT%\system32\Catroot2.bak”
)
if exist “%SYSTEMROOT%\WindowsUpdate.log.bak” (
del /s /q /f “%SYSTEMROOT%\WindowsUpdate.log.bak”
)
call :print Renaming the software distribution folders.
if exist “%SYSTEMROOT%\winsxs\pending.xml” (
takeown /f “%SYSTEMROOT%\winsxs\pending.xml”
attrib -r -s -h /s /d “%SYSTEMROOT%\winsxs\pending.xml”
ren “%SYSTEMROOT%\winsxs\pending.xml” pending.xml.bak
)
if exist “%SYSTEMROOT%\SoftwareDistribution” (
attrib -r -s -h /s /d “%SYSTEMROOT%\SoftwareDistribution”
ren “%SYSTEMROOT%\SoftwareDistribution” SoftwareDistribution.bak
if exist “%SYSTEMROOT%\SoftwareDistribution” (
echo.
echo. Failed to rename the SoftwareDistribution folder.
echo.
echo.Press any key to continue . . .
pause>nul
goto :eof
)
)
if exist “%SYSTEMROOT%\system32\Catroot2” (
attrib -r -s -h /s /d “%SYSTEMROOT%\system32\Catroot2”
ren “%SYSTEMROOT%\system32\Catroot2” Catroot2.bak
)
if exist “%SYSTEMROOT%\WindowsUpdate.log” (
attrib -r -s -h /s /d “%SYSTEMROOT%\WindowsUpdate.log”
ren “%SYSTEMROOT%\WindowsUpdate.log” WindowsUpdate.log.bak
)
:: —– Reset the BITS service and the Windows Update service to the default security descriptor —–
call :print Reset the BITS service and the Windows Update service to the default security descriptor.
sc.exe sdset wuauserv D:(A;;CCLCSWLOCRRC;;;AU)(A;;CCDCLCSWRPWPDTLOCRSDRCWDWO;;;BA)(A;;CCDCLCSWRPWPDTLCRSDRCWDWO;;;SO)(A;;CCLCSWRPWPDTLOCRRC;;;SY)S:(AU;FA;CCDCLCSWRPWPDTLOCRSDRCWDWO;;WD)
sc.exe sdset bits D:(A;;CCLCSWLOCRRC;;;AU)(A;;CCDCLCSWRPWPDTLOCRSDRCWDWO;;;BA)(A;;CCDCLCSWRPWPDTLCRSDRCWDWO;;;SO)(A;;CCLCSWRPWPDTLOCRRC;;;SY)S:(AU;FA;CCDCLCSWRPWPDTLOCRSDRCWDWO;;WD)
sc.exe sdset cryptsvc D:(A;;CCLCSWLOCRRC;;;AU)(A;;CCDCLCSWRPWPDTLOCRSDRCWDWO;;;BA)(A;;CCDCLCSWRPWPDTLCRSDRCWDWO;;;SO)(A;;CCLCSWRPWPDTLOCRRC;;;SY)S:(AU;FA;CCDCLCSWRPWPDTLOCRSDRCWDWO;;WD)
sc.exe sdset trustedinstaller D:(A;;CCLCSWLOCRRC;;;AU)(A;;CCDCLCSWRPWPDTLOCRSDRCWDWO;;;BA)(A;;CCDCLCSWRPWPDTLCRSDRCWDWO;;;SO)(A;;CCLCSWRPWPDTLOCRRC;;;SY)S:(AU;FA;CCDCLCSWRPWPDTLOCRSDRCWDWO;;WD)
:: —– Reregister the BITS files and the Windows Update files —–
call :print Reregister the BITS files and the Windows Update files.
cd /d %SYSTEMROOT%\system32
regsvr32.exe /s atl.dll
regsvr32.exe /s urlmon.dll
regsvr32.exe /s mshtml.dll
regsvr32.exe /s shdocvw.dll
regsvr32.exe /s browseui.dll
regsvr32.exe /s jscript.dll
regsvr32.exe /s vbscript.dll
regsvr32.exe /s scrrun.dll
regsvr32.exe /s msxml.dll
regsvr32.exe /s msxml3.dll
regsvr32.exe /s msxml6.dll
regsvr32.exe /s actxprxy.dll
regsvr32.exe /s softpub.dll
regsvr32.exe /s wintrust.dll
regsvr32.exe /s dssenh.dll
regsvr32.exe /s rsaenh.dll
regsvr32.exe /s gpkcsp.dll
regsvr32.exe /s sccbase.dll
regsvr32.exe /s slbcsp.dll
regsvr32.exe /s cryptdlg.dll
regsvr32.exe /s oleaut32.dll
regsvr32.exe /s ole32.dll
regsvr32.exe /s shell32.dll
regsvr32.exe /s initpki.dll
regsvr32.exe /s wuapi.dll
regsvr32.exe /s wuaueng.dll
regsvr32.exe /s wuaueng1.dll
regsvr32.exe /s wucltui.dll
regsvr32.exe /s wups.dll
regsvr32.exe /s wups2.dll
regsvr32.exe /s wuweb.dll
regsvr32.exe /s qmgr.dll
regsvr32.exe /s qmgrprxy.dll
regsvr32.exe /s wucltux.dll
regsvr32.exe /s muweb.dll
regsvr32.exe /s wuwebv.dll
:: —– Resetting Winsock —–
call :print Resetting Winsock.
netsh winsock reset
:: —– Resetting WinHTTP Proxy —–
call :print Resetting WinHTTP Proxy.
if %family% EQU 5 (
proxycfg.exe -d
) else (
netsh winhttp reset proxy
)
:: —– Set the startup type as automatic —–
call :print Resetting the services as automatics.
sc.exe config wuauserv start= auto
sc.exe config bits start= delayed-auto
sc.exe config cryptsvc start= auto
sc.exe config TrustedInstaller start= demand
sc.exe config DcomLaunch start= auto
:: —– Starting the Windows Update services —–
call :print Starting the Windows Update services.
net start bits
call :print Starting the Windows Update services.
net start wuauserv
call :print Starting the Windows Update services.
net start appidsvc
call :print Starting the Windows Update services.
net start cryptsvc
call :print Starting the Windows Update services.
net start DcomLaunch
:: —– End process —–
call :print The operation completed successfully.


