- How to: Perform Startup Repair in Windows 8/8.1 and 10
- How to BOOT into BIOS to change Boot Order
- Method 1: Perform a Startup Repair from the Startup Options screen
- Method 2: Perform a Startup Repair using installation media
- Method 3: Perform a Startup Repair using a system repair disc
- Устранение ошибки «Startup Repair Offline» при загрузке Windows 7
- Исправляем ошибку «Startup Repair Offline»
- Способ 1: Сброс настроек BIOS
- Способ 2: Подключение шлейфов
- Способ 3: Восстановление запуска
- Способ 4: «Командная строка»
- Заключение
- How to use Startup Repair to fix boot problems with Windows 10
- How to quickly repair startup problems on Windows 10
- Accessing Advanced startup when PC isn’t loading
- Accessing Advanced startup using bootable media
- Accessing Advanced startup when PC is loading
- Using Startup Repair to fix loading problems
- More Windows 10 resources
- Halo: MCC’s live service elements make it better, not worse
- Microsoft’s Surface Duo is not ‘failing up’
- Here’s what you can do if Windows 10 update KB5001330 is causing issues
- These are the best PC sticks when you’re on the move
How to: Perform Startup Repair in Windows 8/8.1 and 10
Hardware defects and issues aren’t the only things that can cause a computer running on the Windows Operating System to fail to start up properly. Software issues – everything from corrupt Windows startup files to invalid boot files – can also cause a computer to fail at startup. This is where Startup Repair comes in. Startup Repair is a tool developed by Microsoft designed to detect any issues with the files and software in general that a computer needs to have in order to correctly boot into Windows and fix them. Startup Repair is available for all versions of the Windows Operating System starting from Windows XP.
On Windows 8, 8.1 and 10, there are three distinctly different ways using which you can perform a Startup Repair on your computer. The following are the three methods that you can use to perform a Startup Repair in Windows 8, 8.1 and 10:
How to BOOT into BIOS to change Boot Order
You must know how to boot and change boot order since this will be needed to perform the solutions below. Restart your computer. Enter your computer’s BIOS (or UEFI) settings as soon as it starts up. The key that you need to press to enter these settings depends on the manufacturer of your computer’s motherboard and can be anything from Esc, Delete or F2 to F8, F10 or F12, usually F2. This is displayed on the post screen, and the manual that was supplied with your system. A quick google search asking “how to enter bios” followed by model number will also list results. Navigate to the Boot.
Method 1: Perform a Startup Repair from the Startup Options screen
Almost every single computer that comes with Windows 8, 8.1 and 10 has a horde of recovery and restoration utilities built into its Operating System, and Startup Repair happens to be one of these tools. On such a computer, you can easily access and perform a Startup Repair from the Startup Options screen which can be accessed quite easily. However, it should be noted that you can only perform a Startup Repair using this option if you can manage to sign into Windows or at least get to the Windows login prompt (this is the screen on which you sign into your account).
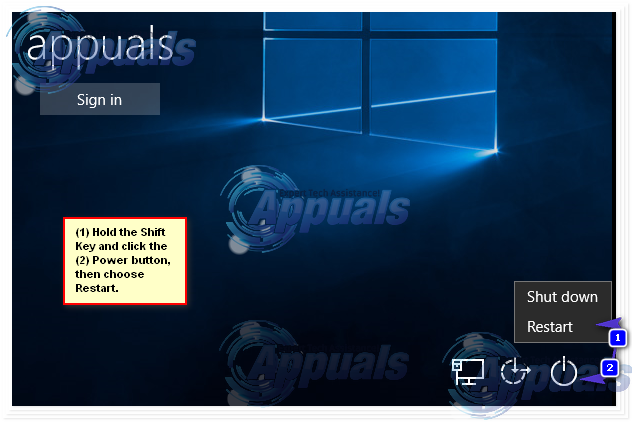
To access the Startup Options screen, click on the Power button and then, while holding down the Shift key, click on Restart.
When your computer boots up, you will be at the Startup Options screen. Once you are at this screen, click on Troubleshoot.
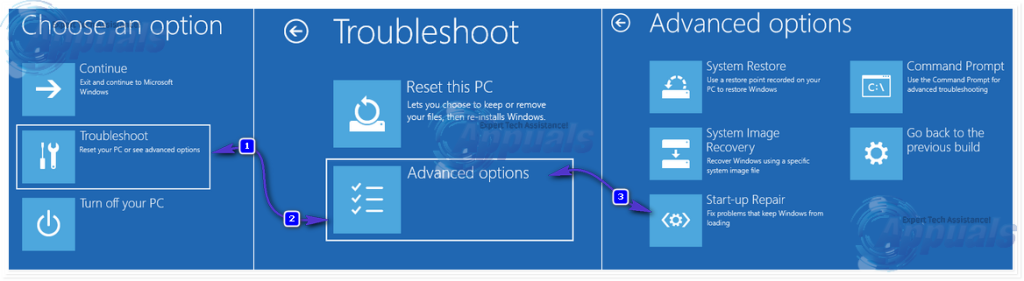
Click on Advanced options. Click on Automatic Repair (it may also be displayed as Startup Repair or Start-up repair). If prompted to do so, choose the Operating System you want to perform the Startup Repair on. If prompted to do so, select an account that is an Administrator.
Enter the password for the account you selected and click on Continue. The Startup Repair process will now begin. If you are asked to do something or make a choice, do so. If the computer needs to be restarted, restart it.
Once the process has been completed, you will be informed of whether or not any problems were detected and whether or not the detected problems were fixed by Startup Repair.
Method 2: Perform a Startup Repair using installation media
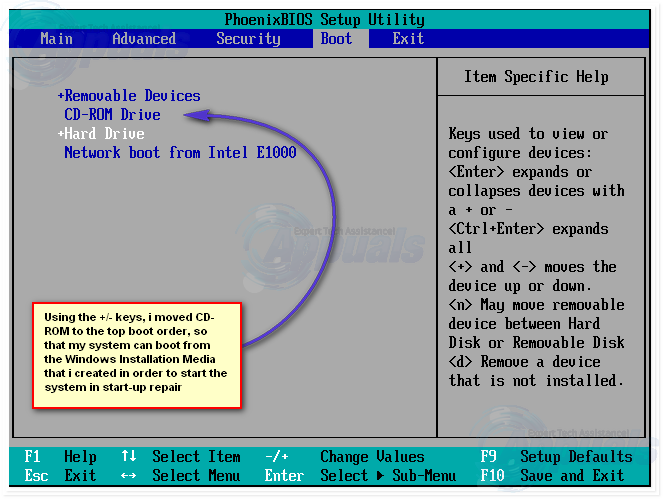
You can also perform a Startup Repair in Windows 8, 8.1 or 10 using an installation disc or installation USB. To do so, you need to: Insert the Windows installation disc or USB into the affected computer and restart it. If you don’t have one, you can create it using Rufus or the Media Creation Tool. As soon as the computer starts booting up, get into its BIOS settings (the instructions for which vary depending on the manufacturer of the computer’s motherboard), usually F2 key needs to be pressed when the first screen appears before the logo and configure the computer’s boot order from the boot tab to boot from the installation media instead of the hard drive.
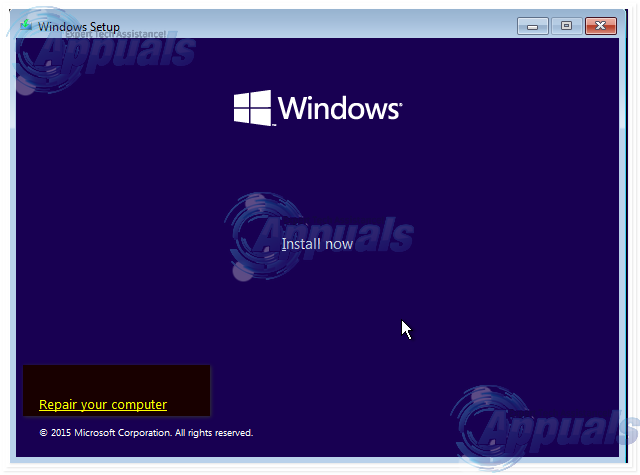
Save the changes and exit the BIOS settings. If prompted to do so, press any key to boot from the installation media. Select your language, time zone and keyboard layout preferences and then click on Next. When you reach a window with an Install now button at its center, look for and click on Repair your computer in the bottom left corner of the window.
You will now arrive at the Startup Options screen. Once you are here, you need to:
Click on Troubleshoot > Advanced options. Click on Automatic Repair (it may also be displayed as Startup Repair or Start-up repair).
If prompted to do so, choose the Operating System you want to perform the Startup Repair on. If prompted to do so, select an account that is an Administrator. Enter the password for the account you selected and click on Continue.
The Startup Repair process will now begin. If you are asked to do something or make a choice, do so. If the computer needs to be restarted, restart it.
Once the process has been completed, you will be informed of whether or not any problems were detected and whether or not the detected problems were fixed by Startup Repair.
Method 3: Perform a Startup Repair using a system repair disc
A Startup Repair can also be performed using a system repair disc that you created for your computer beforehand or one that you created using a computer that is in working condition and is running on the same version of the Windows OS as yours. To perform a Startup Repair using a system repair disc in Windows 8, 8.1 or 10, you need to:
Insert the system repair disc into the computer and restart it.
As soon as the computer starts booting up, get into its BIOS settings (the instructions for which vary depending on the manufacturer of the computer’s motherboard) and configure the computer’s boot order to boot from the system repair disc instead of the hard drive.
Save the changes and exit the BIOS settings.
If prompted to do so, press any key to boot from the system repair disc.
If a list of keyboard language layouts is displayed, click on the one you prefer.
Once you do so, you will arrive at the Startup Options screen.
At the Startup Options screen, you need to:
Click on Troubleshoot > Advanced options.
Click on Automatic Repair (it may also be displayed as Startup Repair or Start-up repair).
If prompted to do so, choose the Operating System you want to perform the Startup Repair on.
If prompted to do so, select an account that is an Administrator.
Enter the password for the account you selected and click on Continue.
The Startup Repair process will now begin. If you are asked to do something or make a choice, do so. If the computer needs to be restarted, restart it.
Once the process has been completed, you will be informed of whether or not any problems were detected and whether or not the detected problems were fixed by Startup Repair.
Устранение ошибки «Startup Repair Offline» при загрузке Windows 7
Исправляем ошибку «Startup Repair Offline»
Буквально данная неисправность означает – «восстановление запуска не в сети». После перезапуска компьютера, система предприняла попытку по восстановлению работы (не подключаясь к сети), но попытка оказалась неудачной.
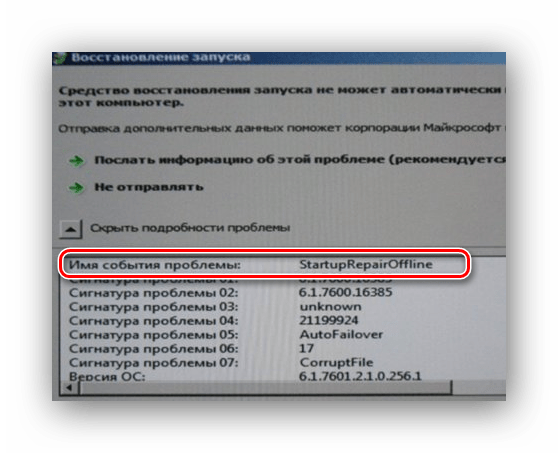
Неисправность «Startup Repair Offline» зачастую появляется из-за проблем с жестким диском, а именно из-за повреждения сектора, на котором находятся системные данные, отвечающие за правильный запуск Windows 7. Также возможны проблемы с поврежденными разделами реестра системы. Перейдем к способам исправления этой неполадки.
Способ 1: Сброс настроек BIOS
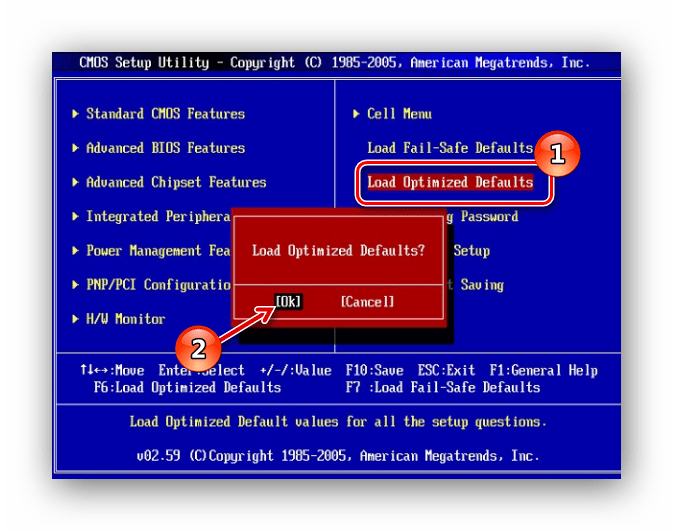
Переходим в БИОС (при помощи клавиш F2 или Del при загрузке компьютера). Производим загрузку настроек по умолчанию (пункт «Load optimized defaults»). Сохраняем сделанные изменения (нажав клавишу F10) и перезапускаем Виндовс.
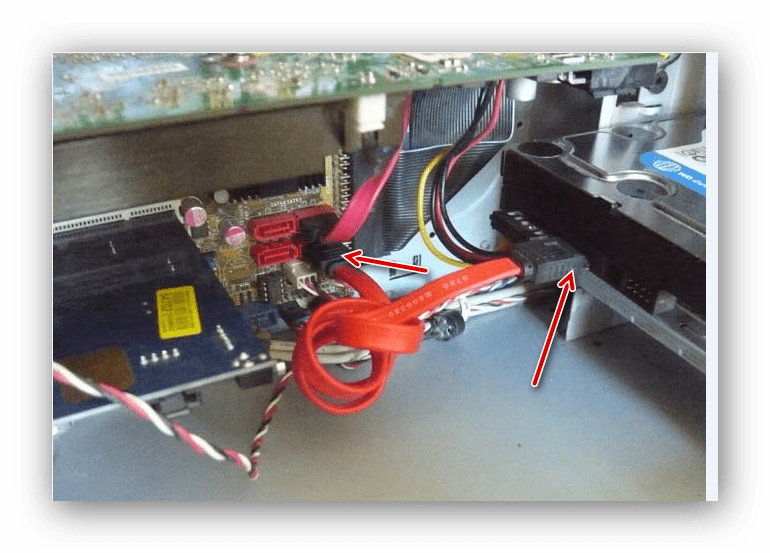
Способ 2: Подключение шлейфов
Необходимо произвести проверку целостности разъемов и плотность подключения шлейфов жесткого диска и материнской платы. Убедитесь, что все контакты подключены качественно и плотно. После проверки перезапускаем систему и проверяем на наличие неисправности.
Способ 3: Восстановление запуска
Так как обычный запуск операционной системы невозможен, рекомендуем воспользоваться загрузочным диском или флешкой с системой, которая является идентичной установленной.
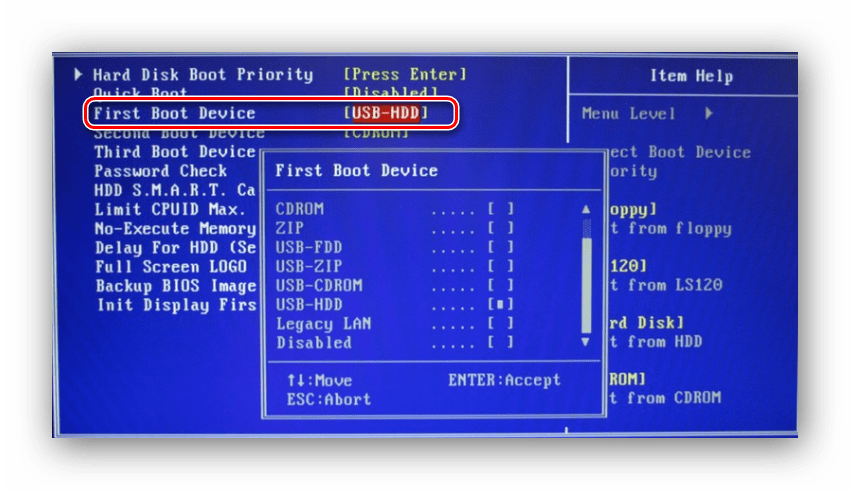
- Выполняем запуск с загрузочной флешки или диска. В БИОСе устанавливаем опцию запуска с диска или флеш-накопителя (устанавливаем в пункте «First Boot Device USB-HDD» параметр «USB-HDD«). Как это сделать на различных версиях BIOS, подробно описано в уроке, который представлен ниже.
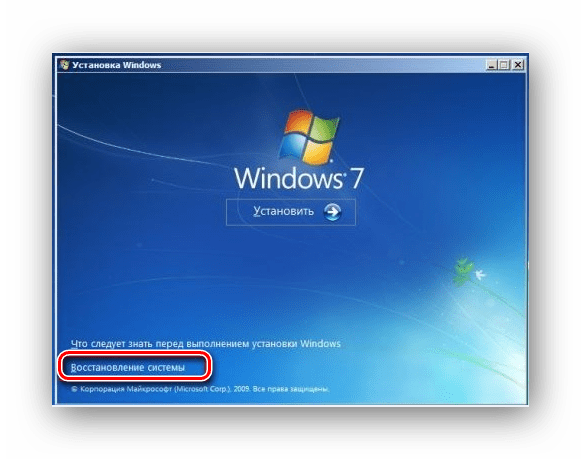
Системой будет произведён поиск неполадок в автоматическом режиме. Жмём на кнопочку «Далее» в открывшемся окне, выбрав необходимую ОС.
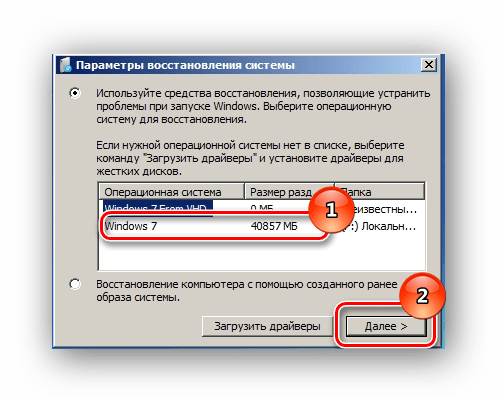
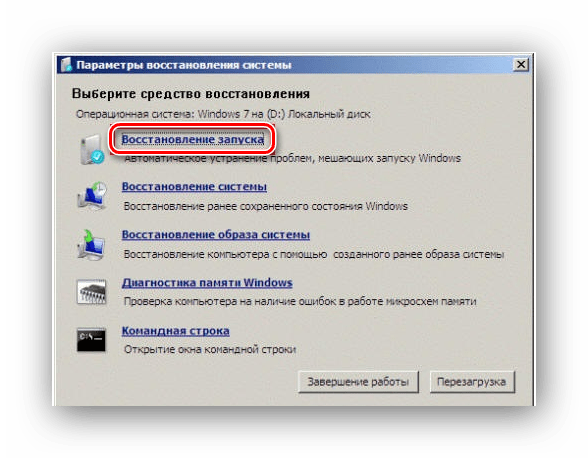
В окошке «Параметры восстановления системы» щелкаем по пункту «Восстановление запуска» и дожидаемся завершения проверочных действий и корректного запуска компьютера. После окончания проверки перезагружаем ПК.
Способ 4: «Командная строка»
Если приведенные выше способы не помогли устранить неполадку, тогда вновь запускаем систему с флешки или установочного диска.
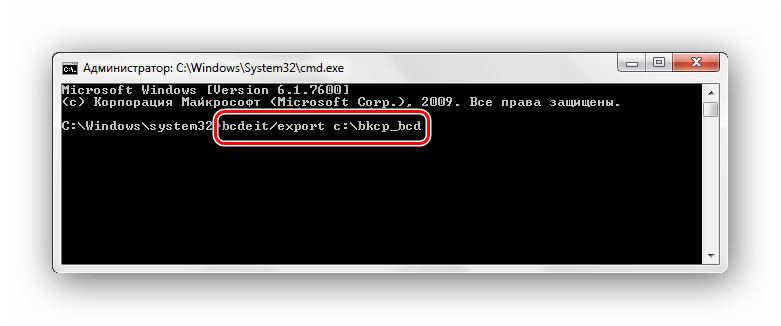
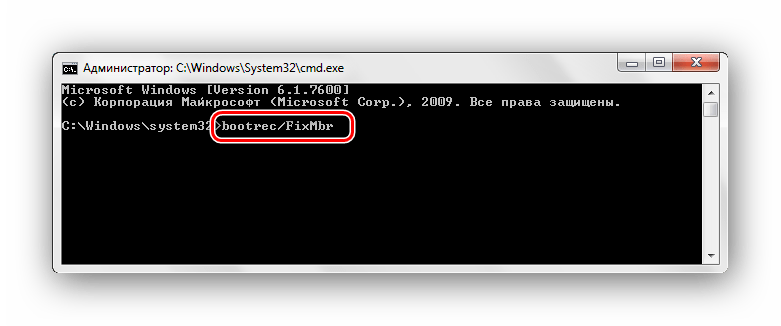
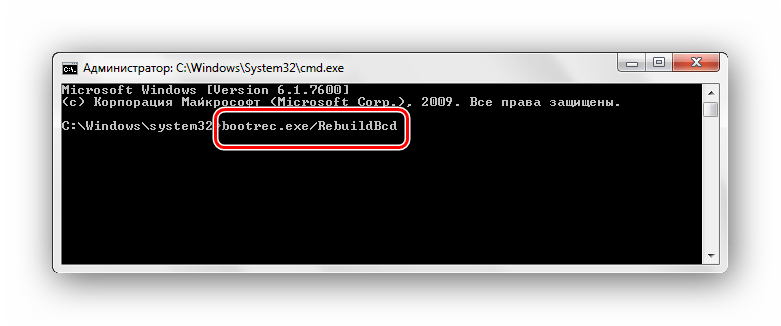
Нажимаем клавиши Shift+F10 в самом начале установочного процесса. Попадаем в меню «Командной строки», где необходимо набрать поочередно определенные команды (после ввода каждой из них нажимаем Enter).
bcdedit /export c:\bckp_bcd
attrib c:\boot\bcd -h -r –s

ren c:\boot\bcd bcd.old


После того, как ввели все команды, перезапускаем ПК. Если Виндовс 7 не запустилась в работоспособном режиме, тогда в данных о неисправности может быть имя проблемного файла (например, библиотеки расширения .dll). Если было указано название файла, то необходимо попробовать совершить поиска данного файла в интернете и поместить его на ваш винчестер в необходимую директорию (в большинстве случаев, это папка windowds\system 32 ).
Заключение
Итак, что же делать с неполадкой «Startup Repair Offline»? Самый простой и эффективный способ – это использование восстановления запуска ОС, применяя загрузочный диск или флеш-накопитель. Если способ с восстановлением системы не исправил проблему, то воспользуйтесь командной строкой. Также проверьте целостность всех соединений компьютера и настройки BIOS. Применение этих методов позволит устранить ошибку запуска Windows 7.
How to use Startup Repair to fix boot problems with Windows 10
It’s just a matter of time before your device gets stuck loading or won’t start at all. Instead of spending time trying to find out the problem, Windows 10 includes the Startup Repair feature designed to quickly fix most common issues that may be preventing your computer from loading correctly.
In this Windows 10 guide, we’ll walk you through the steps to use the Startup Repair tool to fix boot problems on your device.
How to quickly repair startup problems on Windows 10
To use the Startup Repair feature to fix boot issues with Windows 10, you’ll need to access the Advanced startup settings, which you can do in at least three different ways depending on your situation.
Accessing Advanced startup when PC isn’t loading
If your device isn’t loading or stuck during boot, you can use this method to access the recovery environment:
As soon as the Windows logo appears on your screen, press the power button. (This will immediately interrupt the boot sequence.)

After the third interruption, Windows 10 will open into the Advanced Startup environment, and then you can continue with the steps below to use the Startup Repair tool to fix booting issues with Windows 10.
Accessing Advanced startup using bootable media
Alternatively, in the case your device isn’t starting at all, you can use a USB installation media to get to the Advanced settings environment. Here’s how:
Start your device using a USB bootable media.
- Quick Tip: If your computer isn’t starting from the USB flash drive, you’ll need to change your system’s BIOS settings to make sure it can boot from USB. Usually, you can access the BIOS by powering up your device and pressing one of the functions, Delete, or ESC keys, but make sure to check your manufacturer’s support website for more information.
Click the Repair your computer link in the bottom-right corner.
Accessing Advanced startup when PC is loading
If you have access to the desktop, you can use these steps to access the recovery environment to use the Startup Repair tool:
- Open Settings.
- Click on Update & Security.
- Click on Recovery.
Under the «Advanced startup» section, click the Restart now button.
After completing the steps, you can now continue with the steps below to fix loading problems with your device using the automatic repair feature.
Using Startup Repair to fix loading problems
While in the Advanced startup environment, use the following steps to use Startup Repair:
Click the Troubleshoot button.
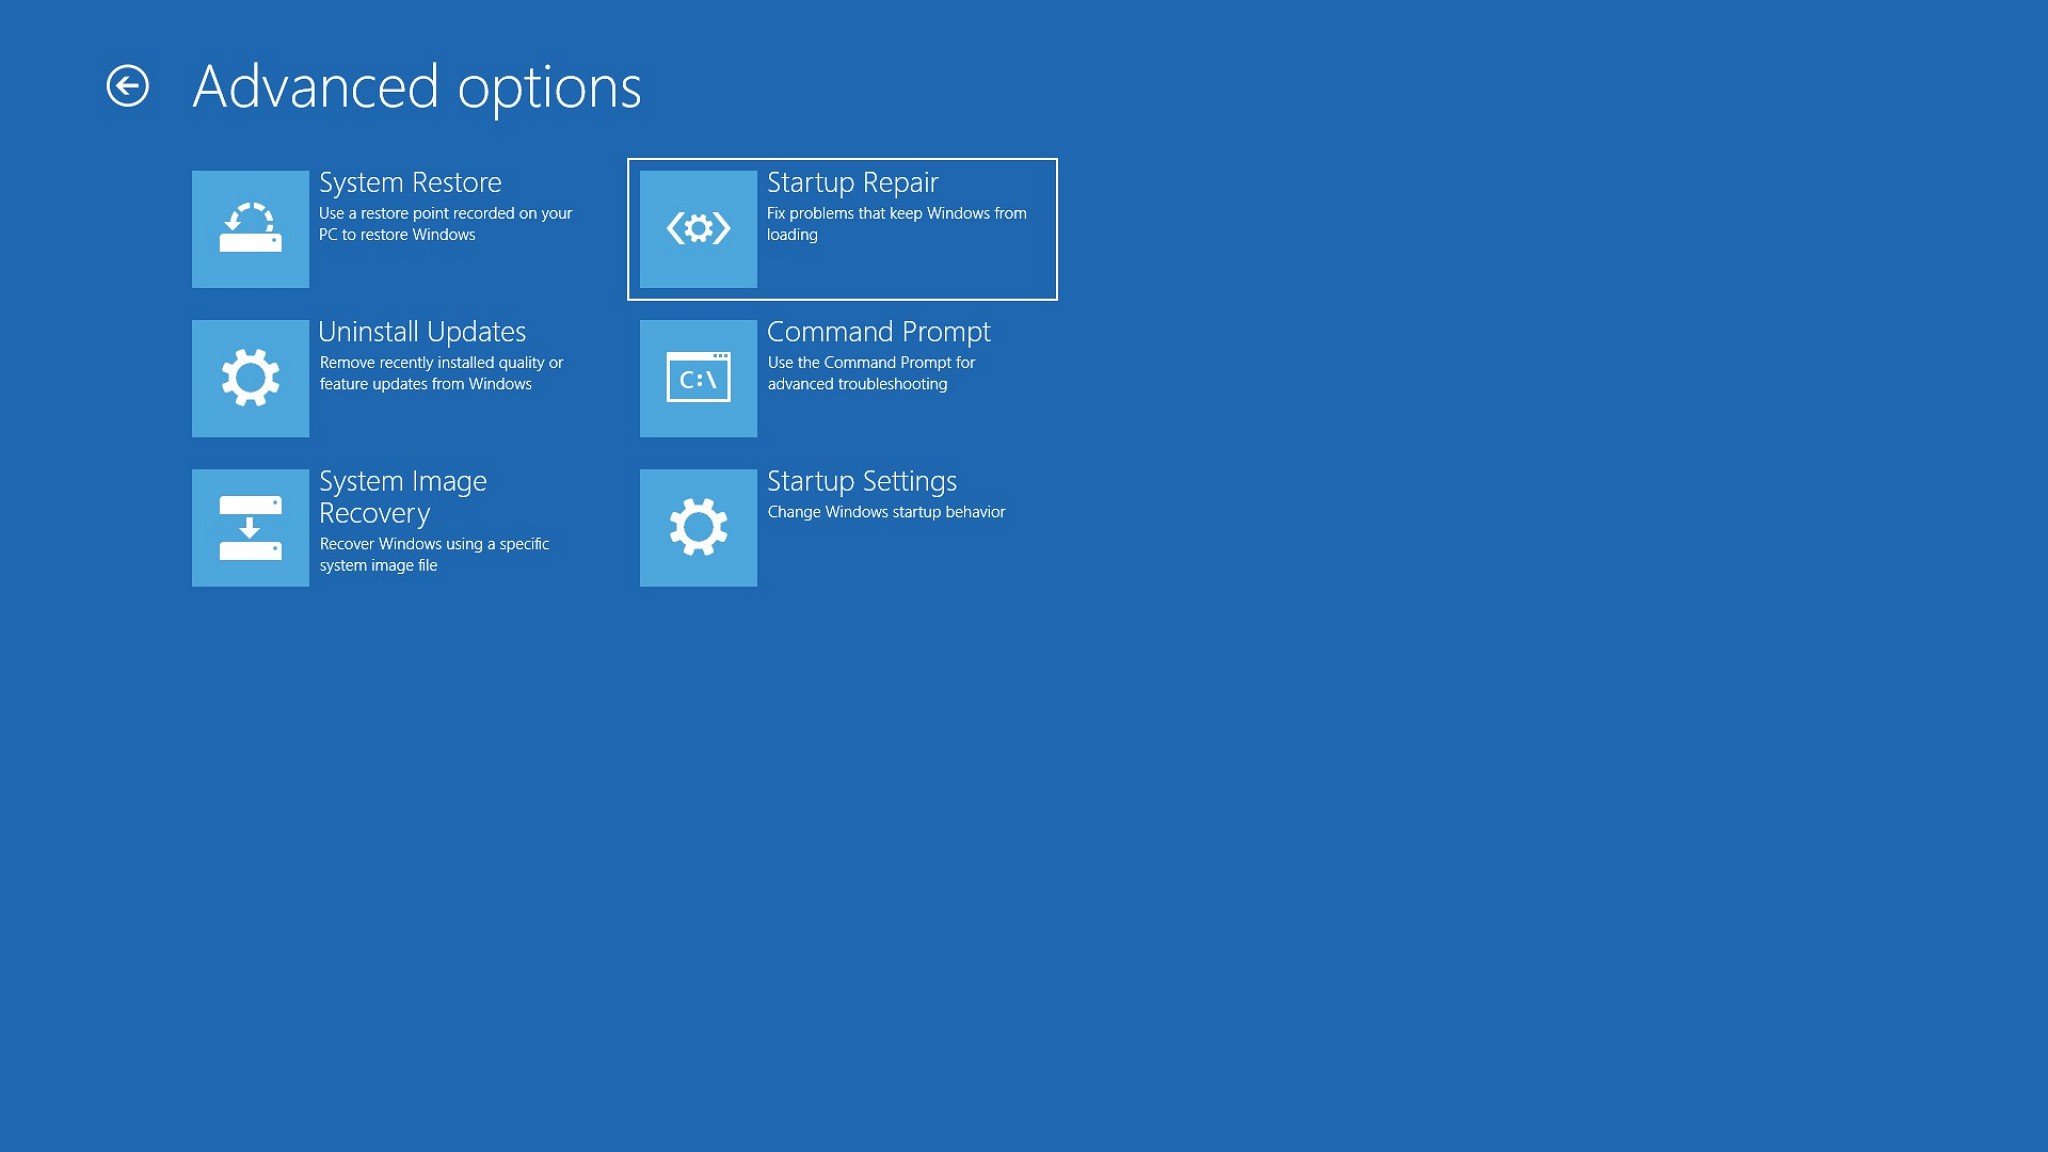
Click the Advanced options button.
Click the Startup Repair button.
Click the Continue button.
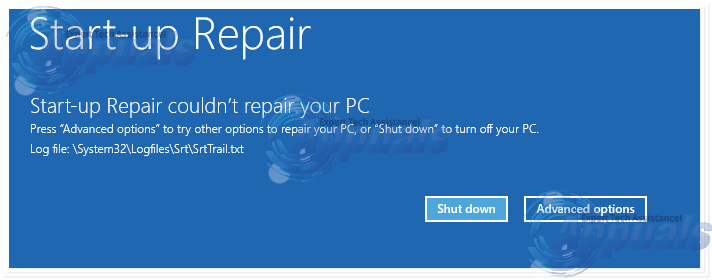
Quick Tip: If your computer is loading correctly, using this tool, you’ll get the «Start Repair couldn’t repair your PC» message because there’s nothing that needs fixing.
Once you’ve completed the steps, the Start Repair feature will proceed to scan, detect, and fix any problems that may prevent your device from loading correctly.
Also, the repair process creates a SrtTrail.txt file in the «C:\Windows\System32\Logfiles» folder with log information that you can view to have a better understanding of the diagnostics.

If you’re still having problems, you should use the Windows Central forums to find help.
Alternatively, if you’ve been running the same installation for a long time, you should consider nuking the old installation with a clean copy of Windows 10. This process will take longer, and it’ll erase everything on your computer, but it’ll help to fix the loading issues, as well as performance, battery life, and other problems.
More Windows 10 resources
For more helpful articles, coverage, and answers to common questions about Windows 10, visit the following resources:
![]()
Halo: MCC’s live service elements make it better, not worse
Halo: The Master Chief Collection is more popular than ever, but some fans don’t agree with the live service approach 343 Industries has taken with it. Here’s why those elements are, at the end of the day, great for the game and for Halo overall.
![]()
Microsoft’s Surface Duo is not ‘failing up’
Microsoft announced this week that it was expanding Surface Duo availability to nine new commercial markets. While Surface Duo is undoubtedly a work in progress, this is not a sign of a disaster. It’s also doesn’t mean that Surface Duo is selling a ton either. Instead, the reason for the expansion is a lot more straightforward.
![]()
Here’s what you can do if Windows 10 update KB5001330 is causing issues
In this guide, we’ll show you the steps to get rid of the update KB5001330 to fix profile, gaming, and BSoD problems with the Windows 10 October 2020 Update and May 2020 Update.
![]()
These are the best PC sticks when you’re on the move
Instant computer — just add a screen. That’s the general idea behind the ultra-portable PC, but it can be hard to know which one you want. Relax, we have you covered!


