- Подключение компьютера Windows к компьютеру Mac
- Подключение к компьютеру с Windows, найденному в списке
- Подключение к компьютеру с Windows путем ввода его адреса
- Подключение с помощью кабеля Ethernet
- Подключение к недавно использованному компьютеру или серверу
- How to Access Mac Files from a Windows PC
- Enable File Sharing on Mac OS X
- Connect to Mac from Windows
- Remotely Access a Mac from a Windows PC on a Local Network
- Remote Access a Mac from Windows
Подключение компьютера Windows к компьютеру Mac
Вы можете подключиться к компьютерам, работающим в ОС Windows, и серверам Вашей сети с компьютера Mac.
Подключение к компьютеру с Windows, найденному в списке
В Finder  на Mac выберите «Переход» > «Подключение к серверу» и нажмите «Просмотреть».
Найдите имя компьютера в разделе «Общий доступ» в боковом меню окна Finder и нажмите на него, чтобы установить подключение. В некоторых случаях для просмотра всех общих компьютеров нужно нажать кнопку «Все».
Когда Вы обнаружите компьютер или сервер с включенным общим доступом, выберите его и нажмите «Подкл. как».
В некоторых случаях Вам понадобится информация о сети или рабочей группе, к которой относится общий компьютер. Если Вы не располагаете данной информацией, свяжитесь с владельцем компьютера или обратитесь к сетевому администратору.
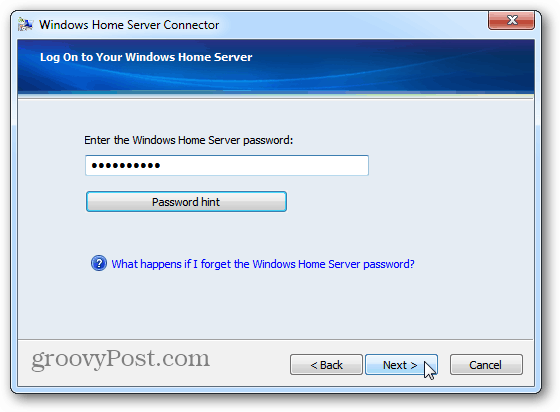
При необходимости введите имя пользователя и пароль, затем выберите тома или общие папки сервера.
Пароли для компьютеров и серверов, работающих с Windows, часто состоят из 14 символов или менее. Для надежности обратитесь к администратору или владельцу.
Чтобы облегчить подключение к компьютеру в дальнейшем, установите флажок «Запомнить пароль в связке ключей» для добавления Вашего имени пользователя и пароля в Вашу связку ключей.
Подключение к компьютеру с Windows путем ввода его адреса
В Finder на Mac выберите «Переход» > «Подключение к серверу».
В поле «Адрес сервера» введите сетевой адрес компьютера в одном из следующих форматов.
Дополнительную информацию о корректном формате сетевых адресов см. в Форматы сетевого адреса для общих компьютеров и серверов.
Чтобы верно ввести имя пользователя и пароль, следуйте инструкциям на экране, затем выберите нужную общую папку.
Если Вы не знаете имя рабочей группы и сетевое имя («имя компьютера») для компьютера с Windows, обратитесь к владельцу компьютера или к администратору сети.
При необходимости введите имя пользователя, пароль и выберите тома или общие папки сервера.
Пароли для компьютеров и серверов, работающих с Windows, часто состоят из 14 символов или менее. Уточните пароль у владельца или администратора компьютера.
Чтобы облегчить подключение к компьютеру в дальнейшем, установите флажок «Запомнить пароль в связке ключей» для добавления Вашего имени пользователя и пароля в Вашу связку ключей.
Подключение с помощью кабеля Ethernet
Подключите Mac к компьютеру с Windows, используя стандартный кабель Ethernet. Если Ваш Mac не оснащен Ethernet-разъемом, используйте адаптер «USB в Ethernet».
Соединение двух компьютеров создает небольшую локальную сеть, состоящую всего из двух компьютеров.
На компьютере с Windows включите общий доступ к файлам. Если Вы столкнулись с затруднениями, обратитесь к сопроводительной документации к компьютеру с Windows.
Убедитесь, что брандмауэр сетевого подключения на компьютере Windows выключен или, если он включен, убедитесь, что TCP-порт 445 открыт для разрешения общих подключений.
Дополнительную информацию см. в руководстве пользователя и экранной справке компьютера Windows.
На компьютере Mac выберите «Переход» > «Подключение к серверу», затем нажмите «Просмотреть» или введите сетевой адрес компьютера в поле «Адрес сервера».
Подключение к недавно использованному компьютеру или серверу
Вот несколько вариантов удобного подключения к общим компьютерам и серверам, которые Вы часто используете:
На Mac выберите меню «Apple»

> «Недавно использованные объекты», затем выберите сервер в списке недавно использованных серверов.
В Finder на Mac выберите «Переход» > «Подключение к серверу», нажмите всплывающее меню в правой части поля «Адрес сервера» и выберите недавно использованный сервер.
Добавьте общие компьютеры, сети и рабочие группы в боковое меню Finder. Выберите элемент, затем выберите «Файл» > «Добавить в боковое меню» или нажмите сочетание клавиш Command-T.
Добавьте общий компьютер или сервер в список избранных. В Finder на Mac выберите меню «Переход» > «Подключение к серверу», введите сетевой адрес, затем нажмите кнопку «Добавить»  .
.
Если Вы не можете обнаружить сервер или компьютер с включенным общим доступом или подключиться к нему, возможно, он недоступен, либо у Вас отсутствует разрешение на подключение к нему. Обратитесь за помощью к владельцу компьютера или администратору сети.
Источник
How to Access Mac Files from a Windows PC
It’s fairly simple so long as you are on the same network
Apple is becoming more popular everyday (I love my MacBook and it’s selling in record numbers this year), yet most people still have Windows PCs at home. If you are running both Macs and PCs on your network, there’s a good chance you might want to share files between your Mac and PC. You can do this in one of two directions: either access Mac files from a Windows PC or access Windows files from a Mac.
Today I’m going to talk about how you can share files on your Mac and access them on your PC. The process is fairly simple and should work as long as you are on the same network and don’t have any over zealous security settings configured on your Mac.
The first thing you’ll need to do is enable file sharing on your Mac. Here’s how to do it.
Enable File Sharing on Mac OS X
First go to the System Preferences menu option by clicking on the Apple icon at the top left and then clicking on System Preferences.

Now click on the Sharing icon, which is where we need to go to configure all the sharing options.

Before you get started, make sure to click on the little gold lock icon at the bottom left otherwise everything will be greyed out and you won’t be able to make any changes.
Now go ahead and check the File Sharing box under Service to enable file sharing. This one dialog pretty much contains all the settings and options for sharing. Starting at the top, you can change your computer name to something less complex so Windows users have an easier time connecting. If you don’t, OS X will give it a short name automatically so that Windows can recognize it. Click the Edit button to change the name.

You’ll also see the IP address for the computer listed by the Options button. Under Shared Folders, the Public folder is shared out by default. Click the little + (plus) button to share any folder on your hard drive. Under Users, you can see the standard permissions and edit them as you see fit.
The only other thing you have to do is click on the Options button and you’ll see a section at the bottom called Windows File Sharing. In order to connect from a Windows machine, you have to check the box next to the user name and enter your password. For whatever reason, OS X has to store your Mac user account password in a less secure way in order to connect from a Windows machine. If you don’t do this step, you’ll be asked to enter the username and password from your Windows machine, but it will just give you an error even if you type it in correctly.

That’s about it from the Mac side. Now it’s time to try connect from your Windows machine.
Connect to Mac from Windows
There are a couple of ways you can do this. One way is to simply open up Explorer and click on Network. You should see the Mac computer listed there.

If Windows asks you to enable Network Discovery, then go ahead and do that. Now when you double-click on the computer name, it should pop up a login dialog box. Enter the same username and password that you had entered in the Windows File sharing dialog on OS X earlier. If the user account on your Mac had spaces, don’t worry because Windows can handle it just fine.

If everything went well, you should see some shared folders now on your Windows computer!

Another way to connect is to use the Run command from the Start Menu. Click on Start, then Run and type in the IP address or computer name:

Now you’ll get the same dialog box where you have to enter the username and password for your Mac user account. You should now be able to copy files back and forth from Windows to Mac and vice versa.
The only setting that can cause issues is the firewall on OS X. Everything should work fine with the firewall enabled with default settings, but if you go to firewall and then Firewall Options, you can block all incoming connections. If this item is checked, then file sharing will no longer work.

Just uncheck that option under firewall options and you should be good to go. If you have any other trouble sharing your Mac files with your PC, post a comment and I’ll see if I can help. Enjoy!
Founder of Online Tech Tips and managing editor. He began blogging in 2007 and quit his job in 2010 to blog full-time. He has over 15 years of industry experience in IT and holds several technical certifications. Read Aseem’s Full Bio
Источник
Remotely Access a Mac from a Windows PC on a Local Network


If you have a network environment with both Windows and macOS, there will be times you need to connect to the Mac from Windows.
Note: In this example, I’m connecting a Windows 7 system to my Mac running OS X Lion over my home network.
Remote Access a Mac from Windows
First, download and install the most recent stable version of the free utility TightVNC to your Windows computer.
During installation, uncheck TightVNC Server unless you’re using it for other remote access situations. For connecting your Windows system to a Mac, the server isn’t required. 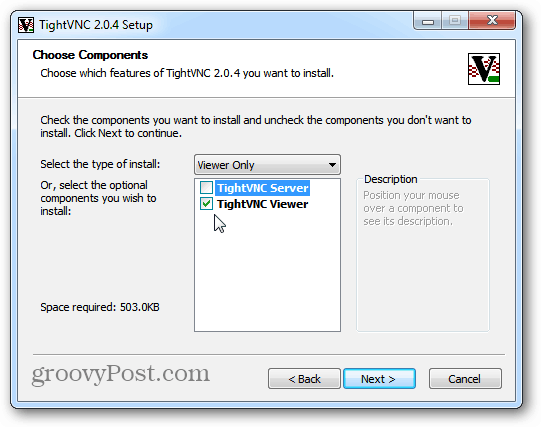
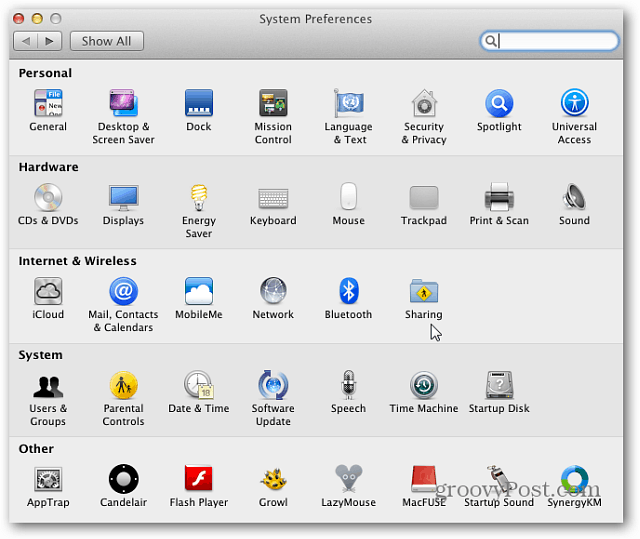
On your Mac, click the Apple icon and select System Preferences.

System Preferences opens. Click Sharing under Internet & Wireless.
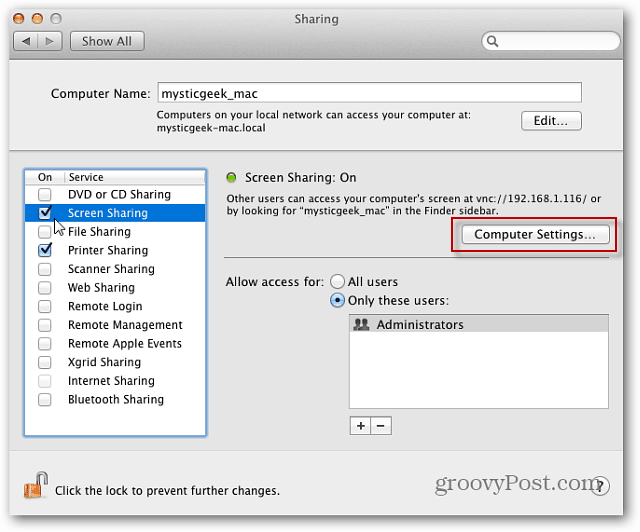
Now, in the Sharing window, check Screen Sharing. Then click the Computer Settings button. Note the IP address is shown above the Computer Settings button. You’ll need it to connect with TightVNC.
Next, check VNC Viewers Macy Control Screen with Password. Type in a password and click OK.

Then type in the password for your Mac system and click OK.

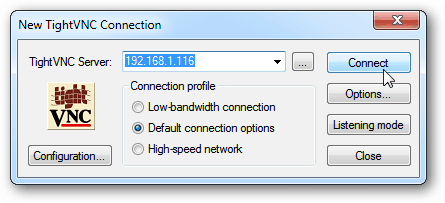
Go back to your Windows computer and click Start > All Programs > TightVNC > TightVNC Viewer.

Enter in the IP address for the Mac computer. The IP address is displayed on the Screen Sharing window on the Mac. Click Connect.
Next, type in the password you created for the VNC connection earlier. This is NOT your Mac system password.
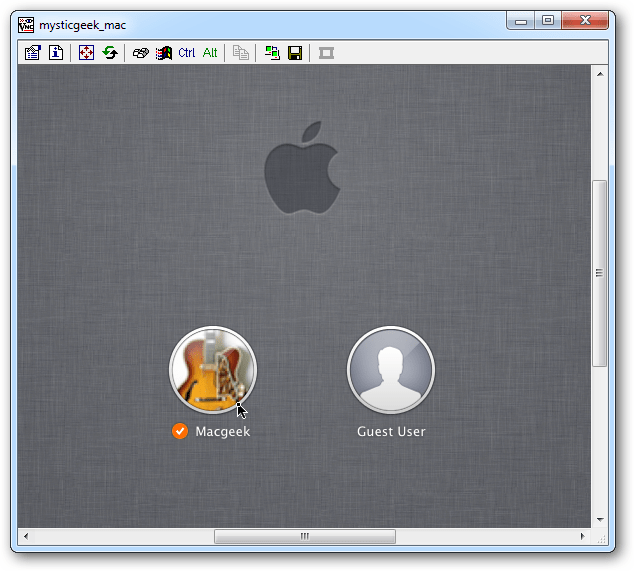
Wait a few seconds for the connection to be established. Tight VNC brings up the remote connection screen. Select the user account you want to use to log in on your Mac.
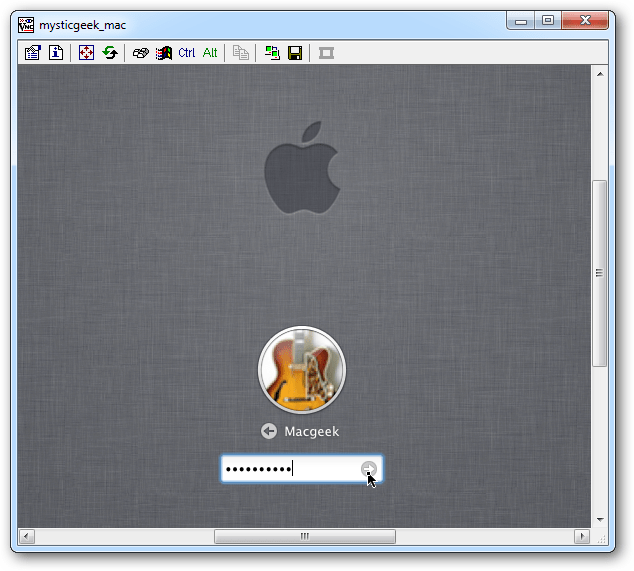
Enter the user account password.
There you go! You can control your Mac remotely from your Windows PC just as if you were sitting in front of it. I have my Mac set to a large display resolution, so the first thing I did is turn it down to 1024×768.
This setting is up to you. You can run it at full resolution if your Windows display is capable.

In fact, TightVNC provides several cool options you can explore to get the remote session to work how you like.

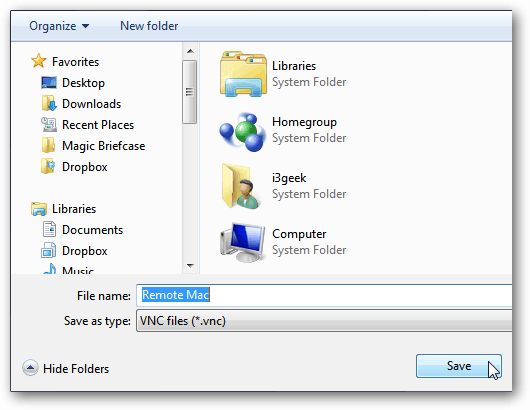
If you use the remote connection a lot, create a shortcut on your desktop. On the TightVNC toolbar, click the Save icon.
Then give the connection shortcut a name, save it to desktop, and click Save.
Next, it asks if you want to save the password. If you’re the only user on the Windows PC, it’s easier to save it, but again it’s up to you.

The TightVNC remote connection to your Mac icon displays on your desktop. Just double-click it anytime you want to connect remotely to your Mac. Simple and nice!
There’s a bit of lag time while controlling your Mac from Windows via TightVNC, based on your network speed or over a Wi-Fi connection. Your mileage will vary. Overall, though, this is an easy and efficient way to remotely control your Mac from your Windows system on the same network.
Источник


