Windows Phone 8: Media file access
Are there means to access audio and video files from the default audio/video folders in Windows Phone 8? I already checked this document but all methods (for instance KnownFolders.MusicLibrary) are not implemented on the WP8: http://msdn.microsoft.com/en-us/library/windows/apps/hh967755.aspx
I need access to the raw file data. It would also be fine to access the data from a Windows Phone Runtime or from pure C++ if it’s not possible from C#.
3 Answers 3
KnownFolders doesn’t work on WP8 for 3rd party apps.
In terms of access on WP8 here’s what’s available:
- Contacts: Read access available since WP7.5, write-access available via WP8 ContactStore.
- Appointments: Read-access available since WP7.5. In WP8 you can add individual appointments after user confirmation via the SaveAppointmentTask.
- Photos: Read access to all folders available since WP7. Write-access to Camera Roll and Saved Pictures available since WP7.5.
- Audio: Developers can iterate over the music library and even play it via the native player since WP7. Starting WP8 developers can add songs to the music library using MediaLibraryExtensions.SaveSong().
- Video: Read-write isn’t available. There are security and storage issue with transporting files that big.
- uSD Card: Starting WP8 apps can register for specific file extensions and read those from the micro-SD card.
- Documents: No read-write access. But starting WP8 developers can open up docx/xlsx/etc files using Launcher.LaunchFileAsync and it will open up a read-only copy in Office. Users can then choose to save that copy in the Office Hub.
I’ve made this post a wiki so if there are any additional areas, feel free to edit and add those bullet points.
[GUIDE] Full FileSystem Access over SFTP / CMD over SSH on Windows 10 Mobile
Breadcrumb

snickler
Retired Forum Moderator / Inactive Recognized Deve
This guide uses the built-in SSH server on the phone that gets activated once you enable Device Discovery to give us TRUE full file system access. MTP doesn’t truly give full file system access as there are files and folders that aren’t accessible still.
NOTE: The automation of the steps listed in this whole guide has been incorporated into an easy GUI within @gus33000 ‘s app called Interop Tools. Big thanks to him for taking the time to simplify this whole process.
Many thanks to @gus33000 [For the simplification and guinea pig process ] and @black_blob [ For making me try the UMCIAuditMode trick again]!
Manual Steps for SFTP
- @djamol’s Root Tool , or even the OEMSetting.reg tweak that @WojtasXda came up with
- Some SFTP program (Swish Easy SFTP works the BEST, WinSCP works second best, but for some reason it can’t read the root C: drive from SFTP).
- If you’re using @djamol’s Root Tool, use @vcfan’s Lumia Registry Editor for this
- The following keys should be set to the following string values under the Path of System\Currentcontrolset\control\ssh\sirepuser
Represented in this guide as key: value
stfp-home-dir : C:\
default-home-dir : C:\
sftp-mkdir-rex : .*
sftp-open-dir-rex : .*
sftp-read-file-rex : .*
sftp-remove-file-rex : .*
sftp-rmdir-rex : .*
sftp-stat-rex : .*
sftp-write-file-rex : .*
auth-method : password
user-pin : 1234
[*] Pair to your phone using WConnect, either from usb connect mode («wconnect usb«) or IP (wconnect youripaddress) using the pin on your device
[*] When this is complete, go to %USERPROFILE%\appdata\local\Microsoft\WConnectSrv. In this directory, you should see a privkey.pem file. Hold on to this
[*] Open up PuttyGen, click on the Conversions menu and then click Import key. Point to the path that contains the privkey.pem file, then press Okay
[*] Back in PuttyGen, click on the Save private key button and then save the .ppk file off somewhere that you’ll remember.
[*] Open Pagent, click Add key and point to the .ppk file you generated before. You’ll want to make sure this is ALWAYS running.
If using Swish
- Go to Windows Explorer, dbl-click on the Swish icon under Devices and Drives. Click on Add SFTP Connection at the top
- Enter in a label that you wish to save the connection present as .
- Under host your phone’s IP as Host.
- Enter in Sirepuser as the User.
- Enter / as the Path.
- Press Create
- Go back to the Swish folder then click on the connection that you just created
(YOU MUST HAVE PAGENT RUNNING FOR THIS TO WORK). - When prompted, enter «1234» as the password.
If using WinSCP:
- Open WinSCP. Underneath of the Password box, click on Advanced.
-
- Click on the SFTP menu item and set the Preferred SFTP protocol version to 2
Click on the SSH -> Authentication menu item. Click Allow agent forwarding, click on the ellipsis next to Private key file and choose the .ppk file you saved from PuttyGen
- Press Ok to save the settings
- Back on the WinSCP main screen, enter in your phone’s Wi-Fi IP into host name and for the User name, type in Sirepuser. Press save and then save this session as a «Site» in WinSCP
- Login. When prompted, enter «1234» as the password.
- You’ll receive an error initially about not being able to browse /C/ and blah blah. You can right-click and click on Goto Folder. /C/Data will be a nice folder to start at since that’s where most of the goodies are.
Voila, you should know be able to have full file system access.
Now there are a FEW caveats to this..
- If you’re looking to modify/download any of the important files in the AOW folder, you won’t be able to. For SOME REASON, it’s returning «No such file or directory» if you try to download/modify some certain files. It will also return this if you try to do the same for the registry hives.
- If you happen to remove all paired pins on your phone, you must add pin from the phone and use the pin as the password to your SFTP session
I’m tired of my SFTP access cutting out because the WiFi disappears when the screen goes to lock >_ 2
For some reason the service that keeps wifi running even while the screen is under lock is disabled on 10512. This enables it. Reboot and you’ll have WiFi working under lock screen on 10512.
Manual Steps for running CMD over SSH (assuming you’ve done the SFTP steps above) Redstone builds required. 10586.XXX builds will NOT work
- IoT Insider Preview ISO
- Interop Tools — Download the latest arm package and all packages from the Dependencies directory. Install the dependencies first, THEN install the app.
Pageant- Putty
Steps:
First, you’ll need to download the Windows IoT Core Insider Preview ISO. Mount it and then install the MSI. Next, you’ll need to go into Disk Management (diskmgmt.msc) and create a new 4GB VHD by clicking Action-> Create VHD. Set the location to any place you wish for it to be, set the size to 4GB and keep the rest the same. Pay attention to the disk number shown in the Disk Management screen after you create and mount that VHD (They have a blue drive icon to the left of them).
When this is complete, open up an elevated command prompt. Go to C:\Program Files (x86\Microsoft IoT\FFU.
Run the following command:
Where N is the disk number. At this point, you should start seeing a bunch of volumes created. The MainOS volume is the one we’ll care about.
Go to that drive and copy the Windows\System32\cmd.exe and Windows\system32\en-us\cmd.exe.mui to your phone’s Document’s folder.
Next step is to open up the Interop Tools app, and tap on the Interop Unlock menu item from the hamburger menu. Select the option to restore NDTKSvc, reboot.
When the device comes back up, re-open Interop Tools and this time click on the Registry Editor from the hamburger menu.
Enter the following values, then press Write Data:
Registry Hive : HKEY_LOCAL_MACHINE
Registry Type: String
Registry Key Path: SYSTEM\Controlset001\Control\SSH\Sirepuser
Registry Value Name: default-shell
Registry Value Data: C:\Data\Users\Public\Documents\cmd.exe
Write this key tap on the hamburger menu and go to the Registry Browser. Travel to HKEY_LOCAL_MACHINE -> SYSTEM -> ControlSet001 -> Control -> Ci.
Tap the + button on the application bar and make sure the values are set to the following and then press Write:
Registry Hive: HKEY_LOCAL_MACHINE
Registry Type: Integer
Registry Key Path: SYSTEM\ControlSet001\Control\CI
Registry Value Name: UMCIAuditMode
Registry Value Data: 1
This actually enables the execution of unsigned executables. This is how we end up making CMD and the other programs work ^_^.
Reboot your phone. Wait a good 3-5 minutes before you try doing anything because your phone will be acting very unstable (Some apps crashing, and others working).
While you have pageant open and the private key added, open up a putty SSH session to your phone using the username of Sirepuser. You should be delighted at this point (If you did everything correctly) to see a Command Prompt. You should be getting random resource string errors when you try typing DIR, etc and this is due to the fact that we don’t have the mui string in the correct place. Let’s fix that.
ONE BIG THING TO NOTE: running CMD in SSH is very sensitive to keystrokes. If you are typing a command and press backspace even once, then the command won’t send at all. It will state that it doesn’t recognize what you’re doing, so be sure to type these things in FLAWLESSLY (yeah it’s annoying)
What we want to do now is then copy the cmd.exe to C:\Windows\System32 and the cmd.exe.mui to C:\Windows\System32\en-US. Run the following commands:
copy c:\Data\Users\Public\cmd.exe c:\Windows\System32
copy c:\Data\Users\Public\cmd.exe.mui c:\Windows\System32\en-US
Back on your phone, go back to Interop Tools and click on the Registry Editor. Follow the same exact steps as you did for changing the default-shell key, but make one change:
Registry Value Data: C:\Windows\system32\cmd.exe
At this point, restart your putty session and then you’ll be good to go with CMD running over SSH as SYSTEM!
There was a reason I said to copy off the system32 folder somewhere. If you follow the same process to get the files to your Documents folder and move them over to system32, you can have quite a bit of exes to run from the command line. The easiest thing to do is to use xcopy to get everything there.
Extra #2:
You can run .NET Console apps in CMD if they are named the following 3 names: TailoredDeploy.exe, WConnectAgent.exe or WConnectAgentLauncher.exe.
Make a directory on your SD Card named «test» or put it in the test directory on your phone’s C: drive and it should go. Beware that the runtime is weird on the phone and not ALL things are possible to do with a .NET Console app
PLEASE. For the love of god DO NOT add DefApps to the Administrators group if you don’t want all of your apps to stop working
USE THIS AT YOUR OWN RISK! I AM NOT RESPONSIBLE IF YOU BLOW UP YOUR PHONE ON PURPOSE OR BY ACCIDENT
Accessing files windows phone
This forum has migrated to Microsoft Q&A. Visit Microsoft Q&A to post new questions.
Asked by:
![]()
Question
![]()
![]()
When I connect my Lumia 830 Windows 10 phone to my desktop PC, I can access the files from Windows Explorer, probably thanks to something that relies on the MTP protocol.
I would like to script some operations on those files (e.g. if there are files in a certain folder on the phone, move them all to a folder on the PC).
How can I access the phone’s «filesystem namespace» from PowerShell?
All replies
![]()
![]()
Can you not access it via the drive letter it is mapped to?
Step 1 Plug in phone and get drive letter (M — just used for discussion)
Step 2 open PowerShell
Step 3 type M: and hit enter
You are now accessing the phones file system.
If you find that my post has answered your question, please mark it as the answer. If you find my post to be helpful in anyway, please click vote as helpful. (99,108,97,121,109,97,110,50,64,110,121,99,97,112,46,114,114,46,99,111,109|%<[char]$_>)-join»
![]()
![]()
Windows 10 Mobile phones do not implement mass-storage over USB, only MTP. (When I had a Windows Mobile 6.5 HTC HD2, its µSD card would show up as a drive letter in Windows when connected to a PC.)
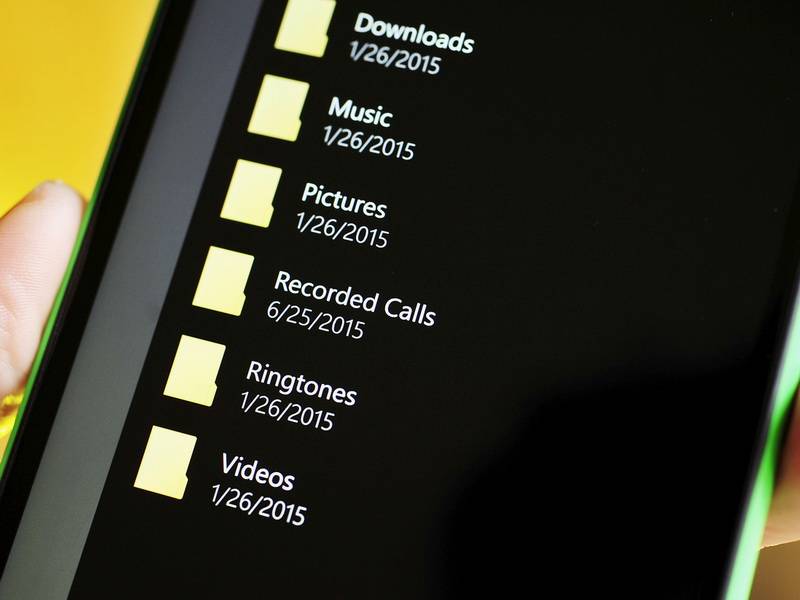
As a result, one doesn’t get a drive letter when connecting the phone, only a virtual folder of sorts in File Explorer:
FWIW, please note the data I need to access resides on the phone’s internal memory, not on the µSD card.
Как получить доступ к файловой системе Windows 10 Mobile с телефона
В Windows 10 Mobile функция доступа к файловой системе реализована максимально просто. По умолчанию Проводник на вашем смартфоне отображает несколько пользовательских папок во внутренней памяти, а также позволяет взаимодействовать с файлами на SD-карте или подключенной флешке. Залезть в какие-либо системные директории вы не сможете. Вполне разумное решение, поскольку обычный пользователь может причинить системе вред, если будет что-то делать с этими папками. К сожалению, защитные механизмы не предоставляют очевидной возможности просматривать скрытые каталоги и более продвинутым юзерам. В этой статье мы опишем способ получить доступ к системным папкам прямо через Проводник на вашем смартфоне.
Предупреждение: мы не несём ответственности за последствия ваших действий.
- Сделайте Interop Unlock.
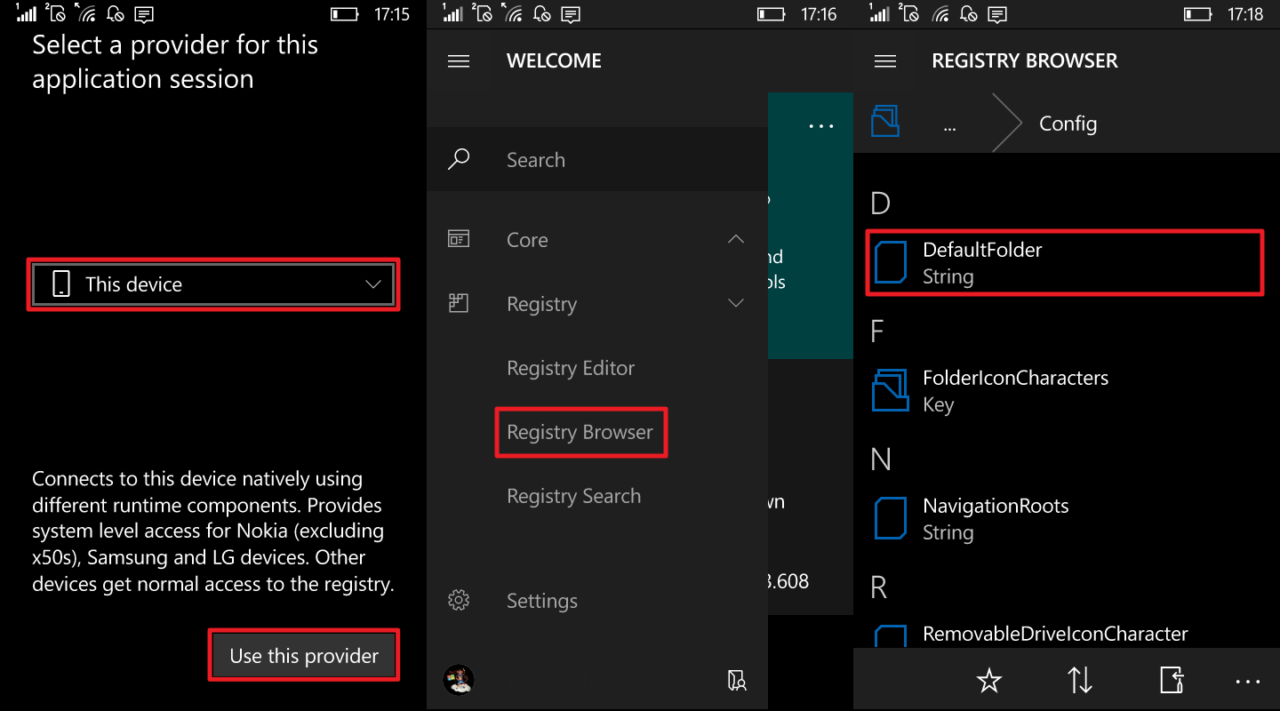
- Откройте приложение Interop Tools. Выберите пункт This Device и нажмите Use this provider.
- В меню-гамбургере найдите пункт Registry — Registry Browser.
- Перейдите по пути: HKEY_LOCAL_MACHINE \ SOFTWARE \ Microsoft \Windows \ CurrentVersion \ FileExplorer \ Config.

- Кликните по ключу DefaultFolder.
- Если вы хотите, чтобы при запуске Проводника открывалось меню Этот компьютер со ссылками на все диски (в том числе системный C), просто удалите текст из строки Registry Value Data. Если же вам нужно, чтобы при запуске Проводник перекидывал вас в конкретную системную папку, впишите в строку её адрес. Нажмите на галочку Write.
- Чтобы вернуть всё обратно, поменяйте значение ключа на исходное. В сборке 15063.608 оно таково: shell. .

Теперь при запуске Проводника вы увидите подобное меню:
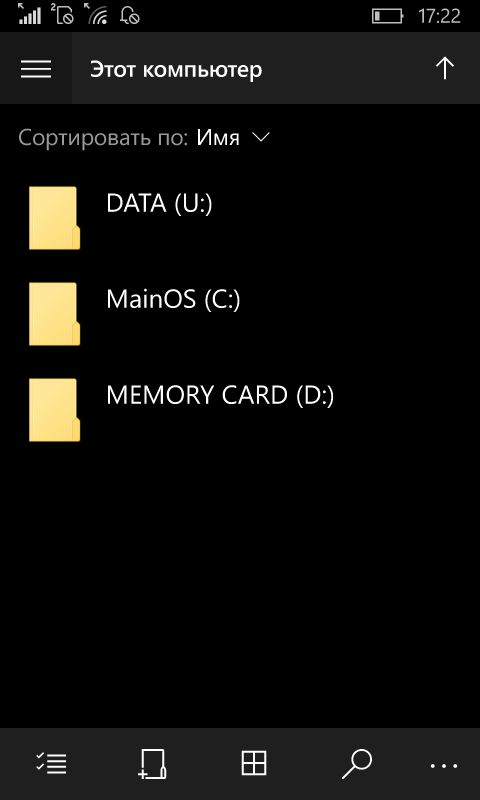
Диск U (DATA) является ничем иным, как ссылкой на системную папку C:\Data. Он нужен для корректной работы операционной системы. Пользовательские папки находятся по адресу C:\Data\Users\Public (или U:\Users\Public). Впрочем, вы легко можете перейти к ним, выбрав пункт Это устройство в меню-гамбургере Проводника. Отметим, что иногда после применения этой инструкции файловый менеджер может сам по себе вылетать. К сожалению, пользователь ничего не сможет с этим сделать. В любой момент вы можете вернуть всё обратно, чтобы избежать подобных проблем.


