- Соединение точка-точка (ad-hoc) по WiFi между Ubuntu Linux и Windows XP
- June 18, 2013
- Шаг Первый — настройка ad-hoc wifi в Ubuntu Karmic
- Шаг Второй — Настройка ad-hoc wifi в Windows XP
- Шаг Третий — тестирование сети из Ubuntu
- TypeScript — размеченные объединения
- Wi-Fi в режиме ad-hoc без шифрования — КАК?
- Настройка Wifi в Linux при помощи Adhoc на примере Ubuntu
- Ubuntu Documentation
- Network Manager
- Joining an ad hoc network
- Creating an ad hoc network
- NetworkManager Method
- Linux to Windows peers
- Linux to Linux peers
- Troubleshooting
- Wireless Extensions CLI tools Method
- Preparation
- Configuration
- Activation
- Testing
- Example Interfaces File
- Supported Cards
- Atheros
- Autocreation
- Wlanconfig
- Broadcom
- Intel
- Ralink
- Encryption
- Avahi-autoip
- Real-life examples
Соединение точка-точка (ad-hoc) по WiFi между Ubuntu Linux и Windows XP
June 18, 2013
Рассмотрим случай, когда на одной машине (desktop) стоит все та же Ubuntu, а на другой машине (notebook) стоит Windows XP.
Необходимо соединить оба компьютера по ad-hoc wifi. Требуется создать локальную домашнюю сеть, которая называется одноранговой. Другими словами, у нас нет в наличии таких сетевых устройств, как концентратор, коммутатор или маршрутизатор. Соединение между двумя (в нашем случае) компьютерами будет установлено напрямую, точка-точка . В первом шаге настроим сеть на десктопе в Ubuntu. Затем повторим настройку на ноутбуке в Windows XP.
И в заключение, протестируем созданную нами сеть.
Шаг Первый — настройка ad-hoc wifi в Ubuntu Karmic
Открываем NetworkManager правым щелчком мыши на значке в Панели Gnome и выбираем “Edit connections”. Появляется окно “Network Connections”.
Переходим на вкладку “Wireless” (Беспроводные):
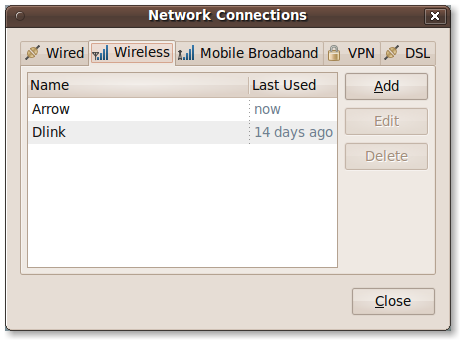
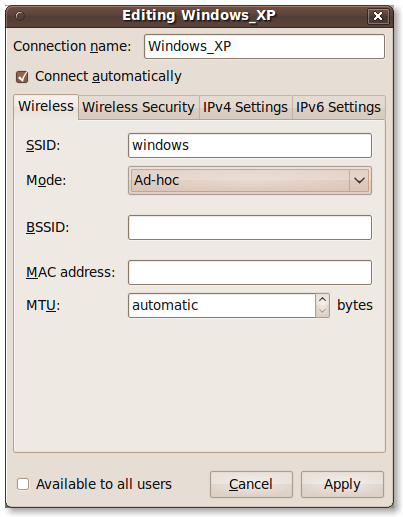
Нажимаем Add (Добавить). Появляется окно из четырех вкладок (tabs) для создания нового соединения. В первой вкладке вводим общую информацию о создаваемой нами сети:
- Connection name (имя сети) — это имя сети, которое будет отображаться на компьютере и в списке сетей NetworkManager;
- SSID — реальное имя сети. Каждая сеть Wi-Fi имеет свое имя, по которому сетевые устройства распознают их и подключаются к ним;
- Mode — режим сети. В выпадающем списке выбираем режим сети Ad-hoc;
- остальные три поля — BSSID , MAC address и MTU оставляем пустыми.
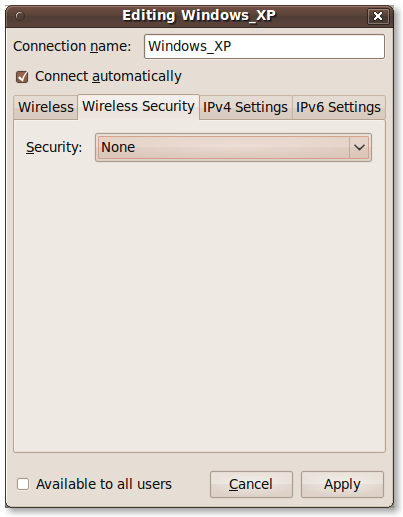
Переходим на вкладку “Wireless Security”. Оставляем поле “Security” пустым (None):
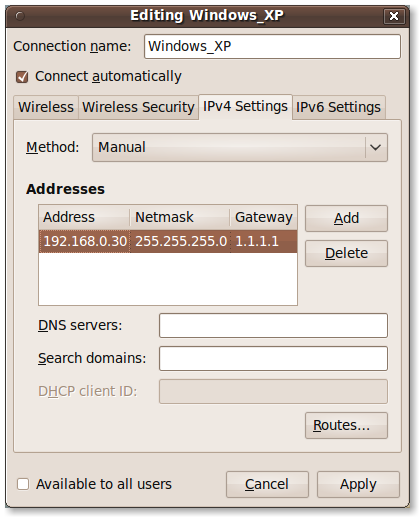
Далее, переходим на вкладку “IPv4 Settings”. Здесь мы выбираем метод получения IP-адреса компьютером в сети. В нашем случае мы задаем его вручную.
Для этого в выпадающем списке “Method” выбираем “Manual” (Ручной). Затем, в поле “Addresses” (Адреса) нажимаем кнопку Add (Добавить) и последовательно задаем IP-адрес 192.168.0.30 , маску сети “Netmask” 255.255.255.0 и шлюз сети “Gateway” 1.1.1.1 . Поля “DNS servers” и “Search domains” оставляем пустыми:
Вкладку “IPv6 Settings” оставляем как есть, ничего не конфигурируя (Method — Ignore):

Нажимаем кнопочку Apply (Применить) и видим конечный результат работы — список сетей в “NetworkManager” и нашу Windows_XP среди них:

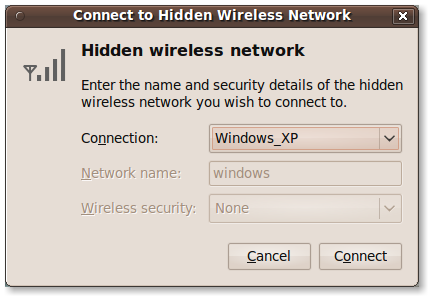
Закрываем окно. Вновь нажимаем, теперь уже левой кнопкой мыши, на значке “NetworkManager” в Панели Gnome. Выбираем в выпавшем списке “Connect to hidden wireless network” (Подключиться к скрытой беспроводной сети).
В списке “Connection” выбираем нашу Windows XP и нажимаем Connect (Соединить):
В эмуляторе терминала набираем команду:
и видим, что сетевой интерфейс поднят и сеть запущена:

Шаг Второй — Настройка ad-hoc wifi в Windows XP
Открываем в “Панели управления” — “Сетевые подключения”:

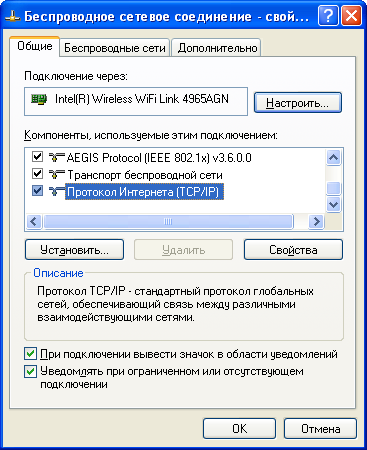
Кликаем правой кнопкой мыши на значке “Беспроводное сетевое соединение” и в контекстном меню — “Properties” (Свойства). В окне “Свойств” находим в самом низу строку “Протокол Интернета (TCP/IP)”:
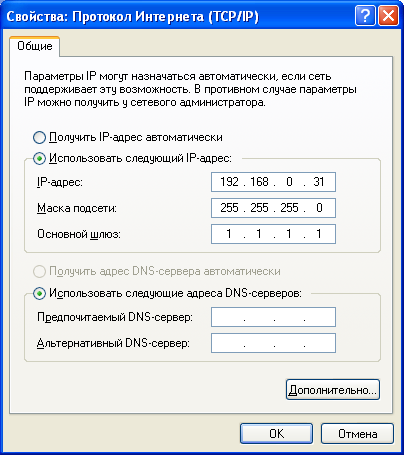
Нажимаем “Свойства”. Открывается окно настроек TCP/IP. Здесь мы задаем IP-адрес, маску сети и шлюз сети так же, как и в NetworkManager, за исключением того, что IP-адрес у нас будет несколько иной — 192.168.0.31 :
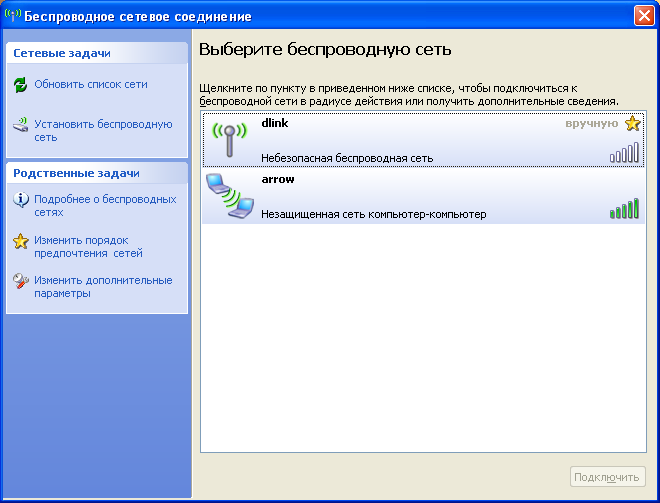
Нажимаем OK . Далее кликаем левой кнопкой мыши на значке “Беспроводное сетевое соединение” в “Сетевые подключения” “Панели управления”. Открывается окно со списком беспроводных сетей, находящихся в зоне доступа компьютера:
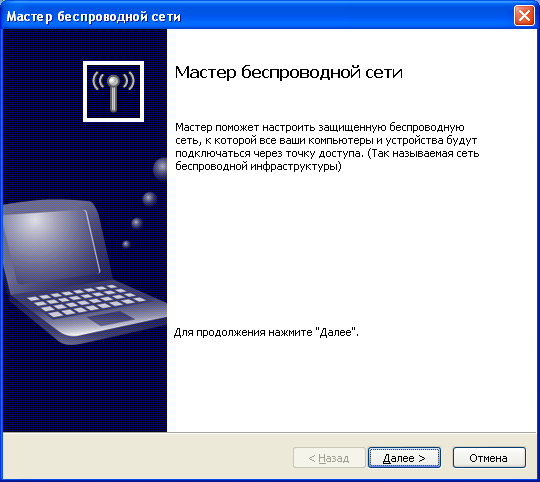
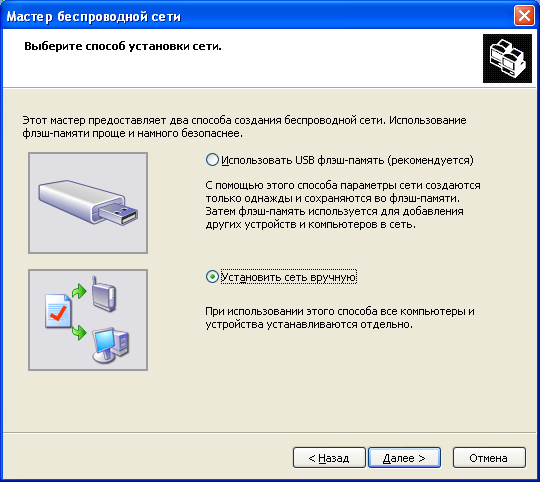
Выбираем “Установить беспроводную сеть” для создания сети ad-hoc . Запускается “Мастер беспроводной сети”, пошагово проведущий по несложной настройке новой сети windows:


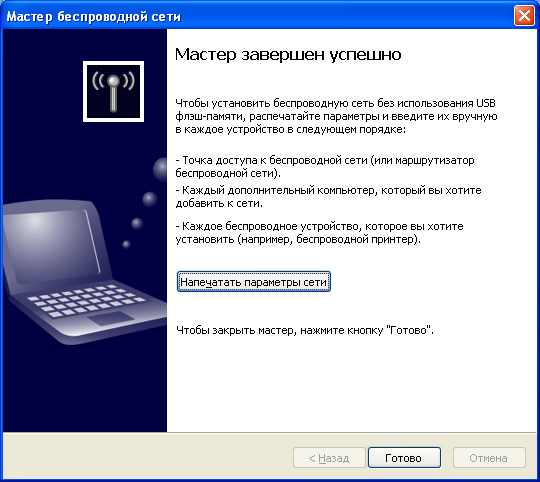
Нажимаем “Готово”. Вновь открывается окно со списков доступных беспроводных сетей. В этом списке появилась и наша windows:

Выбираем сеть windows и нажимаем “Подключить”:

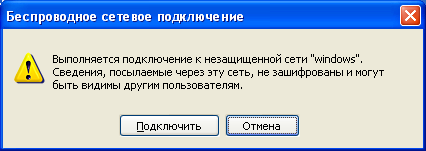
В итоге получаем подключение к сети windows:

Шаг Третий — тестирование сети из Ubuntu
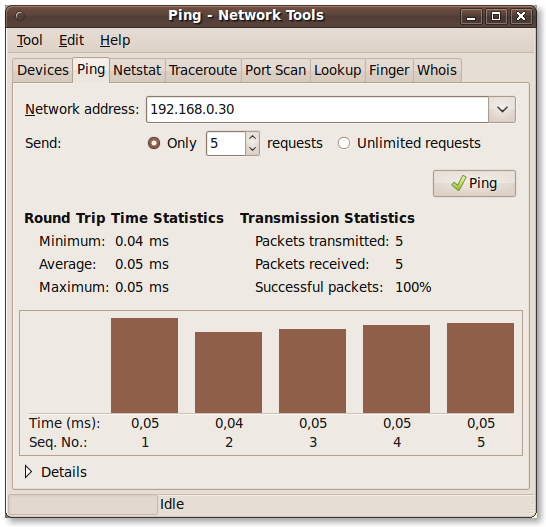
Ping самих себя:
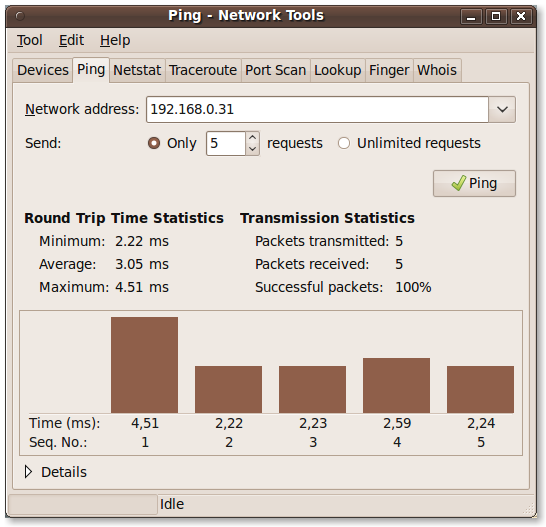
Ping Windows XP:
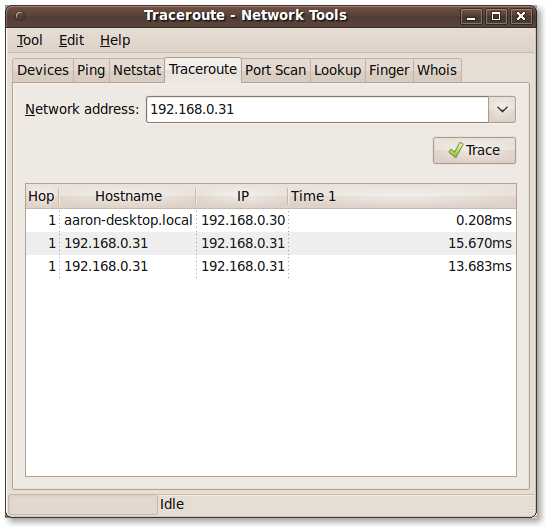
Трассировка Windows XP:
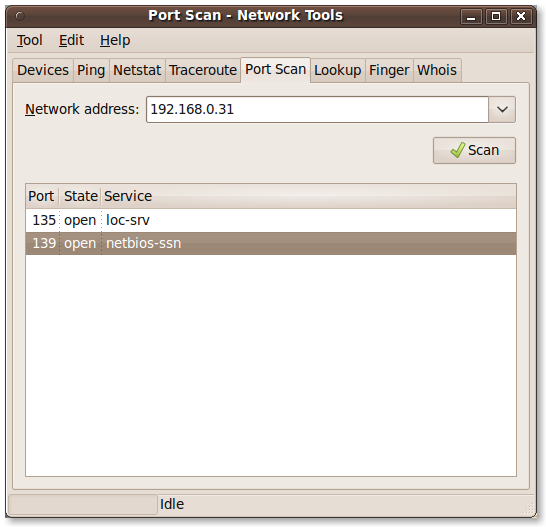
Сканирование портов Windows XP:
TypeScript — размеченные объединения
> Пользовательское объединение типов — что это и как можно использоватьПомимо объединения **примитивных** типов данных (например):<% high. … Continue reading
Источник
Wi-Fi в режиме ad-hoc без шифрования — КАК?
Доброго времени суток!
Хочу соединить по wi-fi настольный комп и нетбук. В десктопе стоит карточка ath5k, в буке — rlt8192se. Десктопная карточка почему-то не хочет запускаться в режиме точки, пытаюсь запускать в режиме ad-hoc. Перевожу карту на буке в тот же режим, назначаю адреса — пинга нет.
Пробовал воспользоваться hostapd, но он сказал, что карта не может быть сконфигурирована.
Мне нужно просто соединить их, потом буду по вайфаю раздавать интернет на мелкобук, читать лор сидя в туалете и так далее. Но у меня ничего не получается.
Если у кого-нибудь есть конфиги (или просто идеи, где я мог чего-то не так сделать) для ad-hoc сети между двумя машинами, поделитесь, пожалуйста! Уже второй вечер ломаю голову и ничего не могу придумать.
Бук в других wi-fi сетях работает, в режиме managed. Переводил в режим ad-hoc командой # iwconfig wlan0 mode ad-hoc. Через iwconfig же назначал адрес и так далее. На десктопе есть dhcp-сервер, вроде бы добавил подсеть и нетбук, но проверить пока не было возможности.

к меня такой скрипт сделан, всё пашет
#!/bin/sh ## На телефоне прописать статический адрес-192.168.100.2, шлюз-192.168.100.1, а ДНС прописать от провайдера.
EXT_IF=’ppp1′ #сеть с интернетом LAN_IF=’wlan0′ #куда интернет раздавать
##запускаем вайфай сеть ifconfig $LAN_IF down iwconfig $LAN_IF mode ad-hoc channel 4 essid pizdo.NET ifconfig $LAN_IF up ifconfig $LAN_IF 192.168.100.1
## маскарад. чтобы доступ к к интернету дать echo «1» > /proc/sys/net/ipv4/ip_forward echo «1» > /proc/sys/net/ipv4/ip_dynaddr
iptables -t nat -F iptables -t nat -Z iptables -t filter -F iptables -t filter -Z
iptables -A FORWARD -i $EXT_IF -o $LAN_IF -m state —state ESTABLISHED,RELATED -j ACCEPT iptables -A FORWARD -i $LAN_IF -o $EXT_IF -j ACCEPT iptables -t nat -A POSTROUTING -o $EXT_IF -j MASQUERADE
у меня такой скрипт написан для этого дела. инет раздаю для мобилки с вайфаем
можно бросить в автозагрузку куданить или запускать самому при неоходимости.
Источник
Настройка Wifi в Linux при помощи Adhoc на примере Ubuntu
Эта тема уже не раз поднималась, но хорошей и легкой инструкции я так и не нашел.
Данная статья расчитана на новичков в мире Linux поэтому тут используются наиболее легкие методы настройки.
Для начала ставим пакеты:
sudo apt-get install wireless-tools dhcp3-server
Далее создаем сеть через апплет например название «My Wifi»
И настроим интерфейс(для определения интерфейса воспользуйтесь командой iwconfig)
Пишем в консоли из под root
ifconfig wlan0 down
iwconfig wlan0 mode ad-hoc
iwconfig wlan0 channel 1
iwconfig wlan0 Bit 54Mb/s
iwconfig wlan0 essid ‘My Wifi’
ifconfig wlan0 10.42.43.1 netmask 255.255.255.0 up
iwconfig wlan0
ifconfig wlan0 up
echo 1 > /proc/sys/net/ipv4/ip_forward
iptables -t nat -A POSTROUTING -o eth0 -j MASQUERADE
Разберем шаги:
- ifconfig wlan0 down — отключаем интерфейс.
- iwconfig wlan0 mode ad-hoc — устанавливаем режим Ad-hoc
- iwconfig wlan0 channel 1 — ставим ad-hoc канал
- iwconfig wlan0 Bit 54Mb/s — скорость(по стандарту 11Mb/s)
- iwconfig wlan0 essid ‘My Wifi’ — название нашей созданной сети
- ifconfig wlan0 10.42.43.1 netmask 255.255.255.0 up — IP адрес компьютера и маска подсети
- iwconfig wlan0 — проверяем настройки
Вот мои:
wlan0 IEEE 802.11bg ESSID:»Bupyc»
Mode:Ad-Hoc Frequency:2.412 GHz Cell: 8A:BF:88:4B:4E:60
Tx-Power=11 dBm
Retry long limit:7 RTS thr:off Fragment thr:off
Power Management:off
Link Quality:0 Signal level:0 Noise level:0
Rx invalid nwid:0 Rx invalid crypt:0 Rx invalid frag:0
Tx excessive retries:0 Invalid misc:0 Missed beacon:0 - ifconfig wlan0 up — запускаем интерфейс
- echo 1 > /proc/sys/net/ipv4/ip_forward
iptables -t nat -A POSTROUTING -o eth0 -j MASQUERADE
Настраиваем раздачу интернета через NAT
Не забываем подставить свой интерфейс и IP адреса.
Данные команды можно добавить в автозагрузку, ибо эти настройки иногда сбрасываются
Настроим dhcp для раздачи ip адресов.
sudo gedit /etc/dhcp3/dhcpd.conf
Cтираем там все(если не нужно) и пишем
ddns-update-style ad-hoc;
default-lease-time 3600;
max-lease-time 9000;
authoritative;
log-facility local7;
subnet 10.42.43.0 netmask 255.255.255.0 <
interface wlan0;
range 10.42.43.2 10.42.43.255;
option domain-name-servers 195.34.32.116; # пишем либо свой dns сервер, либо dns провайдера
option routers 10.42.43.1;
option broadcast-address 10.42.43.0;
>
sudo gedit /etc/default/dhcp3-server
Там пишем интерфейс откуда идет интернет.
INTERFACES=»eth0″
Перезапускаем dhcp
sudo /etc/init.d/dhcp3-server restart
Также для автоматической настройки можно прописать в файле /etc/network/interfaces все параметры. sudo gedit /etc/network/interfaces
auto wlan0
iface wlan0 inet static
address 10.42.43.1
netmask 255.255.255.0
broadcast 10.42.43.255
network 10.42.43.0
wireless-essid Bupyc
wireless-mode ad-hoc
wireless-channel 11
wireless-rate 54Mb/s
Теперь достаточно соединиться с любого устройства к данной сети и интернет будет работать.
Это первая моя статья на хабре, так что строго не судите.
Источник
Ubuntu Documentation
The aim of this document is to provide information about the steps needed to create and connect to ad hoc networks with a working wireless card. Identification of hardware and installation of drivers will not be covered, if you are unsure please look to the Supported Cards section first.
There are several ways of managing your wireless connection.
Network Manager
Network Manager has the ability to connect to ad hoc networks through the simple to use nm-applet interface. Some wifi cards will not work with it automatically, see the supported cards section below.
Joining an ad hoc network
Click on the tray icon and you will see the ssid of the ad hoc network with the ad hoc icon next to it, click on it to connect.
Creating an ad hoc network
NetworkManager Method
Linux to Windows peers
Linux to Linux peers
tested on 10.04 Netbook Remix using the Broadcom B43 proprietary driver. Broadcom STA did not work properly
1. Right-mouse click the NetworkManager icon (top right)
2. Select «Edit Connections»
3. Click the «Wireless» tab
4. Click «Add» to edit a new wireless connection
5. On the wireless dialogue give the connection a name, e.g «Mochudi».
SSID: «Mochudi». The SSID will appear on the NetworkManager of your other Peers
Mode: Ad Hoc
BSSID: leave blank
MAC Address: leave blank
MTU: leave as automatic
If fixed IP addresses are required edit the IPv4 Settings Tab before closing NetworkManager above:
6a. Click «IPv4 Settings Tab»
- Select Method «Manual»
- Under Addresses click Add
- Type your Address: 10.42.43.1
- Type the Netmask: 255.255.255.0
Gateway: leave blank or 0.0.0.0
Do the above for each machine joining your fixed IP address Ad-Hoc network except assign a unique Address to each machine, so 10.42.43.1 becomes 10.42.43.2 for the second computer, 10.42.43.3 for the third, etc.
Troubleshooting
If the SSID does not appear in NetworkManager try looking for it through «Connect to Hidden Wireless Network. » from the NetworkManager icon.
Wireless Extensions CLI tools Method
This process is often used as the fall back position if the gui tools fail to work. The following example uses eth1 for the wifi interface though this may be wlan0, ath0 or something else in your case.
Preparation
Ensure that network manager has been stopped and then bring the interface down.
Configuration
- Switch the card into ad hoc mode
- Set the channel/frequency that you want to use.
- Add the name (ssid) for the network you want to create/join. Use single quotes if there is a space in the name.
- Add a WEP encryption key
Activation
- Bring the interface back up
- Start dhclient to get an address
- If you want to do it manually, you will have to make up an IP address.
You should now be connected to the ad hoc network. Use the iwconfig command to view the cell being used. This must match the same cell on the other PCs that you want to connect to.
Testing
Once you have two or more computers connected to the ad hoc network, all of them showing the same cell number and having different IP addresses, then try pinging one from the others.
If that doesn’t work then try specifying the interface name along with the address.
If you have more than one interface with link-local addresses there can be some routing confusion, so I recommend that you bring down these unused interfaces while connected to non-DHCP networks. If the other interfaces are all on DHCP networks, such as in the case of InternetConnectionSharing this is not necessary.
Example Interfaces File
Currently Network Manager does not support static address settings and Network-Admin does not support ad hoc networks. So instead we can configure the network in the /etc/network/interfaces file. The following is an example.
Supported Cards
Instructions for wireless cards that support ad hoc networking, separated by chipset manufacturer. Please identify the chipset included in your card via the WirelessCardsSupported list.
Atheros
The restricted Madwifi driver supports ad hoc mode through the creation of a new VAP. This document only covers the madwifi-ng driver as used in Ubuntu 6.10 (Edgy) and later. For madwifi-old as used in Ubuntu 6.06 (Dapper) and earlier, check the madwifi.org website for information.
You can create an ad hoc interface in either of the following two ways:
Autocreation
Usually when the driver module is loaded on boot it automatically creates an ath0 interface in managed (sta) mode. We can redo this procedure but create an ad hoc interface instead. This will not make a permanent change, it will default back to creating a managed mode interface on next boot or if you re-insert the driver without the option.
- Remove the ath_pci module with modprobe
- Now re-insert the module with the option of creating it in ad hoc mode.
Wlanconfig
This process requires that you install the madwifi-tools package from the universe repository. In Ubuntu 6.10 (Edgy) there is a backports version available from Launchpad https://launchpad.net/+builds/+build/327859/madwifi-tools. The main benefit of this package is that you can create multiple interfaces.
- Destroy the current managed mode interface
- Create a new interface in ad hoc mode
Broadcom
The b43 driver (http://linuxwireless.org/en/users/Drivers/b43) supports ad-hoc networking for many cards in the Broadcom 43xx family. The b43 driver was formerly known as the bcm43xx driver. If you find your card is not supported, you may want to try Ndiswrapper as a temporary solution until the b43 driver team figures out your card. However, there are a number of other things in this tutorial to try before switching to the ndiswrapper.
Intel
The Intel PRO/Wireless 3945abg cards using the restricted ipw3945 driver support ad hoc mode out of the box. The ipw2200 driver supports the Intel PRO/Wireless 2915 out-of-the-box as well. Other Intel cards should work too.
Ralink
This section has not yet been written.
Encryption
It is recommended that you use some form of encryption on all wireless networks. Currently this is easiest to achieve with WEP, even though WEP is no longer considered secure. «Unfortunately WPA is much harder to get working, though this is being worked on in wpa_supplicant.»
To start WPA adhoc network, create wpa-adhoc.conf:
here is part of documentation (wpasupplicant-0.6.9/wpa_supplicant/wpa_supplicant.conf):
you do not need to setup any thing before this steps.
WPA2 is currently not supported.
Alternatively, you could leave encryption disabled and establish a VPN between hosts, either using OpenVPN https://help.ubuntu.com/community/OpenVPN or even SSH https://help.ubuntu.com/community/SSHHowto
Avahi-autoip
This is designed to self allocate IP addresses in a network where there are no DHCP servers. So it is valuable in ad hoc networks. To make use of it you have to start dhclient, once that fails avahi-autoip will kick in and give you an address in the link-local address space. This means that you will have an IP address in the 169.254.0.0 — 169.254.255.255 range. In combination with avahi’s mdns stack you will be able to communicate with other PCs via the .local domain.
e.g. ping hostname.local
Real-life examples
1. Connecting with an Atheros card to a Windows peer to peer wireless network to utilise another machine’s internet connection
This example is for beginners like me who want the technical solution to a simple real-world problem. It may not be the most elegant answer but it works.
Background: At my inlaws’ house I recently set up a wireless peer to peer network between 2 Windows machines, one of which had an internet connection. To keep things simple the network that I set up on the host machine (the one with the internet connection) was ‘open’ and WEP-encrypted, and the properties of the internet connection were set to allow other machines to connect to the web through it. In return the father of the house kindly donated me a really old laptop, which of course I stripped down and stuck Ubuntu 7.04 on, and added a wireless card: a Netgear WG511T. For this Atheros card it is possible to use the Madwifi drivers or Ndiswrapper. I chose Madwifi.
Solution: Following the instructions in the rest of this document I wrote a simple script that I could run at the click of a button whenever I wanted to join the ad-hoc network, rather than have the card running in its default managed mode. Essentially all it does is turn off the default Network Manager, put the card into ad-hoc mode, specify what network to join, bring the card back up and get an IP address. The script is as follows, where the ad-hoc network name in my case is ‘binky’ and the password is ‘12345’ — obviously you should replace these with your specific details:
The last line gets me an IP address. Dhclient will look for a DHCP server and ask it for one. But in my ad-hoc network there is no DHCP server, which would normally be a problem. Luckily avahi-autoip comes with Ubuntu by default, and when Dhclient failed to find a server it kicked in and automatically self-assigned an IP address to me — see the avahi-autoip section above for more details.
I saved the script somewhere in my home area as adhoc.sh and made sure it had permission to be executed:
I need to run the script as sudo, which means in my case I type sudo /home/andy/scripts/adhoc.sh
You should be able to use this as is (making suitable network name and password changes), and the nice thing about it for me is that the machine will remain in roaming managed mode most of the time, therefore able to connect to any Wifi hotspots that may be around, unless I run this script to connect to the inlaws’ ad-hoc network.
WifiDocs/Adhoc (последним исправлял пользователь takashi 2011-05-23 03:29:45)
The material on this wiki is available under a free license, see Copyright / License for details
You can contribute to this wiki, see Wiki Guide for details
Источник


