- linux-notes.org
- Установка Zabbix-agent в Unix/Linux
- Установка Zabbix-agent в CentOS/Fedora/RedHat
- Установка Zabbix-agent в Debian/Ubuntu
- Установка Zabbix-agent в MacOS X
- Настройка Zabbix-agent в Unix/Linux
- Настройка на стороне zabbix-server
- Настройка на стороне zabbix-agent
- Тестирование
- One thought on “ Установка Zabbix-agent в Unix/Linux ”
- Добавить комментарий Отменить ответ
- Mail.Ru Агент в Linux
- Qutim
- MyAgent-IM
- Pidgin
- mrimpy
- Про Mail.ru Агент для Linux
- Managing Linux Computers
- Supported Linux OS
- Configuring Linux Agent Settings
- Installing Desktop Central Agents
- Installing Desktop Central Agent Remotely
- Uninstalling Desktop Central Agents
- Supported Features:
linux-notes.org

Были статьи о том, как установить zabbix-server в Unix/Linux и сегодняшняя тема, — это установка zabbix-agent-ов.
- 192.168.13.10 — zabbix-server
- 192.168.13.187 — zabbix-agent для CentOS 6
- 192.168.13.175 — zabbix-agent для Debian 8
Установка Zabbix-agent в Unix/Linux
Данная статья, подразумевает то, что имеется zabbix-server и он уже установлен и работает.
Установка Zabbix-agent в CentOS/Fedora/RedHat
Я приводил примеры добавления разных версий репозиториев с zabbix (смотрите статья выше), приведу наглядный пример.
Добавим теперь хотя бы одного агента мониторинга, чтобы проверить работу системы. Устанавливать будем на этот же сервер. Делается это просто:
Нужно еще настроить конфиг с агентом.
Установка Zabbix-agent в Debian/Ubuntu
Я приводил примеры добавления разных версий репозиториев с zabbix (смотрите статья выше), приведу наглядный пример.
Добавим теперь хотя бы одного агента мониторинга, чтобы проверить работу системы. Устанавливать будем на этот же сервер. Делается это просто:
Нужно еще настроить конфиг с агентом.
Установка Zabbix-agent в MacOS X
Скачиваем последнюю версии zabbix_agentd_osx_installer:
PS: Вот полезное чтиво:
Приводим к виду:
Агент запускается автоматически во время следующей загрузки. Для запуска вручную введите:
Если, Launchctl unload не работает, используйте команду ниже:
Собираем zabbix agentd
Вы должны установить инструменты командной строки xcode и PackageMaker.app.
Скачиваем исходный код:
PS: У меня не завелось на новой версии Mac OS X!
Настройка Zabbix-agent в Unix/Linux
Настройка zabbix-agent-а можно несколькими способами:
- Установить агент на нужный хост и потом добавлять вручную на zabbix-server (хорошо подойдет, если имеется не очень большое количество серверов для мониторинга)
- Установить агент на нужный хост и потом настроить «Auto registration» на zabbix-server (хорошо подойдет, если имеется большое количество серверов для мониторинга)
Я расскажу оба варианта.
Настройка на стороне zabbix-server
Подключаемся к серверу где находится сервер и допишем правило:
Именно по 10051 будет ходить заббикс агент на заббикс сервер.
PS: Приведу на всякий случай мои конфиги (без комментариев).
Открываем URL-у заббикса и переходи в « Configuration» -> « Actions «. В поле « Event source» выбираем «Auto registration»:

После этого, нажимаем на «Create action»:
Я создам наглядный пример для Linux хостов:
- Name — В этом поле, прописываем название действия для авторегистрации.
- Conditions — созданные действия.
- New condition — служит для создания действий.
- Enabled — дает возможность включить созданное действие для определения всех Linux хостов.
Это была вкладка с действиями (Action). Переходим на следующую вкладку — «Operations»:
На этой вкладке нужно создать действия которые будет выполняться, если подходит условие:
- Default subject — В этом поле, я ничего не изменял. Оно служит для оповещения ( собственно — это тема).
- Default message — В этом поле, я ничего не изменял. Оно служит для оповещения ( собственно — это сообщение).
- Operations — Описываются некоторые действия. Я создал правило для добавления хоста, применить ему группу и темплейты.
Настройка на стороне zabbix-agent
Для работы с сервером, который установлен локально на этой же машине, больше никаких настроек не надо делать. Если же вы будете устанавливать zabbix agent на удаленную машину, то в файле конфигурации агента /etc/zabbix/zabbix_agentd.conf нужно будет задать следующие параметры:
Вот так выглядит мой zabbix-agent конфиг:
Запускаем агент и добавляем в автозагрузку:
PS: Не забываем выкл\настроить SELinux:
Переходим к тестированию.
Тестирование
Открываем свой заббикс URL. Переходим в «Configuration» — > « Latest data». Выбираем нужный хост и смотрим что все принимается.
А на этом, у меня все. Статья «Установка Zabbix-agent с добавлением нового хоста в Zabbix» завершена.
One thought on “ Установка Zabbix-agent в Unix/Linux ”
Статья очень помогла. Спасибо Вам большое и удачи во всем.
Добавить комментарий Отменить ответ
Этот сайт использует Akismet для борьбы со спамом. Узнайте, как обрабатываются ваши данные комментариев.
Источник
Mail.Ru Агент в Linux
Продолжая тему использования в IM-сети Mail.Ru Агент хочется рассмотреть основные способы работы в этой сети под Linux.
Под Linux можно использовать либо клиенты с поддержкой протокола MRA (Mail.Ru Agent), либо Jabber-клиенты, подключенные к транспорту или специальному серверу. Но обо всём по порядку.
Qutim
Qutim это мультипротокольный IM-клиент, присутствующий в репозиториях большинства дистрибутивов. В числе прочих протоколов есть и поддержка Mail.Ru Агента. Клиент поддерживает базовый функционал:
- Обмен сообщениями;
- Поиск контактов;
- Управление списком контактов;
- Расширенные статусы
Quitm использует библиотеку Qt. Имеются дополнительные модули для более тесной интеграции со средой KDE, однако на прямую он от неё не зависит и может быть легко использован в любом рабочем окружении.
MyAgent-IM
MyAgent-IM это клиент IM-сети Mail.Ru Агент написанный так же как и Qutim с использованием библиотеки Qt, однако он поддерживает только один протокол — MRA, но зато немного лучше. В частности есть частичная поддержка микроблогинга, функция будильника, возможность отправки SMS и возможность изменять используемый в сообщениях шрифт. На странице проекта есть пакеты под многие популярные дистрибутивы.
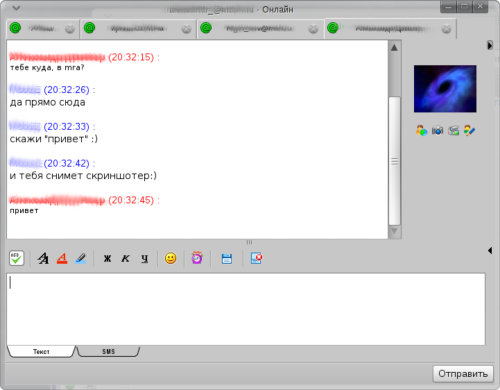
Пожалуй это лучший клиент из тех, что можно использовать под Linux.
Pidgin
Популярный среди пользователей Linux мультипротокольный IM-клиент Pidgin штатно не поддерживает протокол MRA, однако для него (а значит и для других основанных на libpurple клиентов, в частности Empathy) есть неофициальный модуль.
К сожалению этот модуль имеет проблемы при работе на 64-битных системах и потому полноценно протестировать его на используемой автором Xubuntu 10.10 amd64 не получилось. Однако судя по документации функционал модуля совсем минимален и ограничен только сообщениями и поддержкой аватаров, так что владельцам 64-битных систем особо расстраиваться не стоит.
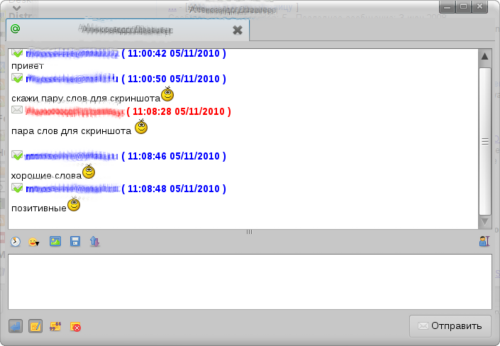
mrimpy
Очень интересен проект mrimpy, установке и запуску этого сервиса была посвящена предыдущая статья. Содержит минимальный набор функций:
- Обмен сообщениями;
- Аватары пользователей;
- Запросы авторизации
Источник
Про Mail.ru Агент для Linux

Mail.ru Агент — это интернет-пейджер почтовой веб-службы mail.ru, его разработка была начата в 2003 году компанией Mail.ru.

Официальных версий Mail.ru Агента для Linux/Unix нет!

Но если он нужен, то есть пять вариантов выхода из положения:
Первый — запустить Веб-Агент (работает прямо на сайте!)
Второй — попробовать запустить его с помощью wine (тем кто ей пользуется)
Третий — воспользоваться транспортами jabber (описание как это делать в Kopete).
Четвёртый — использовать пейджер с добавляемой поддержкой протокола mail agent«а (например MDC или Pidgin)
Пятый — установить неофициальную версию Mail.ru Агента (далее об этом)
В сети было найдено две неофициальных версий Mail.ru Агента для Linux: myagent-im (далее о нём) и mra-qt.


В myagent-im (как и M-Agent) используется тот же логин и пароль, что и в вашем аккаунте на Mail.ru.
Это очень удобно для приятного и беззаботного общения в сети Internet.


Используя myagent-im вы получите возможность в «реальном времени» получать оповещения о пришедших, на mail.ru почтовый ящик, сообщениях. А так же, писать письма не заходя в почтовый ящик.


myagent-im (как и оф.M-Agent) интегрирован со многими сервисами Mail.Ru. Кроме текстовых сообщений, программа допускает также отправку SMS.


Функции программы соответствуют традиционному набору интернет пейджеров: способность получать извещения о новых письмах (приходящих только на mail.ru), отправка сообщений в оф-лайн, показ статуса абонентов.


Хоть и многие функции официального в myagent-im отсутствуют (программа находится в разработке и есть надежда на увеличение функционала) но основные функции в нём есть! И он вполне пригоден для комфортного использования!


Установка поддержки протокола mail agent в Pidgin, на Ubuntu (пошаговая инструкция):

Для того что бы добавить поддержку протокола mail agent в Pidgin, на Ubuntu, нужно с сайта mrim-prpl скачать .deb пакет:


Далее установить пакет, двойным кликом по пакету, в GDebi или Центром приложений Ubuntu:


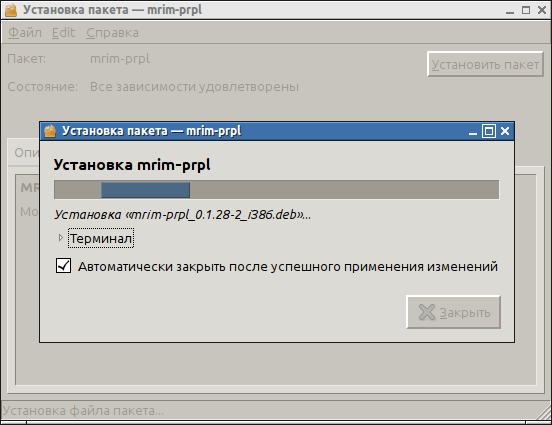

После окончания установки, поддержка протокола mail agent будет добавлена в Pidgin:

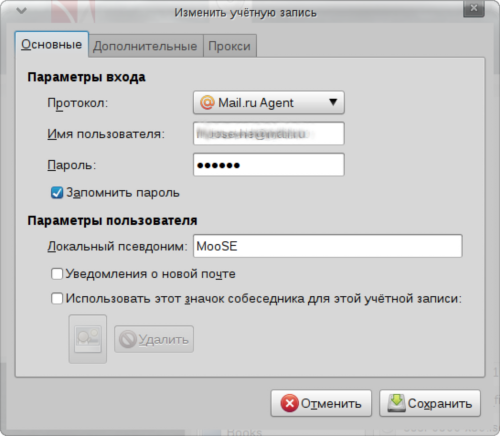
Далее нужно просто ввести свои данные, авторизоваться и можно приступать к общению:
Источник
Managing Linux Computers
Administrators can use Desktop Central to manage computers running Linux operating system. This document will explain you on the following:
Supported Linux OS
Desktop Central currently supports the following Linux versions:
- Ubuntu 10.04 and later versions
- RedHat Enterprise Linux 6 and later versions
- CentOS 6 and later versions
- Fedora 19 and later versions
- Mandriva 2010 and later versions
- Debian 7 and later versions
- Linux Mint 13 and later versions
- Open SuSe 11 and later versions
- Suse Enterprise Linux 11 and later versions
- Pardus 17, and 19
- Oracle Linux Server 6, 7, and 8
Note:Patch management and software deployment is supported for select Linux flavors. See our complete Linux flavor comparison matrix for better visibility on the features supported by different versions of Linux OS.
Configuring Linux Agent Settings
Desktop Central has different agents for managing windows, Mac and Linux computers. Mac and Linux agents will not be created by default. You can create Linux agents by configuring the settings in the scope of management. This will help you automatically create Linux agents for the local office and the remote offices. To Configure the Linux agent settings follow the steps mentioned below.
-
- Click the Admin tab to invoke the Admin page.
- Click the Agent Settings link available under SoM Settings.
- Select Linux Agent Settings tab
- Select the domain or the workgroup to group Linux computers (this is virtual grouping and will not impact on its functions). Agents that are pushed remotely from SoM —> Add Computers will be shown under the respective Domain/Workgroup from which they are added.
The credentials added will be used for automatic installation of agents across local office computers irrespective of their domain. While adding credentials, it is recommended that the user account falls under active directory else the credentials can be added under workgroup type.
Click Save Changes to create Linux agents.
Linux agents can be download from the SoM page, by choosing the appropriate agent, such as LAN agent or WAN agent for specific Remote offices.
Installing Desktop Central Agents
Linux agents can be installed manually in the computers that need to be managed. Agents should be downloaded on the Linux computer manually before initiating the installation process. For invoking the installation in client computers, SSH port (default port 22) should be open in the computers where the agent needs to be installed. SSH port is used only for agent installation purposes and not for agent-server communication. Follow the steps mentioned below.
- Go to the terminal as a root user. If you do not login as a root user, open the terminal and use sudo command to perform each operation mentioned below and enter password whenever prompted. This provides you the root privilege.
- Navigate to the location, where the agent is downloaded and Unzip the DCLinuxAgent.zip by using the command «unzip -e DCLinuxAgent.zip«.
- Verify if, » DesktopCentral_LinuxAgent.bin» & «serverinfo.json » are located in the same path
- Execute the Command, » chmod +x DesktopCentral_LinuxAgent.bin » as a root user. This prepares the executable for installation.
- Run the Installer using » ./DesktopCentral_LinuxAgent.bin «. Agent will be installed by default in » /usr/local/desktopcentralagent » directory.
- If you wanted to change the installation location of the agent, use this command » ./DesktopCentral_LinuxAgent.bin -d » .
You can see that the Desktop Central agent is successfully installed on the Linux computer. You need to install the agents manually on the computers, which needs to be managed using Desktop Central. Once the agent installation is completed, the computer will be scanned automatically and the following details will be updated to the Desktop Central server:
- System Details : All details about the computer, like Users, Groups and Services. This does not include details on the network shares mapped to the computer.
- Hardware Details : All hardware details of the computer like, BIOS, Disk Drives, Physical Memory, Processors, Network Adapters etc. This does not include details on Printers and Ports.
- Software Details : All details on the software that is installed on the managed computer, with the version of the application and installation date etc.
Installing Desktop Central Agent Remotely
If you wanted to install agents for computers within the LAN, then you can choose the computers and invoke agent installation from the Desktop Central web console Admin tab —> SoM —>Select computers and invoke agent installation . If you wanted to install agents to computers which belongs to a different remote office, then you will have to use SSH port (default port 22)
When you want to push Desktop Central agents to remote office computers, you can install them using SSH (default port 22), provided the port should be open. Follow the steps mentioned below to install Desktop Central agent using SSH (default port 22):
- Login to a Linux computer
- Download the appropriate agent, based on the remote office
- Copy the downloaded Desktop Central agent to the remote computer on which the agent needs to be installed
- Go to terminal as root user
- Navigate to the location where the agent is being copied/downloaded
- Type » scp DCLinuxAgent.zip username@hostname:
» to copy the agent to the target computer, enter password if prompted
where username refers to the root user name of the target computer
hostname refers to the local host name of the target computer
If no path is specified, then the agent will be copied to «/home/username» in the target computer - Install the agent by following the steps mentioned below:
- Go to the terminal and Type «ssh rootusername@hostname» to login to the target computer
- Login as a root user. If you do not login as rootuser, open the terminal and use sudo command to perform each operation mentioned below and enter password whenever prompted. This provides you the root privilege.
- Navigate to the location, where the agent is downloaded/copied, if the downloaded agent is a remote office agent, then extract .zip and navigate to Unzip the DCLinuxAgent.zip by using the command «unzip -e DCLinuxAgent.zip«.
- Verify if, » DesktopCentral_LinuxAgent.bin» & «serverinfo.json » are located in the same path
- Execute the Command, » chmod +x DesktopCentral_LinuxAgent.bin » as a root user. This prepares the executable for installation.
- Run the Installer using » ./DesktopCentral_LinuxAgent.bin «. Ensure that the Property File «severinfo.json» exists in the Same Directory as «DesktopCentral_LinuxAgent.bin «. Agent will be installed by default in » /usr/local/desktopcentralagent » directory. You also have an option to force Linux agent installation even if an agent is already installed on a machine by using the command «./DesktopCentral_LinuxAgent.bin -f«
- If you wanted to change the installation location of the agent, use this command » ./DesktopCentral_LinuxAgent.bin -d » .
You have successfully installed the Desktop Central agent on a remote computer using SSH.
Uninstalling Desktop Central Agents
If you do not want to manage a computer, you can follow the steps mentioned below to uninstall the Desktop Central agent. Once Desktop Central agent is uninstalled, all the details related to the computer will be removed from Desktop Central server. If you wanted to manage this computer again, then you will have to re-install Desktop Central agent in it. However the previous details related to the computer will not be available. To uninstall the agents from the computers, follow the steps mentioned below:
-
- Go to the terminal as a root user. If you do not login as root user, open the terminal and use sudo command to perform each operation mentioned below and enter password whenever prompted. This provides you the root privilege.
- Navigate to the location, where the agent is installed, ( d efault Location : /usr/local/desktopcentralagent ) execute this command to » chmod +x RemoveDCAgent.sh » to initiate the uninstaller. You need to have root privilege to uninstall the agent. If you do not remember the installation location, you can locate it here, Agent Installed Directory : «/etc/desktopcentralagent/dcagentsettings.json»
- Execute this command » ./RemoveDCAgent.sh » to uninstall the agent.
-
- Managing Software License
- Managing Software Categories
- Hardware & Software Inventory Reports
- Alerting by email for every Hardware & Software Changes
-
- Automate patch deployment to Linux OS and third-party applications
- Patch compliance audits and reports
-
- Supports installing/uninstalling of DEB based applications
- Customize and schedule software deployment during non business hours
-
- Execution of custom scripts
- Install/Uninstall third-party and Linux OS related patches
- Install/Uninstall software in Linux machines
- Display message to target users
-
- Remotely access computers on LAN and WAN using Active X and HTML5 Viewer
- Prompts user confirmation before providing access to a remote desktop
- Multi-monitor support with easy switching options
You can see that the Desktop Central agent has been uninstalled successfully from the computer.
Supported Features:
Desktop Central currently supports the following features for Linux computers.
Features supported in the Inventory Module
Features supported in the Patch Module
Features supported in the Software Deployment Module
Feature supported in the Configurations Module
Features supported in Remote Control
Источник


