- Aircrack-ng
- User Tools
- Site Tools
- Table of Contents
- Aircrack-ng Newbie Guide for Linux
- Setting up Hardware, Installing Aircrack-ng
- Aircrack-ng installation
- IEEE 802.11 basics
- How a wireless network is found
- Connecting with a network
- Simple sniffing and cracking
- Discovering Networks
- Sniffing IVs
- Cracking
- Active attacks
- Injection support
- Инструменты Kali Linux
- Список инструментов для тестирования на проникновение и их описание
- Aircrack-ng (программа)
- Описание aircrack-ng
- Справка по aircrack-ng
- Руководство по aircrack-ng
- Примеры запуска aircrack-ng
- Установка aircrack-ng
- Установка в другие операционные системы
Aircrack-ng
User Tools
Site Tools
Table of Contents
Aircrack-ng Newbie Guide for Linux
Idea and initial work: ASPj
Additions by: a number of good souls
Last updated: Nov 21, 2018
This tutorial will give you the basics to get started using the aircrack-ng suite. It is impossible to provide every piece of information you need and cover every scenario. So be prepared to do some homework and research on your own. The Forum and the Wiki have lots of supplementary tutorials and information.
Although it does not cover all the steps from start to finish like this tutorial, the Simple WEP Crack tutorial covers the actual aircrack-ng steps in much more detail.
Setting up Hardware, Installing Aircrack-ng
The first step in getting aircrack-ng working properly on your Linux system is patching and installing the proper driver for your wireless card. Many cards work with multiple drivers, some of which provide the necessary features for using aircrack-ng, and some of which do not.
Needless to say, you need a wireless card which is compatible with the aircrack-ng suite. This is hardware which is fully compatible and can inject packets. A compatible wireless card can be used to crack a wireless access point in under an hour.
To determine to which category your card belongs to, see hardware compatibility page. Read Tutorial: Is My Wireless Card Compatible? if you don’t know where to look in this table. It still does not hurt to read this tutorial to build your knowledge and confirm your card attributes.
First, you need to know which chipset is used in your wireless card and which driver you need for it. You will have determined this using the information in the previous paragraph. The drivers section will tell you which drivers you need.
Aircrack-ng installation
Get the latest copy of aircrack-ng from the homepage, use our packages or use a penetration testing distribution such as Kali Linux or Pentoo where Aircrack-ng is already installed and up to date.
To install aircrack-ng, refer to the documentation on the installation page.
IEEE 802.11 basics
Ok, now everything is ready, time to make a pit stop before the action finally starts and learn something about how wireless networks work.
The following chapter is very important, if something doesn’t work as expected. Knowing what all is about helps you find the problem or helps you at least to describe it so someone else who can help you. This is a little bit scientific and maybe you feel like skipping it. However, a little knowledge is necessary to crack wireless networks and because it is a little more than just typing one command and letting aircrack do the rest.
How a wireless network is found
This is a short introduction into managed networks, these ones working with Access Points (AP). Every AP sends out about 10 so called beacon frames a second. These packets contain the following information:
This information is then shown in your tool that connects to this network. It is shown when you let your card scan for networks with iwlist scan and when you run airodump-ng.
Every AP has a unique MAC address (48 bit, 6 pair of hexadecimal numbers). It looks like 00:01:23:4A:BC:DE. Every network hardware device has such an address and network devices communicate with each other by using this MAC address. So its basically like a unique name. MAC addresses are unique, no two network devices in the world have the same MAC address.
Connecting with a network
If you want to connect to a wireless network, there are some possibilities. In most cases, Open System Authentication is used. (Optional: If you want to learn more about authentication, check this out.)
Open System Authentication:
This is the simplest case, BUT there could be some problems if you are not legitimate to connect:
Simple sniffing and cracking
Discovering Networks
The first thing to do is looking out for a potential target. The aircrack-ng suite contains airodump-ng for this — but other programs like Kismet can be used too.
Prior to looking for networks, you must put your wireless card into what is called “monitor mode”. Monitor mode is a special mode that allows your computer to listen to every wireless packet. This monitor mode also allows you to optionally inject packets into a network. Injection will be covered later in this tutorial.
To put your wireless card into monitor mode using airmon-ng:
It will create create another interface, and append “mon” to it. So, wlan0 will become wlan0mon. To confirm it is in monitor mode, run “iwconfig” and confirm the mode.
Then, start airodump-ng to look out for networks:
If airodump-ng could connect to the WLAN device, you’ll see a screen like this:
airodump-ng hops from channel to channel and shows all access points it can receive beacons from. Channels 1 to 14 are used for 802.11b and g (in US, they only are allowed to use 1 to 11; 1 to 13 in Europe with some special cases; 1-14 in Japan). 802.11a is in the 5GHz and availability in different countries is more fragmented than on 2.4GHz. In general, known channels starts at 36 (32 in some countries) to 64 (68 in some countries) and 96 to 165. Wikipedia has more details on channel availability. The Linux Central Regulatory Domain Agent takes care of allowing/forbidding transmissions on the different channels for your country; however, it needs to be set appropriately.
The current channel is shown in the top left corner.
After a short time some APs and (hopefully) some associated clients will show up.
The upper data block shows the access points found:
| BSSID | The MAC address of the AP |
|---|---|
| RXQ | Quality of the signal, when locked on a channel |
| PWR | Signal strength. Some drivers don’t report it |
| Beacons | Number of beacon frames received. If you don’t have a signal strength you can estimate it by the number of beacons: the more beacons, the better the signal quality |
| Data | Number of data frames received |
| CH | Channel the AP is operating on |
| MB | Speed or AP Mode. 11 is pure 802.11b, 54 pure 802.11g. Values between are a mixture |
| ENC | Encryption: OPN: no encryption, WEP: WEP encryption, WPA: WPA or WPA2 encryption, WEP?: WEP or WPA (don’t know yet) |
| ESSID | The network name. Sometimes hidden |
The lower data block shows the clients found:
| BSSID | The MAC of the AP this client is associated to |
|---|---|
| STATION | The MAC of the client itself |
| PWR | Signal strength. Some drivers don’t report it |
| Packets | Number of data frames received |
| Probes | Network names (ESSIDs) this client has probed |
Now you should look out for a target network. It should have a client connected because cracking networks without a client is an advanced topic (See How to crack WEP with no clients). It should use WEP encryption and have a high signal strength. Maybe you can re-position your antenna to get a better signal. Often a few centimeters make a big difference in signal strength.
In the example above the net 00:01:02:03:04:05 would be the only possible target because it’s the only one with an associated client. But it also has a high signal strength so it’s really a good target to practice.
Sniffing IVs
Because of the channel hopping you won’t capture all packets from your target net. So we want to listen just on one channel and additionally write all data to disk to be able to use it for cracking:
With the -c parameter you tune to a channel and the parameter after -w is the prefix to the network dumps written to disk. The “- -bssid” combined with the AP MAC address limits the capture to the one AP. The “- -bssid” option is only available on new versions of airodump-ng.
Before being able to crack WEP you’ll usually need between 40 000 and 85 000 different Initialization Vectors (IVs). Every data packet contains an IV. IVs can be re-used, so the number of different IVs is usually a bit lower than the number of data packets captured.
So you’ll have to wait and capture 40K to 85K of data packets (IVs). If the network is not busy it will take a very long time. Often you can speed it up a lot by using an active attack (=packet replay). See the next chapter.
Cracking
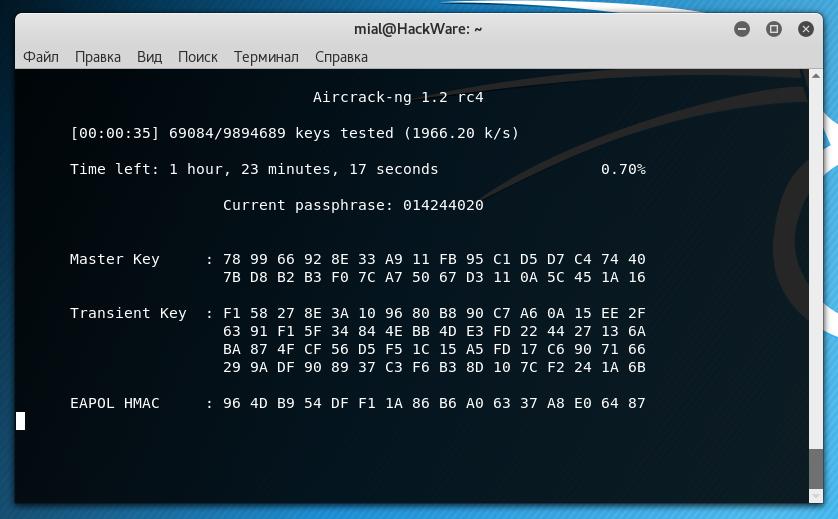
If you’ve got enough IVs captured in one or more file, you can try to crack the WEP key:
The MAC after the -b option is the BSSID of the target and dump-01.cap the file containing the captured packets. You can use multiple files, just add all their names or you can use a wildcard such as dump*.cap.
For more information about aircrack-ng parameters, description of the output and usage see the manual.
The number of IVs you need to crack a key is not fixed. This is because some IVs are weaker and leak more information about the key than others. Usually these weak IVs are randomly mixed in between the stronger ones. So if you are lucky, you can crack a key with only 20 000 IVs. But often this it not enough and aircrack-ng will run a long time (up to a week or even longer with a high fudge factor) and then tell you the key could not be cracked. If you have more IVs cracking can be done a lot faster and is usually done in a few minutes, or even seconds. Experience shows that 40 000 to 85 000 IVs is usually enough for cracking.
There are some more advanced APs out there that use an algorithm to filter out weak IVs. The result is either that you can’t get more than “n” different IVs from the AP or that you’ll need millions (like 5 to 7 million) to crack the key. Search in the Forum, there are some threads about cases like this and what to do.
Active attacks
Injection support
Most devices don’t support injection — at least not without patched drivers. Some only support certain attacks. Take a look at the compatibility page, column aireplay. Sometimes this table is not up-to-date, so if you see a “NO” for your driver there don’t give up yet, but look at the driver homepage, the driver mailing list or our Forum. If you were able to successfully replay using a driver which is not listed as supported, don’t hesitate to update the compatibility page table and add a link to a short howto. (To do this, request a wiki account on IRC .)
The first step is to make sure packet injection really works with your card and driver. The easiest way to test it is the injection test attack. Make sure to perform this test prior to proceeding. Your card must be able to successfully inject in order to perform the following steps.
You’ll need the BSSID (AP MAC) and ESSID (network name) of an AP that does not do MAC filtering (e.g. your own) and must be in range of the AP.
Try to connect to your AP using aireplay-ng:
The value after -a is the BSSID of your AP.
If injection works you should see something like this:
Источник
Инструменты Kali Linux
Список инструментов для тестирования на проникновение и их описание
Aircrack-ng (программа)
Описание aircrack-ng
Aircrack-ng — это программа по взлому ключей 802.11 WEP и WPA/WPA2-PSK.
Aircrack-ng может восстановить WEP ключ, как только будет захвачено достаточно зашифрованных пакетов в программе airodump-ng. Эта часть набора aircrack-ng определяет WEP ключ используя два фундаментальных метода. Первый метод — посредством подхода PTW (Pyshkin, Tews, Weinmann). Метод взлома по умолчанию — это PTW. Он делается в две стадии. На первом этапе aircrack-ng использует только ARP пакеты. Если ключ не найден, тогда она использует все пакеты в захвате. Пожалуйста помните, что не все пакеты могут быть использованы для PTW метода. Важное ограничение в том, что атака PTW в настоящее время может взломать только 40- и 104-битные WEP ключи. Главное преимущество подхода PTW в том, что требуется совсем немного пакетов данных для взлома WEP ключа. Второй метод — это метод FMS/KoreK. Метод FMS/KoreK включает различные статистические атаки для раскрытия WEP ключа и использует их в комбинации с брутфорсингом.
Дополнительно для обнаружения WEP ключа программа предлагает атаку по словарю.
Для взлома паролей WPA/WPA2 используется только метод атаки по словарю. Для значительного ускорения обработки WPA/WPA2 ключа включена поддержка SSE2 . В качестве ввода требуется «четырёхэтапное рукопожатие». Полное WPA рукопожатие состоит из четырёх пакетов. Тем не менее, aircrack-ng способен успешно работать даже с двумя пакетами. EAPOL пакеты (2 и 3) или пакеты (3 и 4) рассматриваются как полное рукопожатие.
Автор: Thomas d’Otreppe, Первоначальная работа: Christophe Devine
Справка по aircrack-ng
Руководство по aircrack-ng
Общие опции:
Режим атаки брутфорсом, 1 или wep для WEP и 2 или wpa для WPA-PSK.
-e
Выбрать целевую сеть, основываясь на ESSID. Эта опция также требуется для взлома WPA если SSID скрыт.
-b или —bssid
Выбрать целевую сеть основываясь на MAC адресе.
-p
Установить количество используемых CPU (доступно только на SMP системах). По умолчанию, используются все доступные CPU.
-q
Если указан этот ключ, то информация о состоянии не отображается.
-C или —combine
Объединить эти MAC адреса ТД (разделённые запятой) в один виртуальный.
-l
Записать ключ в файл.
-E
Создать файл проекта Elcomsoft Wireless Security Auditor (EWSA) v3.02.
Опции статичного взлома WEP:
-c
Поиск только буквенно-цифровых символов.
-t
Поиск только бинарно-закодированных десятеричных символов.
-h
Поиск числа ключа для Fritz!BOX
-d или —debug
Указать маску ключа. Например: A1:XX:CF
-m
Сохранять только IV пришедшие из пакетов, которые соответствуют этому MAC адресу. Альтернативно, используйте -m ff:ff:ff:ff:ff:ff для использования всех и каждого IV, независимо от сети (это отключает фильтрацию ESSID и BSSID).
-n
Указать длину ключа: 64 или 40-бит WEP, 128 или 104-бит WEP, и т.д., до 512 бит длины. Значение по умолчанию это 128.
-i
Сохранять только IV, которые имеют ключевой индекс (от 1 до 4). Поведение по умолчанию — игнорировать ключевой индекс в пакетах и использовать IV независимо от него.
-f
По умолчанию этот параметр установлен в 2. Используйте более высокую величину для увеличения уровня брутфорса: взлом займёт больше времени, но с большей вероятностью на успех.
-k
Есть всего 17 атак KoreK. Иногда одна атака создаёт громадное ложное срабатывание, что не даёт найти ключ, даже с множеством IV. Попробуйте -k 1, -k 2, … -k 17 для последовательного исключения каждой атаки.
-x или -x0
Отключить брутфорс последних keybytes (не рекомендуется)
-x1
Включить брутфорсинг последнего keybyte (по умолчанию)
-x2
Включить брутфорсинг последних двух keybytes.
-X
Отключить многопоточный брутфорсинг (только SMP).
-s
Показать ASCII версию ключа в правой части экрана.
-y
Это экспериментальная атака единичного брутфорса, которую следуют использовать когда стандартный режим атаки терпит неудачу с более чем одним миллионом IV.
-z
Использовать PTW (Andrei Pyshkin, Erik Tews и Ralf-Philipp Weinmann) атаку (атака по умолчанию).
-P или —ptw-debug
Отладка PTW: 1 Отключить klein, 2 PTW.
-K
Использовать атаки KoreK вместо PTW.
-D или —wep-decloak
Использовать режим раскрытия WEP.
-1 или —oneshot
запустить только 1 попытку для взлома ключа с PTW
-M
Задать максимальное число IV которое использовать
Опции взлома WEP и WPA-PSK
-w
Путь до файла словаря для взлома wpa. Укажите «-» для стандартного ввода. Списки словарей: https://kali.tools/?p=1896
-N или —new-session
Создать новую сессию взлома. Она позволяет прерывать процесс взлома (брут-форс) пароля и затем вновь запускать с места остановки (используя -R или —restore-session). Файлы статуса сохраняются каждые 5 минут.
Она не перезаписывает существующий файл сессии.
-R или —restore-session
Восстановить и продолжить ранее сохранённую сессию взлома. Этот параметр должен использоваться один, другие параметры не должны быть указаны при запуске aircrack-ng (вся необходимая информация присутствует в файле сессии).
Опции взлома WPA-PSK:
-E
Создать файл проекта Elcomsoft Wireless Security Auditor (EWSA) v3.02.
-j
Создать файл захвата Hashcat v3.6+ (HCCAPX).
-J
Создать файл захвата Hashcat (HCCAP).
-S
тест скорости взлома WPA.
-Z
Продолжительность теста скорости взлома WPA в секундах.
-r
Путь до базы данных airolib-ng. Нельзя использовать с ‘-w‘.
SIMD selection:
—simd=
Aircrack-ng автоматически загружает и использует самую быструю оптимизацию на основе инструкций, доступных для вашего CPU. Эта опция позволяет принудительно выбрать другую оптимизацию. Выборы зависят от вашего центрального процессора, в общей сложности доступны следущие варианты, которые могут быть скомпилированы независимо от типа CPU: generic, sse2, avx, avx2, avx512, neon, asimd, altivec, power8.
—simd-list
Показывает список доступных SIMD архитектур, разделённых символом пробела. Aircrack-ng автоматически выбирает самую быструю оптимизацию и поэтому эта опция нужна не часто. Случаями использования могут быть в целях тестирования, когда «более низкая» оптимизация, такая как «generic», является более быстрой, чем выбранная автоматически. Перед принудительным включением архитектуры SIMD, убедитесь, что инструкции поддерживаются вашим CPU, для этого используйте -u.
Другие опции:
-H или —help
-u или —cpu-detect
Обеспечивает информации о количестве CPU и поддержке MMX/SSE
Примеры запуска aircrack-ng
Использовать файл словаря (-w newrockyou.txt), для взлома рукопожатия, содержащегося в файле (capture-01.cap):
Установка aircrack-ng
Программа предустановлена в Kali Linux.
Установка в другие операционные системы
Эта программа из пакета Aircrack-ng. Т.е. для её установки нужно установить Aircrack-ng.
Источник


