- Airflow apache установка windows
- Install Apache Airflow locally
- Install Apache Airflow on server
- Install Apache Airflow on cluster
- Install Apache Airflow to contribute
- Install Apache Airflow by Cloud
- DATAENGINER
- Установка Airflow
- Подготовка Демона Airflow
- Скачать служебные файлы демона
- Инициализация домашнего каталога Airflow
- Конфигурация Airflow Демона
- Запустите настроенный демон Airflow
- Резюме
- Installation
- Prerequisites
- Installation tools
- Airflow extra dependencies
- Provider packages
- Differences between extras and providers
- System dependencies
- Constraints files
- Installation script
- Python versions support
- Set up a database
- Troubleshooting
- Airflow command is not recognized
- Symbol not found: _Py_GetArgcArgv В
Airflow apache установка windows
Remember that Apache Airflow is a platform created by the Community and you can join us!
Install Apache Airflow locally
When installing locally is a good option for you?
- If you don’t want to do it by yourself
- If you don’t want to do it by yourself
- If you don’t want to do it by yourself
- If you don’t want to do it by yourself
Install Apache Airflow on server
When installing locally is a good option for you?
- If you don’t want to do it by yourself
- If you don’t want to do it by yourself
- If you don’t want to do it by yourself
- If you don’t want to do it by yourself
Install Apache Airflow on cluster
When installing locally is a good option for you?
- If you don’t want to do it by yourself
- If you don’t want to do it by yourself
- If you don’t want to do it by yourself
- If you don’t want to do it by yourself
Install Apache Airflow to contribute
When installing locally is a good option for you?
- If you don’t want to do it by yourself
- If you don’t want to do it by yourself
- If you don’t want to do it by yourself
- If you don’t want to do it by yourself
Install Apache Airflow by Cloud
When installing locally is a good option for you?
DATAENGINER
Airflow — это потрясающий инструмент от Airbnb, который в настоящее время является своего рода стандартом развертывания ETL в области инженерии данных. Но в то же время вы также можете использовать Airflow для планирования конвейера машинного обучения и автоматизации всего конвейера машинного обучения (почти).
Установка Airflow
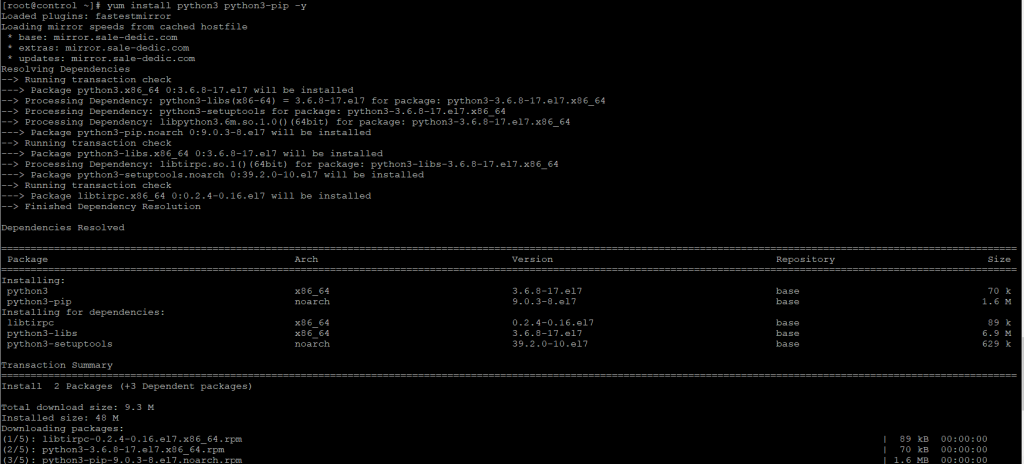
Шаг 1. Проверим что наша система использует последнюю версию пакетов для CentOS 7, проверять будет через менеджеров пакетов yum:

Шаг 2. Для установки Airflow установим последнюю версию python3 и pip3-python, для этого выполним команду:
Шаг 3. Создадим пользователя под которым будет работать airflow, пользователя назовем так же airflow:

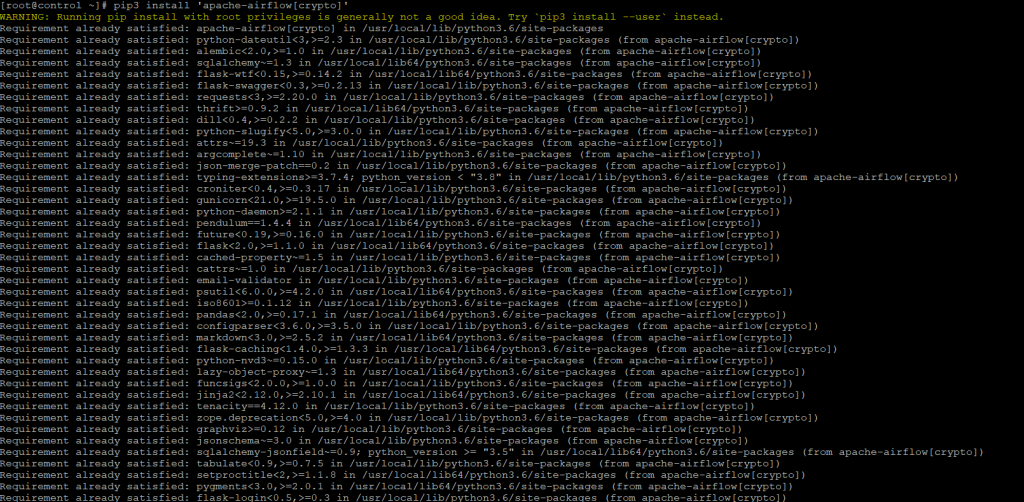
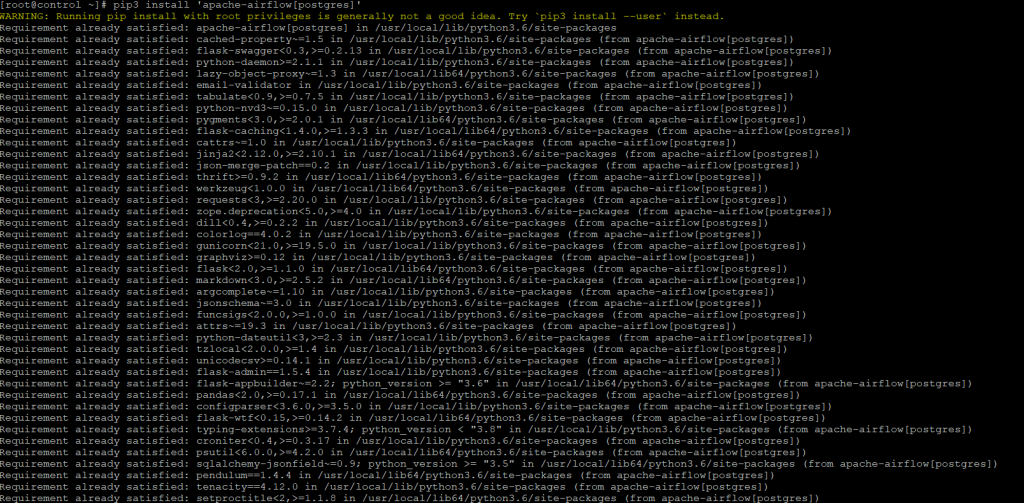
Шаг 4. Теперь при помощи менеджера пакетов python3 установим airflow и дополнительно необходимые пакеты crypto и пакет для работы с базой данных в моей случае postgres, так же для работы с базой данных вы можете установить mysql:
Будет установлено большое количество пакетов, необходимых для работы airflow:
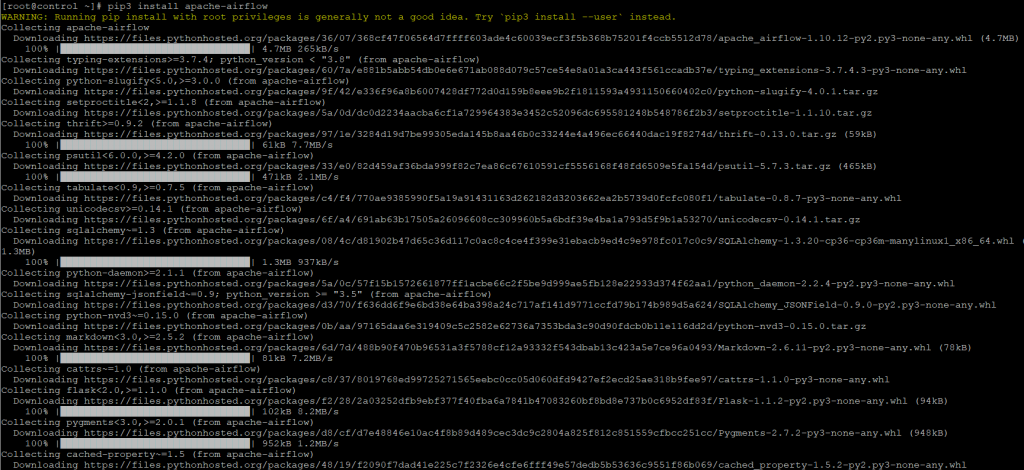
Будут проверены зависимости и при необходимости до установлены необходимые пакеты
Также после данной команды будут проверены версии пакетов и до установлены пакеты для работы с СУБД PostgreSQL.
Подготовка Демона Airflow

Прежде чем мы сможем настроить наш systemd сервис для Airflow, нам нужно сделать некоторые приготовления. Первым шагом будет загрузка файлов определения службы из Airflow GitHub Репозитория.
Ссылка на ресурс:
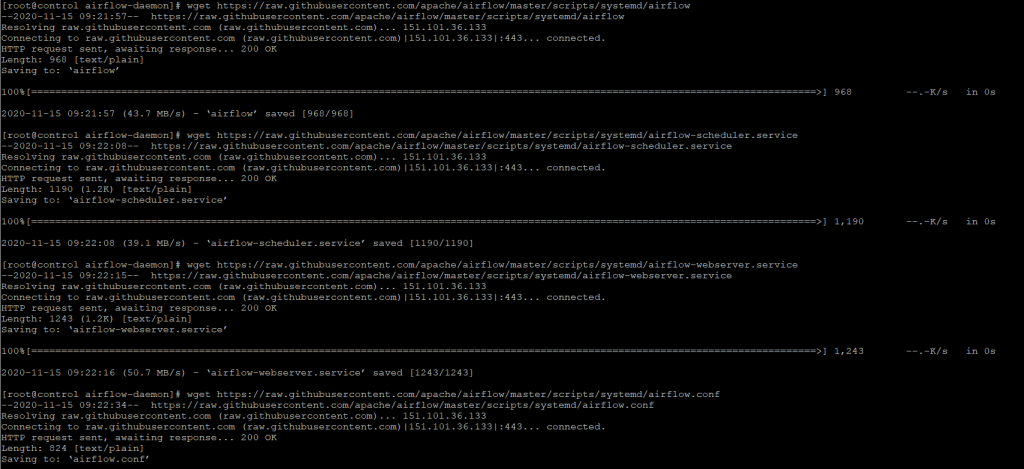
Скачать служебные файлы демона
Шаг 5. Создадим временную папку для файлов загрузки.

Шаг 6. Затем загрузим файлы во временную папку.
В репозитории GitHub есть следующее краткое объяснение:
Что ж, я полагаю, что для большинства тех, кто не знаком с Linux, приведенная выше документация может быть очень расплывчатой и вводящей в заблуждение. Итак, я нарисовал эту диаграмму, чтобы показать, какой файл по какому пути следует поместить.

Шаг 7. Скопируем файлы по пути, указанному на схеме:

Шаг 8. Создадим необходимые каталоги, которые требуются демону. Во-первых, ему нужен специальный каталог для хранения информации о времени выполнения, такой как файлы pid . Давайте создадим каталог в /run каталоге и изменим владельца и разрешение.

Обратите внимание, что для разрешения установлено значение, 0755 поскольку на практике у нас может быть несколько других пользователей для разработки DAG (рабочих процессов) в Airflow. При наличии 0755 разрешения он гарантирует, что у всех других пользователей есть вторичная группа, так как у них группа airflow , то будет достаточно данных разрешений.
Шаг 9. Еще один каталог, который нам нужно создать, — это домашний каталог Airflow, который включает:
- Конфигурации воздушного потока
- SQLite, который используется Airflow
- Группы DAG
- Журналы DAG
Обычно, если нет export AIRFLOW_HOME=. , они будут автоматически сгенерированы в домашнем каталоге текущего пользователя, например /home/airflow/airflow/ . Это нормально, если вы тестируете Airflow или разрабатываете несколько групп DAG. Однако это не рекомендуется, а также неудобно в производстве, потому что другие пользователи не смогут легко получить доступ airflow к домашнему каталогу пользователя.
В моем случае я хотел бы разместить домашний каталог Airflow в каталоге /opt , поэтому давайте создадим его.
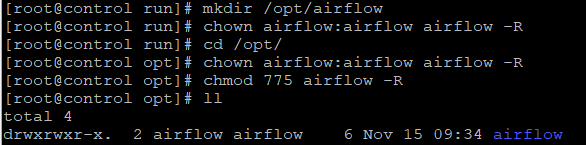
Опять же, измените разрешение, чтобы разрешить всем пользователям в airflow группе не только читать, но и писать в каталог, потому что им нужны права чтобы изменить DAG.
Инициализация домашнего каталога Airflow
Шаг 10. Все готово. Теперь нам нужно инициализировать домашний каталог Airflow. Важно экспортировать домашний каталог в AIRFLOW_HOME переменную среды. В противном случае домашний каталог будет автоматически создан в домашней папке пользователя, как указано выше.
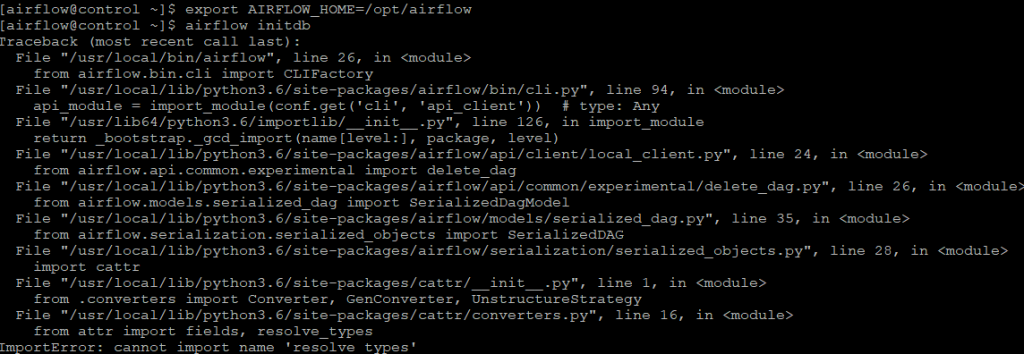
Если же у вас возникла ошибка, как на приведенном скриншоте:
То необходимо переустановить cattrs пакет для python3, для этого выполните команду:

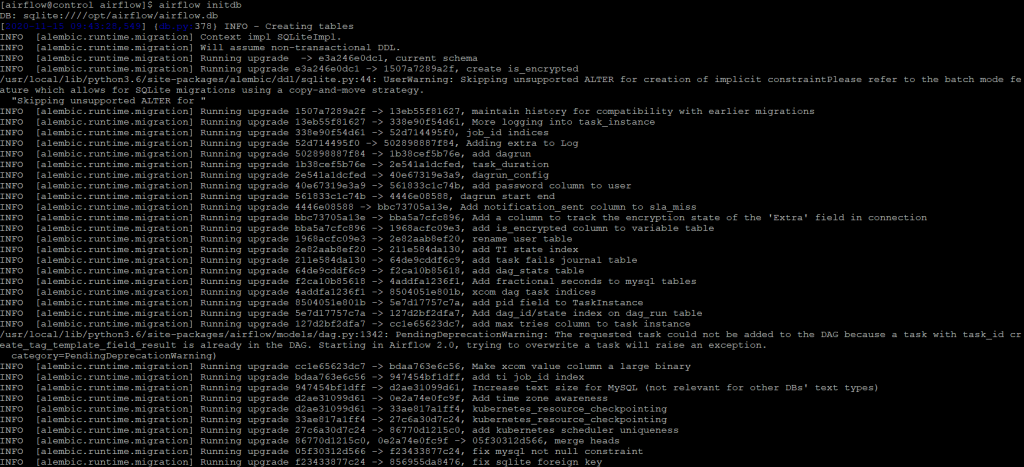
После чего повторите попытку инициализации базы данных
Конфигурация Airflow Демона
Шаг 11. Теперь все служебные файлы, файлы конфигурации и необходимые каталоги готовы. Нам нужно настроить демон, чтобы убедиться, что все указывает на правильные пути, прежде чем демон сможет работать правильно.
Прежде всего, давайте дважды проверим путь к airflow двоичному файлу, потому что он должен быть указан в определении службы позже.
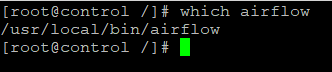
В моем случае двоичный файл имеет расположение: /usr/local/bin/airflow . Запишите, пожалуйста, свой, который, скорее всего, будет таким же, но на всякий случай обратите на него внимание. Не копируйте напрямую мой.
Затем давайте изменим определение airflow-webserver .
Измените ExecStart значение следующим образом.
Точно так же изменим airflow-webserver как и airflow-scheduler .
Обратите внимание, что pid необходимо записать в только что созданный каталог /run/airflow .
Затем нам нужно изменить системную конфигурацию Airflow. В противном случае службы не будут знать, где находится домашний каталог Airflow.
Две приведенные ниже конфигурации необходимо изменить следующим образом, исходя из того, что мы делали ранее:
На последнем этапе настройки служб нам необходимо включить эти службы, прежде чем мы сможем их запускать.

Запустите настроенный демон Airflow
Шаг 12. Имея root разрешение (пользователь root или sudo), мы можем:
- Запустите демон Airflow
- Проверить его статус
- Остановите демона
- Перезагрузите демон
- Просмотр журналов службы демона (последние 50 строк, количество строк настраивается с помощью -n параметра)
Резюме
В этой статье было рассказано, как установить Airflow в системе CentOS, что есть недостатки, если мы просто запускаем Airflow из командной строки, поэтому нам нужно решить эту проблему, запустив его как демон.
Сначала нам нужно загрузить файлы определения службы из репозитория Apache Airflow GitHub, а затем поместить их в правильные системные каталоги. Нам также необходимо создать несколько папок, потому что они потребуются демону для правильной работы.
Наконец, нам нужно настроить файлы определения службы, чтобы демон мог находить ресурсы в правильных местах. После этого мы можем запустить Apache Airflow как демон, чтобы он собирал соответствующие журналы выполнения служб, а также автоматически перезапускал службы, если что-то пойдет не так.
Installation
This page describes installations using the apache-airflow package published in PyPI, but some information may be useful during installation with other tools as well.
Airflow is also distributed as a Docker image (OCI Image). For more information, see: Production Container Images
Prerequisites
Airflow is tested with:
Python: 3.6, 3.7, 3.8
PostgreSQL: 9.6, 10, 11, 12, 13
Kubernetes: 1.16.9, 1.17.5, 1.18.6
Note: MySQL 5.x versions are unable to or have limitations with running multiple schedulers – please see: Scheduler . MariaDB is not tested/recommended.
Note: SQLite is used in Airflow tests. Do not use it in production. We recommend using the latest stable version of SQLite for local development.
Please note that with respect to Python 3 support, Airflow 2.0.0 has been tested with Python 3.6, 3.7, and 3.8, but does not yet support Python 3.9.
Installation tools
The official way of installing Airflow is with the pip tool. There was a recent (November 2020) change in resolver, so currently only 20.2.4 version is officially supported, although you might have a success with 20.3.3+ version (to be confirmed if all initial issues from pip 20.3.0 release have been fixed in 20.3.3). In order to install Airflow you need to either downgrade pip to version 20.2.4 pip install —upgrade pip==20.2.4 or, in case you use Pip 20.3, you need to add option —use-deprecated legacy-resolver to your pip install command.
While they are some successes with using other tools like poetry or pip-tools, they do not share the same workflow as pip — especially when it comes to constraint vs. requirements management. Installing via Poetry or pip-tools is not currently supported. If you wish to install airflow using those tools you should use the constraint files and convert them to appropriate format and workflow that your tool requires.
Airflow extra dependencies
The apache-airflow PyPI basic package only installs what’s needed to get started. Additional packages can be installed depending on what will be useful in your environment. For instance, if you don’t need connectivity with Postgres, you won’t have to go through the trouble of installing the postgres-devel yum package, or whatever equivalent applies on the distribution you are using.
Most of the extra dependencies are linked to a corresponding providers package. For example “amazon” extra has a corresponding apache-airflow-providers-amazon providers package to be installed. When you install Airflow with such extras, the necessary provider packages are installed automatically (latest versions from PyPI for those packages). However you can freely upgrade and install provider packages independently from the main Airflow installation.
For the list of the extras and what they enable, see: Reference for package extras .
Provider packages
Unlike Apache Airflow 1.10, the Airflow 2.0 is delivered in multiple, separate, but connected packages. The core of Airflow scheduling system is delivered as apache-airflow package and there are around 60 providers packages which can be installed separately as so called Airflow Provider packages . The default Airflow installation doesn’t have many integrations and you have to install them yourself.
You can even develop and install your own providers for Airflow. For more information, see: Provider packages
For the list of the provider packages and what they enable, see: Providers packages reference .
Differences between extras and providers
Just to prevent confusion of extras versus provider packages: Extras and providers are different things, though many extras are leading to installing providers.
Extras are standard Python setuptools feature that allows to add additional set of dependencies as optional features to “core” Apache Airflow. One of the type of such optional features are providers packages, but not all optional features of Apache Airflow have corresponding providers.
We are using the extras setuptools features to also install provider packages. Most of the extras are also linked (same name) with provider packages — for example adding [google] extra also adds apache-airflow-providers-google as dependency. However there are some extras that do not install providers (examples github_enterprise , kerberos , async — they add some extra dependencies which are needed for those extra features of Airflow mentioned. The three examples above add respectively github enterprise oauth authentication, kerberos integration or asynchronous workers for gunicorn. None of those have providers, they are just extending Apache Airflow “core” package with new functionalities.
System dependencies
You need certain system level requirements in order to install Airflow. Those are requirements that are known to be needed for Linux system (Tested on Ubuntu Buster LTS) :
You also need database client packages (Postgres or MySQL) if you want to use those databases.
Constraints files
Airflow installation might be sometimes tricky because Airflow is a bit of both a library and application. Libraries usually keep their dependencies open and applications usually pin them, but we should do neither and both at the same time. We decided to keep our dependencies as open as possible (in setup.cfg and setup.py ) so users can install different version of libraries if needed. This means that from time to time plain pip install apache-airflow will not work or will produce unusable Airflow installation.
In order to have repeatable installation, starting from Airflow 1.10.10 and updated in Airflow 1.10.13 we also keep a set of “known-to-be-working” constraint files in the constraints-master , constraints-2-0 and constraints-1-10 orphan branches and then we create tag for each released version e.g. constraints-2.0.1 . This way, when we keep a tested and working set of dependencies.
Those “known-to-be-working” constraints are per major/minor python version. You can use them as constraint files when installing Airflow from PyPI. Note that you have to specify correct Airflow version and python versions in the URL.
You can create the URL to the file substituting the variables in the template below.
AIRFLOW_VERSION — Airflow version (e.g. 2.0.1 ) or master , 2-0 , 1-10 for latest development version
PYTHON_VERSION Python version e.g. 3.8 , 3.7
Installation script
In order to simplify the installation, we have prepared a script that will select the constraints file compatible with your Python version
Plain installation:
If you don’t need to install any extra extra, you can use the command set below:
Installing with extras
If you need to install extra dependencies of airflow , you can use the script below (the example below installs postgres and google extras.
Python versions support
As of Airflow 2.0 we agreed to certain rules we follow for Python support. They are based on the official release schedule of Python, nicely summarized in the Python Developer’s Guide
We end support for Python versions when they reach EOL (For Python 3.6 it means that we will stop supporting it on 23.12.2021).
The “oldest” supported version of Python is the default one. “Default” is only meaningful in terms of “smoke tests” in CI PRs which are run using this default version.
We support a new version of Python after it is officially released, as soon as we manage to make it works in our CI pipeline (which might not be immediate) and release a new version of Airflow (non-Patch version) based on this CI set-up.
Set up a database
Airflow requires a database. If you’re just experimenting and learning Airflow, you can stick with the default SQLite option. If you don’t want to use SQLite, then take a look at Set up a Database Backend to setup a different database.
Troubleshooting
This section describes how to troubleshoot installation issues.
Airflow command is not recognized
If the airflow command is not getting recognized (can happen on Windows when using WSL), then ensure that
/.local/bin is in your PATH environment variable, and add it in if necessary:
You can also start airflow with python -m airflow
Symbol not found: _Py_GetArgcArgv В
If you see Symbol not found: _Py_GetArgcArgv while starting or importing Airflow, this may mean that you are using an incompatible version of Python. For a homebrew installed version of Python, this is generally caused by using Python in /usr/local/opt/bin rather than the Frameworks installation (e.g. for python 3.7 : /usr/local/opt/python@3.7/Frameworks/Python.framework/Versions/3.7 ).
The crux of the issue is that a library Airflow depends on, setproctitle , uses a non-public Python API which is not available from the standard installation /usr/local/opt/ (which symlinks to a path under /usr/local/Cellar ).
An easy fix is just to ensure you use a version of Python that has a dylib of the Python library available. For example:
Alternatively, you can download and install Python directly from the Python website.


