- Connect a display to your Mac
- Find out how many displays you can connect
- Connect your display
- Use AirPlay
- Locate and view your connected device on your computer
- View your device in the Finder
- View your device in iTunes
- Use multiple displays with your Mac
- Connect the displays
- If your Mac doesn’t detect a connected display
- Set up the displays as an extended desktop
- Set up the displays for video mirroring
- Set up some displays for mirroring and others for an extended desktop
- Remote Mouse & Keyboard 4+
- for iMac/MacBook/PC computer
- Evgeny Cherpak
- Screenshots
- Description
- Apple Configurator 2 4+
- Apple
- Screenshots
- Description
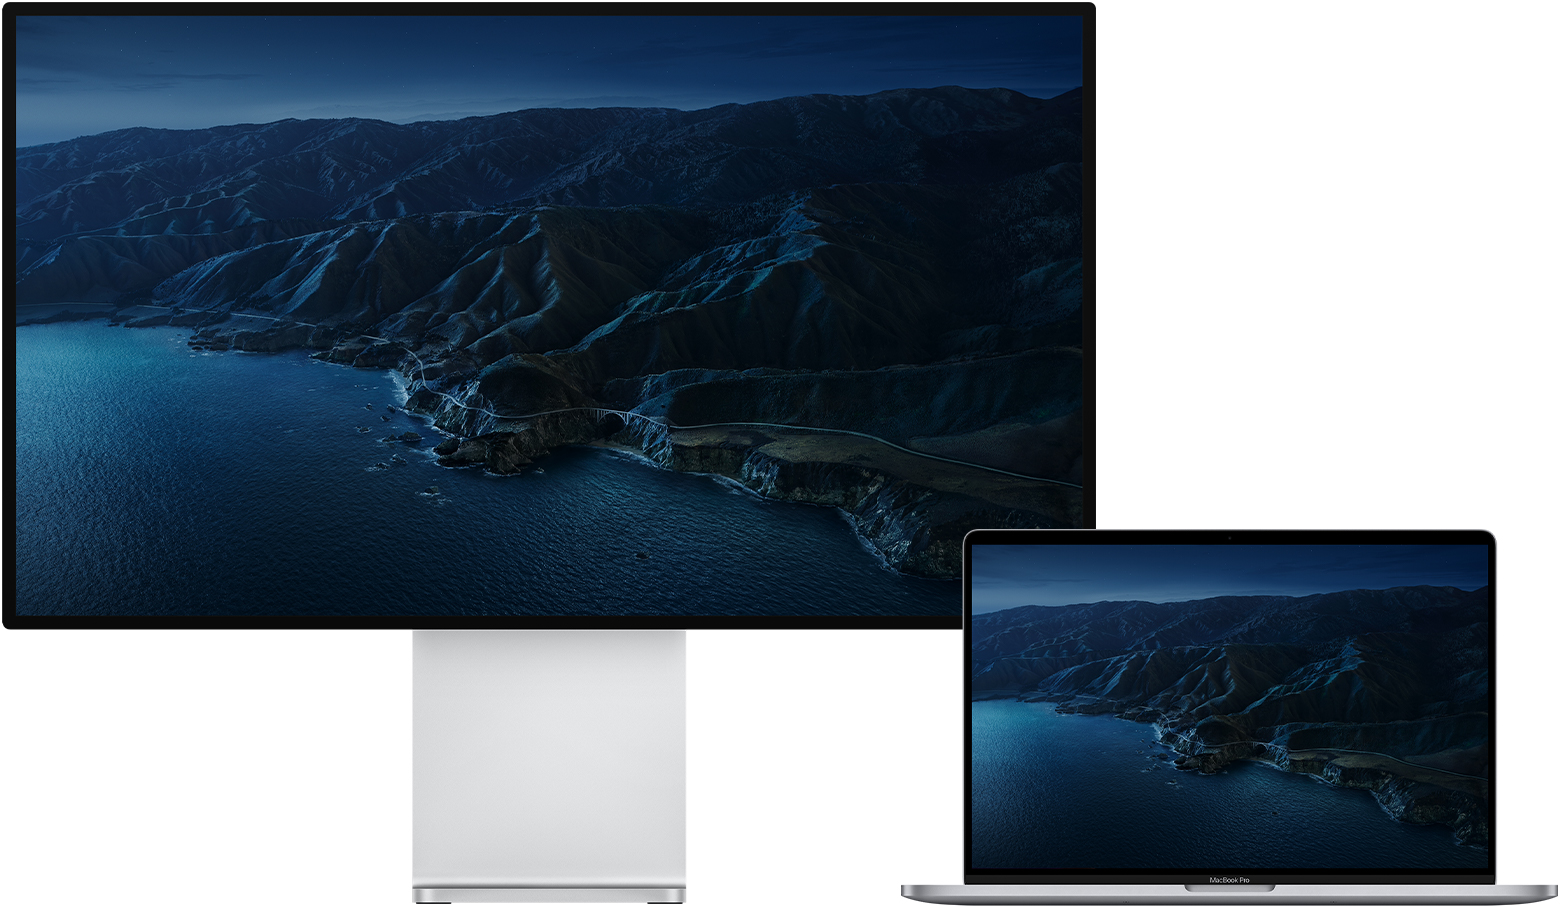
Connect a display to your Mac
Learn how to connect another display to your Mac.
Find out how many displays you can connect
You can connect one or more external displays depending on your Mac model. To find out how many external displays your Mac supports, check its technical specifications page:
- Choose Apple menu > About This Mac, double-click your serial number, then press Command-C to copy it.
- Go to the Tech Specs page, click the Search Tech Specs bar, press Command-V to enter your computer’s serial number, then click Search.
- Click the specs page for your Mac. The number of displays your Mac supports appears under Video Support or Graphics.
If you’re using a Mac with Apple silicon:
- You can connect one external display to your Mac using either of the Thunderbolt / USB 4 ports. On iMac and Mac mini, connect your display to either of the ports with the Thunderbolt symbol .
- On Mac mini (M1, 2020), you can connect a second display to the HDMI port.
- Using docks or daisy chaining devices doesn’t increase the number of displays you can connect.
Connect your display
Connect your display to power, then connect your display to your Mac. Check the ports on your Mac to find out whether you need an adapter.
If you use an external keyboard and mouse with your Mac notebook, you can close the built-in display after you connect your external display. You might have to press a key or click your mouse to wake the external display.
If your external display doesn’t turn on after you connect it to your Mac, connect your display while your Mac is off, then wake or turn on your Mac.
Use AirPlay
If you have an Apple TV or an AirPlay 2–enabled smart TV, you can use your TV as a separate display for your Mac. Learn how to use AirPlay to mirror or extend your Mac display.
Источник
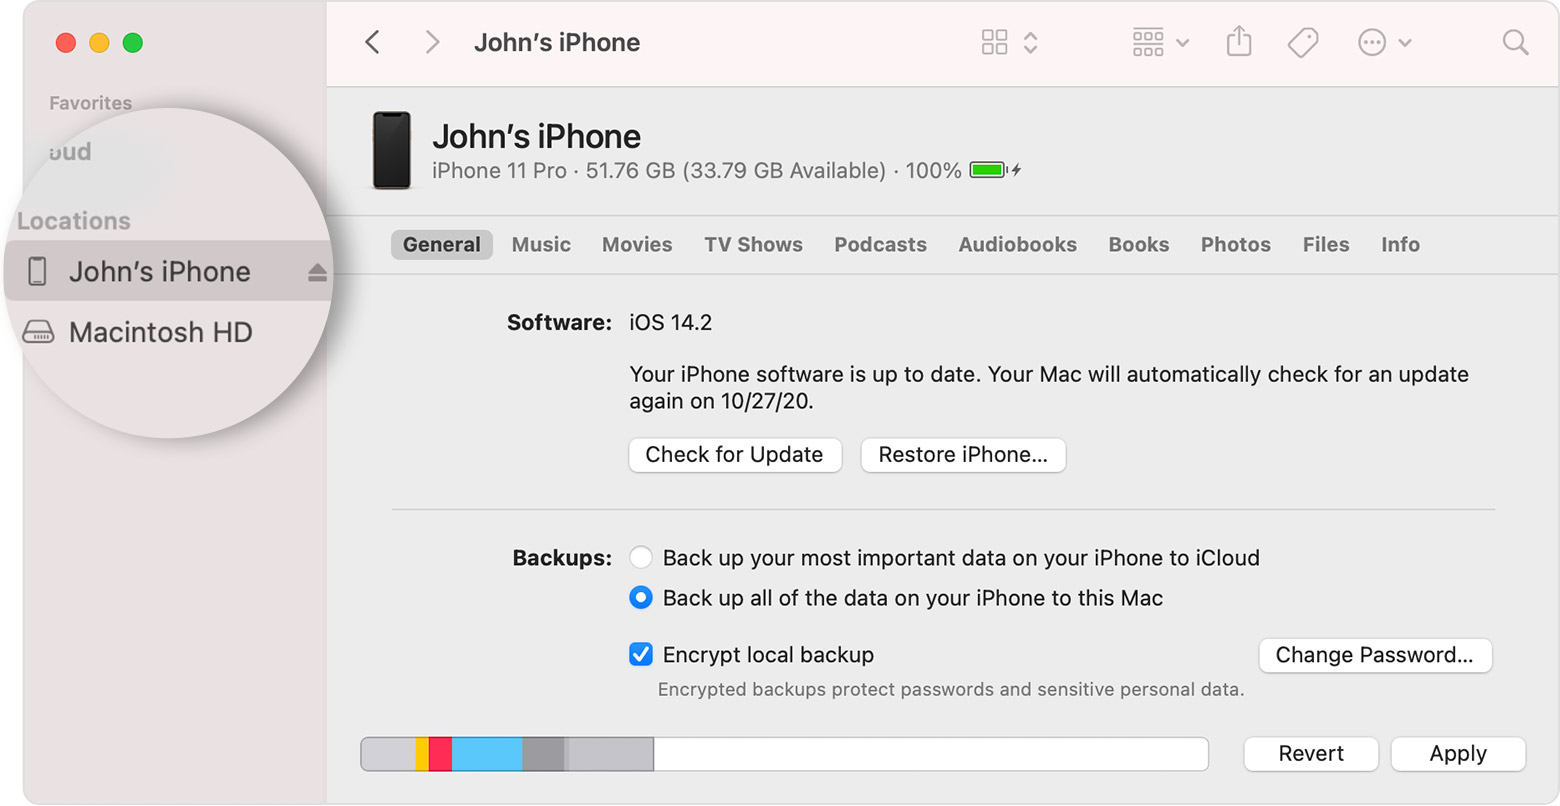
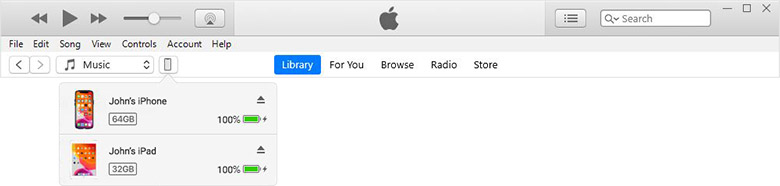
Locate and view your connected device on your computer
After you connect your iPhone, iPad, or iPod to your computer, you can view it and access its settings in the Finder or iTunes.
View your device in the Finder
Starting with macOS Catalina, your devices appear in the sidebar of the Finder. Click the device to select it.
View your device in iTunes
Make sure that you have the latest version of iTunes. If you’re using Windows or macOS Mojave or earlier, your device will show in the upper-left corner of the iTunes window. If you don’t see your device on your computer, learn what to do.

If you have multiple devices connected to your computer, click the device icon, then choose your device from the menu.
Information about products not manufactured by Apple, or independent websites not controlled or tested by Apple, is provided without recommendation or endorsement. Apple assumes no responsibility with regard to the selection, performance, or use of third-party websites or products. Apple makes no representations regarding third-party website accuracy or reliability. Contact the vendor for additional information.
Источник
Use multiple displays with your Mac
You may be able to connect more than one display to your Mac. To do so, you need a video cable for each display, and you might need an adapter. See the Apple Support article Adapters for the Thunderbolt 3 or USB-C port on your Mac or iPad Pro.
After you connect the displays to your Mac, you can choose whether to use them as an extended desktop or for video mirroring.
Connect the displays
For each display, securely connect a video cable (and adapter, if necessary) from a video output port on your Mac to the video input port on the display. See About the video ports on Mac.
You can connect one or more external displays, depending on your Mac.
For Mac computers with Apple silicon: You can connect a single external display to your Mac. Docks don’t increase the number of displays you can connect. On a Mac mini with an Apple M1 chip, you can connect a second display to the HDMI port. See the Apple Support article Mac computers with Apple silicon.
For Mac computers with Thunderbolt 3 (USB-C): You can connect a single display to each port. If you connect multiple Thunderbolt devices to each other, the Thunderbolt 3 display must be the last device in the chain. If your Thunderbolt 3 display has USB ports, those can be used for data and power.
For Mac computers with Mini DisplayPort, Thunderbolt or Thunderbolt 2: You can connect up to two displays. If the displays themselves have Thunderbolt ports, you can connect one display to another, and then connect one of the displays to a Thunderbolt port on your Mac. If your Mac has two Thunderbolt ports, you can connect each display to separate Thunderbolt ports on your Mac. A DisplayPort device must be the last device in a chain of connected Thunderbolt devices. See Connect a display, TV or projector to Mac.
Note: Only the device directly connected to your Mac receives power from the computer’s Thunderbolt port. The other devices in the chain must be powered by separate power adapters.
If your Mac doesn’t detect a connected display
On your Mac, choose Apple menu

> System Preferences, click Displays, then click Display.
Click the Detect Displays button. (You may need to press the Option key to see the Detect Displays button.)
Set up the displays as an extended desktop
You can arrange your displays in any configuration to create an extended desktop. For example, you can set your displays side by side to create one large continuous desktop.
On your Mac, choose Apple menu
> System Preferences, click Displays, then click Arrangement.
Follow the onscreen instructions.
Set up the displays for video mirroring
Video mirroring shows the entire desktop on each connected display.
On your Mac, choose Apple menu
> System Preferences, click Displays, then click Display.
Set both displays to the same resolution.
Click Arrangement, then select Mirror Displays.
Set up some displays for mirroring and others for an extended desktop
If more than two displays are connected to your Mac, you can specify that some displays use mirroring, showing the entire desktop, and other displays show the extended desktop (displaying the desktop across two or more displays). For example, if you have three displays, you can have two displays showing the same information and the third display showing the extended desktop.
Press and hold the Option key and drag one display icon onto another display icon to mirror those two displays.
If you are playing a DVD on a television connected to your Mac, click the Arrangement button in Displays preferences and move the menu bar to the television. If you don’t see an Arrangement button, your Mac is only capable of mirroring.
Источник
Remote Mouse & Keyboard 4+
for iMac/MacBook/PC computer
Evgeny Cherpak
-
- 4.6 • 4.5K Ratings
-
- Free
- Offers In-App Purchases
Screenshots
![]()
![]()
![]()
![]()
![]()
![]()
![]()
Description
If you are using your computer to watch movies or listen to music, this app is for you.
Turn your iPhone or iPad into a friendly yet powerful remote control for your computer.
Control your computer from the couch, bed, or even from another room. No line of sight is required — the app uses WiFi to connect to your computer. And you can even use Apple Watch to control your computer — how cool is that?!
Setup is both quick and easy, download the helper app from my website and install it on your computer, and that’s it.
The app exists since 2016 and has been downloaded more than 2 million times and received very positive reviews both from users and from the press. It’s actively maintained and receives frequent updates with new and exciting features.
MAIN FEATURES
— Control media playback in popular apps and websites
— Use your device like computer keyboard and mouse
— See your computer screen on your device [PREMIUM]
— Control AirPlay output (audio/video) [Mac only] [PREMIUM]
— Launch and quit apps [PREMIUM]
— Execute system actions like Sleep, Turn Display Off, and many more [PREMIUM]
— Open websites
ADVANCED FEATURES
— Schedule and use Siri to execute actions [PREMIUM]
— Create custom keypads to control apps and websites [PREMIUM]
— Add custom actions using scripting languages (AppleScript for Mac/Powershell for Windows) [PREMIUM]
— High customization of the app & widget interface [PREMIUM]
— History of connected devices for quicker re-connection [PREMIUM]
— Wake On LAN
Источник
Apple Configurator 2 4+
Apple
Screenshots
![]()
![]()
![]()
![]()
![]()
Description
Apple Configurator 2 makes it easy to deploy iPad, iPhone, iPod touch, and Apple TV devices in your school or business.
Use Apple Configurator 2 to quickly configure large numbers of devices connected to your Mac via USB with the settings, apps, and data you specify for your students, employees, or customers.
Rebuilt from the ground up, Apple Configurator 2 features a flexible, device-centric design that enables you to configure one or dozens of devices quickly and easily. Simply select a single device or many at once and perform an action. With Apple Configurator 2, you’re able to update software, install apps and configuration profiles, rename and change wallpaper on devices, export device information and documents, and much more. You can also inspect any device to see details like serial number and hardware addresses, which apps and profiles are installed, and its console log.
Apple Configurator 2 integrates with device enrollment and purchasing in Apple Business Manager or Apple School Manager to seamlessly distribute apps from the App Store. The all-new Prepare assistant makes it easy to supervise and configure a cart of iPads for the classroom or quickly enroll a large number of devices in your MDM server for ongoing management. The built-in configuration profile editor supports creating and editing profiles with the latest iOS settings.
If you’re configuring devices in an environment where consistency is critical, Blueprints allow you to create a custom configuration for your devices that can be applied with one click. A Blueprint is a template device to which you add configuration profiles and apps and perform actions, just like you would to a connected physical device.
Fully automate Apple Configurator 2 and integrate its capabilities into your existing device management workflows using the included command-line tool, AppleScript scripting library, or Automator Actions.
Support for iCloud Drive enables you to keep your configuration profiles and other settings consistent across multiple Configurator stations.
Источник


