- Basic Linux Network Commands
- The ip command
- The ifconfig command
- The iwconfig command
- The dhclient command
- The route command
- The host command
- The netstat command
- About the author
- David Adams
- 14 Useful Linux Networking Commands
- ip link
- ip address
- ip route
- iPerf
- traceroute
- tcpdump
- netstat
- scp and sftp
- Ifconfig
- telnet
- nslookup
- Summary
Basic Linux Network Commands
This tutorial briefly describes some basic commands any Linux user should know to check the network configuration, state and configure it. This tutorial will show basic applications of commands, a new tutorial is being written to explain more advanced scenarios. For advanced tips on the following and additional tutorials check Advanced Linux Network Commands. Here you’ll learn how to change IP addresses on Linux, how to disable and enable network cards under Linux using different commands, how to set your wireless card in monitor and managed modes with iwconfig, how to get an IP address from your DHCP server using the dhclient command, how to set a gateway under Linux, get the IP address of a domain name and monitor the traffic between your device and the network with netstat, in some cases the same functions with different commands.
The ip command
The ip command allows to print information on the network interfaces and configuration, as well to apply changes, it replaces the old ifconfig command which will be explained later in this tutorial.
To get a general view on your network devices configuration you can run:
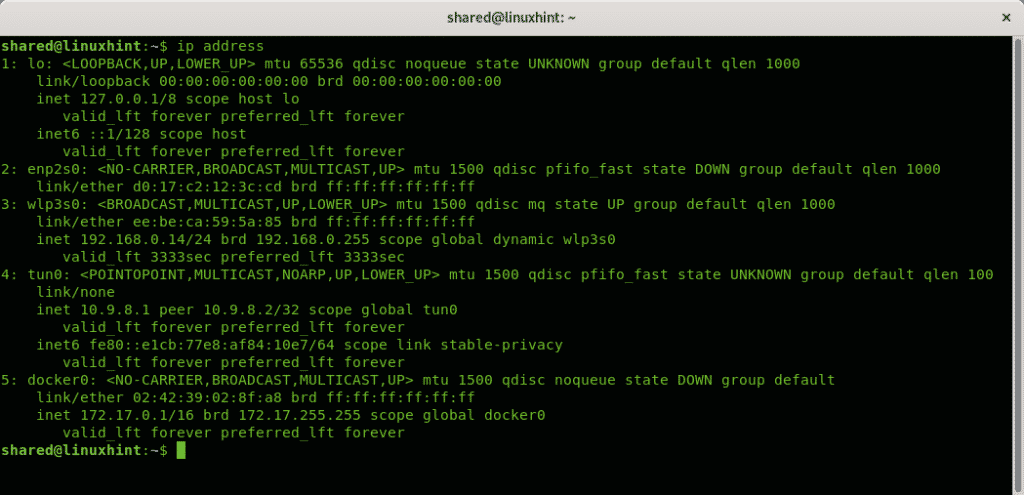
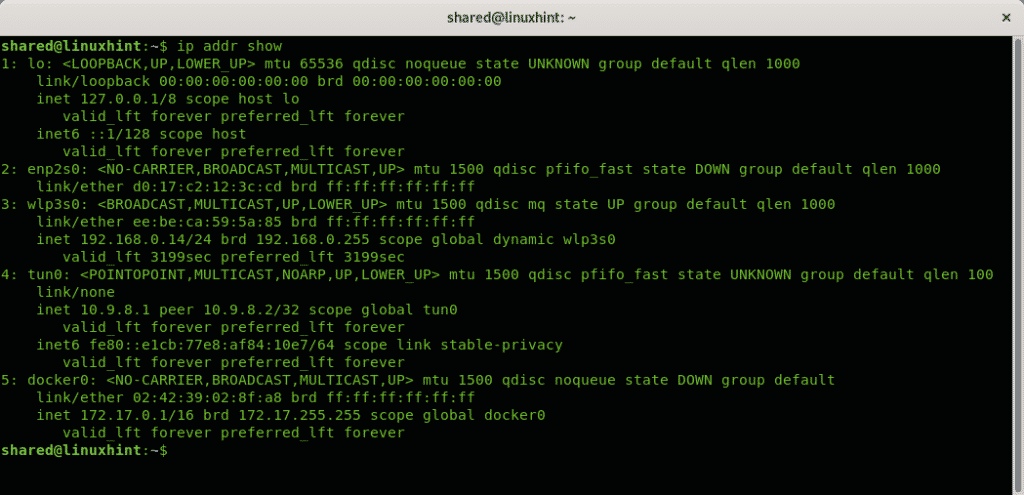
An equivalent to ip address is ip addr show, it will throw the same result:
If you want to limit the information to IPv4 information run:
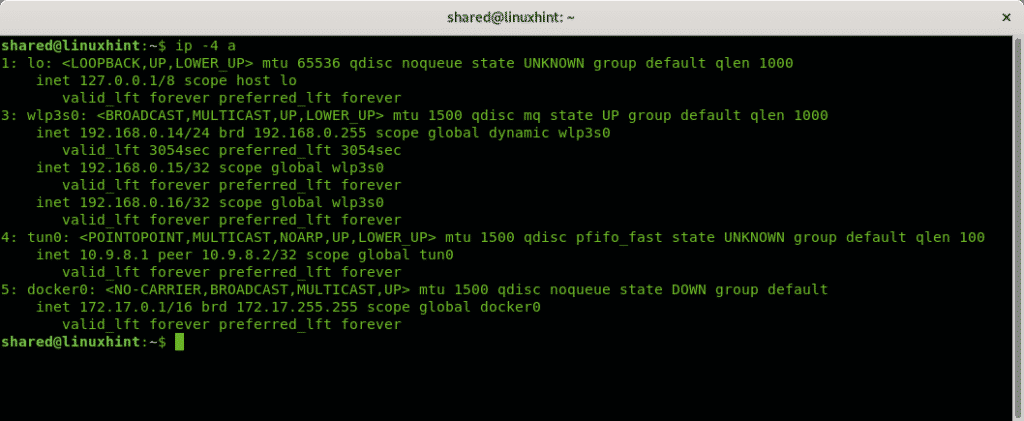
Note: if you work with IPv6 run ip -6 a
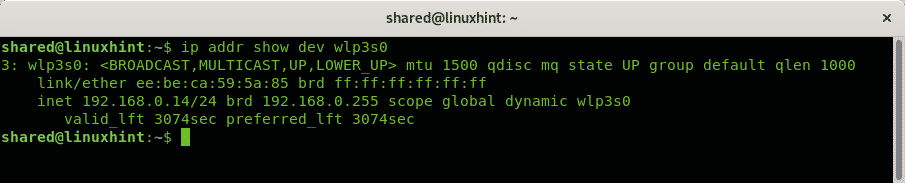
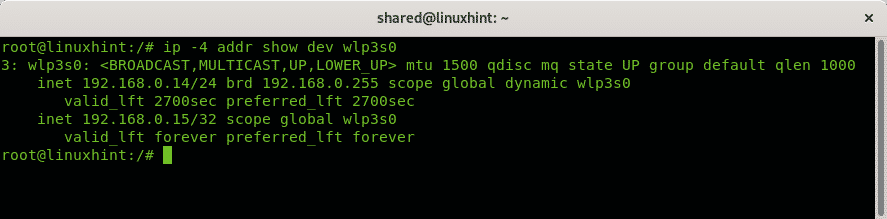
To show the information on a single network device apply the option dev as in the next example:
In my case I executed:
If you want to show the IPv4 information of a single device you can run:
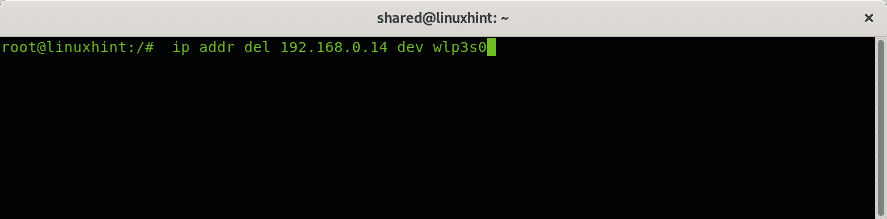
To remove an existing IP address for a device you can run:
In my case I ran:
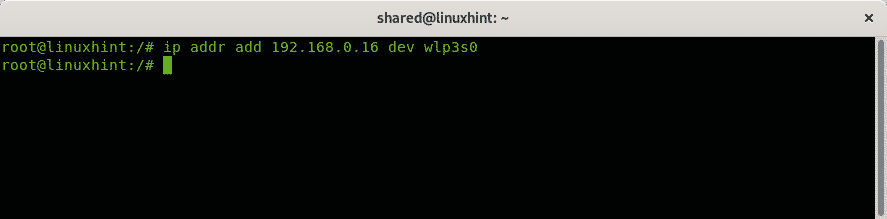
Then, to assign a new IP address run:
In my case I executed:
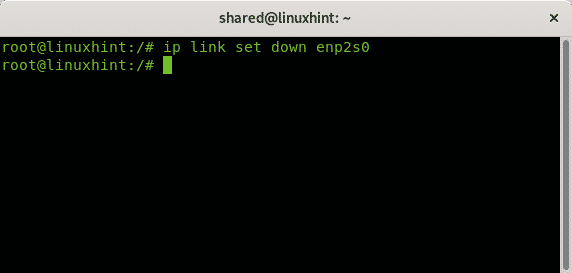
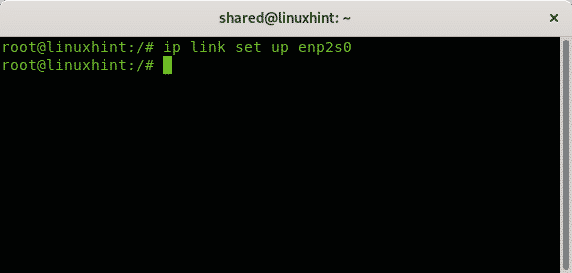
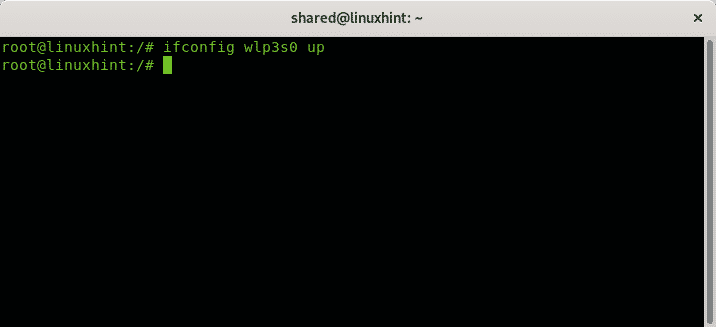
To disable a network card the command is:
In my case I run:
To enable the network card called enp2s0 back I run:
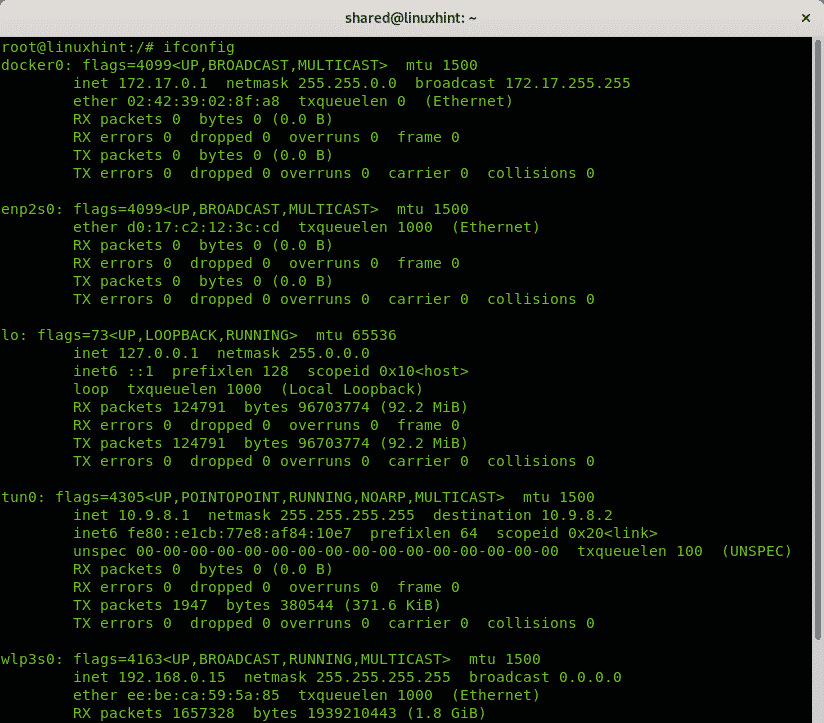
The ifconfig command
The ifconfig command is predecessor to the command ip. Not all modern Linux distributions include it, to get it working some distributions need the user to install the package net-tools.
To get a general view on your devices configuration run as root:
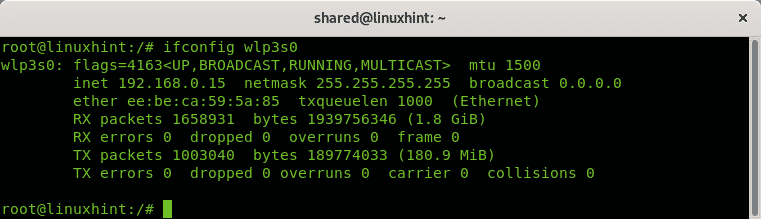
You can also print information on a specific device by adding it after invoking ifconfig, in the following example I print information for the wlp3s0 device:
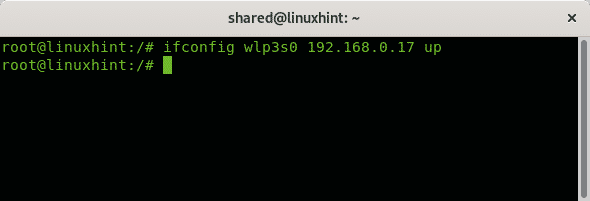
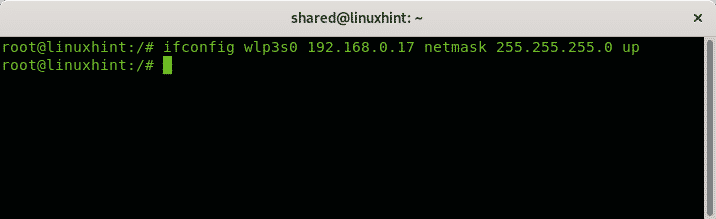
With ifconfig you can change the address by specifying it after the network device
In my case it would be like:
Note: the examples above show how to enable the network card using the command ifconfig, but you can also use the command ip link set down as explained in the ip command section.
It is recommended to include the proper netmask as in the next example by adding the netmask option.
For more information on the ifconfig command, check the tutorial How to use ifconfig.
The iwconfig command
Very similar to ifconfig, Linux includes the iwconfig command too which is useful to set configurations exclusive for wireless network cards. In the following examples the iwconfig command will be used to change the wireless network card modes between managed mode and monitor mode. The monitor mode is useful to sniff packets without being associated with other stations or routers, it is mandatory when cracking wireless routers with programs like reaver or aircrack-ng.
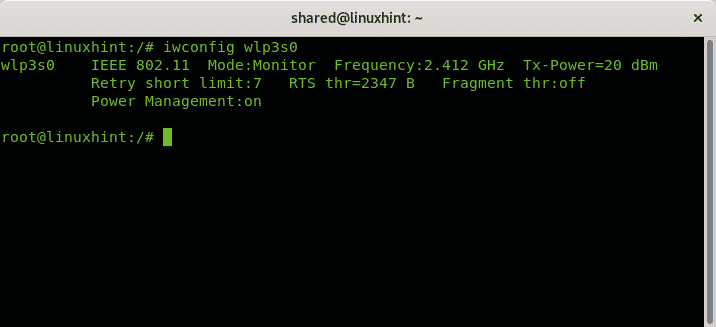
As you can see by default our network cards are set in Managed mode, which allows the wifi card to act as a network station. Run:
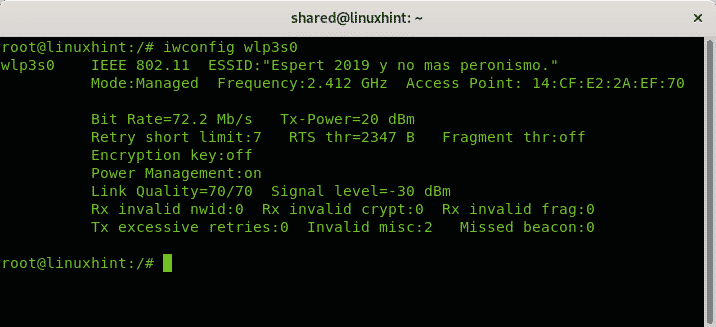
Note: where “wlp3s0” replace it with your network device name.
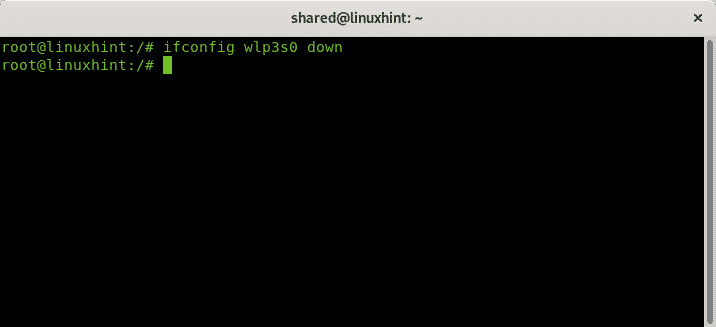
To change the Managed mode shown in the image above, first we need to disable the wifi card using the command ifconfig.
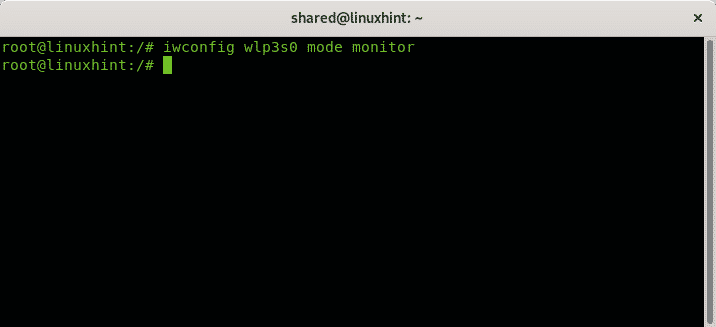
Then set the monitor mode by running:
And now enable the wireless network card back
Check the new mode by running iwconfig wlp3s0:
To restore the managed mode repeat the process replacing the step iwconfig wlp3s0 mode monitor for iwconfig wlp3s0 mode managed
The dhclient command
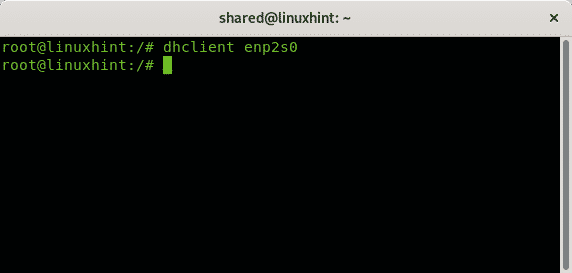
When joining a network you obviously need a free IP address to attach your device to it. While you can ping or nmap the network to set up a new device, many routers assign it through DHCP. if you want your new device to automatically get an IP address and it didn’t by default you can use the dhclient command. In many cases when trying to join a wireless network using WICD, I found the “Obtaining IP” process to get stuck or taking a long time and managed to help it by running this command.
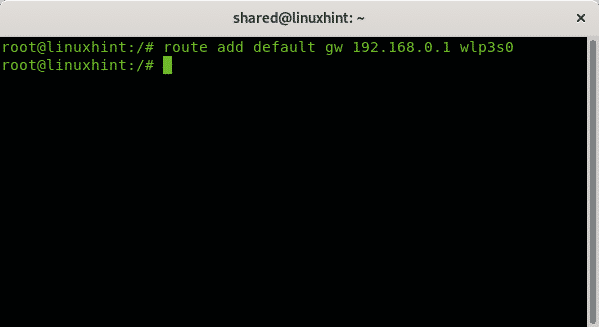
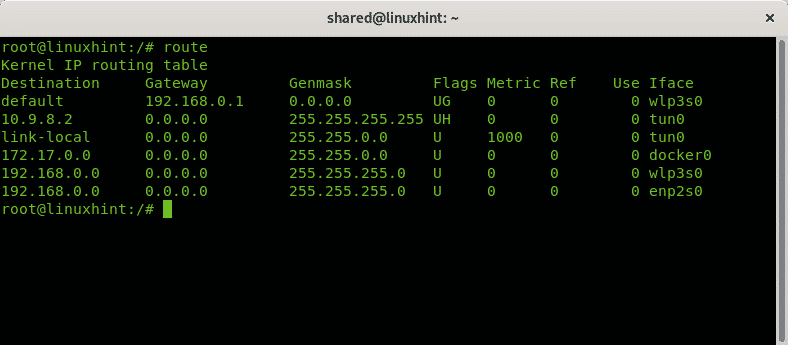
The route command
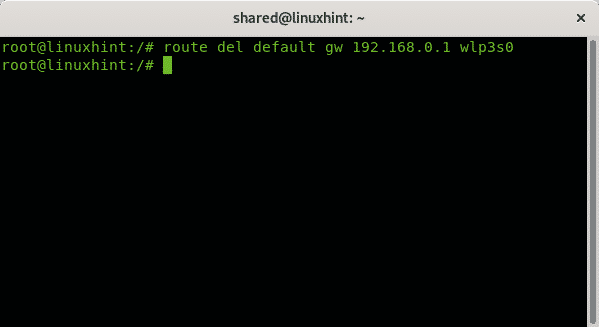
When joining a network which wasn’t properly configured to allow new devices to connect you will need to set a proper IP address, usually it will be manually through the command ip or ifconfig, to set the proper gateway using the command route and enable proper DNS, like 8.8.8.8 to access internet. The following example shows how to add and remove gateways.
To remove a defined gateway run:
In my case I ran:
To add a new gateway run:
To check your defined gateways run:
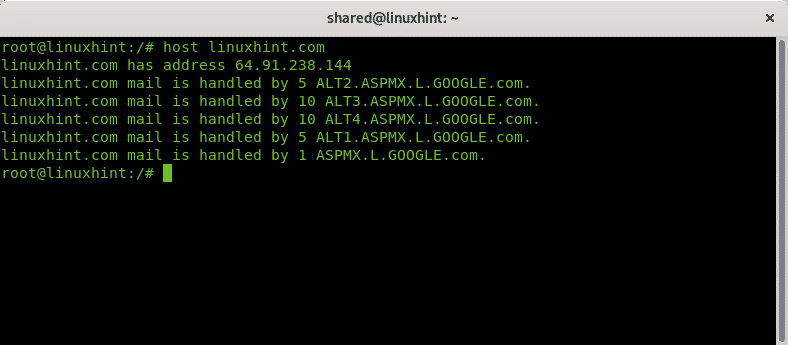
The host command
The command host is useful for domain name lookup, to learn the IP address of a specific domain name. For example, to learn linuxhint.com IP address just run
The netstat command
To end this tutorial lets see how to monitor our network traffic with the command netstat.
Run the command netstat without options:
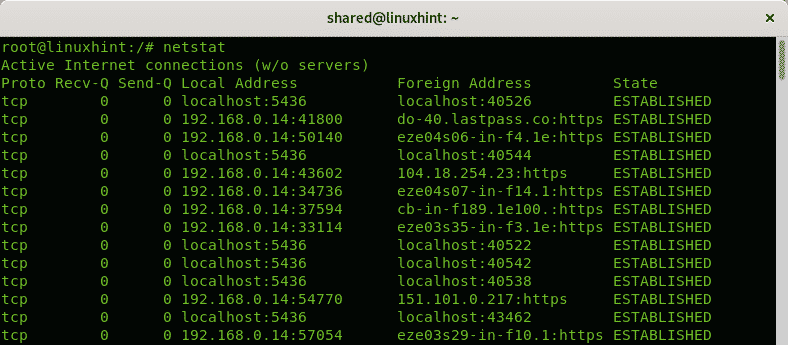
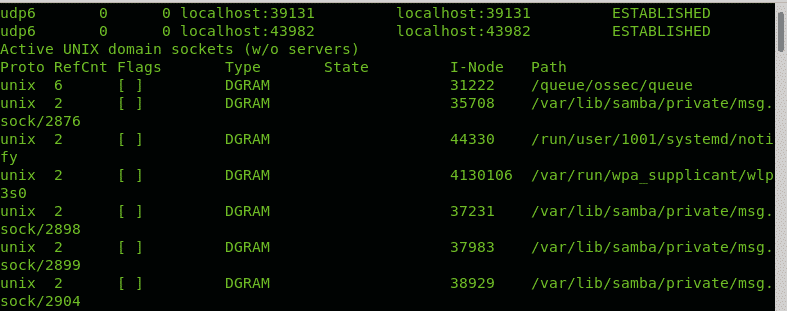
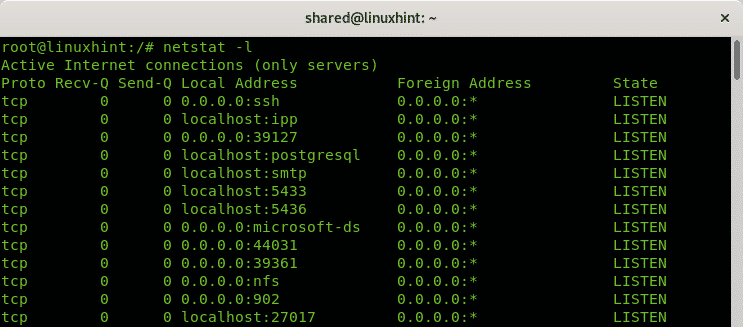
By default the netstat command will show ESTABLISHED connections, If you want to list the listening ports only run the command with the -l option:
By default, netstat will also list all TCP and UDP connections, if you want to show TCP connections, or listening ports only run:
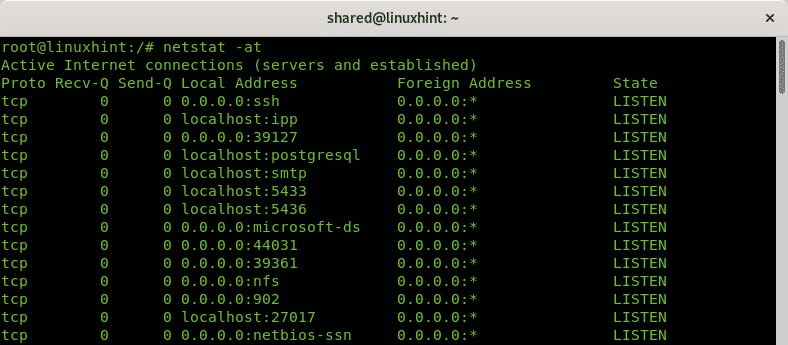
Note: the option -a prevents lookup to speed up results.
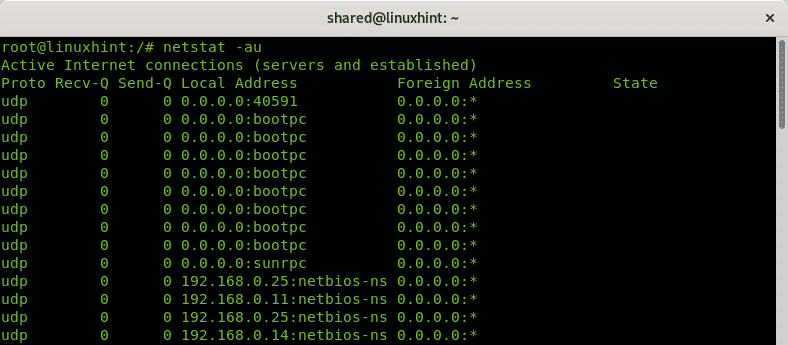
If you want to show UDP connections only then run:
I hope you found this article useful to learn basic network commands, learning them is a must for every Linux user to afford any network inconvenient. Keep following LinuxHint for more tips and updates on Linux and networking.
About the author
David Adams
David Adams is a System Admin and writer that is focused on open source technologies, security software, and computer systems.
Источник
14 Useful Linux Networking Commands
![]()
Geekflare is supported by our audience. We may earn affiliate commissions from buying links on this site.
Configuring, monitoring, and securing networks form an essential part of a Sysadmin’s job. When it comes to managing Linux networks, there are many commands and utilities available.
At times networked systems fail. You as an administrator are required to diagnose and resolve issues. Monitoring helps in detecting problems and fixing them before things get out of hand. Monitoring for security and performance also forms an essential part of an admin’s activities.
Here we discuss some commonly used commands to manage Linux networks.
The iproute2 package includes the IP command which is used for network and routing configuration. This replaces the traditional ifconfig and route commands.
ip takes a second argument that specifies the object on which you wish to execute a command and an action like add, delete, or show.
ip link
ip link is for configuring, adding, and deleting network interfaces. Use ip link show command to display all network interfaces on the system :
You can see the man page for ip link with:
ip address
Use ip address command to display addresses, bind new address or delete old ones. The man page ip address command is named as ip-address.
For example, the following command shows the IP address assigned to the network interface enp0s8:
ip route
Use the IP route to print or display the routing table. The following command displays the contents of the routing table:
While Nmap had been used in many movies, The Matrix Reloaded ( Wikipedia , IMDB , Amazon ) turned Nmap into a movie star!.
Nmap (“Network Mapper”) is a powerful utility used for network discovery, security auditing, and administration. Many system admins use it to determine which of their systems are online, and also for OS detection and service detection.
The default Nmap scan shows the ports, their state (open/closed), and protocols. It sends a packet to 1000 most common ports and checks for the response.
To check which hosts on your network are up:
Use -O flag to identify which operating system a host is running.
A word of caution: Nobody appreciates their systems being scanned over the internet. So before you do so, seek permission.
You can also use Nmap on Windows, check out this installation guide.
Use ping to see if a host is alive. This super simple command helps you check the status of a host or a network segment. Ping command sends an ICMP ECHO_REQUEST packet to the target host and waits to see if it replies.
However, some hosts block ICMP echo requests with a firewall. Some sites on the internet may also do the same.
By default, ping runs in an infinite loop. To send a defined number of packets, use -c flag.
With -o flag ping exits successfully after receiving one reply packet.
You can use -n flag to avoid reverse DNS lookups. The ICMP sequence number is particularly important. A Break in sequence numbers indicates lost packets.
A failed ping could be due to
- network failure
- host being not alive
- firewall blocking ICMP ECHO requests
You can also perform an online ping test to check the connectivity from different parts of the world.
iPerf
While ping verifies the availability of a host, iPerf helps analyze and measure network performance between two hosts. With iPerf, you open a connection between two hosts and send some data. iPerf then shows the bandwidth available between the two hosts.
You can install an iPerf using your distribution package manager. For example on Ubuntu-based distributions you can install like this:
Once you have installed iPerf on both the machines, start the iPerf server on one of them. The following example starts the iPerf server on a host with IP address 10.0.0.51.
On the second machine start iPerf with the -c flag. This connects with the server and sends some data.
iPerf returns with the bandwidth results in a few seconds.
traceroute
If ping shows missing packets, you should use traceroute to see what route the packets are taking. Traceroute shows the sequence of gateways through which the packets travel to reach their destination. For example, traceroute from my machine to google.com shows the following:
Line 4 in this output shows a * in the round trip times. This indicates no response was received. This can be due to many reasons – as the traceroute ICMP packets are low-priority, these may be dropped by a router. Or there could be simply congestion. If you see a * in all the time fields for a given gateway, then possibly the gateway is down.
Many web-based route tracing tools allow you to do a reverse traceroute, that is, from a website to your host. You can check these at traceroute.org or Geekflare Traceroute.
tcpdump
tcpdump is a packet sniffing tool and can be of great help when resolving network issues. It listens to the network traffic and prints packet information based on the criteria you define.
For example, you can examine all packets sent to or from a particular host, Ubuntu18 in this example:
By default, tcpdump resolves IP addresses to hostnames. Use -n flag, if you do not want tcpdump to perform name lookups.
tcpdump output prints one line for each packet. Use -c flag to limit output, 5 in the example above.
tcpdump is useful for solving network problems and also identifying potential problems. It is a good idea to run a tcpdump on your network occasionally to verify everything is in order.
netstat
Netstat command is used to examine network connections, routing tables, and various network settings and statistics.
Use -i flag to list the network interfaces on your system.
Here is an example:
Using -r flag will display the routing table. This shows the path configured for sending network packets.
An asterisk in the last two lines indicates that no gateway is required to send packets to any host on these networks. This host is directly connected to the networks 10.0.0.0 and 10.0.2.0.
In the first line, the destination is the default, which means any packet destined for a network not listed in this table is handled by the router 10.0.2,2.
netstat command without any options displays a list of open sockets. Use -l flag to show only listening sockets, which by default, are not shown. You can use -a flag to show listening and non-listening sockets. Here is an example:
More Netstat command example here
Linux installations have a lot of services running by default. These should be disabled or preferably removed, as this helps in reducing the attack surface. You can see what services are running with the netstat command. While netstat is still available, most Linux distributions are transitioning to ss command.
use ss command with -t and -a flags to list all TCP sockets. This displays both listening and non-listening sockets.
To display only TCP connections with state established:
ssh enables you to connect securely with remote hosts over the internet. Earlier rlogin and telnet were used to connect to and administer remote hosts. However, both suffer from a fundamental flaw, that is, they send all information including login names and passwords in cleartext.
ssh enables secure communication over the internet with the following two features :
- It confirms that the remote host is, who it says it is.
- It encrypts all communication between the hosts.
To connect to a remote host you need to have an OpenSSH server running on the remote host. You can install it using your distribution package manager. For example on Ubuntu you can install it like this:
Here is an example showing how you can connect to the remote host 10.0.0.50 using the ssh command:
You get a message saying that the authenticity of the host 10.0.0.50 cannot be established, this is because it’s the first time a connection is being made with 10.0.0.50 (server) and the ssh client has never seen this remote host before. Enter yes to continue connecting. Once the connection has been established, you are prompted for a password:
After you enter the correct password, you are logged into the remote host.
You can exit this remote shell with the exit command.
Also, you can easily execute a single command on the remote host using ssh. For example, to run df -h on the remote host:
scp and sftp
scp (secure copy) is very similar to cp command for copying files, with an addition – you can include remote hostnames in the source or destination pathnames. The hostname and the directory path are separated by a colon. This enables you to copy files securely over the network in an encrypted form. The following command copies a.txt from the local machine to 10.0.0.50 :
sftp (secure ftp) is also a file copy program similar to ftp . However, it uses an SSH encrypted tunnel to copy files, instead of sending everything in cleartext. Also, you do not need an FTP server running on the remote host. You only need an ssh server. Here is an example session:
Ifconfig
Mostly we use ifconfig command to check the IP address assigned to the system.
dig (Domain Information Groper) is a flexible tool for interrogating DNS name servers.
It performs DNS lookups and displays the answers that are returned from the name servers.
telnet
telnet connect destination’s host and port via a telnet protocol if a connection establishes means connectivity between two hosts is working fine.
nslookup
nslookup is a program to query domain name servers and resolving IP.
Summary
Networking in Linux is a vast subject, with a large number of commands and utilities. In this article, we have discussed some commonly used commands which hopefully, will help you in managing and securing your network.
Источник


