- IntelВ® FPGA Download Cable (formerly USB-Blaster) Driver for Linux
- Driver Setup on RedHat Linux Enterprise 5 and Above
- Driver Setup on RedHat Linux Enterprise 4 and Below
- Первый проект на FPGA Altera и подключение USB-Blaster в Linux
- Altera USB Blaster Driver Installation Instructions
- From Terasic Wiki
- Contents
- For Windows 10, do the following:
- For Windows 7 and Windows 8, do the following:
- For Windows Vista, do the following:
- For Windows XP, do the following:
- Fighting Altera USB-Blaster on Ubuntu
- Altera Quartus on Ubuntu 17.04
- (Re)Discovering USB Blaster
IntelВ® FPGA Download Cable (formerly USB-Blaster) Driver for Linux
The IntelВ® QuartusВ® Prime software and older versions of Intel Quartus development software use built-in usb_device drivers on Linux to access the Intel FPGA Download CableВ and theВ Intel FPGA Download Cable II. By default, root is the only user allowed to use these devices. You must change the permissions on the ports before you can use the Intel FPGA Download Cable or Intel FPGA Download Cable II to program devices with Intel Quartus development software.
You must have system administration (root) privileges to configure the Intel FPGA Download Cable drivers.
Select the appropriate RedHat Linux* Enterprise version for instructions on changing port permissions:
Driver Setup on RedHat Linux Enterprise 5 and Above
- Add the following lines to the /etc/udev/rules.d/51-usbblaster.rules file.
- Complete your installation by setting up the programming hardware in the software.
- Setting up programming hardware in legacy Intel Quartus development software
- Setting up programming hardware in the Intel Quartus Prime softwareВ
Driver Setup on RedHat Linux Enterprise 4 and Below
- Add the following lines to the /etc/hotplug/usb.usermap file.
- Create a file named /etc/hotplug/usb/usbblaster and add the following lines to it.
- Make the file executable.
- Complete your installation by setting up the programming hardware in the software.
- Setting up programming hardware in legacy Intel Quartus development software
- Setting up programming hardware in Intel Quartus Prime software
For more information, please refer to the following user guides:
Источник
Первый проект на FPGA Altera и подключение USB-Blaster в Linux
Продолжаем осваивать FPGA Altera. В первой части я описал процесс установки программного обеспечения Altera Quartus под CentOS7. Теперь уже наконец попробуем что-то сделать «железное», например светодиодики позажигаем. Но прежде небольшое вступление.
Одним из направлений моей деятельности является преподавание в кружке робототехники в небольшом городке Беларуси. Окунувшись во всю эту кухню и поучаствовав в разных конкурсах не только как тренер команды, но и как судья, я пришел к выводу, что ардуино в частности и микроконтроллеры в целом не самая лучшая база для конкурсных роботов (про лего вообще молчу). Многие задачи эффективней решать на уровне голой электроники. Кроме того 90% процентов кружков и «школ» робототехники не дают даже базовых знаний именно электроники, сосредоточившись чисто на «обучении» программированию готовых конструкций. Но чисто электронные роботы (например незаслуженно забытые BEAM) заточены под конкретную задачу и изменение условий конкурса приведет к необходимости существенной перестройки робота, что не всегда возможно. Вот тут я и вспомнил про программируемую логику. В результате поиска информации о применении ПЛИС в обучении я наткнулся на блог Юрия Панчула YuriPanchul. Пользуясь случаем я хочу публично выразить ему свою благодарность. Благодаря ему наш кружок совершенно бесплатно получил плату TerasIC DE0-CV c Altera Cyclone V на борту.
Собственно эта и последующие публикации будут представлять собой реальный учебный материал, который мы реализовываем на кружке. И я буду благодарен за конструктивную критику и замечания, так как применение ПЛИС на кружках для школьников — нехоженая пока область.
Итак, начинаем. В этой публикации будут описаны первые шаги в Quartus, описание элементарной цифровой логики на языке Verilog и загрузка конфигурации в FPGA Altera Cyclone V. Работать мы будем с платой TerasIC DE0-CV, которая имеет на борту встроенный USB-Blaster. Так же затронем и вопрос «запуска» USB-Blaster под Linux.
Запускаем Quartus:

Выбираем «Create a New Project». Запускается диалог мастера создания проекта. Тут просто нажимаем Next.
А теперь нам надо выбрать рабочую директорию для проекта (не забываем про права доступа!). Придумываем название проекта:
На следующем шаге нам предлагают добавить в проект дополнительные файлы. На данном этапе нам это не нужно, но в будущем для облегчения работы стоит добавлять как минимум файл назначения выводов.
Теперь настало время важных настроек. На этом шаге нам надо выбрать кристалл, под который пишется проект. В принципе если вы ошибетесь или захотите перекомпиллировать проект под другое устройство — это можно будет исправить позже.
Здесь нам предлагают выбрать дополнительные инструменты. Мы пока оставляем все как есть и жмем Next.
Ну вот, мы выполнили первоначальные настройки и создали проект. Жмем Finish.
Теперь нам нужно создать файл, описывающий логику проекта. Заходим в меню File/New, появляется диалог в котором требуется выбрать тип файла. В принципе логику можно нарисовать в специальном графическом редакторе, но сейчас мы выбираем Verilog HDL File:
Файл создан, пишем текст нашей программы, описывающей элементы NO, AND, OR, XOR. В качестве входов используем, имеющиеся на плате переключатели (key*), а состояние выхода индицируем светодиодами (led*). Небольшая ремарка: производитель платы предлагает создать конфигурационный файл для входов-выходов в специальной программе, работающей только под Windows. Если пойти этим путем, то надо следить чтобы имена «проводов» и «регистров» в программе совпадали с таковыми в конфигурационном файле. Но мы сейчас будем делать все вручную, поэтому вольны выбрать любые имена.
Теперь сохраняем файл. Важный момент — для корректной работы необходимо, чтобы имя файла совпадало с именем модуля, описываемого в программе (В нашем примере basic_logic).
Теперь необходимо сделать ряд настроек для успешной компиляции проекта. Во-первых укажем, какой модуль у нас главный явным образом. Конкретно в этом проекте это не актуально, но для сложных проектов с множеством модулей этот шаг обязателен. Заходим в меню Project/Set As Top Level Entity. Готово. Далее надо сделать ряд настроек для конкретного кристалла. Выберем пункт меню Assignments/Device. Открывается диалог, в котором мы имеем возможность изменить тип кристалла (или проверить, что ранее мы его указали верно):
Теперь жмем кнопку Device and Pin Option и в открывшемся диалоге в первую очередь зададим состояние для неиспользуемых выводов. По умолчанию все неиспользуемые контакты микросхемы подключаются к нулю по питанию. Но мы не знаем, как эти выводы разведены физически на плате и такая конфигурация может привести к короткому замыканию и выходу из строя чипа. Поэтому безопасней неиспользуемые выводы сделать входами с высоким сопротивлением — As input tri-stated
Следующий необходимый шаг — указать, какие физические ножки микросхемы соответствуют входам и выходам описанного нами модуля. Для этого идем в меню Assignments/Assignment Editor. В открывшемся окне делаем нужные нам назначения согласно схеме нашей платы. В колонке To вписываем имя входа или выхода. В колонке Assignment Name выбираем из списка нужную нам настройку Location. В колонке Value вписываем название контакта микросхемы:
Закономерный вопрос: откуда берется название контактов? Обычно в даташите на плату или конкретную микросхему есть табличка PIN OUT. Так же, как я ранее писал, с платой может идти специальная программа, создающая конфигурационный файл. А сейчас вы можете воспользоваться этими данными:
Наконец-то можно нажать кнопочку Start Compilation!
Получаем 16 warnings. Ничего серьезного.
Можно посмотреть репорт:
Теперь подключаем плату и запускаем программу программатора: Tools/Programmer. Линукс автоматически подхватывает USB-Blaster, но прошивка не работает… Что же, открываем любимую консоль, вооружаемся бубном и погружаемся в документацию к Quartus…
Для начала убеждаемся, что система видит программатор:
Переходим в папку /etc/profile.d/ , где создаем файл custom.sh
А затем в папке /etc/udev/rules.d/ файл с названием 51-usbblaster.rules И наполняем его
смыслом:
Теперь все работает и прошивка прекрасно вгружается в чип:
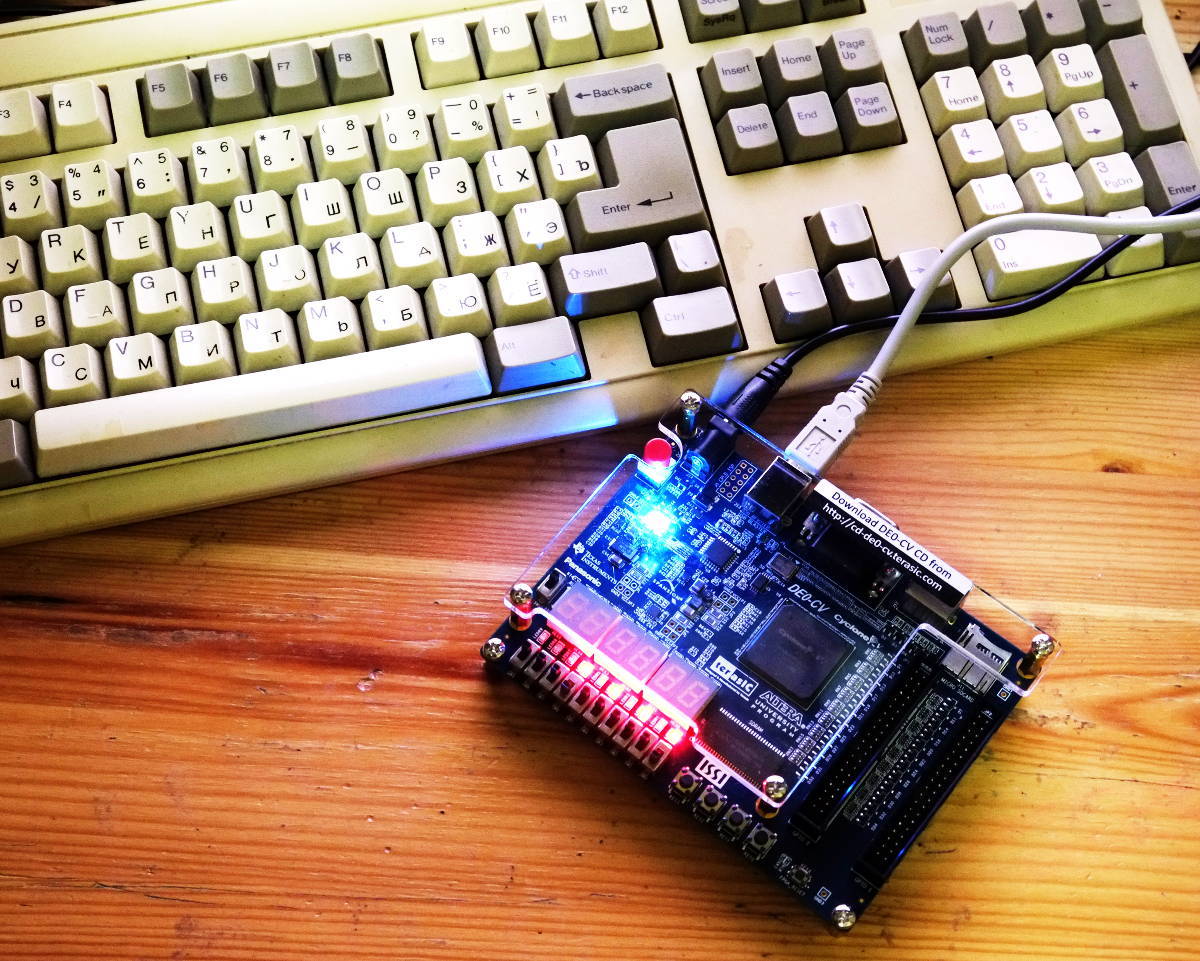
Любуемся результатом, играемся переключателями, мигая светодиодиками:
Источник
Altera USB Blaster Driver Installation Instructions
From Terasic Wiki
To install the driver for your USB Blaster cable, follow the instruction for your particular operating system.
Contents
For Windows 10, do the following:
- Plug the USB-Blaster into your PC.
- Open the Device and Printers (Control Panel | Devices and Printers).
- Under Unspecified, USB Blaster should be listed. Right mouse click on this and then select Properties.
- Select the Hardware tab and select Properties.
- A new window should pop up with the General tab already selected. Select Change Settings.
- Again a new window should pop up with the General tab already selected. Select Update.
- Select Browse my computer for driver software.
- Find
\quartus\drivers\
- (Note 1: Your altera file is located at the location you selected when you first installed quartus. The location listed in this document is the default location)
- (Note 2: Stop at the drivers folder, i.e., do NOT go deeper by opening a folder within the drivers folder)
- Select OK. Make sure the proper path was selected then select Next.
- If the Windows security window pops up Check the Always trust software from “Altera Corporation”box and select Install.
For Windows 7 and Windows 8, do the following:
- Plug the USB-Blaster download cable into the PC. The following will appear on the screen: Device driver software was not successfully install. Select Click here for details.
- Select Change settings…
- Now cancel this (probably by selecting Cancel)
- Open the Device Manager (Windows Key | Control Panel | Device Manage)
- Under Other devices, USB Blaster should be listed. Right mouse click on this and then select Update Driver Software…
- Select Browse my computer for driver software
- Find
\quartus\drivers\, then select Next; (Note: Stop at this folder, i.e., do NOT go deeper by opening a folder within the drivers folder)
For Windows Vista, do the following:
- Plug the USB-Blaster download cable into the PC. The Found New Hardware dialog box appears.
- Select Locate and install driver software (recommended).
- Select Don’t search online.
- When you are prompted to Insert the disc that came with your USB-Blaster, select I don’t have the disc. Show me other options.
- Select Browse my computer for driver software (advanced) when you see the Windows couldn’t find driver software for your device.
- Click Browse. and browse to the
\drivers\usb-blaster directory. Click OK.
For Windows XP, do the following:
- Plug the USB-Blaster download cable into the PC. The Found New Hardware dialog box appears.
- Select Locate and install driver software (recommended).
- Select Don’t search online.
- When you are prompted to Insert the disc that came with your USB-Blaster, select I don’t have the disc. Show me other options.
- Select Browse my computer for driver software (advanced) when you see the Windows couldn’t find driver software for your device.
- Click Browse. and browse to the
\drivers\usb-blaster directory. Click OK.
When The software for this device has been successfully installed appears, click Close. If you are running Windows in 64-bit mode, you MUST boot your computer as following both when installing the USB-Blaster driver AND when using Quartus to program your PLD.
-
- During boot up of the computer, continuously press F8 (but do NOT hold it down).
- Scroll down to “Disable Driver Signature Enforcement,” then hit Enter.
You must set up the driver before programming your PLD (CPLD or FPGA)
Источник
Fighting Altera USB-Blaster on Ubuntu
Today I was really surprised by realizing that Quartus Prime Programmer doesn’t see USB blaster connected to my laptop and cant program the FPGA from linux OS. It took me good couple of hours to figure out how to marry USB blaster with Programmer app on my Ubuntu 17.04 install. Unfortunately, Altera USB Blaster User Guide doesn’t shed any light on this problem so I had to find my own way out.
Altera Quartus on Ubuntu 17.04
If you already have Quartus up and running on your linux you can skip to the next part where actual USB Blaster problems and configuration is described.
Let’s start from the beginning during active debug and testing we decided it is bad practice to disconnect test board and run back and force between computer every time firmware is changed so I decided to have running version of Quartus on my development laptop. From my previous experience I know it runs nice and easy in Windows environment, so I tried to run with wine. And surprise, surprise it doesn’t work from wine. Not a biggie, heading up to Altera Download Center and downloading Linux distro. Quartus setup is straight forward. Libpng or something like that is missing.
fixed the problem and we’re ready to roll.
Running the icon on the desktop did nothing. Ok, it seems like Quartus had been installed into my home folder, console command
actually starts Quartus:

Kinda inconvenient to type in full path to the quartus every time you need it, but I can understand, they are making FPGAs, not the linux software. Now I can create an alias to run it via full path by typing quartus, but I’m suspecting it’ll need access to the bin folder later on so adding Quartus’s bin folder on the PATH. To do that edit your
/.profile with nano or whatever text editor you like:
Add this at the end of file:
Save file, log out, log back in and type quartus in the console. Now it starts right away, good deal!
Now creating new project, adding files, compiling source code, etc. A lot of USB blaster unrelated actions been taken to bring project into ready-to-program state. I will post another article with all these steps explaining how to create a project and and compile AtomMiner project in Quartus later when we publish Verilog sources on the GitHub.
(Re)Discovering USB Blaster
Now that the project is done it is time to program it into the FPGA board and start testing. You can access Quartus Programmer from the main menu, or by typing quartus_pgmw —64bit in command line. Programmer interface opens up, but there’s no compatible hardware detected. Unplugging test board, plugging it back in and no result. Does it look familiar?

Now I gotta find my USB Blaster and figure out how to make programmer app to talk to it. For that, unplug test board, plug it back in and type on the command line:
Great news! USB Blaster is here and recognized by the system, let’s go ahead and verify it is still there:
Perfect! The Blaster is here, it is connected and seems to be operational. I’ve noticed idVendor and idProduct looks way too familiar. Quick google search shows that they are just using FTDI chip on board as an USB Blaster, which supposedly makes things easier. On most linux installs users don’t have raw access to any physical port. In our case we’re looking at FTDI’s USB-Serial type of port. Typical work around for that problem is to run whatever you need as root . This is real bad practice though due to security issues, but let’s give it a shot. sudo quartus_pgmw —64bit brings up programmer interface but USB blaster is still not on the list of available hardware. Do not run any application as root unless you’re 100% sure this app has to have root access.
Closer look at programmer tool shows that it is just a GUI over jtagd daemon, that does all the programming and communication. Quartus’s bin folder contains 2 files we need to look at jtagconfig and jtagd . jtagconfig talking to the jtag daemon and only shows jtagd doesn’t see connected board:
Further investigation showed that jtagd is being started as me, while system is blocking access to the blaster for security reason. Temporary solution was to kill JTAG daemon and start it as root:
Finally, I’ve got some progress programming my test board:
Bingo! Now Quartus Programmer starts and you can program FPGA as if you would use it in windows environment. Job is done except for the fact that jtagd is still running as root and I’ll have to kill and restart it as superuser every time I restart my laptop. I can live with jtagd being started manually if it wasn’t running as root, so while FPGA is programmed and being tested in background, it is perfect time to setup permissions so jtagd can talk to USB Blaster while started as me once and forever.
To setup permissions in the right way we need to know what library or driver is being used by jtagd daemon to communicate with FPGA. For that, you can look at files accessed by jtagd process:
Highlighted line shows that jtagd is using old good system libudev. Now we need to create rules for libudev so any user can access USB Blaster. According to Altera website idProduct for USB Blaster can be one of the following 6001, 6002, 6003, 6010, 6810 so I’ll add them all to libudev rules in case I’ll have to work with different type of USB blaster down the pipeline.
For the changes to take effect reboot your PC or run following command if you have it:
If jtagconfig doesn’t show your FPGA/board name you might have to copy board description file to jtag config and restart jtagd:
Done is done! Now you can start Quartus Programmer at any time and upload your updated firmware to connected board like you always do with just a few mouse clicks.

Basically, the same steps will work on any linux installation since all the steps and commands are common for most *nix distributives.
As a bonus, here’s the bash script that will do all the necessary steps for you: usbblaster.sh on GitHub:
Please leave your OS name and version along with Quartus version you’re using in comments if this script didn’t work for you, so I can update it.
If you find any of provided information helpful or just want to support our project, please donate:
BTC 1BBZMp3qouKY2MHx3vbosmPinTLMeU9C9u
DOGE DMLrv8ZT2NfPUZUtPmGMJq9DvuQsH82QLN
LTC LQ1QLdRjj1uf2MDiiMA3xLuEoLHBSeyvFU
Источник


