- Amd driver linux manjaro
- Запуск live-usb со сгорервшей дискретной видеокартой
- amd turboboost
- Зависет система при использовании DRI_PRIME=1 на amd
- Configure Graphics Cards
- Содержание
- Identifying Available Drivers
- Installing a Driver
- Force Reinstall a Driver
- Identifying Installed Drivers
- Removing Installed Drivers
- PRIME GPU offloading
- Nvidia Optimus
- Configure The Resolution/Refresh Rate
- Configure X Screen settings (OpenGL Settings, Antialiasing, X Server XVideo)
- Nvidia settings for special cases
- nvidia-prime
- Bumblebee
- AMD Catalyst
- Contents
- Selecting the right driver
- Installation
- Installing the driver
- Installing from the unofficial repository
- Installing from the AUR
- Configuring the driver
- Configuring X
- Loading the module at boot
- Disable kernel mode setting
- Checking operation
- Custom kernels
- PowerXpress support
- Running two X servers (one using the Intel driver, another one using fglrx) simultaneously
- Issues with PowerXpress laptops running in AMD mode (pxp_switch_catalyst amd) with external / secondary monitor
- Xorg repositories
- xorg117
- xorg116
- Catalyst-hook
- Catalyst-generator
- OpenCL and OpenGL development
- amdapp-aparapi
- amdapp-sdk (formerly known as amdstream)
- amdapp-codexl
- Features
- Tear Free Rendering
- Video acceleration
- GPU/Mem frequency, Temperature, Fan speed, Overclocking utilities
- Double Screen (Dual Head / Dual Screen / Xinerama)
- Introduction
- ATI Catalyst Control Center
- Installation
- Configuration
- Uninstallation
- Troubleshooting
- Failed to start atieventsd.service
- Failed to open fglrx_dri.so
- GDM fails to start
- 3D Wine applications freeze
- Compiz
- Problems with video colours
- KWin and composite
- Black screen with complete lockups and/or hangs after reboot or startx
- Faulty ACPI hardware calls
- KDM disappears after logout
- Hibernate/Sleep issues
- Video fails to resume from suspend2ram
- System freezes/Hard locks
- Hardware conflicts
- Temporary hangs when playing video
- «aticonfig: No supported adapters detected»
- WebGL support in Chromium
- Lag/freezes when watching flash videos via Adobe’s flashplugin
- Lag/slow windows movement in GNOME3
- Not using full screen resolution at 1920×1080 (underscanning, black borders around the screen)
- Dual Screen Setup: general problems with acceleration, OpenGL, compositing, performance
- Disabling VariBright feature
- Hybrid/PowerXpress: turning off discrete GPU
- Switching from X session to TTYs gives a blank screen/low resolution TTY
- Switching from X session to TTYs gives a black screen with the monitor backlight on
- Switching to TTYs then back to X session gives a black screen with a mouse cursor
- 30 FPS / Tear-Free / V-Sync bug
- Backlight adjustment does not work
- Chromium glitching when using plasma
- Xorg crashes
- Unsupported Xorg Version
Amd driver linux manjaro
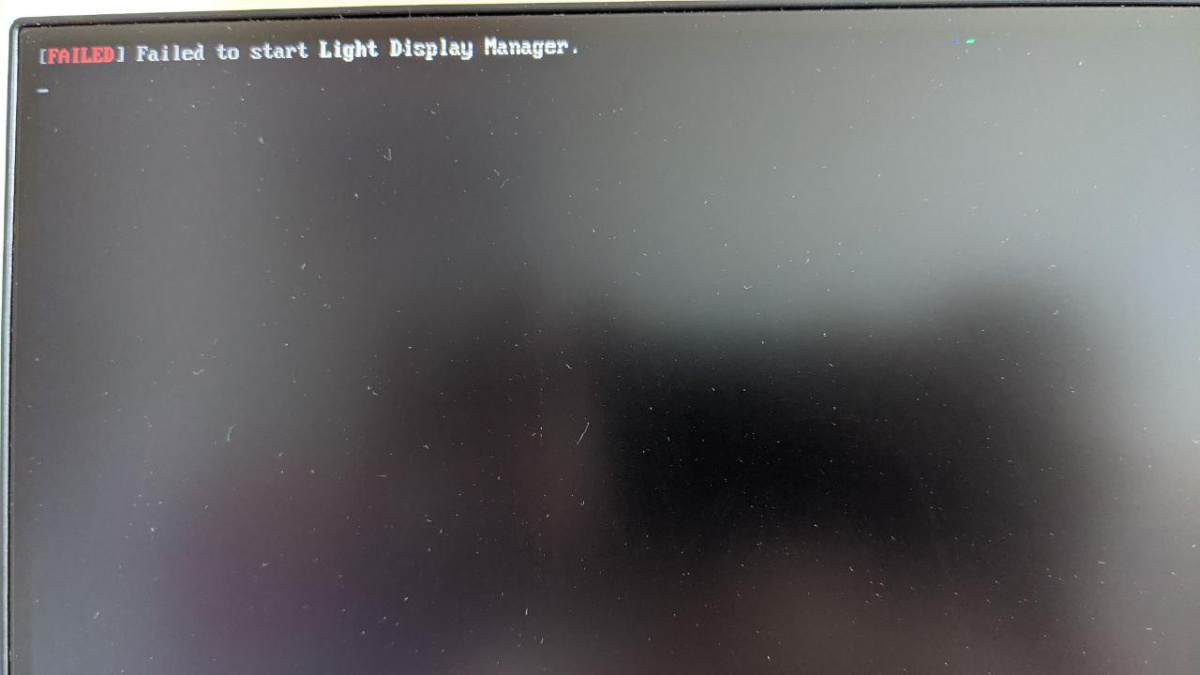
Это бывает часто. На некоторых версиях ядра система загружается на 5-7 раз. На некоторых ошибка появляется при загрузке раз в 5-7 нормальных загрузок. Я пробовал проприетарные драйвера, возвращался на открытые. Менял видеокарты, вместо Vega 56 ставил Geforce 1060, но ничего не помогает. Ошибка появляется снова и снова, на разных версиях ядра и разных видеокартах.
Очень боюсь, что в один прекрасный момент система перестанет загруужаться. Сейчас использую ядро 5.10.60-1-MANJARO и на нём ошибка проявляется нечасто.
Пожалуйста помогите победить проблему?
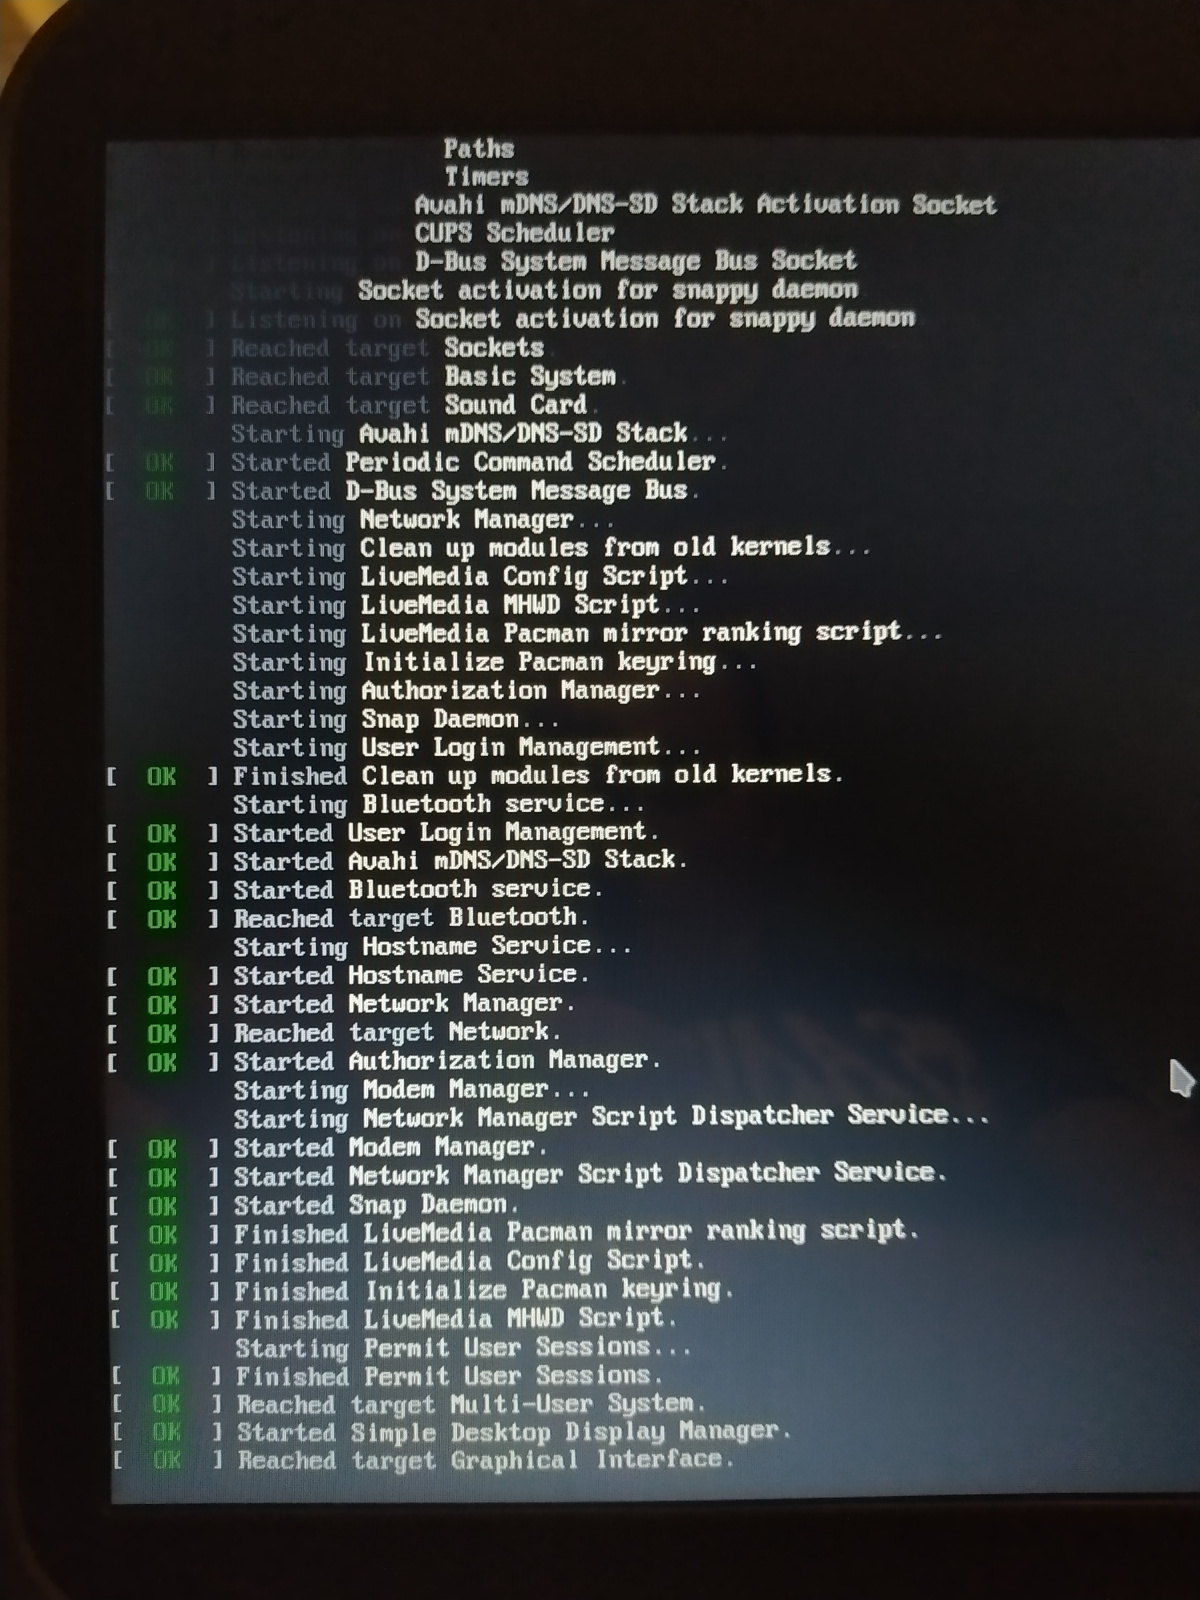
Запуск live-usb со сгорервшей дискретной видеокартой
amd turboboost
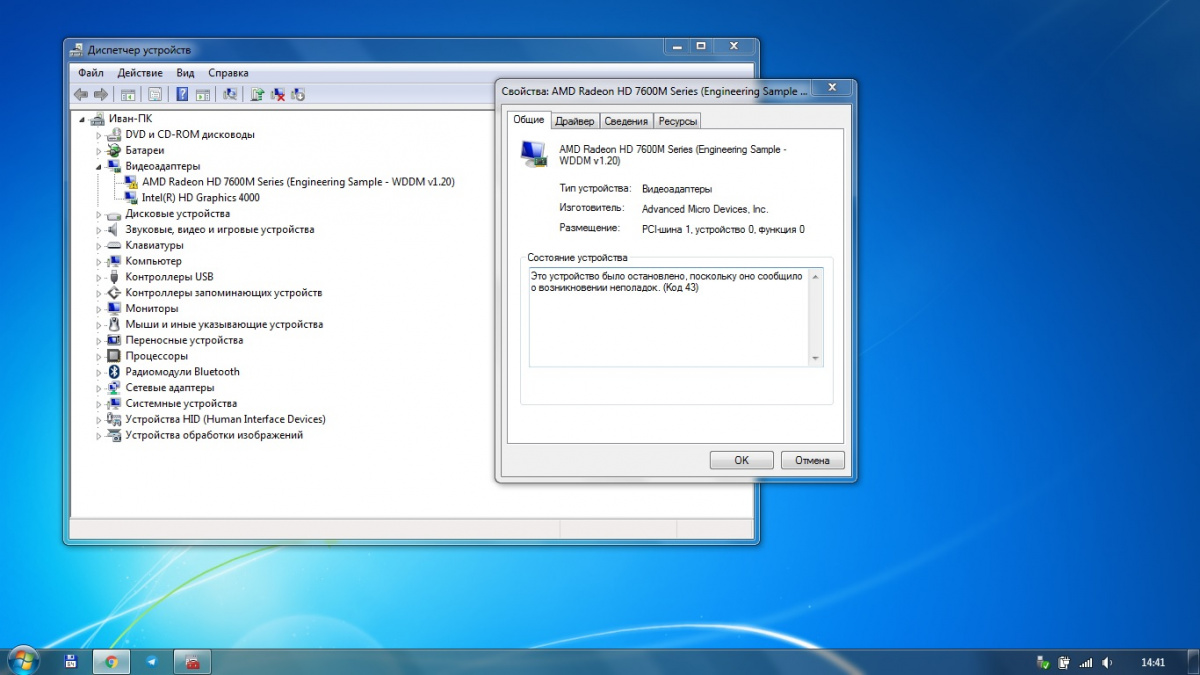
Зависет система при использовании DRI_PRIME=1 на amd
OS: Manjaro Linux x86_64
Host: 20388 Lenovo B50-45
Kernel: 5.8.0-2-MANJARO
DE: GNOME 3.36.4
WM: Mutter
CPU: AMD A8-6410 APU with AMD Radeon R5 Graphics (4) @ 2.000GHz
GPU: AMD ATI Radeon R4/R5 Graphics (встройка)
GPU: AMD ATI Radeon HD 8550M / R5 M230 (дискретка)
Система видит обе видеокарты
Когда я использую DRI_PRIME=1, и когда не использую, у меня показываются разные видеокарты
Но стоит мне запустить любую программу не текстового вида, например
И у меня сразу же зависает система (даже тту сменить невыходит), как сделать что бы система не зависала при DRI_PRIME=1?
Источник
Configure Graphics Cards
Содержание
Where installing the full version of Manjaro (i.e. complete with a pre-installed desktop environment, codecs, and software applications), the mhwd command will be automatically run by the GUI and CLI installer to automatically detect your graphics card and install the most appropriate driver for it. Whether free or proprietary drivers are installed will depend on your initial choice of using free or nonfree graphics drivers to boot up. Otherwise, it will be necessary to run the mhwd command manually as part of the post-installation process for the minimalistic NET-Edition of Manjaro.
For Beginners, it is recommended to use «Hardware Detection» in Manjaro Settings Manager to change or install new graphics drivers.
For intermediate and advanced users, it is also possible to use the mhwd command to install, re-install, and remove installed graphics drivers at any time, as illustrated below.
This is the recommended method for the detection and installation of graphics drivers. The syntax for the automated installation method is:
A breakdown of the command used for the automated method is as follows:
- -a: Automatically detect and install the appropriate driver
- [pci or usb]: Install the appropriate driver for devices connected internally via pci, or externally via usb (again, mhwd currently only supports pci connections at this stage in its development)
- [free or nonfree]: Install either free drivers (e.g. provided by the Linux community), or nonfree drivers (e.g. provided by hardware manufacturers)
- 0300: Identify that a driver is to be installed for a graphics card (0300 is the ID for graphics cards. As the mhwd command develops, new ids will be used for other hardware devices).
For example, the following command would result in the automatic detection and installation of the best available proprietary driver for a pci-connected graphics card:
Otherwise, the following command would result in the automatic detection and installation of the best available free driver for a pci-connected graphics card:
Taking a do-it-yourself approach is itself relatively easy and straightforward using the mhwd command. This should be undertaken in two stages:
1. Identify the appropriate driver to be installed, and then
2. Install the driver
Identifying Available Drivers
Prior to manually installing a graphics driver, it will be necessary to identify what drivers are available for your system. To list the appropriate drivers available, the basic syntax is:
Using this command without the additional options will list basic information for all the available drivers for devices connected to your system. All drivers graphics card drivers will have the prefix (video-) in their name. The basic information provided for all listed drivers will be:
- Name
- Version
- Free or proprietary, and
- PCI or USB connection
A more detailed list of installed drivers can be obtained by entering:
A detailed list will provide the following information:
- Name
- Version
- PCI or USB connection
- Description
- Priority
- Free or proprietary
- Dependencies
- Conflicts
- Class ID (e.g. ‘0300’ for graphics card drivers), and
- Vendor ID
In addition, using the —pci filter in the following example will list detailed information for only the drivers available for devices (e.g. graphics cards) using an internal PCI connection:
Installing a Driver
To install a driver for a graphics card, the syntax is:
A breakdown of the command used to manually install a driver is as follows:
- -i: Install a driver
- [pci]: Install a driver for a device connected internally via pci (e.g. graphics cards)
- [name of driver]: The name of the driver to be installed
For example, to install the proprietary nvidia graphics card driver, the following command would be used:
Force Reinstall a Driver
To force the re-installation of an existing driver without removing it first, the syntax is:
For example, to force the re-installation of a previously installed nvidia graphics card driver, the following command would be used:
On occasion it may be necessary to remove an installed graphics card driver. Similarly to manually installing a graphics card driver, two steps should be undertaken for removal:
1. Identify the installed driver
2. Remove the identified driver
After all, it would be somewhat difficult to remove an installed driver if you don’t know what it’s called!
Identifying Installed Drivers
To identify and list Manjaro’s installed drivers — including the graphics driver to be removed, the syntax is:
Using this command without the additional options will list the basic information of all the drivers currently installed on your system. Once again, all drivers for graphics cards will have the prefix (video-) in their name. As with listing drivers available for your system, the -d option used in the following command will list detailed information:
This information may prove useful to determine any otherwise unforeseen consequences or problems upon removing a driver. And again, it is also possible to filter your list of installed drivers by whether they are used on hardware connected via pci or usb. In this instance, a detailed list will be generated only for installed drivers used on hardware with a PCI connection:
One other way of reporting drivers installed andin use is using the inxi tool.
Removing Installed Drivers
To remove an installed driver, the syntax is:
For example, to remove the installed driver for a nvidia graphics card (connected internally via pci), the following command would be used:
You can check configuration with:
And if needed fix issues with:
Make sure the path to xorg config file is valid.
Note about ati, xorg file and login artifacts or kicad: if you get artifacts upon logging in or if kicad rendering and zooming is slow, try adding [Option «EXAPixmaps» «off»] in the «Device» section of xorg config file. See here.
PRIME GPU offloading
If your hardware includes more than one GPU card you can make use of PRIME offloading. PRIME is a technology used to manage hybrid graphics found on recent desktops and laptops (Optimus for NVIDIA, AMD Dynamic Switchable Graphics for Radeon). PRIME detects both cards and automatically selects Intel card by default; using the more powerful discrete graphics card, when called, for more demanding applications.
In Manjaro this will automatically be available for hybrid graphics systems using intel/modesetting for the integrated card and free drivers (AMDGPU or Nouveau) for the dGPU.
You may choose to run a program with a specific GPU, prepending the application’s command with DRI_PRIME=x, where x is the card priority number.
For example, to run an application using the second card prepend the application command with DRI_PRIME=1
To use the 1st card (usually when the CPU has an embedded GPU, this is used)
If you want to always run some application with the discrete gpu, you may copy that application’s .desktop file to
/.local/share/applications/ and edit the «Exec» property
Some applications (usually games like steam) may have an embedded option to specify the command line, where it is preferred to use this way.
For example, in Steam, select a game — that you want to run using your discrete Nvidia card — from the Library page of the Steam client, right-click, and select Properties. Click the SET LAUNCH OPTIONS. button and specify for the command line options followed by the default launch hook %command%.
To use the dGPU by default see Reverse Prime
If you have a Nvidia card, you have the option to use the proprietary (closed source = non-free) drivers instead of the open source (free) nouveau driver.
For Legacy/older nvidia cards, Manjaro maintains older drivers for compatibility. In these cases the driver name is different, instead of nvidia it is nvidia-390xx or nvidia340xx, whether in nvidia-only or bumblebee mhwd driver configuration.
When you install the non-free driver, mhwd includes a Nvidia utility «Nvidia Settings Utility» that can help you configure several settings. You can find this utility in your GUI Applications Menu or start it from a terminal
If you are using bumblebee, the nvidia utility needs a special command
Nvidia Optimus
For Optimus laptops or dual GPU hardware with intel and nvidia GPUs, you have three options to utilize the card driver usage at your preference or your hardware capabilities.
When you install Manjaro with the non-free option selected from Grub menu, or when you use automatic driver installation, PRIME or bumblebee is installed by default, depending on support for your GPU, PRIME being preferred. In these cases, the mhwd driver is named «video-hybrid-intel-nvidia-***xx-prime» or «video-hybrid-intel-nvidia-***xx-bumblebee».
Configure The Resolution/Refresh Rate
1. Start nvidia-settings utility
2. Change resolution and refresh rate in ‘X Server Display Configuration’ tab.
3. Hit the ‘Save to X Configuration File’ button and save to /etc/X11/mhwd.d/nvidia.conf
4. Now start your terminal and enter the following command to complete the process:
Configure X Screen settings (OpenGL Settings, Antialiasing, X Server XVideo)
1. Start nvidia-settings utility
2. Change settings in X Server XVideo Settings, OpenGL and Antialiasing, in the ‘X Screen’ tab.
3. Click on ‘nvidia-settings configuration’ tab and click on the ‘Save Current Configuration’ button.
4. Save the .nvidia-settings-rc to the default location specified (/home/[your account name])
5. Edit the .xinitrc file with your preferred text editor. For example, if you use gedit, run this in your terminal:
6. Once opened, add the following line into the configuration file:
Nvidia settings for special cases
In case your monitor is not entering powersave mode (DPMS), try adding `Option «HardDPMS» «true»` in your Xorg monitor section. For example:
nvidia-prime
Manjaro also offers an easy way to use PRIME with proprietary Nvidia drivers.
Simply select and install an ‘nvidia-prime’ profile through MSM or mhwd (such as video-hybrid-intel-nvidia-440xx-prime) and ensure the package nvidia-prime is installed.
Then to use the discrete Nvidia card it works the same as PRIME offloading above but uses a different command. Prepend the application command with prime-run. For example:
Bumblebee
Bumblebee configuration is mainly developed to help minimize laptop battery consumption, since Nvidia usually consumes significant power, while Intel cards are more power efficient. So, bumblebee detects both cards and automatically selects Intel card by default and can use the Nvidia for more demanding applications. For an application to use the Nvidia card, prepend the application command with optirun or primusrun. For example:
If you want to specifically run some application with the nvidia driver, you may edit that application’s .desktop file «Exec» property, or run it in terminal like this
Some applications (usually games like steam) may have an embedded option to specify the command line, where it is preferred to use this way.
For example, in Steam, select a game — that you want to run using your discrete Nvidia card — from the Library page of the Steam client, right-click, and select Properties. Click the SET LAUNCH OPTIONS. button and specify for the command line options followed by the default launch hook %command%.
If you have problems with a bumblebee setup, refer to this Forum Tutorial for advice.
Источник
AMD Catalyst
 This article is being considered for archiving.
This article covers the now legacy AMD proprietary Catalyst driver.
Contents
Selecting the right driver
Depending on the card you have, find the right driver in Xorg#AMD. This page has instructions for Catalyst and Catalyst legacy.
Compared with the open source ATI driver, Catalyst performs generally worse in 2D rendering, equal in 3D rendering and has better power management but lacks efficient multi-head support. Catalyst supports OpenCL 2.0 which is the main difference between it and the open source driver. Supported devices are Radeon video cards with chipsets from R600 to Volcanic Islands (HD 2xxx to Rx 300). See the Release notes, Xorg’s decoder ring or this list to translate model and code names.
Installation
There are three ways of installing Catalyst on your system. One way is to use Vi0L0’s (Arch’s unofficial Catalyst maintainer) repository. This repository contains all the necessary packages. The second method you can use is the AUR; PKGBUILDs offered here are also made by Vi0L0 and are the same he uses to built packages for his repository. Lastly, you can install the driver directly from AMD.
Before choosing the method you prefer, you will have to see which driver you need. For Radeon HD 5xxx to Rx 300, there is the regular Catalyst driver. The Radeon HD 2xxx, 3xxx and 4xxx cards need the legacy Catalyst driver. Regardless of the driver you need, you will also need the Catalyst utilities.
Installing the driver
Installing from the unofficial repository
If you do not fancy building the packages from the AUR, this is the way to go. The repository is maintained by our unofficial Catalyst maintainer, Vi0l0. All packages are signed and are considered safe to use. As you will see later on in this article, Vi0L0 is also responsible for many other packages that will help you get your system working with your ATI graphic cards.
Vi0L0 has three different Catalyst repositories, each having different drivers:
- catalyst [broken link: invalid section] for the regular Catalyst driver needed by Radeon HD 5xxx to Rx 300, it contains the latest beta release (Catalyst 15.12).
- catalyst-stable for the regular Catalyst driver needed by Radeon HD 5xxx to Rx 300, with the latest stable release (Catalyst 15.9).
- catalyst-hd234k [broken link: invalid section] for the legacy Catalyst driver needed by Radeon HD 2xxx, 3xxx and 4xxx cards (Catalyst 12.4).
Before adding any repositories, xorg-server should be installed first. Follow the instructions in Unofficial user repositories to add the catalyst repository and a repository from #Xorg repositories then perform a downgrade with pacman -Syuu . Vi0L0 commented on 2017-03-14 19:32. Remember to add the chosen repository above all other repositories in /etc/pacman.conf .
Once Xorg is downgraded, install these packages (see #Tools for more information):
- catalyst-hook
- catalyst-utils
- catalyst-libgl
- opencl-catalyst — optional, needed for OpenCL support
- lib32-catalyst-utils — optional, needed for 32-bit OpenGL support on 64-bit systems
- lib32-catalyst-libgl — optional, needed for 32-bit OpenGL support on 64-bit systems
- lib32-opencl-catalyst — optional, needed for 32-bit OpenCL support on 64-bit systems
catalyst-hook requires libxfont which can be downloaded from the Arch Linux Archive and installed by Arch Linux Archive#How to downgrade one package.
Installing from the AUR
The second way to install Catalyst is from the AUR. If you want to build the packages specifically for your computer, this is the way to go. Note that this is also the most tedious way to install Catalyst; it requires the most work and also requires manual updates upon every kernel update.
All packages mentioned above in Vi0L0’s unofficial repository are also available on the AUR:
The AUR also holds some packages that are not found in any of the repositories. These packages contain the so-called Catalyst-total packages and the beta versions:
The catalyst-total AUR [broken link: package not found] packages are made to make the lives of AUR users easier. It builds the driver, the kernel utilities and the 32 bit kernel utilities. It also builds the catalyst-hook AUR [broken link: package not found] package, which is described in #Tools.
Configuring the driver
After you have installed the driver via your chosen method, you will have to configure X to work with Catalyst. Also, you will have to make sure the module gets loaded at boot. Also, one should disable kernel mode setting.
Configuring X
To configure X, you will have to create an xorg.conf file. Catalyst provides its own aticonfig tool to create and/or modify this file. It also can configure virtually every aspect of the card for it also accesses the /etc/ati/amdpcsdb file. For a complete list of aticonfig options, run:
Now, to configure Catalyst. If you have only one monitor, run this:
However, if you have two monitors and want to use both of them, you can run the command stated below. Note that this will generate a dual head configuration with the second screen located above the first screen.
Although the current Xorg versions auto-detect most options when started, you may want to specify some in case the defaults change between versions.
Here is an example (with notes) for reference. Entries with # should be required, add entries with ## as needed:
If you need more information on Catalyst, visit this thread.
Loading the module at boot
We have to blacklist the radeon module to prevent it from auto-loading. To do so, blacklist radeon in /etc/modprobe.d/modprobe.conf . Also, make sure that it is not loaded by any file under /etc/modules-load.d/ . For more information, see kernel modules#Blacklisting.
Then we will have to make sure that the fglrx module gets auto-loaded. Either add fglrx on a new line of an existing module file located under /etc/modules-load.d/ , or create a new file and add fglrx .
Disable kernel mode setting
Disabling kernel mode setting is important, as the Catalyst driver does not take advantage of KMS. If you do not deactivate KMS, your system might freeze when trying to switch to a TTY or even when shutting down via your DE.
To disable kernel mode setting, add nomodeset to your kernel parameters.
Checking operation
Assuming that a reboot to your login was successful, you can check if fglrx is running properly with the following commands:
If you get output, it works. Finally, run X manually with $ startx or by using a display manager (see Xorg#Running).
The following command should output your graphic card model name:
You can then verify that direct rendering is enabled by running the following command in a terminal:
If it says «direct rendering: yes» then you are good to go! If the $ glxinfo command is not found install the mesa-demos package.
as the fglrx alternative test to glxgears .
Custom kernels
To install catalyst for a custom kernel, you will need to build your own catalyst-$kernel package:
- Obtain the PKGBUILD and catalyst.install files from Catalyst.
- Editing the PKGBUILD. Two changes need to be made here:
- Change pkgname=catalyst to pkgname=catalyst-$kernel_name , where $kernel_name is whatever you want (e.g. custom, mm, themostawesomekernelever).
- Change the dependency of linux to $kernel_name .
- Build your package and install; run makepkg -i or makepkg followed by pacman -U pkgname.pkg.tar.gz as the root user.
PowerXpress support
PowerXpress technology allows switching notebooks with dual-graphic capability from integrated graphics (IGP) to discrete graphics either to increase battery life or to achieve better 3D rendering capabilities.
To use such functionality on Arch you will have to:
- Get and build catalyst-totalAUR [broken link: package not found] / catalyst-testAUR [broken link: package not found] package from the AUR, or
- Install catalyst-libgl alongside with catalyst-utils packages from the [catalyst] repository.
To perform a switch into Intel’s IGP you will also have to install the mesa package and Intel’s drivers: xf86-video-intel .
Now you can switch between the integrated and the discrete GPU, using these commands:
Just remember that fglrx needs /etc/X11/xorg.conf configured for AMD’s card with fglrx inside.
You can also use the pxp_switch_catalyst switching script that will perform some additional usefull operations:
- Switching xorg.conf — it will rename xorg.conf into xorg.conf.cat (if there is fglrx inside) or xorg.conf.oth (if there is intel inside) and then it will create a symlink to xorg.conf , depending on what you chose.
- Running aticonfig —px-Xgpu .
- Running switchlibGL .
- Adding/removing fglrx into/from /etc/modules-load.d/catalyst.conf .
If you have got problems when you try to run X on Intel’s driver you may try to force «UXA» acceleration. Just make sure you got Option «AccelMethod» «uxa» in xorg.conf :
Running two X servers (one using the Intel driver, another one using fglrx) simultaneously
Because fglrx is crash-prone (regarding PowerXpress), it could be a good idea to use the Intel driver in the main X server and have a secondary X server using fglrx when 3D acceleration is needed. However, simply switching to the discrete GPU from the integrated GPU using aticonfig or amdcccle will cause all sorts of weird bugs when starting the second X.
To run two X servers at the same time (each using different drivers), you should firstly set up a fully working X with Catalyst and then move its xorg.conf to a temporary place (for example, /etc/X11/xorg.conf.fglrx . The next time X is started, it will use the Intel driver by default instead of fglrx.
To start a second X server using fglrx, simply move xorg.conf back to the proper place ( /etc/X11/xorg.conf ) before starting X. This method even allows you to switch between running X sessions. When you are done using fglrx, move xorg.conf somewhere else again.
The only disadvantage of this method is not having 3D acceleration using the Intel driver. 2D acceleration, however, is fully functional. Other than that, this will provide us with a completely stable desktop.
Issues with PowerXpress laptops running in AMD mode (pxp_switch_catalyst amd) with external / secondary monitor
When using a PowerXpress laptop in AMD-only mode (ie, setting the discrete card to render everything) you sometimes run into issues with artifacting/duplicating between displays. This is a known issue, and seems to effect 7xxxM series cards.
The artifacting disappears when you transform one of the monitors by either rotating or scaling. So you can use xrandr to fix this:
Xorg repositories
Since Catalyst is no longer updated, it is not compatible with current Xorg versions. This means that Catalyst users either have to build Xorg packages on their own, or use a backported repository that only contains the Xorg packages that should be held back. Vi0L0 has stepped in to fulfil this task and provides several backported repositories.
To enable one of these, follow the instructions in Unofficial user repositories (use the same PGP key as for the catalyst [broken link: invalid section] repository). Remember to add the chosen repository above all other repositories in /etc/pacman.conf , even above your catalyst repository, should you use one.
xorg117
Catalyst does not support xorg-server 1.18
xorg116
Catalyst-hook
Catalyst-hook AUR [broken link: package not found] is a systemd service that will automatically rebuild the fglrx modules while the system shuts down or reboots, but only if it is necessary (e.g. after an update).
Before using this package make sure that both the base-devel group and the linux-headers package (the one specific to the kernel you use) are installed.
To enable the automatic update, enable the catalyst-hook.service .
You can also use this package to build the fglrx module manually. Simply run the catalyst_build_module script after the kernel has been updated:
A few more technical details:
The catalyst-hook.service is stopping the systemd «river» and is forcing systemd to wait until catalyst-hook finishes its job.
The catalyst-hook.service is calling the catalyst_build_module check function which checks if fglrx rebuilds are really necessary.
The check function is checking if the fglrx module exists, if it:
- does not exist, it will build it;
- does exist, it will compare the two values to be sure that a rebuild is necessary.
These values are md5sums of the /usr/lib/modules/ /build/Module.symvers file (because I, Vi0L0, noticed that this file is unique and different for every kernel’s release). The first value is the md5sum of the existing Module.symvers file. The second value is the md5sum of the Module.symvers file which existed in a moment of the fglrx module creation. This value was compiled into the fglrx module by a catalyst_build_module script.
If the values are different, it will compile the new fglrx module.
The check is checking the whole /usr/lib/modules/ directory and building modules for all of the installed kernels if it is necessary. If the build or rebuild is not necessary, the whole process takes only some milliseconds to complete before it gets killed by systemd.
Catalyst-generator
catalyst-generator AUR [broken link: package not found] is a package that is able to build and install the fglrx module packed into pacman compliant catalyst-$
It creates catalyst-$
To build and install catalyst-$
A short summary on how to use this package:
- As root: catalyst_build_module remove . This will remove all unused catalyst-
packages. - As unprivileged user: catalyst_build_module $
, where $ is the version of the kernel to which you just updated. For example: catalyst_build_module 2.6.36-ARCH . You can also build catalyst- for all installed kernels by using catalyst_build_module all . - If you want to remove catalyst-generator , it is best to run this as root before removing catalyst-generator: catalyst_build_module remove_all . This will remove all catalyst-
packages from the system.
Catalyst-generator is not able to remove all those catalyst-
Catalyst-generator is most safe and KISS-friendly solution because:
- you can use unprivileged user to build the package;
- it is building modules in a fakeroot environment;
- it is not throwing files here and there, pacman always knows where they are;
- all you have to do is to remember to use it
OpenCL and OpenGL development
Since years AMD is working on tools for OpenCL and OpenGL developement.
Now under the banner of «Heterogeneous Computing» AMD is providing even more of them, fortunately most of their computing tools are available also for Linux.
In the AUR and the [catalyst] repositories you will find packages that represent the most important work from AMD, namely:
APP shortcut stands for Accelerated Parallel Processing.
amdapp-aparapi
AMD’s Aparapi is an API for expressing data parallel workloads in Java and a runtime component capable of converting the Java bytecode of compatible workloads into OpenCL so that it can be executed on a variety of GPU devices. If Aparapi can’t execute on the GPU, it will execute in a Java thread pool.
You can find more information about Aparapi here.
amdapp-sdk (formerly known as amdstream)
The AMD APP Software Development Kit (SDK) is a complete development platform created by AMD to allow you to quickly and easily develop applications accelerated by AMD APP technology. The SDK provides samples, documentation and other materials to quickly get you started leveraging accelerated compute using OpenCL, Bolt, or C++ AMP in your C/C++ application.
Since version 2.8 amdapp-sdk is providing aparapiUtil as well as aparapi’s samples. A package is available on the [catalyst] repository; it depends on the amdapp-aparapi AUR package. The AUR’s package will let you decide whether you want aparapi’s additions or not.
Version 2.8 does not provide Profiler functionality, it has been moved to CodeXL.
You can find more information about AMD APP SDK here.
amdapp-codexl
CodeXL is an OpenCL and OpenGL Debugger and Profiler, with a static OpenCL kernel analyzer. It is a GUI application written atop of the well known gdebugger.
Features
Tear Free Rendering
Presented in Catalyst 11.1, the Tear Free Desktop feature reduces tearing in 2D, 3D and video applications. This likely adds triple-buffering and v-sync. Do note that it requires additional GPU processing.
To enable ‘Tear Free Desktop’ run amdcccle and go to: Display Options → Tear Free .
To disable, again use amdcccle or run:
Video acceleration
Catalyst supports hardware video acceleration on AMD Radeons UVD2 chipsets and later via X-Video Bitstream Acceleration (XvBA). XvBA backend fo VA-API is also shipped with the driver as most applications already support VA-API but not XvBA.
For mplayer: Install mplayer-vaapi AUR and libva . Then just set your video player to use vaapi:gl as video output:
These options can be added to your mplayer configuration file, see MPlayer.
If Video Output vaapi:gl is not working — please check:
It might help to enable v-sync in amdcccle:
GPU/Mem frequency, Temperature, Fan speed, Overclocking utilities
You can get the GPU/Mem clocks with: $ aticonfig —od-getclocks .
You can get the fan speed with: $ aticonfig —pplib-cmd «get fanspeed 0»
You can get the temperature with: $ aticonfig —odgt
To set the fanspeed with: $ aticonfig —pplib-cmd «set fanspeed 0 50» Query Index: 50, Speed in percent
To overclock and/or underclock it is easier to use a GUI, like ATi Overclocking Utility, which is very simple and requires qt to work. It might be out of date/old, but you can get it here.
Another, more complex utility to perform such operations is AMDOverdriveCtrl. Its homepage is here and you can build amdoverdrivectrl AUR from the AUR or from Vi0L0’s unofficial repositories.
Double Screen (Dual Head / Dual Screen / Xinerama)
Introduction
- In this chapter, we will describe the installation of two different-sized screens on only one graphics card with two different output ports (DVI + HDMI) using a «BIG Desktop» configuration.
- The Xinerama solution has some inconveniences, especially because it is not compatible with XrandR. For that very reason, you should not use this solution, because XrandR is a must for our later configuration.
- The Dual Head solution would allow you to have 2 different sessions (one for each screen). It could be what you want, but you will not be able to move windows from one screen to another. If you have only one screen, you will have to define the mouse inside your Xorg session for each of the two sessions inside the Server Layout section.
ATI Catalyst Control Center
The GUI tool shipped by ATI is very useful and we will try to use it as much as we can. To launch it, open a terminal and use the following command:
Installation
Before we start, make sure that your hardware is plugged in correctly, that power is on and that you know your hardware characteristics (screen dimensions, sizes, refreshment rates, etc.) Normally, both screens are recognized during boot time but not necessarily identified properly, especially if you are not using any Xorg base configuration file ( /etc/X11/xorg.conf ) but relying on the hot-plugging feature.
The first step is to make sure that you screens will be recognized by your DE and by X. For this, you need to generate a basic Xorg configuration file for your two screens:
Now you should have a basic Xorg configuration file that you can edit to add your screen resolutions. It is important to use the precise resolution, especially if you have screens of different sizes. These resolutions have to be added in the «Screen» section:
From now on, instead of editing the xorg.conf file manually, let us use the ATI GUI tool. Restart X to be sure that your two screens are properly supported and that the resolutions are properly recognized (Screens must be independent, not mirrored).
Configuration
Now you will only have to launch the ATI control center with root privileges, go to the display menu and choose how you would like to set your configuration (small arrow of the drop down menu). A last restart of X and you should be done!
Before you restart X, do not hesitate to verify your new xorg.conf file. At this stage, inside the «Display» sub-section of the «Screen» section, you should see a «Virtual» command line, of which the resolution should be the sum of both screens. The «Server Layout» section says all the rest.
Uninstallation
If for any reason this driver is not working for you or if you simply want to try out the open source driver, remove the catalyst and catalyst-utils packages. Also you should remove catalyst-generator AUR [broken link: package not found] , catalyst-hook AUR [broken link: package not found] and lib32-catalyst-utils AUR [broken link: package not found] packages if they have been installed on your system.
Also follow these steps:
- If you have the /etc/modprobe.d/blacklist-radeon.conf file remove it or comment the line blacklist radeon in that file.
- If you have a file in /etc/modules-load.d to load the fglrx module on boot, remove it or comment the line containing fglrx .
- Make sure to remove or backup /etc/X11/xorg.conf .
- If you have installed the catalyst-hookAUR [broken link: package not found] package, make sure to disable the systemd service.
- If you used the nomodeset option in your kernel parameters and plan to use KMS, remove it.
- Reboot before installing another driver.
Troubleshooting
If you can still boot to command-line, then the problem probably lies in /etc/X11/xorg.conf
You can parse the whole /var/log/Xorg.0.log or, for clues:
If you are still confused about what is going on, search the forums first. Then post a message in the thread specific to ATI/AMD. Provide the information from xorg.conf and both commands mentioned above.
Failed to start atieventsd.service
Install acpid from the official repositories. Start and enable the acpid service.
If the service still fails to start, edit /usr/lib/systemd/system/atieventsd.service and change acpid.socket to acpid.service .
Failed to open fglrx_dri.so
 The factual accuracy of this article or section is disputed.
Create a symlink from /usr/lib/xorg/modules/dri/fglrx_dri.so to /usr/X11R6/lib64/modules/dri/fglrx_dri.so (or other requested path)
GDM fails to start
Downgrade the xorg-server package or try to use another display manager like LightDM.
3D Wine applications freeze
If you use a 3D Wine application and it hangs, watch out for the following workarounds.
One source of problems is TLS. To disable it, either use aticonfig or edit /etc/X11/xorg.conf . To use aticonfig :
Or, to edit /etc/X11/xorg.conf ; first open the file in an editor as root and then add Option «UseFastTLS» «off» to the Device section of this file.
After applying either of the solutions, restart X for it to take effect.
Compiz
In case you are using compiz as the windows compositer, disable it. For instance, if you are using XFCE as your desktop environment, open a terminal and execute:
Problems with video colours
You may still use vaapi:gl to avoid video flickering, but without video acceleration:
- Run mplayer without -vo vaapi switch.
- Run smplayer remove -vo vaapi from Options → Preferences → Advanced → Options for MPlayer → Options: -vo vaapi
Plus for smplayer you may now safely turn screenshots on.
KWin and composite
You may use XRender if the rendering with OpenGL is slow. However, XRender might also be slower than OpenGL depending on your card. XRender also solves artefact issues in some cases, for instance when resizing Konsole.
Black screen with complete lockups and/or hangs after reboot or startx
Ensure you have added the nomodeset option to the kernel options line in your bootloader (see #Disable kernel mode setting). Make sure that Catalyst is compatible with your installed Xorg version and used Linux kernel version.
If you are using the legacy driver ( catalyst-hd234k ) and get a black screen, try downgrading xorg-server to 1.12 by using the #xorg112 repository.
Faulty ACPI hardware calls
It is possible that fglrx does not cooperate well with the system’s ACPI hardware calls, so it auto-disables itself and there is no screen output.
If so, try to run this:
KDM disappears after logout
If you are running Catalyst proprietary driver and you get a console (tty1) instead of the expected KDM greeting when you log out, you must instruct KDM to restart the X server after each logout. Uncomment the following line under the section titled [X-:*-Core]
KDM should now appear when you log out of KDE.
Hibernate/Sleep issues
Video fails to resume from suspend2ram
ATI’s proprietary Catalyst driver cannot resume from suspend if the framebuffer is enabled. To disable the framebuffer, add vga=0 to your kernel kernel parameters.
To see where you need to add this with other bootloaders, see #Disable kernel mode setting.
System freezes/Hard locks
- The radeonfb framebuffer drivers have been known in the past to cause problems of this nature. If your kernel has radeonfb support compiled in, you may want to try a different kernel and see if this helps.
- If you experience system freezes when exiting your DE (shut down, suspend, switching to tty etc.) you probably forgot to deactivate KMS. (See #Disable kernel mode setting)
Hardware conflicts
Radeon cards used in conjunction with some versions of the nForce3 chipset (e.g. nForce 3 250Gb) will not have 3D acceleration. Currently the cause of this issue is unknown, but some sources indicate that it may be possible to get acceleration with this combination of hardware by booting Windows with the drivers from nVIDIA and then rebooting the system. This can be verified by getting output something similar to this (using an nForce3-based system):
and also if issuing the following command gets you the following output:
you have this bug.
Some sources indicate that in some situations, downgrading the motherboard BIOS may help, but this cannot be verified in all cases. Also, a bad BIOS downgrade can render your hardware useless, so beware.
See this bugreport for more information and a potential fix.
Temporary hangs when playing video
This problem may occur when using the proprietary Catalyst.
If you experience temporary hangs lasting from a few seconds to several minutes occuring randomly during playback with mplayer, check the system logs for output like:
Adding the nopat and/or nomodeset kernel parameters should work.
«aticonfig: No supported adapters detected»
If you get the following:
It may still be possible to get Catalyst working by manually setting the device in your your etc/X11/xorg.conf file or by copying an older working /etc/ati/control file (preferred — this also fixes the watermark issue).
To get an older control file, download a previous version of fglrx from AMD and run it with —extract driver parameter. You will find the control file in driver/common/etc/ati/control . Copy the extracted file over the system file and restart Xorg. You can try different versions of the file.
To set your model in xorg.conf , edit the device section of /etc/X11/xorg.conf to:
Where **** should be replaced with your device’s marketing number (e.g. 6870 for the HD 6870 and 6310 for the E-350 APU).
Xorg will start and it is possible to use amdcccle instead of aticonfig . There will be an «AMD Unsupported hardware» watermark.
You can remove this watermark using the following script:
and then reboot your machine.
WebGL support in Chromium
Google has blacklisted Linux’s Catalyst driver from supporting webGL in their Chromium/Chrome browsers. See Chromium#WebGL for details.
Lag/freezes when watching flash videos via Adobe’s flashplugin
If you are using KDE make sure that «Suspend desktop effects for fullscreen windows» is unchecked under System Settings → Desktop Effects → Advanced .
Lag/slow windows movement in GNOME3
You can try this solution, it has been reported to work for many people.
Add this line into
/.profile or into /etc/profile :
Restart X server or reboot your system.
Not using full screen resolution at 1920×1080 (underscanning, black borders around the screen)
This usually happens when you use a HDMI connection to connect your monitor/TV to your computer.
Seemed to be a feature by AMD/ATI to work with all HDTVs that could be adjusted via the amdccle.
Using the amdcccle GUI you can select the affected display, go to adjustments, and set underscan to 0% (aticonfig defaults to 15% underscan). It is possible as well that the underscan slider will not show under the display’s adjustments, as sometimes in (at least) version 14.10.
The problem is that the settings will not persist after restarting X server or rebooting or wake up or might even revert after changing TTYs.
For the changes to become permanent, you will need to adjust the underscan settings manually using «aticonfig» via console (as root) or manually edit the file /etc/ati/amdpcsdb (as root)
using aticonfig method:
After changing the settings, reboot.
For newer version (for example, 12.11), if Catalyst control center repeatedly fails to save the overscan setting you can also try:
Manually editing /etc/ati/amdpcsdb method:
Add the following line anywhere under the following header [AMDPCSROOT/SYSTEM/MCIL]
For newer version (for example, 12.11), if Catalyst control center repeatedly fails to save the overscan setting you can also try: locate under [AMDPCSROOT/SYSTEM/MCIL] the following line
and change it to
After changing the settings, reboot.
For the amd database file not to be overwritten you have to modify it without the fglrx driver running.
This can be made by rebooting in any «safe mode» that will not use the driver or directly booting into console mode
Workaround: For whatever reason you can find yourself not wanting to touch ATI’s config files you can circumvent the problem by forcing the panel’s position and resolution: as user:
DISPLAYTYPE will be the name of the monitor you want to change its attributes, for example «dfp9». To get the name of your DISPLAYTYPE run the following command:
Should RandR be not enabled use:
Using the display switch or DISPLAY variable set to the appropriate display/screen (:0.1 for example) might be necessary.
That will show you which displays are connected and disconnected and its properties
This workaround will not persist but it is a quick fix that will show that the panel works just fine and that the above solutions are to be put into place.
Try aticonfig —help | grep set-pcs-val to read ATI’s notice
Dual Screen Setup: general problems with acceleration, OpenGL, compositing, performance
Try to disable xinerama and xrandr12. Check out ie. this way:
Type those commands:
Then reboot your system. In /etc/X11/xorg.conf check that xinerama is disabled, if it is not, disable it and reboot your system.
Next run amdcccle and pick up amdcccle → display manager → multi-display → multidisplay desktop with display(s) 2.
Reboot again and set up your display layout whatever you desire.
Disabling VariBright feature
Vari-Bright is a feature designed to save power by dynamically adjusting how much power the display panel uses. Enter the following command to disable VariBright:
Hybrid/PowerXpress: turning off discrete GPU
![]() This article or section needs language, wiki syntax or style improvements. See Help:Style for reference.
This article or section needs language, wiki syntax or style improvements. See Help:Style for reference.![]()
When you are using packages with powerXpress support and you are switching to integrated GPU you may notice that discrete GPU is still working, consuming power and making your system’s temperature higher.
Sometimes ie. when your integrated GPU is intel’s one you can use vgaswitcheroo to turn the discrete GPU off. Sometimes unfortunately, it is not working.
Then you may check out acpi_call-pf AUR . MrDeepPurple has prepared the script which he is using to perform ‘turn off’ task. He is calling script via systemd service while booting and resuming his system. Here is his script:
Switching from X session to TTYs gives a blank screen/low resolution TTY
Workaround for this «feature», which appeared in catalyst 13.2 betas, is to use vga= kernel option, like vga=792 . You can get the list of supported resolutions with the
command. Get the one that corresponds to your wanted resolution, and copy-paste it into kernel line of your bootloader, so it could look like ie. vga=0x03d4
Switching from X session to TTYs gives a black screen with the monitor backlight on
Use uvesafb as your framebuffer driver. Moreover with uvesafb it is also possible to set whatever resolution for the TTY.
Switching to TTYs then back to X session gives a black screen with a mouse cursor
If you experience this bug, try adding
to the ‘Device’ section of your xorg.conf file.
The factual accuracy of this article or section is disputed.
Also, make sure you have a polkit authentication agent installed and running, as this behavior can happen when a program is asking for a password, but does not have an authentication agent installed to display the password dialog box.
30 FPS / Tear-Free / V-Sync bug
Bug introduced in Catalyst 13.6 beta, not fixed till now (13.9).
After enabling «Tear-Free» functionality every freshly started OpenGL application is lagging, often generates only 30 FPS, it also touches composited desktop.
Workaround is pretty simple and was found by M132:
- Open «AMD Catalyst Control Center» (amdcccle) application
- Enable Tear-Free, it will set 3D V-Sync option to «Always on».
- Set 3D V-Sync to «Always Off».
- Make sure Tear-Free is still on.
- Restart X / Re-login.
It is working well on KDE 4.11.x, but in case of problems M132 suggests: «Try disabling «Detect refresh rate» and specify monitor’s refresh rate in the Composite plugin.»
Backlight adjustment does not work
If you have a problem with backlight adjustment, you can try the following command:
Some users reported that this can decrease FPS. To restore defaults, run:
Chromium glitching when using plasma
Add —disable-gpu execute option to the chromium, ie. to /usr/share/applications/chromium.desktop file, like here:
Xorg crashes
Unsupported Xorg Version
When having a supported Linux kernel version but an unsupported Xorg version, you might get this error message and Xorg will crash
For example: fglrx 15.20.3 does not support Xorg 1.17.
To solve this, you should downgrade Xorg. A helpful list of steps can be found on [1]
Источник


