- TES 4: Oblivion «Animated Window Lighting System 5.5.4 ( OMOD )»
- Animated Window Lighting System 5.5.3 OMOD/BAIN
- Please log in or register
- Animated Window Lighting System and Chimneys — AWLS
- File information
- Last updated
- Original upload
- Created by
- Uploaded by
- Virus scan
- Tags for this mod
- About this mod
- This mod does not have any known dependencies other than the base game.
- Mods requiring this file
- Credits and distribution permission
- Author notes
- File credits
- Donation Points system
TES 4: Oblivion «Animated Window Lighting System 5.5.4 ( OMOD )»
Version: 5.5.4 — 2011
Автор :XMarksTheSpot, Brumbek & Ismelda
Требования : Oblivion, OBSE, OBMM
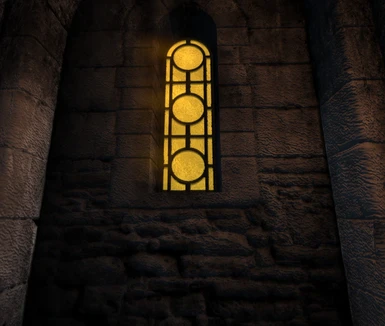
Мод можно рассматривать как эволюцию от оригинальной оконной системы освещения Texian’s original Window Lighting System, мод использует очень похожий метод, но использует новые и более эффективные методы для освещения.
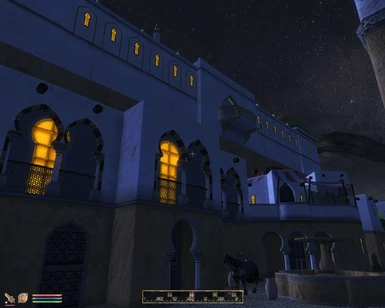
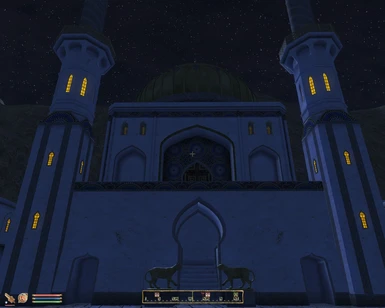
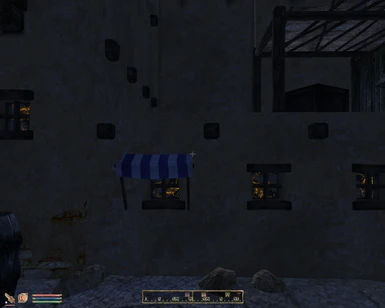
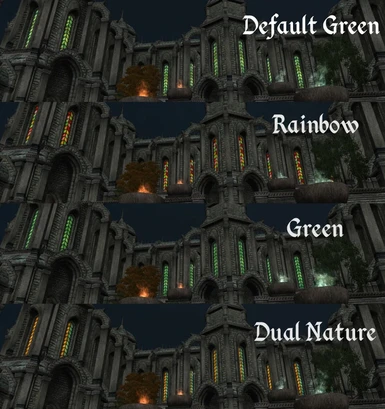
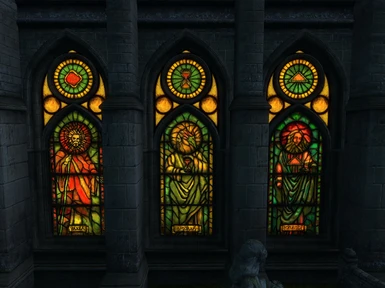
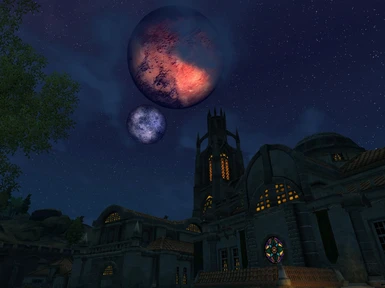
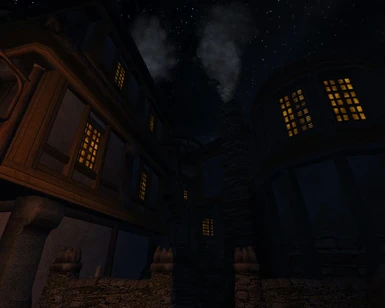
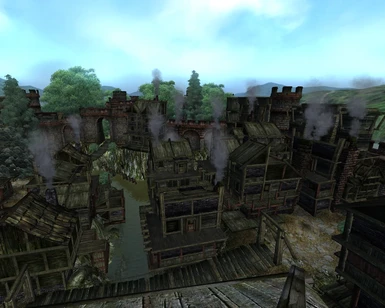
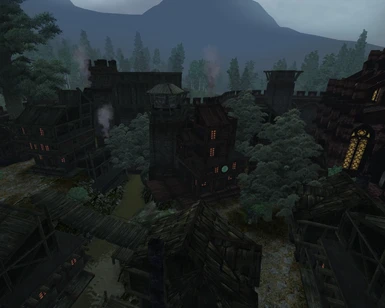
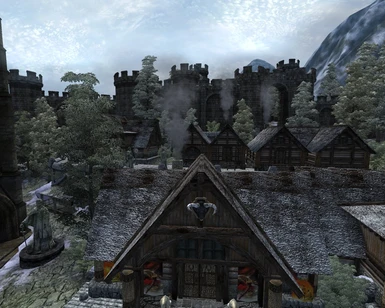
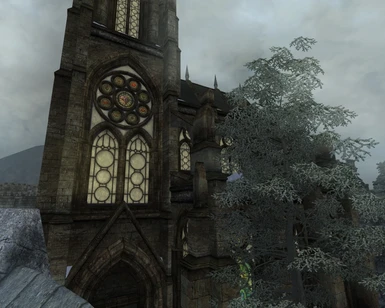
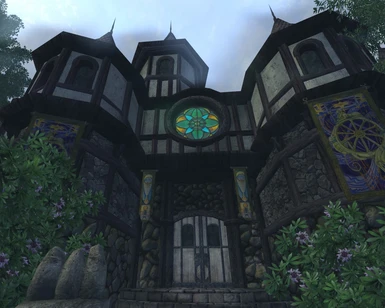
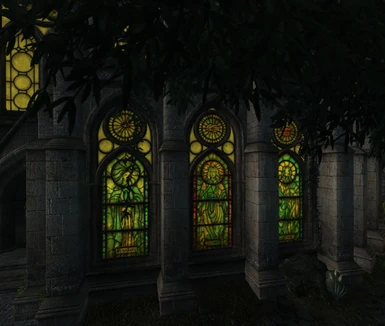
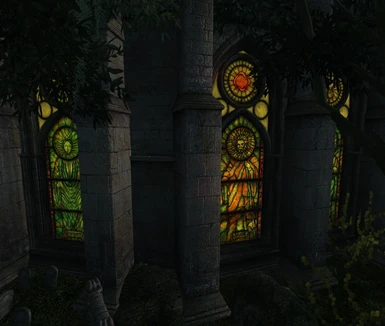
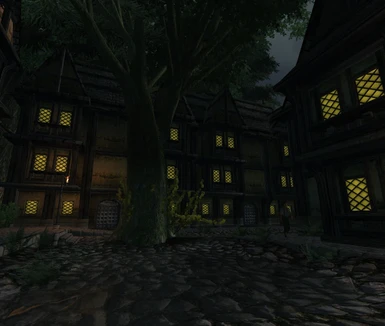
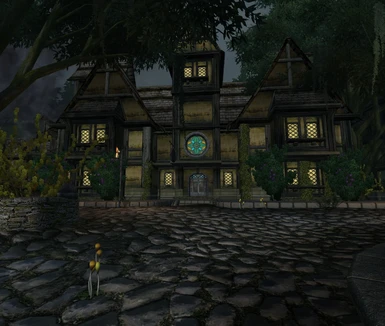
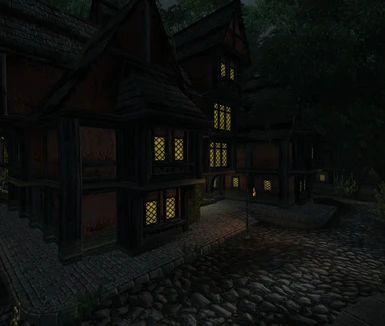
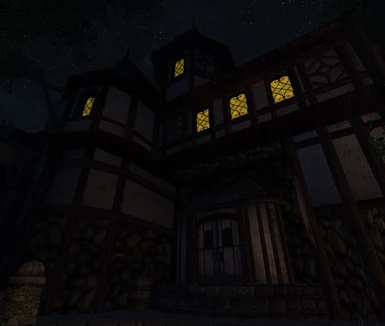
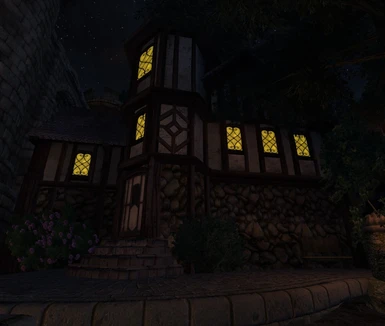
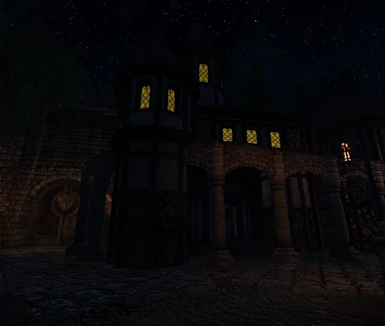
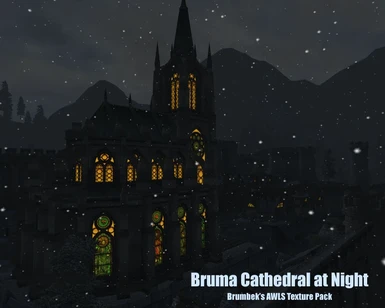
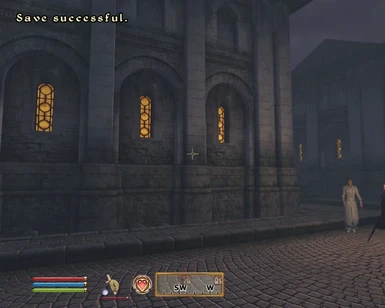
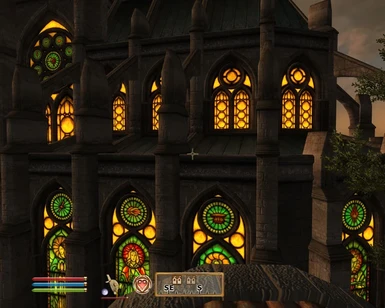
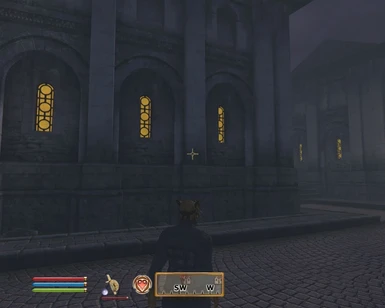
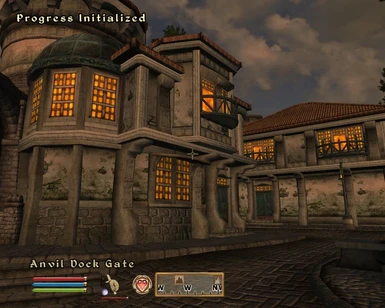
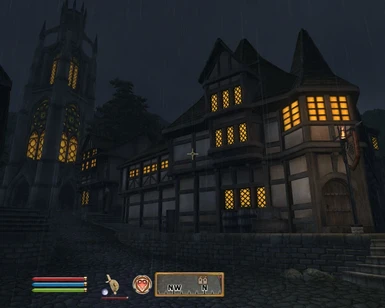
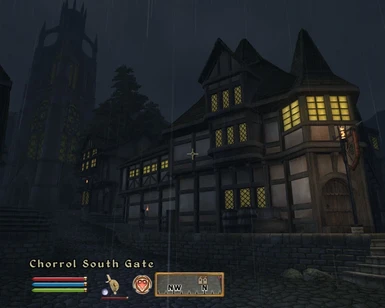
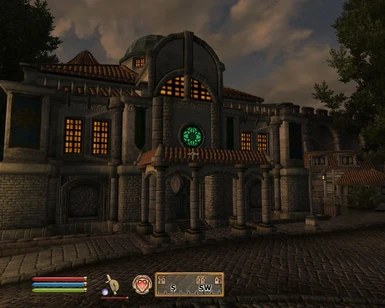
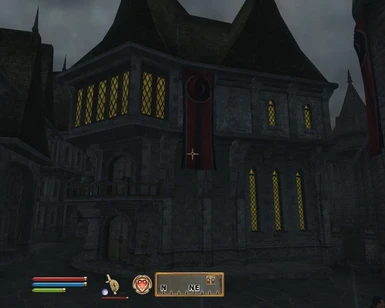
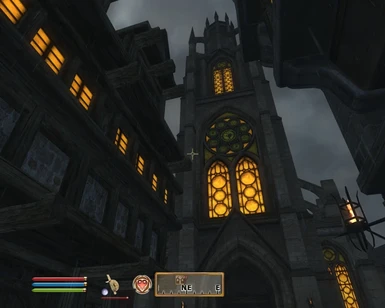
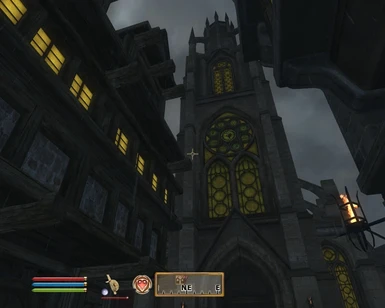
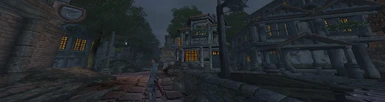
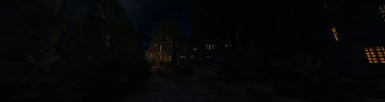
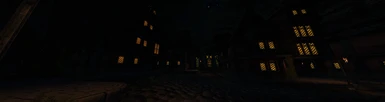
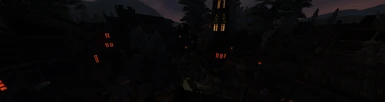
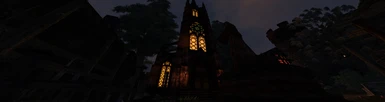
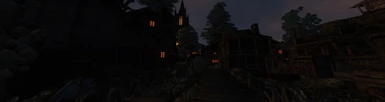
Несколько расцветок для освещения окон ( как в сирадиле так и на островах ) отдельное освещение соборов, гильдий магов ( так же предоставлены разные варианты освещения ) Все варианты скриншотов освещения находятся в папке —Skreenshots
Примечательно то, что на каждый город можно поставить персональное освещение окон.. на Бруму одно, на Чейденхолл другое и т.д. Так же можно выбирать освещение соборов и Имперского города.
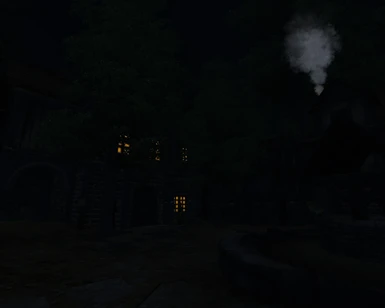
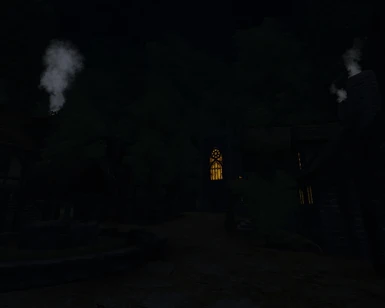
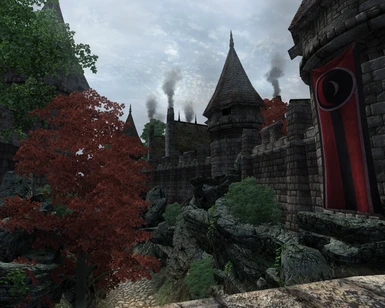
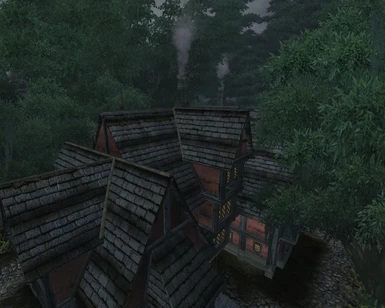
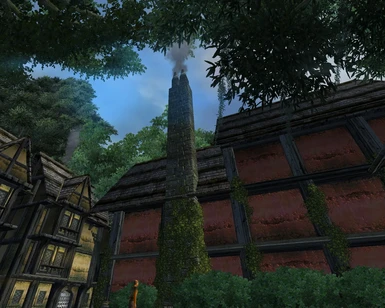
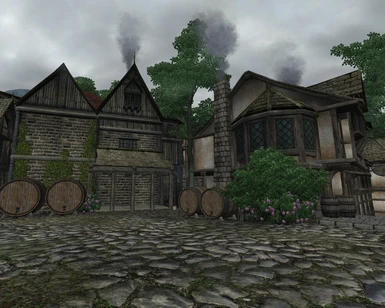
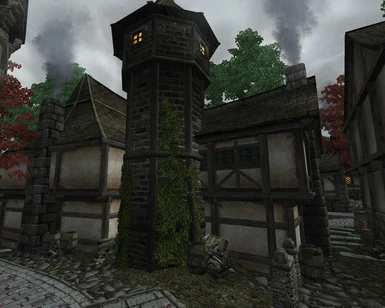
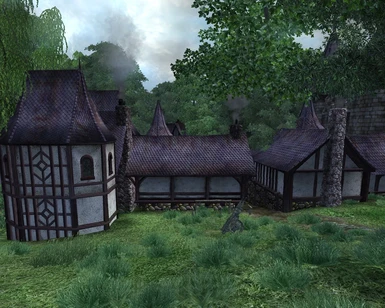
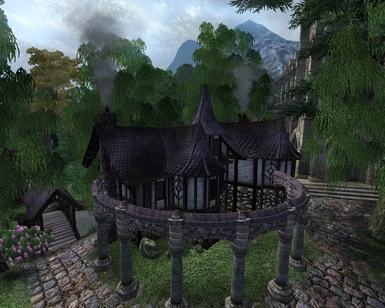
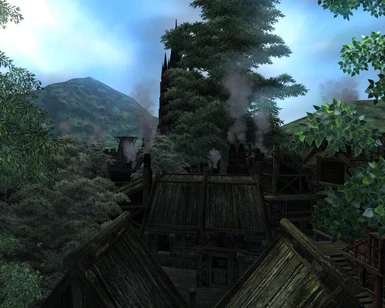
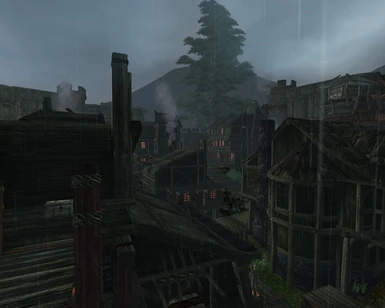
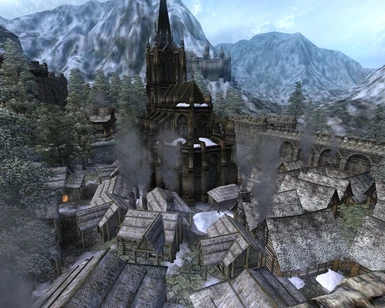
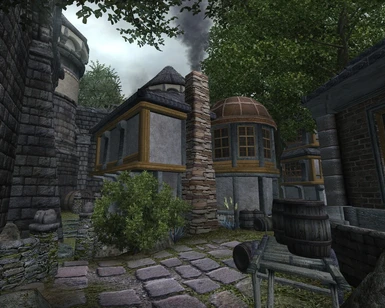
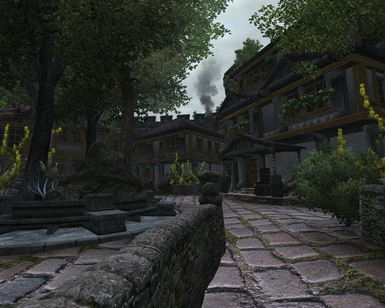
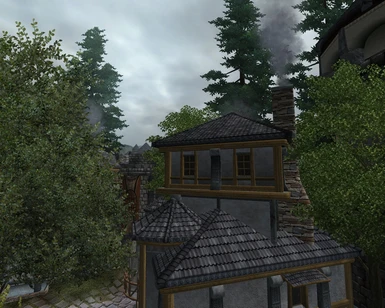
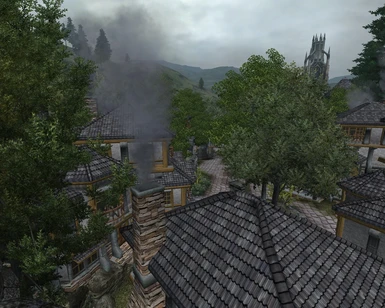
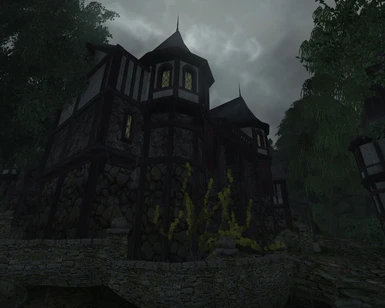
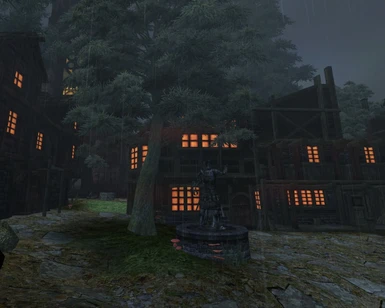
Так же мод добавляет идущий из труб домов дым.
Всего в моде 6 esp файлов, Вам будет надо выбрать один :
1-AdvancedESP No Smoking: Свет в окнах с 01-05 утра. Нет дыма из труб.
2-001 AdvancedESP Smoking Chimneys: Свет в окнах с 01-05 утра. Дым из труб валит в зависимости от сезона и погодных условий.
3-001 BasicESP No Smoking: Свет в окнах с 20.00-06.00 утра. Нет дыма из труб.
4-001 BasicESP Smoking Chimneys: Свет в окнах с 20.00-06.00 утра. Дым валит больше ночью и меньше днем.
5-001 MediumESP No Smoking: Окна освещены и ночью и днем и в дождливую погоду. Дым из трубы не валит.
6-001 MediumESP Smoking Chimneys: Окна освещены и ночью и днем и в дождливую погоду. Дым из трубы валит всегда, но ночью и во время дождя гуще.
Активируйте OMOD файл и выбирайте настройки. Настройки на английском языке для первого класса 😉
Animated Window Lighting System 5.5.3 OMOD/BAIN
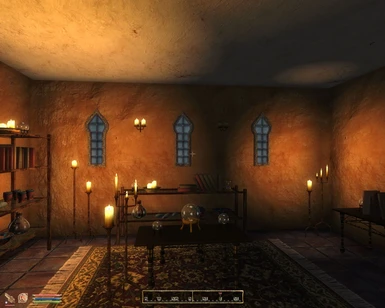
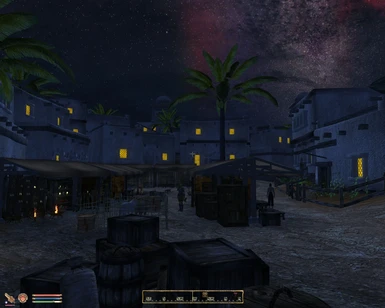
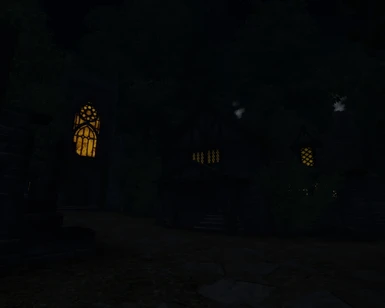
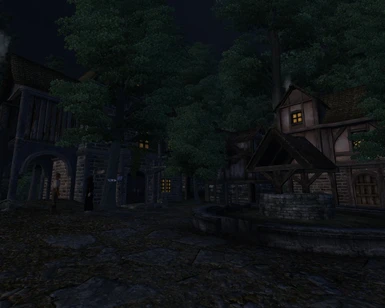
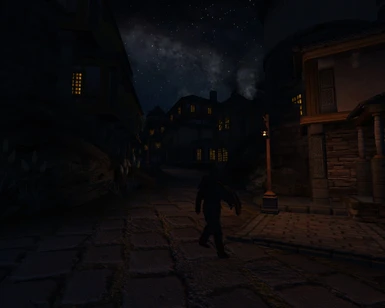
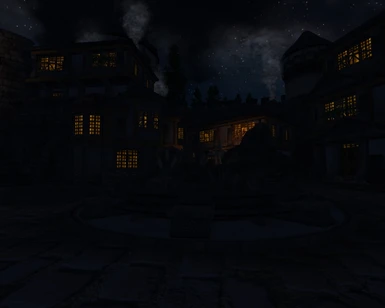
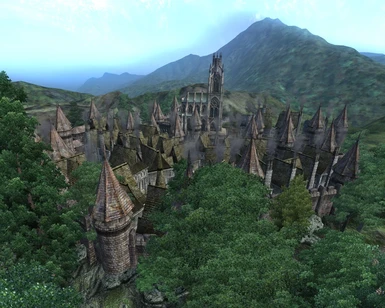
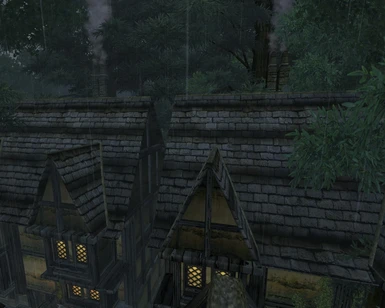
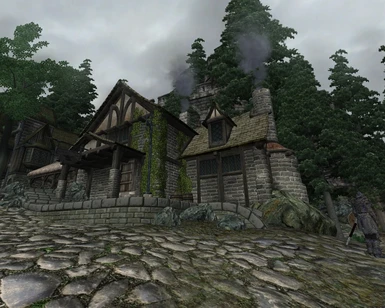
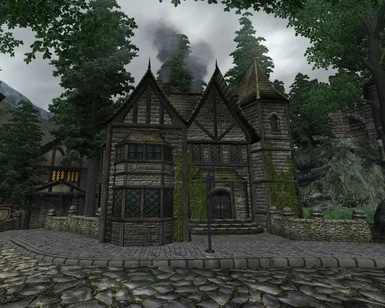
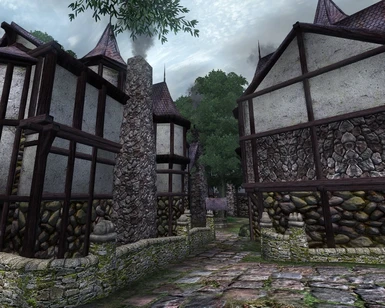
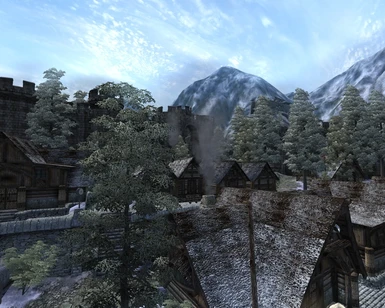
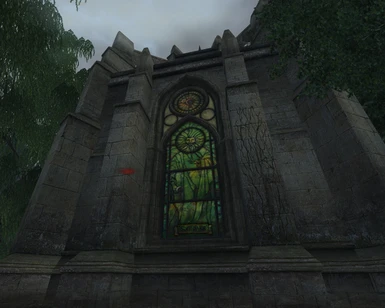
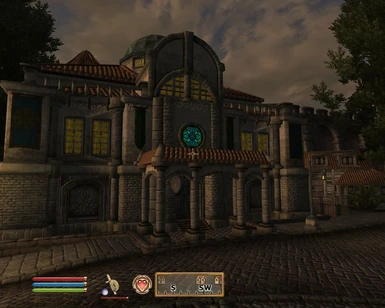
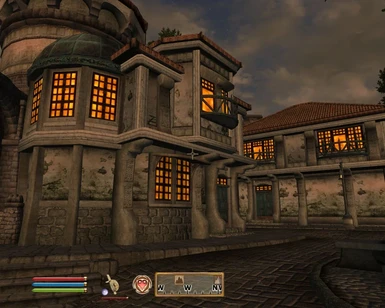
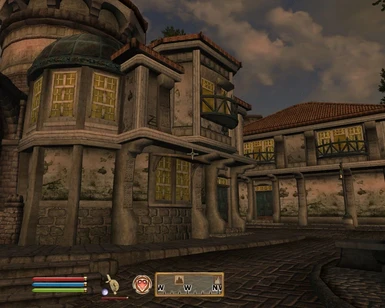
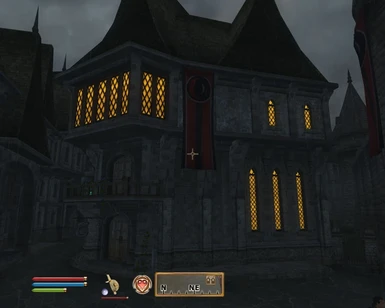
ОПИСАНИЕ Великолепный мод, добавляющий в игру реалистичную систему свечения окон. В этой версии так же добавлены дымовые трубы, дым из которых идет в зависимости от погоды и времени суток!
2. Вы можете выбрать свет 24 часа в сутки, только ночью, ночью и в дождь. Опции, начиная с Medium, требуют наличия OBSE выше 14 версии.
3. По желанию вы можете настроить дымовые трубы.
УСТАНОВКА НАЧАЛО
1. Если вы обычно ставите любые неофициальные патчи, то их следует установить ДО AWSL
2. В процессе установки мода во избежание ошибок следует установить патчи для некоторых модов, которые используют НЕ дефолтные модели или изменяют дефолтные.
Сами моды следует установить ДО установки AWSL! Список модов, патчи к которым встроены в установщики:
Blood & Mud
Qarl’s Texture Pack III
Qarl’s Texture Pack for Blood & Mud
Really Almost Everything Visible When Distant
Bomret’s Texture Pack for Shivering Isles
Kvatch Rebuilt
Elsweyr Desert of Anequina
Better Cities
Во время установки у вас запросят разрешение на постановку патчей.
3. Далее следуйте инструкции для одной из двух программ. Мод НЕ предназначен для установки вручную!
УСТАНОВКА ФАЙЛА
1. Распакуйте архив в любую удобную вам папку (НЕ В ИГРУ)
2. Запустите Мод Менеджер
3. Выберите внизу кнопку Create OMOD
4. В открывшемся меню находим кнопочку Folder и выбираем папку, на ругань на количество esp жмем ОК
5. При запросе импортировать ли omod data — обязательно соглашаемся
6. Жмем ОК и ждем, когда архив будет готов. Он сам соберется в нужную папку и появится в списке модов в окне OMOD
7. Выделяем мод и внизу жмем Activate
8. Следуем вопросам (см. пункт Опции)
10. Дождитесь, когда мод менеджер активирует мод.
1. Поместите архив 7z в папку установшиков . \Oblivion Mods\Bash Installers (она образуется при запуске Wrye Bash и заходе во вкладку Установщики, лежит рядом с папкой Oblivion)
2. Запустите Wrye Bash
3. Зайдите на вкладку Установшики. Подождите пока data обновится
4. Кликните правой кнопкой на моде в окне слева.
5. В выпадающем меню выберите Wizard
6. Выбирайте установки (см. Опции)
7. В конце выберите finish
8. Снова кликните на моде правой кнопкой
9. Выберите Install
ОПЦИИ
При установке вы будете выбирать различные опции в зависимости от предпочтений и наличия сторонних модов.
Выбор 1 — базовые опции мода и наличие дымовых труб
Basic no smocking
Окна светятся с 8 до 6 утра. Труб нет.
Medium no smocking
OBSE определяет наступление дня и ночи. Окна светятся ночью и гаснут днем. Освещение так же включается в дождь. Нет дыма из труб.
Advanced no smocking
OBSE определяет наступление дня и ночи. Окна светятся вечером и гаснут между часом ночи и пятью утра, в пять утра зажигаются и светятся до наступления рассвета. Часовни светятся всю ночь. Дым из труб отсутствует.
Basic smocking
Окна светятся с 8 до 6 утра. Дым становится гуще к вечеру и меньше днем.
Medium smocking
OBSE определяет наступление дня и ночи. Окна светятся ночью и гаснут днем. Освещение так же включается в дождь. Дым становится интенсивнее к вечеру и в плохую погоду.
Adwanced smocking
OBSE определяет наступление дня и ночи. Окна светятся вечером и гаснут между часом ночи и пятью утра, в пять утра зажигаются и светятся до наступления рассвета. Часовни светятся всю ночь. Дым из труб идет в зависимости от времени суток и погоды.
Выбор 2 Патчи для модов
Выбор 3 Хотите ли вы выбрать окна индивидуально для городов и локаций?
Рекомендуется индивидуальный выбор. Освещение станет разнообразнее а города приобретут большую индивидуальность
Выбор 4 Патчи для модов
ВАЖНО! Выбор 5 — города, селения и так далее. Цвета освещения.
Далее если вы выбрали индивидуальную установку, для каждого города вам будут показаны опции.
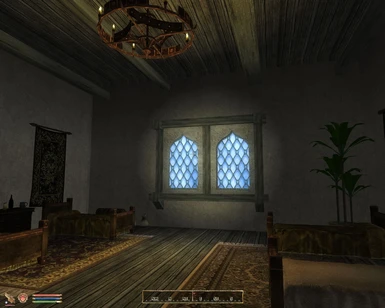
Frames — сами стекла будут окрашены неравномерно.
No Frames — стекла окрашены гладко
Curtains — шторы в окнах
Выбираем строку, жмем на Preview, смотрим скриншот, выбираем.
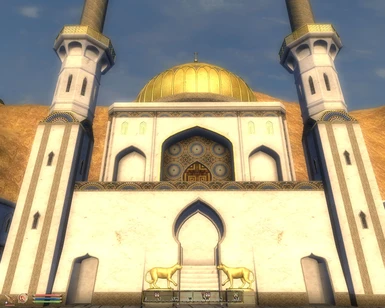
Помимо городов, выбор будет для ферм (farm), соборов (cathedral), кораблей (Ships), часовен и приоратов (Priory), гильдии магов, Храма Единого. Gользуемся просмотром и выбираем.
ВАЖНО! Дрожащие острова.
Выбор 6 — Патчи для модов
Выбор 7 — выберите цвета окон для поселений. Рекомендуется выбрать пестрые (Brumbeck multicolor)
Выбор 8 — цвет окон дворца Шигората
Выбор 9 — Крусибл
Выбор 10 — Блисс
КОНФЛИКТЫ Для использования мода с Illumination Within следуйте следующим инструкциям:
НЕ СТАВЬТЕ «Illumination Within» или оригинальный «Illumination Within Revived»
СКАЧАЙТЕ Illumination Within Revived Optimised и достаньте оттуда IWR-Lights.esp, и подключите только его, не устанавливая больше никаких частей и есп мода. (НИ моделей, ни текстур, ничего!)
ImpeREAL City работает с IWR, поэтому с AWSL результат может быть хуже.
Требования: Oblivion Золотое издание, OBSE
Please log in or register
To enjoy the benefits of Nexus Mods, please log in or register a new account
- All games
- Oblivion
- Mods
- Visuals and Graphics
- Animated Window Lighting System and Chimneys — AWLS
Animated Window Lighting System and Chimneys — AWLS


File information
Last updated
Original upload
Created by
Uploaded by
Virus scan
Tags for this mod
About this mod
A replacement of the Texian\’s Window Lighting System now with animated meshes with a tool to animate your own building windows. It also comes now with Chimney Smoke.
This mod does not have any known dependencies other than the base game.
Mods requiring this file
Credits and distribution permission
- Other user’s assets Some assets in this file belong to other authors. You will need to seek permission from these authors before you can use their assets
- Upload permission You can upload this file to other sites but you must credit me as the creator of the file
- Modification permission You are allowed to modify my files and release bug fixes or improve on the features so long as you credit me as the original creator
- Conversion permission You can convert this file to work with other games as long as you credit me as the creator of the file
- Asset use permission You are allowed to use the assets in this file without permission as long as you credit me
- Asset use permission in mods/files that are being sold You are not allowed to use assets from this file in any mods/files that are being sold, for money, on Steam Workshop or other platforms
- Asset use permission in mods/files that earn donation points You must get permission to earn Donation Points for your mods if they use my assets
Author notes
Feel free to use the textures and meshes as you wish in your projects. Grant back credits to the people mentioned in the credits below as the ideas/meshes are theirs with some rework I did and me (Ismelda).
File credits
Brumbek: For the Mixed Textures pack combining the Illumination Within textures with the Texian’s frame for the windows as well as some new glow map and textures.
Dev_Akm: for Qarl Textures Pack III for Blood & Mud
dev_akm and Kivan: for QTP3 UOP32 Compatibility Patch
Ismelda: Original concept of the Animated Window Lighting System.
OBSE Team: for OBSE which allows this mod to work with animations.
Quarn and Kivan: for their job at fixing meshes
Ryan: for Blood & Mud
Slap & ModMan: Textures from Illumination Within
Texian: for the creation of the Window Lighting System
Vargr: For the wizard.txt script for BAIN installation.
XMarksTheSpot: For the animated meshes, for the program to animate your buildings, for the basic script to make the animation usable.
Donation Points system
This mod is not opted-in to receive Donation Points
Welcome to the most comprehensive and compatible window lighting system ever devised for TES:IV.
AWLS is an illuminated window system that has three goals:
1) Add illuminated windows to all vanilla building meshes in such a way that also allows all mods using vanilla buildings to also have illuminated windows without the need of patches.
2) Allow the player to choose to have the lights on 24/7, at night only, or also during rainy weather. The player can pick what option is best for him or her by using one or none of the three included plugins (medium and advanced plugins require OBSE v14 or higher).
3) Add smoke effects to all chimneys if desired.
Please download and read the brand-new, nicely formatted, comprehensive Readme as it covers many things not listed on this page!
AWLS can be considered an evolution from Texian’s original Window Lighting System. AWLS uses a very similar method but takes advantage of newer and better methods for illumination.
So Texian made his mod solve both issues, and AWLS goes even further with more features. It should be noted that Illumination Within is still considered to be the most attractive window illumination method. With that in mind, it is possible to use both AWLS and Illumination Within together. Read the Using AWLS + Illumination Within section.
AWLS is a very complicated mod with over 200 install options and folders! Therefore, it is mandatory that you use a mod manager program. Either use the easiest and simplest option, Oblivion Mod Manager (OBMM), or use Wrye Bash’s BAIN to install this mod. Do not try to install it manually, seriously.
Before AWLS: Install Mods AWLS Patches
For both install methods, if you use any of the mods AWLS patches, make sure you install these mods BEFORE INSTALLING AWLS! You can read more about these mods in the «Mods that AWLS Patches» section. These mods are:
Blood & Mud
Qarl’s Texture Pack III
Qarl’s Texture Pack for Blood & Mud
Really Almost Everything Visible When Distant
Bomret’s Texture Pack for Shivering Isles
Kvatch Rebuilt
Elsweyr Desert of Anequina
Better Cities
Note: ALWS will conflict with many files from the above mods by design. Let AWLS overwrite all files!
Before AWLS: Installing the Unofficial Patches
Every Oblivion player should use the Unofficial Patches (UOP, USIP, UOMP) plus the Unofficial Patches Supplementals. Install these BEFORE AWLS since AWLS will conflict with several files, but do not worry because AWLS incorporates all fixes of these patches up to the latest 3.3.4. In fact, AWLS has several fixes not included anywhere else, including extensive exterior window UV Texture Mapping fixes.
Run OBMM, click «Create» then «Add archive» and select the AWLS 7zip file you downloaded. Click «Yes» for the warning about .esps in sub-folders that pops up, then click «Yes» again about importing the omod script. Then click «Create omod.» After it finishes, double-click on the mod package in the right hand window. Now follow the very detailed install script. After you pick all your options, if you get warnings about files already existing, pick «Yes» while holding down the «Ctrl» key to let all files overwrite.
BAIN is more complex so it’s assumed you are comfortable with Wrye Bash and BAIN. If not, please read the Wrye Bash readme and read through this pictorial guide.
With that said, run Wrye Bash, click on the Installers tab, add the AWLS 7zip file to your BAIN archives by either dragging and dropping as of Wrye Bash 291 or by manually moving the archive to your «Bash Installers» folder. Select the AWLS archive in the list of packages and right-click and pick «Wizard.» Now follow the very detailed install script. After installing you can check to make sure no other mod is overwriting AWLS’s files by clicking on the «Conflicts» tab and making sure no files are listed as «=Higher=.»
The key to know is that any set of folders with the same starting number should only have ONE of those folders installed since they directly conflict with each other. Folders with their own unique number should be installed if you need or want what the folder installs.
Folders generally are numbered in groups and options that require previous options are usually placed right after the requires options. For instance, the «40» series is the Shivering Isles options, and the «RAEVWD» folders follow each different window type series (42 SI Settlements has three options and then the three corresponding 43 RAEVWD SI Settlements options follow).
Only install folders with specific mod names if you have that mod installed. For example, a folder that has “QTP3” in the name should only be installed if you use QTP3. A folder with “B&M” in the name should only be installed if you use Blood&Mud.
The above also applies to specific parts of AWLS. For instance, a folder with “Chimneys” in the name should only be installed if you picked one of the Chimney-enabled .esp files.
Please download the archive and open the full Readme file to detailed instructions.
Oblivion Script Extender (OBSE) version 14 or higher is required to use the plugins. Nothing else is required.
==================================================================================
Version History
==================================================================================
AWLS 5.5.4 — June 13, 2011
-Updated BAIN install script to support Wrye Bash version 292’s new comma requirement. Thanks to alt3rn1ty for the updated script.
-Fixed one incorrectly name texture under “500 Leyawiin Yellow Ismelda” option. Now the lowerclass windows will light up properly for users of Ismelda’s Yellow in Leyawiin.
AWLS 5.5.3 — March 30, 2011
-Fixed missing lit arch windows from many Anvil buildings when using the certain curtains options.
-Added a note for install scripts indicating your choice of Chorrol windows also affects many Skingrad windows.
AWLS 5.5.2 — March 22, 2011
-Fixed missing lit Mages Guild windows for people who used Red Curtains or Red Dark Curtains Chorrol option. Note the missing windows do not have curtains on them by design. Also added the appropriate RAEVWD versions.
-Updated install scripts to ask user if they want chimney smoke even if they don’t use an .esp. Thanks Corepc for making the suggestion.
AWLS 5.5.1 — February 17, 2011
-Fixed install scripts errors like Advanced .esp No Smoking description. Renamed BaseESP folders to BasicESP to match the install script.
-Fixed missing architecture folder for 050 Bomrets folder for meshes, thanks UndWDoG.
-Fixed install script error regarding Cheydinhal RAEVWD Yellow options, thanks KarmaPowered.
AWLS 5.5.0 — February 15, 2011
-Merged mesh pack and texture pack to create one unified AWLS install file. This required massive restructuring of package and scripts. Many folders have been renamed or changed.
-Renamed .esp folders to have them all use the same number (01) to signify a user should use only one of the six options.
-Changed both Advanced plugins to fix the Game Month && bug, which has been present for a long time. Now && has been replaced with || in order to allow the script to properly detect the month.
-Advanced scripts «IsRaining» checks changed to «IsRaining > 0» to fix issues reported by a user a while ago.
-Renamed «Gray» folders and script install options to «Yellow» to match actual color in-game to make more sense for end-user.
-Included all Unofficial Patch Supplement changes including all the Shivering Isles Palace fixes. Also fixed collision errors on exterior SI Palace that the USIP Supplement didn’t fix. Also includes additional Leyawiin Mages Guild exterior building fixes not in UOP Supplement (UV errors, crack around Mages Guild Circle Window).
-Added compatibility option for Bomret’s Textures for Shivering Isles. This will preserve all the parallax shading on the meshes AWLS edits and also allow you to use whatever install options you want and still get full compatibility.
-Fixed window clipping error in SkHouseMiddle04.nif mesh; fixed regular, QTP3, and Kvatch Rebuilt versions of mesh. (This was a vanilla issue.)
-Changed all Farmhouse meshes to use the Farmhouse window style for all windows instead of using the Chorrol window style. This also matches upcoming All Natural changes.
-Changed Weynon House windows to use all Weynon House style windows instead of partially using Chorrol windows as in vanilla. This change now matches how the interior looks in the mod «All Natural».
-Added a few new window install options (like Cathedral Orange Sterile, Imperial City Blue) and redid screenshots so that every single option has a preview image.
-Add new options for cities that previously were forced to use Chorrol window textures, such as Leyawiin and Bravil. Now you can use greenish colored curtains for Leyawiin or Blood Red windows and curtains for Bravil.
-All meshes optimized with PyFFI 2.1.8.
-New single combined readme with nicer format.
-A bunch of other minor tweaks and changes, wow, a lot of work.
Please download the archive and open the full Readme file to view the entire version history.
What is the performance impact of AWLS?
Answer: Basically zero impact.
How do I install this manually?
Answer: We do not support manual installs. AWLS is very, very complicated to install manually. There is no reason to not use either Oblivion Mod Manager (OBMM) or Wrye Bash’s BAIN feature. The time it would take to read how to manually install this mod is longer than it would take to download and use OBMM. That being said, there is an install guide for manual installations provided.
How do I make my mod I created support AWLS?
Answer: If you are using vanilla buildings, AWLS is will work already. If you’ve altered a vanilla mesh and created a new static ID for your building, then you can use the IllumAnimation.exe tool provided as an optional download on the Tesnexus.com page. Please read the readme included with the tool.
Can I use Illumination Within with AWLS?
Answer: Yes, you can and this will provide you with the best visuals. See the AWLS + Illumination Within section for details.
Feel free to use the textures and meshes as you wish in your projects. Grant back credits to the people mentioned in the credits here.
Ismelda: Orginal concept of the Texian’s Window Lighting System enhancement.
Brumbek: For the Mixed Textures packs and the work on the windows UVmaps and meshes.
Dev_Akm: For Qarl Textures Pack III for Blood & Mud.
Dev_Akm and Kivan: QTP3 UOP32 Compatibility Patch.
Quarn and Kivan: for their job at fixing meshes.
Ryan: For Blood & Mud.
Arthmoor: For RAEVWD.
Qarl: For QTP3.
Slap & ModMan: Textures from Illumination Within.
Texian: For the creation of the Window Lighting System.
XMarksTheSpot: For the animated meshes, the program to animate buildings, and the basic script to make the animation usable.
Vargr: For fixing some errors in the BAIN Wizard script!
KarmaPowered: Pointing out install script errors.
UndWDoG: Pointing out install script errors.
MadCat221: For reporting the glow map issues and proper DDS compression.
ThreeD: For motivation to create a better OMOD script.
Belphegor: For finding an OMOD scripting error.
Metallicow: For the initial BAIN Wizard script.
Kalikut: For the Anvil wood window frames.


