- Move your data from a Windows PC to your Mac
- Before you begin
- Move your data
- How to move your information from a PC to your Mac
- After you move your data
- If you have issues moving your data
- What data can I transfer?
- Guide for changing your dev environment from Mac to Windows
- Keyboard shortcuts
- Trackpad shortcuts
- Command-line shells and terminals
- Windows shells
- Linux shells
- Windows Terminals
Move your data from a Windows PC to your Mac
Use Windows Migration Assistant to transfer your pictures, documents, and other data from a Windows PC to your Mac.
Windows Migration Assistant transfers your contacts, calendars, email accounts, and more from a PC. It migrates this data to the appropriate places on your Mac. After migrating data to your Mac, authorize your computer for iTunes Store purchases. It’s important to authorize before you sync or play content that you download from the iTunes Store.
If you’re migrating from one Mac to another Mac, follow the steps to move your content to a new Mac.
Before you begin
To prepare for a smooth migration:
- Make sure that Windows is up to date. Migration Assistant works with Windows 7 and later.
- Make sure that you know the name and password of an administrator account on your PC.
- Connect your Mac and PC to the same network, such as your home Wi-Fi network. Or connect an Ethernet cable between the ports on your Mac and PC to create a direct network connection. Some Mac models require an Ethernet adapter, such as the Belkin USB-C to Gigabit Ethernet Adapter or Apple Thunderbolt to Gigabit Ethernet Adapter.
- If you’re using Microsoft OneDrive on your PC, follow Microsoft’s instructions for uninstalling OneDrive before continuing. You can reinstall OneDrive after migration is complete.
Then use the check disk (chkdsk) utility on your PC to make sure that your Windows hard drive doesn’t have any issues:
- Right-click the Start button, then click Run.
- Type cmd and press Enter. Command Prompt opens.
- At the prompt, type chkdsk and press Enter.
- If the utility reports that it found problems, type the following, where drive is the letter that represents your Windows startup disk, such as D:
- Press Enter.
- At the prompt, type Y , then restart your PC.
- Repeat this process until the check disk utility reports no issues. If the utility can’t fix every issue that it finds, you might need to have your PC serviced. Then migrate your data to your Mac.
Move your data
This section guides you through migration, post-migration, and what to do if the steps don’t work for you.
How to move your information from a PC to your Mac
- On your PC, download and install the appropriate Windows Migration Assistant, based on the version of macOS on your Mac:
- Windows Migration Assistant for macOS Big Sur
- Windows Migration Assistant for macOS Mojave and macOS Catalina
- Windows Migration Assistant for macOS Sierra and High Sierra
- Windows Migration Assistant for OS X El Capitan or earlier
- Quit any open Windows apps.
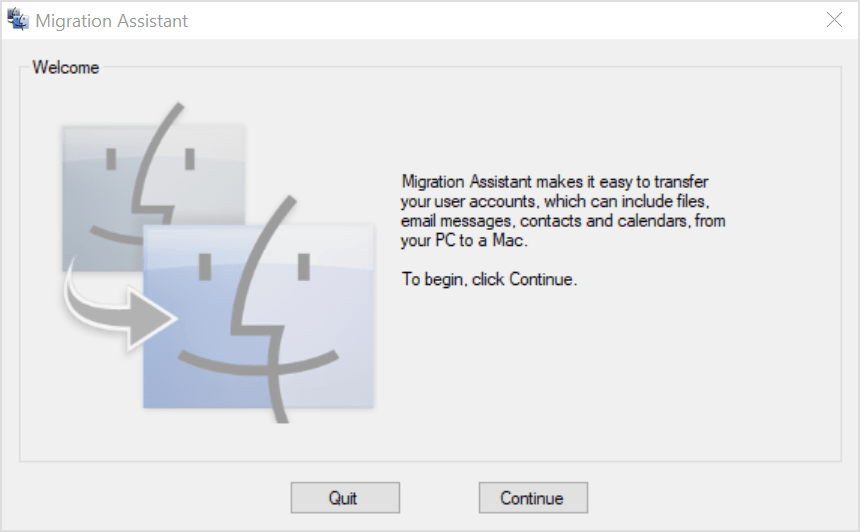
- Open Windows Migration Assistant, then click Continue.

- Start up your Mac. Setup Assistant automatically opens the first time you turn on your Mac. If you’ve already set up your Mac, open Migration Assistant, which is in the Utilities folder of your Applications folder.
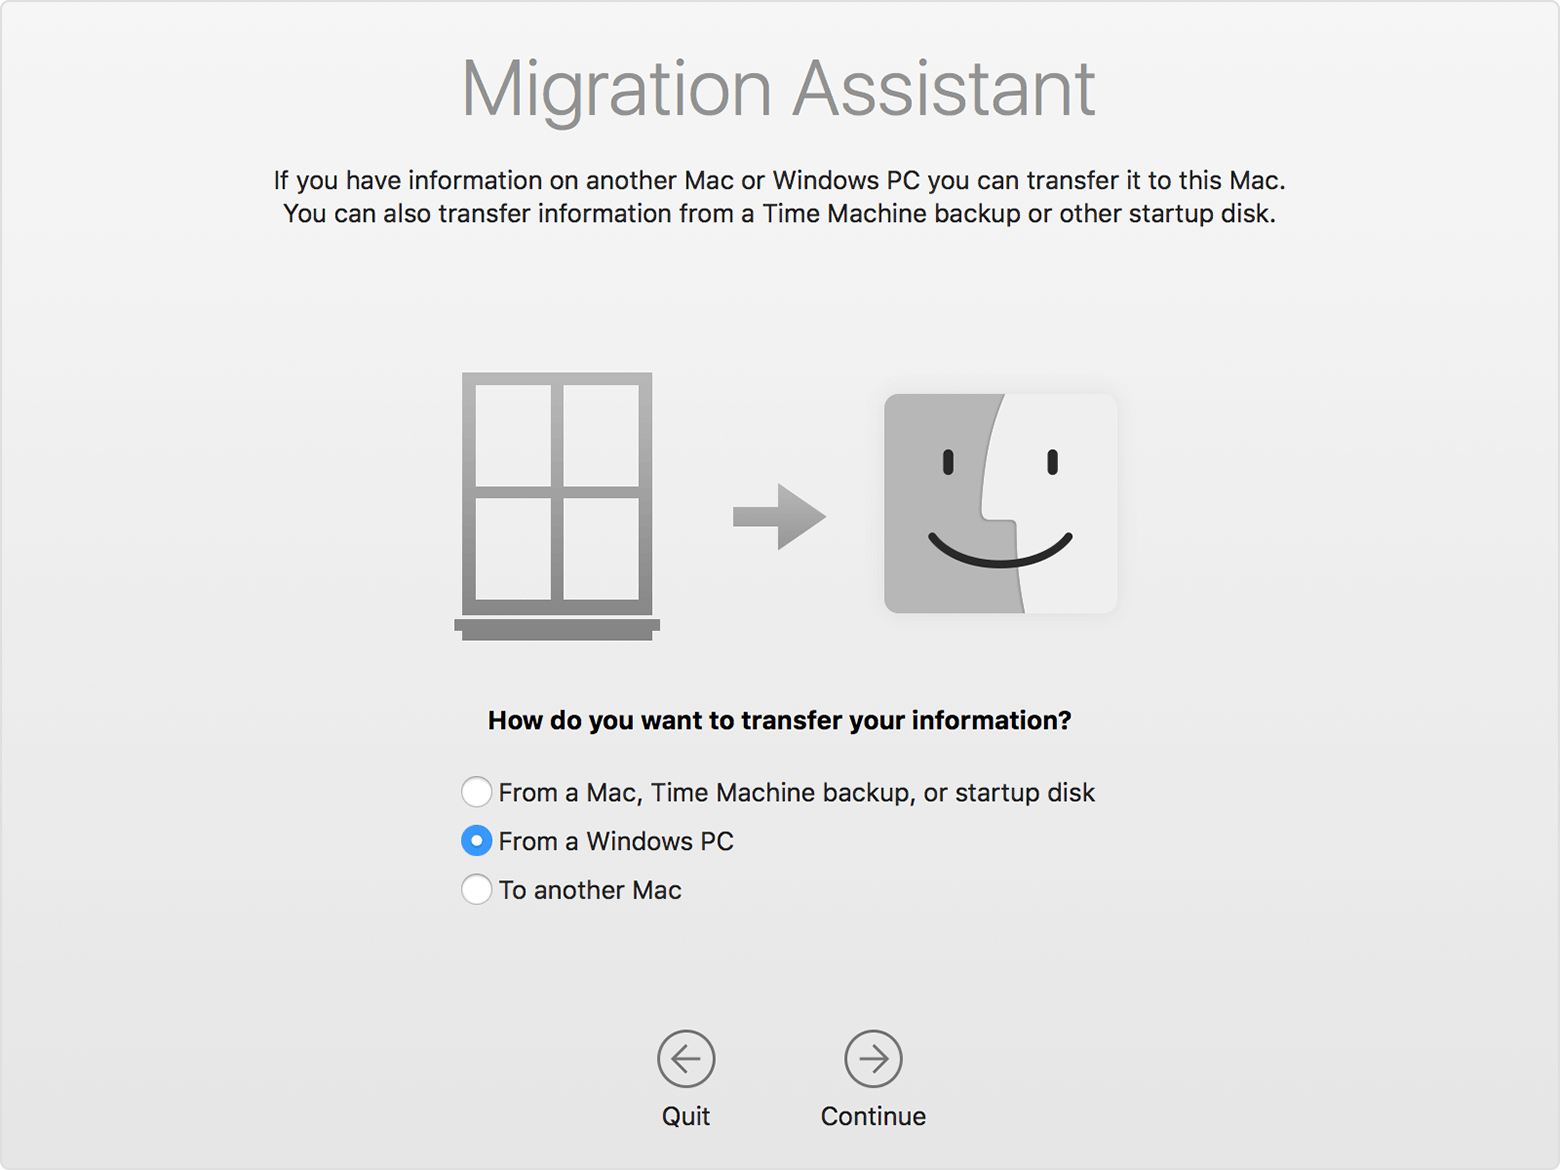
- On your Mac, follow the onscreen prompts until you get to the migration pane of the assistant. Select the option to transfer your information “From a Windows PC,” then click Continue.
- When prompted, enter an administrator name and password.
- Click Continue to close any other open apps.
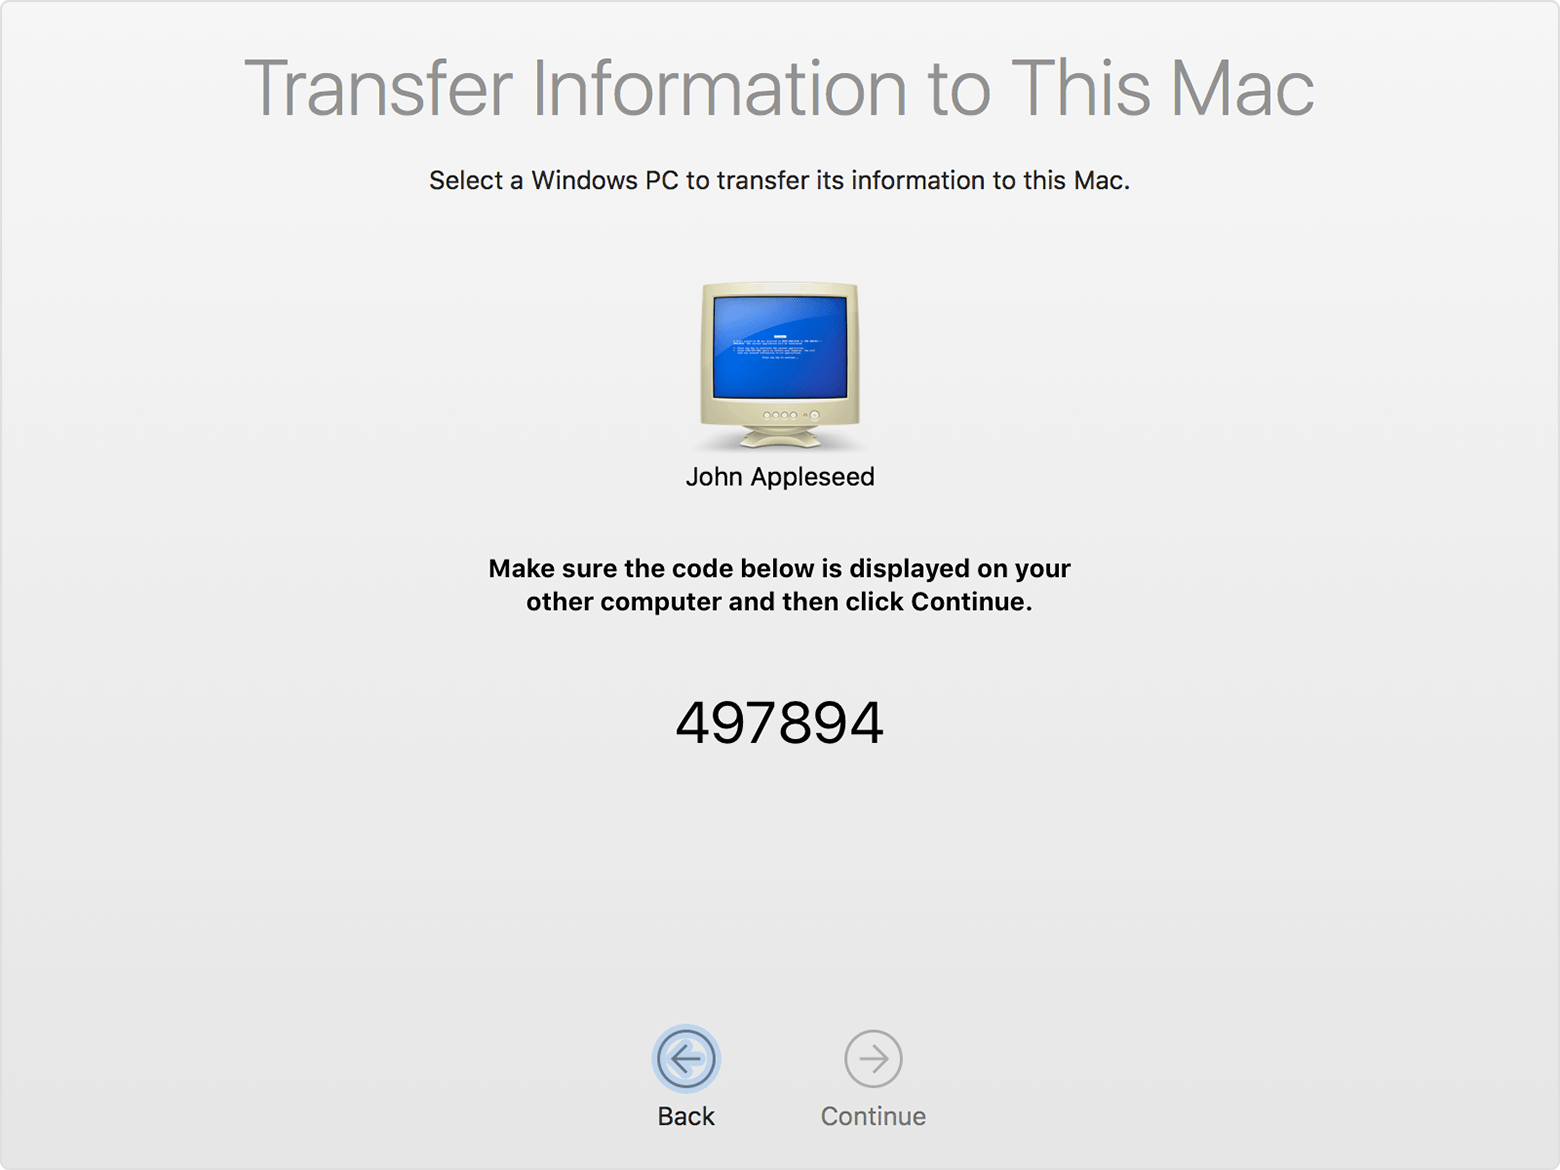
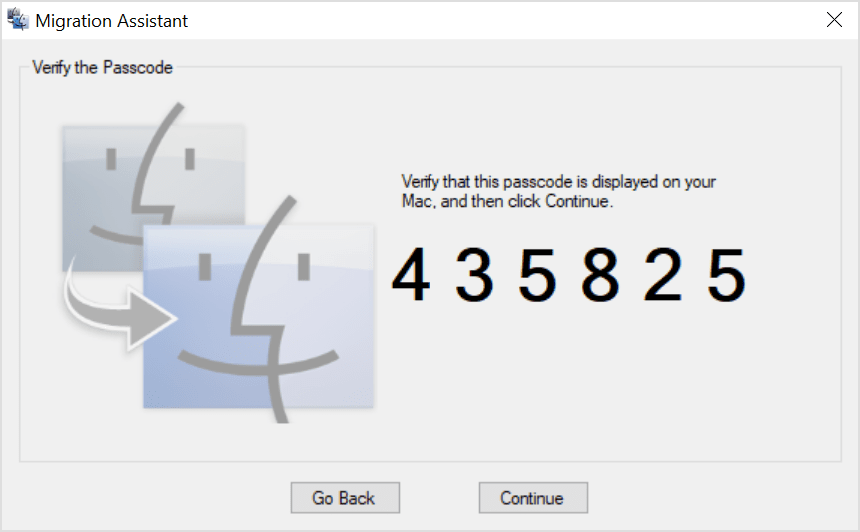
- In the migration window on your Mac, select your PC from the list of available computers. Then wait for the PC to show the same passcode that your Mac shows.
- When both computers display the same passcode, click Continue on your PC and Mac.
- Your Mac scans the drives on your PC to build a list of information to migrate. When the scan completes, select the information that you want to migrate to your Mac and click Continue. Learn about some of the data that you can transfer.
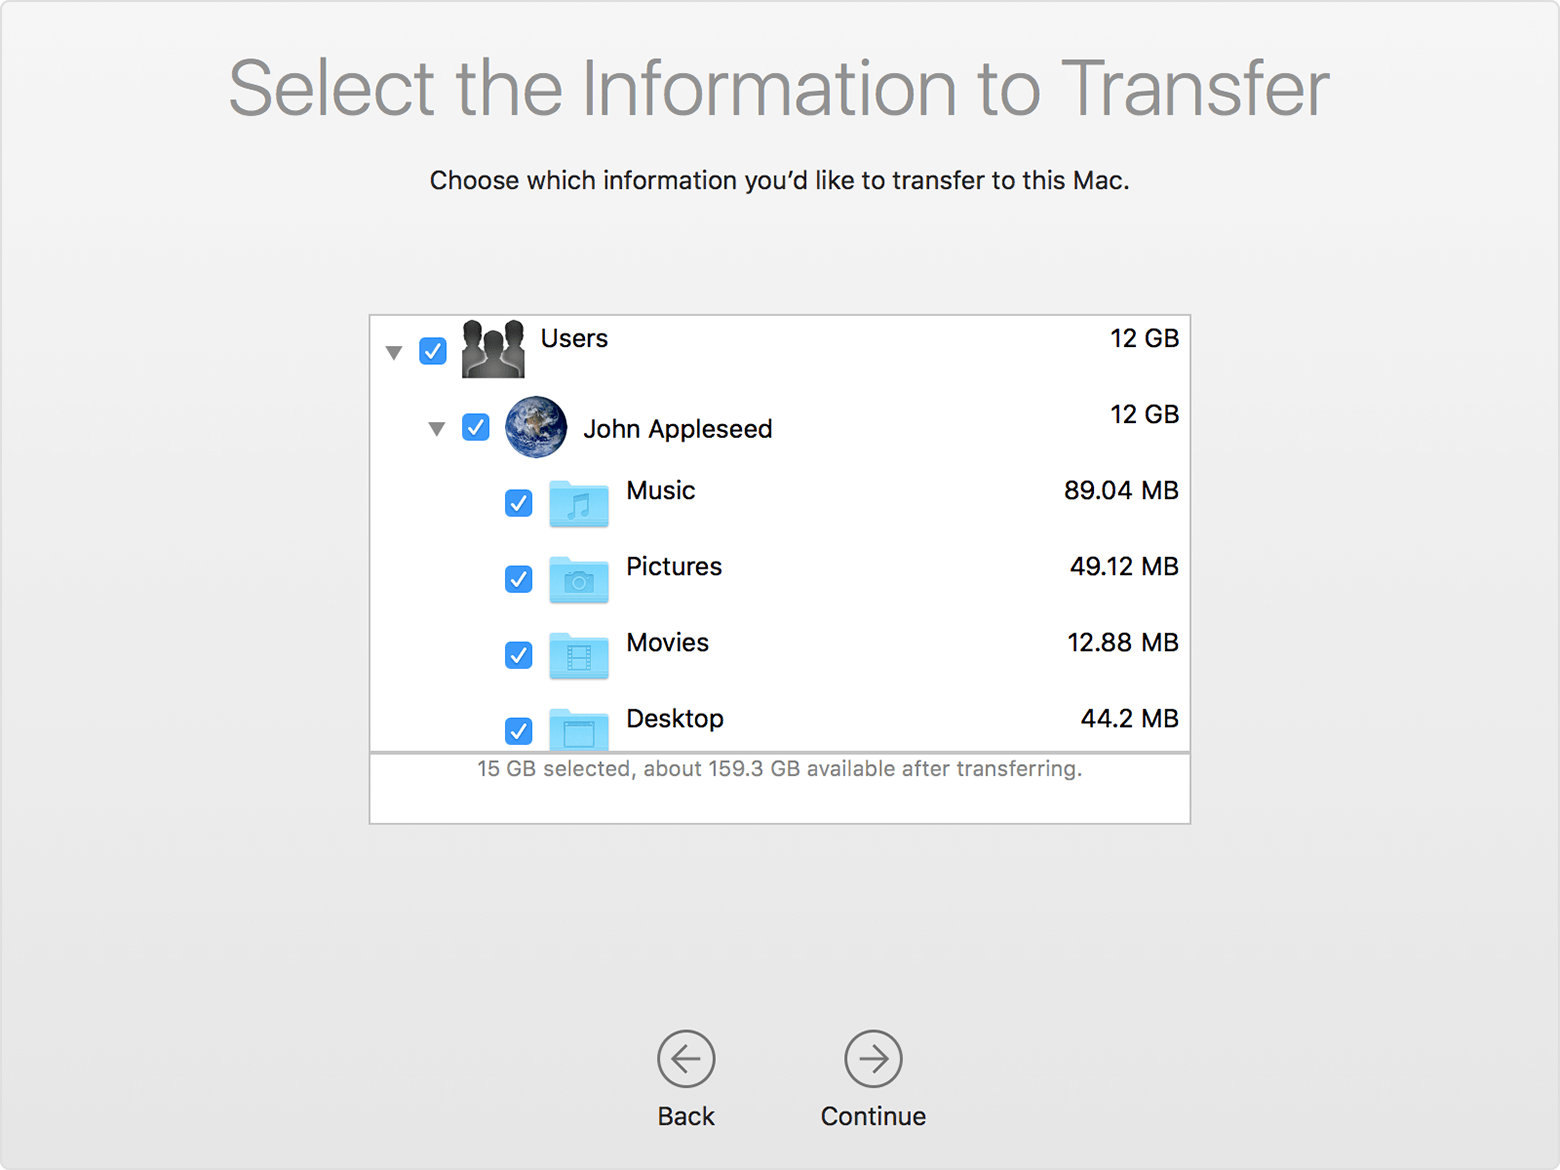
You can watch the progress and estimated time remaining on both the PC and your Mac. They tell you when migration is complete.
After you move your data
When migration completes, close Windows Migration Assistant on your PC. Then log in to the new user account on your Mac. The first time you log in to a user account migrated from your PC, you’re asked to set a password. You can use the same password that you used on your PC, or create a new password.
After logging in to the user account that you migrated, authorize your computer for iTunes Store purchases. It’s important to authorize before you sync or play content downloaded from the iTunes Store.
If you have issues moving your data
- Quit all open apps on your PC, then try migrating your content again. For example, you can press Alt-Tab to choose an open application, then press Alt-F4 to quit it.
- If your PC doesn’t appear in the Setup Assistant or Migration Assistant window on your Mac, make sure the computers are connected to the same network. You can create a network by connecting a single Ethernet cable between your Mac and PC. If that doesn’t help, check for firewall software on your PC and turn it off. After migration completes, you can turn firewall software on again.
- If Migration Assistant doesn’t open on your PC, turn off any antivirus software on your PC. Then try to open Migration Assistant again. After migration completes. You can turn that software on again.
- If you still can’t migrate your information successfully, you can use an external drive or file sharing to manually copy important data to your Mac.
What data can I transfer?
Migration Assistant lets you choose the data to move to your Mac. Here’s what moves over for specific apps and data types:
Email, contacts, and calendar information
Email messages, email-account settings, contacts, and appointments move based on which version of Windows you’re using and which accounts you have.
Outlook 1
Data from 32-bit versions of Outlook in Windows 7 and later move as follows:
- People move to Contacts 2
- Appointments move to the Calendar app
- IMAP and Exchange settings and messages move to the Mail app
- POP settings and messages move to Mail 2
Windows Live Mail
Data from Windows Live Mail in Windows 7 and later moves as follows:
- IMAP settings and messages move to Mail
- POP settings and messages move to Mail 2
Windows Mail
Data from Windows Mail in Windows 7 and later (excluding Windows 8) move as follows:
- IMAP settings and messages move to Mail
- POP settings and messages move to Mail 2
- People move to Contacts
Bookmarks
Bookmarks from Internet Explorer, Safari for Windows, and Firefox move to Safari.
System settings
Language and location settings, and custom desktop pictures move to System Preferences. Your web browser homepage moves to Safari preferences.
Pictures
Photos and other images move to your home folder. You can then add them to Photos, or open Photos and let it search your Mac for photos to import.
iTunes content
Migration Assistant transfers your iTunes media as follows: music to the Apple Music app, videos to the Apple TV app, podcasts to the Apple Podcasts app, and audiobooks to the Apple Books app.
Other files
Migration Assistant also moves these files:
- Files from the top-level folder of the currently logged-in user’s home directory
- Non-system files located in the Windows or Program Files folders
- Top-level folders located on the Windows system disk and other attached disks
1. Migration Assistant doesn’t support 64-bit versions of Outlook. You can manually migrate Mail, Contacts, or Calendars from Outlook 2013 or Outlook 2016 by signing in and entering the content on your Mac manually.
2. Migration Assistant transfers only the Mail or Contacts data that belongs to the logged-in Windows user. To transfer data from another user account, use Migration Assistant again while you’re logged in to another Windows account. Each time you migrate, your Mac creates a new user account.
Information about products not manufactured by Apple, or independent websites not controlled or tested by Apple, is provided without recommendation or endorsement. Apple assumes no responsibility with regard to the selection, performance, or use of third-party websites or products. Apple makes no representations regarding third-party website accuracy or reliability. Contact the vendor for additional information.
Guide for changing your dev environment from Mac to Windows
The following tips and control equivalents should help you in your transition between a Mac and Windows (or WSL/Linux) development environment.
For app development, the nearest equivalent to Xcode would be Visual Studio. There is also a version of Visual Studio for Mac, if you ever feel the need to go back. For cross-platform source code editing (and a huge number of plug-ins) Visual Studio Code is the most popular choice.
Keyboard shortcuts
| Operation | Mac | Windows |
|---|---|---|
| Copy | Command+C | Ctrl+C |
| Cut | Command+X | Ctrl+X |
| Paste | Command+V | Ctrl+V |
| Undo | Command+Z | Ctrl+Z |
| Save | Command+S | Ctrl+S |
| Open | Command+O | Ctrl+O |
| Lock computer | Command+Control+Q | WindowsKey+L |
| Show desktop | Command+F3 | WindowsKey+D |
| Open file browser | Command+N | WindowsKey+E |
| Minimize windows | Command+M | WindowsKey+M |
| Search | Command+Space | WindowsKey |
| Close active window | Command+W | Control+W |
| Switch current task | Command+Tab | Alt+Tab |
| Maximize a window to full screen | Control+Command+F | WindowsKey+Up |
| Save screen (Screenshot) | Command+Shift+3 | WindowsKey+Shift+S |
| Save window | Command+Shift+4 | WindowsKey+Shift+S |
| View item information or properties | Command+I | Alt+Enter |
| Select all items | Command+A | Ctrl+A |
| Select more than one item in a list (noncontiguous) | Command, then click each item | Control, then click each item |
| Type special characters | Option+ character key | Alt+ character key |
Trackpad shortcuts
Note: Some of these shortcuts require a “Precision Trackpad”, such as the trackpad on Surface devices and some other third party laptops.
| Operation | Mac | Windows |
|---|---|---|
| Scroll | Two finger vertical swipe | Two finger vertical swipe |
| Zoom | Two finger pinch in and out | Two finger pinch in and out |
| Swipe back and forward between views | Two finger sideways swipe | Two finger sideways swipe |
| Switch virtual workspaces | Four fingers sideways swipe | Four fingers sideways swipe |
| Display currently open apps | Four fingers upward swipe | Three fingers upward swipe |
| Switch between apps | N/A | Slow three finger sideways swipe |
| Go to desktop | Spread out four fingers | Three finger swipe downwards |
| Open Cortana / Action center | Two finger slide from right | Three finger tap |
| Open extra information | Three finger tap | N/A |
| Show launchpad / start an app | Pinch with four fingers | Tap with four fingers |
Note: Trackpad options are configurable on both platforms.
Command-line shells and terminals
Windows supports several command-line shells and terminals which sometimes work a little differently to the Mac’s BASH shell and terminal emulator apps like Terminal and iTerm.
Windows shells
Windows has two primary command-line shells:
PowerShell — PowerShell is a cross-platform task automation and configuration management framework, consisting of a command-line shell and scripting language built on .NET. Using PowerShell, administrators, developers, and power-users can rapidly control and automate tasks that manage complex processes and various aspects of the environment and operating system upon which it is run. PowerShell is fully open-source, and because it is cross-platform, also available for Mac and Linux.
Mac and Linux BASH shell users: PowerShell also supports many command-aliases that you are already familiar with. For example:
- List the contents of the current directory, using: ls
- Move files with: mv
- Move to a new directory with: cd
Some commands and arguments are different in PowerShell vs. BASH. Learn more by entering: get-help in PowerShell or checkout the compatibility aliases in the docs.
To run PowerShell as an Administrator, enter «PowerShell» in your Windows start menu, then select «Run as Administrator.»
Windows Command Line (Cmd): Windows still ships the traditional Command Prompt (and Console – see below), providing compatibility with current and legacy MS-DOS-compatible commands and batch files. Cmd is useful when running existing/older batch files or command-line operations, but in general, users are recommended to learn and use PowerShell since Cmd is now in maintenance, and will not be receiving any improvements or new features in the future.
Linux shells
Windows Subsystem for Linux (WSL) can now be installed to support running a Linux shell within Windows. This means that you can run bash, with whichever specific Linux distribution you choose, integrated right inside Windows. Using WSL will provide the kind of environment most familiar to Mac users. For example, you will ls to list the files in a current directory, not dir as you would with the traditional Windows Cmd Shell. To learn about installing and using WSL, see the Windows Subsystem for Linux Installation Guide for Windows 10. Linux distributions that can be installed on Windows with WSL include:
Just to name a few. Find more in the WSL install docs and install them directly from the Microsoft Store.
Windows Terminals
In addition to many 3rd party offerings, Microsoft provides two “terminals” – GUI applications that provide access to command-line shells and applications.
Windows Terminal: Windows Terminal is a new, modern, highly configurable command-line terminal application that provides very high performance, low-latency command-line user experience, multiple tabs, split window panes, custom themes and styles, multiple “profiles” for different shells or command-line apps, and considerable opportunities for you to configure and personalize many aspects of your command-line user experience.
You can use Windows Terminal to open tabs connected to PowerShell, WSL shells (like Ubuntu or Debian), the traditional Windows Command Prompt, or any other command-line app (e.g. SSH, Azure CLI, Git Bash).
Console: On Mac and Linux, users usually start their preferred terminal application which then creates and connects to the user’s default shell (e.g. BASH).
However, due to a quirk of history, Windows users traditionally start their shell, and Windows automatically starts and connects a GUI Console app.
While one can still launch shells directly and use the legacy Windows Console, it’s highly recommended that users instead install and use Windows Terminal to experience the best, fastest, most productive command-line experience.


