- Simple Way to Install Cassandra In Windows 10
- What is cassandra and why to use it?
- Let’s try to create the table in it:
- First create the namespace where data holds.
- Congratulations! You have your Cassandra installed. Now you can explore it.
- Установка СУБД Cassandra на Windows Server
- Что это такое?
- Установка на Windows
- Apache cassandra on windows
- Latest Stable Version
- Older Maintained Releases
- Installation from Debian packages
- Installation from RPM packages
- Source
- Getting Started with Apache Cassandra on Windows the Easy Way
- Download the Software
- Validate Prerequisites
- Using the Windows Installer
- Finding and Using Installed Software
- Conclusion
Simple Way to Install Cassandra In Windows 10

Jul 25, 2019 · 4 min read
Figure out simple way to get installed and configure to run cassandra NoSQL database in Windows 10 PC in just 4 steps:


I am writing this tutorial since i face challenge to install cassandra in windows on self and i want to share what i figure out for the solution to other geeks.
What is cassandra and why to use it?
Apache Cassandra is a highly scalable, high-per f ormance distributed database designed to handle large amounts of data across many commodity (cheap) servers, providing high availability with no single point of failure. It is a type of NoSQL database that is considered a key-value store. It’s query much similar to SQL.
- Outgrown your regular relational database i.e petabytes, zettabytes size
- Need of fast insert/update/selection of data that is scalable and fault-tolerant.
Steps to setup Cassandra on Window Machine locally.
1. Cassandra need JDK to run. First need to install JDK on the PC.
- Go To Oracle (SignUp required) or Filehippo to download JDK 1.8 from which you find suitable.
- Run the Install as it is.
- Configure JDK path As:
- Copy the JDK where is installed it’s bin directory. Mine is 64-bit found inside “C:\Program Files\Java\jdk1.8.0_181\bin” and place on Environment Variable as new Env_name : “JAVA_HOME” later we use for cassandra.
- Note: Progra
1 = ‘Program Files’ for 64-bit
Progra
2 = ‘Program Files(x86)’ for 32-bit in Environment path.

2. Go to Apache Cassandra Download Page. And Download the latest version. The latest version at that time is cassandra-3.11.4
- Unzip it and place all files inside sub folder into ……………….. “C:\Program Files\apache-cassandra-3.11.4”
- Open CMD inside “C:\Program Files\apache-cassandra-3.11.4\bin” and type cassandra then the output as shown below.


1\Java\jdk1.8.0_181″
- Save the cassandra.bat then run “cassandra.bat -f” with CMD Run as Administrator. This time, error should resolve if your edit successful.
3. Need Python2.7 to run Cassandra Query shell cqlsh .
- Download Python2.7 latest version and extract inside the “C:\Program Files\apache-cassandra-3.11.4\bin” during installing. Or simply copy after installing python2.7 all files inside “bin” directory of cassandra-3.11.4. This is a easy way to go.

4. Finally run the Cassandra Server as “cassandra.bat -f” with CMD Run as Administrator from the bin directory. Following screen should see on successful start.

- Don’t close it, keep running.
- Then, open other CMD go over the bin directory of cassandra installed. To run cqlsh by type cqlsh . Following output should get.

Let’s try to create the table in it:
First create the namespace where data holds.
cqlsh> create keyspace test
cqlsh:test>CREATE TABLE emp(
emp_id int PRIMARY KEY,
emp_name text,
emp_city text,
emp_sal varint,
emp_phone varint
);
For Verification: cqlsh:test> select * from emp;

Congratulations! You have your Cassandra installed. Now you can explore it.
If you find helpful this tutorial please click on green icon, share to others.
Установка СУБД Cassandra на Windows Server
В инструкции описан процесс установки СУБД Cassandra на виртуальные сервера под управлением операционной системы семейства Windows.
Что это такое?
Cassandra — проект Apache, представляет собой распределенную базу данных для управления большими объемами структурированных данных. В данной инструкции установка будет выполняться через интеграторов DataStax, которые являются ключевыми участниками проекта Cassandra Apache. Продукт DataStax бесплатен, прост и удобен в установке, в отличии от исходных пакетов.
- Cassandra требовательна к количеству доступной оперативной памяти, так как написана на языке Java, поэтому рекомендуется наличие не менее 4 Гб RAM;
- На вашем Windows Server должна быть поставлена Java Runtime Environment, о том как это сделать написано в нашей инструкции: Установка Java для Windows.
Установка на Windows
Запустите загруженный файл. Нажмите Next для продолжения инсталляции.

Примите лицензионное соглашение.

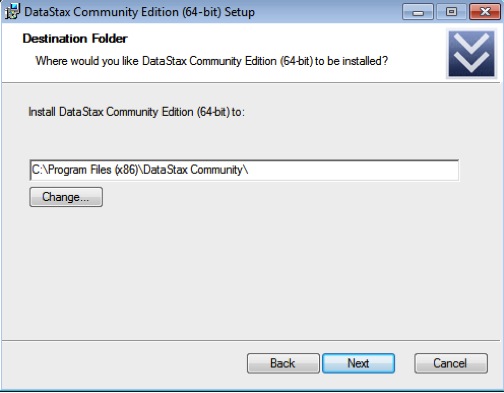
На следующем шаге укажите путь до программного обеспечения.

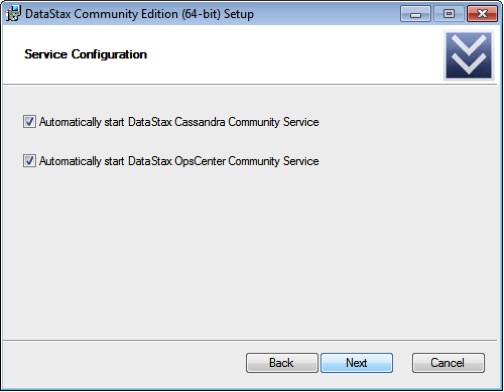
При необходимости отметьте галочкой автоматический запуск DataStax Cassandra Community Service.


По окончании процесса установки нажмите Next.


Для работы с Cassandra в меню Windows найдите новую установленную программу Cassandra CQL Shell и запустите.

Перед вами откроется новое консольное окно, в котором можно начинать работать.
Apache cassandra on windows
Download the latest Apache Cassandra 4.0 beta release: 4.0-beta4 (pgp, sha256 and sha512), released on 2020-12-30.
Latest Stable Version
Download the latest Apache Cassandra 3.11 release: 3.11.10 (pgp, sha256 and sha512), released on 2020-11-04.
Older Maintained Releases
The following older Cassandra releases are still maintained:
- Apache Cassandra 3.11 will fully be maintained until April 30, 2022 and with critical fixes only until April 30, 2023 The latest release is 3.11.10 (pgp, sha256 and sha512), released on 2020-11-04.
- Apache Cassandra 3.0 will be maintained until April 30, 2022 with critical fixes only. The latest release is 3.0.24 (pgp, sha256 and sha512), released on 2020-11-04.
- Apache Cassandra 2.2 will be maintained until April 30, 2021. with critical fixes only. The latest release is 2.2.19 (pgp, sha256 and sha512), released on 2020-11-04.
- Apache Cassandra 2.1 will be maintained until April 30, 2021 with critical fixes only. The latest release is 2.1.22 (pgp, sha256 and sha512), released on 2020-08-31.
Older (unmaintained) versions of Cassandra are archived here.
Installation from Debian packages
- For the specify the major version number, without dot, and with an appended x .
- The latest is 311x .
For older releases, the can be one of 30x , 22x , or 21x .
- Add the Apache Cassandra repository keys:
Then add the public key A278B781FE4B2BDA as follows:
and repeat sudo apt-get update . The actual key may be different, you get it from the error message itself. For a full list of Apache contributors public keys, you can refer to https://downloads.apache.org/cassandra/KEYS.
- You can start Cassandra with sudo service cassandra start and stop it with sudo service cassandra stop . However, normally the service will start automatically. For this reason be sure to stop it if you need to make any configuration changes.
- Verify that Cassandra is running by invoking nodetool status from the command line.
- The default location of configuration files is /etc/cassandra .
- The default location of log and data directories is /var/log/cassandra/ and /var/lib/cassandra .
- Start-up options (heap size, etc) can be configured in /etc/default/cassandra .
Installation from RPM packages
- For the specify the major version number, without dot, and with an appended x .
- The latest is 311x .
- For older releases, the can be one of 30x , 22x , or 21x .
(Not all versions of Apache Cassandra are available, since building RPMs is a recent addition to the project.)
- Install Cassandra, accepting the gpg key import prompts:
Start Cassandra (will not start automatically):
Systemd based distributions may require to run systemctl daemon-reload once to make Cassandra available as a systemd service. This should happen automatically by running the command above.
Make Cassandra start automatically after reboot:
Please note that official RPMs for Apache Cassandra only have been available recently and are not tested thoroughly on all platforms yet. We appreciate your feedback and support and ask you to post details on any issues in the corresponding Jira ticket.
Source
Development is done in the Apache Git repository. To check out a copy:
© 2016 The Apache Software Foundation. Apache, the Apache feather logo, and Apache Cassandra are trademarks of The Apache Software Foundation.
Getting Started with Apache Cassandra on Windows the Easy Way
Robin Schumacher on January 31, 2012 · 5 minute read
The legacy methods of developing with DataStax Enterprise on Windows as discussed in this blog post have evolved to using our new and improved Docker containers, which provide a much better development experience on Windows.
Many architects and developers today are targeting Apache Cassandra as the underlying database because of its ability to easily scale and perform fast under extreme workloads. Developers like the fact that no modifications are required on their part if the application is initially written to just use one Cassandra node, but grows into hundreds in the future.
According to industry analysts such as Evans Data, Microsoft Windows remains the number one platform used by developers to write code and test their work (although Mac has recently been challenging that ranking). Many times developers need a complete environment to do their work, and this translates into having a full functioning copy of the database their application will target running on their Windows workstation or laptop.
For those wanting to develop against Apache Cassandra on Windows, this article will show you how to easily install, setup, and manage/monitor Apache Cassandra on a Windows machine.
Download the Software
The first step is to download the software you’ll need for your Windows machine. In the past, getting Apache Cassandra and all its utilities and management software on Windows wasn’t that easy, but that’s now a thing of the past since DataStax introduced its free Windows installer.
DataStax makes available the DataStax Community Edition, which contains the latest community version of Apache Cassandra, along with the Cassandra Query Language (CQL) utility, and a free edition of DataStax OpsCenter, which is the tool you’ll want to use for managing and monitoring your Cassandra cluster on Windows. To get Datastax Community Edition, go to the downloads page and select the Windows installation package for your version of Microsoft Windows. Note that 32 and 64-bit installers are offered.
Validate Prerequisites
The only prerequisites you’ll need for your Windows machine are:
- Windows 7 or Windows 2008 server
- Java
- Either the Firefox or Chrome Web browser for DataStax OpsCenter (which doesn’t support Internet Explorer yet)
- There is a dependency on the Visual C++ 2008 runtime (32bit), but Windows 7 and Windows 2008 Server R2 has it already installed. If you need it, see: http://www.microsoft.com/download/en/details.aspx?displaylang=en&id=29
Using the Windows Installer
The Windows installer is an MSI package that is run like any other on Windows. When you execute the setup program, you are first presented with an initial welcome panel that identifies your installation package:

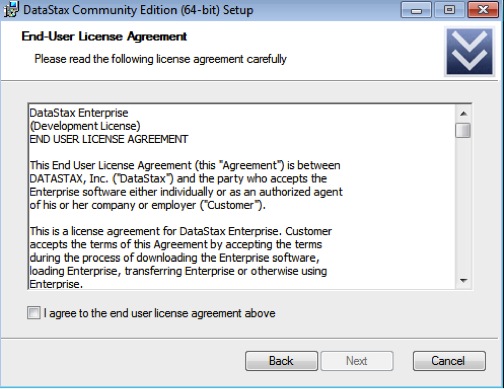
Clicking next takes you to the end user license agreement (don’t worry, the software is free):
The next panel allows you to specify where the software is to be installed:
Once the installation directory has been set, the installer will ask how you want to handle the services that will be installed. Installed services include:
- The Apache Cassandra server, labeled DataStax Cassandra Community Service
- The DataStax OpsCenter management tool, which includes both the OpsCenter service used to manage and monitor Cassandra, and the OpsCenter agent, which is used to gather metrics and carry out various tasks on every Cassandra node. Note that the primary OpsCenter service and agent are actually broken out into two distinct services on Windows
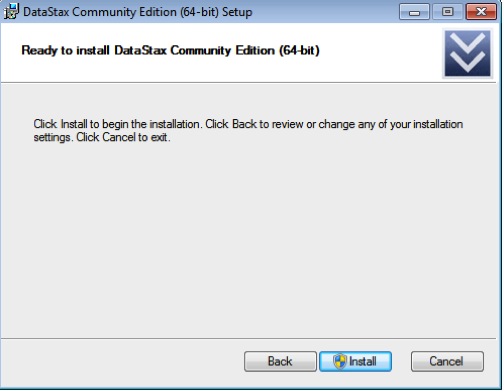
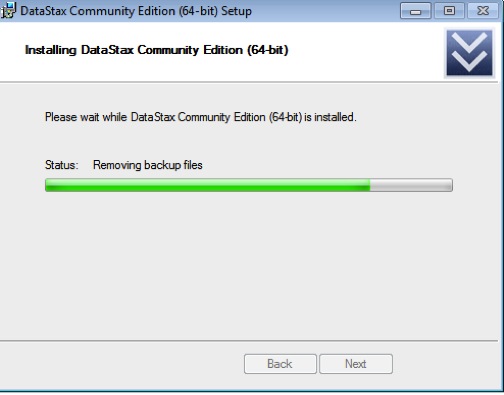
The next panel initiates the installation process:
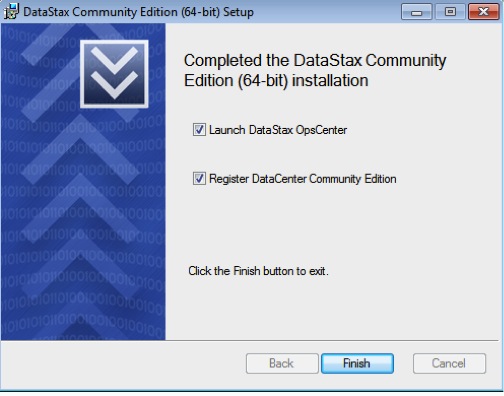
The final panel asks if you would like to launch DataStax OpsCenter in your browser and also register to be updated when new versions of the software become available:
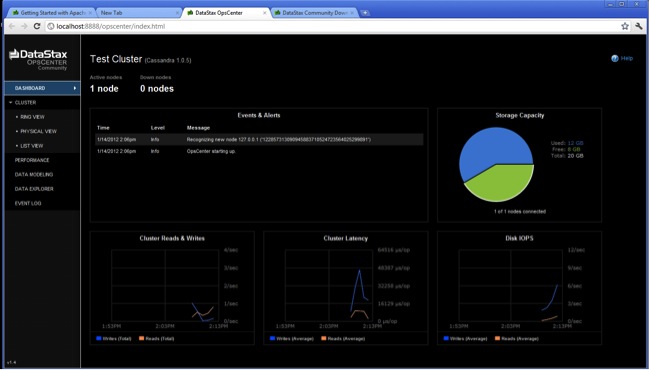
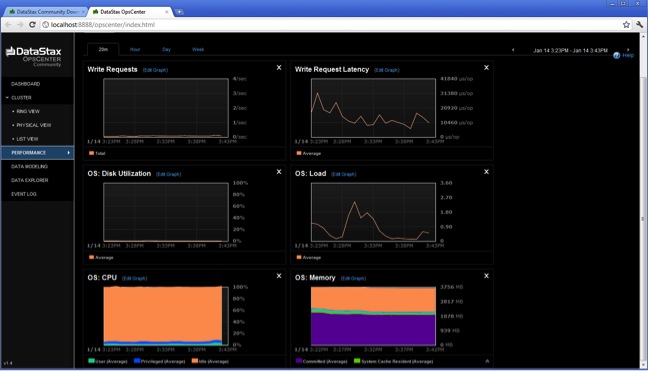
If you choose to execute DataStax OpsCenter (and you have either Google Chrome or Firefox as your default web browser), you’ll be presented with the OpsCenter dashboard:
Finding and Using Installed Software
You can find a number of the most used interfaces you’ll need in a Windows program group that the installer creates for you:
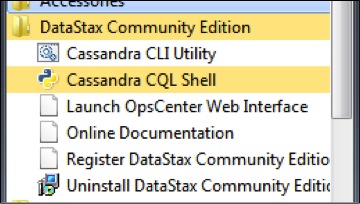
The primary interface into Cassandra is the CQL (Cassandra Query Language) shell utility, which can be used to create a new keyspace (analogous to a database in the RDBMS world) for the new Cassandra server:
Once a keyspace is created, you can create column families (the primary data object in Cassandra), insert data, query data, and more:
Typing, “Help;” at the CQL prompt will bring up the supported list of commands.
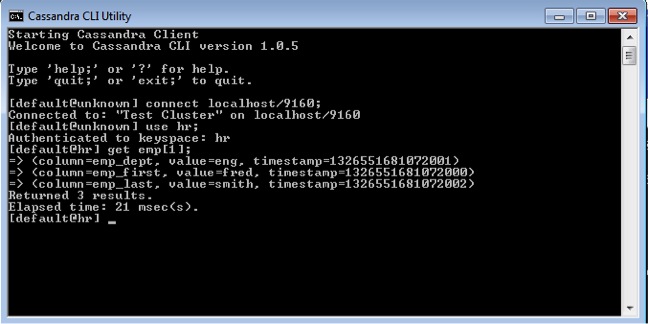
You can also use the Cassandra Command Line Interface (CLI) utility, which until the arrival of CQL was the primary interface used to create, manage, and query objects:
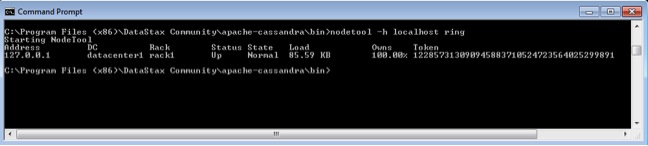
Another utility that’s used to perform various management tasks on Cassandra is the nodetool shell program. It’s not installed as a Windows program group item, and most of what it does can be visually performed through DataStax OpsCenter, but you can access it in the bin subdirectory that’s under the main installation directory:
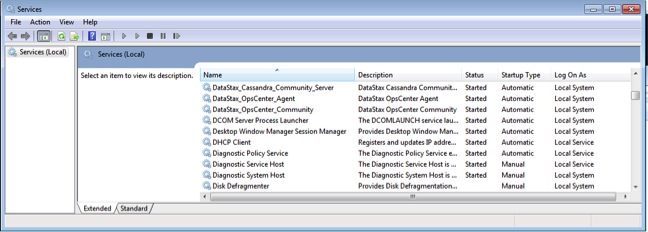
Lastly, you can start, stop, and manage the various services installed via the standard Windows services control panel interface:
Conclusion
That’s all there is to it to get Apache Cassandra and the DataStax OpsCenter visual management and monitoring tool installed on your Windows machine. For other software such as application drivers, client libraries, and more visit the downloads page.
DataStax has many ways for you to advance in your career and knowledge.


