- Compiling and Installing
- See also
- Overview for the impatient
- Requirements
- Download
- Extract
- Configuring the source tree
- Build
- Install
- Customize
- Upgrading
- Third-party packages
- Comments
- ИТ База знаний
- Полезно
- Навигация
- Серверные решения
- Телефония
- Корпоративные сети
- Установка Apache в Linux
- Установка веб-сервера Apache на Linux
- Установка Apache на CentOS и RHEL
- Установка Apache на Ubuntu и Debian
- Запуск и управление веб-сервером Apache
- Проверить веб-сервер Apache
- Проверьте тестовую страницу Apache
- Создать HTML-файл для тестирования
- Настройка фаервола для Apache
- Файлы и каталоги Apache
Compiling and Installing
This document covers compilation and installation of the Apache HTTP Server on Unix and Unix-like systems only. For compiling and installation on Windows, see Using Apache HTTP Server with Microsoft Windows and Compiling Apache for Microsoft Windows. For other platforms, see the platform documentation.
Apache httpd uses libtool and autoconf to create a build environment that looks like many other Open Source projects.
If you are upgrading from one minor version to the next (for example, 2.4.8 to 2.4.9), please skip down to the upgrading section.
See also

Overview for the impatient
Installing from source
| Download | Download the latest release from http://httpd.apache.org/download.cgi |
| Extract | $ gzip -d httpd-NN.tar.gz $ tar xvf httpd-NN.tar $ cd httpd-NN |
| Configure | $ ./configure —prefix=PREFIX |
| Compile | $ make |
| Install | $ make install |
| Customize | $ vi PREFIX/conf/httpd.conf |
| Test | $ PREFIX/bin/apachectl -k start |
NN must be replaced with the current version number, and PREFIX must be replaced with the filesystem path under which the server should be installed. If PREFIX is not specified, it defaults to /usr/local/apache2 .
Each section of the compilation and installation process is described in more detail below, beginning with the requirements for compiling and installing Apache httpd.
Requirements
The following requirements exist for building Apache httpd:
APR and APR-Util Make sure you have APR and APR-Util already installed on your system. If you don’t, or prefer to not use the system-provided versions, download the latest versions of both APR and APR-Util from Apache APR, unpack them into /httpd_source_tree_root/srclib/apr and /httpd_source_tree_root/srclib/apr-util (be sure the directory names do not have version numbers; for example, the APR distribution must be under /httpd_source_tree_root/srclib/apr/) and use ./configure ‘s —with-included-apr option. On some platforms, you may have to install the corresponding -dev packages to allow httpd to build against your installed copy of APR and APR-Util. Perl-Compatible Regular Expressions Library (PCRE) This library is required but not longer bundled with httpd. Download the source code from http://www.pcre.org, or install a Port or Package. If your build system can’t find the pcre-config script installed by the PCRE build, point to it using the —with-pcre parameter. On some platforms, you may have to install the corresponding -dev package to allow httpd to build against your installed copy of PCRE. Disk Space Make sure you have at least 50 MB of temporary free disk space available. After installation the server occupies approximately 10 MB of disk space. The actual disk space requirements will vary considerably based on your chosen configuration options, any third-party modules, and, of course, the size of the web site or sites that you have on the server. ANSI-C Compiler and Build System Make sure you have an ANSI-C compiler installed. The GNU C compiler (GCC) from the Free Software Foundation (FSF) is recommended. If you don’t have GCC then at least make sure your vendor’s compiler is ANSI compliant. In addition, your PATH must contain basic build tools such as make . Accurate time keeping Elements of the HTTP protocol are expressed as the time of day. So, it’s time to investigate setting some time synchronization facility on your system. Usually the ntpdate or xntpd programs are used for this purpose which are based on the Network Time Protocol (NTP). See the NTP homepage for more details about NTP software and public time servers. Perl 5 [OPTIONAL] For some of the support scripts like apxs or dbmmanage (which are written in Perl) the Perl 5 interpreter is required (versions 5.003 or newer are sufficient). If no Perl 5 interpreter is found by the configure script, you will not be able to use the affected support scripts. Of course, you will still be able to build and use Apache httpd.
Download
The Apache HTTP Server can be downloaded from the Apache HTTP Server download site, which lists several mirrors. Most users of Apache on unix-like systems will be better off downloading and compiling a source version. The build process (described below) is easy, and it allows you to customize your server to suit your needs. In addition, binary releases are often not up to date with the latest source releases. If you do download a binary, follow the instructions in the INSTALL.bindist file inside the distribution.
After downloading, it is important to verify that you have a complete and unmodified version of the Apache HTTP Server. This can be accomplished by testing the downloaded tarball against the PGP signature. Details on how to do this are available on the download page and an extended example is available describing the use of PGP.
Extract
Extracting the source from the Apache HTTP Server tarball is a simple matter of uncompressing, and then untarring:
$ gzip -d httpd-NN.tar.gz
$ tar xvf httpd-NN.tar
This will create a new directory under the current directory containing the source code for the distribution. You should cd into that directory before proceeding with compiling the server.
Configuring the source tree
The next step is to configure the Apache source tree for your particular platform and personal requirements. This is done using the script configure included in the root directory of the distribution. (Developers downloading an unreleased version of the Apache source tree will need to have autoconf and libtool installed and will need to run buildconf before proceeding with the next steps. This is not necessary for official releases.)
To configure the source tree using all the default options, simply type ./configure . To change the default options, configure accepts a variety of variables and command line options.
The most important option is the location —prefix where Apache is to be installed later, because Apache has to be configured for this location to work correctly. More fine-tuned control of the location of files is possible with additional configure options.
Also at this point, you can specify which features you want included in Apache by enabling and disabling modules. Apache comes with a wide range of modules included by default. They will be compiled as shared objects (DSOs) which can be loaded or unloaded at runtime. You can also choose to compile modules statically by using the option —enable- module =static .
Additional modules are enabled using the —enable- module option, where module is the name of the module with the mod_ string removed and with any underscore converted to a dash. Similarly, you can disable modules with the —disable- module option. Be careful when using these options, since configure cannot warn you if the module you specify does not exist; it will simply ignore the option.
In addition, it is sometimes necessary to provide the configure script with extra information about the location of your compiler, libraries, or header files. This is done by passing either environment variables or command line options to configure . For more information, see the configure manual page. Or invoke configure using the —help option.
For a short impression of what possibilities you have, here is a typical example which compiles Apache for the installation tree /sw/pkg/apache with a particular compiler and flags plus the two additional modules mod_ldap and mod_lua :
$ CC=»pgcc» CFLAGS=»-O2″ \
./configure —prefix=/sw/pkg/apache \
—enable-ldap=shared \
—enable-lua=shared
When configure is run it will take several minutes to test for the availability of features on your system and build Makefiles which will later be used to compile the server.
Details on all the different configure options are available on the configure manual page.
Build
Now you can build the various parts which form the Apache package by simply running the command:
Please be patient here, since a base configuration takes several minutes to compile and the time will vary widely depending on your hardware and the number of modules that you have enabled.
Install
Now it’s time to install the package under the configured installation PREFIX (see —prefix option above) by running:
This step will typically require root privileges, since PREFIX is usually a directory with restricted write permissions.
If you are upgrading, the installation will not overwrite your configuration files or documents.
Customize
Next, you can customize your Apache HTTP server by editing the configuration files under PREFIX/conf/ .
Have a look at the Apache manual under PREFIX/docs/manual/ or consult http://httpd.apache.org/docs/2.4/ for the most recent version of this manual and a complete reference of available configuration directives.
Now you can start your Apache HTTP server by immediately running:
$ PREFIX/bin/apachectl -k start
You should then be able to request your first document via the URL http://localhost/ . The web page you see is located under the DocumentRoot , which will usually be PREFIX/htdocs/ . Then stop the server again by running:
$ PREFIX/bin/apachectl -k stop
Upgrading
The first step in upgrading is to read the release announcement and the file CHANGES in the source distribution to find any changes that may affect your site. When changing between major releases (for example, from 2.0 to 2.2 or from 2.2 to 2.4), there will likely be major differences in the compile-time and run-time configuration that will require manual adjustments. All modules will also need to be upgraded to accommodate changes in the module API.
Upgrading from one minor version to the next (for example, from 2.2.55 to 2.2.57) is easier. The make install process will not overwrite any of your existing documents, log files, or configuration files. In addition, the developers make every effort to avoid incompatible changes in the configure options, run-time configuration, or the module API between minor versions. In most cases you should be able to use an identical configure command line, an identical configuration file, and all of your modules should continue to work.
To upgrade across minor versions, start by finding the file config.nice in the build directory of your installed server or at the root of the source tree for your old install. This will contain the exact configure command line that you used to configure the source tree. Then to upgrade from one version to the next, you need only copy the config.nice file to the source tree of the new version, edit it to make any desired changes, and then run:
$ ./config.nice
$ make
$ make install
$ PREFIX/bin/apachectl -k graceful-stop
$ PREFIX/bin/apachectl -k start
You can pass additional arguments to config.nice , which will be appended to your original configure options:
$ ./config.nice —prefix=/home/test/apache —with-port=90
Third-party packages
A large number of third parties provide their own packaged distributions of the Apache HTTP Server for installation on particular platforms. This includes the various Linux distributions, various third-party Windows packages, Mac OS X, Solaris, and many more.
Our software license not only permits, but encourages, this kind of redistribution. However, it does result in a situation where the configuration layout and defaults on your installation of the server may differ from what is stated in the documentation. While unfortunate, this situation is not likely to change any time soon.
A description of these third-party distributions is maintained in the HTTP Server wiki, and should reflect the current state of these third-party distributions. However, you will need to familiarize yourself with your particular platform’s package management and installation procedures.
Comments
Copyright 2021 The Apache Software Foundation.
Licensed under the Apache License, Version 2.0.
Источник
ИТ База знаний
Курс по Asterisk
Полезно
— Узнать IP — адрес компьютера в интернете
— Онлайн генератор устойчивых паролей
— Онлайн калькулятор подсетей
— Калькулятор инсталляции IP — АТС Asterisk
— Руководство администратора FreePBX на русском языке
— Руководство администратора Cisco UCM/CME на русском языке
— Руководство администратора по Linux/Unix
Навигация
Серверные решения
Телефония
FreePBX и Asterisk
Настройка программных телефонов
Корпоративные сети
Протоколы и стандарты
Установка Apache в Linux
Apache — популярный бесплатный opensource веб-сервер. Он является частью стека LAMP (Linux, Apache, MySQL, PHP), который обеспечивает большую часть Интернета. Мы уже рассказывали про его установку на Windows и сравнивали его с nginx, а сегодня расскажем про то как установить Apache на Linux.
Мини — курс по виртуализации
Знакомство с VMware vSphere 7 и технологией виртуализации в авторском мини — курсе от Михаила Якобсена


А про то как установить nginx на Linux, можно прочитать в нашей статье.
Установка веб-сервера Apache на Linux
Установка Apache на CentOS и RHEL
Откройте окно терминала и обновите списки пакетов репозитория, введя следующее:
Теперь вы можете установить Apache с помощью команды:
httpd — это имя службы Apache в CentOS. Опция –y автоматически отвечает да на запрос подтверждения.
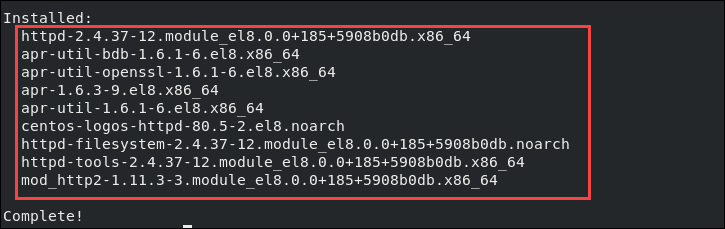
Готово, Apache установлен.
Установка Apache на Ubuntu и Debian
В Ubuntu и Debian пакет и служба Apache называются apache2 . Сначала также обновите инструмент управления пакетами apt .
Теперь устанавливаем Apache:
Запуск и управление веб-сервером Apache
Apache — это сервис, работающий в фоновом режиме. В Debian и Ubuntu он автоматически запустится после установки, а в CentOS его нужно запустить вручную.
Не забывайте что в командах в CentOS нам нужно использовать httpd , а в Debian и Ubuntu apache2
Запустите службу Apache, введя следующее:
Система не возвращает вывод, если команда выполняется правильно.
Чтобы настроить автозагрузку Apache при запуске используйте команду:
Чтобы проверить состояние службы Apache:

Чтобы перезагрузить Apache (перезагрузит файлы конфигурации, чтобы применить изменения):
Чтобы перезапустить весь сервис Apache:
Чтобы остановить Apache:
Чтобы отключить Apache при запуске системы:
Проверить веб-сервер Apache
Задача вашего программного обеспечения Apache — обслуживать веб-страницы по сети. Ваша новая установка Apache имеет тестовую страницу по умолчанию, но вы также можете создать собственную тестовую страницу.
Проверьте тестовую страницу Apache
В окне терминала найдите IP-адрес вашей системы:
Если вы знакомы с командами ip addr show или ifconfig , вы можете использовать их вместо этого. Подробно про команду ip можно прочитать тут.
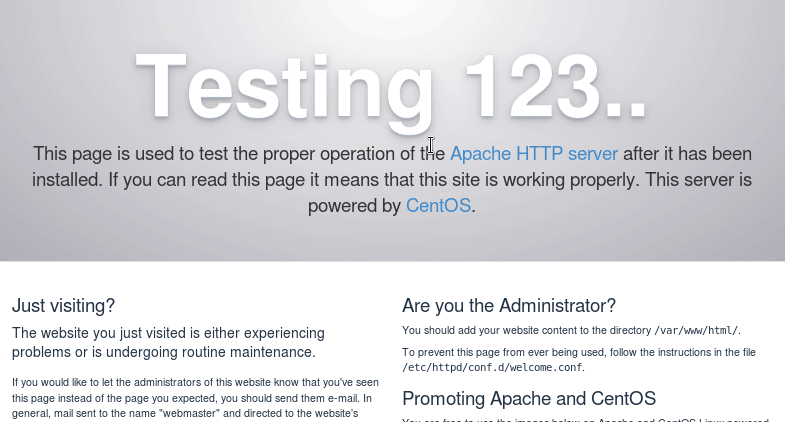
Откройте веб-браузер и введите IP-адрес, отображаемый в выводе. Система должна показать тестовую страницу HTTP-сервера Apache, как показано на скриншоте ниже:
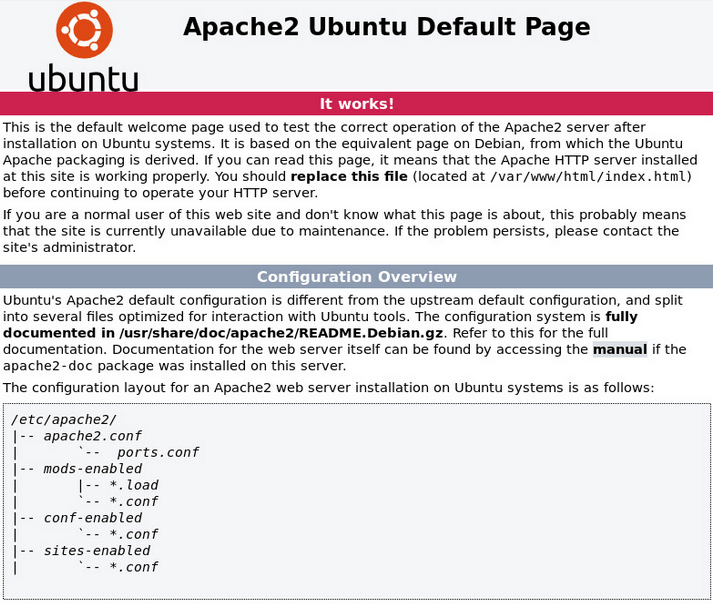
Или так, если у вас Ubuntu:
Если ваша система не имеет графического интерфейса, используйте команду curl:
Примечание. В конце: 80 обозначает порт 80, стандартный порт для интернет-трафика. Обязательно напишите соответствующий IP-адрес вместо [your_system’s_IP_address].
Создать HTML-файл для тестирования
Если по какой-либо причине вам нужна или у вас уже есть пользовательская HTML-страница, которую вы хотите использовать в качестве тестовой страницы, выполните следующие действия:
В окне терминала создайте новый индекс файл HTML:
Отредактируйте файл по своему вкусу и сохраните его.
Теперь вы можете выполнить действия, описанные в предыдущем разделе, и если ваш сервер Apache работает правильно, если он отобразит указанную пользовательскую страницу.
Настройка фаервола для Apache
Фаервол в вашей системе блокирует трафик через разные порты. Каждый порт имеет свой номер, и разные виды трафика используют разные порты. Для вашего веб-сервера вам нужно разрешить HTTP и HTTPS трафик через порты 80 и 443 .
В терминале введите следующее:
Еще раз проверьте, правильно ли настроен ваш фаервол:
Вы должны увидеть http и https в списке разрешенных сервисов.
Если вы пользуйтесь UFW, то можно открыть порты HTTP ( 80 ) и HTTPS ( 443 ), включив профиль Apache Full :
Если вы используете nftables для фильтрации подключений к вашей системе, откройте необходимые порты, введя следующую команду:
Файлы и каталоги Apache
Apache управляется путем применения директив в файлах конфигурации:
- /etc/httpd/conf/httpd.conf — основной файл конфигурации Apache
- /etc/httpd/ — Расположение всех файлов конфигурации
- /etc/httpd/conf.d/ — Все конфигурационные файлы в этом каталоге включены в основной файл настроек
- /etc/httpd/conf.modules.d/ — Расположение конфигурационных файлов модуля Apache
Примечание. При внесении изменений в файлы конфигурации не забывайте всегда перезапускать службу Apache, чтобы применить новую конфигурацию.
Логи Apache расположены тут:
- /var/log/httpd/ — расположение файлов логов Apache
- /var/log/httpd/access_log — показывает журнал систем, которые обращались к серверу
- var/log/httpd/error_log — показывает список любых ошибок, с которыми сталкивается Apache
Назначьте каталог для хранения файлов для вашего сайта. Используйте файлы конфигурации, чтобы указать каталог, который вы выбрали. Некоторые типичные места включают в себя:
- /home/username/my_website
- /var/www/my_website
- /var/www/html/my_website
- /opt/my_website
Мини — курс по виртуализации
Знакомство с VMware vSphere 7 и технологией виртуализации в авторском мини — курсе от Михаила Якобсена
Источник


