- Essentials
- Documentation
- Subprojects
- Miscellaneous
- Apache httpd 2.4.51 Released 2021-10-07 
- Apache httpd 2.2 End-of-Life 2018-01-01 
- Want to try out the Apache HTTP Server?
- Want to contribute to the Apache HTTP Server?
- Essentials
- Documentation
- Subprojects
- Miscellaneous
- Mirror
- Apache HTTP Server 2.4.51 (httpd): 2.4.51 is the latest available version 2021-10-07 
- Apache mod_fcgid FastCGI module for Apache HTTP Server released as 2.3.9 2013-10-08 
- Apache FTP module for Apache HTTP Server released as 0.9.6-beta 2008-10-08 
- Verify the integrity of the files
- Apache HTTP Server
- Содержание
- Версии Apache в Ubuntu
- Хостинг сайтов
- Установка
- Настройка
- Кодировка по умолчанию
- Виртуальные хосты
- Модули
- mod_userdir
- Настройка HTTPS в Apache
- Создание ключа и ssl-сертификата
- Настройка Apache
- Перенаправление HTTP запросов на HTTPS
- Как установить Apache на Ubuntu 20.04 и разместить веб-сайт
- Установка Apache2 в Ubuntu 20.04
- Проверка Состояния Сервера Apache2 в Ubuntu 20.04
- Протестируйте установленный веб-сервер Apache2
- Настройка виртуальных хостов Apache2 в Ubuntu
- Создание виртуального хоста
- Создать корневой каталог документа
- Создание индексного файла сайта
- Welcome to SETIWIK!
- Apache последняя версия linux
- What you’ll learn
- What you’ll need
- 2. Installing Apache
- 3. Creating Your Own Website
- 4. Setting up the VirtualHost Configuration File
- 5. Activating VirtualHost file
- End result
Essentials
Documentation
Subprojects
Miscellaneous
The Apache HTTP Server Project is an effort to develop and maintain an open-source HTTP server for modern operating systems including UNIX and Windows. The goal of this project is to provide a secure, efficient and extensible server that provides HTTP services in sync with the current HTTP standards.
The Apache HTTP Server («httpd») was launched in 1995 and it has been the most popular web server on the Internet since April 1996. It has celebrated its 25th birthday as a project in February 2020.
The Apache HTTP Server is a project of The Apache Software Foundation.
Apache httpd 2.4.51 Released 2021-10-07 
The Apache Software Foundation and the Apache HTTP Server Project are pleased to announce the release of version 2.4.51 of the Apache HTTP Server («httpd»).
This latest release from the 2.4.x stable branch represents the best available version of Apache HTTP Server.
Apache HTTP Server version 2. 4 .43 or newer is required in order to operate a TLS 1.3 web server with OpenSSL 1.1.1.
Apache httpd 2.2 End-of-Life 2018-01-01 
As previously announced, the Apache HTTP Server Project has discontinued all development and patch review of the 2.2.x series of releases.
The Apache HTTP Server Project had long committed to provide maintenance releases of the 2.2.x flavor through June of 2017. The final release 2.2.34 was published in July 2017, and no further evaluation of bug reports or security risks will be considered or published for 2.2.x releases.
Want to try out the Apache HTTP Server?
Great! We have updated our download page in an effort to better utilize our mirrors. We hope that by making it easier to use our mirrors, we will be able to provide a better download experience.
Please ensure that you verify your downloads using PGP or MD5 signatures.
Want to contribute to the Apache HTTP Server?
Awesome! Have a look at our current ‘Help Wanted’ listings then:
Copyright © 1997-2021 The Apache Software Foundation.
Apache HTTP Server, Apache, and the Apache feather logo are trademarks of The Apache Software Foundation.
Источник
Essentials
Documentation
Subprojects
Miscellaneous
Use the links below to download the Apache HTTP Server from one of our mirrors. You must verify the integrity of the downloaded files using signatures downloaded from our main distribution directory. The signatures can be verified with our KEYS file.
Only current recommended releases are available on the main distribution site and its mirrors. Historical releases, including the 1.3, 2.0 and 2.2 families of releases, are available from the archive download site.
Apache httpd for Microsoft Windows is available from a number of third party vendors.
Stable Release — Latest Version:
If you are downloading the Win32 distribution, please read these important notes.
Mirror
The currently selected mirror is https://downloads.apache.org/. If you encounter a problem with this mirror, please select another mirror. If all mirrors are failing, there are backup mirrors (at the end of the mirrors list) that should be available.
Apache HTTP Server 2.4.51 (httpd): 2.4.51 is the latest available version 2021-10-07 
The Apache HTTP Server Project is pleased to announce the release of version 2.4.51 of the Apache HTTP Server («Apache» and «httpd»). This version of Apache is our latest GA release of the new generation 2.4.x branch of Apache HTTPD and represents fifteen years of innovation by the project, and is recommended over all previous releases!
Apache mod_fcgid FastCGI module for Apache HTTP Server released as 2.3.9 2013-10-08 
The Apache Software Foundation and the Apache HTTP Server Project are pleased to announce the release of version 2.3.9 of mod_fcgid, a FastCGI implementation for Apache HTTP Server versions 2.2 and 2.4. This version of mod_fcgid is a security release.
For information about this module subproject, see the mod_fcgid module project page.
Win32, Netware or OS/2 Source with CR/LF line endings: mod_fcgid-2.3.9-crlf.zip [ PGP ] [ MD5 ] [ SHA1 ]
Apache FTP module for Apache HTTP Server released as 0.9.6-beta 2008-10-08 
The Apache HTTP Server Project is pleased to announce the release of Apache FTP module for Apache HTTP Server, version 0.9.6 as beta.
Users are encouraged to test and provide feedback on this beta release. For information about this module subproject, see the mod_ftp module project page.
Win32, Netware or OS/2 Source with CR/LF line endings: mod_ftp-0.9.6-beta-crlf.zip [ PGP ] [ SHA1 ] [ MD5 ]
Verify the integrity of the files
It is essential that you verify the integrity of the downloaded files using the PGP or SHA signatures. Please read Verifying Apache HTTP Server Releases for more information on why you should verify our releases and how to do it.
Copyright © 1997-2021 The Apache Software Foundation.
Apache HTTP Server, Apache, and the Apache feather logo are trademarks of The Apache Software Foundation.
Источник
Apache HTTP Server
Содержание
Версии Apache в Ubuntu
Хостинг сайтов
Можно реализовать четырьмя способами:
Установка
Для установки Apache выполните в терминале:
Настройка
В Ubuntu конечный файл настройки (apache2.conf) расделён на несколько файлов, расположенных в разных поддиректориях. Подробней написано в комментариях файла apache2.conf.
Настройки модулей расположены в директории /etc/apache2/mods-available. Для подключения или отключения модулей (настроек модулей) следует использовать соответствующие команды a2enmod или a2dismod . Пример подключения модуля:
Свои настройки следует сохранять в файлы, расположенные в директории /etc/apache2/conf-available. Для подключения или отключения своих настроек следует использовать соответствующие команды a2enconf или a2disconf . Пример подключения файла со своими настройками:
Настройки виртуальных хостов следует сохранять в файлы, расположенные в директории /etc/apache2/sites-available. Для подключения виртуальных хостов следует использовать соответствующие команды a2ensite или a2dissite . Пример подключения виртуального хоста:
Кодировка по умолчанию
Для указания кодировки по умолчанию следует использовать директиву AddDefaultCharset в файле /etc/apache2/conf-available/charset.conf (или раскомментировать соответствующую строку):
Виртуальные хосты
Файлы настроек виртуальных хостов хранятся в /etc/apache2/sites-available/*.conf. По умолчанию в Apache уже настроен один виртуальный хост. Его настройки лежат в файле 000-default.conf. Вы можете использовать этот виртуальный хост в качестве примера.
Пример настройки виртуального хоста:
Назовите файл настройки именем вашего хоста host1.server1.conf и сохраните.
После создания файла настроек допишите в /etc/hosts имя вашего хоста:
Для включения созданного виртуального хоста используется утилита a2ensite :
Отключается хост аналогично утилитой a2dissite :
Модули
mod_userdir
Модуль mod_userdir позволяет использовать директории, находящиеся в домашних директориях пользователей для хранения веб страниц. По умолчанию Apache ищет запрашиваемые страницы в директории
Чтобы включить mod_userdir , выполните:
и добавьте необходимого пользователя в группу www-data:
после чего перезагрузите Apache:
Страницы будут доступны по адресу http://localhost/
username, где username — имя пользователя.
Если Вы хотите запускать на сервере cgi-скрипты, подключите модуль cgi командой
По умолчанию cgi-скрипты размещаются в директории /usr/lib/cgi-bin, но вы можете разместить их где угодно, указав это в настройках своего виртуального хоста, либо глобально для всех хостов в файле /etc/apache2/conf-enabled/serve-cgi-bin.conf.
Настройка HTTPS в Apache
Веб-сервер Apache полностью поддерживает работу по HTTPS. Чтобы активировать поддержку HTTPS на уже установленном Apache, необходимо выполнить следующее.
Создание ключа и ssl-сертификата
Использование самоподписанных сертификатов хоть и защищает от пассивного прослушивания, тем не менее не гарантирует клиентам, что сервер является именно тем сервером, который им нужен. Преимуществом самоподписанных сертификатов является их бесплатность. Сертификат, подписанный компанией-сертификатором (Certificate authority), стоит денег.
Для создания ключа и сертификата вводим команду:
На вопрос «Enter PEM pass phrase:» отвечаем паролем, подтверждаем и запоминаем.
На все последующие вопросы отвечаем произвольно, можно просто щелкать по Enter , соглашаясь с предложенными вариантами, только на вопрос «Common Name (eg, YOUR name) []:» отвечаем именем сайта, для которого создаем сертификат, например www.example.com.
После ответа на все вопросы в директории должны появиться два новых файла — server.pem (ключ) и server.crt (сертификат).
Чтобы использовать сгенерированный ключ, нужно знать пароль, введённый нами, и Apache будет спрашивать его у нас при загрузке, а к чему нам лишние вопросы от демонов? 🙂 Поэтому снимаем пароль с ключа:
Скопируем их в /etc/ssl и назначим файлу ключа права чтения только администратору:
Настройка Apache
Для начала необходимо активировать mod_ssl :
А затем включить настройки HTTPS сайта по умолчанию:
Теперь необходимо отредактировать файл с настройками HTTPS сайта по умолчанию, указав в нём пути к вашим сертификатам. Сам файл называется /etc/apache2/sites-enabled/default-ssl (или /etc/apache2/sites-enabled/default-ssl.conf ).
В этом файле рекомендуется после директивы
чтобы запретить использование устаревшего протокола SSLv2.
Дальше вам необходимо отредактировать параметры, ответственные за сертификаты.
Теперь просто перезагрузите Apache:
И если все параметры указаны верно, ваши сайты станут доступны по HTTPS.
Перенаправление HTTP запросов на HTTPS
Затем изменяем файл /etc/apache2/sites-enabled/000-default , отвечающий за виртуальный хост по умолчанию для HTTP запросов. В этот файл добавляем директиву
При этом все настройки директорий можно удалить, поскольку по HTTP на ваши сайты всё равно будет не попасть.
Всё, теперь ещё раз перезапустите Apache и убедитесь, что при заходе по HTTP вы автоматически перенаправляетесь на HTTPS-страницу.
Источник
Как установить Apache на Ubuntu 20.04 и разместить веб-сайт
Apache — это программное обеспечение бесплатного веб-сервера, с открытым исходным кодом, разработан Apache Software Foundation. Официально он называется Apache HTTP Server. Apache является одним из самых старых, кросс-платформенных веб-серверов.
В этой инструкции мы установим Apache версии 2 (Apache2) на Ubuntu 20.04. Кроме того, мы настроим виртуальные хосты таким образом, чтобы на одном сервере могли размещаться несколько веб-сайтов.
Установка Apache2 в Ubuntu 20.04
Первое что требуется сделать это проверить наличие обновлений пакетов с помощью команды ниже.
Во — вторых, выполните следующую команду, чтобы установить Apache версии 2 из репозитория пакетов Ubuntu.
При появлении запроса введите Y, чтобы продолжить установку.
После успешной установки Apache2 выполните следующую команду для просмотра версии.
Проверка Состояния Сервера Apache2 в Ubuntu 20.04
Далее следует проверить состояние сервера Apache2, для этого выполните следующую команду.
По умолчанию служба Apache2 должна быть активна (запущена). Если нет, запустите службу следующей командой.
Протестируйте установленный веб-сервер Apache2
Последний шаг — это тестирование веб-сервера Apache2. Откройте веб-браузер и введите IP — адрес вашего сервера Ubuntu. Или введите localhost, если вы локально подключены к серверу.
Вы должны увидеть страницу Apache2 Ubuntu default page, как показано на рисунке ниже.
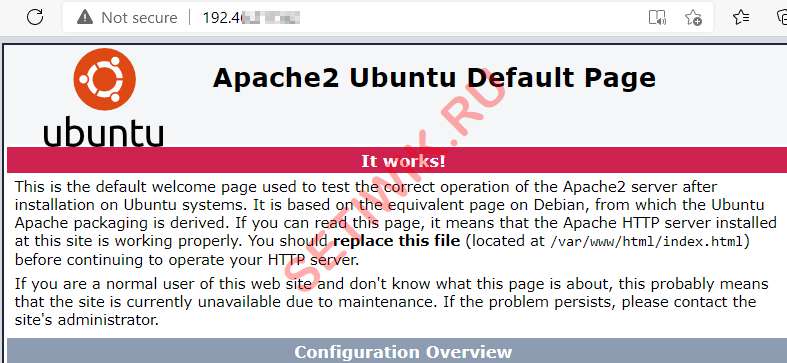 Страница Apache2 Ubuntu по умолчанию
Настройка виртуальных хостов Apache2 в Ubuntu
Виртуальные хосты позволяют размещать более одного веб-сайта на одном сервере Apache2. В Nginx это называется серверными блоками.
По умолчанию Apache2 поставляется с одним виртуальным хостом, а его конфигурационная информация хранится в файле /etc/apache2/sites-enabled/000-default.conf. Кроме того, корень веб-сайта по умолчанию — располагается в /var/www/html.
Настроить новый виртуальный хост очень просто. Следуйте инструкции и просто замените setiwik своим собственным зарегистрированным доменным именем.
Примечание: ваше зарегистрированное доменное имя должно указывать на IP-адрес вашего сервера Ubuntu.
Создание виртуального хоста
Создайте новый конфигурационный файл виртуального хоста, скопировав файл по умолчанию следующим образом.
$ cp /etc/apache2/sites-available/000-default.conf /etc/apache2/sites-available/setiwik.conf
Далее отключите виртуальный хост по умолчанию с помощью приведенной ниже команды.
Создать корневой каталог документа
Выполните следующую команду, чтобы создать корневой каталог документа для хранения файлов веб — сайта.
Затем сделайте учетную запись Пользователя службы Apache2 (www-data) и группу (www-data) владельцами корневого каталога документа. Это можно сделать следующим образом.
$ sudo chown www-data:www-data /var/www/setiwik
Далее, предоставьте учетной записи Пользователя службы Apache2 (www-data) полный доступ к корневому каталогу документа с помощью следующей команды.
Создание индексного файла сайта
Теперь создайте индексный файл в корневом каталоге документа с помощью команды:
Скопируйте и вставьте пример HTML-кода ниже.
Welcome to SETIWIK!
Если вы видите эту страницу, веб-сайт SETIWIK работает правильно
Источник
Apache последняя версия linux
Apache is an open source web server that’s available for Linux servers free of charge.
In this tutorial we’ll be going through the steps of setting up an Apache server.
What you’ll learn
- How to set up Apache
- Some basic Apache configuration
What you’ll need
- Ubuntu Server 16.04 LTS
- Secure Shell (SSH) access to your server
- Basic Linux command line knowledge
Got everything ready? Let’s move on to the next step!
Originally authored by Aden Padilla
2. Installing Apache
To install Apache, install the latest meta-package apache2 by running:
After letting the command run, all required packages are installed and we can test it out by typing in our IP address for the web server.

If you see the page above, it means that Apache has been successfully installed on your server! Let’s move on.
3. Creating Your Own Website
By default, Apache comes with a basic site (the one that we saw in the previous step) enabled. We can modify its content in /var/www/html or settings by editing its Virtual Host file found in /etc/apache2/sites-enabled/000-default.conf .
We can modify how Apache handles incoming requests and have multiple sites running on the same server by editing its Virtual Hosts file.
Today, we’re going to leave the default Apache virtual host configuration pointing to www.example.com and set up our own at gci.example.com .
So let’s start by creating a folder for our new website in /var/www/ by running
We have it named gci here but any name will work, as long as we point to it in the virtual hosts configuration file later.
Now that we have a directory created for our site, lets have an HTML file in it. Let’s go into our newly created directory and create one by typing:
Paste the following code in the index.html file:
Pretty cool, right?
Now let’s create a VirtualHost file so it’ll show up when we type in gci.example.com .
4. Setting up the VirtualHost Configuration File
We start this step by going into the configuration files directory:
Since Apache came with a default VirtualHost file, let’s use that as a base. ( gci.conf is used here to match our subdomain name):
Now edit the configuration file:
We should have our email in ServerAdmin so users can reach you in case Apache experiences any error:
We also want the DocumentRoot directive to point to the directory our site files are hosted on:
The default file doesn’t come with a ServerName directive so we’ll have to add and define it by adding this line below the last directive:
This ensures people reach the right site instead of the default one when they type in gci.example.com .
Now that we’re done configuring our site, let’s save and activate it in the next step!
5. Activating VirtualHost file
After setting up our website, we need to activate the virtual hosts configuration file to enable it. We do that by running the following command in the configuration file directory:
You should see the following output
To load the new site, we restart Apache by typing:
End result
Now is the moment of truth, let’s type our host name in a browser.  Hooray!
Источник


