- Apache spark install mac os
- Latest Preview Release
- Link with Spark
- Installing with PyPi
- Release Notes for Stable Releases
- Archived Releases
- How to Install Scala and Apache Spark on MacOS
- Step 1: Get Homebrew
- Step 2: Installing xcode-select
- Step 3: Use Homebrew to install Java
- Step 4: Use Homebrew to install Scala
- Step 5: Use Homebrew to install Apache Spark
- Step 5: Start the Spark Shell
- Installing Apache Spark on Mac OS
- How to Install Scala and Apache Spark on MacOS
- How to Install Scala and Apache Spark on MacOS
- Step 1: Get Homebrew
- Step 2: Installing xcode-select
- Step 3: Use Homebrew to install Java
- Step 4: Use Homebrew to install Scala
- Step 5: Use Homebrew to install Apache Spark
- Step 5: Start the Spark Shell
- Apache spark install mac os
- About
Apache spark install mac os
Choose a Spark release:
Choose a package type:
Verify this release using the and project release KEYS.
Note that, Spark 2.x is pre-built with Scala 2.11 except version 2.4.2, which is pre-built with Scala 2.12. Spark 3.0+ is pre-built with Scala 2.12.
Latest Preview Release
Preview releases, as the name suggests, are releases for previewing upcoming features. Unlike nightly packages, preview releases have been audited by the project’s management committee to satisfy the legal requirements of Apache Software Foundation’s release policy. Preview releases are not meant to be functional, i.e. they can and highly likely will contain critical bugs or documentation errors. The latest preview release is Spark 3.0.0-preview2, published on Dec 23, 2019.
Link with Spark
Spark artifacts are hosted in Maven Central. You can add a Maven dependency with the following coordinates:
Installing with PyPi
PySpark is now available in pypi. To install just run pip install pyspark .
Release Notes for Stable Releases
Archived Releases
As new Spark releases come out for each development stream, previous ones will be archived, but they are still available at Spark release archives.
NOTE: Previous releases of Spark may be affected by security issues. Please consult the Security page for a list of known issues that may affect the version you download before deciding to use it.
Источник
How to Install Scala and Apache Spark on MacOS

Here is a Step by Step guide to installing Scala and Apache Spark on MacOS.
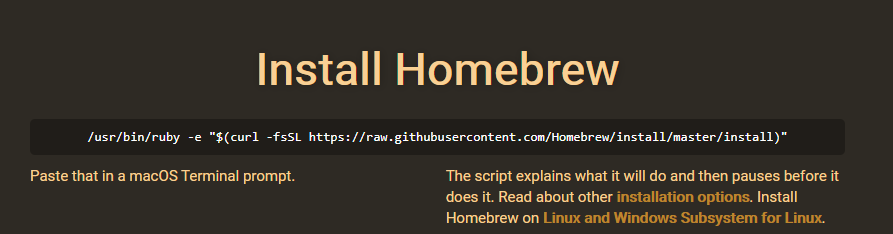
Step 1: Get Homebrew
Homebrew makes your life a lot easier when it comes to installing applications and languages on a Mac OS. You can get Homebrew by following the instructions on it’s website.
Which basically just tells you to open your terminal and type:
There are more detailed instructions on installing on the project’s GitHub page. Installing everything through Homebrew should automatically add all the appropriate PATH settings to your profile.
Step 2: Installing xcode-select
In order to install Java, Scala, and Spark through the command line we will probably need to install xcode-select and command line developer tools. Go to you terminal and type:
You will get a prompt that looks something like this:

Go ahead and select install.
Step 3: Use Homebrew to install Java
Scala is dependent on Java, you may or may not need to install it. The easiest way to install it is to just use HomeBrew:
In your terminal type:
You may need to enter your password at some point to complete the java installation. After running this Homebrew should have taken care of the Java install. Now we can move on to Scala.
Step 4: Use Homebrew to install Scala
Now with Homebrew installed go to your terminal and type:
Step 5: Use Homebrew to install Apache Spark
Now with Scala installed go to your terminal and type:
Homebrew will now download and install Apache Spark, it may take some time depending on your internet connection.
Step 5: Start the Spark Shell
Now try this command:
You should see a flood of text and warnings but eventually see something like this:
You can confirm that it is working by typing the scala code:
Congratulations! You’re all set up!
Common Issue: Setting PATH in bash.
Homebrew should have taken care of all of this, but in case you need to add spark to your PATH, you’ll want to use:
Just type that straight into your terminal.
I’m Jose Portilla, and I teach over 200,000 students about programming, data science, and machine learning on Udemy. You can check out all my courses here.
If you’re interested in learning Python for Data Science and Machine learning, check out my course here. (I also teach Full Stack Web Development with Django!)
Источник
Installing Apache Spark on Mac OS

Copy the url from Home page on mac os terminal to install Home brew

Run below command to update home brew
Check Java Version

Run below command to install Java8

For Latest Java use
Check Java Version


Use scala -version to get the scala version

Install Apache Spark

To start spark shell execute below command

Run below command to check the execution which will return the string “Hello World”

Run pyspark to start pyspark shell

Add Spark path to bash profile
Run below command and then add the path to the profile

And execute below command to start all services
Источник
How to Install Scala and Apache Spark on MacOS

by Jose Marcial Portilla
How to Install Scala and Apache Spark on MacOS
Here is a Step by Step guide to installing Scala and Apache Spark on MacOS.
Step 1: Get Homebrew
Homebrew makes your life a lot easier when it comes to installing applications and languages on a Mac OS. You can get Homebrew by following the instructions on it’s website.
Which basically just tells you to open your terminal and type:
There are more detailed instructions on installing on the project’s GitHub page. Installing everything through Homebrew should automatically add all the appropriate PATH settings to your profile.
Step 2: Installing xcode-select
In order to install Java, Scala, and Spark through the command line we will probably need to install xcode-select and command line developer tools. Go to you terminal and type:
You will get a prompt that looks something like this:
Go ahead and select install.
Step 3: Use Homebrew to install Java
Scala is dependent on Java, you may or may not need to install it. The easiest way to install it is to just use HomeBrew:
In your terminal type:
You may need to enter your password at some point to complete the java installation. After running this Homebrew should have taken care of the Java install. Now we can move on to Scala.
Step 4: Use Homebrew to install Scala
Now with Homebrew installed go to your terminal and type:
Step 5: Use Homebrew to install Apache Spark
Now with Scala installed go to your terminal and type:
Homebrew will now download and install Apache Spark, it may take some time depending on your internet connection.
Step 5: Start the Spark Shell
Now try this command:
You should see a flood of text and warnings but eventually see something like this:
You can confirm that it is working by typing the scala code:
Congratulations! You’re all set up!
Common Issue: Setting PATH in bash.
Homebrew should have taken care of all of this, but in case you need to add spark to your PATH, you’ll want to use:
Just type that straight into your terminal.
I’m Jose Portilla, and I teach over 200,000 students about programming, data science, and machine learning on Udemy. You can check out all my courses here.
If you’re interested in learning Python for Data Science and Machine learning, check out my course here. (I also teach Full Stack Web Development with Django!)
If this article was helpful, tweet it.
Learn to code for free. freeCodeCamp’s open source curriculum has helped more than 40,000 people get jobs as developers. Get started
freeCodeCamp is a donor-supported tax-exempt 501(c)(3) nonprofit organization (United States Federal Tax Identification Number: 82-0779546)
Our mission: to help people learn to code for free. We accomplish this by creating thousands of videos, articles, and interactive coding lessons — all freely available to the public. We also have thousands of freeCodeCamp study groups around the world.
Donations to freeCodeCamp go toward our education initiatives and help pay for servers, services, and staff.
Источник
Apache spark install mac os
1. Spark / PySpark Installation
We are going to install Spark+Hadoop. Use the Part that corresponds to your configuration:
- 1.1. Installing Spark+Hadoop on Mac with no prior installation
- 1.2. Installing Spark+Hadoop on Linux with no prior installation
- 1.3. Use Spark+Hadoop from a prior installation
We’ll do most of these steps from the command line. So, open a terminal and jump in !
NOTE: If you would prefer to jump right into using spark you can use the spark-install.sh script provided in this repo which will automatically perform the installation and set any necessary environment variables for you. This script will install spark-2.2.0-bin-hadoop2.7 .
1.1. Installing Spark+Hadoop on MAC with no prior installation (using brew)
Be sure you have brew updated before starting: use brew update to update brew and brew packages to their last version.
1. Use brew install hadoop to install Hadoop (version 2.8.0 as of July 2017)
2. Check the hadoop installation directory by using the command:
3. Use brew install apache-spark to install Spark (version 2.2.0 as of July 2017)
4. Check the installation directory by using the command:
5. You’re done ! You can now go to the section 2 for setting up your environment and run your Spark scripts.
1.2. Installing Spark+Hadoop on Linux with no prior installation
1. Go to Apache Spark Download page. Choose the latest Spark release (2.2.0), and the package type «Pre-built for Hadoop 2.7 and later». Click on the link «Download Spark» to get the tgz package of the latest Spark release. On July 2017 this file was spark-2.2.0-bin-hadoop2.7.tgz so we will be using that in the rest of these guidelines but feel free to adapt to your version.

2. Uncompress that file into /usr/local by typing:
3. Create a shorter symlink of the directory that was just created using:
4. Go to Apache Hadoop Download page. On the table above, click on the latest version below 3 (2.8.1 as of July 2017). Click as to download the binary version tar.gz archive, choose a mirror and download the file unto your computer.
5. Uncompress that file into /usr/local by typing:
6. Create a shorter symlink of this directory using:
1.3. Using a prior installation of Spark+Hadoop
We strongly recommend you update your installation to the must recent version of Spark. As of July 2017 we used Spark 2.2.0 and Hadoop 2.8.0.
If you want to use another version there, all you have to do is to locate your installation directories for Spark and Hadoop, and use that in the next section 2.1 for setting up your environment.
2. Setting up your environment
2.1. Environment variables
To run Spark scripts you have to properly setup your shell environment: setting up environment variables, verifying your AWS credentials, etc.
/.bash_profile to add/edit the following lines depending on your configuration. This addition will setup your environment variables SPARK_HOME and HADOOP_HOME to point out to the directories used to install Spark and Hadoop.
For a Mac/Brew installation, copy/paste the following lines into your
For the Linux installation described above, copy/paste the following lines into your
For any other installation, find what directories your Spark and Hadoop installation where, adapt the following lines to your configuration and put that into your
/.bash_profile , be sure to have two environment variables for your AWS keys. We’ll use that in the assignments. Be sure you have the following lines set up (with the actual values of your AWS credentials):
Note: After any modification to your .bash_profile , for your terminal to take these changes into account, you need to run source
/.bash_profile from the command line. They will be automatically taken into account next time you open a new terminal.
2.2. Python environment
1. Back to the command line, install py4j using pip install py4j .
2. To check if everything’s ok, start an ipython console and type import pyspark . This will do nothing in practice, that’s ok: if it did not throw any error, then you are good to go.
3. How to run Spark python scripts
3.1. How to run Spark/Python from a Jupyter Notebook
Running Spark from a jupyter notebook can require you to launch jupyter with a specific setup so that it connects seamlessly with the Spark Driver. We recommend you create a shell script jupyspark.sh designed specifically for doing that.
1. Create a file called jupyspark.sh somewhere under your $PATH , or in a directory of your liking (I usually use a scripts/ directory under my home directory). In this file, you’ll copy/paste the following lines:
Save the file. Make it executable by doing chmod 711 jupyspark.sh . Now, whenever you want to launch a spark jupyter notebook run this script by typing jupyspark.sh in your terminal.
Here’s how to read that script. Basically, we are going to use pyspark (an executable from your Spark installation) to run jupyter with a proper Spark context.
The first two lines :
will set up two environment variables for pyspark to execute jupyter .
Note: If you are installing Spark on a Virtual Machine and would like to access jupyter from your host browser, you should set the NotebookApp.ip flag to —NotebookApp.ip=’0.0.0.0′ so that your VM’s jupyter server will accept external connections. You can then access jupyter notebook from the host machine on port 8888.
is part of a multiline long command to run pyspark with all necessary packages and options.
The next 3 lines:
Set up the options for pyspark to execute locally, using all 4 cores of your computer and setting up the memory usage for Spark Driver and Executor.
Is creating a directory to store Sparl SQL dataframes. This is non-necessary but has been solving a common error for loading and processing S3 data into Spark Dataframes.
The final 3 lines:
add specific packages to pyspark to load. These packages are necessary to access AWS S3 repositories from Spark/Python and to read csv files.
Note: You can adapt these parameters to your own liking. See Spark page on Submitting applications to tune these parameters.
2. Now run this script. It will open a notebook home page in your browser. From there, create a new notebook and copy/pate the following commands in your notebook:
What these lines do is to try to connect to the Spark Driver by creating a new SparkSession instance.
After this point, you can use spark as a unique entry point for reading files and doing spark things.
3.2. How to run Spark/Python from command line with via spark-submit
Instead of using jupyter notebook, if you want to run your python script (using Spark) from the command line, you will need to use an executable from the Spark suite called spark-submit . Again, this executable requires some options that we propose to put into a script to use whenever you need to launch a Spark-based python script.
1. Create a script you would call localsparksubmit.sh , put it somewhere handy. Copy/paste the following content in this file:
See the previous section 2.1 for an explanation of these values. The final line here $@ means that whatever you gave as an argument to this localsparksubmit.sh script will be used as a last argument in this command.
2. Whenever you want to run your script (called for instance script.py ), you would do it by typing localsparksubmit.sh script.py from the command line. Make sure you put localsparksubmit.sh somewhere under your $PATH , or in a directory of your linking.
Note: You can adapt these parameters to your own setup. See Spark page on Submitting applications to tune these parameters.
4. Testing your installation
1. Open a new jupyter notebook (from the jupyspark.sh script provided above) and paste the following code:
It should output the following result :
2. Create a python script called testspark.py and paste the same lines above in it. Run this script from the command line using localsparksubmit.sh testspark.py . It should output the same result as above.
About
Installation guide for Apache Spark + Hadoop on Mac/Linux
Источник


