- With MIT App Inventor, anyone can build apps with global impact
- Get Started
- Tutorials
- Teach
- Support
- Contribute
- Collaborate
- Artificial Intelligence with App Inventor New Curriculum and Teacher Resources
- News & Events
- MIT App Inventor for iOS on the App Store
- 2020 Year in Review — App Inventor Development
- Earn an MIT App Inventor certificate from MITx!
- App inventor setup software для windows
- Download the App Inventor software
- Create a new project, open the blocks editor
- Open an emulator
- Now you’re ready to build an app
- With MIT App Inventor, anyone can build apps with global impact
- Get Started
- Tutorials
- Teach
- Support
- Contribute
- Collaborate
- Artificial Intelligence with App Inventor New Curriculum and Teacher Resources
- News & Events
- MIT App Inventor for iOS on the App Store
- 2020 Year in Review — App Inventor Development
- Earn an MIT App Inventor certificate from MITx!
- Installing and Running the Emulator in AI2
- Step 1. Install the App Inventor Setup Software
- Step 2. Launch aiStarter (Windows & GNU/Linux only)
- Step 3. Open an App Inventor project and connect it to the emulator
- Installing App Inventor 2 Setup on Windows
- Installing the App Inventor Setup software package
- Locating the Setup software
With MIT App Inventor, anyone can build apps with global impact
App Inventor now offers a certification exam via edX. Click here to learn more.
Get Started
Follow these simple directions to build your first app!
Tutorials
Step-by-step guides show you how to create even more apps.
Teach
Find out about curriculum and resources for teachers.
Support
Get answers to your questions in our community.
Contribute
Contribute to the App Inventor system or educational resources.
Collaborate
Learn about research and affiliations with App Inventor.

Artificial Intelligence with
App Inventor
New Curriculum and Teacher Resources
Made in partnership with YR Media.
News & Events
MIT App Inventor for iOS on the App Store
It is with great pleasure that the App Inventor team announces that the MIT App Inventor companion app for iOS is now generally available on the Apple App Store for iPhone, iPad, iPod Touch, and Mac. At over 66,000 lines of code, this has been a tremendous undertaking by the team.

2020 Year in Review — App Inventor Development
This year we had a total of 199 commits to the App Inventor open source repository, which included 88 commits from 27 contributors external to MIT. We performed thirteen releases this year including seven companion updates. This is two more contributors than last year. Welcome to everyone new this year.
Earn an MIT App Inventor certificate from MITx!
MIT and edX are collaborating to offer official certificates that demonstrate basic proficiency in creating apps with MIT App Inventor. To earn a certificate one must pass a 90-minute online certification exam developed by the MIT App Inventor team. The cost of the exam is $49 USD. Please click here for more information and to register.
App inventor setup software для windows
Open a browser to beta.appinventor.mit.edu Login with your Google account.
Download the App Inventor software
App Inventor is mostly a cloud tool but it does require you to download some software to your computer. Go to the Setup page in App Inventor and setup your computer. Here are some notes on the process:
- Most computers have Java on them already, so for now ignore that step.
- Instead, go straight to Install the App Inventor Setup Software instructions and follow the link for the type of computer you have.
- If you have a Mac, download the .dmg file and double click it. It may start the install process automatically. If not, look on your desktop and you’ll see a mounted disk. Click it, then double click on the .pkg file within it. This will start the install process. After installation completes, you are ready to go.
Create a new project, open the blocks editor
- Back in App Inventor choose the New button on the far left to create a new project. Enter a name for the project. This will open the Component Designer. This is where you’ll show how the app will look.
- In the Component Designer, click on Open Blocks Editor. A dialog should appear asking if you want to open or save a file named appinventorForAndroidCodeblocks.jnlp. If one option is to open it with Java Web Start, perfect, do so. The process will take up to a minute, so don’t get impatient. If after a minute nothing has happened, look in your downloads folder to see if the file is there, and double click it.
- If the system doesn’t ask you to open with Java Web Start, you probably need to configure your system with Java (go back to the Learn | Setup screen).
- The blocks editor is where you’ll program the behavior of your app, e.g. what happens when the user clicks on a button.
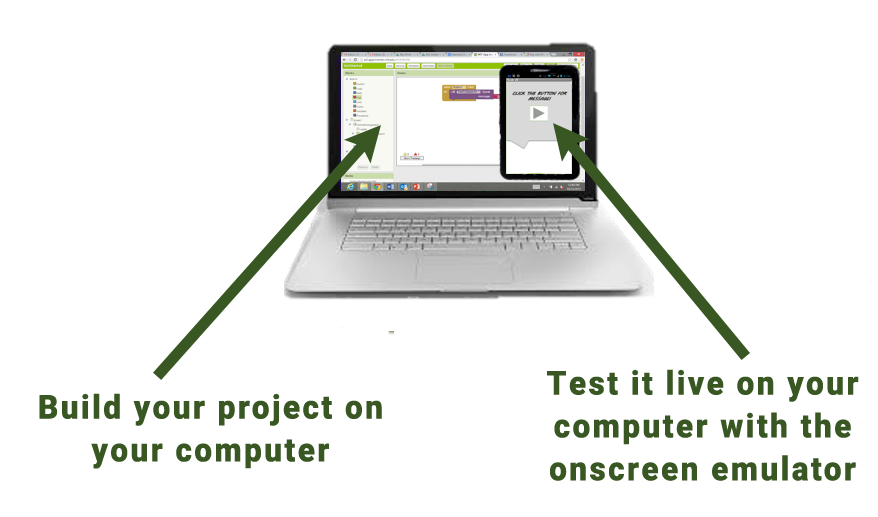
Open an emulator
Once you’ve successfully opened the blocks editor, click on New Emulator. Click OK on the dialog that appears. In about a minute, an emulator (an on-screen phone) will appear.
Now you’re ready to build an app
Most people start with Hello Purr, an app in which touching the phone (or clicking the emulator) causes a cat to meow. Get started using this video tutorial
With MIT App Inventor, anyone can build apps with global impact
App Inventor now offers a certification exam via edX. Click here to learn more.
Get Started
Follow these simple directions to build your first app!
Tutorials
Step-by-step guides show you how to create even more apps.
Teach
Find out about curriculum and resources for teachers.
Support
Get answers to your questions in our community.
Contribute
Contribute to the App Inventor system or educational resources.
Collaborate
Learn about research and affiliations with App Inventor.
Artificial Intelligence with
App Inventor
New Curriculum and Teacher Resources
Made in partnership with YR Media.
News & Events
MIT App Inventor for iOS on the App Store
It is with great pleasure that the App Inventor team announces that the MIT App Inventor companion app for iOS is now generally available on the Apple App Store for iPhone, iPad, iPod Touch, and Mac. At over 66,000 lines of code, this has been a tremendous undertaking by the team.
2020 Year in Review — App Inventor Development
This year we had a total of 199 commits to the App Inventor open source repository, which included 88 commits from 27 contributors external to MIT. We performed thirteen releases this year including seven companion updates. This is two more contributors than last year. Welcome to everyone new this year.
Earn an MIT App Inventor certificate from MITx!
MIT and edX are collaborating to offer official certificates that demonstrate basic proficiency in creating apps with MIT App Inventor. To earn a certificate one must pass a 90-minute online certification exam developed by the MIT App Inventor team. The cost of the exam is $49 USD. Please click here for more information and to register.
Installing and Running the Emulator in AI2
If you do not have an Android phone or tablet, you can still build apps with App Inventor. App Inventor provides an Android emulator, which works just like an Android but appears on your computer screen. So you can test your apps on an emulator and still distribute the app to others, even through the Play Store. Some schools and after-school programs develop primarily on emulators and provide a few Androids for final testing.
To use the emulator, you will first need to first install some software on your computer (this is not required for the wifi solution). Follow the instructions below for your operating system, then come back to this page to move on to starting the emulator
Important: If you are updating a previous installation of the App Inventor software, see How to update the App Inventor Software. You can check whether your computer is running the latest version of the software by visiting the page App Inventor 2 Connection Test.
Step 1. Install the App Inventor Setup Software
Step 2. Launch aiStarter (Windows & GNU/Linux only)
Using the emulator or the USB cable requires the use of a program named aiStarter. This program is the helper that permits the browser to communicate with the emulator or USB cable. The aiStarter program was installed when you installed the App Inventor Setup package. You do not need aiStarter if you are using only the wireless companion.
- On a Mac, aiStarter will start automatically when you log in to your account and it will run invisibly in the background.
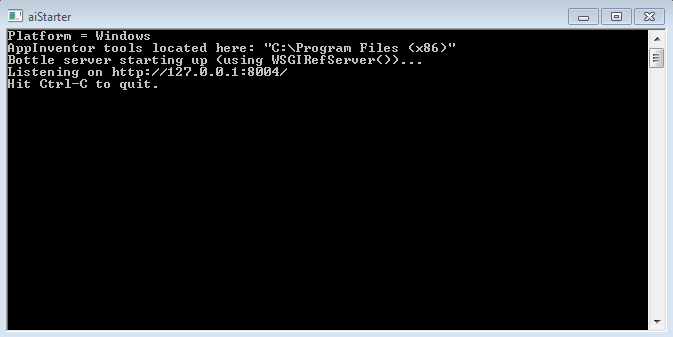
On Windows, there will be shortcuts to aiStarter from your Desktop, from the Start menu, from All Programs and from Startup Folder. If you want to use the emulator with App Inventor, you will need to manually launch aiStarter on your computer when you log in. You can start aiStarter this by clicking the icon on your desktop or using the entry in your start menu.
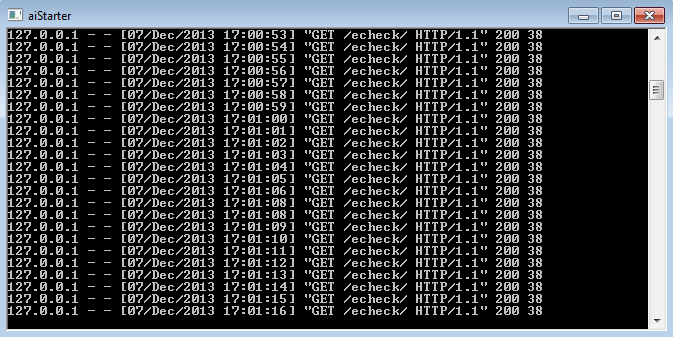
To launch aiStarter on Windows, double click on the icon (shown above). You’ll know that you’ve successfully launched aiStarter when you see a window like the following:
For Help with aiStarter, see Connection Help.
Step 3. Open an App Inventor project and connect it to the emulator
First, go to App Inventor and open a project (or create a new one — use Project > Start New Project and give your project a name).
Then, from App Inventor’s menu (on the App Inventor cloud-based software at ai2.appinventor.mit.edu), go to the Connect Menu and click the Emulator option.

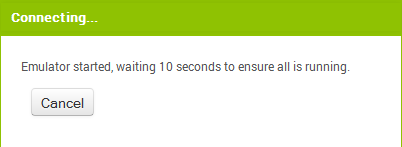
You’ll get a notice saying that the emulator is connecting. Starting the emulator can take a couple of minutes. You may see update screens like the following as the emulator starts up:
The emulator will initially appear with an empty black screen (#1). Wait until the emulator is ready, with a colored screen background (#2). Even after the background appears, you should wait until the emulated phone has finished preparing its SD card: there will be a notice at the top of the phone screen while the card is being prepared. When connected, the emulator will launch and show the app you have open in App Inventor.
#1 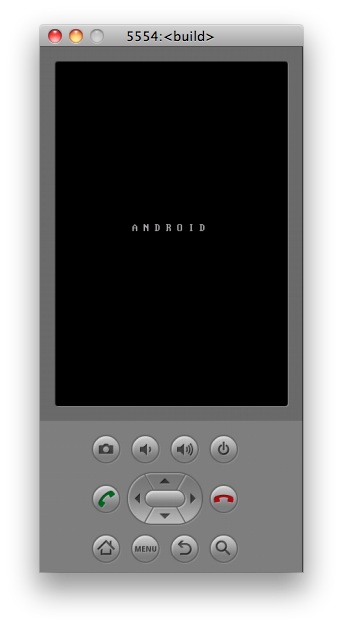 #2
#2 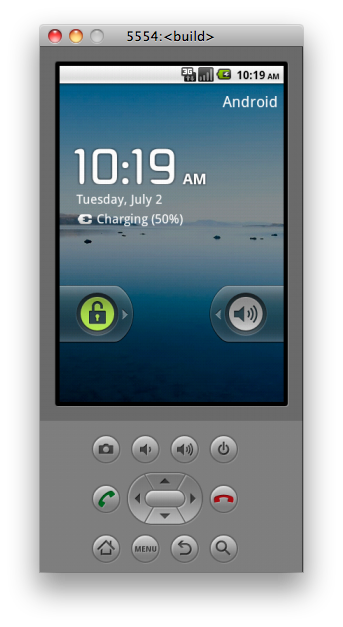 #3
#3 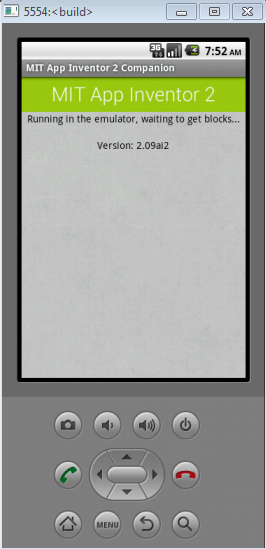 #4
#4 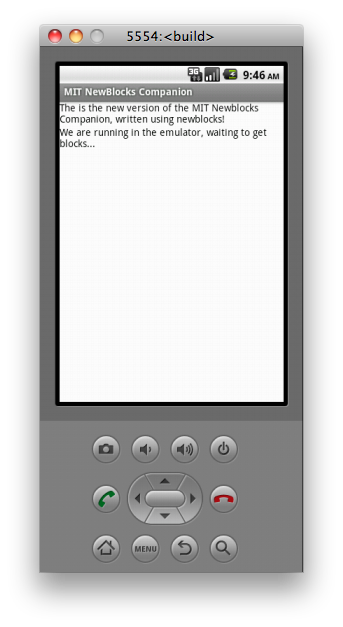
Installing App Inventor 2 Setup on Windows
Installing the Windows software for App Inventor Setup has two parts:
- Installing the App Inventor Setup software package. This step is the same for all Android devices, and the same for Windows XP, Vista, Windows 7, 8.1, and 10.
- If you choose to use the USB cable to connect to a device, then you’ll need to install Windows drivers for your Android phone.
NOTE: App Inventor 2 does not work with Internet Explorer. For Windows users, we recommend using either Chrome or Firefox as your browser for use with App Inventor.
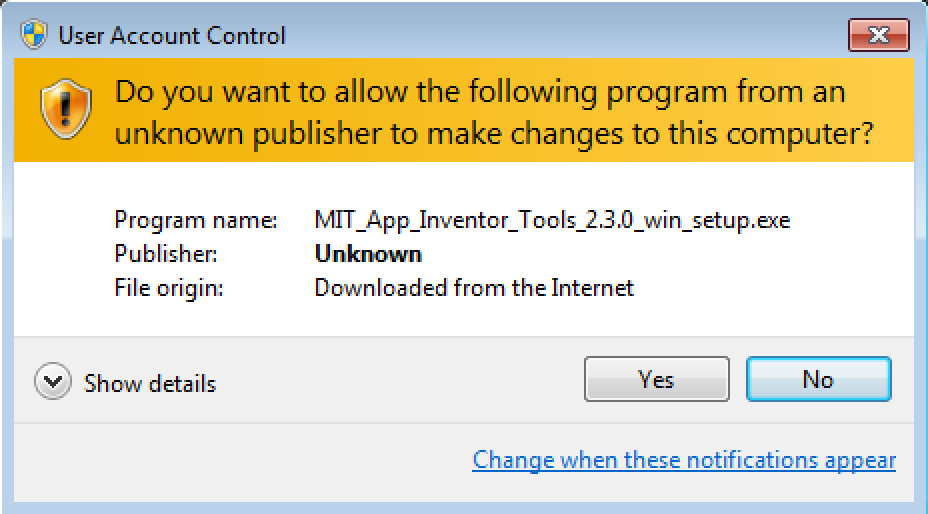
Installing the App Inventor Setup software package
You must perform the installation from an account that has administrator privileges. Installing via a non-administrator account is currently not supported.
If you have installed a previous version of the App Inventor 2 setup tools, you will need to uninstall them before installing the latest version. Follow the instructions at How to Update the App Inventor Setup Software.
80 MB) in your Downloads file or your Desktop. The location of the download on your computer depends on how your browser is configured.
Locating the Setup software
In most cases, App Inventor should be able to locate the Setup software on its own. But if it asks for the location of the software, the path to enter is C:\Program Files\Appinventor\commands-for-Appinventor. If you are using a 64-bit machine ((How to tell if you’re on 64-bit Windows), you should type Program Files (x86) rather than Program Files. Also, if you did not install the software as an administrator, it was installed in your local directory rather than in C:\Program Files. You’ll need to search for it to find the correct pathname.


