- Pamblam / Initial Setup.md
- Dual boot ArchLinux и Windows 8 на UEFI без GRUB c помощью rEFInd
- xtrymind / archinstall.md
- This comment has been minimized.
- gihyeonsung commented Feb 25, 2020
- This comment has been minimized.
- GreasyPizzaToppings commented Feb 29, 2020
- This comment has been minimized.
- ShahinSha-dot commented Nov 19, 2020
- ppartarr / archdualboot.md
Pamblam / Initial Setup.md
Newb’s Guide to installing Arch Next to Pre-installed Windows 10
The steps I took to dual boot Arch Linux alongside the preinstalled Windows 10 that came with my new Lenovo Ideapad. I used Ubuntu exclusively for the last 6 years so I’m Window’s illiterate. I don’t know a whole lot about the inner workings of Linux either.
Prepare the preinstalled Windows to share the system.
Verify the boot mode.
- Boot into Windows
- Press Win key and ‘R’ to start the Run dialog
- In the Run dialog type «msinfo32» and press Enter
- In the System Information windows, select System Summary on the left and check the value of BIOS mode item on the right.
- Make sure the value is UEFI, which means Windows boots in UEFI/GPT mode
Disable secure boot
- Open Settings (The gear icon in the start menu)
- Click «Updates & Security»
- In the «Recovery» menu, click «Restart now» under the «Advanced startup» header
- After restart, choose the «Troubleshoot» option.
- Choose «Advanced Options»
- Choose «UEFI Firmware Settings»
- Press the restart button to load the UEFI firmware
- In the Security settings find and disable Secure Boot
- In the Boot settings also find and disable Fast Boot
Disable Fast Startup
- Open Control Panel (Press Windows key, Type «Control Panel» and press enter)
- In the «View by» menu, choose «Small Icons» and click on «Power Options».
- Open «Choose what power buttons do» on the left side menu.
- Click «Change settings that are currently unavailable»
- Uncheck «Turn on Fast Startup» and save changes.
Shrink the Windows partition
- Press Windows Key + R and type diskmgmt.msc — hit enter
- Right click the C drive and choose «Shrink Volume»
- Enter the amount of space to shrink the partition (I shrunk mine by 200000mb — 200 gigs)
- Click «Shrink»
Make a bootable USB
- Choose a mirror from www.archlinux.org/download — I used the American pair.com mirror because it’s the first reputable domain I recognised.
- Download the .iso file.
- Download Rufus from https://rufus.akeo.ie/
- Plug in a new USB stick and open Rufus
- Select the USB drive and the downloaded Linux iso.
- Choose the GPT partition scheme, FAT32 file system
- Press start
We’re ready to boot and install Arch.
- Plug in the USB
- Hold down the shift key while clicking Restart
- Choose «Troubleshoot» then «Advanced Options» then «UEFI Firmware Settings» then restart.
- In the Boot menu, find your bootable USB and move it up above the Windows boot manager so it will boot the USB first.
- Save and exit
Load keyboard layout & locale
- Type loadkeys us at the command line and press enter
- Type locale-gen at the command line and press enter
Hookup them internets
- At the command line type rfkill unblock wifi and press enter
- Type iw dev and press enter. It will tell you the name of the Wifi interface.
- Type wifi-menu (using your actual interface name) and press enter.
- A UI will show allowing you to choose a network and log into it.
- After logging in, ping google.com to verify the internets work. After a few packets are sent, CTRL+C to stop pinging — if it says no packets were lost then we’re good.
- First type free -m , hit enter. Take note of the amount of total memory available.
- Type gdisk /dev/sda and hit enter to start the GPT partitioning program
- Create SWAP partition
- At the prompt, type n , press enter to create a new partition
- It will prompt for a partition number. Just hit enter to use the default.
- It asks where to start the first sector. Press enter to accept the default which is automatically the start of unallocated space.
- It asks for the last sector. Type +12GB (I have 12 gigs of memory — if you have more or less you should adjust accordingly) and press enter.
- If it says anything other than «Linux Filesystem» type 8200 at the next prompt. Hit enter.
- Create Root partition
- At the prompt, type n , press enter to create a new partition
- It will prompt for a partition number. Just hit enter to use the default.
- It asks where to start the first sector. Press enter to accept the default which is automatically the start of unallocated space.
- It asks for the last sector. Press Enter to accept the default and use all of remaining unallocated space.
- If it says anything other than «Linux Filesystem» type 8300 at the next prompt. Hit enter.
- At the prompt, type W , press enter to write changes to the drive. When prompted, type Y and press enter to confirm.
Create SWAP space
- Type gdisk -l /dev/sda , press enter and take note of the partition number of the Swap part.
- Type mkswap -L «Linux Swap» /dev/sda7 (My swap partition was number 7 — if yours is 5 use /dev/sda5 instead). Hit enter.
- Type swapon /dev/sda7 (again, using the apprpriate swap partition number). Hit enter.
- Verify status of swap space by typing free -m and press enter. If the last line starts with «Swap:» we’re good.
Format and mount the root partition
- Type gdisk -l /dev/sda , press enter and take note of the partition number of the Root part.
- Type mkfs.ext4 -L /dev/sda8 (My root partition was number 7 — if yours is 6 use /dev/sda6 instead). Hit enter.
- Type mount /dev/sda8 /mnt (again, using the apprpriate swap partition number). Hit enter.
Start the installation
- Type pacstrap /mnt base , hit enter.
Mount the EFI partition
- Type gdisk -l /dev/sda , press enter and take note of the partition number of the EFI part.
- Type mount /dev/sda1 /mnt/boot/efi (My efi partition was number 1 — if yours is 2 use /dev/sda2 instead). Hit enter.
Configure the system
- Type genfstab -U /mnt >> /mnt/etc/fstab . Hit enter.
- Type cat /mnt/etc/fstab , press enter, to verify the file was created correctly.
- Change root into the new installation: type arch-chroot /mnt and press enter.
Set the timezone
- Type cd /usr/share/zoneinfo && ls press enter. Take note of the appropriate region and use it as follows.
- Type cd && ls (replacing with the most appropriate region.) press enter. Take note of the most appropraite city.
- Type ln -sf /usr/share/zoneinfo/ / /etc/localtime (replacing and with the most appropriate region and city.)
- Type hwclock —systohc . Hit enter.
- Create the file /etc/hostname and write your hostnme in it with nano or vim
- Create the file etc/hosts and populate it like this (replacing myhostname with whatever you put in your hostname file.)
Create the root user’s password
- Type passwd and press enter
- Enter a new root password and press enter. verify it and press enter.
Create new initramfs image
- Type mkinitcpio -p linux . Hit enter.
Install Grub bootloader
- Type pacman -Syu grub efibootmgr and hit enter.
- Type pacman -Syu efibootmgr and hit enter.
- Type grub-mkconfig -o /boot/grub/grub.cfg . Hit enter.
- Type grub-install /dev/sda . Hit enter.
- Verify the install. Type ls -l /boot/efi/EFI/arch/ . Hit Enter. If you see a file called grubx64.efi then all is well.
Create new user
- Type useradd -s /bin/bash -m username (replace «username» with the new user’s name). Hit enter.
- Type passwd username (replace «username» with the new user’s name). Hit enter.
- Enter and verify the password.
Install a desktop environment and some important packages
Источник
Dual boot ArchLinux и Windows 8 на UEFI без GRUB c помощью rEFInd
Инструкция для новичков, о том, как сделать красивый dualboot windows и archlinux (и других ОС) через efi без grub и лишних заморочек.
Фото для привлечения внимания:
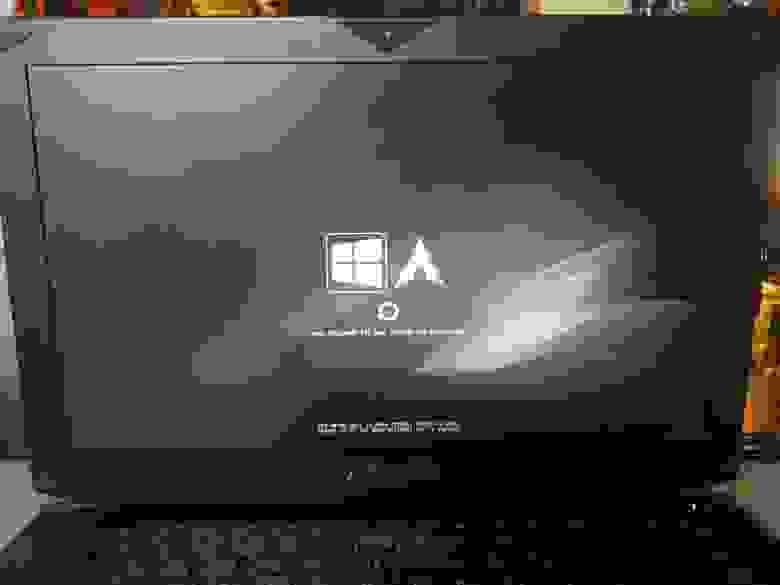
Можете посмотерть в google как это ещё может выглядеть.
Сразу оговорюсь.
Предполагается, что вы уже поставили windows и archlinux, понимаете как размечать диски и что куда монтировать и осталось вам только разобраться с загрузчиком. Если нет, то рекомендую посмотреть для начала вот это видео.
Я пробовал различные варианты, как описано тут, тут и тут и прочие выкрутасы с efibootmgr. Пытался добавлять опции прямо в «BIOSе» — ничего хорошего у меня не получилось, то рут раздел не находит то ещё что-то. Да и сам подход к переключению систем (жать Esc при включении ПК для выбора системы) меня не очень радовал.
Провозившись весь выходной, нашёл для себя простое и элегантное решение — пакет refind-efi (ArchWiki).
Если коротко, — достаточно установить этот пакет (pacman -S refind-efi) и выполнить refind-install, — всё.
В /boot/efi/EFI/ будет создан каталог refind и в опции загрузки добавлен новый пунк «rEFInd boot manager ».
Предупреждение
Добавлю к этой статье предупреждение: запись в NVRAM из ОС — достаточно опасная операция, которая может приводить к «кирпичу» на некоторых моделях ноутбуков с BIOSами на платформе Phoenix SCT. У автора BIOS на платформе AMI Aptio, с ним таких проблем нет.
Именно поэтому я настоятельно не рекомендую использовать на ноутбуках как саму efibootmgr, так и все, что ее вызывает, и устанавливать любые загрузчики вручную, либо заменяя имеющийся загрузчик по умолчанию (fs0:/EFI/BOOT/bootx64.efi), либо прописывая новый загрузчик из UEFI Shell командой bсfg boot add 0 fs0:/path/to/bootloader.efi «My Fancy Bootloader» — это намного безопаснее.
Всё что вы делаете, вы делаете на свой страх и риск!
Теперь подробнее об установке и конфигурировании
Для начала сверим конфигурации.
В моём случае это:
- Windows 8.1
- Arch Linux x86_64 Kernel Release: 3.14.4-1-ARCH
Вывод lsblk:
Раздел с типом «EFI System» созданный инсталятором windows, монтируем в /boot/efi/ ( /mnt/boot/efi/ ведь мы загрузились с liveiso верно?)
где X это номер вашего EFI раздела ( например mount /dev/sda2 /mnt/boot/efi ).
Далее перейдя в уже установленный arch ( arch-chroot /mnt/ ) устанавливаем сам refind:
Если вдруг такой пакет не найден, поищите в yaourt:
и если не было ошибок
После перезагрузки можно поставить в «биосе» в настройках приоритета загрузки «rEFInd boot manager » на первое место.
И не забудьте отключить «Secure Boot».
В каталоге /boot/efi/EFI создана дирректория refind. В ней есть refind.conf в котором можно установить время отображения списка ОС и настроить внешний вид.
Refind сам находит установленные ОС и определяет параметры их загрузки. Так же мне очень понравилось что если вставлена загрузочная флешка или диск они тоже появляются в списке.
Мне понравилась тема Next-Theme (вы можете подобрать что-то на свой вкус), положил её в /boot/efi/EFI/refind/next-theme и прописал в конфиге:
Конфиг хорошо документирован и вопросов вызывать не должен.
Источник
xtrymind / archinstall.md
Arch Linux installation (Windows 10 dual boot)
- Disable Windows Fast-Startup
- Disable Secure Boot
Windows 10 Efi partitioning
| Partition | Location | Size | File system |
|---|---|---|---|
| Recovery | sda1 | 500 MB | ntfs |
| ESP | sda2 | 100 MB | vfat |
| Reserved | sda3 | 16 MB | ? |
| Windows 10 | sda4 | 80 GB | ntfs |
Connect to the internet (Wi-Fi)
Format and mount disks
Chroot and configure base system
/etc/hosts should look like:
Initial ramdisk environment
Then add following content to /boot/loader/entries/arch.conf
and following content to /boot/loader/loader.conf
Edit /etc/default/grub , set DEFAULT_TIMEOUT=30 .
Now, let’s add Windows to the GRUB menu. Edit /boot/grub/grub.cfg and add the following menuentry after the Arch Linux menuentries:
$hints_string by the output of $ grub-probe —target=fs_uuid /boot/efi/EFI/Microsoft/Boot/bootmgfw.efi
$fs_uuid by the output of $ grub-probe —target=hints_string /boot/efi/EFI/Microsoft/Boot/bootmgfw.efi
Network configuration (Wi-Fi)
Unmount and reboot
This comment has been minimized.
Copy link Quote reply
gihyeonsung commented Feb 25, 2020
But, in my opinion, options root=/dev/sba6 rw should be changed to options root=/dev/sdb2 rw .
This comment has been minimized.
Copy link Quote reply
GreasyPizzaToppings commented Feb 29, 2020
Very helpful but there are some errors.
- «tittle Arch» has ‘title’ misspelled
- Where you say to substitute ‘$hints_string’ and ‘$fs_uuid’ for outputs of grub-probe, you put fs_uuid for $hints_string and fs_uuid for $hints_string. The grub-probe command should be swapped for these variables so fs_uuid goes with $fs_uuid and hints_string goes with $hints_string.
This comment has been minimized.
Copy link Quote reply
ShahinSha-dot commented Nov 19, 2020
You could have used os-prober to detect windows automatically
You can’t perform that action at this time.
You signed in with another tab or window. Reload to refresh your session. You signed out in another tab or window. Reload to refresh your session.
Источник
ppartarr / archdualboot.md
Dual booting Arch linux & Windows 10
There are already dozens of tutorials to setup an Arch and Windows dual boot — welcome to a dozen + 1. Like most others this is a step by step guide. Unlike most others the steps are ordered in a way that makes sense (starting with the download first — duh!) so you won’t have to restart your computer a gazillion times.
I did this on a single SSD Dell XPS 15 with windows 10 preinstalled. It’s obviously possible to follow this guide if you’re installing Arch onto a different drive or if you’re running older hardware. If you run into any problems please be sure to read through the Arch Installation Guide and the Arch Dual boot with Windows wiki.
To get started you will need:
- a stable internet connection
- a USB key with 1GB storage
- a cup of coffee & and a can do attitude
Download the Arch image
Let’s begin by downloading the .iso preferably using BitTorrent and verifying the checksum [1].
Check the partition table type in Windows
If you recently purchased a laptop it will most likely be using UEFI. In case you’re performing this dual-boot installation on an old laptop you should check this by:
- starting the run dialog with Win key + R
- type msinfo32 and press enter
- in the System information section open System Summary and take note of the value of BIOS mode
Make some space for Arch
Let’s begin by doing some wiping. In Windows 10 launch the Disk Management tool and create a partition of the desired size by reducing the size of the existing windows installation:
- start the run dialog with Win key + R
- type diskmgmt.msc and press enter
- shrink the partition to the desired size
Create a bootable USB with Arch
I recommend you use Etcher but you can also use Rufus. Simply download the tool, plug in your USB and flash it with the .iso.
Note: I recommend that you keep the .iso installed on the USB key. You might need it after completing the setup since Windows updates may overwrite your boot partition (see FAQ for more info)
Disable Fast Boot & Secure Boot & optionally switch from RAID to AHCI
This may sound dumb but trust me on this one: since you’ll be restarting your computer, read all the steps in this section before following through:
- use your favourite search engine to lookup what key to press during boot to enter the UEFI settings
- restart your computer and press it
- the UEFI interface varies depending on your motherboard but they shouldn’t be too hard to find:
- disable Fast Boot
- disable Secure Boot
- change the boot order to prioritise your USB over the Windows Boot Loader
- (optional) if you have problems partioning your disk switch from RAID to AHCI
- save & exit & restart your computer & drop into the Arch root prompt!
If you’re using a particular keyboard layout, search for it with:
Connect to the interwebs
Create partitions for your new system
Here you will need to create 3 partitions: boot (>200MB), swap (match your RAM [3]), and a root partition (whatever space you have left)
You should end up with something similar to this:
Prepare your partitions
Install the base arch packages
Generate your fstab file so that partitions are mounted when your reboot
The fstab (short for filesystems table) is used to list disk partitions or various block devices and specify how they should be mounted into the filesystem.
Change root & install GRUB
Now that your base packages have been installed and that your partitions are mounted, let’s change the root directory for the current running process. These steps are the exact same as arch’s installation guide configure the system section, so feel free to switch, follow those instructions and come back before you start the boot loader setup. If you prefer to stay here, the commands are the exact same except you won’t get the usefull documentation links in case of a boo-boo.
And now for the main event: the boot loader installation! For this step to work, the partitions must be properly mounted:
To check that grub has properly detected the windows boot loader have a look in /boot/grub/grub.cfg you should see a menuentry that looks a little like this:
You’ve partitoned your system, installed your base packages and your bootloader — what could you possibly be missing? Oh yeah the wpa_supplicant package used for key negociation when you want to connect via WiFi. I made these mistakes so that you don’t have too:
Finally we got here
If you got to this stage without any errors, crashes or additional reboots — please let me know because you’re probably the one we’ve all been waiting for and I could use you to debug some C. I hope this guide helped you, give me a thumbs up if you liked it and don’t forget to subscribe to my youtube channel /s
There are so many different ways forward from here but I recommend following the Arch general recommendations to secure your system by doing some system administration before you move on to more exciting stuff. If you want to dive into the rabbit hole you should have a look at i3. You can find my Arch + i3 setup guide here.
Q: After a Windows update my computer boots directly to Windows instead of grub, how do I fix this?
Windows updates can sometimes mess with your boot partition. To fix this you will need a USB key with the Arch .iso on hand. It’s quite simple to fix if you follow these steps.
- Plug-in the USB key with the Arch .iso
- Boot into BIOS settings and switch from RAID to AHCI
- Boot into Arch
- Reinstall grub by using these commands
[1] This is recommended to guarantee that the file you downloaded hasn’t been tampered with. You shouldn’t compare the checksum of the downloaded .iso with the checksum provided to you in the install since if the torrent or ftp server has been compromised it is likely both image and the checksum will have been modified. To verify the checksum, simply follow these steps:
- open a command line by running Win key + R and typing cmd and pressing enter
- run certutil -hashfile C:\path\to\arch-linux.iso MD5 and compare the output to the MD5 checksum on the arch download page
[2] As you can see in the output of lsblk I only allocated 1GB for my swap. Since then, I have upgraded this to 8GB. It is also possible to use a swapfile instead of creating a swap partition.
[3] Although this guide is for setting up an encrypted arch linux system it is clear & easy to follow
Источник


