- Install Arch Linux via SSH (Русский)
- На удалённой (целевой) машине
- На локальной машине
- Install Arch Linux via SSH
- Contents
- On the remote (target) machine
- On the local machine
- Installation on a headless server
- Prepare cloud-init configuration files
- Using an additional FAT formatted drive
- Using an additional ISO
- Using a single USB flash drive
- Using a single custom-built ISO
- Boot from the installation medium
- Arch Linux SSH Server Setup, Customization and Optimization
- Installing SSH Server on Arch Linux
- Starting SSH sever
- Stopping the SSH Server
- Starting SSH Server on System Boot:
- Removing SSH Server from the System Startup
- Connecting to the SSH Server
- Configuration Files of OpenSSH Server
- Changing the Default Port
- Securing SSH Server
- Configure SSH on an Arch Linux Server
- SSH Server Setup
- Configure nftables
- Setup OpenSSH
- Enable SSHGuard
- SSH via Password
- SSH Key Generation
- Authorized Key Setup on Server
- Closing Remarks
Install Arch Linux via SSH (Русский)
Эта статья предназначена для того, чтобы показать пользователям удалённую установку Arch по SSH-соединению. Данный подход полезен, когда хост находится на удалённом расстоянии или вы хотите использовать функции SSH-клиента для копирования и вставки текста в процессе установки Arch.
На удалённой (целевой) машине
Загрузите целевую машину в Live-среду Arch с помощью образа Live CD/USB, что запустит сессию от имени root-пользователя.
На данном этапе настройте сеть на целевом компьютере, как показано, например, в разделе Руководство по установке#Соединение с интернетом.
Во-вторых, настройте пароль root, который необходим для подключения SSH, так как он по умолчанию пуст:
Теперь проверьте, что параметр PermitRootLogin yes присутствует (и раскомментирован) в файле /etc/ssh/sshd_config . Этот параметр позволяет авторизироваться пользователя root на SSH-сервере.
Наконец, запустите службу openssh — sshd.service — которая входит в live CD по умолчанию.
На локальной машине
На локальной машине подключитесь к целевому хосту по SSH с помощью следующей команды:
Теперь отобразится сообщение-приветствие live-среды и можно будет управлять целевой системой так же, как и сидя за её физической клавиатурой. Если необходимо просто установить Arch, следуйте статье Руководство по установке. Если вы хотите изменить существующую установку Linux (например, из-за каких-либо неполадок), см. статью Установка Arch из другого дистрибутива.
Источник
Install Arch Linux via SSH
This article is intended to show users how to install Arch remotely via an SSH connection. Consider this approach when the host is located remotely or you wish to use the copy/paste ability of an SSH client to do the Arch install.
Contents
On the remote (target) machine
Boot the target machine into a live Arch environment via the Live CD/USB image: this will log the user in as root.
At this point, setup the network on the target machine as for example suggested in Installation guide#Connect to the internet.
Secondly, setup a root password which is needed for an SSH connection, since the default Arch password for root is empty:
Now check that PermitRootLogin yes is present (and uncommented) in /etc/ssh/sshd_config . This setting allows root login with password authentication on the SSH server.
Finally, start the openssh daemon with sshd.service , which is included by default on the live CD.
On the local machine
On the local machine, connect to the target machine via SSH with the following command:
From here one is presented with the live environment’s welcome message and is able to administer the target machine as if sitting at the physical keyboard. At this point, if the intent is to simply install Arch from the live media, follow the guide at Installation guide. If the intent is to edit an existing Linux install that got broken, follow the Install from existing Linux wiki article.
Installation on a headless server
This section describes installation of Arch Linux on a headless server without a keyboard, mouse or display. It uses an additional drive with cloud-init NoCloud configuration to automatically configure OpenSSH authorized keys and optionally iwd connection(s).
Prepare cloud-init configuration files
There are two required cloud-init configuration files: meta-data and user-data .
The meta-data file can be empty:
user-data will contain the relevant configuration:
Replace ssh-ed25519 XXXXXXXXXXXXXXXXXXXXXXXXXXXXXXXXXXXXXXXXXXXXXXXXXXXXXXXXXXXXXXXXXXXX with your public SSH key. To add multiple keys, simply repeat the statement as shown above.
To automatically connect to a Wi-Fi network, use the write_files: statement to create iwd network configuration files in the correct directory. For example:
Once both files are created they need to be placed on a drive with an ISO 9660 or FAT volume labeled CIDATA .
Using an additional FAT formatted drive
Use a FAT formatted drive. Copy meta-data and user-data to the drive and change the file system’s LABEL to CIDATA .
You will need to attach this drive to the headless machine in addition to the one with the official ISO.
Using an additional ISO
Create a cloud-init.iso file using xorriso from libisoburn :
Prepare the cloud-init data medium by burning cloud-init.iso to an optical disc or, if deployment options permit, use the ISO as is.
Using a single USB flash drive
If the installation image is written to e.g. a USB flash drive, provided there is enough space on the drive, and additional partition to house cloud-init data can be created.
First follow USB flash installation medium#Using the ISO as is (BIOS and UEFI) to prepare the USB flash drive installation medium.
Use fdisk to edit drive’s MBR partition table without touching the ISO 9660 or invalid GPT structures:
Create a new (third) partition and set its partition type to 0c . When done, write the partition table to disk.
Format the newly created partition with a FAT file system and set its LABEL to CIDATA :
Mount the file system and copy the meta-data and user-data to the root of it.
Using a single custom-built ISO
Alternatively, create a custom ISO using Archiso. This allows using only one drive regardless of type.
Use the releng profile as basis. Place the cloud-init configuration files in airootfs/var/lib/cloud/seed/nocloud/ and build the ISO.
Boot from the installation medium
Once finished, deploy the installation medium and the cloud-init data medium (if it is separate) to the headless machine using the appropriate method.
Power up the headless machine and boot into a live Arch environment from the installation medium. Wait for a minute or so to allow the headless machine time to boot up and connect to the network.
From your existing machine (with keyboard and display) SSH into the live Arch environment on the headless server and complete the installation as described in the Installation guide.
Источник
Arch Linux SSH Server Setup, Customization and Optimization
Installing SSH Server on Arch Linux
The name of the program that provides SSH server on Arch Linux is called OpenSSH Server. It is available in the official package repository of Arch Linux.
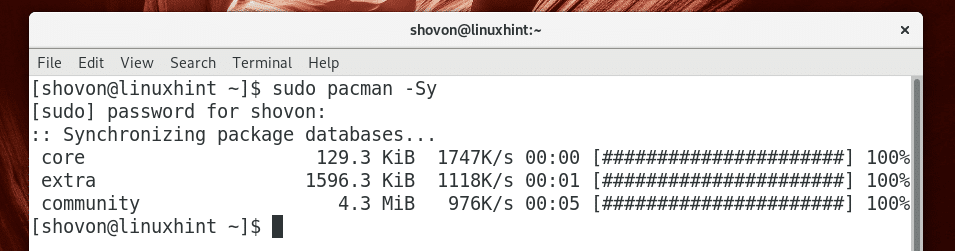
Before you install OpenSSH server, update the package repository cache of Arch Linux with the following command:

The pacman package repository cache should be updated.
Now run the following command to install OpenSSH server:

Now press y and then press to continue.
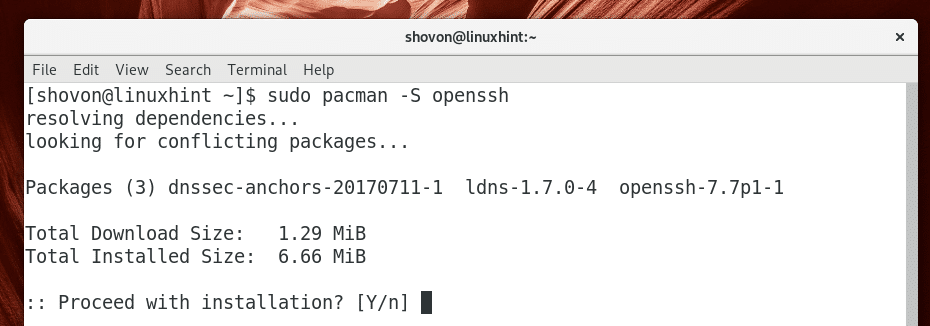
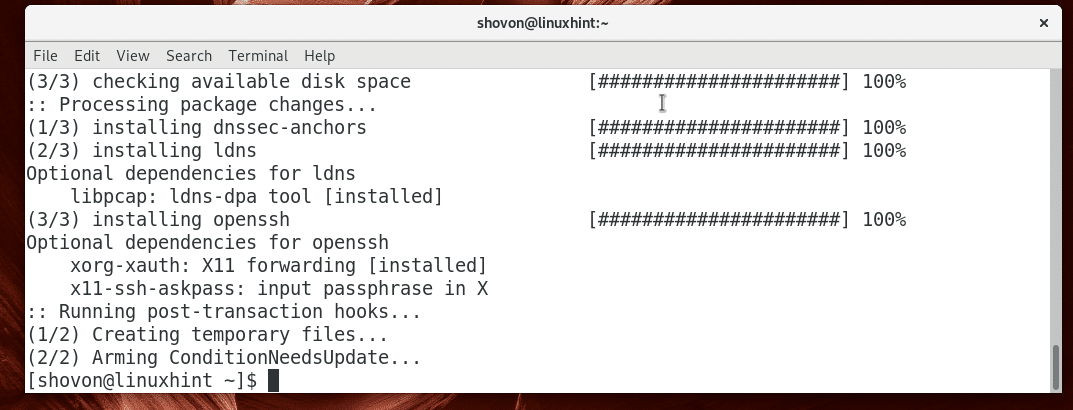
OpenSSH server should be installed.
Starting SSH sever
When you install OpenSSH server on Arch Linux, it won’t start automatically by default. You will have to start it manually.
You can check whether OpenSSH server is running with the following command:
As you can see in the marked section of the screenshot below, OpenSSH server is inactive, which means it’s not running.

You can start OpenSSH server with the following command:

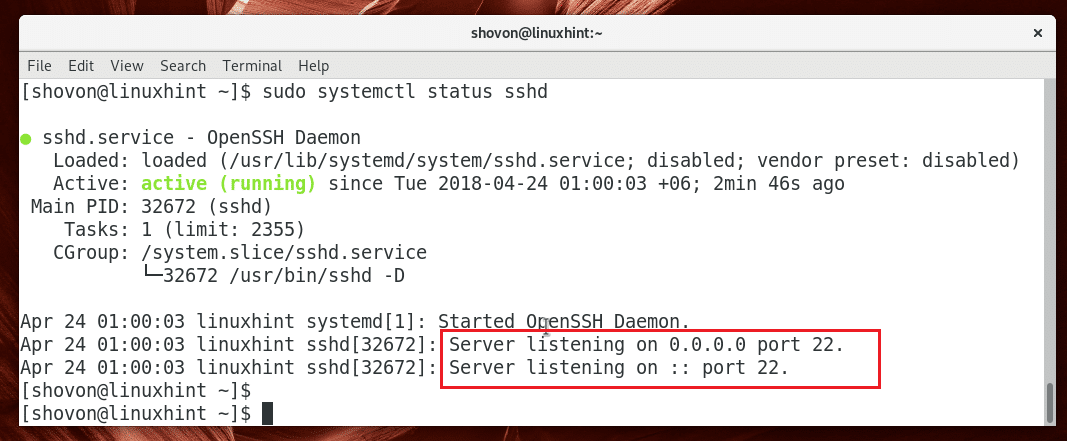
You can check whether the OpenSSH server is running with the following command:
As you can see in the marked section of the screen below, the OpenSSH server is active, which means it is running.

Also pay attention to the marked section of the screenshot below, the OpenSSH server listens on all the available network interfaces configured with IPv4 and IPv6 on the system on port 22 by default. If you want, you can change that later.
Stopping the SSH Server
You can run the following command to stop the OpenSSH server:

The OpenSSH server should be stopped.
Starting SSH Server on System Boot:
The OpenSSH service is not added to the system startup by default on Arch Linux. You can manually add it to the system startup with the following command:

As you can see, the OpenSSH service is added to the system startup.

Removing SSH Server from the System Startup
If you don’t want your OpenSSH server to start when your computer boots, you can remove OpenSSH service from system startup with the following command:

It should be removed from the system startup.

Connecting to the SSH Server
Now that you have the OpenSSH server setup, it’s time to connect to it.
Before you can connect to the OpenSSH server, you must know the hostname or IP address of the computer where OpenSSH server is installed.
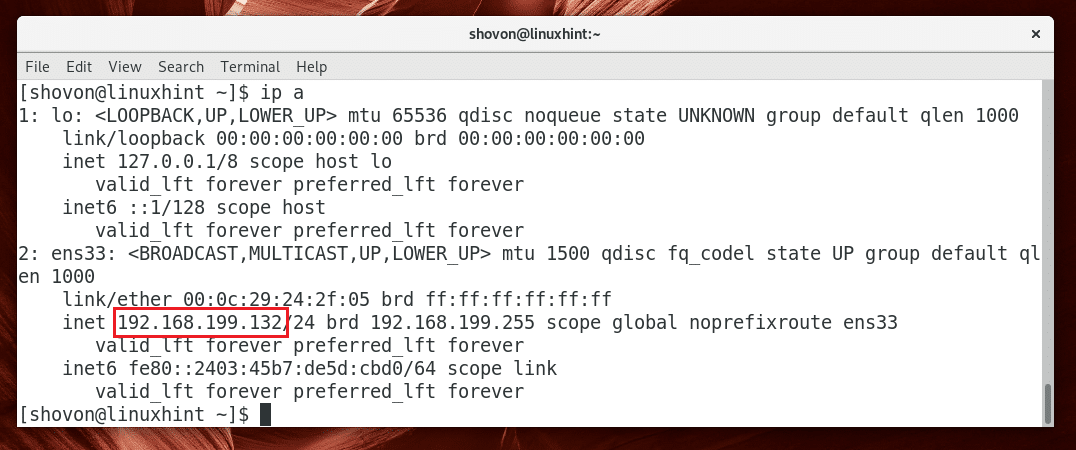
You may run the following command to find out what IP address the OpenSSH server was configured with:
As you can see from the marked section of the screenshot below, the IP address of my OpenSSH server is 192.168.199.132
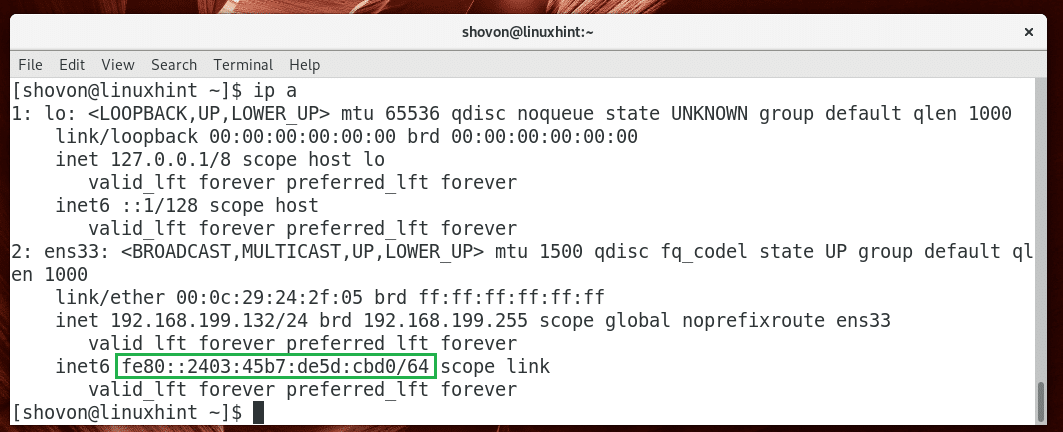
If you have IPv6 configured, you should also see the IPv6 (fe80::2403:45b7:de5d:cbd0 in my case) IP address as you can see in the marked section of the screenshot below.
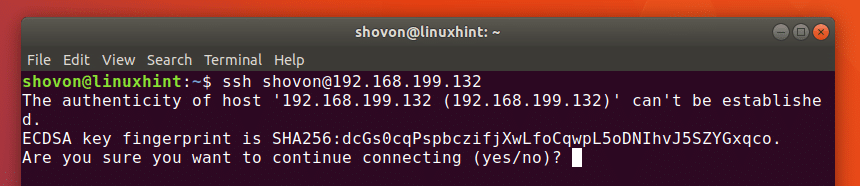
Now to connect to the SSH server from another computer (must be in the same network or configured with an internet routable address), run the following command:
NOTE: Here USERNAME is the name of the user that you want to connect to the OpenSSH server as and IP_ADDRESS is the IP of the OpenSSH server.

Type in yes and then press to continue.
Now type in the password for your user USERNAME on the OpenSSH server and press .
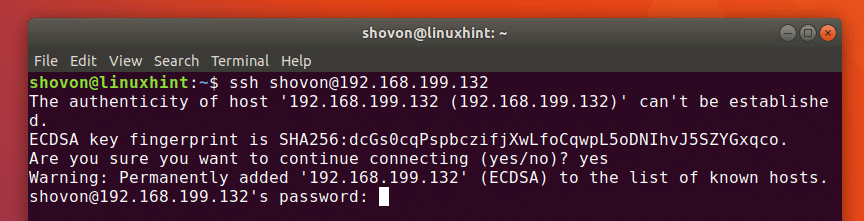
You should be connected.

Now you can run any command you want and configure your Arch Linux server remotely.
Configuration Files of OpenSSH Server
The main configuration file of OpenSSH server is in /etc/ssh/sshd_config
You can enable and disable some options there to change how the OpenSSH server works. For more information on all the options that OpenSSH server supports, you may take a look into the OpenSSH server’s man page with the following command:

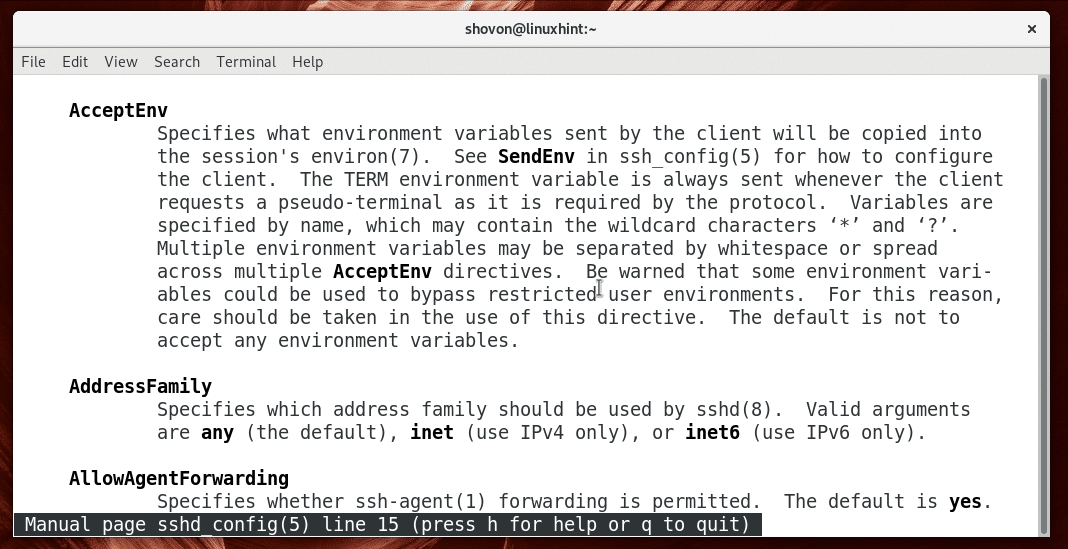
I will talk about some of the common ones in this article.
Changing the Default Port
You can change the default port 22 into something else. It is good for the security purpose.
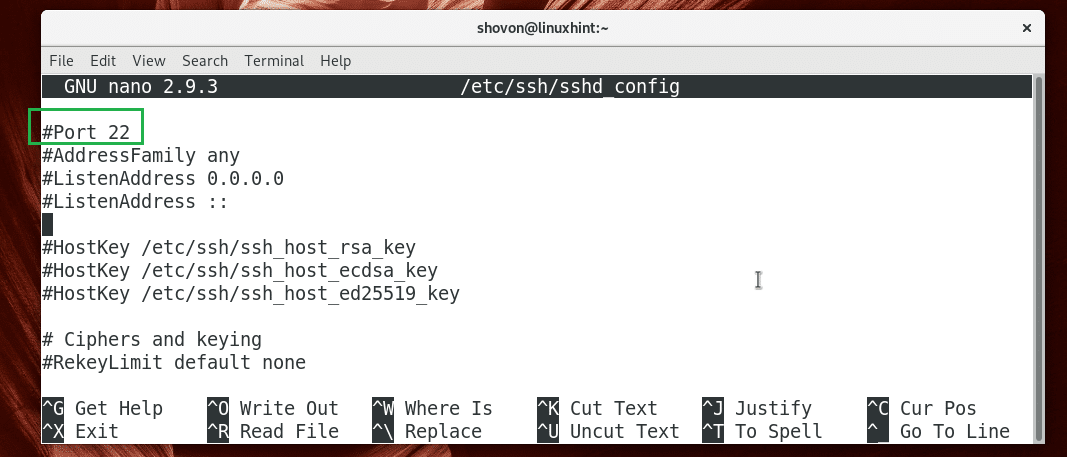
Let’s say you want to change the port to 888. First edit the sshd_config file with the following command:

You should see the following window. Now uncomment the marked line and set Port 22 to Port 888.
The final configuration file should look like this.
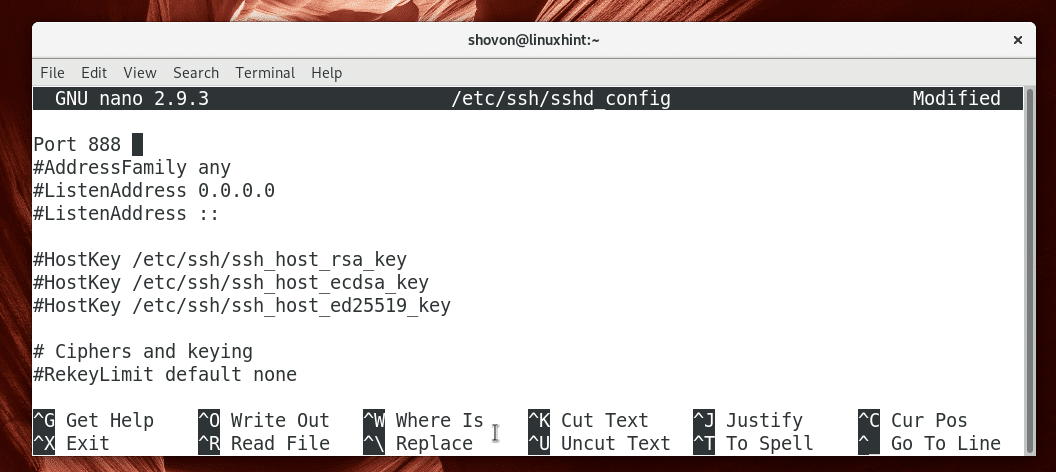
Now save the file with + x and then press y and then press .
Now restart OpenSSH server with the following command:

Now you can connect to the OpenSSH server with the following command:

Type in your password and press .

You should be connected.

Securing SSH Server
You can secure your OpenSSH server by setting the following options in the sshd_config configuration file.
X11Forwarding – Enabling X forwarding makes your system vulnerable to X11 related issues. So it’s a good idea to set it to no.
PermitRootLogin – You should not allow root users to login directly to the system. You should always set it to no.
Port – change the default port 22 to something non-standard like 9812. It’s a good security practice.
That’s how you install, configure and optimize SSH server on Arch Linux. Thanks for reading this article.
Источник
Configure SSH on an Arch Linux Server
Setting up Secure Shell (SSH) on a server is a somewhat daunting task. Configure SSH and the firewalls incorrectly and the machine will be left defenseless to malicious bots and individuals. Here, we will try to layout a basic setup, which will render the machine reasonably secure (baring any other changes) and enable SSH access.
Beware: subtle errors and / or changes can leave a server vulnerable. The most secure systems simply reject all (or most) inbound traffic. Enabling SSH, intentionally creates an access point, through which you (or anyone) can attempt to access. Our goal in this article, is to minimize the chances of finding the access point (i.e. port number) and block users who attempt to “brute force” the login (try to guess a user & password).
SSH Server Setup
Configure nftables
First item we need to cover is configuring a filter. In this case, we will setup nftables – similar to iptables. The intent is to do packet filtering and define rules or set of rules (chains) to block or direct incoming / outgoing connections. The default in nftables is to block most type of connections, we will continue to use this behavior.
To install and enable the nftables service, execute the following commands:
After install, we will modify the default config to use a custom SSH port (reduces login attempts from automated bots). Easiest thing to do is add the following rule to your /etc/nftables.conf:
Then remove the following line (blocking the standard SSH port):
The ling above enables TCP connections to port 22 (which is normally SSH, but we are not utilizing that port).
That’s all we will do to the nftables, for now.
Setup OpenSSH
Next step to get SSH setup, install OpenSSH:
Then, edit the config /etc/ssh/sshd_config .
Set the custom port by adding in the line:
Improve security on root (see wiki) by uncommenting:
For even more security, I’d recommend:
Skip this step for now, but later we will disable text passwords with the following line:
Disable x11 forwarding, removing a potential attack surface, add the following:
That covers most of the basics. There more advanced discussions around securing SSH on the web, but this should be “good enough” for most basic server setups. We can start & enable the service on startup via:
Finally, make the
/.ssh/ directory for the user you wish to SSH into:
Enable SSHGuard
To protect against a brute force attack, SSHGuard (or a similar service) is recommended. This service will ban repeated offenders who are attempting to access the machine, but have to main failed password attempts (aka too high of a risk score). Setup is relatively easy:
Once installed, we’ll have an of edit we need to do in the config file.
Because we are utilizing nftables, edit /etc/sshguard.conf and change the Backend:
From there, we just start the service (defaults are pretty decent):
SSH via Password
At this point, it should be possible to SSH into the machine via the following command (will need password):
To access the server, type the users password and that should be it.
Note: it is possible a router can block SSH. If there is an issue at this point, ensure the correct IP is being utilized and that the router is allowing TCP connections over the given port.
SSH Key Generation
At this point, hopefully it’s been validated that the server is accessible via SSH (where a password was used for authentication).
For security, it’s best to disable passwords and instead use keys. To utilized keys, we will first to generate them, then add them to the authorized_keys file on the given server. Key generation is advised to be done on a client machine, i.e. not server.
Step one is make the
/.ssh directory (this is on client and server):
The next thing we need to do is generate an SSH key, I tend to use a 4096 bit key:
It is also recommended to add a passphrase to the key (leave empty for no passphrase) :
Enter passphrase (empty for no passphrase):
Enter same passphrase again:
Your identification has been saved in /home/ /.ssh/id_rsa.
Your public key has been saved in /home/ /.ssh/id_rsa.pub.
Once the key is generated, secure copy (SCP) the public key to the server using a password:
After copying the public key from the client to the server, SSH into the server:
Authorized Key Setup on Server
Once logged into the server —
Append the public key to your authorized_keys list:
Then edit /etc/ssh/sshd_config to enable the authorized_keys, uncomment the following line:
Add the authorized key file (believe this is also default):
Disable text passwords, add the following:
That should do it!
Now, on the client you can add the following
/.ssh/config and create a short cut to ssh into the server machine:
Once you add an entry in the config it’s possible to quickly ssh into the server:
This will bring you directly to the server.
Closing Remarks
There is a lot of careful consideration that should go into locking down a server. Quite frankly, it makes me sweat thinking about all the potential issues. The primary goal here is the reduction of risk most servers can be broken into.
Here, we attempted to reduce the risk of “brute force” attacks, in which an attacker can gain access to the server via guessing the correct password.
In addition to all of the above, I tend to turn on verbose logging (on the server):
This will let you later inspect what exactly is going on if / when someone is attempting to access the system.
It is also recommended to isolate SSH access to a subset of users (likely without sudo access). Critical systems should run under users without SSH access, as this will help protect the integrity of the server and mitigate damage, even if there is a breach.
Hope this helps! Feel free to leave comments, email, or contact me in any other way to update / improve this post or if you have questions.
Источник


