- SYNOPSIS
- FILE FORMAT
- MAIN SECTION
- KEYFILE SECTION
- IFUPDOWN SECTION
- LOGGING SECTION
- How to Use the Network Manager in Arch Linux
- Installation Process
- Prerequisites
- Installing the Network Manager
- Configuration
- Using Network Manager
- Using Network Manager nmti
- Desktop Environment
- Conclusion
- About the author
- Younis Said
SYNOPSIS
If a default NetworkManager.conf is provided by your distribution’s packages, you should not modify it, since your changes may get overwritten by package updates. Instead, you can add additional .conf files to the /etc/NetworkManager/conf.d directory. These will be read in order, with later files overriding earlier ones. Packages might install further configuration snippets to /usr/lib/NetworkManager/conf.d. This directory is parsed first, even before NetworkManager.conf. Scripts can also put per-boot configuration into /run/NetworkManager/conf.d. This directory is parsed second, also before NetworkManager.conf. The loading of a file /run/NetworkManager/conf.d/name.conf can be prevented by adding a file /etc/NetworkManager/conf.d/name.conf. Likewise, a file /usr/lib/NetworkManager/conf.d/name.conf can be shadowed by putting a file of the same name to either /etc/NetworkManager/conf.d or /run/NetworkManager/conf.d.
NetworkManager can overwrite certain user configuration options via D-Bus or other internal operations. In this case it writes those changes to /var/lib/NetworkManager/NetworkManager-intern.conf. This file is not intended to be modified by the user, but it is read last and can shadow user configuration from NetworkManager.conf.
Certain settings from the configuration can be reloaded at runtime either by sending SIGHUP signal or via D-Bus’ Reload call.
NetworkManager does not require any configuration in NetworkManager.conf. Depending on your use case, you may remove all files to restore the default configuration (factory reset). But note that your distribution or other packages may drop configuration snippets for NetworkManager, such that they are part of the factory default.
FILE FORMAT
For keys that take a list of devices as their value, you can specify devices by their MAC addresses or interface names, or «*» to specify all devices. See the section called “Device List Format” below.
A simple configuration file looks like this:
As an extension to the normal keyfile format, you can also append a value to a previously-set list-valued key by doing:
MAIN SECTION
The default value and the number of available plugins is distro-specific. See the section called “PLUGINS” below for the available plugins. Note that NetworkManager’s native keyfile plugin is always appended to the end of this list (if it doesn’t already appear earlier in the list).
If this key is missing, it defaults to internal. If the chosen plugin is not available, clients are looked for in this order: dhclient, dhcpcd, internal.
When the default wired connection is deleted or saved to a new persistent connection by a plugin, the device is added to a list in the file /var/lib/NetworkManager/no-auto-default.state to prevent creating the default connection for that device again.
See the section called “Device List Format” for the syntax how to specify a device.
See the section called “Device List Format” for the syntax how to specify a device.
default: NetworkManager will update the hostname with the one provided via DHCP or reverse DNS lookup of the IP address on the connection with the default route or on any connection with the property hostname.only-from-default set to ‘false’. Connections are considered in order of increasing value of the hostname.priority property. In case multiple connections have the same priority, connections activated earlier are considered first. If no hostname can be determined in such way, the hostname will be updated to the last one set outside NetworkManager or to ‘localhost.localdomain’.
dhcp: this is similar to ‘default’, with the difference that after trying to get the DHCP hostname, reverse DNS lookup is not done. Note that selecting this option is equivalent to setting the property ‘hostname.from-dns-lookup’ to ‘false’ globally for all connections in NetworkManager.conf.
none: NetworkManager will not manage the transient hostname and will never set it.
If the key is unspecified, default is used, unless /etc/resolv.conf is a symlink to /run/systemd/resolve/stub-resolv.conf, /run/systemd/resolve/resolv.conf, /lib/systemd/resolv.conf or /usr/lib/systemd/resolv.conf. In that case, systemd-resolved is chosen automatically.
default: NetworkManager will update /etc/resolv.conf to reflect the nameservers provided by currently active connections. The rc-manager setting (below) controls how this is done.
dnsmasq: NetworkManager will run dnsmasq as a local caching nameserver, using «Conditional Forwarding» if you are connected to a VPN, and then update resolv.conf to point to the local nameserver. It is possible to pass custom options to the dnsmasq instance by adding them to files in the «/etc/NetworkManager/dnsmasq.d/» directory. Note that when multiple upstream servers are available, dnsmasq will initially contact them in parallel and then use the fastest to respond, probing again other servers after some time. This behavior can be modified passing the ‘all-servers’ or ‘strict-order’ options to dnsmasq (see the manual page for more details).
systemd-resolved: NetworkManager will push the DNS configuration to systemd-resolved
unbound: NetworkManager will talk to unbound and dnssec-triggerd, using «Conditional Forwarding» with DNSSEC support. /etc/resolv.conf will be managed by dnssec-trigger daemon. This option is deprecated. Note that dnssec-trigger ships a NetworkManager dispatcher script so this DNS plugin is not necessary.
none: NetworkManager will not modify resolv.conf. This implies rc-manager unmanaged
Note that the plugins dnsmasq, systemd-resolved and unbound are caching local nameservers. Hence, when NetworkManager writes /var/run/NetworkManager/resolv.conf and /etc/resolv.conf (according to rc-manager setting below), the name server there will be localhost only. NetworkManager also writes a file /var/run/NetworkManager/no-stub-resolv.conf that contains the original name servers pushed to the DNS plugin.
When using dnsmasq and systemd-resolved per-connection added dns servers will always be queried using the device the connection has been activated on.
If you configure dns=none or make /etc/resolv.conf immutable with chattr +i, NetworkManager will ignore this setting and always choose unmanaged (below).
auto: if systemd-resolved plugin is configured via the dns setting or if it gets detected as main DNS plugin, NetworkManager will update systemd-resolved without touching /etc/resolv.conf. Alternatively, if resolvconf or netconfig are enabled at compile time and the respective binary is found, NetworkManager will automatically use it. Note that if you install or uninstall these binaries, you need to reload the rc-manager setting with SIGHUP or systemctl reload NetworkManager. As last fallback it uses the symlink option (see next).
symlink: If /etc/resolv.conf is a regular file or does not exist, NetworkManager will write the file directly. If /etc/resolv.conf is instead a symlink, NetworkManager will leave it alone. Unless the symlink points to the internal file /var/run/NetworkManager/resolv.conf, in which case the symlink will be updated to emit an inotify notification. This allows the user to conveniently instruct NetworkManager not to manage /etc/resolv.conf by replacing it with a symlink.
file: NetworkManager will write /etc/resolv.conf as regular file. If it finds a symlink to an existing target, it will follow the symlink and update the target instead. In no case will an existing symlink be replaced by a file. Note that older versions of NetworkManager behaved differently and would replace dangling symlinks with a plain file.
resolvconf: NetworkManager will run resolvconf to update the DNS configuration.
netconfig: NetworkManager will run netconfig to update the DNS configuration.
unmanaged: don’t touch /etc/resolv.conf.
none: deprecated alias for symlink.
Note that this setting is complementary to the dns setting. You can keep this enabled while using dns set to another DNS plugin alongside systemd-resolved, or dns set to systemd-resolved to configure the system resolver to use systemd-resolved.
If systemd-resolved is enabled, the connectivity check resolves the hostname per-device.
RLIMIT_CORE: set ulimit -c unlimited to write out core dumps. Beware, that a core dump can contain sensitive information such as passwords or configuration settings.
fatal-warnings: set g_log_set_always_fatal() to core dump on warning messages from glib. This is equivalent to the —g-fatal-warnings command line option.
The path can also be overriden by pointing to a specific existing and writable directory. On the other hand setting this to an empty string or any other value disables the profile conversion mechanism.
This mechanism allows editing connection profile settings such as the 802.1x configuration using NetworkManager clients. Without it such changes have no effect in IWD.
KEYFILE SECTION
A device unmanaged due to this option is strictly unmanaged and cannot be overruled by using the API like nmcli device set $IFNAME managed yes. Also, a device that is unmanaged for other reasons, like an udev rule, cannot be made managed with this option (e.g. by using an except: specifier). These two points make it different from the device*.managed option which for that reason may be a better choice.
See the section called “Device List Format” for the syntax on how to specify a device.
IFUPDOWN SECTION
The default value is false.
LOGGING SECTION
In addition, these special domains can be used: NONE, ALL, DEFAULT, DHCP, IP.
Источник
How to Use the Network Manager in Arch Linux
The network manager is responsible for the administration, detection, and connection of the server with internet connectivity. It is a tool that assists the user in automatically connecting the Arch Linux operating system with the network. You can also opt for the netctl utility that comes along the Arch Linux server. An effective network manager puts up your system defenses against unknown connectivity bugs. Arch Linux is a complex system, so it requires an efficient network-manager to oversee the secure connection. This guide provides a detailed understanding of downloading and using the network manager in Arch Linux.
Installation Process
To get the network manager for your system, there are only two steps that you need to follow:
- Step 1: Installation
- Step 2: Configuration
Once the network manager is working effectively on your server, you can use the manager to connect to your network. After the successful installation of the network manager, you can opt for various command-line tools to maximize the efficacy and ease of operationality of this tool.
Prerequisites
The essential components for installing the network manager in Arch Linux include a sudo user and the Pacman package manager.
Installing the Network Manager
First, input the following command to update and sync any existing system packages:

This command will sync, refresh, and update packages that are already available in your Arch Linux official database. It is very easy to install the network manager in Arch Linux because it comes in the Arch repository packages.

To install a network-manager for your mobile device, run the following command for the additional installation of the related package:
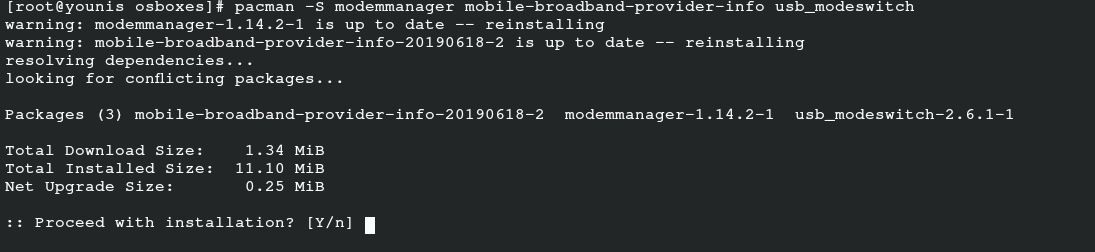
To obtain the respective packages for PPPoE support, issue the following command:

This last command allows you to obtain the respective packages to support the UI. Installing any of these packages depends on your preferences.

Configuration
Enabling the network manager will assist you in setting up the network manager as the main package for network connectivity after booting the system.

Disable the default dhcpcd service to avoid conflict over network management by issuing the following command:

You may also need to enable some supportive services. Run the following command to enable supportive services:

Lastly, input the following command to start the network manager and reboot the system to bring the changes into effect:

Using Network Manager
Now, you can use the network manager on your Arch Linux system with the netctl utility or some other command-line tool. The priority is to get the list of networks that are nearby your system. Enter the cli command below to list out the networks. I am using a Virtual box here, so it will not display any devices, as I am using the host machine connection as ethernet.
You can also input the following command using netctl:

Once you have selected your preferable network, proceed with connectivity via the following command:
Input the network and its respective password to connect the network to your server via the following command:
This command will visualize all the hidden networks available to your system.
If you are curious about the connected network details, then input the following command:

The above command will present a list onscreen of all connected networks on your system, along with their respective details. After checking the network, you can also check the available device connected with that network. You can add your interface to the wireless network before disconnecting it via the following command:
Visualize the network to reconnect to it using UUID.

The next phase is to edit the connection. You can save the settings in the respective repository of the network via the following command:
To alter the settings of the respective file, execute the following cli command:

The last step is to reload the server to ensure that the changes have been made successfully. To do so, issue the following:
Using Network Manager nmti
Using the nmti network manager is comparatively easy because it applies the user interface to select the options, instead of running the command. Nmti is a command-line UI tool, and you can navigate the network manager after launching this tool.
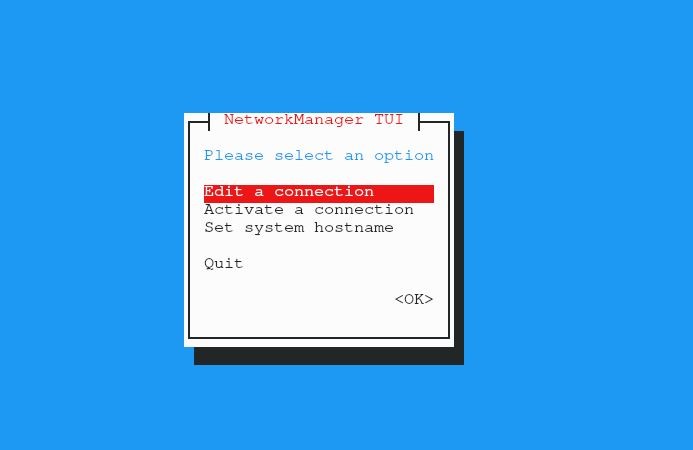
Select the “Edit a connection” option in the window visible on your screen and hit “OK.” Select the connection and click “Edit.” You can delete any networks that you do not need and add those that you wish to edit. Type the details of the network you are editing and press “OK.” You can also activate and deactivate the connection in this way.
Desktop Environment
If you are using a desktop environment like GNOME or KDE, then you can integrate the network manager with the desktop environment. You can manage settings on GNOME with the GNOME plug-in. You can also use the following command in KDE Plasma to configure the settings:
Conclusion
Using the network manager in Arch Linux can save you a lot of trouble. This tool makes managing your internet connection swift and easy. You can secure your network devices and also get detailed information about the network with the network manager. Moreover, you do not need to concern yourself with network issues anymore. The network manager allows automatic connection with your preferred networks. You can connect to your server and also mobile networking through the network manager.
This guide shares the complete details of the Arch Linux network manager, from its installation to its uses. This way, even if you are a beginner, you can still effectively ace the operations of the network manager in Arch Linux.
About the author

Younis Said
I am a freelancing software project developer, a software engineering graduate and a content writer. I love working with Linux and open-source software.
Источник


