- [Mac OS X] Доступ к настройкам Утилиты архивирования
- Лонгриды для вас
- Archiver
- Информация
- Описание
- Using the Mac’s Hidden Archive Utility to Control Compression
- Tweak the settings to suit your needs
- Launch the Archive Utility Preferences
- Manage Archive Utility Preferences
- Expansion Options
- Compression Options
- Use the Archive Utility to Compress Files
- Use the Archive Utility to Expand an Existing Archive
- Как распаковать RAR архивы в Mac OS. Бесплатная программа
- Archive Utility 4+
- RootRise Technologies Pvt. Ltd.
- Снимки экрана
- Описание
[Mac OS X] Доступ к настройкам Утилиты архивирования
Для получения доступа к настройкам Утилиты архивироания нужно в Finder с помощью комбинации Shift+Cmd+G перейти в каталог:
Найти в нем файл Утилита архивирования.app и запустить его, после чего в системном меню найти этот пункт:


Вот эти настройки:

Возможно этот способ доступа к настройкам покажется вам не очень удобным. В таком случае можно установить дополнительную панель Архив в Системных настройках, в разделе Другие:

Для этого подводим указатель к уже найденному нами ранее файлу Утилита архивирования.app и вызываем правой кнопкой контекстное меню, в котором выбираем пункт:

Далее заходим в Contents – Resources и там находим файл Archives.prefPane, который запускаем, в результате чего начнется установка новой панели Системных настроек:

Устанавливаем и получаем нужное. Разбираемся с настройками. 🙂
Удачи!

Новости, статьи и анонсы публикаций
Свободное общение и обсуждение материалов


Лонгриды для вас

Спустя месяц после начала продаж AirTag в России подешевел до 2 тысяч рублей. То есть скидка по сравнению с изначальной ценой, по которой трекер поступил в розницу, составила почти 30%. Вот это по-нашему!

Apple начнёт лицензировать Siri для сторонних производителей. Голосовой помощник компании появится на устройствах умного дома, музыкальных колонках и других устройствах. Правда, на многое не рассчитывайте

Apple планирует ещё больше расширить возможности iPhone и iPad в iOS 15, добавив недостающих функций и качественно переработав то, что уже давно нужно было переработать: iMessage, рабочий стол, систему уведомлений и много чего ещё
Источник
Archiver
Информация
Описание
Благодаря целому перечню типов файлов для архивирования и обширным опциям Archiver — то, что вам потребуется, когда дело дойдет до сжатия и распаковки файлов. Пакуйте, распаковывайте и дешифруйте архивы, разделяйте большие файлы. Вам понравятся плавный интерфейс, привлекательные функции и быстрая работа приложения. Это определенно одна из самых многофункциональных программ для компрессии и экстракции. И вот почему!
Распаковывайте папки и файлы в один клик
Извлекайте любые архивы за считанные секунды. Открывайте RAR архивы и другие сжатые файлы и мгновенно получайте элементы, содержащиеся внутри. Эта удобная программа для разархивирования файлов достает содержимое из основных форматов сжатия. Да, это не только ZIP-архиватор — он может без усилий открывать RAR, StuffIt, 7z и другие форматы.
Запаковывайте файлы, чтобы освободить место
Хотели бы иметь больше места? Сжимайте файлы этим архиватором за пару щелчков. Выберите желаемый формат из широкого списка поддерживаемых или попробуйте уникальный упаковщик файлов. Наслаждайтесь сжатием изображений и аудио файлов без усилий.
Предварительно просматривайте файлы в архиве, не открывая их
Перед распаковкой взгляните на свой файл, чтобы проверить, что там внутри. Экономьте время путем предпросмотра файлов с QuickLook. Не извлекайте ненужные файлы — выбирайте только те, что требуются. Выделяйте необходимые вам файлы, и Archiver молниеносно их распакует.
Настраивайте сжатие файлов согласно предпочтениям
Адаптируйте Archiver согласно своим основным требованиям. Обозначьте желаемый уровень сжатия, выберите стандартную папку для сохранения результатов. Настройте автоматическое удаление архивов после распаковки. В Archiver спрятаны эти и многие другие опции, они ждут, пока вы настроите их под свои нужды.
Расшифровывайте и защищайте архивы паролями
Защищайте важные данные, зашифровывая их во время сжатия. Применяйте пароли для еще более надежной защиты. Процесс шифрования происходит просто и быстро, вы получите удовольствие при мысли о том, что ваши файлы в безопасности.
Делите и объединяйте большие файлы
У вас есть несколько больших файлов, которыми хотите поделиться? Неплохо бы отправить email с большим вложением? Archiver — технология выбора. Разделение и объединение файлов происходит согласованно и легко. Это хорошее решение, если вы хотите разделить архивы быстро и просто.
Источник
Using the Mac’s Hidden Archive Utility to Control Compression
Tweak the settings to suit your needs
The macOS’ Finder uses the system’s built-in Archive Utility to perform compression (archiving) and expansion of files in the background without opening a window for the utility itself. It relies on several preconfigured defaults: As installed, the Finder always uses the ZIP format and always saves archives in the same folder as the original. You can change these defaults for a bit more control over the archive format, what happens to the original files, and where expanded or compressed files are stored by using the Archive Utility directly.
The procedures and screenshots described here apply to macOS 10.15 (Catalina), but the they are similar in older versions of macOS and OS X.
Launch the Archive Utility Preferences
You’ll find the Archive Utility in your computer’s System folder at /System/Library/CoreServices/Applications (or at /System/Library/CoreServices in pre-Yosemite versions).
:max_bytes(150000):strip_icc()/001-mac-hidden-archive-utility-2260851-29cd4c09f0c345cfb23f5d115cb36ff8.jpg)
Search for «Archive Utility» in the Finder’s search bar to find it quickly. Alternatively, open a Spotlight search by pressing Command + spacebar.
Archive Utility opens without presenting a window; instead, there’s just a set of menus along the top of the screen. To change the utility’s defaults, open Archive Utility > Preferences.
:max_bytes(150000):strip_icc()/002-mac-hidden-archive-utility-2260851-acbb3ee8aca7437eaca02f339c4fcac6.jpg)
Manage Archive Utility Preferences
The Preferences window is broken into two sections: one for expanding files, and the other, for compressing them.
:max_bytes(150000):strip_icc()/003-mac-hidden-archive-utility-2260851-165acec42c7841a6809b649595bd2e46.jpg)
Expansion Options
The options for expanding files are:
Save expanded files: Select where you want to store expanded files on your Mac. The default location is the same folder that holds the archived file you’re expanding. To change the destination for all file expansions, click the arrows to the right and navigate to the desired destination folder.
After expanding: This specifies what happens to the original file after it’s expanded. The default action is to leave the archive file in its current location (leave archive alone), or you can choose from the drop-down menu to instead move the archive file to the trash, delete the archive, or move the archive file to specific folder. If you choose the last option, you are directed to navigate to the target folder. Remember, this folder will be used as the target location for all archived files that you expand. You can change your selections at any time, but it’s usually simpler to select one location and stick to it.
Reveal expanded item(s) in Finder: When checked, this option causes the Finder to highlight the files you expanded. This can be handy when the files in an archive have different names than what you were expecting.
Keep expanding if possible: This box is checked by default and tells the Archive Utility to keep expanding items it finds within the archive. This is helpful when an archive contains other archives.
Compression Options
The configurable options for compression are:
Save archive: This drop-down menu controls where the archive file is stored after the selected files are compressed. The default is to create the archive file in the same folder where the selected files are located. If desired, select the Into option to pick a destination folder for all created archives.
Archive format: The Archive Utility supports three compression formats.
- Compressed archive, which is the same as a UNIX compression method called cpgz.
- Regular archive, also known in the UNIX world as cpio. This method actually doesn’t perform any compression; instead, it just creates a container file made up of all of the selected files.
- ZIP is the final option, and the one most Mac users are familiar with. This is the standard ZIP format that has been used on Mac and Windows computers for years.
After archiving: Once you finish archiving files, you can leave the files alone, which is the default option; move the files to the trash; delete the files; or move the files to a folder of your choice.
Reveal archive in Finder: When checked, this box will cause the archive file to be highlighted in the current Finder window.
The options you set apply only when you manually open the Archive Utility to expand or compress files. Finder-based compression and expansion always uses the factory default options, no matter how you set the preferences.
Use the Archive Utility to Compress Files
Launch Archive Utility, if it’s not already open.
Select File in the Archive Utility menu bar and choose Create Archive.
:max_bytes(150000):strip_icc()/004-mac-hidden-archive-utility-2260851-515b955b1e704e8e9beb51150b573983.jpg)
A window opens that you can use to navigate to the folder that contains the items you want to compress. Make your selection and then click Archive.
Use the Archive Utility to Expand an Existing Archive
Select File in the Archive Utility menu bar and choose Expand Archive.
A window opens that you can use to navigate to the folder that contains the archive you want to expand. Make your selection, and then click Expand.
Источник
Как распаковать RAR архивы в Mac OS. Бесплатная программа

Удачно дополнить стандартный набор приложений macOS может бесплатная утилита из Mac App Store под названием The Unarchiver.
Как понятно из названия, программа позволяет работать со всеми распространенными форматами сжатия.
Странно, что в Купертино игнорируют это направление и пользователь для комфортной работы вынужден скачивать что-то из магазина приложений.
Даже в самом базовом сценарии использования компьютера рано или поздно потребуется утилита для разархивированных данных. То ли скачал архив с файлообменника, то ли знакомый прислал фото одним файлом, то ли большой объем данных был сжат для экономии трафика.
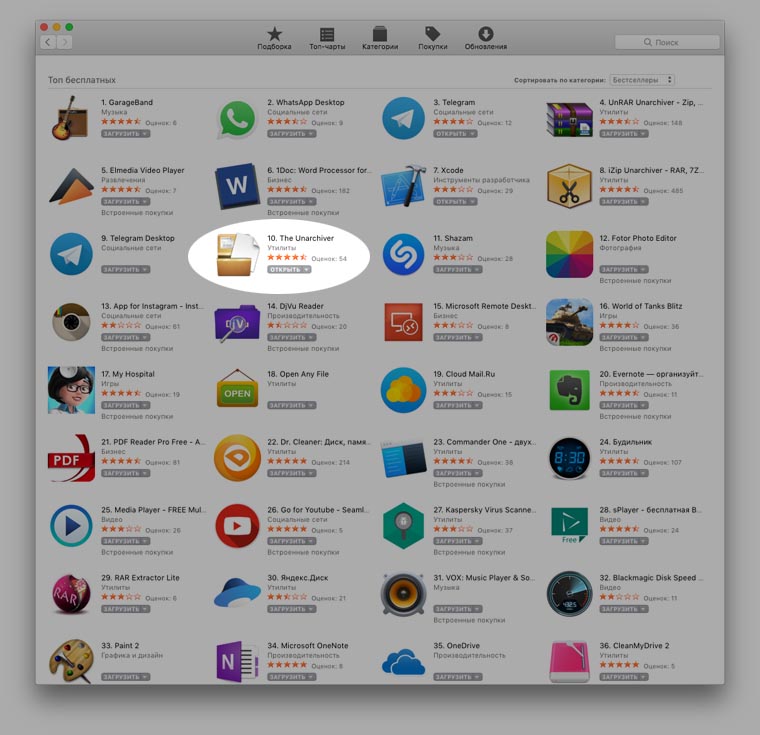
The Unarchiver давно и прочно обосновался в топе бесплатных утилит Mac App Store. Пользователей подкупает всеядность и простота программы. Здесь нет тонны настроек, тонкой подгонки под конкретные требования или глубинных параметров.
Все работает сразу после установки с минимальным вмешательством пользователя.
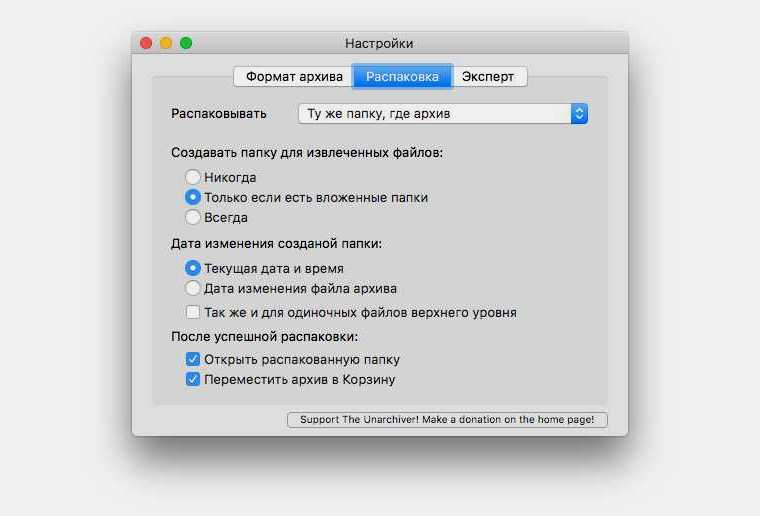
В настройках для удобства можно включить удаление архива после его распаковки и задать базовые правила сохранения файлов.
Можно указать постоянный или переменный путь сохранения, включить создание папки при наличии нескольких файлов в архиве и настроить дату создаваемой папки.
После этого об утилите забываешь и пользуешься по мере необходимости. 
Любой архив по двойному нажатию превращается в готовый к работе файл или папку с данными. Настоящий MustHave для любого маковода.
Скачать The Unarchiver можно бесплатно в Mac App Store.
Источник
Archive Utility 4+
RootRise Technologies Pvt. Ltd.
Снимки экрана
![]()
![]()
![]()
![]()
![]()
Описание
“Archive Utility” is a small and intuitive application to create .zip file and decompress many different kinds of archive files on iPhone and iPad. It supports to unarchive or expand common formats like Zip, RAR, 7-zip, CAB, Tar, Gzip and Bzip2, as well as older formats like StuffIt, Cpio, LZH, ARJ, ARC, DiskDoubler and LBR. It can also expand unusual formats like ISO, BIN, MDF, NRG and CDI, Windows self-extracting EXE files, and can even extract media from Flash SWF files and images from PDF files. Many more archive formats are supported, tap Developer Website to visit product page for the complete list.
Your long time wait for computer like compress-uncompress tool on iPhone and iPad is over with «Archive Utility». It integrates Archive and Expand features with Document Browser View to make easy-to-use yet powerful Archive Utility.
* How to create a ZIP file?
— Use powerful Browser view to select file(s) and folder(s) you want to compress and tap Archive button to create ZIP file beside original items.
* How to expand/unarchive/uncompress/extract an archive file?
— Navigate to archive file you want to uncompress in Browser view and tap on it to expand. Decompressed file or folder saved in the same folder as the original archive file.
— Use «Copy to Archive Utility» to open archive file received as email attachment, downloaded from the the web or contained in another app. You can even add files in the app’s Documents folder from your computer through iTunes file sharing.
— It lets you preview files and archives that iOS can support.
— «Archive Utility» built upon Document Browser view which allows to access files no matter where they’re located — on your device or in the cloud with Archive Utility. Handles access to iCloud Drive and third-party cloud storage services such as Dropbox and Box within the app.
— Browse view to navigate folders, organise your files with tags, move files between folders, search and sort.
— Share files using the Share button or a drag-and-drop action.
— You can move, delete, duplicate and rename a document and folder.
— Drag and drop to select files and organise them into folders.
— Inherit tagged and favourite items from Files app and allow to create and change within the app.
Note: “Archive Utility” is standalone application running natively to archive files and expand archives securely right on your iOS device.
You can refer User Manual for any assistance Or Contact Support.
Источник


