- Archive in Outlook for Windows
- Archive messages by using the Archive button
- Archive items in Outlook
- Archive messages by using the keyboard
- How do I disable archiving by the Outlook for Microsoft 365 Backspace key?
- How do I find the Archive folder?
- How do I search the Archive Folder?
- How is this different from Online Archive?
- When should I use Archive and Online Archive?
- Frequently asked questions about archiving
- Recover personal files from the Windows.old Folder such as Documents Pictures and Windows Live Mail Emails in Windows 10
- Create and Restore Archived Files in Windows 10
- How Windows works with ZIP files
- 7-Zip: if you need to handle archives in various formats
- Restoring archived files and folders
Archive in Outlook for Windows
There are several ways to archive messages in Outlook. The methods that you can use depend on the type of email accounts that you have set up in Outlook.
All accounts have access to an Archive folder. For Microsoft 365, Outlook.com, and Exchange accounts, the Archive folder is one of Outlook’s default folders, like Inbox, Sent Items, and the Deleted Items folder. This folder can’t be deleted. If you use Outlook with an Exchange or Exchange Online account, folder policies such as retention policies apply to the Archive folder.
For POP and IMAP accounts, you can create an Archive folder or designate an existing folder to use as the Archive folder. You cannot change the Archive folder location for Microsoft 365 or Exchange accounts.
Using the Archive button to move messages to the Archive folder doesn’t reduce your mailbox size. If you have to reduce your mailbox size, you can use Online Archive in Microsoft 365 for enterprises or you can archive items manually.
Archive messages by using the Archive button
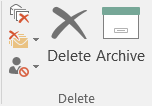
You can use the Archive button in the Delete group on the ribbon to move one or more messages to your Archivefolder without deleting them. There are several benefits to using Archive.
Archived items remain easy to find from the search box or by navigating to your Archivefolder. By default, when you type a term in the Search box, Outlook searches all folders in your mailbox.
Items are still available on your phone or other devices through the Archive folder
Archive items in Outlook
Select one or more messages in your Inbox or other folder to archive.
In the Delete group, select Archive. You can also use the Backspacekey to immediately archive one or more selected messages.
Note: For Microsoft 365, Exchange, Exchange Online, and Outlook.com accounts, your Archive folder already exists, even if you’ve never used the feature before. You’ll find it in your Outlook folder list. If you don’t see the folder and you’re using Outlook 2016 or Outlook for Microsoft 365, go to File > Office Account > Update Options > Update Now.
Your messages will be moved to the Archivefolder. If you archive a message by mistake, go to the Archivefolder and move the message back to your Inbox.
Note: The Archive button is visible only in Outlook 2016, Outlook 2019, and Outlook for Microsoft 365. Older versions of Outlook do not have the Archive button on the ribbon.
Archive messages by using the keyboard
You can archive one or more selected messages by clicking the Backspacekey. If you click the Delete key, the messages go to the Deleted Items folder. You cannot change the behavior of the Backspace key.
Note: If you have a message open in its own window instead of the Reading pane, the Backspace key will not archive the message. You have to close the message and view it in the Reading pane for the Backspace keyto archive the message. When the message is open in a new window, the only way to archive the message is by using the Archive button on the ribbon.
How do I disable archiving by the Outlook for Microsoft 365 Backspace key?
To prevent the Backspace key from moving items to the Archive folder, you can add the following registry entries to disable this functionality.
Important
Follow the steps in this section carefully. Serious problems might occur if you modify the registry incorrectly. Before you modify it, back up the registry for restoration in case problems occur.
Group Policy registry path:
HKEY_CURRENT_USER\SOFTWARE\policies\Microsoft\office\16.0\outlook\options
Name: DisableOneClickArchive
Type: DWORD
Value: 1
Office Customization Tool (OCT) registry path: HKEY_CURRENT_USER\SOFTWARE\microsoft\office\16.0\outlook\options
Name: DisableOneClickArchive
Type: DWORD
Value: 1
Note: This fix doesn’t apply to perpetual versions of Outlook.
How do I find the Archive folder?
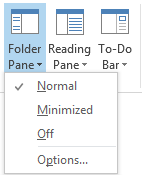
Your Archivefolder is in the folder list. To display the folder list, select View > Folder Pane > Normal.
How do I search the Archive Folder?
By default, when you search for Outlook items by using the Search Current Mailbox feature at the top of your folder list, Outlook searches your entire mailbox.

If you want to scope the search to your Archive folder only, first select the Archive folder in the folder list. Your search box will now search only the Archive folder.

How is this different from Online Archive?
Online Archive is a feature for Microsoft 365 enterprise customers who have uncommonly large mailboxes. These customers can use an Online Archive to avoid deleting old mail. A user’s Online Archive acts somewhat like a second account in Outlook with its own folder structure. Therefore, it isn’t included in searches performed from the Inbox.
If an Online Archive is enabled, administrators and users can set up their mailbox to automatically move old messages to the Online Archive using Archive Policies.
When should I use Archive and Online Archive?
We recommend that you use the Archive feature to keep your Inbox clear of messages that you’ve already answered or acted on. Think of the Archive like a file folder. You can store items in the Archive folder and still access them easily. You can also delete messages or move them to specific folders, if that’s more your style.
For users who have large mailboxes in a Office 365 Enterprise organization, we recommend that administrators set an Archive Policy that moves items to an Online Archive after one year or less if users are reaching their mailbox quota faster. This ensures users don’t have to delete old mail to make room for new mail. Mail that is older than the specified time can be moved from both the Inbox folder and the local Archive folder.
Frequently asked questions about archiving
If you’re using a Microsoft 365, Exchange, Exchange Online, or Outlook.com account, you cannot change the location to which your archived items are moved. The Archive folder is one of Outlook’s default system folders and cannot be renamed, moved, or deleted. If you are using a POP or IMAP account such as Gmail, Yahoo, or iCloud, you can change the location of the Archive folder by selecting File > Mailbox Settings > Tools > Set Archive Folder.
Archive is a well-understood feature that is already available in Outlook Mobile, Outlook Web App, and Outlook.com, and even other email providers such as Gmail. Because this is an established name, and because Online Archive is an existing feature, we decided to keep both the same.
AutoArchive is an older Outlook feature that allows automatic moving of old mails to a .pst file. This means that the messages are removed from the server and are harder to find through search. If the hard drive that contains the AutoArchive.pst becomes unusable, these messages are lost. Online Archive is an enterprise-grade replacement for AutoArchive.
AutoArchive can still be used if you don’t have an Online Archive, and if your IT department doesn’t disable the functionality. For more information about AutoArchive in Outlook 2016, see Archive older items manually in Outlook for Windows.
Recover personal files from the Windows.old Folder such as Documents Pictures and Windows Live Mail Emails in Windows 10
Technical Level : Intermediate
If you performed a custom install of Windows 10 intentionally or not and you are looking for your personal files after Windows is installed, then you might need to recover them manually. A custom install is similar to a clean install, but instead of wiping the hard disk clean, your previous Windows installation is moved to a folder called Windows.old. Windows.old is an archive of your old Windows installation. It is created by setup for a number of reasons depending on how the upgrade was initiated, including recovery of personal data or to facilitate the rollback to that previous version of Windows if you performed an in place upgrade. A custom install is sometimes initiated by booting from the Windows 10 install media (DVD or USB thumbdrive) or if you start the installation from within a previous running version of Windows at the desktop then select the option ‘Keep Nothing’. In this article, we take a look at how to recover your files if they are still there.
To recover your personal files, click Start > File Explorer
Click This PC
Open the system drive where Windows 10 is installed represented by the Windows logo.
Open the folder Windows.old
Open the Users folder
Open your old account folder which should contain your files. In my case, its Andre.
Open each personal folder which will contain your files.
Press Control + A or click Select All then click Copy or Cut
Launch a new File Explorer window (press Windows key + E or click Start > File Explorer) then navigate to the respective personal folder (Documents, Pictures, Music, Videos) then paste the files there.
Repeat the same steps for other folders containing files such as Music, Pictures, Videos and Downloads.
Import your Windows Live Mail messages from the Windows.old folder
Windows 10 comes built in with a new Mail app which is incompatible with older mail desktop apps such as Windows Live Mail and Outlook Express. This means, you won’t be able to import email messages into it from other mail programs. If you were previously running one of those mail programs, you will need to download then install the latest version which is Windows Live Mail 2012. It is included with the Windows Essentials 2012 suite which you can download for free at the following link.
Once you have downloaded Windows Essentials 2012, proceed to install it. You will need to ensure the .NET Framework 3.5 is installed, the Windows Essentials 2012 setup program will guide you through the installation.
Enable Show Hidden Files and Folders
Click Start > File Explorer > This PC > click the View tab then click Options
Click View tab again then select the Show hidden files, folders and drives radio box. Click Apply then OK
Launch Windows Live Mail 2012
Once Windows Live Mail 2012 is installed, launch the program from Start > All Apps > Windows Live Mail
You will be prompted to add an email account, click Cancel.
Click the File menu then click Import messages
Select the appropriate email program you were previously running. In this case, we will use Windows Live Mail. Click Next.
Click Browse
Expand This PC > Local Disk (where Windows 10 is installed) > Windows.old > Users > Your Old Account Folder (represented by the username) > expand AppData
Expand Local > Microsoft then select Windows Live Mail then click OK
Click Next
Make sure All folders is selected then click Next
Wait while your emails are imported.
Expand Storage folders > Imported folders > then click Inbox
Should you did delete the Windows.old folder?
It depends, I would wait 30 days before deleting it unless you are pressed for disk space. In which case you can do so. If an issue occurs where you might need to rollback to your previous version of Windows, you will have to do so using reinstall media.
Applications will need to be reinstalled for certain programs.
You will notice that application files are blank; you will need to reinstall the appropriate applications in order to view and edit them, examples include Microsoft Office. If you copied over your iTunes folder from the Music folder under your old account in Windows.old, simply reinstall iTunes and it should automatically import your audio files and playlist.
What about Microsoft Outlook?
Your old mail data is stored in C:\Windows.old\Users\AccountName\AppData\Local\Microsoft\Outlook
Copy the Outlook folder to Documents, launch Outlook then perform the import.
Create and Restore Archived Files in Windows 10
Read this article to find out how to archive and extract a file in Windows 10. We will explore both system-integrated and third-party tools, with a closer look at how to restore a deleted archive containing a file or folder. Do you need to extract or archive files, but you don’t like commercial products with loud names like WinZip or WinRAR)? The latest version of Windows features built-in support for ZIP files, to say nothing of the numerous free tools that offer as much functionality as their commercial counterparts.

How Windows works with ZIP files
As a matter of fact, if you are not looking for a peculiar archiving option, there is no need to install a third-party tool for such purposes.
You can create a ZIP file right from the file manager of your operating system, using the integrated archiving feature. Just right-click on a selected file or group of files and choose Send to / Compressed (zipped) folder.
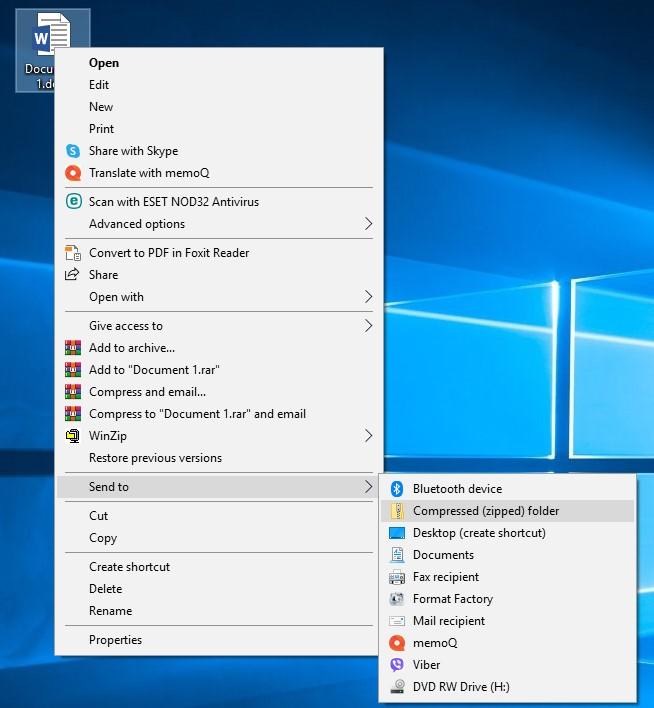
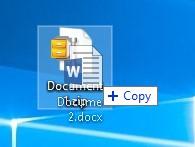
Doing it will not remove the original file. As a result, you will see the original file and a .zip file containing its archived copy.
If you need to add more files to such archived folder, just drag them to the folder while holding down the left mouse button.
Not only can Windows archive files and folders, but also do other things to .zip files. Choose any ZIP archive and double-click on it, and it will open as if it were a regular folder. From there, you can extract files and copy them to any other directory on this computer.
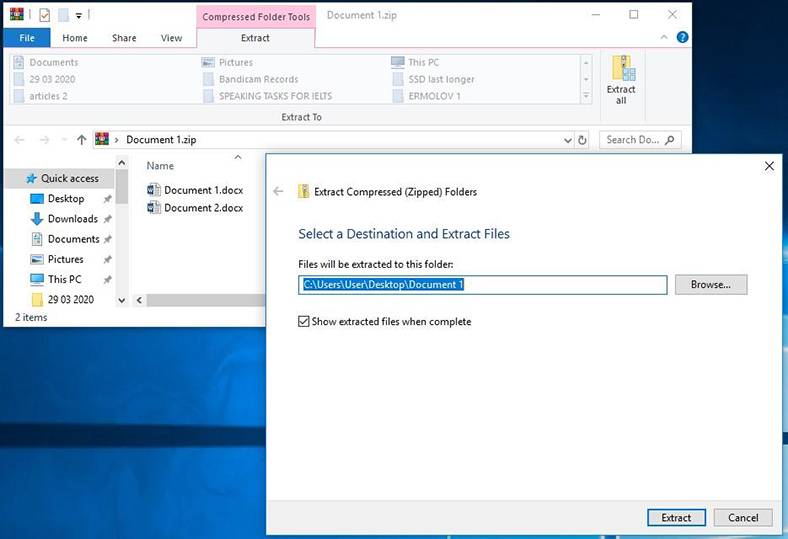
If you need to decompress a folder entirely, click Extract all or right-click on the archive and select Extract all. If you do so, Windows will extract al files into the folder with the name of the archive.
For most ordinary users, these functions are more than enough to deal with their everyday tasks.
7-Zip: if you need to handle archives in various formats
If you want to archive or extract files in other compression formats such as .rar, .7z, .tar.gz, .tar, .bz, or you’d like to protect the archive with encryption or password, it takes a third-party tool to satisfy your needs.
Of course, there are numerous tools with such functionality, but we are not going to describe all of them. Instead, we will focus on the only tool which stands out of the crowd by being free of charge.
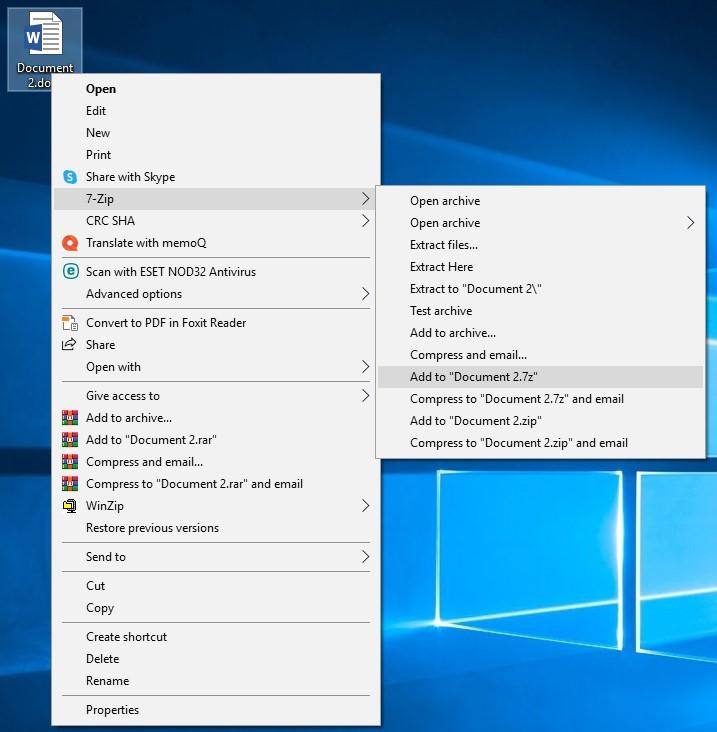
7-Zip is a free open-source archiver for Windows. It works both with its own format, 7z, and other popular formats including RAR, ZIP, GZIP, BZIP2, DMG, ISO.
This archiver is as simple to use as the tool integrated with Windows 10: right-click on a file, select 7-Zip in the context menu and the line depending on your task: to add a file to an archive or extract it.
Also, these functions can be enabled from the program’s internal menu.
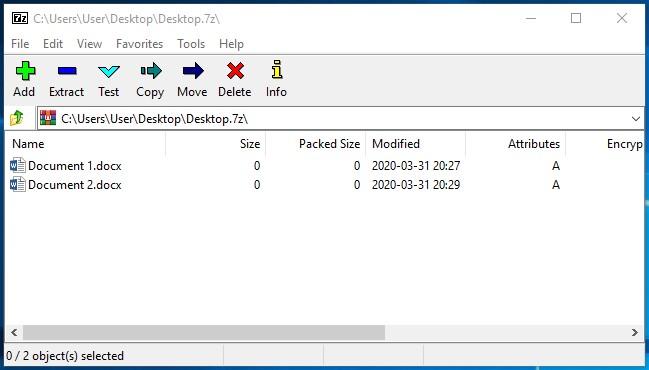
The interface is not too impressive, but it’s a free tool, after all.
In this article, we never attempted to diminish the role of WinZIP and WinRAR, the two leading products in the archiver market. On the contrary, we wanted to demonstrate that there are free alternatives to them as well.
Restoring archived files and folders
Archiving files is a popular way to compress them into archives in order to save hard disk or removable drive space. Often, people also use archivers for convenience of transporting files or sending data by email, for encryption of password protection of folders in order to secure data or reduce opportunities for unauthorized access. That is, files are often stored in an archived format, as compressed folders or archives.
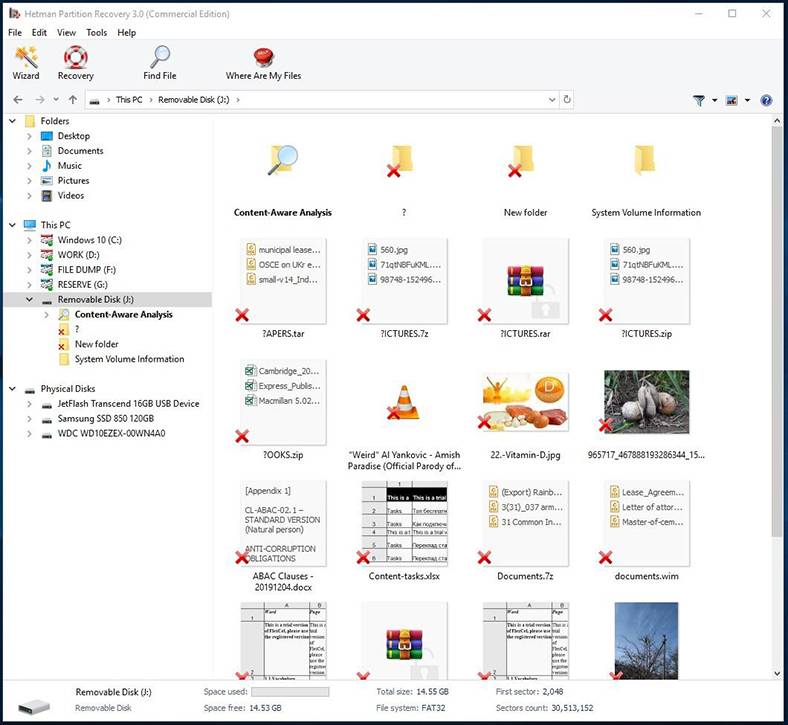
So what can be done if you lost some data, and it was archived in different formats? Can it be restored? Restoring files from any existing archive format is an easy task for the well-known data recovery tool, Hetman Partition Recovery. It can restore lost archives just as good as files of any other format.
Just scan the storage device where the archives used to be stored, and the program will find and display them. An important peculiarity of this tool is that it retains the names of archives, and displays the archive contents in the preview mode. It simplifies the task of restoring a lost archive.

Author: Vladimir Artiukh, Technical Writer
Vladimir Artiukh is a technical writer for Hetman Software, as well as the voice and face of their English-speaking YouTube channel, Hetman Software: Data Recovery for Windows. He handles tutorials, how-tos, and detailed reviews on how the company’s tools work with all kinds of data storage devices. Read more


