Permission denied (publickey)
Привет!
На сервере настроил подключение по ssh-ключу и запретил вход по паролю.
Все работало нормально несколько месяцев, но внезапно при коннекте получаю ошибку «Permission denied (publickey)».
Как решить данную проблему?
Сделай подключение к серверу с ключом -vvv и покажи вывод сюда. И есть ли физический доступ к серверу? И пробовал ли подключаться с других компьютеров/клиентов?
/.ssh/server_rsa -vvv user@user.ddns.net -p5555
OpenSSH_6.7p1 Debian-5+deb8u3, OpenSSL 1.0.1t 3 May 2016
debug1: Reading configuration data /etc/ssh/ssh_config
debug1: /etc/ssh/ssh_config line 19: Applying options for *
debug2: ssh_connect: needpriv 0
debug1: Connecting to user.ddns.net [46.98.89.152] port 55555.
debug1: Connection established.
debug1: identity file /home/sergey/.ssh/server_rsa type 1
debug1: key_load_public: No such file or directory
debug1: identity file /home/sergey/.ssh/server_rsa-cert type -1
debug1: Enabling compatibility mode for protocol 2.0
debug1: Local version string SSH-2.0-OpenSSH_6.7p1 Debian-5+deb8u3
debug1: Remote protocol version 2.0, remote software version OpenSSH_7.4p1 Debian-10+deb9u1
debug1: match: OpenSSH_7.4p1 Debian-10+deb9u1 pat OpenSSH* compat 0x04000000
debug2: fd 3 setting O_NONBLOCK
debug3: put_host_port: [user.ddns.net]:55555
debug3: load_hostkeys: loading entries for host «[user.ddns.net]:55555» from file
«/home/sergey/.ssh/known_hosts»
debug3: load_hostkeys: found key type ECDSA in file /home/sergey/.ssh/known_hosts:1
debug3: load_hostkeys: loaded 1 keys
debug3: order_hostkeyalgs: prefer hostkeyalgs: ecdsa-sha2-nistp256-cert-v01@openssh.com,ecdsa-sha2-nistp384-cert-v01@openssh.com,ecdsa-sha2-nistp521-cert-v01@openssh.com,ecdsa-sha2-nistp256,ecdsa-sha2-nistp384,ecdsa-sha2-nistp521
debug1: SSH2_MSG_KEXINIT sent
debug1: SSH2_MSG_KEXINIT received
debug2: kex_parse_kexinit: curve25519-sha256@libssh.org,ecdh-sha2-nistp256,ecdh-sha2-nistp384,ecdh-sha2-nistp521,diffie-hellman-group-exchange-sha256,diffie-hellman-group14-sha1,diffie-hellman-group-exchange-sha1,diffie-hellman-group1-sha1
debug2: kex_parse_kexinit: ecdsa-sha2-nistp256-cert-v01@openssh.com,ecdsa-sha2-nistp384-cert-v01@openssh.com,ecdsa-sha2-nistp521-cert-v01@openssh.com,ecdsa-sha2-nistp256,ecdsa-sha2-nistp384,ecdsa-sha2-nistp521,ssh-ed25519-cert-v01@openssh.com,ssh-rsa-cert-v01@openssh.com,ssh-dss-cert-v01@openssh.com,ssh-rsa-cert-v00@openssh.com,ssh-dss-cert-v00@openssh.com,ssh-ed25519,ssh-rsa,ssh-dss
debug2: kex_parse_kexinit: aes128-ctr,aes192-ctr,aes256-ctr,aes128-gcm@openssh.com,aes256-gcm@openssh.com,chacha20-poly1305@openssh.com,arcfour256,arcfour128,aes128-cbc,3des-cbc,blowfish-cbc,cast128-cbc,aes192-cbc,aes256-cbc,arcfour,rijndael-cbc@lysator.liu.se
debug2: kex_parse_kexinit: aes128-ctr,aes192-ctr,aes256-ctr,aes128-gcm@openssh.com,aes256-gcm@openssh.com,chacha20-poly1305@openssh.com,arcfour256,arcfour128,aes128-cbc,3des-cbc,blowfish-cbc,cast128-cbc,aes192-cbc,aes256-cbc,arcfour,rijndael-cbc@lysator.liu.se
debug2: kex_parse_kexinit: umac-64-etm@openssh.com,umac-128-etm@openssh.com,hmac-sha2-256-etm@openssh.com,hmac-sha2-512-etm@openssh.com,hmac-sha1-etm@openssh.com,umac-64@openssh.com,umac-128@openssh.com,hmac-sha2-256,hmac-sha2-512,hmac-sha1,hmac-md5-etm@openssh.com,hmac-ripemd160-etm@openssh.com,hmac-sha1-96-etm@openssh.com,hmac-md5-96-etm@openssh.com,hmac-md5,hmac-ripemd160,hmac-ripemd160@openssh.com,hmac-sha1-96,hmac-md5-96
debug2: kex_parse_kexinit: umac-64-etm@openssh.com,umac-128-etm@openssh.com,hmac-sha2-256-etm@openssh.com,hmac-sha2-512-etm@openssh.com,hmac-sha1-etm@openssh.com,umac-64@openssh.com,umac-128@openssh.com,hmac-sha2-256,hmac-sha2-512,hmac-sha1,hmac-md5-etm@openssh.com,hmac-ripemd160-etm@openssh.com,hmac-sha1-96-etm@openssh.com,hmac-md5-96-etm@openssh.com,hmac-md5,hmac-ripemd160,hmac-ripemd160@openssh.com,hmac-sha1-96,hmac-md5-96
debug2: kex_parse_kexinit: none,zlib@openssh.com,zlib
debug2: kex_parse_kexinit: none,zlib@openssh.com,zlib
debug2: kex_parse_kexinit:
debug2: kex_parse_kexinit:
debug2: kex_parse_kexinit: first_kex_follows 0
debug2: kex_parse_kexinit: reserved 0
debug2: kex_parse_kexinit: curve25519-sha256,curve25519-sha256@libssh.org,ecdh-sha2-nistp256,ecdh-sha2-nistp384,ecdh-sha2-nistp521,diffie-hellman-group-exchange-sha256,diffie-hellman-group16-sha512,diffie-hellman-group18-sha512,diffie-hellman-group14-sha256,diffie-hellman-group14-sha1
debug2: kex_parse_kexinit: ssh-rsa,rsa-sha2-512,rsa-sha2-256,ecdsa-sha2-nistp256,ssh-ed25519
debug2: kex_parse_kexinit: chacha20-poly1305@openssh.com,aes128-ctr,aes192-ctr,aes256-ctr,aes128-gcm@openssh.com,aes256-gcm@openssh.com
debug2: kex_parse_kexinit: chacha20-poly1305@openssh.com,aes128-ctr,aes192-ctr,aes256-ctr,aes128-gcm@openssh.com,aes256-gcm@openssh.com
debug2: kex_parse_kexinit: umac-64-etm@openssh.com,umac-128-etm@openssh.com,hmac-sha2-256-etm@openssh.com,hmac-sha2-512-etm@openssh.com,hmac-sha1-etm@openssh.com,umac-64@openssh.com,umac-128@openssh.com,hmac-sha2-256,hmac-sha2-512,hmac-sha1
debug2: kex_parse_kexinit: umac-64-etm@openssh.com,umac-128-etm@openssh.com,hmac-sha2-256-etm@openssh.com,hmac-sha2-512-etm@openssh.com,hmac-sha1-etm@openssh.com,umac-64@openssh.com,umac-128@openssh.com,hmac-sha2-256,hmac-sha2-512,hmac-sha1
debug2: kex_parse_kexinit: none,zlib@openssh.com
debug2: kex_parse_kexinit: none,zlib@openssh.com
debug2: kex_parse_kexinit:
debug2: kex_parse_kexinit:
debug2: kex_parse_kexinit: first_kex_follows 0
debug2: kex_parse_kexinit: reserved 0
debug2: mac_setup: setup umac-64-etm@openssh.com
debug1: kex: server->client aes128-ctr umac-64-etm@openssh.com none
debug2: mac_setup: setup umac-64-etm@openssh.com
debug1: kex: client->server aes128-ctr umac-64-etm@openssh.com none
debug1: sending SSH2_MSG_KEX_ECDH_INIT
debug1: expecting SSH2_MSG_KEX_ECDH_REPLY
debug1: Server host key: ECDSA 95:5a:25:6f:16:3f:7c:aa:f0:54:af:bf:7b:f7:87:be
debug3: put_host_port: [46.98.89.152]:55555
debug3: put_host_port: [user.ddns.net]:55555
debug3: load_hostkeys: loading entries for host «[user.ddns.net]:55555» from file «/home/sergey/.ssh/known_hosts»
debug3: load_hostkeys: found key type ECDSA in file /home/sergey/.ssh/known_hosts:1
debug3: load_hostkeys: loaded 1 keys
debug3: load_hostkeys: loading entries for host «[46.98.89.152]:55555» from file «/home/sergey/.ssh/known_hosts»
debug3: load_hostkeys: found key type ECDSA in file /home/sergey/.ssh/known_hosts:2
debug3: load_hostkeys: loaded 1 keys
debug1: Host ‘[user.ddns.net]:55555’ is known and matches the ECDSA host key.
debug1: Found key in /home/sergey/.ssh/known_hosts:1
debug2: kex_derive_keys
debug2: set_newkeys: mode 1
debug1: SSH2_MSG_NEWKEYS sent
debug1: expecting SSH2_MSG_NEWKEYS
debug2: set_newkeys: mode 0
debug1: SSH2_MSG_NEWKEYS received
debug1: SSH2_MSG_SERVICE_REQUEST sent
debug2: service_accept: ssh-userauth
debug1: SSH2_MSG_SERVICE_ACCEPT received
debug2: key: /home/sergey/.ssh/server_rsa (0x7f82967e2e10), explicit
debug1: Authentications that can continue: publickey
debug3: start over, passed a different list publickey
debug3: preferred gssapi-keyex,gssapi-with-mic,publickey,keyboard-interactive,password
debug3: authmethod_lookup publickey
debug3: remaining preferred: keyboard-interactive,password
debug3: authmethod_is_enabled publickey
debug1: Next authentication method: publickey
debug1: Offering RSA public key: /home/sergey/.ssh/server_rsa
debug3: send_pubkey_test
debug2: we sent a publickey packet, wait for reply
debug1: Authentications that can continue: publickey
debug2: we did not send a packet, disable method
debug1: No more authentication methods to try.
Permission denied (publickey).
2. Физический доступ есть.
3. С других клиентов в сети та же история. Правда, слово-пароль для ключа все-же спрашивает, но итог один — «Permission denied (publickey)».
Источник
Error: Permission denied (publickey)
A «Permission denied» error means that the server rejected your connection. There could be several reasons why, and the most common examples are explained below.
Should the sudo command be used with Git?
You should not be using the sudo command with Git. If you have a very good reason you must use sudo , then ensure you are using it with every command (it’s probably just better to use su to get a shell as root at that point). If you generate SSH keys without sudo and then try to use a command like sudo git push , you won’t be using the same keys that you generated.
Check that you are connecting to the correct server
Typing is hard, we all know it. Pay attention to what you type; you won’t be able to connect to «githib.com» or «guthub.com». In some cases, a corporate network may cause issues resolving the DNS record as well.
To make sure you are connecting to the right domain, you can enter the following command:
The connection should be made on port 22, unless you’re overriding settings to use SSH over HTTPS.
Always use the «git» user
All connections, including those for remote URLs, must be made as the «git» user. If you try to connect with your GitHub username, it will fail:
If your connection failed and you’re using a remote URL with your GitHub username, you can change the remote URL to use the «git» user.
You should verify your connection by typing:
Make sure you have a key that is being used
- Open Terminal Terminal Git Bash .
- Verify that you have a private key generated and loaded into SSH.
If you have GitHub Desktop installed, you can use it to clone repositories and not deal with SSH keys.
If you are using Git Bash, turn on ssh-agent:
If you are using another terminal prompt, such as Git for Windows, turn on ssh-agent:
Verify that you have a private key generated and loaded into SSH.
- Open Terminal Terminal Git Bash .
- Verify that you have a private key generated and loaded into SSH.
The ssh-add command should print out a long string of numbers and letters. If it does not print anything, you will need to generate a new SSH key and associate it with GitHub.
Tip: On most systems the default private keys (
/.ssh/identity ) are automatically added to the SSH authentication agent. You shouldn’t need to run ssh-add path/to/key unless you override the file name when you generate a key.
Getting more details
You can also check that the key is being used by trying to connect to git@github.com :
In that example, we did not have any keys for SSH to use. The «-1» at the end of the «identity file» lines means SSH couldn’t find a file to use. Later on, the «Trying private key» lines also indicate that no file was found. If a file existed, those lines would be «1» and «Offering public key», respectively:
Verify the public key is attached to your account
You must provide your public key to GitHub to establish a secure connection.
Start SSH agent in the background.
Find and take a note of your public key fingerprint.
In the upper-right corner of any page, click your profile photo, then click Settings. 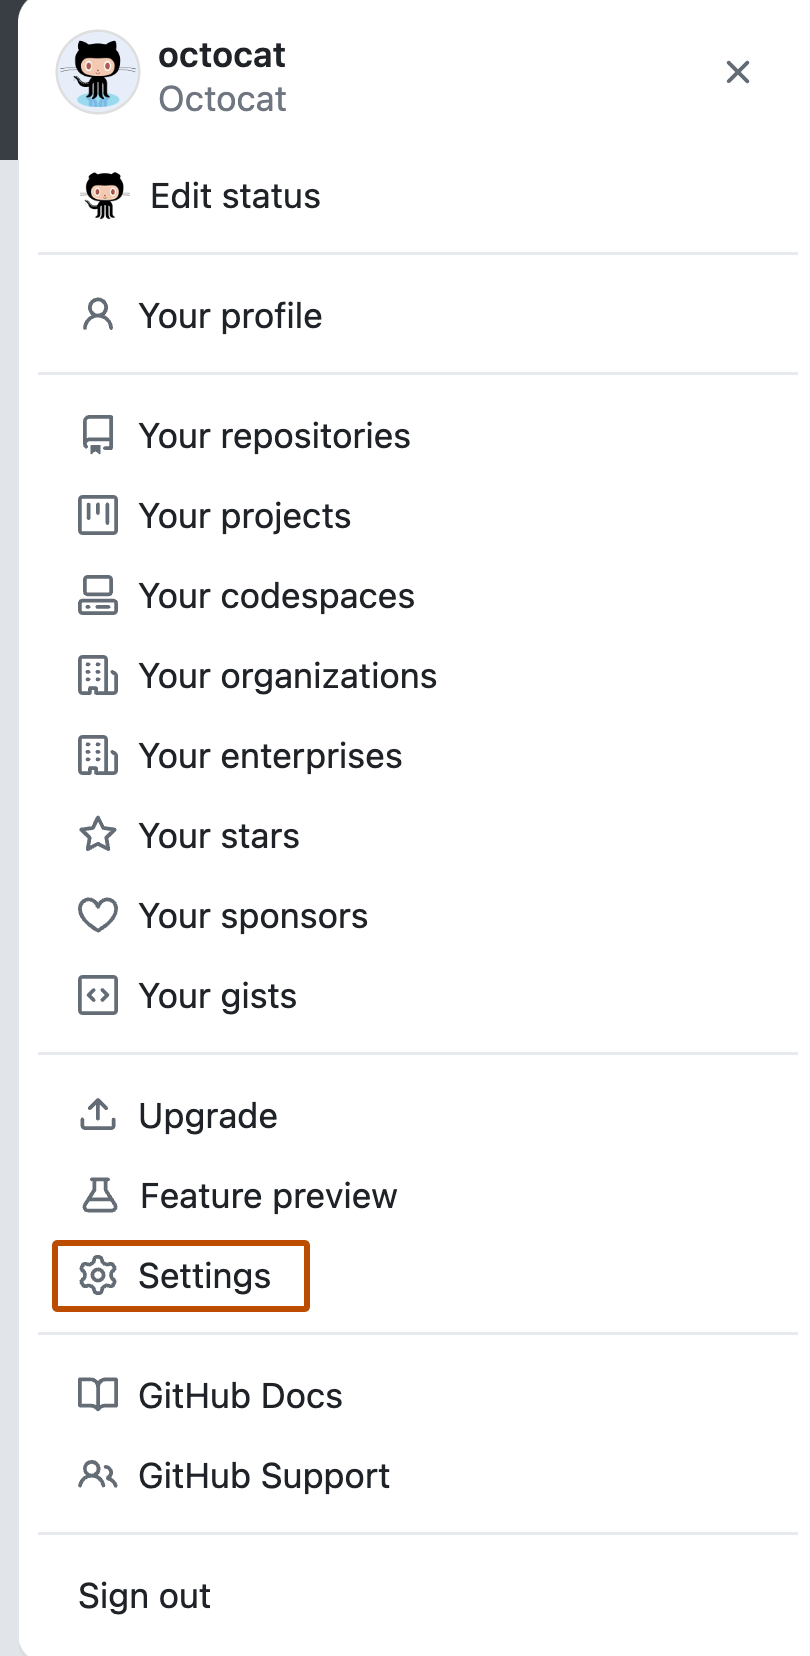
In the user settings sidebar, click SSH and GPG keys. 
Compare the list of SSH keys with the output from the ssh-add command. 
Open the command line.
Start SSH agent in the background.
Find and take a note of your public key fingerprint.
In the upper-right corner of any page, click your profile photo, then click Settings.
In the user settings sidebar, click SSH and GPG keys.
Compare the list of SSH keys with the output from the ssh-add command.
Start SSH agent in the background.
Find and take a note of your public key fingerprint. If you’re using OpenSSH 6.7 or older:
If you’re using OpenSSH 6.8 or newer:
In the upper-right corner of any page, click your profile photo, then click Settings.
In the user settings sidebar, click SSH and GPG keys.
Compare the list of SSH keys with the output from the ssh-add command.
If you don’t see your public key in GitHub, you’ll need to add your SSH key to GitHub to associate it with your computer.
Warning: If you see an SSH key you’re not familiar with on GitHub, delete it immediately and contact GitHub Support, for further help. An unidentified public key may indicate a possible security concern. For more information, see «Reviewing your SSH keys.»
Help us make these docs great!
All GitHub docs are open source. See something that’s wrong or unclear? Submit a pull request.
Источник
Ошибка SSH в Linux. Исправление разрешения denied (publickey)
Главное меню » Операционная система Linux » Ошибка SSH в Linux. Исправление разрешения denied (publickey)

В этом кратком руководстве вы узнаете, как исправить ошибку ssh. “sign_and_send_pubkey: signing failed: agent refused operation Permission denied (publickey)” в Linux.
Е сли вы пытаетесь подключиться к удаленному серверу через SSH, вы можете столкнуться с ошибкой, отказано в доступе. Эта ошибка может произойти по ряду причин. И исправление этой проблемы зависит от причины ошибки.
В нашем случае у нас были общедоступные и закрытые ключи, хранящиеся на рабочем столе Ubuntu 16.04. После выпуска Ubuntu 18.04 мы решили перейти на эту новую версию. Мы предпочитаем новую установку поверх обновлений дистрибутива.
Итак, мы сделали резервную копию основных папок моего домашнего каталога, включая папку .ssh, на которой были открытые и закрытые ключи на внешнем диске. После установки Ubuntu 18.04 мы восстановили все, включая ключи SSH.
Теперь, когда мы попытались подключиться к удаленному серверу с помощью ssh, то подумали, что это сработает сразу, потому что были такие же публичные и закрытые ключи.
Но это не сработало. SSH выдал эту ошибку:
Если вы находитесь в аналогичной ситуации, когда вы скопировали свои SSH-ключи из другого источника, позвольте показать вам, как исправить эту ошибку SSH.
Ошибка исправления отказа от прав (publicickey)
Поэтому проблема заключается в разрешении файлов. Видите ли, когда мы копировали файлы, USB флешка была в формате файла FAT Microsoft. Этот файл не поддерживает разрешения файлов UNIX/Linux.
И, следовательно, разрешения на скопированные ключи ssh были изменены на 777.
Для SSH права доступа к файлу слишком открыты. Просто не разрешено иметь 777 для открытых или закрытых ключей. И вот почему SSH отказался от подключения.
Закрытый ключ должен иметь права на чтение и запись только для пользователя и другие разрешения для группы и других.
Вы должны изменить разрешение, используя команду CHMOD:
Аналогично, открытый ключ не должен иметь права на запись и выполнение для группы и других.
Теперь, когда вы установили правильные разрешения, вы можете снова подключиться к ssh. Он попросит пароль администратора чтобы разблокировать ключи. Введите пароль администратора.
Это также научило нас одному уроку, копирование и вставка файлов – плохая идея, и правильная резервная копия должна быть сделана иначе, все файлы будут иметь опасные разрешения 777 на них. Мне пришлось рекурсивно менять права доступа к файлу во всем каталоге Home и поверьте мне, это было не очень приятно.
Как мы сказали ранее, для этой ошибки могут быть разные причины. Для проблемы, связанной с разрешением на открытие файла, это исправление должно помочь вам исправить ошибку, Permission denied (publickey) в SSH.
Дайте нам знать в разделе комментариев, исправление работает для вас или нет. Также предложите свое мнение о копировании ключей ssh на другие компьютеры.
Если вы нашли ошибку, пожалуйста, выделите фрагмент текста и нажмите Ctrl+Enter.
Источник


