Asus transformer book t100ta linux
Copy raw contents
Copy raw contents
This work is licensed under the Creative Commons Attribution 4.0 International License. To view a copy of this license, visit http://creativecommons.org/licenses/by/4.0/ or send a letter to Creative Commons, PO Box 1866, Mountain View, CA 94042, USA.
Installing Ubuntu on ASUS T100 TA
As of November 2018. (20181125)
John Brodie said
The problem with step by step guides. The information is only accurate for up to a few months.
Follow this guide with a grain of salt. Check if something is working before trying to repair it. After fixing it, verify if it is really working.
Most importantly, backup your data. You already do it monthly, don’t you?
- Asus T100 Ubuntu group. Ask your questions here! https://plus.google.com/communities/117853703024346186936
- Various tutorials with screenshots https://tutorials.ubuntu.com/tutorial/
- Linuxium and Isorespin: customize Ubuntu ISOs! https://linuxiumcomau.blogspot.com/2017/06/customizing-ubuntu-isos-documentation.html
- (2016) Guide for the T100 Ubuntu 16.04: https://drive.google.com/drive/folders/0B4s5KNXf2Z36QW9acnY4RXd3bW8
Other sources that made this guide possible
- (old) Latest steps to install Ubuntu on the Asus T100TA: http://www.jfwhome.com/2016/01/04/latest-steps-to-install-ubuntu-on-the-asus-t100ta/
- (old) Installing Debian On AsusT100TA https://wiki.debian.org/InstallingDebianOn/Asus/T100TA
The guide starts here!
1. Download Ubuntu 18.04.1
Download the ISO file you prefer. I personally like Xubuntu for its lightweight, yet powerful & customizable desktop environment.
Note: Download the 64 bit version. 32 bit versions may fail to boot.
2. Flash the installation media
Flash the installation media. We will need to write on it afterwards, so do not use dd or DD mode.
- Rufus download: https://rufus.ie/ (Rufus or Rufus Portable)
- Run it
The defaults should be alright, I’d just recommend setting the partition scheme to GTP UEFI, since ASUS T100 and Windows 10 are compatible with it. Make sure you are flashing the correct device.
- Partition scheme: GPT UEFI
- Name: 11 characters max, for example UBUNTU1804
- File system: default (FAT32)
- Cluster size: default (8192 bytes)
- Image Mode: default (ISO).
3. Add the bootable GRUB file for our IA32-powered ASUS T100.
Once Rufus has finished to flash the media:
- Copy the bootia32.efi file in the EFI/BOOT directory. This directory should already contain various EFI files: probably BOOTx64.EFI and grubx64.efi .
If, like jfwells, you would like to build bootia32.efi by yourself, follow his guide (primarily for Linux Ubuntu and other Linux Debian-derivatives): https://github.com/jfwells/linux-asus-t100ta/tree/master/boot
Disable Secure Boot
- Power on your ASUS T100
- Press repetitively the F2 button at boot to prompt the UEFI menu, namely Setup Utility
- Go to the tab Security , then Secure Boot menu
- Make sure Secure Boot Support is [Disabled]
Boot the installation medium
It is time to boot the installation medium!
- Power on your ASUS T100
- Press repetitively the ESC button at boot to prompt the boot menu
- Select your installation medium, in our case: UBUNTU1804
- Try Ubuntu without installing
- You might need to turn keyboard’s numeric lock (NumLock) off
- FN + numLock (or FN + Inser) on the keyboard
- or numlockx off in a terminal
- Optionally, change your keyboard layout
- setxkbmap countryCode (de for German, fr for French, etc)
Run the installer
Note: The flag -b is necessary in this tutorial. It tells ubiquity not to install a bootloader. Without this flag, ubiquity would crash when trying to install it (Thanks Steven Andrew Mielke!). The bootloader is installed in the section Bootloader Installation below.
For novice users
For novice users, follow Ubuntu’s tutorial. But do not reboot at the end of the installation. Press the button Continue testing instead. When you are done with Ubuntu’s tutorial, jump to the section Bootloader Installation in this document.
For more advanced users
For more advanced users, choose the last installation type: Something else. And jump to the next section Partitioning.
The changes done in this section are not effectively written on the disk. The actual partitioning will happen when we’ll run the installation. Therefore, you can go back at any time and try again.
Note: A new ESP’s filesystem is displayed as ext4 in ubiquity when partitioning, before install. This is a display bug. The ESP is a VFAT or FAT32 partition.
ESP stands for EFI System Partition.
Note: Ignore the device with a single partition of 8014 MB, namely /dev/mmcblk0 .
Make up space for Ubuntu
2 scenarios: keep Windows or ditch Windows.
- You should have already shrunk Windows’s partition in Windows (Disks)
- Windows 7: https://technet.microsoft.com/en-us/library/gg309169.aspx
- Windows 10: https://docs.microsoft.com/en-us/windows-server/storage/disk-management/shrink-a-basic-volume#BKMK_WINUI
- Delete each partition, except the ESP. The ESP is probably one of the first partition, its size is 100 MB, and may be labeled SYSTEM .
- Select the partition you want to delete
- Press the — button to delete it.
Note: Alternatively, if you know what you are doing, you can create a new partition table and a new ESP. Backup the old ESP, just in case.
Create the partition for Ubuntu
- Select the Free Space
- Press the + button to add a new partition
- Size: the rest (this is the default)
- Use as: ext4 journaling file system
- Mountpoint dropdown-menu: /
- OK
- Make sure ‘Device for bootloader installation’ is the right device, probably /dev/mmcblk2
- Install now
- . Installation.
- When finished, Continue testing
7. Bootloader Installation
- From now onward, we will run the commands as root. To obtain superuser privileges, execute
- sudo -s
- Do not use sudo for each command, since it fails with some commands ( for and > ).
/!\ Theses filenames are for T100TA and T100CHI only. Other T100’s (T100TAF and 100H*) have other brcmfmac numbers. See the troubleshooting section No WiFi at the end of this document.
/!\ The filename ends with sdio.txt. Do not overwrite the file ending with sdio.bin.
- cp /sys/firmware/efi/efivars/nvram-* /lib/firmware/brcm/brcmfmac43241b4-sdio.txt #useful now
- cp /sys/firmware/efi/efivars/nvram-* /target/lib/firmware/brcm/brcmfmac43241b4-sdio.txt #useful after reboot
- modprobe -r brcmfmac
- modprobe brcmfmac
Now, you should be able to connect your ASUS T100 to your network.
Chroot in the new system
- Find the EFI System Partition. This should be the VFAT partition next to /target
- In the example below, it is mmcblk2p1
- If you are unsure, check its size with lsblk , it should be about 100M.
- lsblk -f
- Mount the EFI System Partition on the new system
- mount /dev/mmcblk2p1 /target/boot/efi
- Then, we have to mount some other filesystems before chrooting:
- Here we go!
- chroot /target /bin/bash
Install the Bootloader
- Verify that /dev /dev/pts /proc /run /sys and /boot/efi are mounted
- findmnt
- Install grub for EFI-IA32 architecture, and update its config file
- apt update
- apt install grub-efi-ia32 #grub-pc removed is normal behavior
- grub-install —efi-directory /boot/efi
- update-grub
- Run efibootmgr to see if ubuntu is in BootCurrent and if it is first in BootOrder, as shown below:
- Boot options must be edited in the file /etc/default/grub
- nano /etc/default/grub
- Edit kernel command-line parameters to add intel_idle.max_cstate=1 before quiet
GRUB boot screen
- If you want the system to boot faster, let’s say 1 second after the GRUB boot screen
- Update the grub configuration file in /boot/efi/grub/grub.cfg
- update-grub
9. Feel free to do other things in the chroot environment, then reboot
- When you are done. Just execute exit .
- Before the reboot
- umount /target/boot/efi
- Reboot on the new system.
/!\ T100TA and T100CHI only. Other T100’s (T100TAF and T100H*) has other audio device numbers. You will find files for your device on the Asus T100 group drive.
- Download the following folder
- https://drive.google.com/drive/folders/0B4DiU2o72FbuOXdwRXhfZ3ZmOFE
- Extract it and enter the folder
- Follow the instructions from the file README.txt
- sudo rm /var/lib/alsa/asound.state
- sudo mkdir /usr/share/alsa/ucm/bytcr-rt5640
- sudo cp HiFi bytcr-rt5640.conf /usr/share/alsa/ucm/bytcr-rt5640
- Verify the file are correctly installed, as shown below
- sudo alsactl restore
- We have sound devices in Pulseaudio now :3 But still no sound.
- Lower the sound volume, just in case.
- Reboot
- a new asound file is generated (created before or after reboot), but still no sound
- sudo cp kernel4.5.xand4.4.x.asound.state /var/lib/alsa/asound.state
- sudo alsactl restore
- Now we have sound!
If you have no sound, make sure Pulseaudio is correctly set:
- pavucontrol
- Configuration pane
- Card Name: off
- Built-in audio: Play HiFi quality music
- Input device: ignore it, this is for your micro.
- Output device
- Port: Headphones or speaker playback
- Configuration pane
- You are good!
If you still have no sound, see the troubleshooting section No Sound at the end of this document.
11. Backlit control
Use xbacklight. Working for kernel >= 4.13 (Ubuntu 1804 has kernel 4.15)
- xbacklight -inc 1 and xbacklight -dec 1
- xbacklight requires to configure Xorg: /etc/X11/xorg.conf
12. Hardware video decoding
With hardware video decoding, a video player should use around 25% CPU when playing a 720p, h264 video fullscreen, instead of 70-100% without hardware decoding.
- apt install ubuntu-restricted-addons
- reboot
- apt install vainfo
- vainfo
13. Disable numlock at boot
- Numlock is especially annoying in the login screen, when typing the password. since we do not see the actual characters.
- apt remove numlockx
/!\ Same warning as Sound and WiFi, the following file is for T100TA and T100CHI only. Other T100’s (T100TAF and T100H*) have other Bluetooth device numbers.
Bluetooth should already partially work. For a better support, e.g. pairing and bonding, we need the firmware file BCM4324B3.hcd in the folder /lib/firmware/brcm/ .
- This file can be found in Windows’ partition, in the folder C:\Windows\system32\drivers .
- Or, download it from: https://launchpad.net/asust100-ubuntu/+milestone/bluetooth-t100ta
- Install it
- mv BCM4324B3.hcd /lib/firmware/brcm/
- Reboot.
We have to find out which file your system needs.
- Run dmesg
- sudo dmesg
- Find the following line, ignore the .
- brcmfmac . Direct firmware load for brcm/brcmfmacVWXYZ-sdio.bin for chip .
- For example, a T100TAF needs brcmfmac43340-sdio.txt .
- You can download it on the ASUS group: https://drive.google.com/drive/folders/0B4s5KNXf2Z36cUpzSURqaTk1TE0
Solution A: Turn realtime-scheduling off for pulseaudio
For any software, the rule of thumb is to override the configuration by creating a new .conf file in /etc/software/directory.conf.d/ instead. In this way, the system won’t complain during an upgrade of the configuration file (Here daemon.conf for pulseaudio).
- Obtain superuser privilege (root)
- sudo -s
- Create a new directory for our configuration file
- mkdir -p /etc/pulse/daemon.conf.d/
- Create the configuration file
- echo ‘realtime-scheduling = no’ > /etc/pulse/daemon.conf.d/50-fix_pulseaudio.conf
- You can change the name of the file, provided you keep the .conf extension though.
- For more information
- man pulse-daemon.conf
Solution B: Disable sound over HDMI
- Obtain superuser privilege (root)
- sudo -s
- echo ‘blacklist snd_hdmi_lpe_audio’ > /etc/modprobe.d/fix_audio.conf
- Reboot
3. T100TAM Touchscreen
Add these kernel command-line parameters: tsc=reliable clocksource=tsc
Источник
Делаем DualBoot на планшете Asus T100

В этой публикации — история похождений одного техногика, которому захотелось иметь две системы на одном планшете.
Итак, Asus T100 — планшет-трансформер на Windows 8/8.1 от, внезапно, Asus. Тут есть UEFI, поэтому руки гиков сразу добрались до него, ведь, в теории, на него можно поставить другие системы! Но вся подлянка от Asus заключается в том, что загрузчик тут 32-х битный и он не умеет ничего, кроме загрузки Window s(почти любой Windows, не только предустановленной, но только x86). Если тут обитают представители Asus — скажите, пожалуйста, зачем вы это сделали? Зачем так издеваться над нами, пользователями? Процессор-то нормальный, x64.
Некоторое время спустя товарищи из Android x86 сделали тестовую бету Android, которая загружалась в Live. Там был grub, который загружал сам Android. Но так как ядра 4.0 в те времена ещё не было, то планшет зависал спустя некоторое время. У него не работали кнопки, не работала яркость и так далее. Технодемка, проще говоря. Упорные товарищи (и я среди них) пытались даже играть на зависающей системе.

Планшет вышел в продажу в конце 2013 года, купил я его в мае 2014 года, а в сентябре уже выпустили что-то похожее на Android.
Через какое-то время в профильной ветке 4pda (куратором которой я и являюсь, к слову), появилась инструкция по установке Android на жёсткий диск. Ну, как установка… загрузка из файлов, лежащих на диске C в папке Android.
Сам андроид состоит из файлов data.img, system.sfs/img (зависит от того, что написано в grub.cfg), kernel, ramdisk.img, initrd.img и install.img (очевидно, установка системы, но он нигде не используется). Апгрейд системы сводится к замене файлов в папке. Удобно.
У меня вы не увидите data.img, так как я пошёл ещё дальше и всю дату кинул на другой раздел, но об этом позже.
Работает всё это чудо через rEFInd, который видит все .efi файлы на всех разделах и позволяет их загрузить. Теперь есть возможность загрузить grub, отлично! Так оно и работает — Android запускается через груб, который запускается через рефинд. Казалось бы, что ещё нужно для счастья? Можно запускать сколько душе угодно систем и на сколько хватит встроенного накопителя (пользователи Т100 с жёстким диском в клавиатуре очень рады данному факту). Теперь подлянку устроил сам рефинд: он не определяет, кнопки громкости и вообще ничего не определяет, кроме стрелок на докстанции. А по умолчанию выбрана винда (он видит и её .efi файл) и грузит её, если не успеть выбрать другую систему. Без докстанции рефинд вообще не нужен и толку с него никакого. До определённого момента.
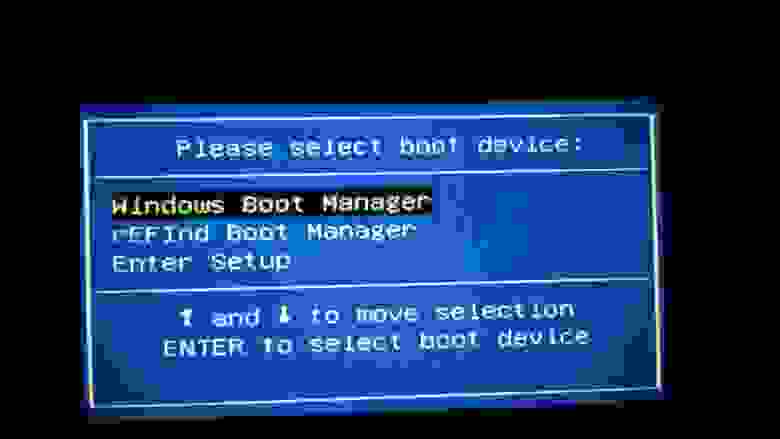
Рефинд выглядит как-то так:
Фон, иконки и прочее редактируется в refind.conf на разделе EFI, в который он и устанавливается.
Я сам с самого начала появления этой инструкции пользовался такими костылями. А что поделать? Заскучал по андроиду и его играм. Всё же, как не крути, Android нужен для потребления контента (моё мнение; интересно послушать ваше мнение в комментариях), а Windows для этих дел не очень подходит.
Шло время, умельцы выпускали билды для Т100, в которых понемногу чинили баги. Но главная проблема с зависаниями никуда не пропала и все ждали ядро 4.0 и умельцев, которые на это ядро повесят Android.
Параллельно в это время развивался лагерь убунтоводов, у которых система работала получше, чем Android, ведь новые ядра без проблем ставились в Ubuntu. Но не без изъянов: wi-fi не работал, звук не работал, но система не вылетала даже на старом ядре.
Выход ядра 4.0 в корне всё поменял, ведь там добавили поддержку всяких кнопок на планшетах и т.д. А самое главное — поддержку eMMC (его в паре со старым ядром обвинили во всех смертных грехах T100). Android теперь не вылетал, а Ubuntu работала ещё стабильнее и быстрее (по ощущениям).
С этого момента люди и задумались — а раз есть хороший билд, то может можно подключить тачскрин или кнопки громкости к рефинду и выбирать систему без докстанции? Эти самые кнопки работают в биосе и родном boot manager, значит, их можно попробовать и к рефинду прикрутить. Но так ничего и не сдвинулось с места.
Спустя какое-то время, в начале мая, вышел ещё один билд, который работал ещё лучше. Тут я загорелся желанием отказаться от докстанции при выборе системы, да и не везде удобно подключать клавиатуру ради загрузки Android.
На том же 4pda мне посоветовали и рассказали, как и что поменять в конфиге рефинда, чтобы он сразу загружал grub и при этом не ждал, а сразу стартовал. Это гениально.
Достаточно было поменять всего 2 значения в конфиге, чтобы моя мечта свершилась:
1. timeout 05 меняется на timeout -1
2. default_selection 1 меняется на default_selection grub
После этих манипуляций рефинд не ждёт пользователя, а сразу загружает grub. То, что нужно. Но есть и минус: запускать нужно с зажатой vol down, чтобы попасть в boot manager и выбрать систему. Конечно, можно зайти в биос и поменять порядок загрузки (поставить первым рефинд, а виндовый загрузчик вторым) и тогда груб будет загружаться по нажатию кнопки без всяких vol down. Что я и сделал.
Но у Android есть один огромный минус — data.img весом в 2/4/8 гигабайт. И он занимает сразу весь объём, а не растёт по мере заполнения. Пользовался я 8 gb файлом, но недолго. В мою голову пришла идея перекинуть дату на отдельный раздел, на котором в то время лежала Ubuntu (триобут был даже, во как!).
Снеся Ubuntu и отформатировав 15 гб в ext3, я встал в ступор. Как направить груб на раздел, а не на файл? Подсказка пришла прямо во время запуска системы: detecting android x86… found at /dev/mmcblk0p4, но это я понял позже, а сначала пытался писать hd(0,5), груб это не принял и позже я заметил /dev/mmcblk0p4. По аналогии я написал «/dev/mmcblk0p5» вместо /android/data.img. И, успех! 15 гигабайт памяти в Android!

Так же в пути к system файлу я заменил .sfs на .img, так как sfs не позволяет работать руту в системе, а Android без рута, что iOS без джейлбрейка. На том скрине я уже разошёлся с xposed и переделал систему под себя, так как что-то менять, связанное с датой, я уже не планировал.
И что же мы имеем в итоге? А вот что:
1. Аналог Asus Transformer Book Duet, цена которому $600 на самую «слабую» комплектацию ($355 у Asus T100. С учётом курса доллара на сегодняшний день). Правда, там работают две ОС сразу и переключаются кнопкой на клавиатуре, либо виртуальной кнопкой на планшете.
2. Хорошее устройство для вардрайвинга (на Хабре статья в трёх частях про данное дело), но частично: wi-fi адаптер работает хорошо, но Kali Linux/Intercepter-ng в андроиде не видят адаптер.

Kali Linux тот ещё зверь на старом ядре и для начала нужно побороть mmcblk0rpmb, которые не дают установить систему (краш во время установки), а работать в live не позволяет, опять же, старое ядро, которое не видит адаптер. Вообще. Даже просто сёрфинг невозможен. Но эти два минуса (и в установленной системе (если повезло с mmcblk0rpmb и установка не крашнулась) и в лайве) убираются внешним wi-fi адаптером, благо порт usb 3.0 есть в докстанции. Один, правда, но и на том спасибо.
3. Не до конца рабочий Android (пока что): акселерометр не работает, что привело к нерабочему автоповороту экрана и невозможности играть в гонки, в которых нет перенастройки поворота на кнопки. Планшет «засыпает» не как обычно. Он вроде как и тушит экран, но подсветка горит на минимальной яркости. В Ubuntu такого нет, там экран выключается, а не понижает яркость.
4. Процессор всё ещё x86 и никогда не станет arm, поэтому не все игры запускаются, но это беда всех x86 процессоров.
5. Atom Z3740/3775 на Android. На моей памяти такой мощи x86 на Android ещё не было. А может и было, но в любом случае Z3740 (первые партии Т100) или Z3775 (следующие партии Т100) — мощная штука. В антуту набирает 35 тысяч или 36. Не пишите про arm, которые набирают по 50-60 тысяч, так как это совсем другая архитектура и глупо их сравнивать.
6. Понты. «Зацени, у меня тут две системы есть!»
Также хочу поблагодарить людей с 4pda, с xda-dev, с группы google+ (убунтоводы), которые бесплатно, сами, своими силами, тратя своё время на нас, делают всю работу, чтобы простым пользователям было хорошо. Спасибо вам огромное. Да и не было бы этого «рассказа», если бы не вы.
Всем спасибо за внимание. В комментариях постараюсь ответить на ваши вопросы и камни в мой огород по поводу ужасных костылей в этой системе.
Источник


