- Asus zenbook mac os
- [Бюро хакинтошей] ASUS Zenbook UX31E
- [Guide] Asus Zenbook UX305FA on High Sierra using Clover UEFI
- pentium0
- Attachments
- Steve1321
- ngochtran0
- vindu
- [Guide] ASUS Zenbook UX310UA (& UX310UQK) macOS Mojave / Catalina with Clover (& Big Sur / Monterey using OpenCore EFI) Installation Guide
- Shinji3rd
Asus zenbook mac os
ASUS Zenbook UX331 OpenCore EFI Hackintosh


ASUS Zenbook UX331FN
| Hardware | Name |
|---|---|
| CPU | Intel Core i5-8265U @ 1.60 GHz |
| GPU | Intel UHD Graphics 620, NVIDIA MX150 (disabled) |
| Memory | 8 GB DDR4 |
| Storage | SanDisk SD7SN6S SATA M.2 256GB |
| Sound Card | Realtek ALC294 |
| Touchpad | ELAN1200 I2C HID |
| WiFi Card | Intel Dual Band Wireless-AC 8265 |
OpenCore EFI might work with Zenbook models under UX333, but it’s not recommended.
Specifically geared towards Zenbooks with Coffee Lake laptop processors.
As of February 24, 2021, it works with Mojave and above. Currently updated to OpenCore 0.6.5 .
- Speakers may sound abit distorted
- The battery may not charge all the way when booted to Mac OS.
- It happens to charge up to only 83%.
- This can be solved by letting it charge all the way while leaving it turned off.
- It happens to charge up to only 83%.
- There is a bug where touchpad will sometimes stop working and work after a few minutes
Everything that works perfectly at the moment
Источник
[Бюро хакинтошей] ASUS Zenbook UX31E
Если вы хотите проверить свой PC-компьютер на совместимость с хакинтошем, отправьте нам максимально подробные сведения о его конфигурации (как минимум — материнская плата, процессор, видеокарта, контроллер жёстких дисков, звуковая карта, сетевые интерфейсы) через форму заявки на проверку хакинтоша. Чем полнее сведения, тем точнее будет наш вердикт. Увы, ввиду огромного количества подобных писем мы не в состоянии консультировать каждый ваш шаг в процессе установки хакинтоша, однако мы постараемся помочь вам ссылкой на русско- или англоязычный мануал по данной теме.
К нам была прислана следующая конфигурация:
Тип компьютера: Ноутбук
Наличие рабочей OS X под рукой: on
Производитель компьютера/материнской платы: asus
Марка компьютера/материнской платы: ux31e.210
Процессор: intel core i7 2677m
Видеокарта: intel hd graphics family
Используемые видеовыходы: Mini-DVI,HDMI
Аудиокодек: realtek
Контроллер HDD: SATA
Ethernet-карта: через usb
Чип Wi-Fi: Atheros AR9485WB-EG Wireless Network Adapter
Дополнительные пожелания пользователя:
Интересует установка и максимальное функционирование mountain lion. Ну и вообще желательно понять на сколько будет работа безглючной, т.к. комп рабочий… но очень хочется мак ось))
Работа будет безглючной только в том случае, если вы решитесь на замену Wi-Fi/Bluetooth-чипа и контроллера USB 3.0. Завести их в данной модели нереально по техническим причинам. Вы попросту не найдёте в свободной продаже и на Ebay альтернативных карточек с совместимыми коннекторами.
Поставить Mac OS X при большом желании вы сможете, достаточно воспользоваться любой относительно свежей сборкой. Но вот рассчитывать на то, что данный ноут вы сможете использовать как полноценный аналог MacBook Air, не стоит. Помимо описанных выше проблем, вас могут преследовать глюки трекпада. В общем, пробовать стоит лишь при наличии энтузиазма и свободного времени.
Источник
[Guide] Asus Zenbook UX305FA on High Sierra using Clover UEFI

pentium0
System:
Asus Zenbook UX305FA — 8GB ram, Intel HD5300 graphics, Intel Core M 5Y10 CPU, 1920×1080 IPS Display
Intel wifi swapped for DW1560
ELAN trackpad model, but some UX305FA are ALPS I hear
10.13.3 with supplemental update
TL : DR
Stock unibeast high sierra USB installer seems to install fine onto this laptop.
Use rehabman’s clover fork to install clover to the HDD, otherwise SSDT/DSDT patching usually doesn’t work right.
Just follow gfoury’s guide for El Capitan (https://github.com/gfoury/UX305FA-DSDT-Patch) to get 99% of the system working. See below for fixing the few things broken by high sierra.
Special note for Clover:
OsxAptioFixDrv-64.efi and also OsxAptioFix2Drv-64.efi sometimes throw the «is printf working?» clover error and freeze on boot.
The other Aptio fix, AptioMemoryFix.efi, does not give this error for me.
If the «is printf working» error happens recommended to remove OsxAptioFix2Drv-64.efi and use AptioMemoryFix.efi instead. It is an option in the clover installer.
Working:
Sleep (via OS menu or shut lid, not via FN-F1 for some reason)
Audio (supposedly with HDMI out also, not tested yet. see below in ‘install’ section)
Proper CPU Scaling — 800mhz resting on battery, 1.29ghz resting on AC resting, scales up to 2ghz regardless
FN keys (via asusFN keys kext)
Display Backlight Control (entire range is too bright, but control works)
Battery Meter
Wifi
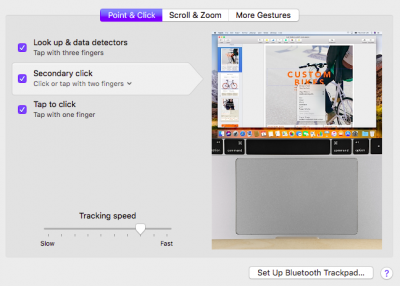
Trackpad prefpane (using 10.13.1 prefpane, voodooPS2, and ApplePS2SmartTouchPad — see attached ZIP and screenshot)
Bluetooth (even after sleep, via turning off «handoff to cloud» on general control panel settings)
Webcam
Not Working:
HiDPI (haven’t looked into, not sure if it’s a good option for 1080p FHD display)
Backlight range is too bright
Background:
Two very good guides are already available:
gfoury (https://github.com/gfoury/UX305FA-DSDT-Patch)
This is what I used to generate the SSDT’s in efi/clover/acpi/patched, and the special DSDT hotpatches in the clover .config
There are two different ZIPs attached here. The «everything» zip has everything, for reference, but the contents of /efi/clover/acpi/patched and the config.plist should not be used. It is straight forward to generate your own using the gfoury guide. The «special» zip just has what is not in the guides, and my clover .config as reference.
* The method I used to get trackpad working, with good prefpane, might be unneccessary/bad. I did not try latest voodooPS2 I believe because I assumed I had the ELAN trackpad hardware which doesn’t work fully with voodooPS2.
Thanks:
Huge thanks to jhawk and gfoury for helping with their great guides. Also the «one person» (I don’t believe it) that is rehabman.
I thought it was going to be impossible to get trackpad prefpane working correctly. Stupid ELAN trackpads. The combination of voodooPS2/ApplePS2SmartTouchPad/trackpad.prefpane attached here in the ZIP does work for me. As stolen from my lenovo y50-70 ELAN install.
Attachments

Steve1321
Late reply, but I’m going to add a few notes here in case any other stragglers are still building on this machine.
- I’d recommend building the install media from scratch following Rehabman’s guide. There’s less fluff installed onto the USB, and the less going on, the easier it is to understand what’s happening
- The vanilla trackpad prefpane works fine using the latest version of ApplePS2SmartTouchPad (v4.7 beta 5).
- This seems to conflict with AsusNBFnKeys.kext, as I believe later versions of smarttouchpad made accommodations for Asus keyboards. My volume keys work fine, but my brightness keys don’t. I haven’t tested very heavily and it may just be my setup that’s wrong.
- Gfoury’s build scripts were not able to install AsusNBFnKeys or the SmartTouchPad kext. Not much of an issue considering they needed to be removed/replaced anyway.
- If following Gfoury’s scripts, don’t forget to uninstall IntelBacklight from /Library/Extensions.
- iMessage works fine provided you install correct SMBIOS information
- Many guides will tell you to install kexts onto Clover’s EFI. On my machine at least, kexts will not execute unless they’re installed in /Library/Extensions.
- ssdtPRGen.sh causes bootloops on my machine. I haven’t troubleshooted this issue very much, because it seems like power management is working fine out of the box without it. (Rehabman’s HWmonitor shows proper CPU scaling when idle and under stress. Maybe that’s just cosmetic, but ignorance is bliss)
- If you’ve tried to install the ssdt and experience bootlooping, you can revert back by launching the recovery partition, opening a terminal window (under utilities), mounting the EFI and removing the ssdt.aml.
- For audio, avoid VoodooHDA. Patching AppleHDA is just as easy, but requires you to start with a fresh, unmodified AppleHDA. You can search around for the details, but essentially just use a layout of 3, and install the kexts to /Library/Extensions and not Clover’s EFI. I can provide more details on this if anyone would like.
If anyone needs assistance, feel free to reach out to me. This community has been very helpful and I’m more than willing to do my part as well.

ngochtran0
Thank you both for the guide and tips,
I’d like to also add that (at least on my machine) the issue of the backlight brightness range being too high can be solved by using AppleBacklightInjector by Rehabman (https://www.tonymacx86.com/threads/. rol-using-applebacklightinjector-kext.218222/).

vindu
anyone having any troubles getting gpu acceleration to work? seems when i enable the igpu the same as i did with el capitan(0x161e0001) it just boots to a black screen
edit. using platform id 0x16260006 + coredisplay patch worked
anyone else having trouble with the battery not detecting if it’s charged and plugged in on startup?
edit. just seems to be a known problem with the acpi battery driver
Источник
[Guide] ASUS Zenbook UX310UA (& UX310UQK) macOS Mojave / Catalina with Clover (& Big Sur / Monterey using OpenCore EFI) Installation Guide

Shinji3rd
This is an installation guide for the Asus UX310UA (or UX310UA-FC620T) laptop with macOS Mojave or Catalina. This is intended to install macOS only, removing Windows. This guide is based on and adapted from Patou75’s guide for UX330UA here https://www.tonymacx86.com/threads/. n-on-asus-ux330ua-skylake-clover-uefi.204479/
Everything except Wi-Fi/Bluetooth (you have to change the card to make it work)
The Internet WIFI/Bluetooth chip will not work on this laptop. Intel chips are not supported at this time on hackintosh. You need to replace it with a DW1560 from eBay or Amazon. You can also try DW1820, but keep in mind that not all of those work and you have to experiment with some patches. This is highly recommended versus buying an external USB Wi-Fi adapter.
Pre-Installation Items Needed:
- At least a 16 gb USB thumb drive
- Access to a Real Mac or another Hackintosh for downloading latest version of Mojave or Catalina from App Store
- Most recent version of UniBeast from the Downloads section on this website (or you can use instructions provided here -use instructions for Catalina Release- and avoid UniBeast: https://www.tonymacx86.com/threads/. catalina-public-beta-installation-usb.278188/)
- Clover EFI (download the pkg, that is the installer) — https://github.com/CloverHackyColor/CloverBootloader/releases/
- HFSPlus.efi file — https://github.com/JrCs/CloverGrowerPro/raw/master/Files/HFSPlus/X64/HFSPlus.efi
- ApfsDriverLoader.efi — https://github.com/acidanthera/applesupportpkg/releases
- AptioMemoryFix.efi — https://github.com/acidanthera/AptioFixPkg/releases (don’t pay attention to the message saying it is now split into two different files, because that will not work with Clover, just download AptioFixPkg and you will find the efi file needed in that zip)
- Lilu.kext — https://github.com/acidanthera/Lilu/releases
- VirtualSMC.kext — https://github.com/acidanthera/VirtualSMC/releases
- VoodooPS2Controller.kext — https://github.com/acidanthera/VoodooPS2/releases
- WhateverGreen.kext — https://github.com/acidanthera/WhateverGreen/releases
- config.plist attached on this same guide. Keep in mind that I’m spoofing SKL graphics, because KBL graphics has a glitch that makes colors and shadows look weird on the laptop’s screen. (If you don’t want to use spoofing, you have to remove the boot-arg lilucpu=8 as well as replacing AAPL,ig-platform-id & device-id in Devices -> Properties -> PciRoot(0x0)/Pci(0x2,0x0) from 00001619 & 16190000 to 00001659 & 16590000 respectively.)
Post-Installation Items Needed:
- You will need a USB mouse in order to complete the installation since the touchpad will not work until you finish the installation and restart the computer
- Clover Configurator — http://mackie100projects.altervista.org
- MaciASL 6.1 (Latest Version) — https://bitbucket.org/RehabMan/os-x-maciasl-patchmatic/downloads
- AppleALC.kext — https://github.com/vit9696/AppleALC/releases
- HibernationFixup.kext — https://github.com/acidanthera/HibernationFixup/releases
- NullEthernet.kext — https://bitbucket.org/RehabMan/os-x-null-ethernet/downloads/
- Again (already downloaded for the Pre-Install): Clover EFI, HFSPlus.efi, ApfsDriverLoader.efi, AptioMemoryFix.efi, config.plist, Lilu.kext, VirtualSMC.kext, VoodooPS2Controller.kext and WhateverGreen.kext
- SMCBatteryManager.kext (it’s included in VirtualSMC’s zip file)
- AsusSMC.kext — https://github.com/hieplpvip/AsusSMC/releases
- VoodooI2C.kext and VoodooI2CHID.kext — https://github.com/alexandred/VoodooI2C/releases
- SSDT-ECUSBX.aml (included in this guide)
- SSDT-PNLF.aml (included as .dsl with Whatevergreen, so you have to compile it with MaciASL, as explained later on this same guide)
- SSDT-UIAC.aml (created by yourself, following guide linked in step 12, or use the SSDT-UIAC.aml attached in this guide if you have the exact same model this guide is intended for)
- USBInjectAll.kext — https://bitbucket.org/RehabMan/os-x-usb-inject-all/downloads/
After replacing the Wi-Fi/BT module, if you replaced it with DW1560 (recommended):
Setup your BIOS at bootup using the ESC on your keyboard and select the following options:
- First, activate Advanced Mode
- Check that DVMT is set to 64M. If not, set that value
- VT-d = disabled
- Disabled Secure Boot
Step 2:
Create the USB installer using UniBeast from the Mac where you have dowloaded Mojave or Catalina installer from App Store. It is really easy, follow the guide here: https://www.tonymacx86.com/threads/. ierra-on-any-supported-intel-based-pc.200564/
Before attempting to boot your newly created USB Thumb Drive, replace the clover generated config.plist with the modified config.plist included in this guide (take a look at the end of this guide). The config.plist that clover creates by default will NOT work.
Open up the folder /Clover/kexts/Other/ and put the following kexts there (replacing if some of them are included already):
- Lilu.kext
- VirtualSMC.kext
- VoodooPS2Controller.kext
- WhateverGreen.kext
IMPORTANT: If you see FakeSMC.kext in that folder, DELETE IT. You can’t use FakeSMC and VirtualSMC at the same time, and we will use VirtualSMC.
Put SSDT-ECUSBX.aml in /Clover/ACPI/patched/
Also put ApfsDriverLoader.efi, AptioMemoryFix.efi, and HFSPlus.efi in /Clover/drivers/UEFI/
Put the USB stick in a USB port on your ASUS, and power on. For selecting your USB to boot, press the ESC key during boot up.
When you reach the Installer, open Utilities, select Disk Utility, and format the HDD as HFS+ Journaled or as APFS (Apple’s new file system). I prefer APFS, but choose what’s best to you. If you don’t know, just use APFS. Name the HDD as you like. I prefer to call it «MacOS» but that is up to you. After that, start and complete the installation process.
IMPORTANT: Please pay attention to the installation process. You will see it restarts the system at some point, and that is normal. It usually reboots and you will see it starts from a partition called «macOS Install Prebooter from Preboot». That is ok. However, usually it will reboot again after some minutes, and then it will try to boot from «MacOS» (or whatever name you chose when you formatted the HDD). You will have to manually move (using the arrow keys) the selection to «macOS Install Prebooter from Preboot» again and press enter.
After the installation process, make sure you install Clover EFI to the Mac HD so you don’t have to keep booting via your Thumb Drive. If you receive a message saying something like Clover is not meant to be installed in that partition or something like that, don’t pay attention to it, just install anyway.
Optional: Install CloverThemeManager.app. This will install an App that you can use to preview, download and use themes for Clover bootloader (recommended Themes are «Mojave» and «Catalina») — https://sourceforge.net/p/cloverefi. hemeManagerApp/Updates/CloverThemeManager.zip
After following the above steps and successfully installing macOS as well as Clover to the Mac HD, install Clover Configurator, open it, and use the tool to mount the EFI partition of your HDD. You need to add these kets to EFI/Clover/kexts/Other:
- VirtualSMC.kext
- VoodooPS2Controller.kext
Also, replace the created config.plist with the modified config.plist included in this guide. The same you have used for the installation USB Thumb Drive. DO NOT FORGET THIS, IT IS IMPORTANT.
Put SSDT-ECUSBX.aml in /Clover/ACPI/patched/
Lastly, put ApfsDriverLoader.efi, AptioMemoryFix.efi, and HFSPlus.efi in /Clover/drivers/UEFI/
Reboot your computer booting without the USB, and get to the clover loading screen. Do NOT boot into the system yet, just press any arrow key to stop the countdown if you need it. Then, press the keyboard F4 button once in order to save the system DSDT and SSDT files to clover. This will be done automatically AFTER you press the F4 button ONCE and you will not see any message as indicative, that is normal. Proceed in booting into macOS.
Note: You will find unpatched DSDT and SSDT’s on EFI/Clover/ACPI/origin
Now we are going to patch the DSDT and compile a SSDT so your laptop will function like a «Real» Mac with the proper Power Management, Battery Indicator, Screen Brightness Control, etc.
For patching the DSDT and SSDT, I followed this guide here… READ THIS slowly. It can be difficult to understand if you’ve never done a DSDT and SSDT patch before: http://www.tonymacx86.com/threads/guide-patching-laptop-dsdt-ssdts.152573/
For models post Skylake (like this one and newer ASUS models) we will not need to use refs.txt and we will not use -da. Basically, we will use this code from that guide
Of course you will need internet by sharing the internet connection with USB using your phone for example. Or you can also copy the extracted DSDT and SSDT’s to a USB drive, and take them to the Mac you used to download Mojave or Catalina installer and do the patching process there.
Please read and follow the instructions in the above link before going down further here:
-Use the MaciASL 6.1 application that you should have downloaded from the above link.
-Go to Preferences, and make sure iASL 6.1 is selected. Click the Sources tab, click the «+» and the following Patch Info (if it’s not already there):
Name = Rehabman
URL = http://raw.github.com/RehabMan/Laptop-DSDT-Patch/master
-It is good to create a copy of your system DSDT to work with the copy and thus keep the original untouched in case you need it again in the future.
-These are the patches I used for my DSDT. I applied this in order from top to bottom:
- «[bat] Asus N55SL/VivoBook Battery Patch» — RehabMan source
- «[sys] Shutdown Fix v2» — RehabMan source
- «[sys] OS Check Fix (Windows 10)» — RehabMan source
- «NullEthernet» patch from RehabMan to make it work with the kext
- «[als] Patch ALSS» — AsusSMC source
- (I had to test special keys later, and found out that I also need to apply patches for F2 (sleep), F5 (brightness down) and F6 (brightness up) to make those keys work. You will have to test in your own keyboard, and see which keys doesn’t work and apply needed patches. Same if your model has backlit keyboard, you’ll need an extra patch. And for Sleep and Airplane Mode you’ll need to install AsusSMCDaemon. Instructions are here: https://github.com/hieplpvip/AsusSMC/wiki/Installation-Instruction)
After trying to compile the DSDT, I got 1 error about BNUM. Just search for BNUM and delete the line
Compile, save, and save as DSDT.aml
For all the SSDTs:
We don’t need any of the extracted kexts. Some of them were needed in the past, but not anymore.
This file comes in WhateverGreen’s Zip file and it’s needed to get brightness control. It comes as SSDT-PNLF.dsl so you also need to open it in MaciASL and save it as aml, the same as you did with the DSDT after patching it.
By now you should have your SSDT-PNLF.aml and your patched DSDT.aml files. Place these files along with the rest of your system files into your EFI HDD Partition. Navigate to the following folder: EFI/Clover/ACPI/patched/ and place your modified DSDT.aml and SSDT-PNLF.aml.
Also place these kexts into EFI/Clover/kexts/Other:
- AppleALC.kext
- AsusSMC.kext
- HibernationFixup.kext
- Lilu.kext
- NullEthernet.kext
- SMCBatteryManager.kext
- USBInjectAll.kext
- VirtualSMC.kext (should be there already from previous step)
- VoodooI2C.kext
- VoodooI2CHID.kext
- VoodooPS2Controller.kext (should be there already from previous step)
- WhateverGreen.kext
Step 11 (THIS IS ONLY NEEDED AFTER YOU HAVE REPLACED THE WIFI/BT MODULE):
Place these kexts into EFI/Clover/kexts/Other:
- AirportBrcmFixup.kext
- BrcmFirmwareData.kext
- BrcmPatchRAM2.kext (only for Mojave)
- BrcmBluetoothInjector.kext and BrcmPatchRAM3.kext (only for Catalina)
Note that you need either BrcmPatchRAM2 or BrcmBluetoothInjector.kext and BrcmPatchRAM3, according to if you installed Mojave or Catalina. Do not place all three kexts, use one or the others accordingly.
Read this guide, carefully, and follow the steps needed to setup your USB internal and external ports. It works with USBInjectAll.kext, which we already installed. You will have to create SSDT-UIAC.aml and place it into EFI/Clover/ACPI/patched/.This is needed to guarantee Wi-Fi and BT to work properly, as well as power management, proper sleep and more: https://www.tonymacx86.com/threads/guide-10-11-usb-changes-and-solutions.173616/
If you have the exact same model described in this guide, you can just use SSDT-UIAC.aml attached in this guide.
Restart the Mac. You will have a fully working Mac now
Bonus Step: Only if you have UX310UQK or any other similar model with Nvidia graphics
Nvidia graphics card will not work with MacOS. You must disable it. Otherwise, you will have graphical glitches, sleep problems, black screens and more. To disable the card, edit your config.plist file using Clover Configurator, and at the Boot section add this bootarg:
NOTE : All USB 3.0 are working, USB-C too, Webcam too, SD Card reader too.
NOTE 2: To make iMessage work, you will need some extra changes. Check this guide: https://www.tonymacx86.com/threads/an-idiots-guide-to-imessage.196827/
@RehabMan for his great work. You are the greatest.
@haimann951 for his workaround for ELAN 1200 touchpad. (although it is not needed anymore due to the updates in the VoodooI2C project)
Alexandred for his work with VoodooI2C (we have multitouch at last!)
@ben9923 for his patience and his great help. Without him I wouldn’t be able to make the touchpad work.
And @patou75 for the UX330UA guide that I used not only as template, but also as guide and source of information to install Mac on my own system.
GUIDE UPDATED ON Nov 5th, 2019: Removed support for Sierra and High Sierra. Keeping Mojave support, since some people don’t want to upgrade yet. Now there are less steps, it is easier to make the audio work (and native, without touching system files), battery indication works perfect (way better than before), power management works great, and we have a trackpad with multitouch
New update Dec. 15th 2019: VoodooI2C new version does not need patches for lpss apple kexts, neither forcing iographics to load, so I’ve removed that from this guide. Now it’s even easier than before
GUIDE UPDATED AGAIN. May 7th, 2020: No need to modify config.plist, so a whole (and complicated) step was removed. As RehabMan’s config.plist’ where updated long ago, but after this guide was made, there were some differences and patches that cause some problems. I decided to include a fully working, updated config.plist here, with the needed patches for audio and video for this laptop (and similar models), updated using WhateverGreen’s standards instead of old kernel and kexts patching. You are free to change values in patches, or remove them and apply your own. Using Clover Configurator you will find patches after loading config.plist in Devices -> Properties.
NEW UPDATE June 2nd, 2020: Adding some extra info for model UX310UQK and similar models including Nvidia graphics. Tested and working, the steps are exactly the same, except that you have to use an additional bootarg to disable Nvidia graphics.
NEW UPDATE August 20th, 2020: Added OpenCore’s EFI folder (0.6.0) to make this laptop work with OpenCore instead of Clover. This way, it not only works with Catalina, but also with Big Sur. Everything works, except fn+Fx keys for screen and keyboard brightness. If you are using Clover now and want to try OpenCore, just open your EFI partition, delete your EFI folder, and put this one instead. You can update from Catalina to Big Sur directly from Software Update without problems. I recommend you to use OpenCore Configurator, to edit config.plist’s Platform Info section and add your generated serial number and system UUID. Check some OpenCore guide if you need help with that. It’s needed to make iMessage and other Apple services work.
Another update October 4th, 2020: OpenCore EFI updated to 0.6.1. All kexts up to date. Fixed problem with fn+fx for screen brightness up and down.
Update Nov 4th: OpenCore updated to 0.6.3, and all kexts are up-to-date too.
Update June 14th, 2021: OpenCore updated to 0.7.0, and all kexts are up-to-date too.
Update July 14th, 2021: Monterey is here! OpenCore updated to 0.7.1, and all kexts are up-to-date too. If any of you want to try it, remember to first generate and add a SMUUID, ROM, SystemSerialNumber and MLB into config.plist. You can use OpenCore Configurator for that (Platform Info -> DataHub — Generic — PlatformNVRAM). IMPORTANT: This time I’m including USBPorts.kext, with perfect injection of the USB ports and internal devices in my laptop. Usually, all the UX310 and even UX410 have the same port mapping, but in case that you experience some issues, de-activate that kext, or replace it with your own kext. If you don’t have one and you need it, follow this awesome guide by @UtterDisbelief: https://www.tonymacx86.com/threads/the-new-beginners-guide-to-usb-port-configuration.286553/
Update July 18th, 2021: Minor update. Fixed some kext placements that were leading to trackpad and bluetooth not working, updated CpuTscSync to the latest commit working for Monterey (including sleep/wake) and removed the old TSCAdjustReset.
Источник


