doc-cam.ru
Каталог
Программное обеспечение
09.10.2015 SynControl ПО для DOKO DS05FE (Windows)
Файл: Загрузить
TWAIN — драйвер для документ-сканеров X5xx и X3xx — Camscanner
Файл: Загрузить
ПО и документация (eng) для док.-сканера DX1460
Файл: Загрузить
ПО и документация (eng) для док.-сканера DX1460 установочный диск
Файл: Загрузить
Программное обеспечение для документ-камер AVerVision рус. (Windows)
Файл: Загрузить
Программное обеспечение для документ-камеры Gaoke GK-9500
Файл: Загрузить
Программное обеспечение для документ-сканеров X5xx и X3xx — Camscanner
Файл: Загрузить
Программное обеспечение для документ-сканеров X5xx и X3xx — ClassCam
Файл: Загрузить
29.07.2016 Программное обеспечения DOKO CamScanner X510 для MAC OS X
Файл: Загрузить
09.08.2016 Программное обеспечения DOKO DC209W/DS05FE для MAC OS X
Файл: Загрузить
09.08.2016 Программное обеспечения DOKO DC516F для MAC OS X
Файл: Загрузить
09.08.2016 Программное обеспечения DOKO DS08FE для MAC OS X
Файл: Загрузить
Программное обеспечение

Напрямую используйте текущие изображения с документ-камеры, записанное видео, удобные инструменты аннотаций, синтезатор речи (TTS), инструменты оцифровки текста OCR и другие возможности в презентациях PowerPoint® с помощью плагина A+ Plug-in for PowerPoint. С помощью Sphere2 – интуитивного автономного ПО для документ-камер AVer – получайте доступ только к своей документ-камере или же интегрируйте ее с интерактивными досками (IWB), воспользовавшись флэш-плагином AVerVision

С помощью плагина A+ Plug-in for Excel, входящего в состав A+ Suite, проводите сканирование и оцифро..

Уникальный плагин для PowerPoint® позволяет пользователям просматривать и управлять живыми ..

A+ Suite сочетает в себе автономное ПО документ-камеры с уникальными плагинами для Microsoft®&nb..

Используя флэш-плагин AVerVision, пользователи могут лучше интегрировать технологии, используемые в ..

Приложение ClassSend для планшетов/браузера Chrome поможет преподавателю вовлечь студентов в действи..

Автономное ПО документ-камеры для ПК и Mac предоставляет пользователям множество удобных функций, та..
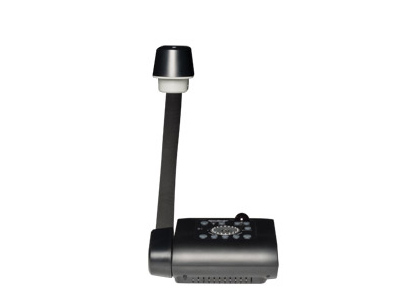
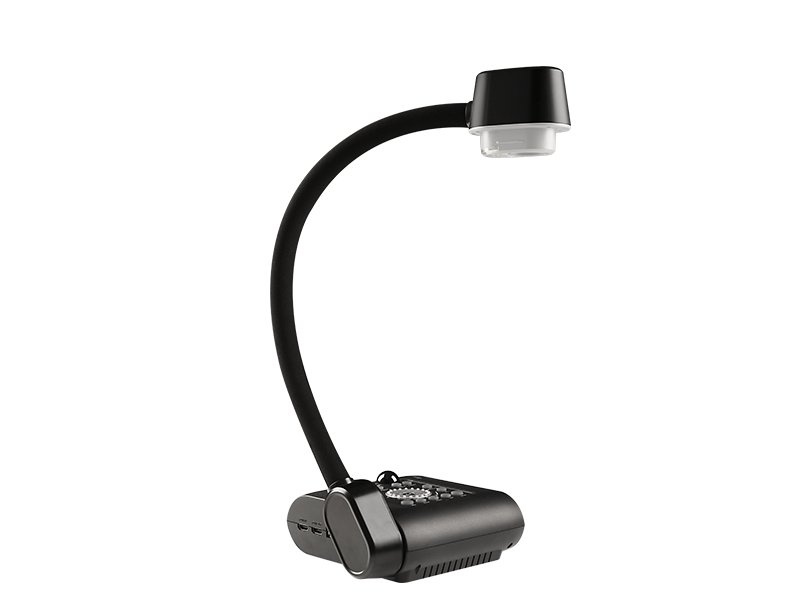
AVerVision F50
AVer F50 Document Camera Guided Tour
Training Video
Basic Features

Advanced Features
Menu Settings
F50 Document Camera Downloads
F50 Document Camera FAQ
64GB USB Flash drives that are formatted to Fat 32. External hard drives are not supported (portable or SATA/IDE).
F50 Document Camera Troubleshooting
The annotation toggle icon will appear during image playback mode. That is after you have selected an image and have a mouse (HID) device plugged into the F50 and also have the toggle on the USB switch on the F50 side panel switched to «USB».
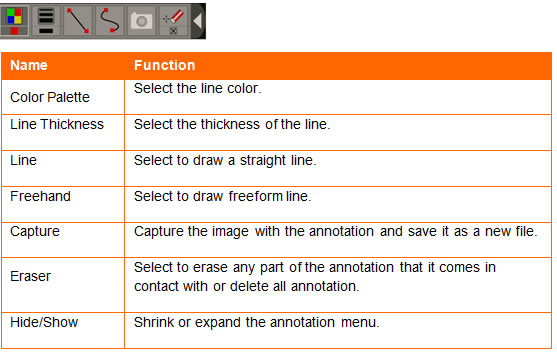
In single image playback mode, you can use the annotation feature to overlay straight line or freeform line on the captured image with the USB mouse connected to the USB port of AVerVision F50. It comes with the following selections: Color Palette, Line Thickness, Line, Freehand, Capture, Eraser, and Hide/Show icons.

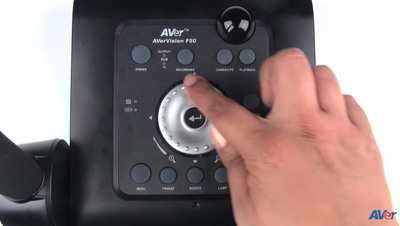
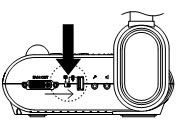
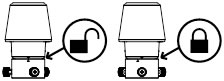
- Set the USB switch on the left panel to . AVerVision F50 will then detect the USB mouse and the LED on the control panel will light up.

- Connect the USB cable to the USB slot of AVerVision F50.

- Press on the remote.
- Use the buttons and select the image you want to annotate in the 16-thumbnail preview.
- Press to make a selection and display the image in fullscreen.
- The annotation menu will appear on the upper left corner of the screen.
- Use the mouse and move the «+» cursor on the item in the annotation panel you want to use. Then left click the mouse button to make a selection.
 to make a selection and display the image in fullscreen.
- Check all connections again as shown in the user manual.
- Verify the setting of the display output device; make sure it is set to the correct input channel.
- The unit’s power light turns Orange in standby mode. Press the POWER button again to turn it ON and the LED Power light will turn Blue.
- The default camera display resolution setting is on 1024X768. If your output device does not support this resolution; no image can be projected.
- Check the TV/RGB switch on the side of the camera and set it accordingly to the type of display device you have.
- Check all cables are good among the display device, AVerVision Document Camera and your PC, replace cables if necessary.
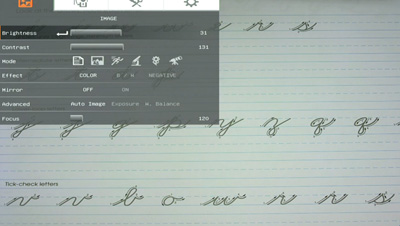
- Turn on Auto Image in your unit’s Menu (Menu > IMAGE > Advanced > Auto Image)
- Reset your document camera to default by pressing Menu > System > Default > Yes > Enter.
- Make sure there are sufficient lighting in the room or Turn on the LED lamp on your document camera head.
- Manually adjusts the Brightness and Contrast levels in the Camera’s Menu.
- Your projector’s bulb may need to be changed.
- Reset all changed settings, if any, to the original manufacturer default setting. Press MENU then go to SYSTEM > Default and select YES in the OSD menu.
- Use the Brightness and Contrast menu functions to reduce the distortion if applicable.
- If you discover that the image is blurry or out of focus, press the Auto Focus button on the control panel or remote control.
- Check all the cable connections among the display device, AVerVision F50 and your PC.
- Connect your PC to the AVerVision F50 first before you power on your computer.
- For notebook, repeatedly press FN+F5 to toggles between display modes and display the computer image on the presentation screen. For different command, please refer to your laptop manual.
- Return to your PC or Notebook, place the mouse on the desktop and right click, choose «Properties», choose «Setting» tab, click on «2» monitor and check the box «Extend my Windows desktop onto this monitor».
- Then go back one more time to your PC or Notebook and place the mouse on the desktop and right click again.
- This time choose «Graphics Options», then «Output To», then «IntelВ® Dual Display Clone», and then choose «Monitor + Notebook».
- After you follow these steps, you should be able to see the same desktop image on your PC or Notebook as well as on the presentation screen.
- Make sure your USB cable is connected.
- Make sure the USB cable or computer USB port is not defective.
- Move the USB switch on the document camera away from the USB symbol.
- Check your Device Manager, If Digital presenter driver shows damaged, right click and select «Update Driver».
- Make sure you have the most currently updated software, download list is found under Download tab.
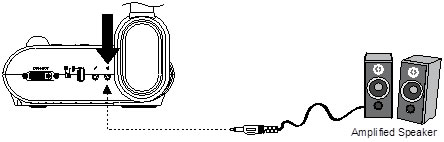
Plug a 3.5mm plug amplified speaker to  port. Only the audio from the video playback is supported.
We recommend connecting an amplified speaker to the Audio output port. Take caution when using earphones. Adjust the volume down on the remote to prevent hearing damage due to loudness.
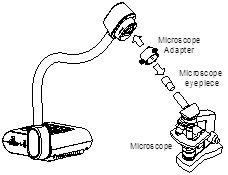
Connect the AVerVision F50 to a microscope enables you to examine microscopic objects on a big screen. You need to purchase the optional accessory «VISIFSEMA».
- Change the image display mode to Microscope. Press MENU > select IMAGE tab > select MODE > select (microscope) and press .
- Aim the camera head at the farthest point and press AUTO FOCUS.
- Adjust the focus of the microscope.
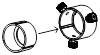
- Select the appropriate rubber coupler size for the microscope eyepiece and insert it in the microscope adapter.
- Remove the microscope eyepiece from the microscope and connect it to the microscope adapter with the rubber coupler inserted. Fasten the 3 bolts until the adapter secures the eyepiece.
For the eyepiece, we suggest using 15.5mm eye relief or higher. - Attach the microscope adapter to the AVerVision camera head. Then connect it to the AVerVision and microscope.
Make sure the arrow on the camera head and microscope adapter are on the same side to connect and twist clockwise for the arrows to meet and lock.
 (microscope) and press
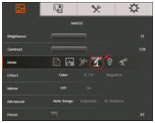

This enables you to transfer the captured image from the built-in memory or SD to a computer.
The instruction below MUST be read and followed BEFORE connecting the USB cable.
- Make sure to set the USB switch to for the computer to detect AVerVision F50HD.
- MUST set the USB to PC as STORAGE before connecting the USB cable.
- When «Mass Storage Start…» appears at the lower right corner of the presentation screen, you may now connect the USB cable.
- Upon connecting the USB cable, the system automatically detects the new removable disk. You can now transfer the captured image(s) from the F50HD built-in memory to the computer hard disk.
 for the computer to detect AVerVision F50HD.
For more AVerVision F50HD Q&A please visit this page.
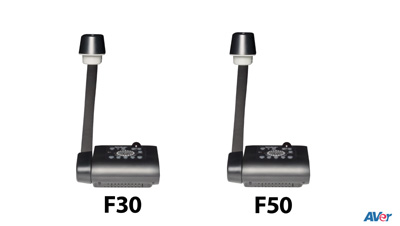
AVerVision F50-8M
General Guides

Guided tour:
Create Videos Using CaptureShare
Guided tour:
Using AVer Camera Setting Tool and CaptureShare

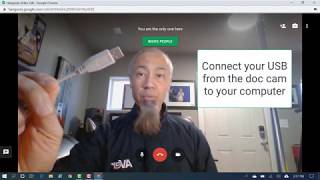
Learn-from-Home series:
Connect Your Doc Cam from Home

Learn-from-Home series:
Connect a Doc Cam to Zoom
Learn-from-Home series:
Connect a Doc Cam to Google Hangouts

Learn-from-Home series:
Connect a Doc Cam to Microsoft Teams

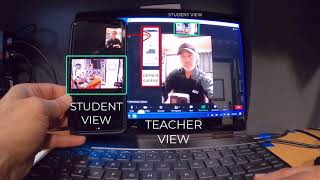
Learn-from-Home series:
Using Zoom and Advanced Split Screen

Learn-from-Home series:
Finding Doc Cam Software

Learn-from-Home series:
TV to RGB Switch

Webinar:
How to Create Content with AVer

Webinar:
Drive Distance Learning with your Document Camera
F50-8M Document Camera Downloads
A+ Suite
New version:
- A+ Suite v2.7.2178.179 — Windows
- A+ Suite v2.7.2178.179 — Windows Server Deployment (Sphere2 Only MSI)
- ClassSend for Students — Windows (requires Chrome browser for operation)
- Release Note
- What’s New
Previous version:
- A+ Suite v2.7.2175.176 — Windows
- A+ Suite v2.7.2175.176 — Windows Server Deployment (Sphere2 Only MSI)
New version:
- A+Suite (Mac) V2.5.2161.162 + Wifi dongle driver v5.0.8 — Mac
- MAC Office Add-ins Uninstaller — Mac
- ClassSend for Students — Mac Student Engagement client-app (requires Chrome browser for operation)
- Release Note
- What’s New
- A+ Suite Office Addin Uninstaller for 2011
- A+ Suite Office Addin Uninstaller for 2016
- Mac Office Add-ins Uninstaller SOP
Previous version:
- Sphere2 for Teachers (For F70W, TabCam)
- ClassSend for Students — iPad Student Engagement client-app
- ClassSend for Students — Chromebook Student Engagement client-app (requires Chrome browser for operation)
- Sphere Lite for Document Camera Viewing
64GB USB Flash drives that are formatted to Fat 32. External hard drives are not supported (portable or SATA/IDE).
The annotation toggle icon will appear during image playback mode. That is after you have selected an image and have a mouse (HID) device plugged into the F50-8M and also have the toggle on the USB switch on the F50-8M side panel switched to «USB».
In single image playback mode, you can use the annotation feature to overlay straight line or freeform line on the captured image with the USB mouse connected to the USB port of AVerVision F50-8M. It comes with the following selections: Color Palette, Line Thickness, Line, Freehand, Capture, Eraser, and Hide/Show icons.
- Set the USB switch on the left panel to . AVerVision F50-8M will then detect the USB mouse and the LED on the control panel will light up.
- Connect the USB cable to the USB slot of AVerVision F50-8M.
- Press on the remote.
- Use the buttons and select the image you want to annotate in the 16-thumbnail preview.
- Press to make a selection and display the image in fullscreen.
- The annotation menu will appear on the upper left corner of the screen.
- Use the mouse and move the «+» cursor on the item in the annotation panel you want to use. Then left click the mouse button to make a selection.
- Check all connections again as shown in the user manual.
- Verify the setting of the display output device; make sure it is set to the correct input channel.
- 3. The unit’s power light turns Orange in standby mode. Press the POWER button again to turn it ON and the LED Power light will turn Blue.
- The default camera display resolution setting is on 1024X768. If your output device does not support this resolution; no image can be projected.
- 5. Check the TV/RGB switch on the side of the camera and set it accordingly to the type of display device you have.
- Check all cables are good among the display device, AVerVision Document Camera and your PC, replace cables if necessary.
- Turn on Auto Image in your unit’s Menu (Menu > IMAGE > Advanced > Auto Image)
- Reset your document camera to default by pressing Menu > System > Default > Yes > Enter.
- Make sure there are sufficient lighting in the room or Turn on the LED lamp on your document camera head.
- Manually adjusts the Brightness and Contrast levels in the Camera’s Menu.
- Your projector’s bulb may need to be changed.
- Reset all changed settings, if any, to the original manufacturer default setting. Press MENU then go to SYSTEM > Default and select YES in the OSD menu.
- Use the Brightness and Contrast menu functions to reduce the distortion if applicable.
- If you discover that the image is blurry or out of focus, press the Auto Focus button on the control panel or remote control.
- Check all the cable connections among the display device, AVerVision F50-8M and your PC.
- Connect your PC to the AVerVision F50-8M first before you power on your computer.
- For notebook, repeatedly press FN+F5 to toggles between display modes and display the computer image on the presentation screen. For different command, please refer to your laptop manual.
- Return to your PC or Notebook, place the mouse on the desktop and right click, choose «Properties», choose «Setting» tab, click on «2» monitor and check the box «Extend my Windows desktop onto this monitor».
- Then go back one more time to your PC or Notebook and place the mouse on the desktop and right click again.
- This time choose «Graphics Options», then «Output To», then «IntelВ® Dual Display Clone», and then choose «Monitor + Notebook».
- After you follow these steps, you should be able to see the same desktop image on your PC or Notebook as well as on the presentation screen.
- Make sure your USB cable is connected.
- Make sure the USB cable or computer USB port is not defective.
- Move the USB switch on the document camera away from the USB symbol.
- Check your Device Manager, If Digital presenter driver shows damaged, right click and select «Update Driver».
- Make sure you have the most currently updated software, download list is found under Download tab.
Plug a 3.5mm plug amplified speaker to port. Only the audio from the video playback is supported.
We recommend connecting an amplified speaker to the Audio output port. Take caution when using earphones. Adjust the volume down on the remote to prevent hearing damage due to loudness.
Connect the AVerVision F50-8M to a microscope enables you to examine microscopic objects on a big screen. You need to purchase the optional accessory «VISIFSEMA».
- Change the image display mode to Microscope. Press MENU > select IMAGE tab > select MODE > select (microscope) and press .
- Aim the camera head at the farthest point and press AUTO FOCUS.
- Adjust the focus of the microscope.
- Select the appropriate rubber coupler size for the microscope eyepiece and insert it in the microscope adapter.
- Remove the microscope eyepiece from the microscope and connect it to the microscope adapter with the rubber coupler inserted. Fasten the 3 bolts until the adapter secures the eyepiece.
For the eyepiece, we suggest using 15.5mm eye relief or higher. - Attach the microscope adapter to the AVerVision camera head. Then connect it to the AVerVision and microscope.
Make sure the arrow on the camera head and microscope adapter are on the same side to connect and twist clockwise for the arrows to meet and lock.
This enables you to transfer the captured image from the built-in memory or SD to a computer.
The instruction below MUST be read and followed BEFORE connecting the USB cable.
- Make sure to set the USB switch to for the computer to detect AVerVision F50-8M.
- MUST set the USB to PC as STORAGE before connecting the USB cable.
- When «Mass Storage Start…» appears at the lower right corner of the presentation screen, you may now connect the USB cable.
- Upon connecting the USB cable, the system automatically detects the new removable disk. You can now transfer the captured image(s) from the F50-8M built-in memory to the computer hard disk.
For more AVerVision F50-8M Q&A please visit this page.


