Axure RP Pro, Team, Enterprise 9 v9.0.0.3727

Axure RP — быстрое макетирование для приложений вебсайта, ориентированное под каркасные прототипы веб-сайтов. Продукт предназначен для снижения издержек проектирования веб-сайтов. Это решение поможет быстро в визуальном режиме создать рабочий прототип будущего сайта, затем выгрузить прототип в html и просмотреть его через браузер. Качество вполне приемлемо для дальнейшей постановки задач дизайнерам и программистам, а также для понимания заказчика конечного результата.
В результате генерирования прототипа получается статический сайт, широко использующий jаvascript. Качественная документация и учебные материалы в свободном доступе на сайте производителя. Axure RP может оказаться очень полезным средством для проектирования небольших, но функционально-насыщенных проектов, а также больших проектов на начальном этапе.
Возможности программы:
- Простое использование.
- Быстрое применение изменений.
- Мгновенное создание функциональных прототипов.
- Создание интерактивных прототипов с аннотациями.
- Настраиваемость.
- Управление версиями.
- Создание эффективного дизайна.
- Экспериментирование с вашим дизайном для достижения максимального результата.
- Автоматизация спецификаций для избежания утомительной документации.
Axure RP 9 Features
- Environment and Canvas
- Dark UI Mode
- Customize UI panes
- Page dimensions
- Negative regions
- Smarter snapping and distance guides
- Toggle ruler visibility
- Pinch to zoom
- Zoom to fit shortcuts
- Center selection shortcuts
- Inline editing for dynamic panels and repeaters
Prototype Player
- Mobile mode with touch cursor and mobile scrollbars
- Scaling options (replaces viewport settings)
- Shortcuts for next and previous page
- Auto-include web fonts for Google Fonts on Axure Share
Shapes and Drawing
- Shape drawing tools
- Single-key shortcuts for drawing tools
- Paste from Sketch (with plugin)
- Double-click border to edit vector points
- Background images on shapes
- Pen tool improvements
- Shapes are generated as SVGs in the prototype
Images
- Color adjust for hue, saturation, brightness, contrast
- Better compression
- Flip horizontal/vertical
- Improved image quality in the prototype
Dynamic Panels
- Inline editing
- Borders
- Corner radius
- Outer shadow
- Libraries
Improved library management - Add image folders to the Libraries pane
- Libraries auto-refresh
- Double-click .rplib to load or edit libraries
Form Widgets
- Custom styling including typography, borders, and fills
- Style effects (mouseover, disabled, etc.)
Interactions
- Inline interaction builder
- New interaction editor dialog
- Search in interaction builder
- Condition on enabled/disabled
- Easing option for Show/Hide actions
- Option to animate along an arc for Move action
- New “focused” style effect
Text Formatting
- Character spacing
- Strikethrough
- Super/subscript
- Case transform
- Generate “lorem ipsum” to fill shapes
- Bulleted lists with hanging indents
- Full justification
Color Picker
- Color wheel
- Radial gradients
- Saved favorite colors
- Suggested colors
Styles
- Copy and paste style (replaces format painter)
- Set borders to any thickness
- “Focused” style effect
Masters
- Master views (replaces adaptive views on masters)
- Override text in masters
- Override images in masters
Adaptive Views
- Pages can have different adaptive views
- Pages can share adaptive view sets
- Prototype shows the largest view that fits (replaces conditions)
Documentation and Notes
- View all notes on a page at once
- Assign multiple notes to a widget
- Notes can be unassigned and reassigned
- Include widget text in a note
- Include widget interactions in a note
- Notes can be organized hierarchically (1, 1.1, 1.1.1)
- Note numbers are shown in the prototype
- Note numbers are continuous through dynamic panels
- Master notes are generated to the prototype
Источник
Как сделать прототип сайта в Axure: пошаговая инструкция
Axure RP — инструмент для создания интерактивных прототипов сайтов. Рассказываем на примерах, как работать с этой программой.

Чтобы создать прототип простого сайта, открыть его в браузере и обсудить с заказчиком, достаточно изучить интерфейс программы и её базовые возможности. И, конечно же, владеть знаниями о прототипах и UX-дизайне.
Для этого Skillbox проводит курс «UX-дизайн», который даёт не только теоретическую базу, но и предоставляет стажировку в компаниях-партнёрах. А сейчас поговорим об азах.

Пишет про дизайн в Skillbox. Рисует макеты и верстает страницы для клиентов.
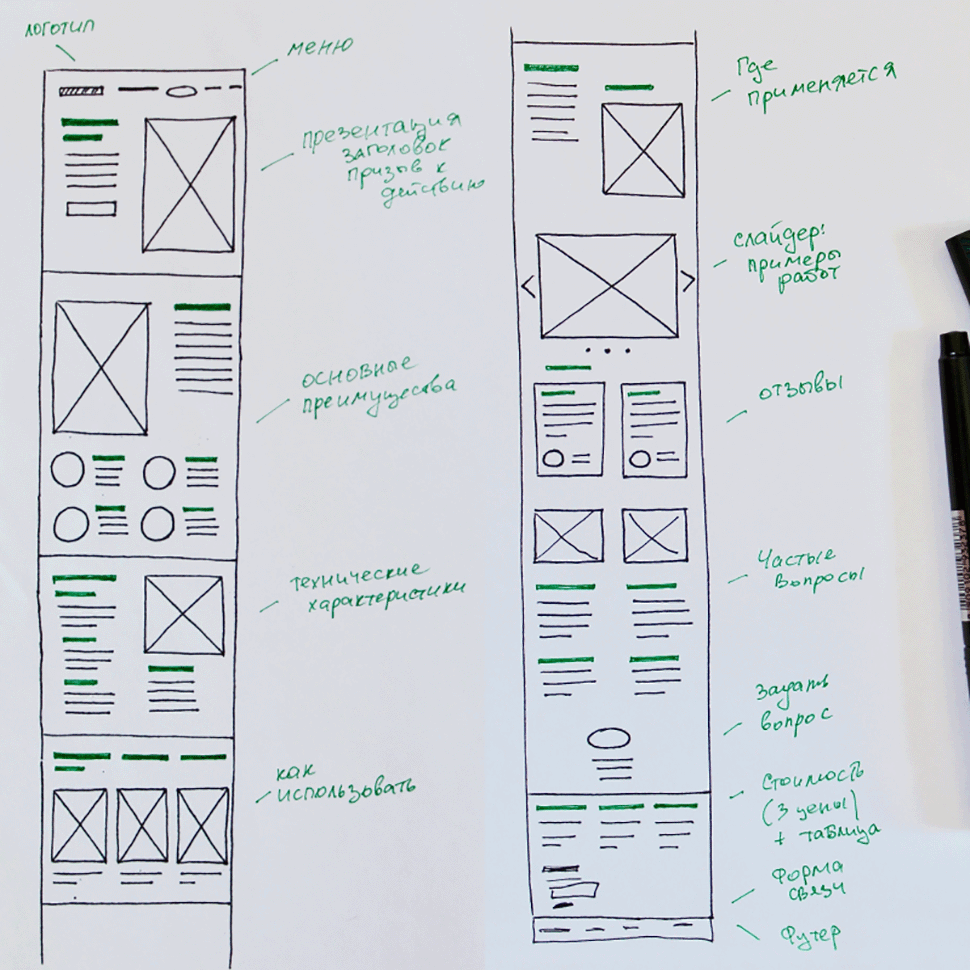
Что такое прототип сайта
Прототип — это детальная схема сайта. С его помощью легко продумать структуру страниц и разделов, расположение информационных блоков на каждой странице, а также согласовать всё это с заказчиком.
Обычно прототип создают чёрно-белым, чтобы сфокусироваться на структуре и расположении контента, а не на красивой обложке.
На встрече с заказчиком делают примерный план сайта на бумаге. После этого — конструируют интерактивный прототип и обсуждают возникшие вопросы, исправляют ошибки и неточности. Такой подход позволяет сэкономить время и ресурсы.
Как сделать прототип сайта
В статье «Скетчинг: как нарисовать сайт на бумаге» мы придумали структуру страницы для компании, которая продаёт строительные блоки.
Скетч — это план организации информации на странице. На его основе создают уже кликабельный прототип. Прототип удобно делать в программе Axure RP. Это полноценный инструмент для сложных макетов сайтов и приложений.
Ответом на вопрос, как сделать прототип сайта самому, будет простой совет: освоить Axure, разобраться в интерфейсе и его базовых функциях.
Создаём новый проект в Axure RP
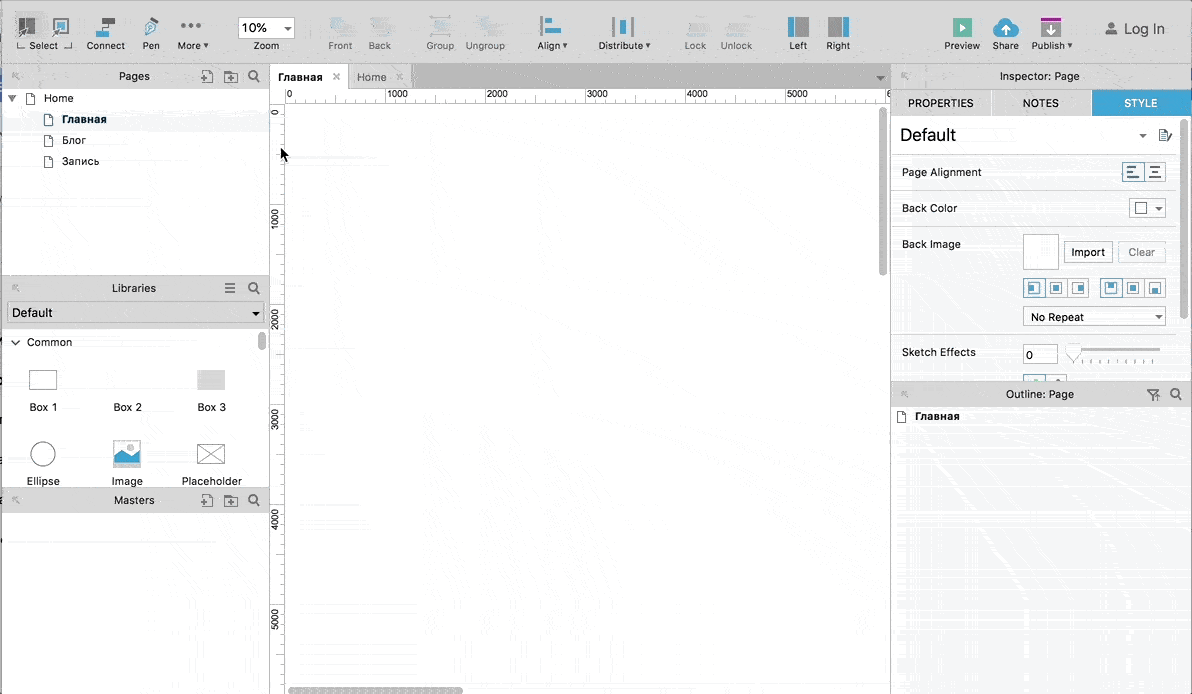
Рассмотрим создание прототипа на примере сайта для компании с блогом. Необходимые страницы для такого сайта — главная, блог и запись в блоге.
Создаём новый проект: File → New. По умолчанию Axure откроет новый проект с тремя пустыми страницами. Переименуем их под структуру будущего сайта.
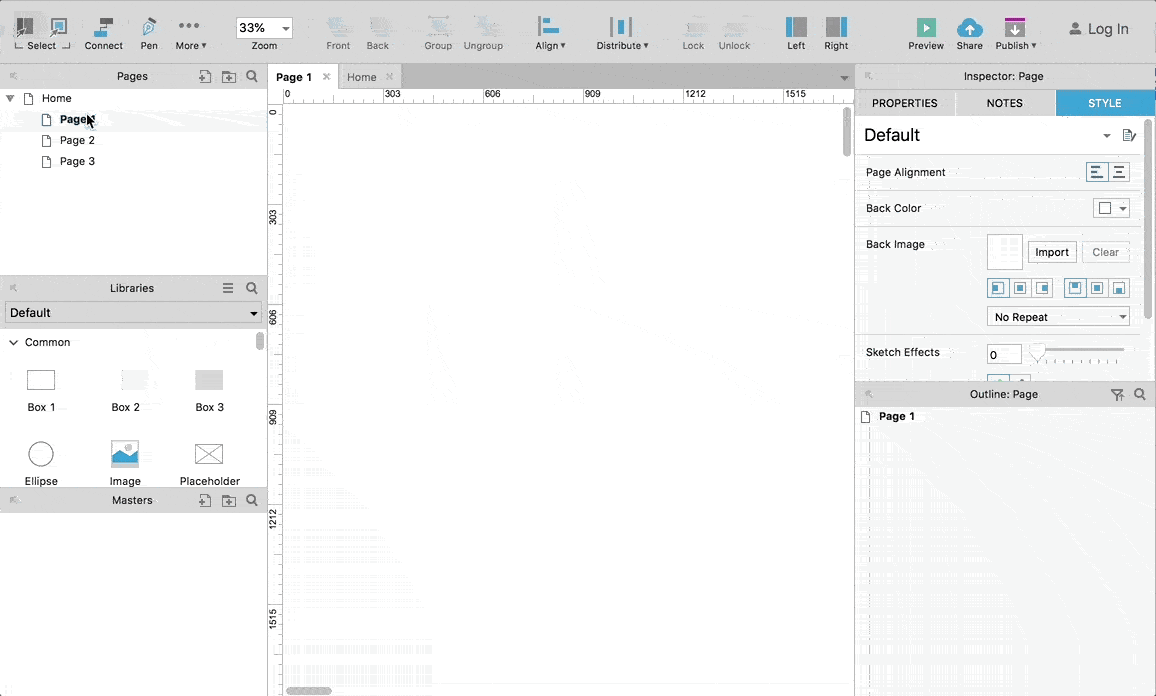
Чтобы поменять имя страницы, достаточно кликнуть правой кнопкой мыши на название страницы в окне Pages и выбрать пункт Rename.
Сетка и ширина экрана
Современные сайты проектируют для разных устройств: смартфонов, планшетов, компьютеров и ноутбуков. У каждого из устройств разное разрешение экрана, поэтому дизайнер обычно рисует несколько макетов одного и того же сайта в разных размерах.
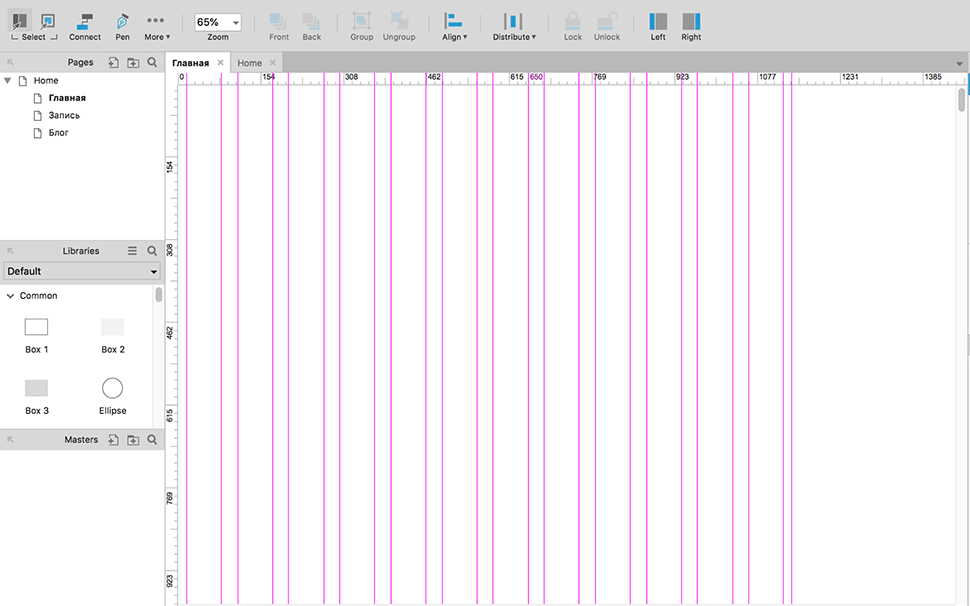
Для простоты мы создадим прототип для экрана шириной 1 140 пикселей и больше. Чтобы все элементы будущего сайта выглядели лаконично и ровно, при проектировании мы используем сетку из CSS-фреймворка Bootstrap 4.
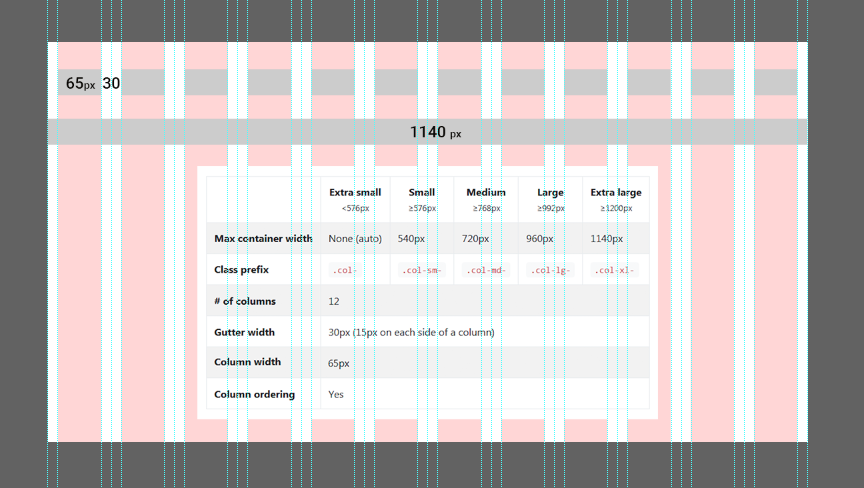
Зададим вручную нужную ширину экрана с помощью направляющей: её можно вытащить из линейки справа от рабочей области. Работает это так же, как и в Photoshop.
Чтобы сэкономить время и не задавать вручную все направляющие для макета, создадим их автоматически: выбираем пункт меню Arrange → Grid and Guides → Create Guides. В появившемся окне задаём размеры.
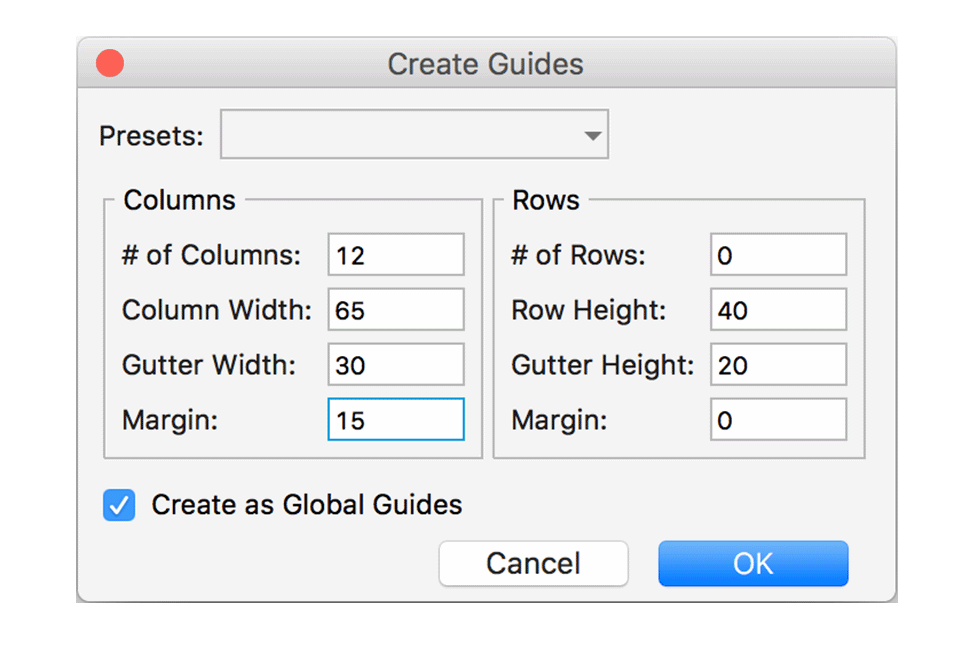
В результате получаем сетку для нужной ширины экрана, по которой удобно выравнивать контент.
Основные элементы для прототипа
После того как мы задали сетку, переходим к созданию прототипа. Для этого используют элементы из библиотеки (окно Libraries).
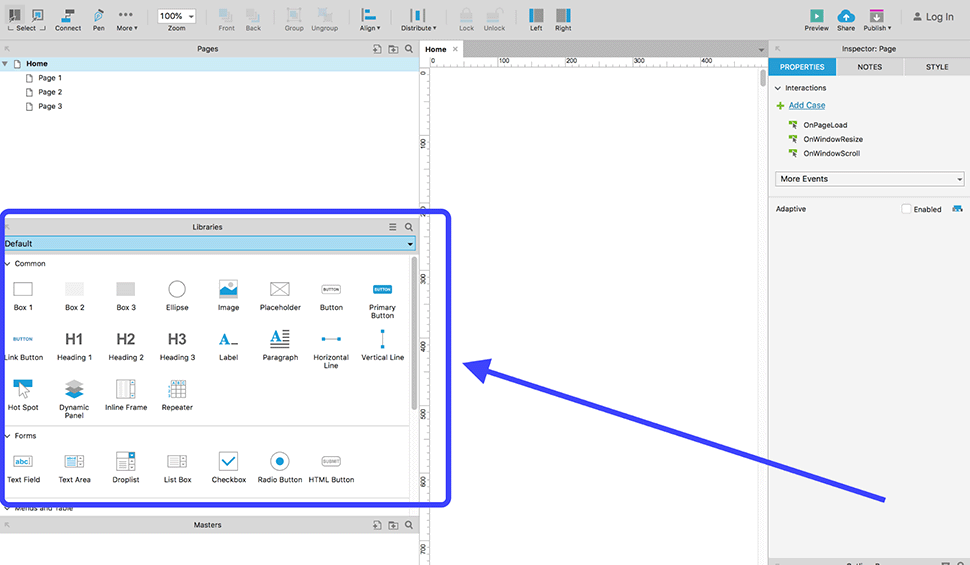
Как использовать элементы
| ЭЛЕМЕНТ | НАЗНАЧЕНИЕ |
|---|---|
| Box | Для структурных блоков сайта |
| Ellipse | Иконки, изображения |
| Image и Placeholder | Изображения |
| Button | Кнопки |
| Heading, Label и Paragraph | Заголовки, основной текст, надписи |
| Horizontal и Vertical Line | Линии, стрелки, указатели и другие элементы |
| Forms | Создание форм |
Чтобы использовать элемент, перетащите его из окна библиотек на рабочую область.
Создание шапки сайта
Шапка — это самый верхний блок сайта, где обычно размещают логотип компании, телефоны и меню сайта. В списке элементов выбираем Box 1, перетягиваем его на рабочую область и задаём нужный размер.

Мы задали размеры шапки, теперь разместим логотип, телефонный номер и меню. Логотип условно обозначим более тёмным прямоугольником Box 2.
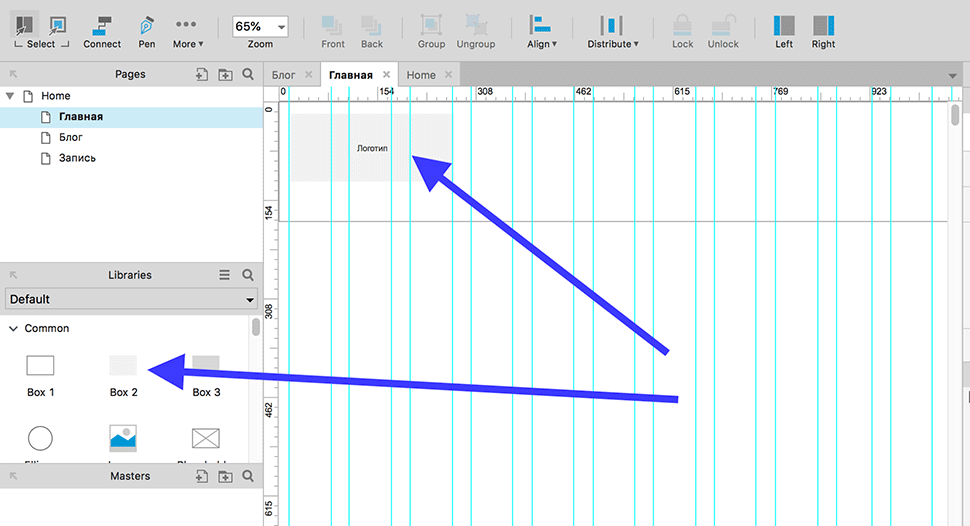
Телефон компании пишем, используя элемент Header 3, а кнопку с вызовом формы обратной связи указываем с помощью уже готового Button.
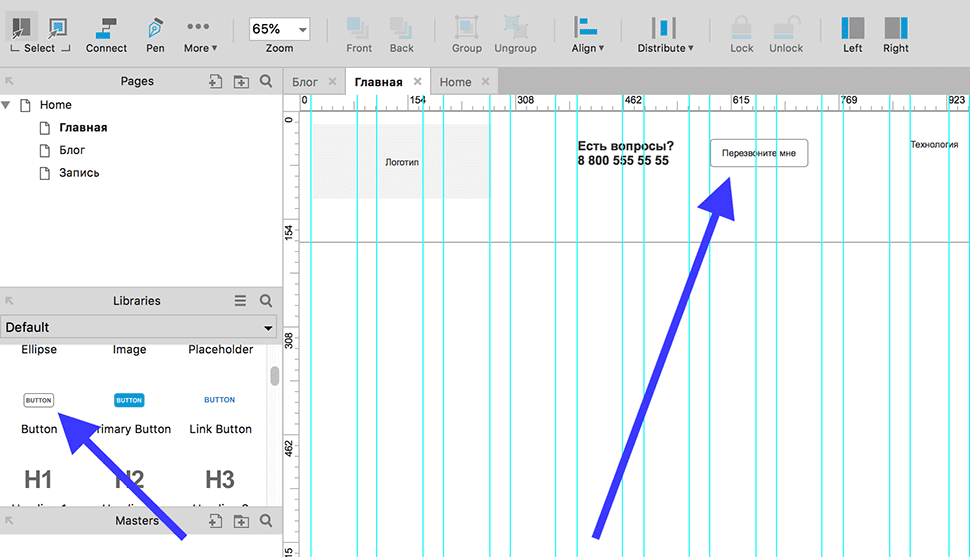
С помощью текстового элемента Paragraph создаём и заполняем область меню.
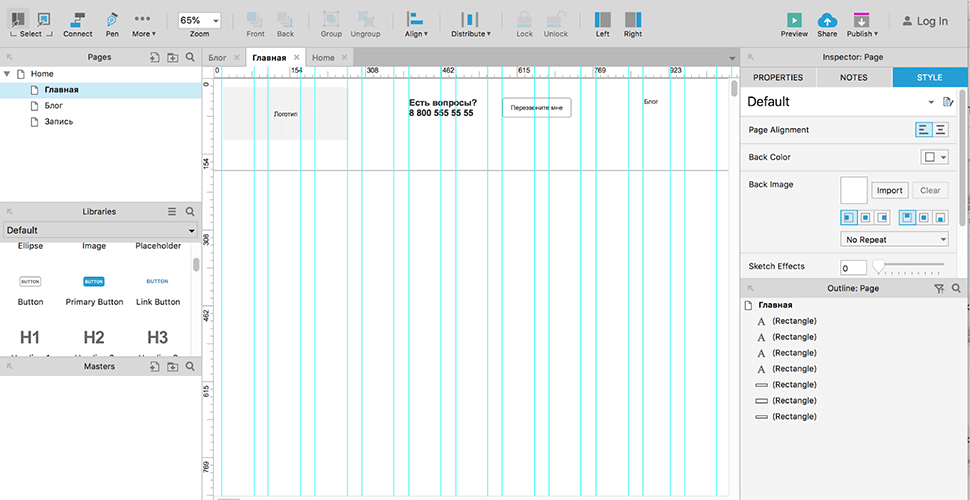
В прототипах с большим количеством страниц пользоваться такой шапкой неудобно. Для каждой новой страницы её нужно будет или рисовать с нуля, или копировать с предыдущей. А если потребуется внести изменения, то придётся редактировать шапку на каждой странице отдельно. Чтобы избежать этого, проектировщики используют панель Masters в правом нижнем углу.
Мастер — это специальный виджет, который применяют к нескольким страницам, но содержание редактируется один раз. Подходит для создания шапки сайта, подвала, формы заказа, меню и других повторяющихся элементов. Шапку, которую мы создали, можно конвертировать в мастер. Так её легче добавлять на другие страницы и редактировать содержимое с помощью одного клика.
Выделяем шапку сайта, нажимаем правую кнопку мыши, в появившемся окне выбираем Convert to Master .

Чтобы добавить шапку на новую страницу, перетащите на неё виджет.
Источник
Installing on macOS
This guide will walk you through installing Axure RP on macOS systems. If you run into any trouble attempting to install or launch the application, please see the troubleshooting guide below or email us at support@axure.com.
If you need to install Axure RP on a Windows computer, please refer to our Windows installation guide.
- macOS 10.13+
- 2 GB memory (RAM) minimum, 4 GB recommended
- Mac computer with 64-bit Intel processor
- 5 GB disk space
- For prototype HTML: Safari 13+, Firefox, or Chrome
- For Word specifications: Microsoft Office Word 2004 (with compatibility pack), 2008, 2011, or 2016, or any other application capable of opening .docx files
Most customers will be able to install Axure RP with the general installer, which is available for download at www.axure.com/download. After downloading the installer, launch it and drag the Axure RP 10 icon into your Applications folder.
If you need to deploy Axure RP to one or more workstations silently and pre-activated, please download the installer and request a shared activation code from support@axure.com. Then, follow the steps below:
Open a text editor like TextEdit or Sublime Text and create a new file.
Copy and paste the shared activation code into the text file.
Save the file and name it site.key (without any other file extension).
Open Finder then open your Applications folder and locate the Axure RP 10 item.
Right-click on the item and choose Show Package Contents.
Navigate to the sub-folder /Contents/Resources.
Place the site.key file in this folder.
Troubleshooting Installation and Launch
Installing Axure RP on your Mac is almost always a smooth process, and problems are rare. Problems during installation are usually related to system requirements or version/OS compatibility.
Problems launching RP on macOS are slightly more common, though still highly unusual. When a crash is seen immediately upon launch or when trying to create a new project, the user account’s permissions settings are usually at issue. (A telltale sign of a crash immediately after launch is when the icon bounces in the Dock a few times but nothing else appears to happen.)
The troubleshooting ideas in this guide are in order of complexity and risk. We strongly recommend trying these items in order instead of skipping around. If an item doesn’t seem relevant to your situation, move on to the next item.
If you’d rather work directly with an Axure employee to find a solution, please feel free to email us at support@axure.com.
If you’re having trouble installing or running Axure RP on a on a Windows computer, please see the Windows troubleshooting guide.
Check Whether Axure RP Is Already Running
In macOS, sometimes the only clues that an application is running are that the menu bar at the very top of the screen shows the application’s name, and there’s a little dot adjacent to the application’s icon in the Dock.
To check whether Axure RP is running, click its icon in the Dock (to give the app focus) and then try the File в†’ New menu command to open a new project for editing.
Axure RP typically has a welcome screen that pops up when you launch the application without opening an RP file. If the application is launching without this window, it may be turned off. To see it each time you start Axure RP, go to Help в†’ Welcome Screen… to display the dialog, and un-check «Don’t show this at startup» at the bottom-left.
Latest Build After an OS Update
It’s always good to be on the latest build of Axure RP, but it’s particularly important after an OS update. Major updates of macOS (e.g. from 10.10 to 10.11) are notorious for breaking third-party applications. You can always compare your current build number, found in the Help в†’ About Axure RP menu, against the current build, available at www.axure.com/update. You can also go to Help в†’ Check for Updates in Axure RP. (Click «Check for updates when Axure RP starts» in the dialog to get notifications when there’s a new update.)
We recommend against installing a developer preview or beta version of macOS on your Axure RP production computer. We can’t guarantee we’ll be able to provide a build of RP that works on a macOS beta. We’ll be working on updating Axure RP’s compatibility during the developer preview and beta periods.
If you’ve recently restored your system using Time Machine, had repair work done on your computer, or made any other major system change, your user account’s folder permissions settings may be misconfigured. Below are some steps for self-diagnosing a permissions problem on your Mac. Remember that you can also reach us at support@axure.com and we’ll be glad to help.
Check Your «Get Info» Dialog
Your user account’s «Info» dialog can tell you a couple of important things. To get to this dialog, follow these steps:
Open up a Finder window
In the left-hand «Favorites» column, locate your Home folder (house icon)
If you don’t see your Home folder in the Favorites list, use the Go в†’ Go to Folder menu command to go to the folder «/Users»
Right-click your Home folder and choose the «Get Info» context menu command Once you’ve got the Info dialog open, look for the following things:
In the «General» section, make sure the «Locked» checkbox is cleared.
Your user account needs «Read & Write» privileges for this folder. You can verify this in the «Sharing & Permissions» section at the bottom of the dialog.
The line that says «(Me)» needs to be showing the words «Read & Write». If it shows some other level, click directly on the words showing the level (e.g. «Read only») and choose «Read & Write» from the resulting list.
If you don’t see a line that says «(Me)», you’ll need to make one. Click the small lock icon at the lower right of the dialog to allow changes, click the «plus» icon to add a new entry, click on your user account name in the resulting dialog, and then click the «Select» button to add your user account to the «Sharing & Permissions» list. (Your account will need to be an admin to do this. If it’s not, please contact your IT team for assistance with this step.)
Using your Mac’s Terminal, you can run a series of commands to collect permissions data for every folder Axure RP might need to access when it launches. Pulling this info together in one place might help you to diagnose a permissions conflict—if you know what to look for.
These commands will collect information and put it into a text file on your desktop, but otherwise they won’t make any permanent changes to your system.
To try this method, open Terminal (Applications в†’ Utilities в†’ Terminal), paste in the following commands, and hit the return key.
Once you hit return , a file called «AxureLog.txt» will appear on the desktop. Open that file in your favorite text editor and let’s get started investigating it.
To copy the terminal commands for Axure RP 9 permissions diagnostics, click here
Folder Owner
The file contains information about a handful of folders that Axure RP writes to during normal operation. Each group of text in the main portion of the document shows a folder’s name on the first line and then a list of that folder’s contents.
The first column of each item is a string of notation describing that item’s permissions. You can probably ignore this part, but if you’d like to understand exactly what you’re seeing here you can do a web search for «Unix file permissions string» or refer to the following resource at LinuxCommand.org:
The third and fourth columns show the item’s owner account and owner group. (The second column isn’t important.) In general, you want the folders and files in this list to be owned by your own user account and by the group called «staff». (One exception is the «users» folder, which will be owned by the «root» account.)
So if my computer’s user name were «AudreyAxure», I’d want to see something like this on the third line of each group (where the permissions for the folder itself are shown):
drwxr-xr-x 3 AudreyAxure staff — 102 Jan 1 2016 .
If you’re seeing a lot of «root» user listed instead of your own user account name, something might be wrong with your permissions and you should consider showing the diagnostic file to your IT team.
«Access Denied» Errors
At the very bottom of the file, you can see where the diagnostic tried to launch the Axure RP executable. (Just after the line reading «Running…».) If the launch went well there won’t be much listed, but if it ran into trouble you’ll see more lines. If you get lucky, you’ll find something like this:
Access to the path «/Users/AudreyAxure/.local/share/Axure» is denied.
An «access to the path is denied» error is a good clue because it’s usually going to point out the folder or folders where your permissions need to be repaired. The actual repairing step is best left to your IT professional.
Stay Connected
Sign up to receive Axure tutorials and news. You can unsubscribe at any time.
Источник


