Как автоматически останавливать воспроизведение звука на Mac при включении другого источника
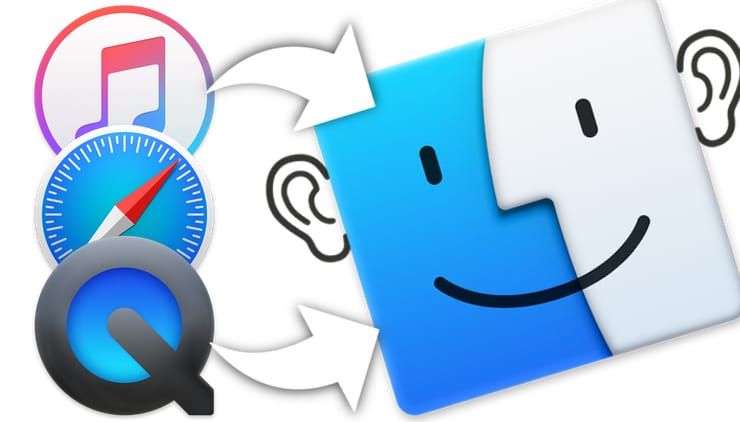
Наверняка, у вас нередко возникала ситуация, когда, прослушивая музыку в любом плеере на Mac, вдруг захотелось просмотреть какой-нибудь видеоролик (например, в YouTube) и начиналась адская вакханалия: играет и видео со своей аудиодорожкой, и музыка, которую вы предварительно забыли отключить. В нашем материале мы расскажем о крутом скрипте Background Music for Mac, который такого не позволит.
Для чего это нужно?
Background Music for Mac позволяет автоматически ставить на паузу воспроизведение музыки из одних источников, дабы отдать приоритет другим источникам, которые были включены в данный момент. К примеру, вы слушаете музыку через iTunes (или другой плеер) и активировали ссылку в браузере, которая запустила воспроизведение ролика в YouTube. В этот же момент iTunes ставится на паузу. После того, как вкладка в браузере с воспроизводимым видео будет закрыта или ролик будет просто поставлен на паузу, iTunes вновь продолжит проигрывать приостановившийся трек. Здорово ведь! Не правда ли?
Как установить Background Music for Mac?
1. Скачайте бесплатно программу Background Music for Mac с GitHub. Для этого пройдите по этой ссылке , пролистайте вниз до раздела «Download» и нажмите на файл BackgroundMusic.pkg.

2. Запустите загруженный установочный файл.
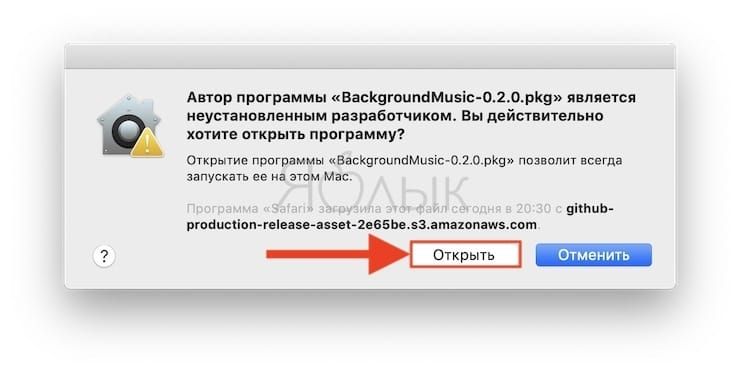
3. Так как приложение не распространяется через Mac App Store, появится сообщение:
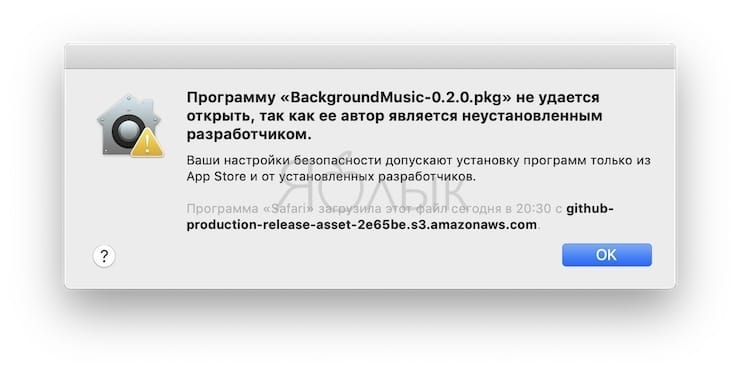
«Программу BackgroundMusic.pkg не удается открыть, так как ее автор является неустановленным разработчиком».
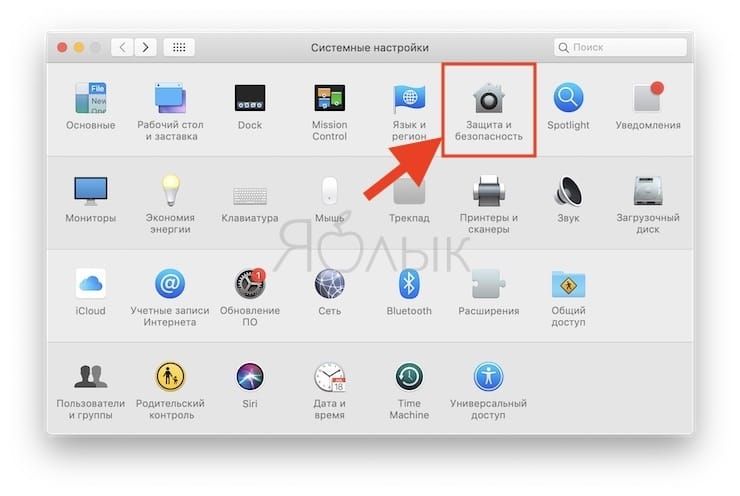
4. Обойти это ограничение достаточно просто, для этого:
— откройте Системные настройки macOS;
— перейдите в раздел Защита и конфиденциальность;
— нажмите кнопку Подтвердить вход;
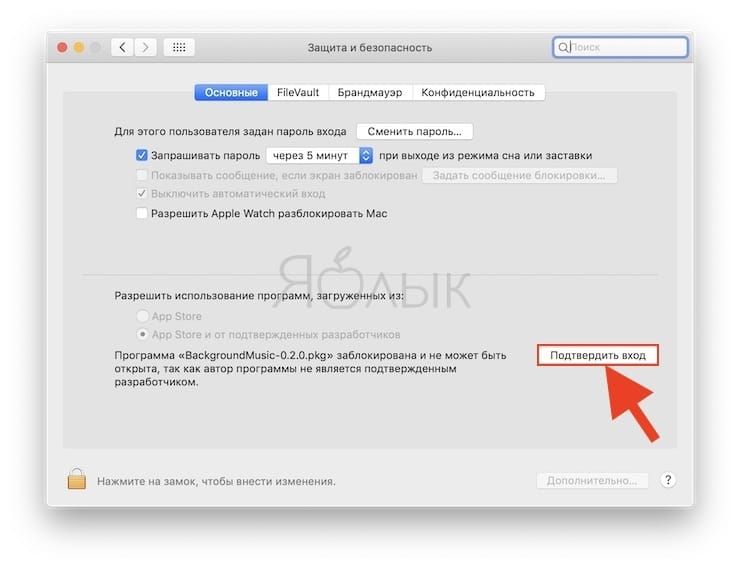
— в появившемся окне нажмите Открыть;
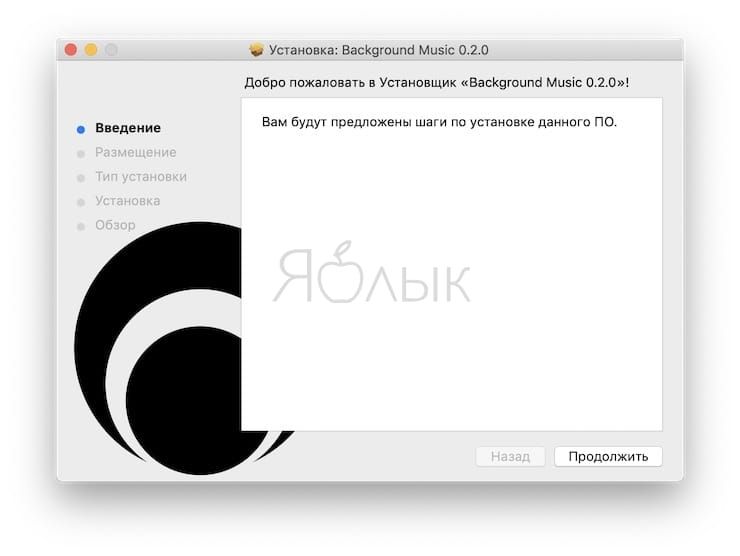
5. Произведите установку программы следуя инструкциям на экране.
Как работает Background Music for Mac
Все настройки со звуком выполняются через иконку в строке меню (для каждой программы выбирается своя громкость музыки). Тут же можно отключить функцию автопаузы. А в меню «Preferences» необходимо выбрать аудиопроигрыватель, которым вы пользуетесь по умолчанию.
Источник
Раздел «Дополнения» в настройках приложения «Музыка» на Mac
В приложении «Музыка»  на Mac используйте панель «Дополнения» настроек приложения «Музыка», чтобы автоматически загружать обложки альбомов, управлять мини-плеером и окнами воспроизведения видео и т. д.
Чтобы изменить эти настройки, выберите «Музыка» > «Настройки», затем нажмите «Дополнения».
Добавлять песни в Медиатеку при добавлении в плейлисты
Когда установлен этот флажок, песни из Apple Music, добавленные в плейлист, также добавляются в медиатеку. Снимите флажок, если хотите добавлять песни из Apple Music только в плейлист без добавления в медиатеку.
Примечание. Этот параметр доступен, если Вы выполнили вход как подписчик Apple Music или iTunes Match, а также включили параметр «Синхронизировать медиатеку» в разделе настроек «Основные».
Автоматически обновлять обложку
Автоматически загружать фото артистов, обложки альбомов и другие изображения, относящиеся к музыке в Вашей медиатеке.
Забыть все пульты
Если приложение «Пульт iTunes» использовалось для создания пары между определенной медиатекой и iPhone, iPad либо iPod touch, выберите этот параметр, чтобы отключить все устройства от медиатеки.
Сбросить все предупреждения
Если в одном или нескольких диалоговых окнах (небольших окнах с сообщениями) установлен флажок «Больше не показывать», то после нажатия кнопки «Сбросить предупреждения» эти сообщения станут отображаться снова.
Сброс кэша магазина
Приложение «Музыка» сохраняет посещенные Вами страницы магазина на компьютере во временном хранилище, которое называется кэш. Когда Вы возвращаетесь на эти страницы, приложение «Музыка» извлекает их из кэша быстрее, чем из интернета.
Если содержимое страницы устарело, можно выполнить сброс кэша, чтобы извлечь новейшие версии страниц. Сброс кэша также может помочь, если страница открывается неправильно.
Держать миниплеер поверх остальных окон
Миниплеер отображается поверх всех открытых окон даже при использовании других приложений.
Держать окно воспроизведения видео поверх остальных окон
Когда видео воспроизводится в отдельном окне, это окно остается поверх всех остальных окон даже при использовании других приложений.
Источник
Background music mac os как удалить
macOS audio utility

- Automatically pause/unpause your music player when other audio sources are playing/stopped
- Per-application volume control
- Record system audio
- No restart required to install
Note: Background Music is still in alpha.
Background Music automatically pauses your music player when a second audio source is playing and unpauses the player when the second source has stopped.
The auto-pause feature currently supports following music players:
Adding support for a new music player is usually straightforward. 1 If you don’t know how to program, or just don’t feel like it, feel free to create an issue. Otherwise, see BGMMusicPlayer.h.
Background Music provides a volume slider for each application running your system. You can boost quiet applications above their maximum volume.
Recording system audio
You can record system audio with Background Music. With Background Music running, launch QuickTime Player and select File > New Audio Recording (or New Screen Recording, New Movie Recording). Then click the dropdown menu ( ⌄ ) next to the record button and select Background Music as the input device.
You can record system audio and a microphone together by creating an aggregate device that combines your input device (usually Built-in Input) with the Background Music device. You can create the aggregate device using the Audio MIDI Setup utility under /Applications/Utilities.
Requires macOS 10.10+.
You can download the current version of Background Music using the following options. We also have snapshot builds.
| ⚠️ Version 0.3.2 doesn’t work on macOS Big Sur. Try this snapshot version: 0.4.0-SNAPSHOT-b38f6dd |
|---|
Download version 0.3.2:
Install using Homebrew by running the following command in Terminal:
If you want the snapshot version, run:
Installing from Source Code
Background Music usually takes less than a minute to build. You need Xcode version 8 or higher.
- Open Terminal.
- Copy and paste the following command into Terminal:
This command uses /bin/bash instead of bash in case someone has a nonstandard Bash in their $PATH . However, it doesn’t do this for tar or curl . In addition, build_and_install.sh doesn’t call programs by absolute paths. This command also uses gzcat — | tar x instead of tar xz because gzcat will also check the file’s integrity (gzip files include a checksum), and will ensure that a half-downloaded copy of build_and_install.sh doesn’t run.
- Clone or download the project.
- If the project is in a zip, unzip it.
- Open Terminal and change the directory to the directory containing the project.
- Run: /bin/bash build_and_install.sh .
The script restarts the system audio process (coreaudiod) at the end of the installation, so pause any applications playing audio if you can.
To manually build and install, see MANUAL_INSTALL.md.
To uninstall Background Music from your system, follow these steps:
- Open Terminal.
- To locate uninstall.sh , run: cd /Applications/Background\ Music.app/Contents/Resources/ .
- Run: bash uninstall.sh .
If you cannot locate uninstall.sh , you can download the project again.
To manually uninstall, see MANUAL_UNINSTALL.md.
If Background Music crashes and your audio stops working, open System Preferences > Sound and change your system’s default output device to something other than the Background Music device. If it already is, then change the default device and then change it back again.
Make sure you allow «microphone access» when you first run Background Music. If you denied it, go to System Preferences > Security & Privacy > Privacy > Microphone , find Background Music in the list and check the box next to it. Background Music doesn’t actually listen to your microphone. It needs the permission because it gets your system audio from its virtual input device, which macOS counts as a microphone. (We’re working on it in #177.)
If the volume slider for an app isn’t working, try looking in More Apps for entries like Some App (Helper) . For some meeting or video chat apps, you may need to do this to change the current meeting volume.
Known issues and solutions
Setting an application’s volume above 50% can cause clipping.
- Set your volume to its maximum level and lower the volumes of other applications.
Only 2-channel (stereo) audio devices are currently supported for output.
VLC pauses iTunes or Spotify when playing, and stops Background Music from unpausing your music afterward.
- Under VLC’s preferences, select Show All. Navigate to Interface > Main interfaces > macosx and change Control external music players to either Do nothing or Pause and resume iTunes/Spotify.
Skype pauses iTunes during calls.
- To disable this, uncheck Pause iTunes during calls on the General tab of Skype‘s preferences.
Plugging in or unplugging headphones when Background Music isn’t running causes silence in the system audio.
- Navigate to System Preferences > Sound. Click the Output tab and change your default output device to something other than the Background Music device. Alternatively, press Option + Click on the sound icon within the menu bar to select a different output device. This happens when macOS remembers that the Background Music device was your default audio device the last time you used (or didn’t use) headphones.
A Chrome bug stops Chrome from switching to the Background Music device after you open Background Music.
- Chrome’s audio will still play, but Background Music won’t be aware of it.
Some applications play notification sounds that are only just long enough to trigger an auto-pause.
- Increase the kPauseDelayNSec constant in BGMAutoPauseMusic.mm. It will increase your music’s overlap time over other audio, so don’t increase it too much. See #5 for details.
Many other issues are listed in TODO.md and in GitHub Issues.
- Core Audio User-Space Driver Examples The sample code from Apple that BGMDriver is based on.
- Soundflower — «MacOS system extension that allows applications to pass audio to other applications.»
- WavTap — «globally capture whatever your mac is playing—-as simply as a screenshot»
- eqMac, GitHub — «System-wide Audio Equalizer for the Mac»
- llaudio — «An old piece of work to reverse engineer the Mac OSX user/kernel audio interface. Shows how to read audio straight out of the kernel as you would on Darwin (where most the OSX goodness is missing)»
- mute.fm, GitHub (Windows) — Auto-pause music
- Jack OS X — «A Jack audio connection kit implementation for Mac OS X»
- PulseAudio OS X — «PulseAudio for Mac OS X»
- Sound Pusher — «Virtual audio device, real-time encoder and SPDIF forwarder for Mac OS X»
- Zirkonium — «An infrastructure and application for multi-channel sound spatialization on MacOS X.»
- BlackHole — «a modern macOS virtual audio driver that allows applications to pass audio to other applications with zero additional latency.»
- Audio Hijack, SoundSource — «Capture Audio From Anywhere on Your Mac», «Get truly powerful control over all the audio on your Mac!»
- Sound Siphon, Sound Control — System/app audio recording, per-app volumes, system audio equaliser
- SoundBunny — «Control application volume independently.»
- Boom 2 — «The Best Volume Booster & Equalizer For Mac»
Copyright © 2016-2021 Background Music contributors. Licensed under GPLv2, or any later version.
Background Music includes code from:
[1] However, if the music player doesn’t support AppleScript, or doesn’t support the events Background Music needs ( isPlaying , isPaused , play and pause ), it can take significantly more effort to add. (And in some cases would require changes to the music player itself.) ↩
About
Background Music, a macOS audio utility: automatically pause your music, set individual apps’ volumes and record system audio.
Источник


