- Скрипты бэкапа файлов из Linux в облачные хранилища
- Backup данных на OneDrive изLinux CentOS
- Резервное копирования на Google Диск.
- Скрипт бекапа на Яндекс.Диск из Linux
- Элементарный Bash скрипт для резервного копирования данных
- Что должен выполнять наш скрипт?
- Full and Incremental Backups Using Tar Linux Command
- Requirements:
- Part 1: Performing a Full and Incremental Backups Using Tar Linux Command.
- Here’s the backup scenario I’m using in my work:
- Taking a Full and Incremental Backup Using Tar command.
- What action the above tar command exactly do?
- Why the above tar command do that action / behavior?
- Examples of Naming the full and incremental backups naming and the snapshot files.
- Part 2: Writing The Shell Backup Script And Add It To Cron Job To Automate the Backup Process.
- Part 3: Removing Old / Expired Backups.
- What is the ideas behind the retention script we created?
- Part 4: Merging The Backup Script And the Retention Period Script Into One.
- Summary
Скрипты бэкапа файлов из Linux в облачные хранилища
Не так давно, мы размещали статью о подключении популярных бесплатных облачных хранилищ на сервере с CentOS 7. В этой статье мы покажем, как можно использовать данные хранилища для резервного копирования данных с вашего сервера. Я использую эти скрипты для дополнительного резервного копирования файлов сайта и базы данных со своего Linux VPS сервера.
Backup данных на OneDrive изLinux CentOS
Мы будем выполнять резервное копирование сайта и базы данных, а также выполнять проверку на «возраст» бэкапа (удалять бэкапы недельной давности) и отправлять на почту отчет с полной информацией выполнения скрипта. Собственно, сам bash скрипт:
#!/bin/bash
#Копируем файлы сайта во временную директорию
rsync -avzr —progress /var/www/html/ /var/www/tmp/backup/ >> result.txt
#Выполняем дамп базы, помещаем файл дампа во временную директорию
mysqldump joomla > /var/www/tmp/backup/backup.sql
#Создаем архив временной директории
tar -cvzf backup-$(date +%y%m%d).tar.gz —absolute-names /var/www/tmp/backup/ >> result.txt
#Проверяем директорию облака на наличие старых бэкапов, если таковые есть, удаляем
find /root/OneDrive/backup/ -name «backup*.tar.gz» -mtime +7 -exec rm -f <> \; >> result.txt
#Копируем созданный ранее архив в облако
rsync -avzr —progress /root/bin/backup*.tar.gz /root/OneDrive/backup/ >> result.txt
Предварительно перед написанием статьи, я создал уже несколько бэкапов, чтобы можно было продемонстрировать, что скрипт работает корректно (удаляет старые бэкапы и закачивает новые).
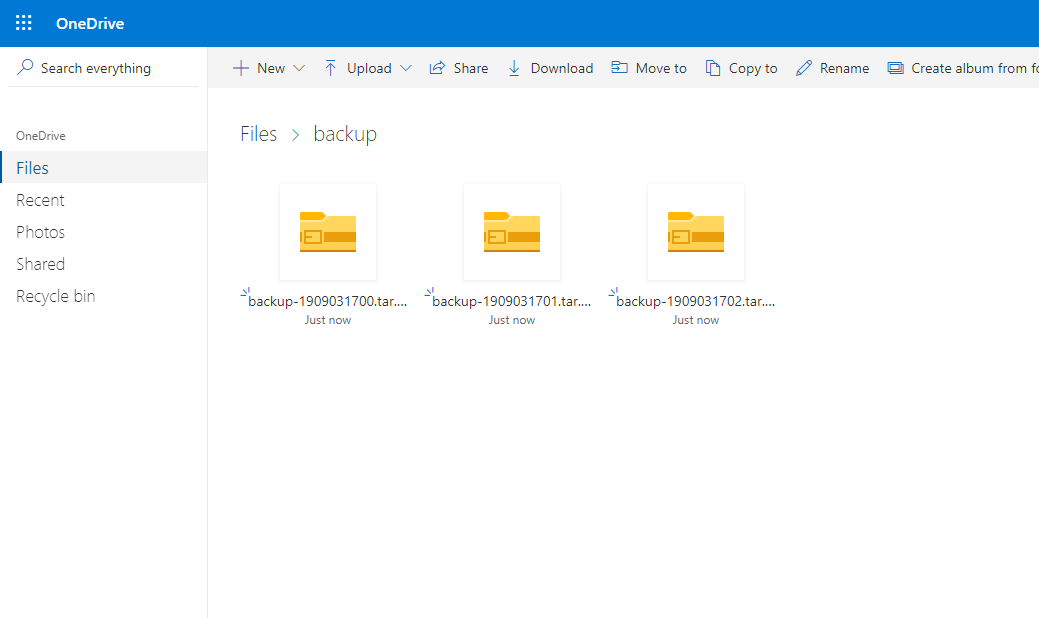
Я запустил 3 раза вручную. Были созданы несколько резервных копий, после чего они все успешно были отправлены в облако:
ls -la /root/OneDrive/backup/
Проверяем облако, все три архива с резервными копиями здесь:
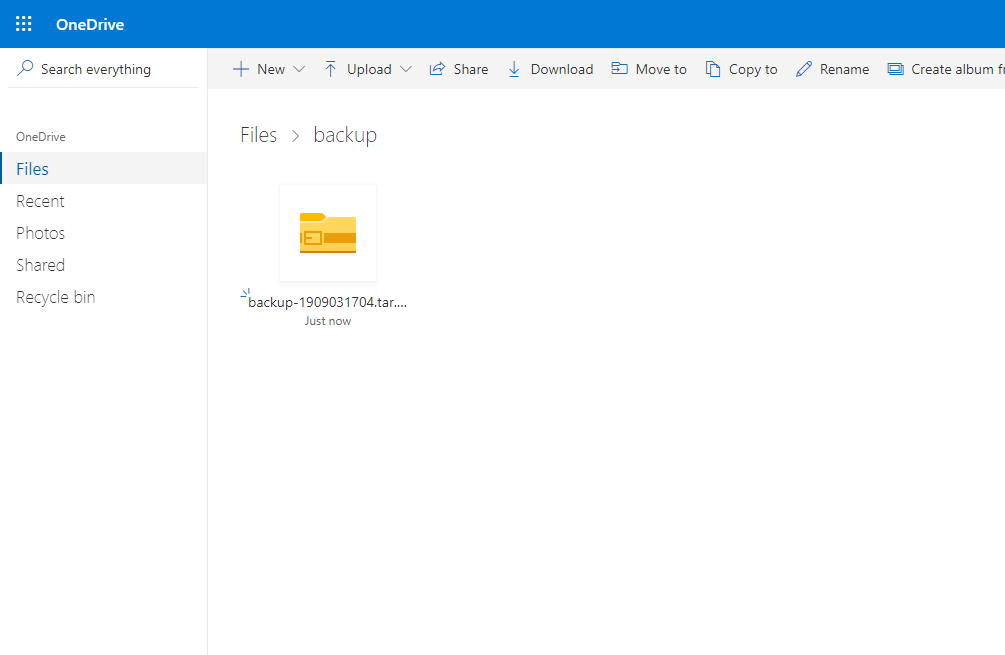
Следующим шагом, я удалил созданные резервные копии с директории на сервере и снова запустил скрипт. Вывод содержимого директории на сервере:
ls -la /root/OneDrive/backup/
Пройдя в веб-интерфейс OneDrive я увидел, что резервные копии удалили и оттуда, автоматически.
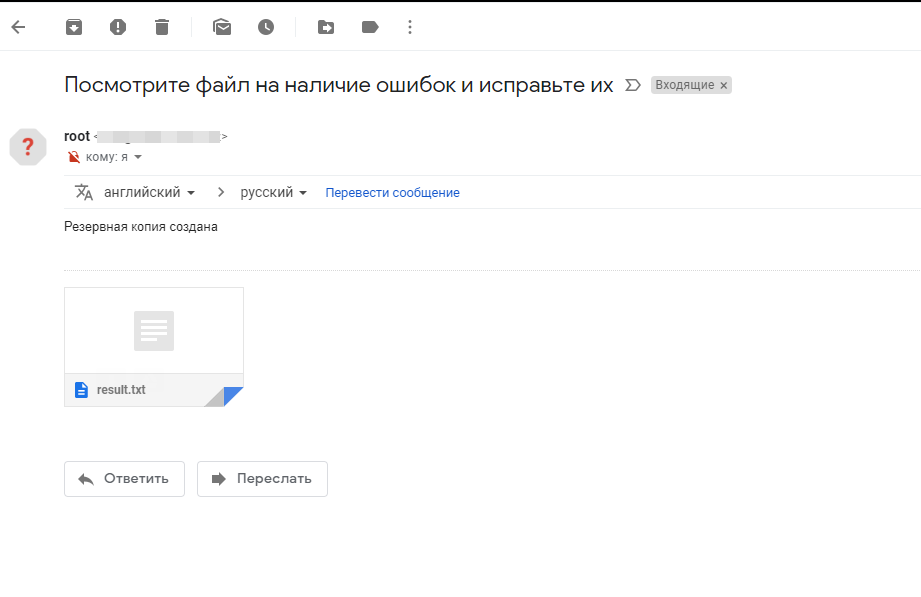
Так же после выполнения скрипта, мне пришло письмо на почту:
 Вот и все, на этом резервное копирование на OneDrive окончено.
Резервное копирования на Google Диск.
С резервным копированием в Google Диск в се вышло не так просто как с OneDrive, хотя сама настройка довольно простая. Основная проблема возникла с удалением старых бэкапов с Google Drive, так как на сервер не монтируется директория хранилища. Но после долгого изучения справки drive help, удалось модернизировать наш уже ранее используемый скрипт.
#!/bin/bash
#удаляем файлы которые старше 7дней с g.drive
/usr/sbin/drive list -q «modifiedDate > result.txt
mysqldump joomla > /var/www/tmp/backup/backup.sql
tar -cvzf backup-$(date +%Y%m%d).tar.gz —absolute-names /var/www/tmp/backup/ >> result.txt
#закачиваем файл на g.drive
/usr/sbin/drive upload -f /root/bin/backup*.tar.gz >> result.txt
rm -rf /root/bin/backup*.tar.gz >> result.txt
echo «Посмотрите файл на наличие ошибок и исправьте их» | mail -a «/root/bin/result.txt» -s «Резервная копия создана» — ******@gmail.com
rm -rf /root/bin/result.txt
rm -rf /var/www/tmp/backup/*
Остальные шаги в скрипте я не расписывал, так как они повторяются с предыдущими.
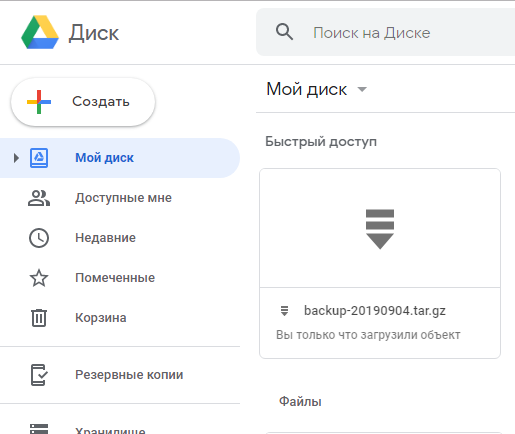
Запустив скрипт, он выполнился:
С веб-интерфейса его так же видно, как и с консоли:
Таким образом мы получаем скрипт, который выполняет проверку на наличие старых бэкапов в облаке Google Диск, удаляет их если они попадают под требования, после чего создает резервную копию сайта и отправляет ее в это же облако.
Скрипт бекапа на Яндекс.Диск из Linux
Данное облачное хранилище я оставил на закуску, так как резервное копирование в Яндекс.Диск является самым простым, т.к. мы смонтировали облачное хранилище Яндекс через WebDav как отдельное дисковое утсройство . Способ все тот же, мы запускаем скрипт, только лишь с небольшой разницей, не нужно делать синхронизацию или заливку файлов специальными командами, работаем как с обычным серверным каталогом. Синхронизация каталога выполняется с помощью rsync. Скрипт будет иметь вид:
#!/bin/bash
rsync -avzr —progress /var/www/html/ /var/www/tmp/backup/ >> result.txt
mysqldump joomla > /var/www/tmp/backup/backup.sql
tar -cvzf backup-$(date +%Y%m%d).tar.gz —absolute-names /var/www/tmp/backup/ >> result.txt
find /mnt/yad/ -name «backup*.tar.gz» -mtime +7 -exec rm -f <> \; >> result.txt
rsync -avzr —progress /root/bin/backup*.tar.gz /mnt/yad/ >> result.txt
rm -rf /root/bin/backup*.tar.gz >> result.txt
echo «Посмотрите файл на наличие ошибок и исправьте их» | mail -a «/root/bin/result.txt» -s «Резервная копия создана» — ****@gmail.com
rm -rf /root/bin/result.txt
rm -rf /var/www/tmp/backup/*
Все тоже самое, только без лишних команд. Если у вас другие пути до облачных хранилищ, меняйте в скрипте на свои.
В конце статьи хотелось бы добавить. Я разместил указанные скрипты в отдельную директорию и запускают их по крону. Если дисковое пространство на ваших облачных дисках позволяет часто создавать бэкапы, создавайте их как можно чаще, я рекомендую не реже одного раза в 3 дня. Используйте ресурсы облачных хранилищ на все 100%.
Примеры заданий в кроне:
0 0 * * 6 /root/bin/backup.sh — запускаем скрипт бэкапа каждую субботу в 00-00
0 0 */3 * * /root/bin/backup.sh — запускаем скрипт бэкапа каждые 3 дня в 00-00
И так далее, настройте бэкапы как вам удобно, когда нагрузка на сервере минимальна.
Источник
Элементарный Bash скрипт для резервного копирования данных
Привет хабралюди, сейчас я расскажу как можно немного автоматизировать рутиную работу по подготовке бэкапов.
В данном случае, мы не будем использовать мощные программы, или даже целые системы для резервного копирования данных, ограничимся самым доступным что у нас есть. А именно — Bash скриптом.
Что должен выполнять наш скрипт?
Бэкапить веб проект, а именно:
— Делать резервную копию базы MySQL.
— Делать резервную копию файлов.
— Структурировать это.
И так, вот наш скрипт:
#!/bin/bash
PROJNAME= #Имя проекта
CHARSET= #Кодировка базы данных (utf8)
DBNAME= #Имя базы данных для резервного копирования
DBFILENAME= #Имя дампа базы данных
ARFILENAME= #Имя архива с файлами
HOST= #Хост MySQL
USER= #Имя пользователя базы данных
PASSWD= #Пароль от базы данных
DATADIR= #Путь к каталогу где будут храниться резервные копии
SRCFILES= #Путь к каталогу файлов для архивирования
PREFIX=`date +%F` #Префикс по дате для структурирования резервных копий
#start backup
echo «[———————————[`date +%F—%H-%M`]———————————]»
echo «[———-][`date +%F—%H-%M`] Run the backup script. »
mkdir $DATADIR/$PREFIX 2> /dev/null
echo «[++———][`date +%F—%H-%M`] Generate a database backup. »
#MySQL dump
mysqldump —user=$USER —host=$HOST —password=$PASSWD —default-character-set=$CHARSET $DBNAME > $DATADIR/$PREFIX/$DBFILENAME-`date +%F—%H-%M`.sql
if [[ $? -gt 0 ]];then
echo «[++———][`date +%F—%H-%M`] Aborted. Generate database backup failed.»
exit 1
fi
echo «[++++——][`date +%F—%H-%M`] Backup database [$DBNAME] — successfull.»
echo «[++++++—-][`date +%F—%H-%M`] Copy the source code project [$PROJNAME]. »
#Src dump
tar -czpf $DATADIR/$PREFIX/$ARFILENAME-`date +%F—%H-%M`.tar.gz $SRCFILES 2> /dev/null
if [[ $? -gt 0 ]];then
echo «[++++++—-][`date +%F—%H-%M`] Aborted. Copying the source code failed.»
exit 1
fi
echo «[++++++++—][`date +%F—%H-%M`] Copy the source code project [$PROJNAME] successfull.»
echo «[+++++++++-][`date +%F—%H-%M`] Stat datadir space (USED): `du -h $DATADIR | tail -n1`»
echo «[+++++++++-][`date +%F—%H-%M`] Free HDD space: `df -h /home|tail -n1|awk ‘
echo «[++++++++++][`date +%F—%H-%M`] All operations completed successfully!»
exit 0
Запускать можно парой способов:
— Простой запуск: ./backup.sh
— Запуск + запись в лог: ./backup.sh | tee backup.log
— а еще его можно в cron запихать: 00 20 * * 7 root sh /home/bond/backup.sh | tee /home/bond/backup/backup.log
После успешного завершения скрипта, мы увидим следующее:
$ sudo sh backup.sh
[———————————[2009-02-14—12-28]———————————]
[———-][2009-02-14—12-28] Run the backup script.
[++———][2009-02-14—12-28] Generate a database backup.
[++++——][2009-02-14—12-29] Backup database [images] — successfull.
[++++++—-][2009-02-14—12-29] Copy the source code project [itmages].
[++++++++—][2009-02-14—12-29] Copy the source code project [itmages] — successfull.
[+++++++++-][2009-02-14—12-29] Stat datadir space (USED): 1,3G /home/bond/backup
[+++++++++-][2009-02-14—12-29] Free HDD space: 49G
[++++++++++][2009-02-14—12-29] All operations completed successfully!
bond@serv:
В итоге наши бэкапы складываются в каталог который вы указали, + резервные копии лежат в каталогах именованых по дате.
Источник
Full and Incremental Backups Using Tar Linux Command
Posted by: Mohammed Semari | Published: August 6, 2016| Updated: August 6, 2016

In this article we will discuss the using of tar command to perform a full and incremental backups for files and directories in Linux systems. Tar is very useful tool in backing up files, directories, and even full systems “full OSes”, here will use it only to backing up data “file and directories” in the following scenario; will use it to perform a full backup every month “day one of every month” and perform a daily backup to the end of the month. We will use cron jobs to schedule “automate” the backup process and will use cron jobs to auto-remove the expired backups “backups which exceeded the retention period”.
This article will include a shell script that performs backups in both types and a shell script that performs tracking and removing expired backups. I’ll explain the idea of each script, and step by step to automate the whole process.
Requirements:
- In general you must have a root privilege to backup most of systems you will work with.
- You must have enough storage space to save your full and incremental backups.
- You should have some experience in using tar command simply by reading our Sysadmins Most Used Tar Command Examples in Linux article.
- Better to have a little experience in writing shell scripts, if No, never mind you can go and use my scripts with little modifications.
- Better to have a little experience in schedule tasks using cron jobs, if No, never mind I’ll show you how to schedule a cron jobs task.
After reading this three parts article, you will gain all the experience to protect your data “the first task sysadmins must master”.
So, let’s start.
Part 1: Performing a Full and Incremental Backups Using Tar Linux Command.
There are three kinds of backups. The simplest type is a ‘full’ or level 0 backup then come the differential backup and finally incremental backup. In this article I’ll only perform full backup and incremental backup to my data.
Full backup means taking a backup of all files and directories, in general, it takes longer time to finish than incremental backup and also needs a huge storage for saving it.
On the other hand, the incremental backup only takes the modified/changed/added files and directories and mark the deleted files and directories, since last taken backup “either full or incremental”, it takes less time and needs less space for saving it.
Here’s the backup scenario I’m using in my work:
- Taking a monthly full backup at day one of each month.
- Taking incremental backup daily from day 2 of each month to the last day of the month.
- After a certain period, I remove the old full and increment backups to save my storage space, this period is known as a retention period.
Taking a Full and Incremental Backup Using Tar command.
Here’s the tar command I use to take a full and incremental backup of my data, I’ll backup a daily modified image directory called uploads which has this full path “/var/discourse/shared/standalone/uploads/“, which daily updated with users photos. I’ll need two directories to save my backup files and my snapshot file, I’ll save my backups files in “/Backups/uploads/“, and save my snapshot file in “/Backups/snap_files/“. We are including a time-stamp in naming the compressed backup file “images_uploads-`date +%Y-%m-%d`.tar.gz“, and in naming the snapshot file “images_uploads-`date +%Y-%m`.snap“, you can see the difference between the two time-stamps. To perform a full and daily incremental backup for the uploads directory, I run the following command:
Let’s discuss the each option we have used in the above command for creating a full backup.
c –> Creates a new .tar archive file.
v –> Verbosely show the .tar file progress.
f –> File name type of the archive file.
z –> Compress the archive file with gzip
p or –preserve-permissions, –same-permissions –> Extract information about file permissions (default for superuser), no need to explicit add this option if you are the root user.
g or –listed-incremental=FILE –> Handle incremental backups with snapshot data in FILE
What action the above tar command exactly do?
The above command will perform a full backup at first time it run, then it will perform incremental backups every time it run after it’s first run till the last day of the current month. Then at the first day of the next month it’ll perform a full backup and will perform incremental backups till the end of the month, and so on. Sure you need to schedule this task to run daily using cron jobs, later in this article I’ll explain the cron job we use.
Why the above tar command do that action / behavior?
The above action / behavior because of the existence of “-g” option. the default behavior of tar archive is to perform a full backup every time it runs, but because we added “-g” option, it will perform a full backup at it’s first run and create a binary snapshot file “images_uploads-`date +%Y-%m`.snap” which specified by “-g” option and will write all the files it archived into this file. In the second time it runs, it’ll detect the existence of the snapshot file, so it’ll not create any new snapshot file and will use this file. By help of the existing snapshot file, it will only backup the modified/changed/added files, and will mark the deleted files in this incremental archive and will do this task every time it run.
At the first day of the next month, the tar command will not find the snapshot file of the current month because of the time-stamp in the snapshot file naming changed to be the current month, so the tar command will perform a full backup and create the new snapshot file for this month, and so on…
Examples of Naming the full and incremental backups naming and the snapshot files.
Let’s say we are in August and will run the above command today “which was at time of writing this post August 4, 2016”, the first backup will be full backup and will have this name “images_uploads-2016-08-04.tar.gz” and the tar will create a snapshot file with this name “images_uploads-2016-08.snap“. Next time the same tar command will run in this month “August”, it will find the snapshot file existing so it’ll perform an incremental backup with this name “images_uploads-2016-08-05.tar.gz“, and so on till the end of August.
Now, suppose we are at “September 01, 2016“, running the above tar will not find a snapshot with this name “images_uploads-2016-09.snap” so it’ll create it and do a full backup then every other day it’ll do incremental backup till the end of September, and will repeat this process forever “suppose the above tar command run daily in a cron job”.
Now you understand the idea of the backup scenario I perform, next part will discuss schedule / automate the above process.
Part 2: Writing The Shell Backup Script And Add It To Cron Job To Automate the Backup Process.
The above tar command must run daily to perform a full and incremental backups, but of course you will not run it manually, you need to schedule this task to run at a certain time every day using cron jobs.
Before we create the cron job, we will write the above command in a shell script and make it a general script. I’ll use variables to set the Backup files and the snapshot files backup location, and finally the directory you want to backup it.
Here’s our general tar backup shell script:
Now, save the above script with name “Server-Backup_V1.sh” in your administration scripts directory “if you have one”. As showed in comments in the above shell script, you only can change the values of four variables “Backup-Snapshot_file_name, Backups_Destination, Snapshots_Destination, and Data_to_be_Backed_up“. Set the values for those variables with the values in your backup system infrastructure. Values naming must be have a absolute path.
Now, it’s time to use the cron jobs, we will create a cron job that runs daily at 12 AM to execute the Server-Backup_V1.sh backup script.
In your terminal, run the following command:
And append the following cron job to the end of the existing jobs as follow:
Save then exit. Now your cron job will run daily at 12 AM to run your backup script located in “/home/mohammed.semari/Semari-Scripts/Server-Backup_V1.sh”
Part 3: Removing Old / Expired Backups.
Removing the old / expired backups is also known as “the backup retention period“, which is how long do you keep old backups files in your storage. It’s important to set the retention period carefully, the perfect case is to set it as long as you can, but this will need a large disk space. Feel free to set this value as you wish in your systems.
I’ll write a shell script to remove the backups files and snapshot files that older than one month. I’ll use the same variables naming used in the backup script, because at the end of this article, I’ll merge the two scripts into one, but now need to show you the ideas behind this retention script.
Here’s our backup retention shell script:
Now, save the above script with name “AutoRetention_V1.sh” in your administration scripts directory “if you have one”, and if you will use it alone, you need to run this script monthly using cron jobs just as what we did with the backup script. For me I’ll merge both scripts into one and run the new script daily at 12 AM.
Here’s the cron job in this case:
What is the ideas behind the retention script we created?
A good question, here’s the idea; simply we need to remove the old backups that created older than a specific period “in our case one month”. Because we only take a full backup once at the start of each month and incremental backup to the end of the month, we can not remove old backups file by file “If we removed only the full backup which taken at day one of the month, other incremental backups will worth nothing if the files we want to restore wasn’t changed since the full backup” So, we have to remove old backups month by month.
In the above script, I set the value of “Retention_period” to 3, this will do the following:
At the start of each month “day one” the “AutoRetention_V1.sh” script will remove the existing backups of the month before before the current month i.e suppose we are At August 01, and the script runs daily at 12 AM, the script will remove the backups file of June, and the snapshot file of June. At this case we have the backups and snapshot of July in our storage. The backup script will take it’s backups daily to the end of August, at September the “AutoRetention_V1.sh” script will remove the backups file of July, and now we have the backups and snapshots of August in our storage, and so on.
Part 4: Merging The Backup Script And the Retention Period Script Into One.
As the above two scripts use the same variable, it’s better for us to merge them into one script. We will name the new script “Full_Backup_Systems_V1.sh” and will run it daily at 12 AM. I’ll remove the comments from it as it exists in the above two scripts.
Here’s our final backup and retention period script:
Now, save the above script with name “Full_Backup_Systems_V1.sh” in your administration scripts directory, and use cron jobs to run it daily at 12 AM.
Summary
In this article, we discussed different ideas for backing up your system. We used tar Linux command to perform a full and incremental backups. In this article we created a full backup at first day in every month and incremental backups in other days till the end of the month. We used cron jobs to schedule the backup process. You have two options for using our two scripts “the backup script and the retention script” either use each of them separately or use the full backup script created by merging the two scripts. All needed from you is to change some values of variables in our scripts.
I hope this article is good enough for you.
See you in other articles
Источник


