- Как создать снимок системы в Linux Mint? Создание резервной копии системы и ее восстановление
- Запуск и настройка TimeShift
- Создание снимка системы в Linux Mint
- Восстановление системы Linux Mint из резервной копии
- Видео-инструкция о том, как создать снимок системы в Linux Mint
- The 5 Best Graphical Backup Tools for Ubuntu and Linux Mint
- 1. Déjà Dup
- 2. Grsync
- 3. Timeshift
- 4. Back In Time
- 5. UrBackup
- If You Appreciate What We Do Here On TecMint, You Should Consider:
- Related Posts
- 10 thoughts on “The 5 Best Graphical Backup Tools for Ubuntu and Linux Mint”
Как создать снимок системы в Linux Mint? Создание резервной копии системы и ее восстановление
Сегодня я расскажу, как можно создать снимок системы, т.е. резервную копию системы в дистрибутиве Linux Mint, а также мы разберем процесс восстановления системы из резервной копии.
Если Вы часто вносите изменения в настройки операционной системы Linux Mint или устанавливаете различные программы, неважно с какой целью, то скорей всего Вы хотите в случае какого-либо сбоя в работе системы иметь возможность откатиться назад, т.е. восстановить систему на определённый момент времени до Ваших действий, которые и стали причиной этого сбоя, это могут быть некорректные настройки или установленное приложение.
В Linux Mint есть такая возможность, благодаря приложению TimeShift, которое умеет создавать снимки системы (включая личные файлы) и восстанавливать ее из этих снимков.
TimeShift – это что-то наподобие компонента System Restore («Восстановление системы») в Windows, которое также создает копию системы и восстанавливает систему из этой копии.
В дистрибутиве Linux Mint TimeShift установлен по умолчанию, поэтому если у Вас операционная система Linux Mint, Вы можете пользоваться этим инструментом, иными словами, дополнительно устанавливать ничего не нужно.
На самом деле иметь возможность восстановить систему из резервной копии — это просто здорово, и я рекомендую периодически делать резервные копии (снимки) системы, чтобы в случае какого-либо сбоя откатиться назад. Даже разработчики дистрибутива Linux Mint перед любым обновлением системы рекомендуют сначала создать снимок системы, а уже потом переходить, казалось бы, к безобидной стандартной процедуре обновления.
Итак, давайте я на примере покажу, как создать снимок системы в Linux Mint с помощью приложения TimeShift.
Запуск и настройка TimeShift
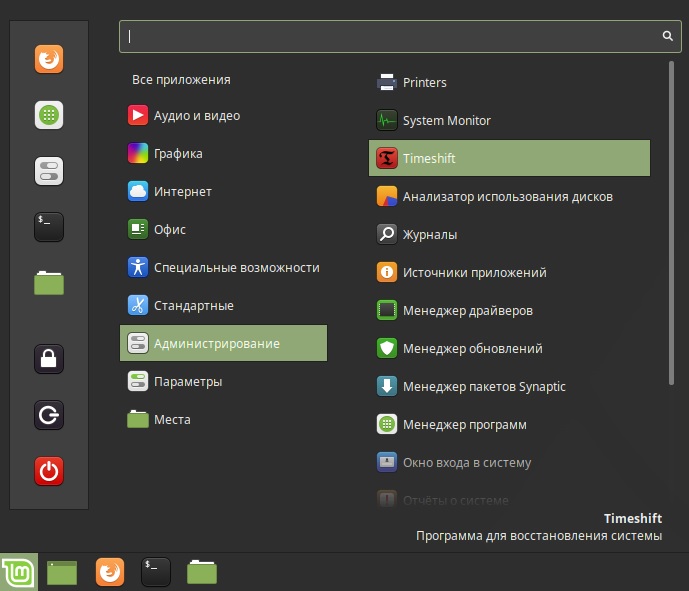
Сначала необходимо запустить приложение TimeShift и провести первоначальную настройку, это можно сделать из меню, нажимаем «Меню -> Администрирование -> TimeShift».
Примечание! В примере используется версия Linux Mint 19.1 со средой Cinnamon. О том, как установить операционную систему Linux Mint на компьютер, можете почитать в материале «Linux Mint 19 – установка и обзор дистрибутива».
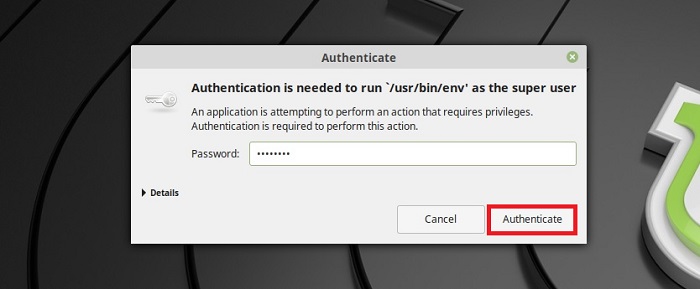
Данная процедура требует прав администратора, поэтому после запуска сразу появится окно для ввода пароля администратора. Вводим и жмем «Authenticate».
Если Вы впервые запускаете инструмент создания снимков TimeShift, то у Вас сразу запустится мастер, который поможет Вам настроить приложение на создание снимков системы.
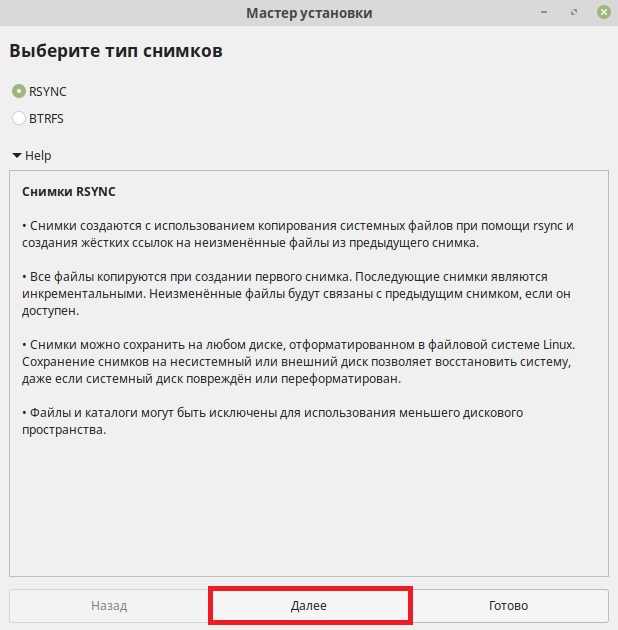
Сначала выбираем тип снимков, если у Вас файловая система Ext4, то выбирайте первый тип «RSYNC», а если Вы используете файловую систему BTRFS, то выбирайте одноименной пункт. Нажимаем «Далее».
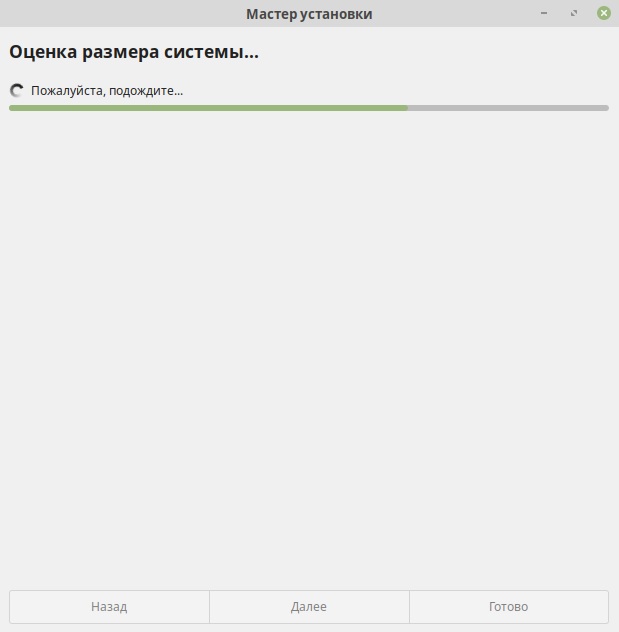
Потом программа проанализирует систему.
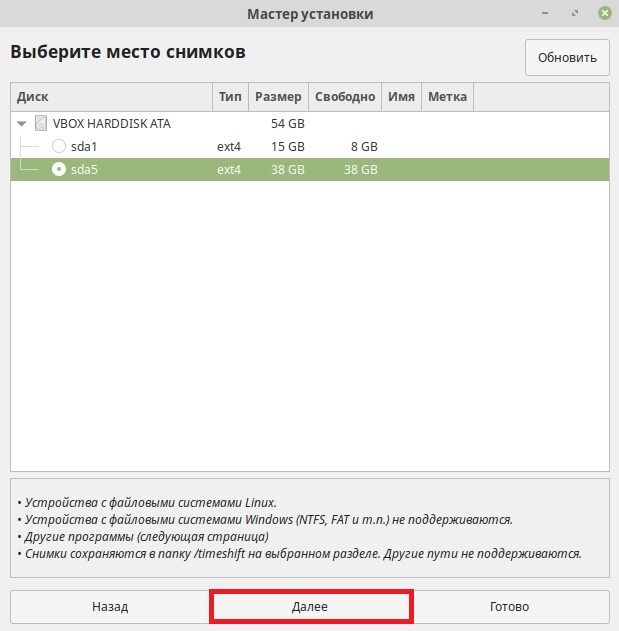
Затем необходимо указать место для хранения снимков, точнее, раздел диска, лучше указывать не системный раздел, а тот, на котором побольше места. Рекомендовано даже хранить снимки на отдельных внешних дисках, для особо важных систем, это, конечно же, правильно. Выбираем и нажимаем «Далее».
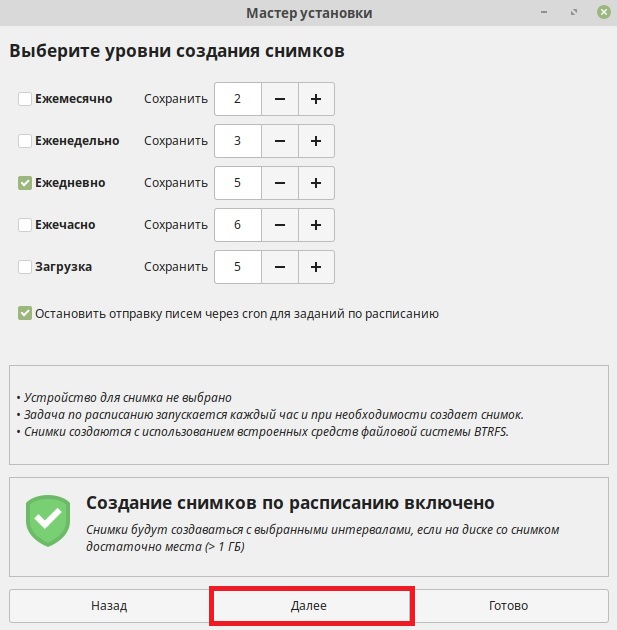
Далее нам предлагают настроить расписание создания снимков, например, ежедневно или раз в неделю, эта возможность позволяет в автоматическом режиме создавать снимки системы Linux Mint на постоянной основе. Здесь Вы также можете указать, сколько снимков нужно хранить, т.е., например, если указать 5, то тогда, когда будет создаваться 6 снимок, самый первый будет удален, таким образом, инструмент будет хранить 5 самых последних снимков, что позволяет контролировать занимаемое место снимками на диске.
Вносим настройки, которые Вас устраивают, и нажимаем «Далее».
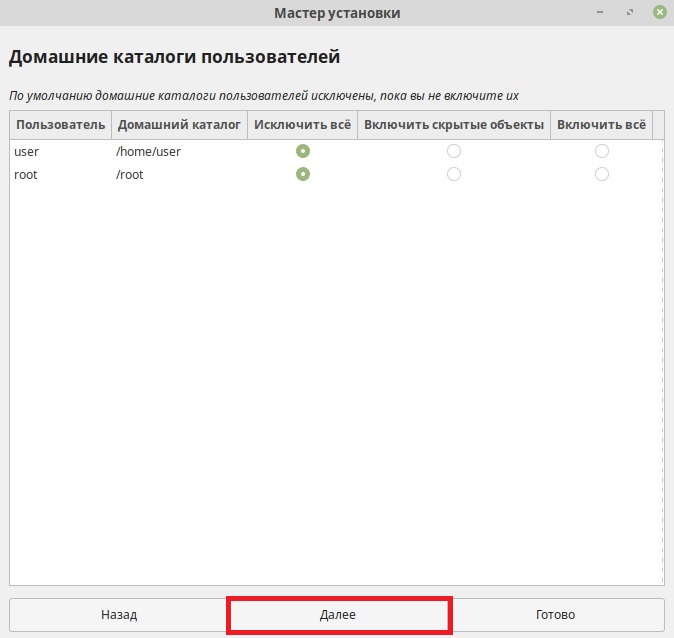
После идут настройки, с помощью которых мы можем указать, что в снимки необходимо включать домашние каталоги пользователей, так как по умолчанию данная возможность не используется, ведь многие пользовательские файлы изменяются с течением времени, а в случае восстановления мы можем потерять эти корректные изменения, да и просто, если включать в снимок все пользовательские файлы, размер снимка может быть очень большим. Поэтому здесь решать Вам, если хотите — включайте, если не хотите — оставляйте по умолчанию.
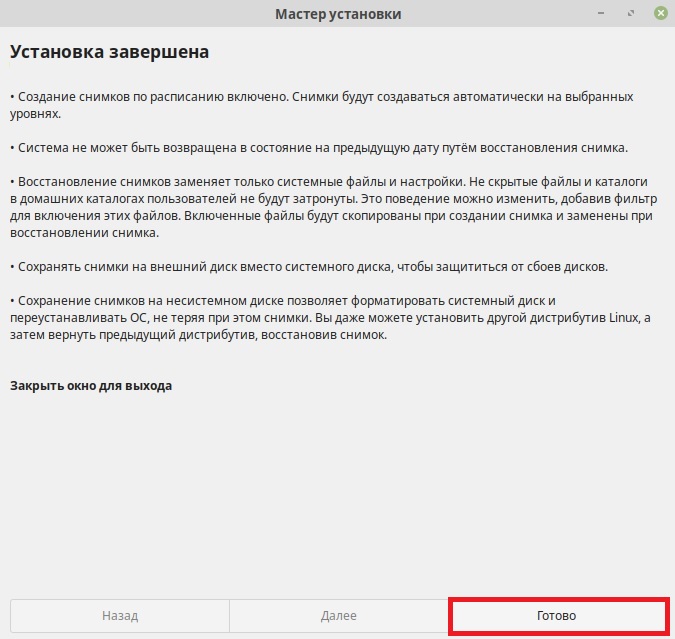
Настройка TimeShift закончена, нажимаем «Готово».
Создание снимка системы в Linux Mint
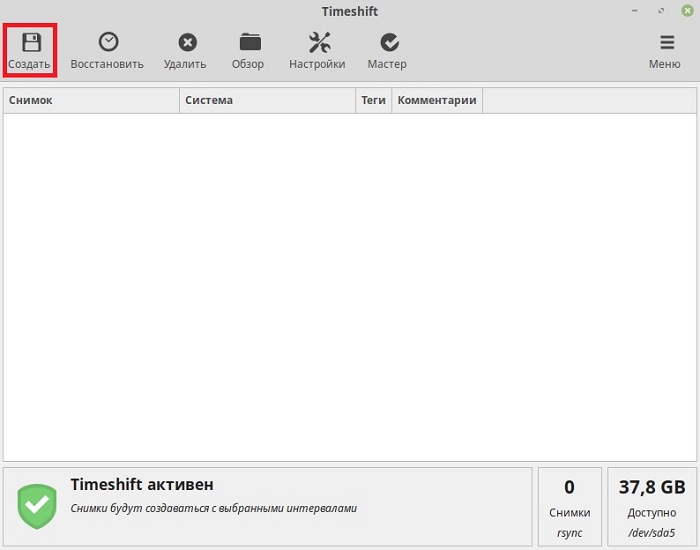
После того как TimeShift мы настроили, можно создать свой первый снимок системы Linux Mint. Для этого нажимаем на кнопку «Создать».
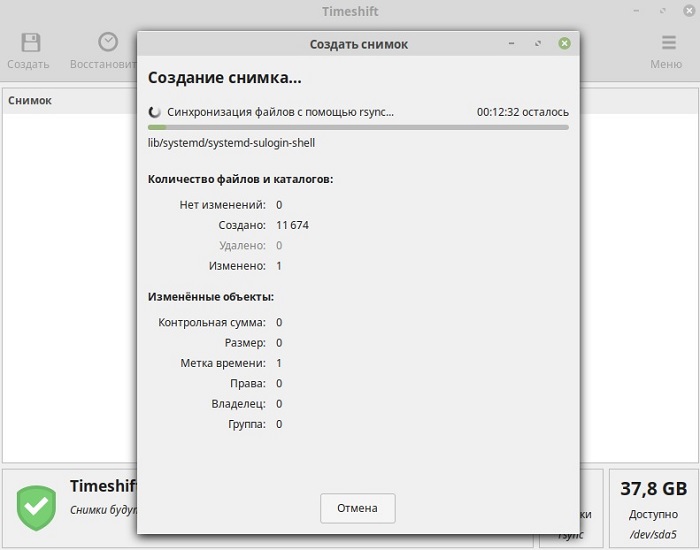
Начнется процесс создания снимка системы.
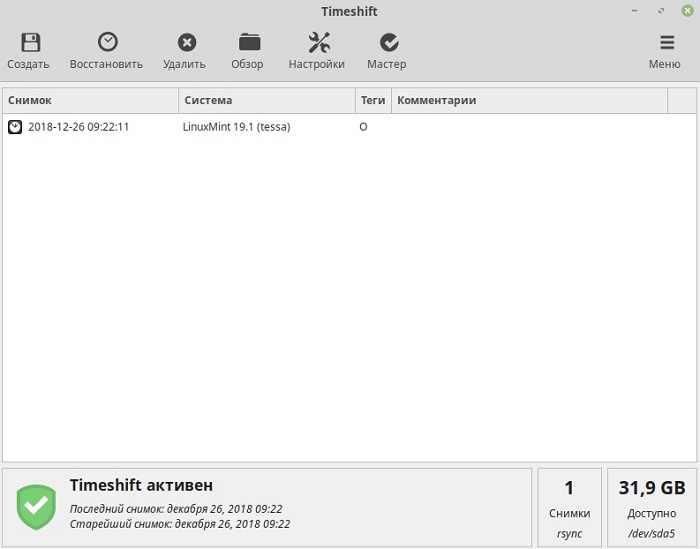
Когда данный процесс будет завершен, в программе TimeShift в списке снимков отобразится новый пункт.
Восстановление системы Linux Mint из резервной копии
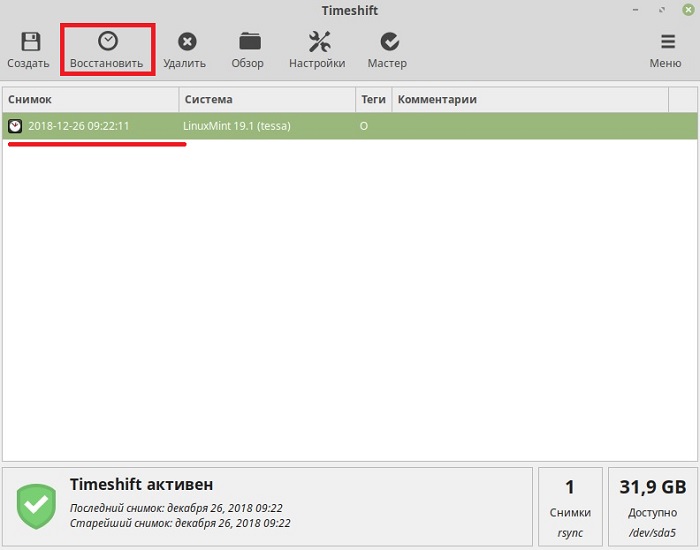
Теперь давайте я покажу, как восстановить систему из снимка. Для этого выбираем нужный снимок в списке и нажимаем кнопку «Восстановить».
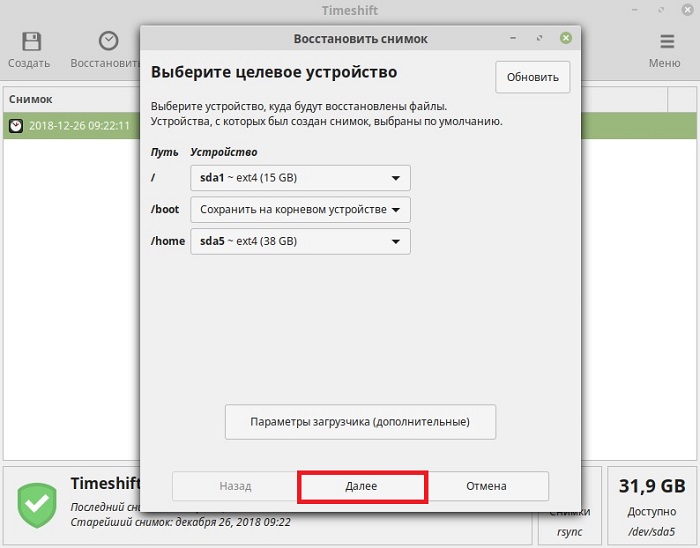
Указываем раздел для восстановления и раздел, на котором расположен снимок. По умолчанию указаны разделы, с которых был создан снимок, т.е. в нашем случае так и оставляем. Нажимаем «Далее».
Затем программа проанализирует снимок и изменения в системе.
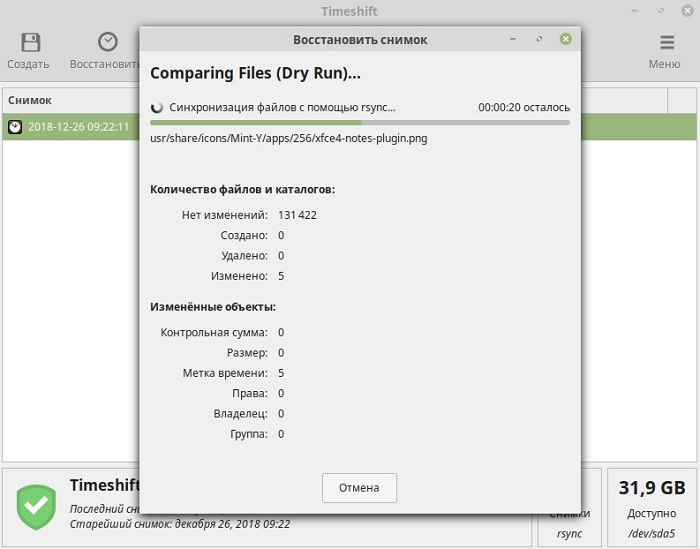
После чего нажимаем на кнопку «Далее».
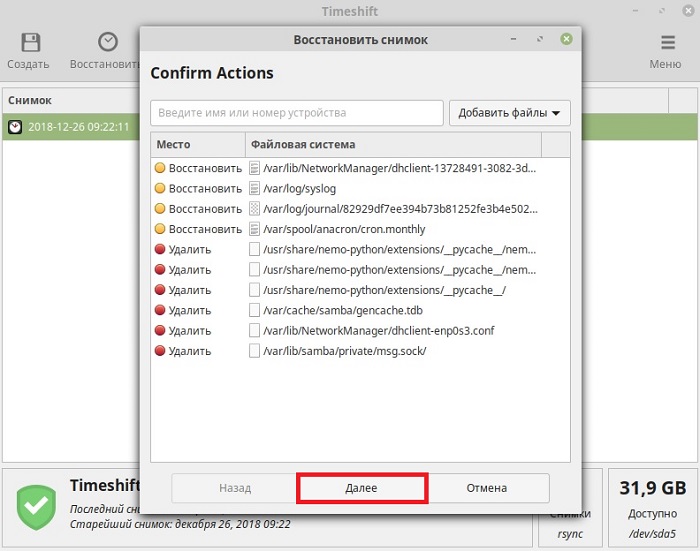
Далее нас предупреждают, что никаких гарантий, что система восстановится, программа TimeShift не дает, мы это понимаем и нажимаем «Далее».
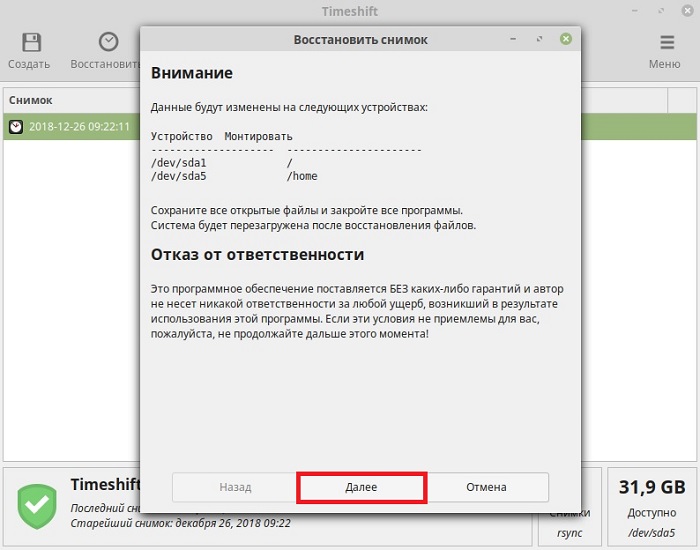
Начнется процесс восстановления системы, когда он будет завершен, Linux Mint перезагрузится, и можно будет пользоваться уже восстановленной системой.

На заметку! Для более тесного знакомства с Linux рекомендую почитать мою книгу « Linux для обычных пользователей » – в этой книге я максимально простым языком рассказываю про основы операционной системы Linux
Видео-инструкция о том, как создать снимок системы в Linux Mint
У меня все, надеюсь, материал был Вам полезен, пока!
Источник
The 5 Best Graphical Backup Tools for Ubuntu and Linux Mint
In this guide, we review the best graphical user interface backup tools for Ubuntu and Linux Mint operating systems. These Linux backup tools are also installable and work on Ubuntu flavors such as Lubuntu, Kubuntu, and Xubuntu and other derivatives such as elementary OS, Zorin OS, and more.
1. Déjà Dup
Déjà Dup is an open-source simple yet powerful personal backup tool that makes backup incredibly easy. It uses duplicity (encrypted bandwidth-efficient backup using the rsync algorithm) as the backend. It supports local, off-site (or remote), or cloud backup locations such as Google drive. It securely encrypts data for safe transactions and compresses data for faster transmission.
It also features incremental backups that allow you to restore from any particular backup, schedules regular backups, and integrates well with GNOME desktop environment.
![]() Déjà Dup – Simple Backup Tool
Déjà Dup – Simple Backup Tool
To install Déjà Dup in Ubuntu and Linux Mint, open a terminal window and run the following command:
Alternatively, you can also install it as a snap as follows. This requires you to have snapd package installed on your system.
2. Grsync
Grsync is an open-source simple, great, and easy to use graphical user interface for the popular rsync command-line tool. It currently supports only a limited set of the most important rsync features, however, it can be used effectively to synchronize directories, files, and make backups. It comes with an efficient interface and supports the storage of different sessions (you can create and switch between sessions).
![]() Grsync – Backup and File Synchronization Tool
Grsync – Backup and File Synchronization Tool
To install Grsync on your system, simply run the following command:
3. Timeshift
Timeshift is an open-source powerful backup and system restore tool for Linux that requires little setup. It is used to create filesystem snapshots in two modes: RSYNC mode where snapshots are taken using rsync+hardlinks on all systems and BTRFS mode where snapshots are taken using the in-built features only on BTRFS systems. By default, user data is excluded in snapshots because the program is designed to protect system files and settings.
Timeshift features scheduled snapshots, multiple backup levels (hourly, daily, weekly, monthly, and boot), and exclude filters. Importantly, snapshots can be restored while the system is running or from Live CD/USB. Besides, it supports cross-distribution restoration and so much.
![]() Timeshift – System Restore Tool for Linux
Timeshift – System Restore Tool for Linux
You can install Timeshift package available in the Launchpad PPA for supported Ubuntu release, by issuing the following commands:
4. Back In Time
A simple open-source backup tool for Linux desktops, Back In Time comes with a Qt5 GUI ‘backintime-qt‘ application which will run on both Gnome and KDE based desktop enthronements and a command-line client ‘backintime’.
Backups are stored in plain text (which enables for the restoration of files even without Back in Time) and files ownership, group, and permissions are stored in a separate compressed plain text file fileinfo.bz2.
![]() Back In Time – Backup Tool for Linux
Back In Time – Backup Tool for Linux
The Back In Time package is included in Ubuntu repositories, you can install it as shown.
5. UrBackup
Last but not least, we have UrBackup, an open-source fast, easy to set up backup tool. Unlike most of the tools we have looked at before, UrBackup has a client/server architecture. It has configurable (but next to no configuration) clients for Linux, FreeBSD, and Windows operating systems.
It features full and incremental image and file backups, file metadata such as last modified is backed up, image and file backups while the system is running, fast calculation of file tree differences, easy to use file and image restore (via restoring CD/USB stick),
UrBackup also features consistent backups of used files on Windows and Linux, e-mail alerts, if a system isn’t backed up for some configurable period of time, reports about backups can be sent to users or administrators. Also, it comes with a web interface used for managing the client, which shows the status of the clients, ongoing activities and statistics, and modifying/overriding client settings.
The main limitation of UrBackup is that image backups only work with NTFS formatted volumes and with the Windows client.
![]() UrBackup – Client/Server Backup System
UrBackup – Client/Server Backup System
To install UrBackup, run the following commands to add its PPA and install it:
That’s all! The above are the best graphical backup tools for Ubuntu and Linux Mint operating systems. Do you have some thoughts to share? Have your say, via the comment form below.
If You Appreciate What We Do Here On TecMint, You Should Consider:
TecMint is the fastest growing and most trusted community site for any kind of Linux Articles, Guides and Books on the web. Millions of people visit TecMint! to search or browse the thousands of published articles available FREELY to all.
If you like what you are reading, please consider buying us a coffee ( or 2 ) as a token of appreciation.

We are thankful for your never ending support.
Related Posts
![]()
![]()
![]()
![]()
![]()
![]()
10 thoughts on “The 5 Best Graphical Backup Tools for Ubuntu and Linux Mint”
Just for information: Urbackup (beta) now (partly) supports image backup on Linux. See https://forums.urbackup.org/t/server-2-5-22-client-2-5-16/10442#linux-image-backups-4
![]()
Nice to see the instructions for installing the software.
How do I find out where it was put and how to start it?”
Search and search and search Google.
..Welcome to Linux !! 😉
![]()
Has anyone tried UrBackup? The GUI looks promising and I don’t mind the limitation mentioned.
![]()
I’ve been using Timeshift since 2019 but I gave up using it this month. It is just pretty annoying that it has to take so much disk space.
![]()
I’m using KDE (Kubuntu) – I think it is 20.10.1 (64-bit), but I don’t yet know how to find out the version I’m running.
sda Window 7 partitions (unbootable because Linux overwrote my boot partition (MBR)) 500GB
The data partition is NTFS – both are accessible from Linux
sdb1 /boot (2GB)
sdb2 swap (8.8GB)
sdb3 / (50GB)
sdb4 extended (remainder of hdd)
sdb5 /home (350GB)
sdb6 /mnt (/ntfs-data-on-sdb) (remainder – 150gb or so)
sdc 1tb an unused Linux installation and a 500GB NTFS partition for data
sdd 1tb external – ntfs for backup
sde (several 500GB Passport-type USB drives and several thumb drives)
I’m trying to find a backup for data – just sync to a partition on an external drive to maintain an uncompressed duplicate of my data partition that can be used as-is, if my primary is lost. I don’t want incremental here, just a copy, maintained when I run a manual backup.
I also need a backup for system images. Incremental is good, but every now and then I want a full image that has a simple path to restoration to an empty drive – that will BOOT after restoration (drive replacement/upgrade), as well as can be restored over the same (current) system (obviously the restore app would need to be on a live thumb drive) – in case the current system develops problems and I want to turn the clock back without affecting my data. I try to run both backups at the same time – data & system, and draw a line under my journal entries with the date & the name of the image backup.
I don’t want any “auto” backups. I keep an online document where I record changes I make to my system between backups, so if I have to restore one, I know what to do to get back to where I was before the glitch.
**How do I know where all of my configurations are? I really really like the app image concept, where everything an app needs is ALL kept together in ONE directory – that’s actually what I thought I would be getting with Linux, but it seems app pieces are flung everywhere in Linux also (like Windows).
I was thinking of backintime or deja dup for system images.
Deja Dup says it ” integrates well with GNOME desktop environment”
Does that mean it DOESN’T “integrate” well with the KDE desktop?
Looking at BackinTime, it seems to provide enough (include/exclude) that it would probably do for my data, too, IF it syncs – that is makes the target match the source, only adding, changing, & deleting files as necessary to accomplish that. Will backintime do that?
The image files must also be able to restore EVERYTHING (except /home) including /boot partition – everything the restoration needs to boot the restored system.
Oh. and I want a GUI interface that I can set up profiles for backups. I don’t feel comfortable enough with Linux to type backup instructions on the fly in the Terminal.
Thank you,
AnneF
![]()
Just downloaded deja-dup, followed install instructions BUT where is the software to run??
Источник


