- Лучшие эмуляторы терминала Linux
- Лучшие эмуляторы терминала для Linux
- 1. GNOME Terminal
- 2. Termite
- 3. Yakuake
- 4. Cool Retro Term
- 5. Guake Linux Terminal
- 6. ROXTerm
- 7. Konsole
- 8. Terminology
- 9. LilyTerm
- 10. Xfce Terminal
- 11. Xterm
- 12. AltYo
- 13. Terminator
- 14. Qterminal
- 15. Tilda
- Выводы
- Top 14 Terminal Emulators for Linux (With Extra Features or Amazing Looks)
- Awesome Terminal Emulators for Linux
- 1. Terminator
- How to install Terminator?
- 2. Guake Terminal
- How to install Guake Terminal?
- 3. Tilix Terminal
- How to install Tilix?
- 5 Tweaks to Customize the Look of Your Linux Terminal
- 4. Hyper
- How to install Hyper?
- 5. Tilda
- How to install Tilda?
- 6. eDEX-UI
- How to install eDEX-UI?
- 5 Tweaks to Customize the Look of Your Linux Terminal
- 7. Cool Retro Terminal
- How to install Cool Retro Terminal?
- 8. Alacritty
- How to install Alacritty?
- 9. Konsole
- How to install Konsole?
- 10. GNOME Terminal
- How to install GNOME Terminal?
- 11. Yakuake
- How to install Yakuake?
- 12. Kitty
- How to install Kitty?
- 13. Simple Terminal (st)
- How to install st?
- 14. XTERM
- How to install XTERM?
- Honorable Mention
- Wrapping Up
Лучшие эмуляторы терминала Linux
Эмулятор терминала Linux — это инструмент, который дает доступ к командной оболочке операционной системы, а значит, позволяет эффективно использовать ресурсы компьютера, экономит время и значительно упрощает выполнение любых задач.
Как правило, эмулятор терминала, который входит в «стартовый набор» программ и устанавливается вместе с дистрибутивом, удовлетворяет все запросы пользователей. Впрочем, почему бы не протестировать и другие приложения, позволяющие управлять компьютером через командную строку? Ниже представлены лучшие эмуляторы терминала Linux, предназначенные как для начинающих, так и для опытных почитателей.
Лучшие эмуляторы терминала для Linux
1. GNOME Terminal
Начать стоит с эмулятора GNOME Terminal, который по дефолту предоставляется пользователям графической оболочки Gnome (для использования с другими оболочками его следует установить вручную). От большинства стандартных терминалов он выгодно отличается наличием целого ряда функций, облегчающих работу.
- Разноцветный текст в зависимости от выбранной пользователем цветовой схемы.
- Изменение внешнего вида с помощью встроенных тем оформления.
- Возможность сделать терминал прозрачным.
- Работа с несколькими вкладками и поддержка мыши.
- При изменении размеров окна предлагает варианты переноса текста.
- Для выполнения разных задач можно создавать индивидуальные профили.
- Делает ссылки кликабельными.
2. Termite
Это простой и ничем не примечательный эмулятор терминала для Linux, который «заточен» под управление горячими клавишами. Обладает набором базовых функций.
- Поддерживает прозрачного фона, пользовательских шрифтов и цветовых схем.
- Кликабельные ссылки.
- Изменение размеров полосы прокрутки.
- Позволяет вставлять и выделять текст.
3. Yakuake
Выпадающий эмулятор терминала для среды KDE (активируется и исчезает с экрана при нажатии кнопки F12). Активные пользователи Konsole заметят схожесть интерфейса этих двух программ, да и функции у них почти идентичные. Также Yakuake кое-что взял от своего коллеги под названием Quake.
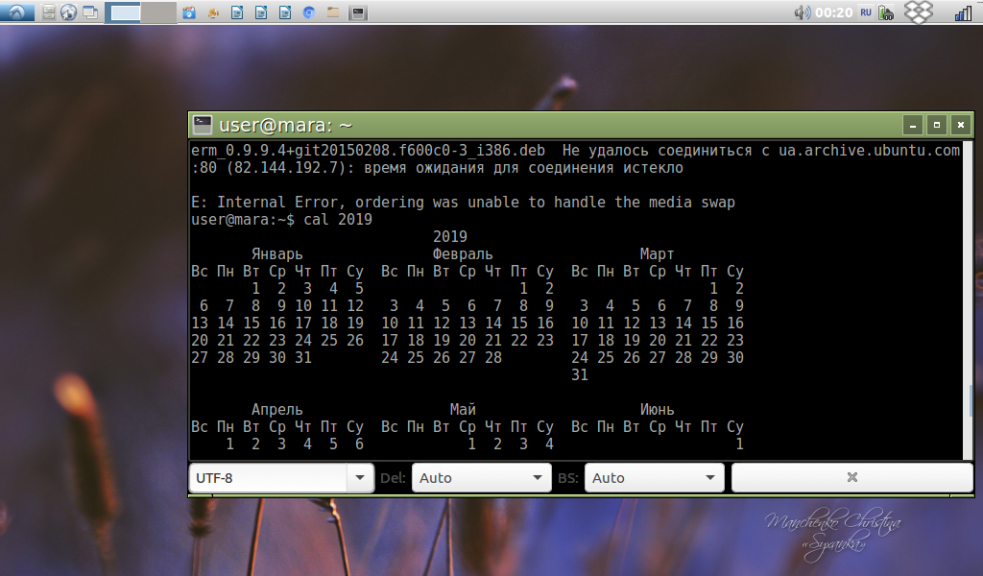
4. Cool Retro Term
Этот эмулятор терминала linux не спутаешь ни с каким другим — его окно выглядит точь-в-точь как экран компьютера из 90-х. Предлагаемые пользователю цветовые темы и эффекты еще больше усиливают ностальгию по беззаветно ушедшим временам. Что же касается функций, то их набор вполне стандартный.
5. Guake Linux Terminal
Легкий и простой, но одновременно красивый терминал linux — именно так можно описать Guake. Запускается и сворачивается после нажатия горячей клавиши. Изначально он был разработан для рабочей среды Gnome, но используется и на других графических оболочках. Основа Guake — эмулятор, который был использован в Quake, отсюда и созвучность названий.
- Позволяет открывать мультиэкраны и мультиокна.
- Настройка цветовых схем с использованием сотен предустановленных паттернов.
- Быстрый и легковесный.
- Эргономичный интерфейс.
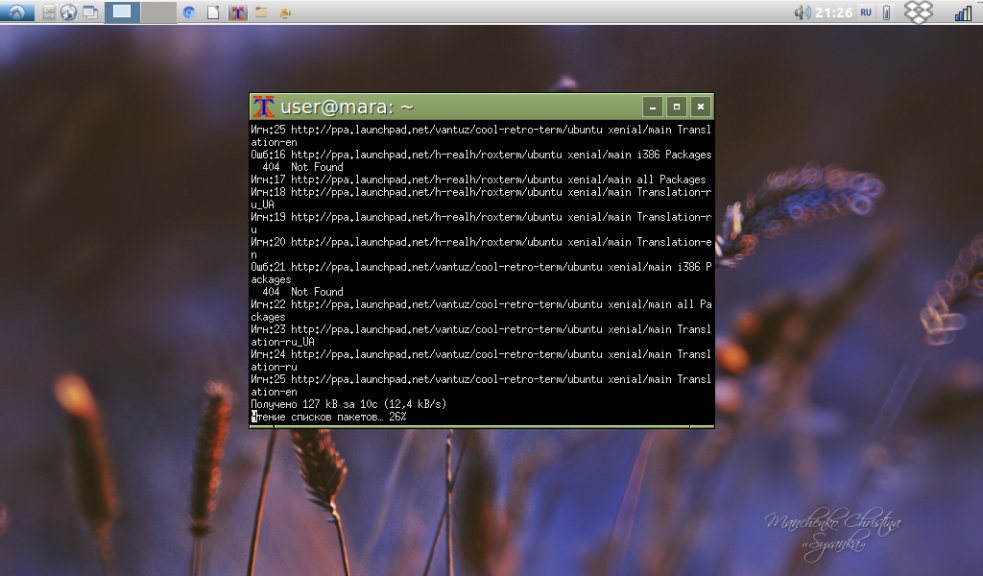
6. ROXTerm
По сути это продвинутый аналог GNOME Terminal. Основной набор функций у этих программ ничем не отличается. Здесь также присутствует возможность управления терминалом при помощи горячих клавиш, создание пользовательских профилей и настройки цвета.
7. Konsole

По умолчанию входит в комплект базовых программ для среды KDE и, являясь одним из её компонентов, обеспечивает поддержку таких приложений как KDevelop, Kate, Konqueror и других.
- Поддерживает работу в нескольких вкладках.
- Прозрачный фон.
- Выдачу терминала можно сохранить в текстовом формате либо в виде HTML-файла.
- Последовательный поиск и работа с файловым менеджером Dolphin.
- Закладки для каталогов и SSH.
8. Terminology
Неплохой эмулятор терминала с функцией предварительного просмотра файлов. Умеет автоматически определять кликабельные ссылки и выделяет их в массиве текста.
- Позволяет открывать несколько окон, одновременно разбивая их на отдельные панели.
- Панели в свою очередь могут состоять из множества вкладок.
- Размер вкладок и их расположение легко изменить так, как нужно пользователю.
9. LilyTerm
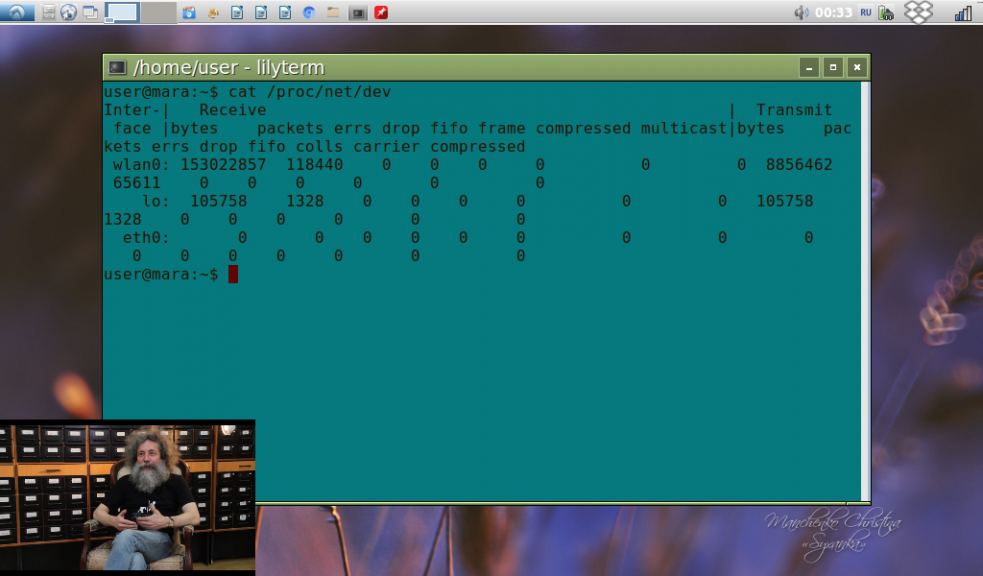
Менее известный, чем остальные, но не менее достойный внимания эмулятор терминала для Linux с открытым исходным кодом. Набор опций — стандартный.
- Быстрый, легковесный.
- Поддерживает кодировку UTF-8.
- Дает возможность создавать несколько профилей.
- Управление вкладками через горячие клавиши.
- Фон можно сделать прозрачным.
10. Xfce Terminal
Прост в настройке и использовании, что станет плюсом для тех, кто лишь недавно познакомился с Linux. Кроме стандартных функций предлагает множество дополнительных.
- Прозрачный фон.
- Вместо указания пути к файлу, файл можно просто перетянуть в окно терминала.
- Разрешает настраивать размер окон и панели управления.
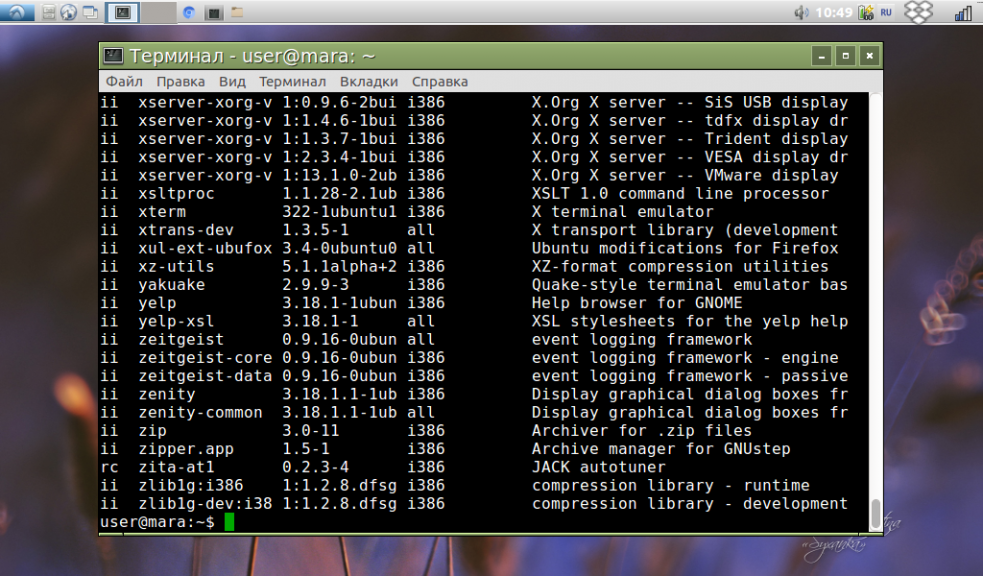
11. Xterm
Одна из наиболее старых программ для терминала Linux, которая была создана еще для системы X Window. Подойдет обладателям маломощных машин, которые стараются выбирать наиболее легкие и версии приложений. Функциональности хватит для выполнения несложных задач.
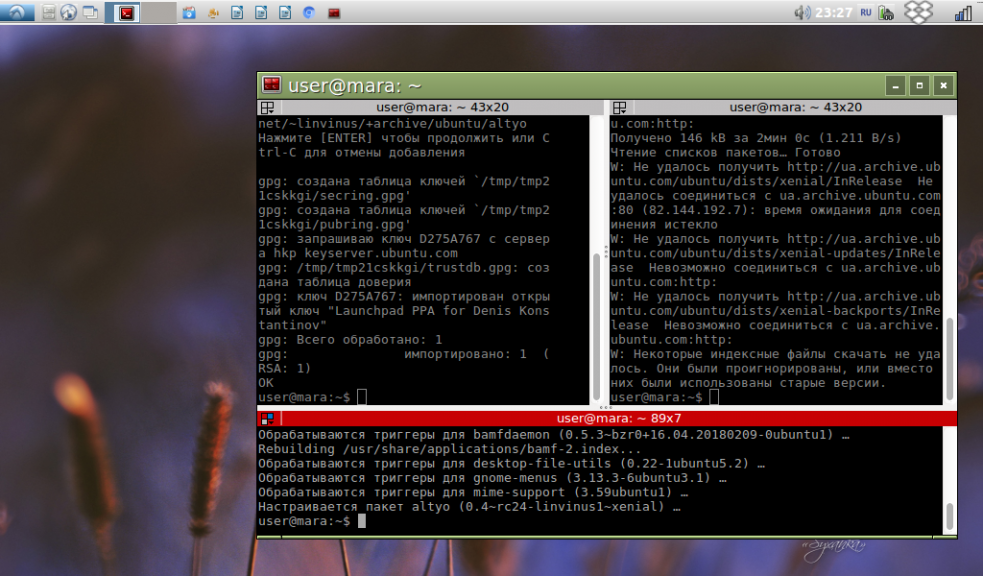
12. AltYo
Выпадающий эмулятор, который может быть открыт в любом месте экрана. Обладает обширным набором функций.
- Позволяет работать со вкладками.
- Вкладки можно заблокировать, чтобы случайно не закрыть.
13. Terminator
Этот эмулятор терминала Linux поддерживает работу со множественными вкладками терминала. Рекомендован для рабочих столов Gnome, хотя, может быть использован в любой среде.
- Расположение терминалов в сетке.
- Настройка горячих клавиш.
- Вкладки можно перетягивать с места на место в любом порядке.
14. Qterminal
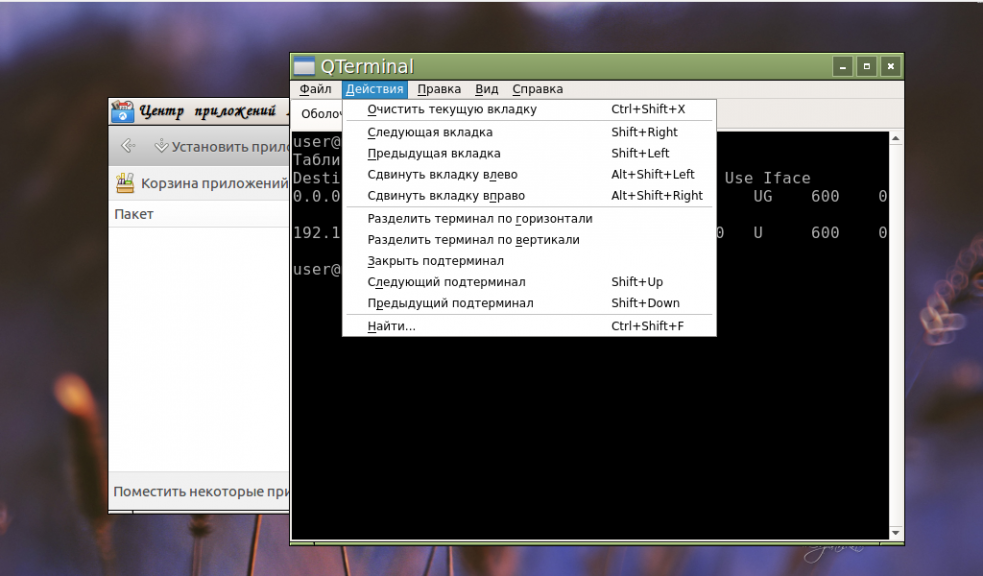
Один из лучших легковесных программ терминала для Linux. Его преимущество — наличие множества функций и полная кастомная настройка. Изменить можно почти все, включая шрифт, цвет текста и фона, сочетания клавиш, закладки, но не ограничиваясь этим списком.
15. Tilda
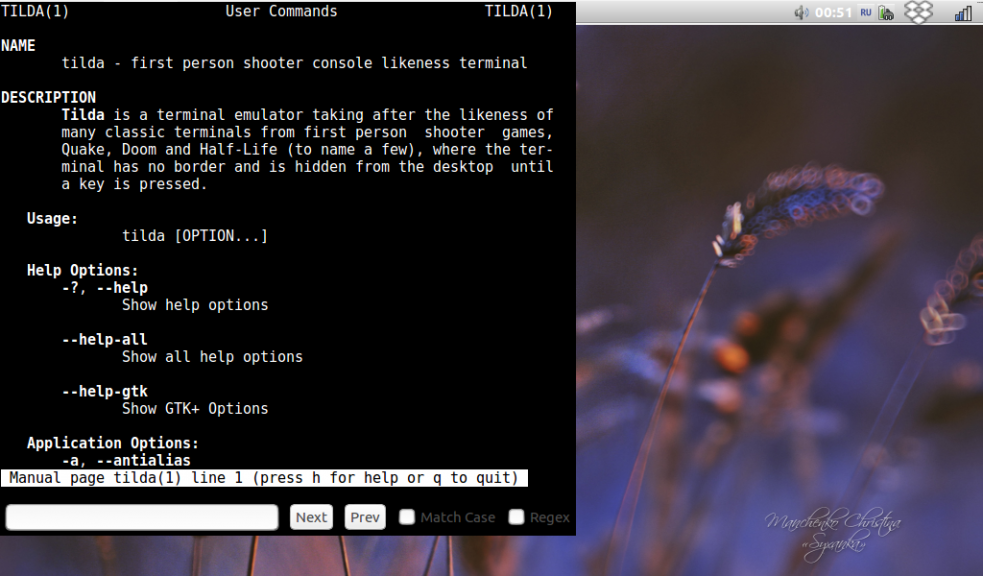
Красивая и легкая программа. «Из коробки» имеет минимум функций, однако, пользователь может настроить все параметры так, как ему нужно, в том числе и создать горячие клавиши.
- Окно появляется в верхней части экрана, но может быть перемещено.
- Запуск с использованием одной клавиши.
- Простая настройка.
Выводы
Вот и подошел к концу наш список лучшие эмуляторы терминала Linux. Почти каждый из эмуляторов имеет характерные особенности и функции, которые реализованы в нем гораздо лучше, чем в аналогичных программах. Прежде чем отдать предпочтение одному из них, стоит проанализировать его возможности и решить, будет ли их достаточно для выполнения повседневных задач. Если же вашего любимого терминала нет в этом списке, расскажите о нем в комментариях к статье.
Источник
Top 14 Terminal Emulators for Linux (With Extra Features or Amazing Looks)
Last updated April 7, 2021 By Ankush Das 48 Comments
By default, all Linux distributions already come pre-installed with a terminal application or terminal emulator (correct technical term). Of course, depending on the desktop environment, it will look and feel different.
Here’s the thing about Linux. You are not restricted to what your distribution provides. You can opt for an alternative application of your choice. Terminal is no different. There are several impressive terminal emulators that offer unique features for a better user experience or for better looks.
Here, I will be compiling a list of such interesting terminal applications that you can try on your Linux distribution.
Awesome Terminal Emulators for Linux
The list is in no particular order of ranking. I’ve tried to list the interesting ones first followed by some of the most popular terminal emulators. Also, I have highlighted the key features for every terminal emulator mentioned, choose what you prefer.
1. Terminator
» data-medium-file=»https://i1.wp.com/itsfoss.com/wp-content/uploads/2021/03/terminator-terminal.jpg?fit=300%2C164&ssl=1″ data-large-file=»https://i1.wp.com/itsfoss.com/wp-content/uploads/2021/03/terminator-terminal.jpg?fit=800%2C436&ssl=1″ loading=»lazy» width=»800″ height=»436″ src=»https://i1.wp.com/itsfoss.com/wp-content/uploads/2021/03/terminator-terminal.jpg?resize=800%2C436&ssl=1″ alt=»terminator terminal» srcset=»https://i1.wp.com/itsfoss.com/wp-content/uploads/2021/03/terminator-terminal.jpg?w=800&ssl=1 800w, https://i1.wp.com/itsfoss.com/wp-content/uploads/2021/03/terminator-terminal.jpg?resize=300%2C164&ssl=1 300w, https://i1.wp.com/itsfoss.com/wp-content/uploads/2021/03/terminator-terminal.jpg?resize=768%2C419&ssl=1 768w, https://i1.wp.com/itsfoss.com/wp-content/uploads/2021/03/terminator-terminal.jpg?resize=100%2C55&ssl=1 100w» sizes=»(max-width: 800px) 100vw, 800px» data-recalc-dims=»1″/>
Key Highlights:
- Multiple GNOME terminals in one window
Terminator is decently popular terminal emulator which is still being maintained (moved from Launchpad to GitHub).
It basically provides you multiple GNOME terminals in one window. You can easily group and re-group terminal windows with the help of it. You may feel like using a tiling window manager but with some restrictions.
How to install Terminator?
For Ubuntu-based distros, all you have to do is type in the following command in the terminal:
You should find it in most of Linux distributions through the default repositories. But, if you need help installing, go through the GitHub page.
2. Guake Terminal
» data-medium-file=»https://i1.wp.com/itsfoss.com/wp-content/uploads/2021/02/guake-terminal-2.png?fit=300%2C162&ssl=1″ data-large-file=»https://i1.wp.com/itsfoss.com/wp-content/uploads/2021/02/guake-terminal-2.png?fit=800%2C432&ssl=1″ loading=»lazy» width=»800″ height=»432″ src=»https://i1.wp.com/itsfoss.com/wp-content/uploads/2021/02/guake-terminal-2.png?resize=800%2C432&ssl=1″ alt=»guake terminal 2″ srcset=»https://i1.wp.com/itsfoss.com/wp-content/uploads/2021/02/guake-terminal-2.png?w=800&ssl=1 800w, https://i1.wp.com/itsfoss.com/wp-content/uploads/2021/02/guake-terminal-2.png?resize=300%2C162&ssl=1 300w, https://i1.wp.com/itsfoss.com/wp-content/uploads/2021/02/guake-terminal-2.png?resize=768%2C415&ssl=1 768w, https://i1.wp.com/itsfoss.com/wp-content/uploads/2021/02/guake-terminal-2.png?resize=100%2C54&ssl=1 100w, https://i1.wp.com/itsfoss.com/wp-content/uploads/2021/02/guake-terminal-2.png?resize=150%2C81&ssl=1 150w» sizes=»(max-width: 800px) 100vw, 800px» data-recalc-dims=»1″/>
Key Highlights:
- Tailored for quick access to terminal on GNOME
- Works fast and does not need a lot of system resource
- Shortcut key to access
Guake terminal was originally inspired by an FPS game Quake. Unlike some other terminal emulators, it works as an overlay on every other active window.
All you have to do is summon the emulator using a shortcut key (F12) and it will appear from the top. You get customize the width or position of the emulator, but most of the users should be fine with the default setting.
Not just as a handy terminal emulator, it offers a ton of features like ability to restore tabs, having multiple tabs, color-coding each tab, and more. You can check out my separate article on Guake to learn more.
How to install Guake Terminal?
Guake is available in the default repositories for most of the Linux distributions. You can refer to its official installation instructions.
Or if you’re using Debian-based distro, just type in the following command:
3. Tilix Terminal
» data-medium-file=»https://i1.wp.com/itsfoss.com/wp-content/uploads/2021/03/tilix-screenshot.png?fit=300%2C173&ssl=1″ data-large-file=»https://i1.wp.com/itsfoss.com/wp-content/uploads/2021/03/tilix-screenshot.png?fit=800%2C460&ssl=1″ loading=»lazy» width=»800″ height=»460″ src=»https://i1.wp.com/itsfoss.com/wp-content/uploads/2021/03/tilix-screenshot.png?resize=800%2C460&ssl=1″ alt=»tilix screenshot» srcset=»https://i1.wp.com/itsfoss.com/wp-content/uploads/2021/03/tilix-screenshot.png?w=800&ssl=1 800w, https://i1.wp.com/itsfoss.com/wp-content/uploads/2021/03/tilix-screenshot.png?resize=300%2C173&ssl=1 300w, https://i1.wp.com/itsfoss.com/wp-content/uploads/2021/03/tilix-screenshot.png?resize=768%2C442&ssl=1 768w, https://i1.wp.com/itsfoss.com/wp-content/uploads/2021/03/tilix-screenshot.png?resize=100%2C58&ssl=1 100w» sizes=»(max-width: 800px) 100vw, 800px» data-recalc-dims=»1″/>
Key Highlights:
- Tiling feature
- Drag and drop support
- Drop down Quake mode
Tilix Terminal offers a similar drop-down experience that you find with Guake – but it also lets you have multiple terminal windows in tiling mode.
This is particularly useful if you do not have tiling windows by default in your Linux distribution and have a big screen to work on multiple terminal windows without needing to switching between workspaces.
We’ve already covered it before separately if you’re curious to learn more about it.
How to install Tilix?
Tilix is available in the default repositories for most of the distributions. If you’re using Ubuntu-based distro, simply type in:
Recommended Read:

5 Tweaks to Customize the Look of Your Linux Terminal
Want to beautify your Linux terminal and give it a different look? Here are a few ways you can customize your terminal.
4. Hyper
» data-medium-file=»https://i1.wp.com/itsfoss.com/wp-content/uploads/2021/03/hyper-screenshot.png?fit=300%2C198&ssl=1″ data-large-file=»https://i1.wp.com/itsfoss.com/wp-content/uploads/2021/03/hyper-screenshot.png?fit=800%2C527&ssl=1″ loading=»lazy» width=»800″ height=»527″ src=»https://i1.wp.com/itsfoss.com/wp-content/uploads/2021/03/hyper-screenshot.png?resize=800%2C527&ssl=1″ alt=»hyper screenshot» srcset=»https://i1.wp.com/itsfoss.com/wp-content/uploads/2021/03/hyper-screenshot.png?w=800&ssl=1 800w, https://i1.wp.com/itsfoss.com/wp-content/uploads/2021/03/hyper-screenshot.png?resize=300%2C198&ssl=1 300w, https://i1.wp.com/itsfoss.com/wp-content/uploads/2021/03/hyper-screenshot.png?resize=768%2C506&ssl=1 768w, https://i1.wp.com/itsfoss.com/wp-content/uploads/2021/03/hyper-screenshot.png?resize=100%2C66&ssl=1 100w» sizes=»(max-width: 800px) 100vw, 800px» data-recalc-dims=»1″/>
Key Highlights:
- Terminal built on HTML/CSS/JS
- Electron-based
- Cross-platform
- Extensive configuration options
Hyper is yet another interesting terminal emulator that is built on web technologies. It doesn’t provide a unique user experience, but looks quite different and offers a ton of customization options.
It also supports installing themes and plugins to easily customize the appearance of the terminal. You can explore more about it in their GitHub page.
How to install Hyper?
Hyper is not available in the default repositories. However, you can find both .deb and .rpm packages available to install through their official website.
If you’re new, read through the articles to get help using deb files and using RPM files.
5. Tilda
» data-medium-file=»https://i2.wp.com/itsfoss.com/wp-content/uploads/2021/03/tilda-terminal.jpg?fit=300%2C160&ssl=1″ data-large-file=»https://i2.wp.com/itsfoss.com/wp-content/uploads/2021/03/tilda-terminal.jpg?fit=800%2C427&ssl=1″ loading=»lazy» width=»800″ height=»427″ src=»https://i2.wp.com/itsfoss.com/wp-content/uploads/2021/03/tilda-terminal.jpg?resize=800%2C427&ssl=1″ alt=»tilda terminal» srcset=»https://i2.wp.com/itsfoss.com/wp-content/uploads/2021/03/tilda-terminal.jpg?w=800&ssl=1 800w, https://i2.wp.com/itsfoss.com/wp-content/uploads/2021/03/tilda-terminal.jpg?resize=300%2C160&ssl=1 300w, https://i2.wp.com/itsfoss.com/wp-content/uploads/2021/03/tilda-terminal.jpg?resize=768%2C410&ssl=1 768w, https://i2.wp.com/itsfoss.com/wp-content/uploads/2021/03/tilda-terminal.jpg?resize=100%2C53&ssl=1 100w» sizes=»(max-width: 800px) 100vw, 800px» data-recalc-dims=»1″/>
Key Highlights:
- Drop down terminal
- Search bar integrated
Tilda is another drop-down GTK-based terminal emulator. Unlike some others, it focuses on providing an integrated search bar which you can toggle and also lets you customize many things.
You can also set hotkeys for quick access or a certain action. Functionally, it is quite impressive. However, visually, I don’t like how the overlay behaves and does not support drag and drop as well. You might give it a try though.
How to install Tilda?
For Ubuntu-based distros, you can simply type in:
You can refer to its GitHub page for installation instructions on other distributions.
6. eDEX-UI

Key Highlights:
- Sci-Fi Look
- Cross-platform
- Theme options to customize
- Supports Multiple terminal tabs
If you’re not looking particularly for a terminal emulator to help you get your work done faster, eDEX-UI is something that you must try.
It is absolutely a beautiful terminal emulator for sci-fi fans and for users who just want their terminal to look unique. In case you didn’t know, it is heavily inspired from the TRON legacy movie.
Not just the design or the interface, overall, it offers you a unique user experience that you will enjoy. It also lets you customize the terminal. It does require a significant amount of system resource if you’re planning to try it.
You might want to check our dedicated article on eDEX-UI to know more about it and the steps to install it.
How to install eDEX-UI?
You can find it in some of the repositories that include AUR. In either case, you can grab a package available for your Linux distribution (or an AppImage file) from its GitHub releases section.
Recommended Read:
5 Tweaks to Customize the Look of Your Linux Terminal
Want to beautify your Linux terminal and give it a different look? Here are a few ways you can customize your terminal.
7. Cool Retro Terminal

Key Highlights:
- Retro Theme
- Animation/Effects to tweak
Cool Retro Terminal is a unique terminal emulator that provides you with a look of a vintage cathode ray tube monitor.
If you’re looking for some extra-functionality terminal emulator, this may disappoint you. However, it is impressive to note that it is decently light on resources and allows you to customize the color, effects, and fonts.
How to install Cool Retro Terminal?
You can find all the installation instructions for major Linux distributions in its GitHub page. For Ubuntu-based distros, you can type in the following in the terminal:
8. Alacritty
» data-medium-file=»https://i1.wp.com/itsfoss.com/wp-content/uploads/2021/03/alacritty-screenshot.png?fit=300%2C186&ssl=1″ data-large-file=»https://i1.wp.com/itsfoss.com/wp-content/uploads/2021/03/alacritty-screenshot.png?fit=800%2C496&ssl=1″ loading=»lazy» width=»800″ height=»496″ src=»https://i1.wp.com/itsfoss.com/wp-content/uploads/2021/03/alacritty-screenshot.png?resize=800%2C496&ssl=1″ alt=»alacritty screenshot» srcset=»https://i1.wp.com/itsfoss.com/wp-content/uploads/2021/03/alacritty-screenshot.png?w=800&ssl=1 800w, https://i1.wp.com/itsfoss.com/wp-content/uploads/2021/03/alacritty-screenshot.png?resize=300%2C186&ssl=1 300w, https://i1.wp.com/itsfoss.com/wp-content/uploads/2021/03/alacritty-screenshot.png?resize=768%2C476&ssl=1 768w, https://i1.wp.com/itsfoss.com/wp-content/uploads/2021/03/alacritty-screenshot.png?resize=100%2C62&ssl=1 100w» sizes=»(max-width: 800px) 100vw, 800px» data-recalc-dims=»1″/>
Key Highlights:
- Cross-platform
- Extension options and focuses on integration
Alacritty is an interesting open-source cross-platform terminal emulator. Even though it is considered as something in “beta” phase, it still works.
It aims to provide you extensive configuration options while keeping the performance in mind. For instance, the ability to click through a URL using a keyboard, copying text to a clipboard, and performing a search using “Vi” mode may intrigue you to try it.
You can explore its GitHub page for more information.
How to install Alacritty?
Alacritty can be installed using package managers says the official GitHub page, but I couldn’t find it in the default repository or synaptic package manager on Linux Mint 20.1.
You can follow the installation instructions to set it up manually if you want to try it.
9. Konsole
» data-medium-file=»https://i0.wp.com/itsfoss.com/wp-content/uploads/2021/03/konsole-screenshot.png?fit=300%2C192&ssl=1″ data-large-file=»https://i0.wp.com/itsfoss.com/wp-content/uploads/2021/03/konsole-screenshot.png?fit=800%2C512&ssl=1″ loading=»lazy» width=»800″ height=»512″ src=»https://i0.wp.com/itsfoss.com/wp-content/uploads/2021/03/konsole-screenshot.png?resize=800%2C512&ssl=1″ alt=»konsole screenshot» srcset=»https://i0.wp.com/itsfoss.com/wp-content/uploads/2021/03/konsole-screenshot.png?w=800&ssl=1 800w, https://i0.wp.com/itsfoss.com/wp-content/uploads/2021/03/konsole-screenshot.png?resize=300%2C192&ssl=1 300w, https://i0.wp.com/itsfoss.com/wp-content/uploads/2021/03/konsole-screenshot.png?resize=768%2C492&ssl=1 768w, https://i0.wp.com/itsfoss.com/wp-content/uploads/2021/03/konsole-screenshot.png?resize=100%2C64&ssl=1 100w» sizes=»(max-width: 800px) 100vw, 800px» data-recalc-dims=»1″/>
Key Highlights:
- KDE’s terminal
- Lightweight and customizable
If you’re not a newbie, this probably needs no introduction. Konsole is the default terminal emulator for KDE desktop environments.
Not just limited to that, it also comes integrated with a lot of KDE apps as well. Even if you’re using some other desktop environment, you can still try Konsole. It is a lightweight terminal emulator with a host of features.
You can have multiple tabs and multiple grouped windows as well. Lot of customization options to change the look and feel of the terminal emulator as well.
How to install Konsole?
For Ubuntu-based distros and most other distributions, you can install it using the default repository. With Debian-based distros, you just need to type this in the terminal:
10. GNOME Terminal
» data-medium-file=»https://i1.wp.com/itsfoss.com/wp-content/uploads/2021/02/default-terminal.jpg?fit=300%2C191&ssl=1″ data-large-file=»https://i1.wp.com/itsfoss.com/wp-content/uploads/2021/02/default-terminal.jpg?fit=773%2C493&ssl=1″ loading=»lazy» width=»773″ height=»493″ src=»https://i1.wp.com/itsfoss.com/wp-content/uploads/2021/02/default-terminal.jpg?resize=773%2C493&ssl=1″ alt=»Default Terminal» srcset=»https://i1.wp.com/itsfoss.com/wp-content/uploads/2021/02/default-terminal.jpg?w=773&ssl=1 773w, https://i1.wp.com/itsfoss.com/wp-content/uploads/2021/02/default-terminal.jpg?resize=300%2C191&ssl=1 300w, https://i1.wp.com/itsfoss.com/wp-content/uploads/2021/02/default-terminal.jpg?resize=768%2C490&ssl=1 768w, https://i1.wp.com/itsfoss.com/wp-content/uploads/2021/02/default-terminal.jpg?resize=100%2C64&ssl=1 100w, https://i1.wp.com/itsfoss.com/wp-content/uploads/2021/02/default-terminal.jpg?resize=150%2C96&ssl=1 150w» sizes=»(max-width: 773px) 100vw, 773px» data-recalc-dims=»1″/>
Key Highlights:
- GNOME’s terminal
- Simple yet customizable
If you’re utilizing any Ubuntu-based GNOME distribution, it already comes baked in. It may not be as customizable as Konsole (depends on what you’re doing) but it lets you configure most of the important aspects of the terminal easily.
Overall, it offers a good user experience and an easy-to-use interface with essential functions.
I’ve also covered a tutorial to customize your GNOME terminal if you’re curious.
How to install GNOME Terminal?
If you’re not using GNOME desktop but want to try it out, you can easily install it through the default repositories.
For Debian-based distros, here’s what you need to type in the terminal:
11. Yakuake
» data-medium-file=»https://i0.wp.com/itsfoss.com/wp-content/uploads/2021/04/yakuake-terminal.png?fit=300%2C165&ssl=1″ data-large-file=»https://i0.wp.com/itsfoss.com/wp-content/uploads/2021/04/yakuake-terminal.png?fit=800%2C440&ssl=1″ loading=»lazy» width=»1001″ height=»551″ src=»https://i0.wp.com/itsfoss.com/wp-content/uploads/2021/04/yakuake-terminal.png?resize=1001%2C551&ssl=1″ alt=»yakuake terminal» srcset=»https://i0.wp.com/itsfoss.com/wp-content/uploads/2021/04/yakuake-terminal.png?w=1001&ssl=1 1001w, https://i0.wp.com/itsfoss.com/wp-content/uploads/2021/04/yakuake-terminal.png?resize=300%2C165&ssl=1 300w, https://i0.wp.com/itsfoss.com/wp-content/uploads/2021/04/yakuake-terminal.png?resize=800%2C440&ssl=1 800w, https://i0.wp.com/itsfoss.com/wp-content/uploads/2021/04/yakuake-terminal.png?resize=768%2C423&ssl=1 768w» sizes=»(max-width: 1000px) 100vw, 1000px» data-recalc-dims=»1″/>
Key Highlights:
- Drop down terminal
- Based on KDE’s Konsole
Yakuake is yet another impressive terminal emulator which can replace Guake depending on what you like. It is based on KDE’s Konsole technologies which is also a powerful terminal emulator that comes loaded by default with KDE Desktop.
It supports customizing the width, height, and also gives you the option of a full-screen mode. You can add multiple shells as well.
You also get to create/manage profiles and assign keyboard shortcuts to adapt with your workflow.
How to install Yakuake?
You should find it in your default repositories. To install on any Ubuntu-based distro, all you have to type in the terminal is:
If you do not find it in the repository of your Linux distribution, you can try to build and install it by following the instructions in its GitHub page.
12. Kitty
» data-medium-file=»https://i0.wp.com/itsfoss.com/wp-content/uploads/2021/04/kitty-terminal.png?fit=300%2C173&ssl=1″ data-large-file=»https://i0.wp.com/itsfoss.com/wp-content/uploads/2021/04/kitty-terminal.png?fit=775%2C448&ssl=1″ loading=»lazy» width=»775″ height=»448″ src=»https://i0.wp.com/itsfoss.com/wp-content/uploads/2021/04/kitty-terminal.png?resize=775%2C448&ssl=1″ alt=»kitty terminal» srcset=»https://i0.wp.com/itsfoss.com/wp-content/uploads/2021/04/kitty-terminal.png?w=775&ssl=1 775w, https://i0.wp.com/itsfoss.com/wp-content/uploads/2021/04/kitty-terminal.png?resize=300%2C173&ssl=1 300w, https://i0.wp.com/itsfoss.com/wp-content/uploads/2021/04/kitty-terminal.png?resize=768%2C444&ssl=1 768w» sizes=»(max-width: 775px) 100vw, 775px» data-recalc-dims=»1″/>
Key Highlights:
- Feature-rich
- GPU-based
- Fast performance
- Cross-platform (macOS)
Kitty is apparently an underrated and a popular option among terminal emulator users that I seemed to have missed in the first version of this article.
It offers plenty of useful features while supporting tiling window as well. Also, it is a GPU-based emulator which depends on the GPU and takes the load off CPU when you work on it.
Especially, if you are a power keyboard user, this will be an exciting option for you to try!
How to install Kitty?
Kitty should be available in all the default repositories of your Linux distributions. For Ubuntu-based systems, you can install it by typing:
To integrate it with your desktop or if you want an alternative installation method for your system, you can refer the official installation instructions.
13. Simple Terminal (st)
» data-medium-file=»https://i0.wp.com/itsfoss.com/wp-content/uploads/2021/04/simple-terminal.png?fit=300%2C198&ssl=1″ data-large-file=»https://i0.wp.com/itsfoss.com/wp-content/uploads/2021/04/simple-terminal.png?fit=595%2C392&ssl=1″ loading=»lazy» width=»595″ height=»392″ src=»https://i0.wp.com/itsfoss.com/wp-content/uploads/2021/04/simple-terminal.png?resize=595%2C392&ssl=1″ alt=»simple terminal» srcset=»https://i0.wp.com/itsfoss.com/wp-content/uploads/2021/04/simple-terminal.png?w=595&ssl=1 595w, https://i0.wp.com/itsfoss.com/wp-content/uploads/2021/04/simple-terminal.png?resize=300%2C198&ssl=1 300w» sizes=»(max-width: 595px) 100vw, 595px» data-recalc-dims=»1″/>
Key Highlights:
- Simple terminal with essential features
- Wayland supported
Simple Terminal or popularly known as st is an alternative for users who dislike bloated terminal emulators like xterm or rxvt.
It offers a couple of useful features like 256 color support and more.
How to install st?
For Ubuntu-based distros, you can install it by typing in:
You can try looking for the same package on your distro. It should be available as st in AUR for Arch-based distros as well. If you don’t find it, you can simply download the archive file from its official website to build it from source.
14. XTERM
» data-medium-file=»https://i2.wp.com/itsfoss.com/wp-content/uploads/2021/04/xterm-terminal.png?fit=300%2C211&ssl=1″ data-large-file=»https://i2.wp.com/itsfoss.com/wp-content/uploads/2021/04/xterm-terminal.png?fit=660%2C464&ssl=1″ loading=»lazy» width=»660″ height=»464″ src=»https://i2.wp.com/itsfoss.com/wp-content/uploads/2021/04/xterm-terminal.png?resize=660%2C464&ssl=1″ alt=»xterm terminal» srcset=»https://i2.wp.com/itsfoss.com/wp-content/uploads/2021/04/xterm-terminal.png?w=660&ssl=1 660w, https://i2.wp.com/itsfoss.com/wp-content/uploads/2021/04/xterm-terminal.png?resize=300%2C211&ssl=1 300w» sizes=»(max-width: 660px) 100vw, 660px» data-recalc-dims=»1″/>
Key Highlights:
- Feature-rich
- One of the oldest terminal emulators
XTERM is one of the most popular terminal emulators out there. Even though it might seem to be a bloated option when compared to st, it’s still a decent option that you can try for X Window System.
It’s been actively developed for more than two decades now and seems to be constantly evolving. This is not visually appealing nor offers things like drop-down mode, but you can try it out.
How to install XTERM?
You can easily find it in your system repositories. For Ubuntu-based distros, you can install it by the following command:
You can find other packages (including NetBSD) from its official website.
Honorable Mention
urxvt is a fork of rxvt terminal emulator with unicode support that you might want to know. It allows you to have multiple windows on different displays along with a bunch of other features.
Unfortunately, the official website is being flagged by Firefox due to SSL certificates being messed up for it and the changelog seems to be last updated in 2016. Hence, I’ve avoided linking it here, you’re free to explore more about it by yourself if you’re curious.
Wrapping Up
There are several terminal emulators available out there. You can try anything you like if you’re looking for a different user experience. However, if you’re aiming for a stable and productive experience, you need to test the terminal emulators before you can rely on them.
For most of the users, the default terminal emulators should be good enough. But, if you’re looking for quick access (Quake Mode) or Tiling feature or multiple windows in a terminal, feel free to try out the options mentioned above.
What’s your favorite terminal emulator on Linux? Did I miss listing your favorite? Feel free to let me know your thoughts in the comments down below.
Like what you read? Please share it with others.
Источник


