- Как в Windows 10 включить функцию X-Mouse
- Change Mouse Pointer and Cursor size on Windows-10, (smaller, larger)?
- The size of the mouse pointer is adjustable in Windows 10, the solution is simple to change mouse pointer and default cursor size on Windows 10!
- 1.) . The fastest Way to change the Mouse pointer size! 2.) . The biggest Mouse Pointer and Cursor for Windows-10!
- 1.) The fastest Way to change the Mouse pointer size!
- 2.) The biggest Mouse Pointer and Cursor for Windows-10!
- How to change mouse pointer size on Windows 10
- How to change pointer size using Settings
- How to change pointer size using Control Panel
- How to fix mouse lags in Windows 10 (and make it fast again)
- How can I solve mouse lags in Windows 10?
- 1. Install the official mouse driver
- Driverfix
- 2. Enable / Disable Scroll Inactive Windows
- 3. Change Palm Check Threshold
- 4. Set the touchpad to No Delay
- 5. Turn off Cortana
- 6. Disable NVIDIA High Definition Audio
- 7. Change your mouse frequency
- 8. Disable Fast Startup
Как в Windows 10 включить функцию X-Mouse

Как и в других операционных системах, активным в Windows может быть только одно окно, другие при этом будут находиться в фоне. Чтобы сделать окно активным или иначе перенести в него фокус, пользователю необходимо кликнуть по окну. Но это по умолчанию, делать активными окна вы можете просто наводя на них курсор мыши. Эта функция называется X-Mouse. Она востребована в ОС Linux, а вот среди пользователей Windows X-Mouse почему-то не получила широкого признания, хотя в системе она появилась очень давно, еще в 95-й версии.
Более того, многие пользователи даже не подозревают о её существовании, и когда им приходит в голову идея реализоввать у себя автоматическое переключение фокуса наведением курсра мыши на окно, они начинают искать сторонние приложения, а ведь всё что нужно, так это просто включить X-Mouse в настройках.
Давайте посмотрим, как это делается на примере с Windows 10.
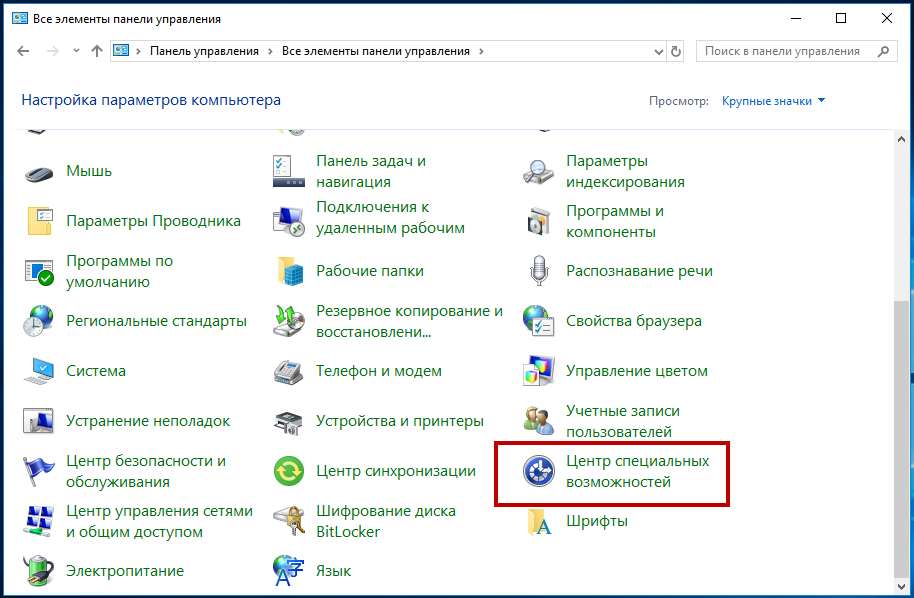
Откройте любым удобным вам способом классическую панель управления, запустите апплет «Центр специальных возможностей».
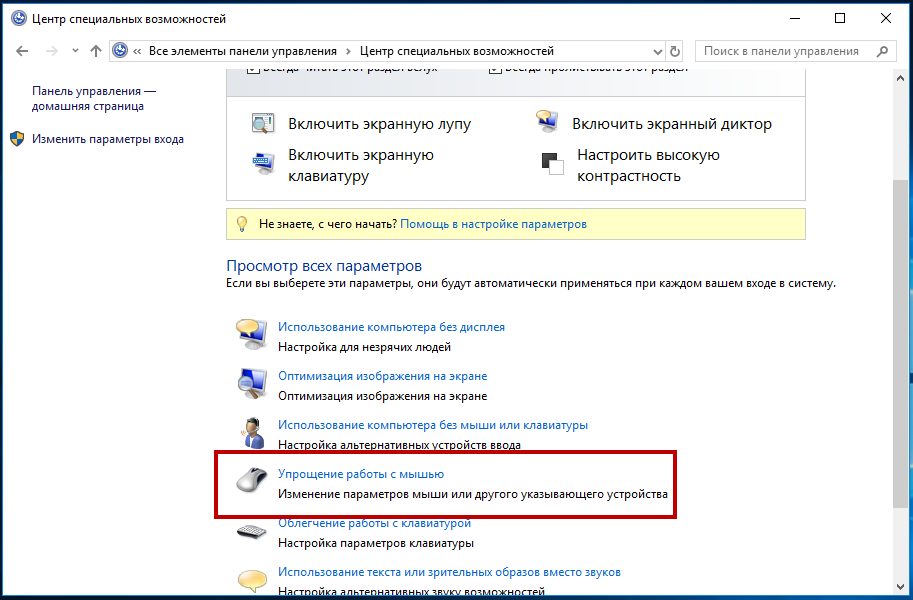
И нажмите ссылку «Упрощение работы с мышью».
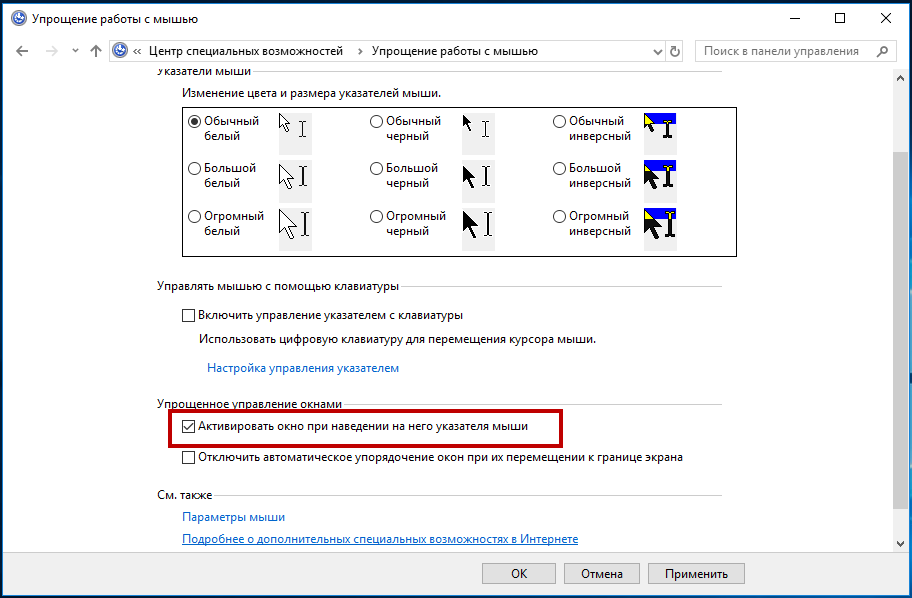
В следующем окне настроек установите галочку в чекбоксе «Активировать окно при наведении на него указателя мыши» и сохраните настройки.
Готово, теперь можно испытать X-Mouse в действии.
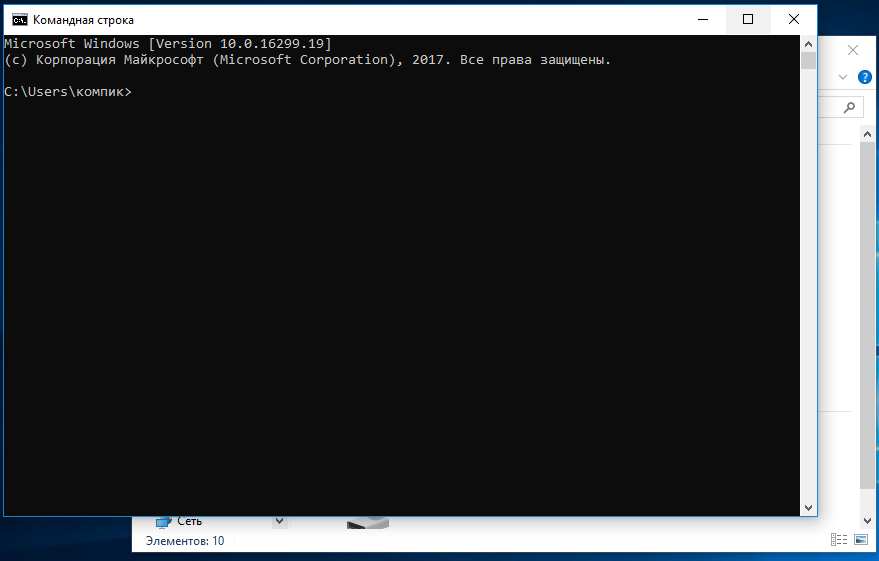
Откройте на рабочем столе, к примеру, окно Проводника и командную строку. Если вы наведете мышку на расположенную на втором плане консоль, она тут же окажется на переднем плане и станет при этом активной, так что вы сходу сможете вводить в неё данные. Окно Проводника, наоборот, утратит фокус и переместится на второй план.
И ещё один момент.
По умолчанию для изменения фокуса окон при наведении на них курсора мыши стоит задержка 500 миллисекунд. А вот как быть, если вы захотите сократить или, напротив, удлинить время задержки, ведь в интерфейсе Windows нет соответствующей опции?
Сделать это можно через реестр.
Откроете редактор реестра командой regedit и разверните ветку:
Справа найдите парамер ActiveWndTrkTimeout и измените его значение, предварительно переключившись в десятичную систему счисления. Если вы хотите, чтобы фокус перемещался между окнами мгновенно, установите в качестве значения параметра 0.
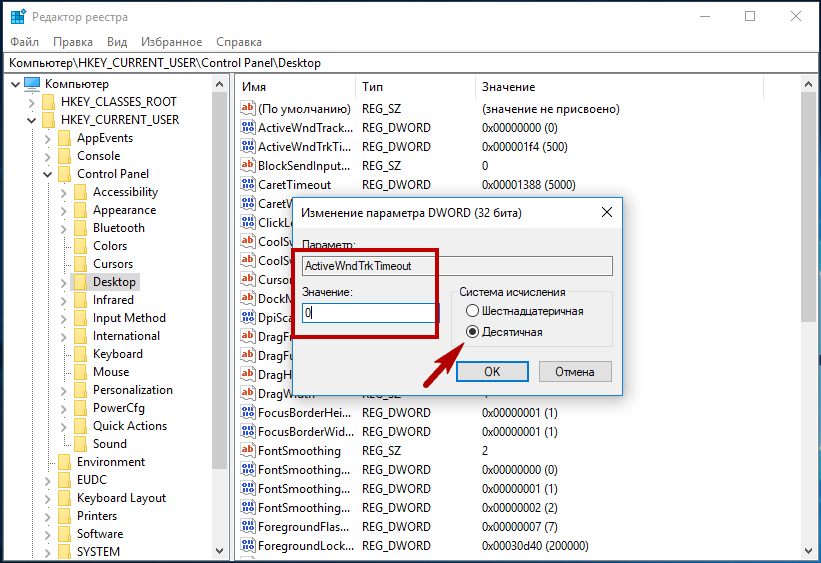
Чтобы увеличить задержку, допустим, до 1 секунды, задайте значение 1000.
Новые настройки вступят после перезахода в учётную запись или перезагрузки компьютера.
Change Mouse Pointer and Cursor size on Windows-10, (smaller, larger)?
The size of the mouse pointer is adjustable in Windows 10, the solution is simple to change mouse pointer and default cursor size on Windows 10!
1.) . The fastest Way to change the Mouse pointer size!
2.) . The biggest Mouse Pointer and Cursor for Windows-10!
If you want to change the Mouse pointer size, please open the Mouse Properties in Windows 10, the mouse pointer is a very important visual point on all desktop OS. This solution in this example is also for Microsofts Windows Server!
1.) The fastest Way to change the Mouse pointer size!
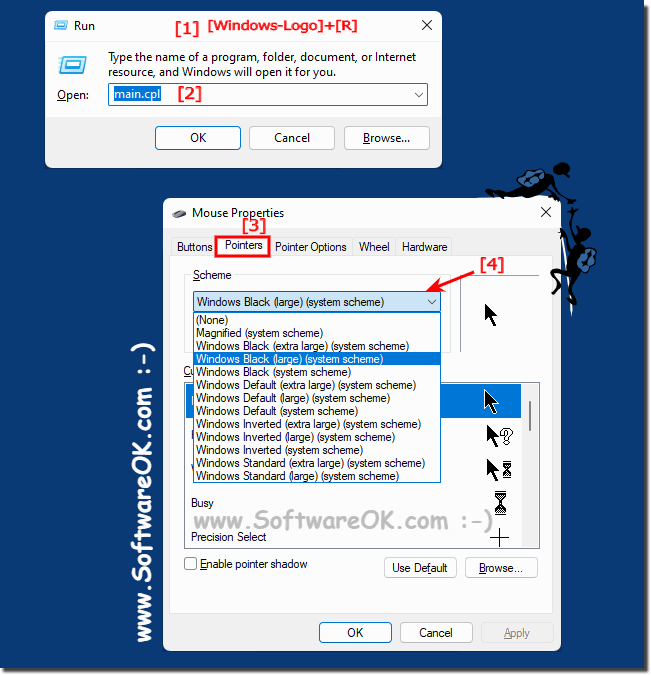
The fastest Way is via Command: control.exe /name Microsoft.Mouse, please start the windows-10 Run Dialog via Windows-Log+R keyboard shortcut and enter the command control.exe /name Microsoft.Mouse or main.cpl.
Please select the Tab Pointers and change the Mouse pointer Size!
(. see Image-1 Arrow 1 to 4)
| (Image-1) Mouse Pointer and Cursor size on Windows-10! |
 |
Not every user is satisfied with the mouse pointer, which is available by default in Windows. For some, it is too small, others do not like too simple design, they want to breathe into it not a lot of life. Even if you are not such a user, you might wonder: is it possible to change the mouse pointer in Windows 10! This FAQ is a visual guide to how to change the size and color of the mouse cursor in Windows 10.

2.) The biggest Mouse Pointer and Cursor for Windows-10!
Many users of desktops and laptops often wonder where they can download cursors for Windows 10 or create their own. The answer to this question is quite simple: you can create a new kind of mouse pointer over the operating system itself. If your own version of the arrow does not suits you, you can download the biggest mouse pointer for Window 10 from our website.
How to change mouse pointer size on Windows 10
Is the mouse pointer too small or too big? In this guide, you’ll learn the easy steps to change its size on Windows 10.

On Windows 10, the mouse pointer is an essential feature that helps us to navigate the desktop more efficiently. However, if the pointer is too small or too big, depending on your requirements or the resolution of your screen, you can change the size in a few ways.
In the guide, you’ll learn the steps to change the mouse pointer size using the Settings app and Control Panel on Windows 10.
How to change pointer size using Settings
To change the mouse pointer size on Windows 10, use these steps:
Open Settings on Windows 10.
Click on Ease of Access.
Click on Cursor & pointer.
Under the “Change pointer size and color” section, use the slider to select a pointer size.
 Change mouse pointer size using Settings app
Once you complete the steps, the pointer will automatically switch to the size you selected. Starting with Windows 10 version 1903, you can select up to 11 different sizes. Also, note that using the Settings app, you can now change the mouse pointer color.
How to change pointer size using Control Panel
In the case that you’re looking to change size of the pointer using the Windows Default scheme, then use these steps.
Open Settings.
Click on Devices.
Click on Mouse.
On the right, under “Related settings,” click the Additional mouse options link.
 Mouse settings on Windows 10
Use the Scheme drop-down to select the size you want, including: system scheme (small), large, and extra large.
 Change mouse pointer size using Control Panel
Click the Apply button.
Click the OK button.
After you complete the steps, the mouse pointer will start using the size you specified.
We may earn commission for purchases using our links to help keep offering the free content. Privacy policy info.
All content on this site is provided with no warranties, express or implied. Use any information at your own risk. Always backup of your device and files before making any changes. Privacy policy info.
How to fix mouse lags in Windows 10 (and make it fast again)

- A laggy mouse can be quite troublesome during certain activities, such as gaming.
- The following guide will show you how to fix any potential mouse lag that you may meet.
- If you want to read more about such system issues, visit our System Errors Hub.
- Even more, guides can be found on our Windows 10 Troubleshooting Guides.

- Download Restoro PC Repair Tool that comes with Patented Technologies (patent available here).
- Click Start Scan to find Windows issues that could be causing PC problems.
- Click Repair All to fix issues affecting your computer’s security and performance
- Restoro has been downloaded by 0 readers this month.
Mouse lag is a major hindrance that will affect your user experience and it appears that some Windows 10 users are having this issue, so let’s see if there’s a way to fix it.
There are many mouse related issues that can occur on Windows 10, and we covered the following problems in this article:
- Windows 10 mouse lag in games
- According to users, this issue can often appear in games.
- This can be a big problem since your game performance might be reduced.
- Windows 10 mouse stutter
- This is another problem that users reported.
- According to them, their mouse frequently stutters which makes it harder to perform everyday tasks.
- Mouse freeze Windows 10
- Another common problem that can appear with your mouse.
- Many users reported that their mouse keeps freezing on their PC.
- This can be a big problem, but you should be able to fix it with one of our solutions.
- Wireless mouse lag Windows 10
- This issue can affect both wired and wireless mice, but according to users, this issue appears more frequently while using a wireless mouse.
- Mouse input, pointer lag Windows 10
- Another issue that can appear is mouse input or pointer lag.
- This is a common problem, but you should be able to solve it easily with one of our solutions.
- Mouse not moving
- Several users reported that their mouse isn’t moving at all.
- This issue is usually caused by a corrupted driver or your mouse configuration.
According to users this issue is present after switching to Windows 10, and the issue persists when using Windows 10 and also while using any other software.
Mouse lag is also a major issue when it comes to gaming and it seriously affects your user experience and performance, but don’t worry, there are few solutions that you can try out.
How can I solve mouse lags in Windows 10?
1. Install the official mouse driver
Several users reported that they fixed mouse lag issues simply by installing the official driver for their mouse. In most cases, Windows 10 will automatically install the default mouse driver, and while that driver usually works, sometimes certain issues can occur.
If you’re using a branded mouse, check the manufacturer’s website and download the latest drivers for your mouse.
Update drivers automatically
Downloading drivers manually is a process that carries the risk of getting the wrong driver installed, which may lead to serious malfunctions.
The safer and easier way to update drivers on a Windows computer is by using an automatic tool such as DriverFix.
- Download DriverFix
- Launch the program
- There is no setup process beforehand since DriverFix is completely portable
- DriverFix will proceed to scan your PC for missing broken or outdated drivers

- Choose which drivers to update or repair
- Wait while DriverFix deals with your drivers
- Restart your PC
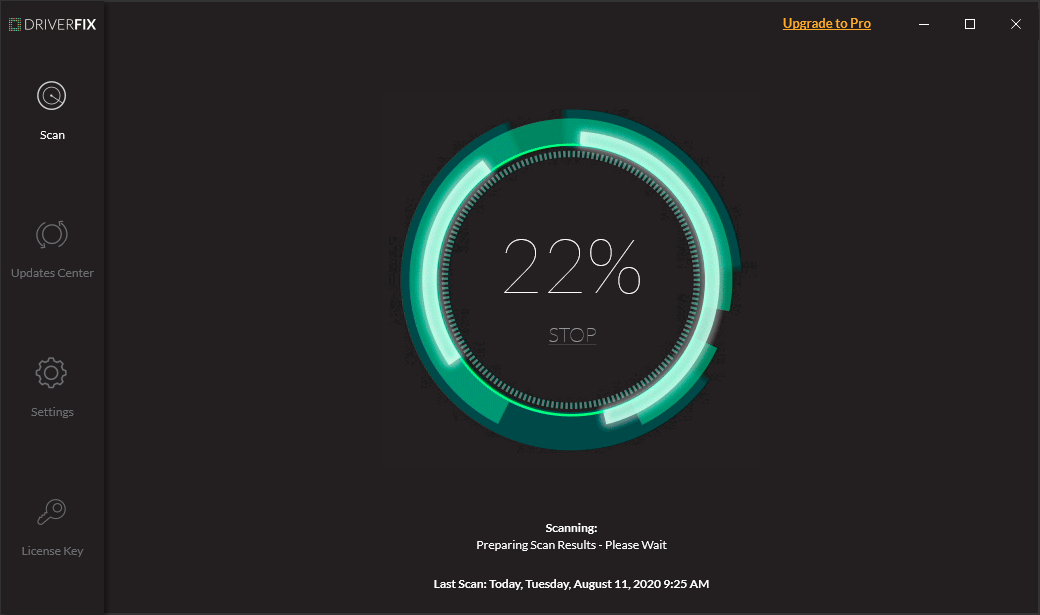
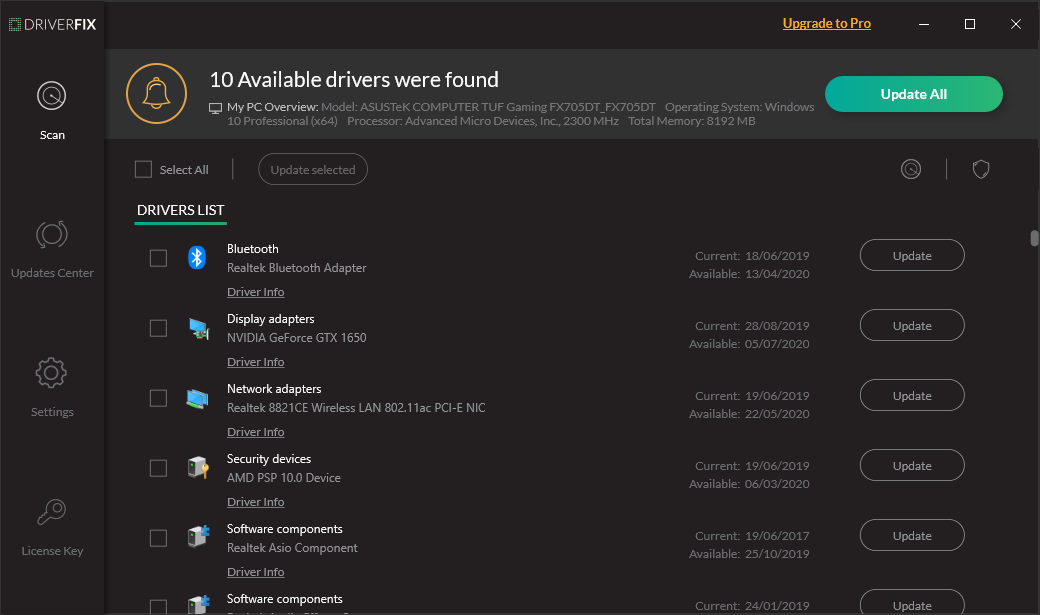

Driverfix
2. Enable / Disable Scroll Inactive Windows
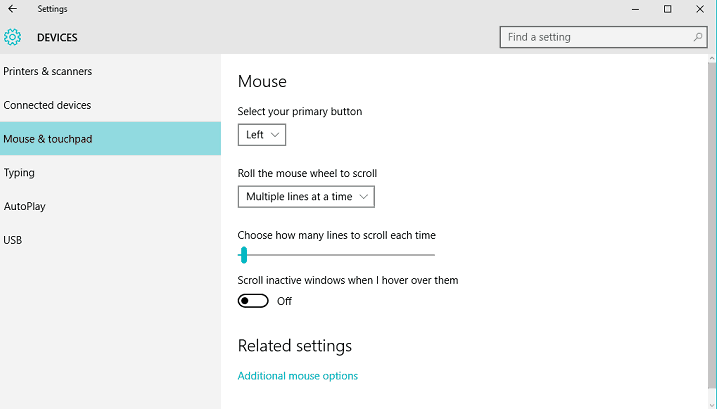
- Navigate to Settings > Devices > Mouse & Touchpad.
- Now locate the Scroll Inactive Windows option and disable / enable it.
- Try disabling and enabling this option a few times and check if the issue is resolved.
If you can’t access the Setting app, check out this guide that will help you solve the problem.
3. Change Palm Check Threshold
- Go to Mouse & Touchpad settings like we showed you in the Solution 1.
- Click Additional Mouse Options.
- Next choose TouchPad Tab.
- Click on Settings and go to Advanced Tab.
- Locate the Palm Check Threshold and move it all the way to the left.
4. Set the touchpad to No Delay
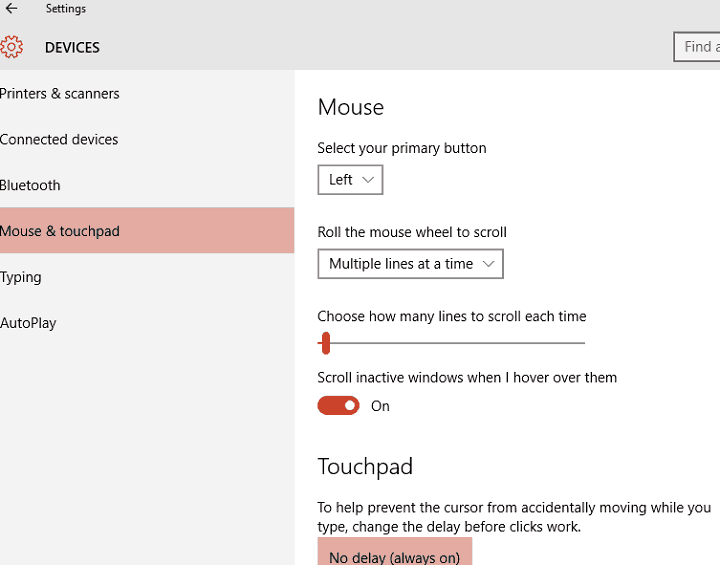
To do this navigate to Mouse & Touchpad settings as we explained in the previous steps. Now find the Touchpad section and set the delay before clicks to No delay (always on).
If you’re using a wired or wireless mouse and you don’t need the touchpad, you can easily disable it by following these steps.
5. Turn off Cortana
This seems like an unusual solution, but many users report that after turning off Cortana the issues with mouse lag disappear as well. To turn off Cortana do the following:
- Open Cortana and go to Settings in the top left corner.
- In Settings find the Cortana can give you suggestions, ideas, reminders, alerts and more option and set it to off.
6. Disable NVIDIA High Definition Audio
Some users claim that NVIDIA High Definition Audio and other audio drivers can sometimes cause these issue. If you’re using NVIDIA card you can try the following steps:
- Uninstall the GeForce Experience app.
- After that go to Device Manager and locate NVIDIA High Definition Audio.
- Right click it and choose Disable.

Same thing might work for other audio drivers such as Realtek, so try disabling them as well. If disabling audio drivers doesn’t help, you might want to uninstall them.
If you’re using Realtek audio, you should know that this issue can be caused by Realtek Audio Manager.
According to users, this application starts automatically with Windows and causes this problem to appear.
To fix the issue, you need to open Task Manager and disable Realtek Audio Manager in Startup tab. After doing that, the issue should be resolved.
You can also fix the problem simply by going to the C:Program FilesRealtekAudioHDA directory and renaming FMAPP.exe. After you rename the file, Realtek Audio Manager won’t start automatically with your PC, and the problem will be resolved.
Can’t access task manager? Here are a few solutions that you should try.
7. Change your mouse frequency
Sometimes mouse lag problems can be related to its frequency. This issue usually affects wireless mice, and if your mouse is lagging, you might be able to solve the problem by adjusting its frequency.
To do that, open your mouse configuration software and change its frequency from 500 to 250Hz. After doing that, your mouse will start working normally.
If your mouse is connected through Bluetooth and it’s not working, this article may help you fix it.
8. Disable Fast Startup
To fix this problem, many users are recommending to disable Fast Startup feature. This is a useful feature, but users reported that it can cause certain issues with your PC such as mouse lag. To fix the problem, you need to do the following:
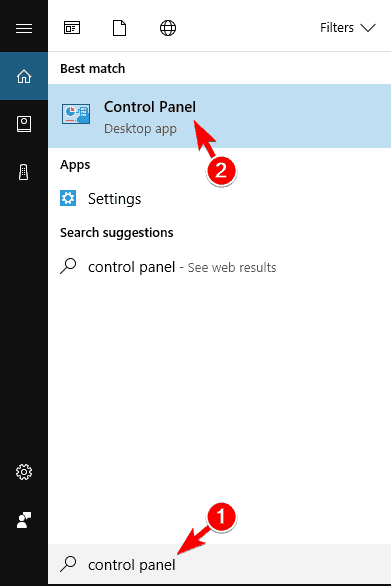
- Press Windows Key + S and enter control panel.
- Choose Control Panel from the list.
- Choose Control Panel from the list.
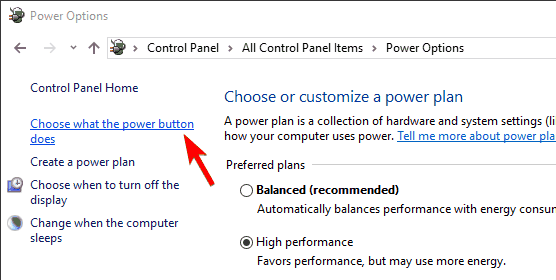
- When Control Panel opens, select Power Options.
- Now click on Choose what the power button does.
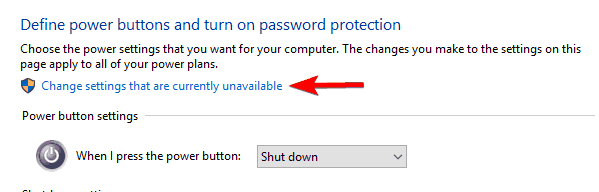
- Click on Change settings that are currently unavailable.
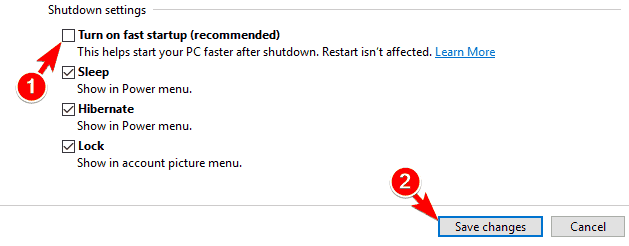
- Uncheck Turn on fast startup (recommended) and click on Save changes.