- Как установить macOS Big Sur на ПК
- Что такое загрузчики macOS?
- Как установить macOS Big Sur на VMWare?
- Как установить macOS Big Sur на PC с помощью загрузчика OpenCore?
- Создаем загрузочную флэшку macOS Big Sur с загрузчиком OpenCore.
- Настройка BIOS
- Установка macOS Big Sur на ПК
- Настройка конфигуратора OpenCore
- # OpenCore and macOS 11: Big Sur
- # Table of Contents
- # Prerequisites
- # A supported SMBIOS
- # Supported hardware
- # Up-to-date kexts, bootloader and config.plist
- # AMD Note
- # Intel HEDT Note
- # Known issues
- # Installation
- # Troubleshooting
- # Stuck at Forcing CS_RUNTIME for entitlement
- # Stuck at PCI Configuration Begins for Intel’s X99 and X299 boards
- # Stuck on ramrod (^^^^^^^^^^^^^)
- # X79 and X99 Kernel Panic on IOPCIFamily
- # DeviceProperties injection failing
- # Keyboard and Mouse broken
- # Early Kernel Panic on max_cpus_from_firmware not yet initialized
- # Cannot update to newer versions of Big Sur
- # Broken Update Utility
- # Broken Seal
- # Kernel Panic on Rooting from the live fs
- # Asus Z97 and HEDT(ie. X99 and X299) failing Stage 2 Installation
- # Laptops kernel panicking on cannot perform kext scan
Как установить macOS Big Sur на ПК
Сегодня мы узнаем, как установить macOS Big Sur на ПК. Это довольно странная и сложная процедура, требующая не только определенных знаний, но и смелости. Подойдет для владельцев ПК и ноутбуков на Windows с процессорами Intel.


Скажу сразу, что вы все делаете на свой страх и риск, поэтому если не уверены в своих силах, то лучше для начала установите систему на виртуальную машину. Об этом мы тоже поговорим. Также будем работать не с последней версией macOS Big Sur (к слову, она уже доступна для установки ), а с Beta-версией, которая стабильно запускается на загрузчике OpenCore. Судя по данным пользователей, на загрузчике Clover появляются проблемы во время установки. Я не гарантирую, что Hackintosh на базе macOS Big Sur запустится на вашем компьютере — все зависит от железа, а если вы устанавливаете на ноутбук, то и от его модели.
Что такое загрузчики macOS?
Загрузчики macOS — специальные программы, позволяющие запустить операционную систему macOS на устройстве не от Apple. По сути, это порт macOS на другое железо. Самые популярные — OpenCore и Clover. Их функционал практически идентичен, за исключением пары моментов. Также на одном устройстве может работать OpenCore, а на другом Clover — когда речь идет за Hackintosh, то все индивидуально, как вам удобно. Но о фишках того или иного загрузчика я рассказывать не буду — сегодня мы поговорим об установке через OpenCore.
Как установить macOS Big Sur на VMWare?
Но перед тем, как устанавливать macOS Big Sur на физический жесткий диск вашего компьютера, разберем, как установить систему на виртуальную машину VMWare. Этот метод хорош тем, что дает возможность попробовать операционную систему Mac без форматирования жесткого диска с Windows.
- Установите VMWare — скачать ее можно с официального сайта.
- Далее нужно разблокировать функцию установки macOS 11. Для этого необходимо дополнительно загрузить unlocker по ссылке, открыть его от имени администратора (файл win-install.cmd), дождаться загрузки дополнительных файлов и снова запустить VMWare.
- Нажимаем на Создать новую виртуальную машину.
- Следуем инструкции на экране.
- В списке операционных систем появилась Apple MacOS X — выбираем macOS 11.0 или 11.1.
- Продолжаем настраивать виртуальную машину. Выделяем не менее 36 ГБ виртуального жесткого диска, минимум 2 или рекомендовано 4 гигабайта оперативной памяти, 2 ядра процессора, а в строке CD/DVD нужно выбрать скачанный образ macOS Big Sur.
- Откройте папку с виртуальной машиной и найдите 2-килобайтный файл xxxxxxxx.vmx (где х — это название виртуальной машины).
- Откройте файл с помощью Блокнота и в конце вставьте строчку smc.version = «0» и сохраните изменения.
- Запустите виртуальную машину.
- Должно появиться яблоко, после чего откроется меню установки macOS Big Sur.
- Необходимо отформатировать виртуальный диск и установить систему в соответствии с инструкцией.
После установки и первой настройки macOS Big Sur можно заметить, что разрешение очень низкое, его поменять нельзя, а сам интерфейс тормозит. Чтобы это исправить необходимо:
- Скачать ISO-образ VMWare Tools.
- Зайти в дополнительные параметры виртуальной машины — CD/DVD.
- Вместо образа системы нужно поставить недавно скачанный ISO-файл VMWare Tools.
- Включите виртуальную машину и откройте файл VMWare Tools на рабочем столе macOS Big Sur.
- Нажмите Install VMWare Tools.
- Следуйте подсказкам установщика на экране.
- После завершения установки будет предложено перезагрузить виртуальную машину — соглашаемся, нажав на Перезагрузить сейчас.
После включения видеопамяти будет выделяться больше и разрешение дисплея виртуальной машины будет соответствовать вашему монитору или экрану ноутбука.
Как установить macOS Big Sur на PC с помощью загрузчика OpenCore?
Создаем загрузочную флэшку macOS Big Sur с загрузчиком OpenCore.
- Скачиваем образ macOS Big Sur Beta 2 вместе с загрузчиком OpenCore или (на свой страх и риск) macOS 11.1 Final.
- Также загружаем с Интернета утилиту R-Drive Image, которая понадобится для создания загрузочной флэшки.
- Берем USB-накопитель объемом не менее 16 ГБ и подключаем к компьютеру.
- Открываем программу Выполнить, нажав комбинацию клавиш Ctrl+R, и вводим diskpart.
- Вводим команду list disk и нажимаем клавишу Enter.
- Появится список подключенных к компьютеру дисков — запоминаем название флэшки (ее можно определить по объему), в нашем случае это disk 1.
- Вводим sel disk 1.
- Вводим слово clean, после чего накопитель будет очищен.
- Открываем программу R-Drive Image.
- Нажимаем Далее — Восстановить из образа.
- Выберите скачанный образ macOS Big Sur с разрешением .rdr и нажмите Далее.
- Нужно выбрать загрузочный раздел и USB-накопитель — выбираем флэшку в качестве источника и приемника (смотрите по объему).
- Несколько раз нажмите Далее, после чего Начать.
Настройка BIOS
Теперь, когда мы создали нашу загрузочную флэшку, необходимо зайти в BIOS компьютера. У разных марок компьютеров кнопка входа в биос разная, но зачастую это Del или F12. Теперь BIOS нужно настроить. Найдите и отключите следующие параметры:
- Виртуализацию Intel VT-d и VT-x.
- Fast Boot.
- Secure Boot.
- Network Boot.
- Установите параметр Boot Mode — UEFI.
- Параметр SATA Mode — AHCI.
- Укажите в разделе DVMT Memory 128 или 64 МБ.
- Установите загрузочный носитель — в нашем случае это флэшка.
- Сохраните изменения и перезагрузитесь.
Установка macOS Big Sur на ПК
Начинается самое интересное — вход в загрузчик OpenCore. Ваш компьютер должен загрузиться с USB-накопителя, после чего появится две кнопки: Install macOS Beta и Reset NVRAM. Нажимаем первую. Бывает, что загрузка дальше огромного полотна различных команд на черном экране не проходит. В таком случае, перезагрузите ПК и нажмите кнопку Reset NVRAM, после чего снова нажмите Установить macOS Beta. На ноутбуках бывает проблема, что после нескольких команд экран становится черным, а сам загрузчик зависает. Решение простое — подключите к ноутбуку внешний монитор или телевизор по HDMI-кабелю, а после установки выберите нужный дисплей для отображения картинки. К слову, если что-то не получается, вы можете перейти по ссылке и найти проблему — здесь собрана целая электронная книга по OpenCore. Продолжаем устанавливать macOS Big Sur на ПК.
- Когда загрузчик прошел, на экране появится яблоко, а после чего привычное окно приветствия с выбором языка.
- Далее нужно зайти в Дисковую утилиту.
- Нажмите Вид — Показать все устройства.
- Выберите жесткий диск и нажмите Стереть.
- Сначала дайте ему имя, например, Macintosh.
- Далее выберите тип форматирования — APFS.
- Если форматирование прошло, закройте дисковую утилиту и нажмите Установить macOS.
- Следуйте инструкциям на экране.
- После выбранного диска начните установку. Произойдет копирование файлов, после чего ПК перезагрузится.
- После перезагрузки нужно нажать кнопку macOS Installer.
- Установка продолжится еще на некоторое время.
- Снова компьютер перезагрузится, и снова нужно выбрать macOS Installer.
- Далее macOS Big Sur запустится и необходимо будет произвести первую настройку.
Настройка конфигуратора OpenCore
Я рассказал как установить бета-версию, но система сможет обновиться и до финальной сборки. Вы можете в любой момент настроить значения загрузчика, в том числе, изменить название компьютера или произвести некоторые изменения в конфигураторе загрузчика. Чтобы это сделать нужно зайти в папку postinstall, которую необходимо перенести с корневого раздела флэшки на рабочий стол. Теперь обязательно нужно произвести некоторые манипуляции с конфигуратором загрузчика, чтобы запускать macOS Big Sur без USB-накопителя.
- Найдите в папке postinstall файл OpenCore Configurator.
- Необходимо вмонтировать в ОС загрузочные разделы флэшки и жесткого диска с системой.
- Вверху в панели меню находим соответствующий значок конфигуратора, нажимаем и в контекстном меню возле каждого диска нужно кликнуть по mount partition.
- После монтирования жесткого диска на рабочем столе появится накопитель EFI с одноименной папкой, которую нужно перенести в загрузочную область HDD.
- Теперь можно запускать систему без использования USB-накопителя.
Часто после установки не работает сеть и звук в системе. Чтобы это исправить необходимо:
- Снова монтируем раздел EFI в панели меню.
- Находим специальные файлы .kext для вашей сетевой и звуковой карты в папке postinstall. Если не подойдет, тогда нужно найти в Интернете специально под ваше оборудование. Иными словами, это как драйвера в Windows.
- Переходим по пути EFI/OC/Kexts и туда скидываем файлы kext.
- Теперь запускаем в папке postinstall файл config с помощью системного редактора или проводим все действия сразу в OpenCore Configurator.
- Во вкладке NVRAM, открываем третью строчку и в параметр bootargs дописываем значение alcid = x (где х — это значение именно вашей модели звуковой карты, все значения конфигураторов под разное железо можно найти на GitHub или другом ресурсе, связанном с Hackintosh).
- Заходим в раздел Kernel и перетаскиваем файл kext сетевой карты из папки EFI/OC/Kexts.
- Сохраните изменения, закройте конфигуратор, выгрузите EFI-разделы в панели меню из системы и перезагрузите ОС.
Как видим, установить macOS Big Sur на обычный ПК может показаться сложной задачей, но если к ней отнестись ответственно, то она будет успешно выполнена. Дам совет: найдите все kext-файлы и значения параметров на GitHub заранее, чтобы потом не возникало никаких проблем. Также предлагаю вашему вниманию инструкцию по установке macOS Big Sur на ПК, где все понятно рассказано.

На этом инструкция, как установить macOS Big Sur на ПК закончена. Если вам интересно узнать о загрузчиках и о различных подводных камнях OpenCore и Clover, то пишите в комментариях — постараемся все предельно ясно объяснить. Также задавайте вопросы — я на них с удовольствием отвечу. Заходите в наш Telegram и не забывайте комментировать новости и посты. Всего доброго!
# OpenCore and macOS 11: Big Sur
It’s that time of year again and with it, and a new macOS beta has been dropped. Here’s all the info you need to get started.
This page will be a small discussion on exactly what you need to prepare for Big Sur, a more in depth look into what’s changed on Big Sur can be found here:
# Table of Contents
# Prerequisites
Before we can jump head first into installing Big Sur, we need to go over a few things:
# A supported SMBIOS
Big Sur dropped a few Ivy Bridge and Haswell based SMBIOS from macOS, so see below that yours wasn’t dropped:
- iMac14,3 and older
- Note iMac14,4 is still supported
- MacPro5,1 and older
- MacMini6,x and older
- MacBook7,1 and older
- MacBookAir5,x and older
- MacBookPro10,x and older
If your SMBIOS was supported in Catalina and isn’t included above, you’re good to go!
SMBIOS still supported in macOS Big Sur:
- iMac14,4 and newer
- MacPro6,1 and newer
- iMacPro1,1 and newer
- MacMini7,1 and newer
- MacBook8,1 and newer
- MacBookAir6,x and newer
- MacBookPro11,x and newer
For full list of supported SMBIOS including OS support, see here: Choosing the right SMBIOS
For those wanting a simple translation for their Machines:
- iMac13,1 should transition over to using iMac14,4
- iMac13,2 should transition over to using iMac15,1
- iMac14,2 and iMac14,3 should transition over to using iMac15,1
- Note: AMD CPU users with Nvidia GPUs may find MacPro7,1 more suitable
- iMac14,1 should transition over to iMac14,4
# Supported hardware
Not much hardware has been dropped, though the few that have:
- Official Ivy Bridge U, H and S CPUs.
- These CPUs will still boot without much issue, but note that no Macs are supported with consumer Ivy Bridge in Big Sur.
- Ivy Bridge-E CPUs are still supported thanks to being in MacPro6,1
- Ivy Bridge iGPUs slated for removal
- HD 4000 and HD 2500, however currently these drivers are still present in 11.0.1
- BCM4331 and BCM43224 based WiFi cards.
- See Wireless Buyers guide
(opens new window) for potential cards to upgrade to.
Potential work-around is to inject a patched IO80211Family, see here for more details: IO80211 Patches(opens new window)
- See Wireless Buyers guide
- Certain SATA controllers dropped
- For some reason, Apple removed the AppleIntelPchSeriesAHCI class from AppleAHCIPort.kext. Due to the outright removal of the class, trying to spoof to another ID (generally done by SATA-unsupported.kext) can fail for many and create instability for others.
- A partial fix is to inject Catalina’s version with any conflicting symbols being patched. You can find a sample kext here: Catalina’s patched AppleAHCIPort.kext
(opens new window)
- We recommend setting the MinKernel value to 20.0.0 for the kext CtlnaAHCIPort.kext to avoid any potential conflicts. This way, it will work in both Catalina and Big Sur so you can remove SATA-unsupported if you want.
Other notable changes:
- MSI Navi users no longer require the ATY,rom / -wegnoegpu patch to boot the installer
- Stage 2 installation requiring working NVRAM
- Asus 9 series: For more info, see here: Haswell ASUS Z97 Big Sur Update Thread
(opens new window)
- X99 and X299 users with broken NVRAM will need to install on another machine and move the SSD when done
# Up-to-date kexts, bootloader and config.plist
Ensure that you have the latest version of OpenCore, kexts and config.plist so it won’t have any odd compatibility issues. You can simply download and update OpenCore and kexts as mentioned here:
If you’re unsure what version of OpenCore you’re using, you can run the following in terminal:
- Note: The about command will require you to include bit 0x2 in Misc -> Security -> ExposeSensitiveData , recommended values for ExposeSensitiveData is 0x6 which includes bits 0x2 and 0x4 .
# AMD Note
Reminder for AMD Users: Don’t forget to update your kernel patches with those provided by AMD OS X, otherwise you’ll be unable to boot Big Sur:
# Intel HEDT Note
For X79, X99 and X299 users, pay close attention to the below. Big Sur has added new requirements for ACPI, so you’ll need to grab some new SSDTs:
For those who’d like precompiled files, see here:
# Known issues
With Big Sur, quite a bit broke. Mainly the following:
- Lilu
- Mainly user-space patching has severely broke, meaning certain functionality may have broken
- These include:
- DiskArbitrationFixup
- MacProMemoryNotificationDisabler
- SidecarEnabler
- SystemProfilerMemoryFixup
- NoTouchID
- WhateverGreen’s DRM and -cdfon patches
- AirportBrcmFixup
- Forcing a specific driver to load with brcmfx-driver= may help
- BCM94352Z users for example may need brcmfx-driver=2 in boot-args to resolve this, other chipsets will need other variables.
- Setting MaxKernel to 19.9.9 for AirPortBrcm4360_Injector.kext may help. More information from the repo
(opens new window)
- Forcing a specific driver to load with brcmfx-driver= may help
- SATA Support broken
- Due to Apple dropping the AppleIntelPchSeriesAHCI class in AppleAHCIPort.kext
- To resolve, add Catalina’s patched AppleAHCIPort.kext
(opens new window) with the MinKernel set to 20.0.0
And while not an issue, SIP has now gained a new bit so to properly disable SIP you need to set csr-active-config to FF0F0000 . See here for more info: Disabling SIP
# Installation
Guides have been updated to accommodate Big Sur, see the applicable OS environment for you:
# Troubleshooting
# Stuck at Forcing CS_RUNTIME for entitlement
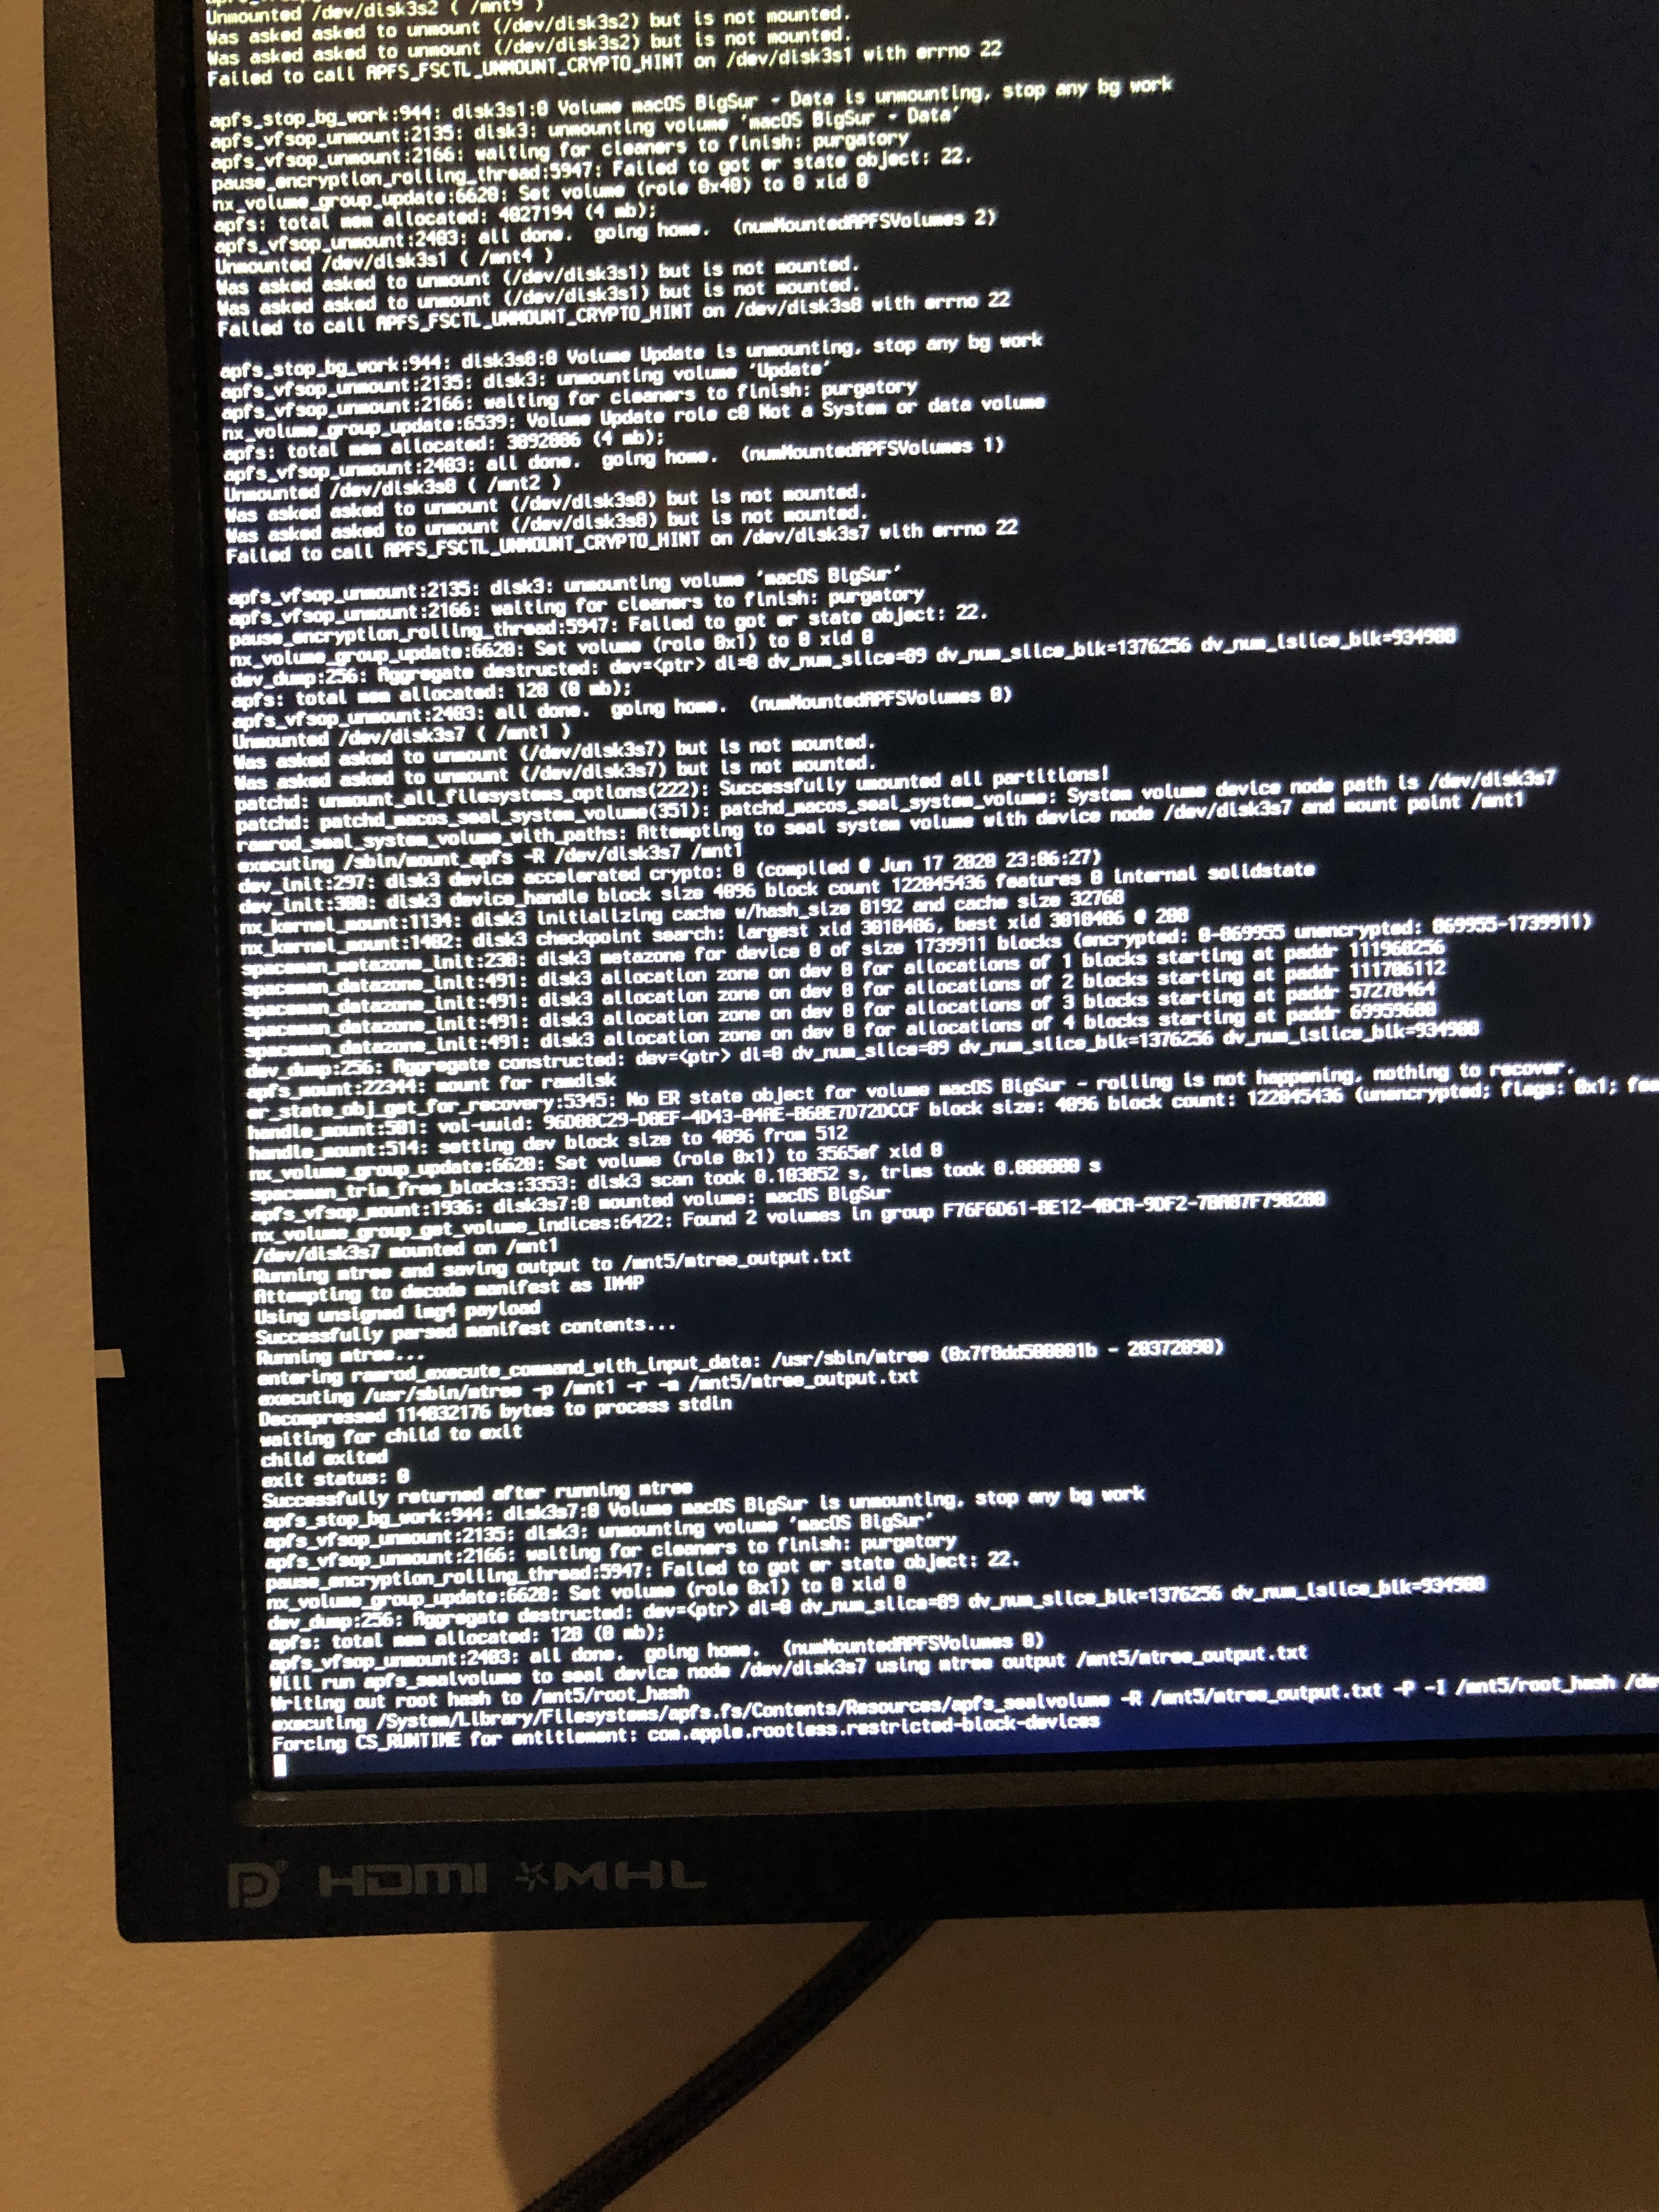
This is actually the part at where macOS will seal the system volume, and where it may seem that macOS has gotten stuck. DO NOT RESTART thinking you’re stuck, this will take quite some time to complete, otherwise you’ll break your installation.
# Stuck at PCI Configuration Begins for Intel’s X99 and X299 boards
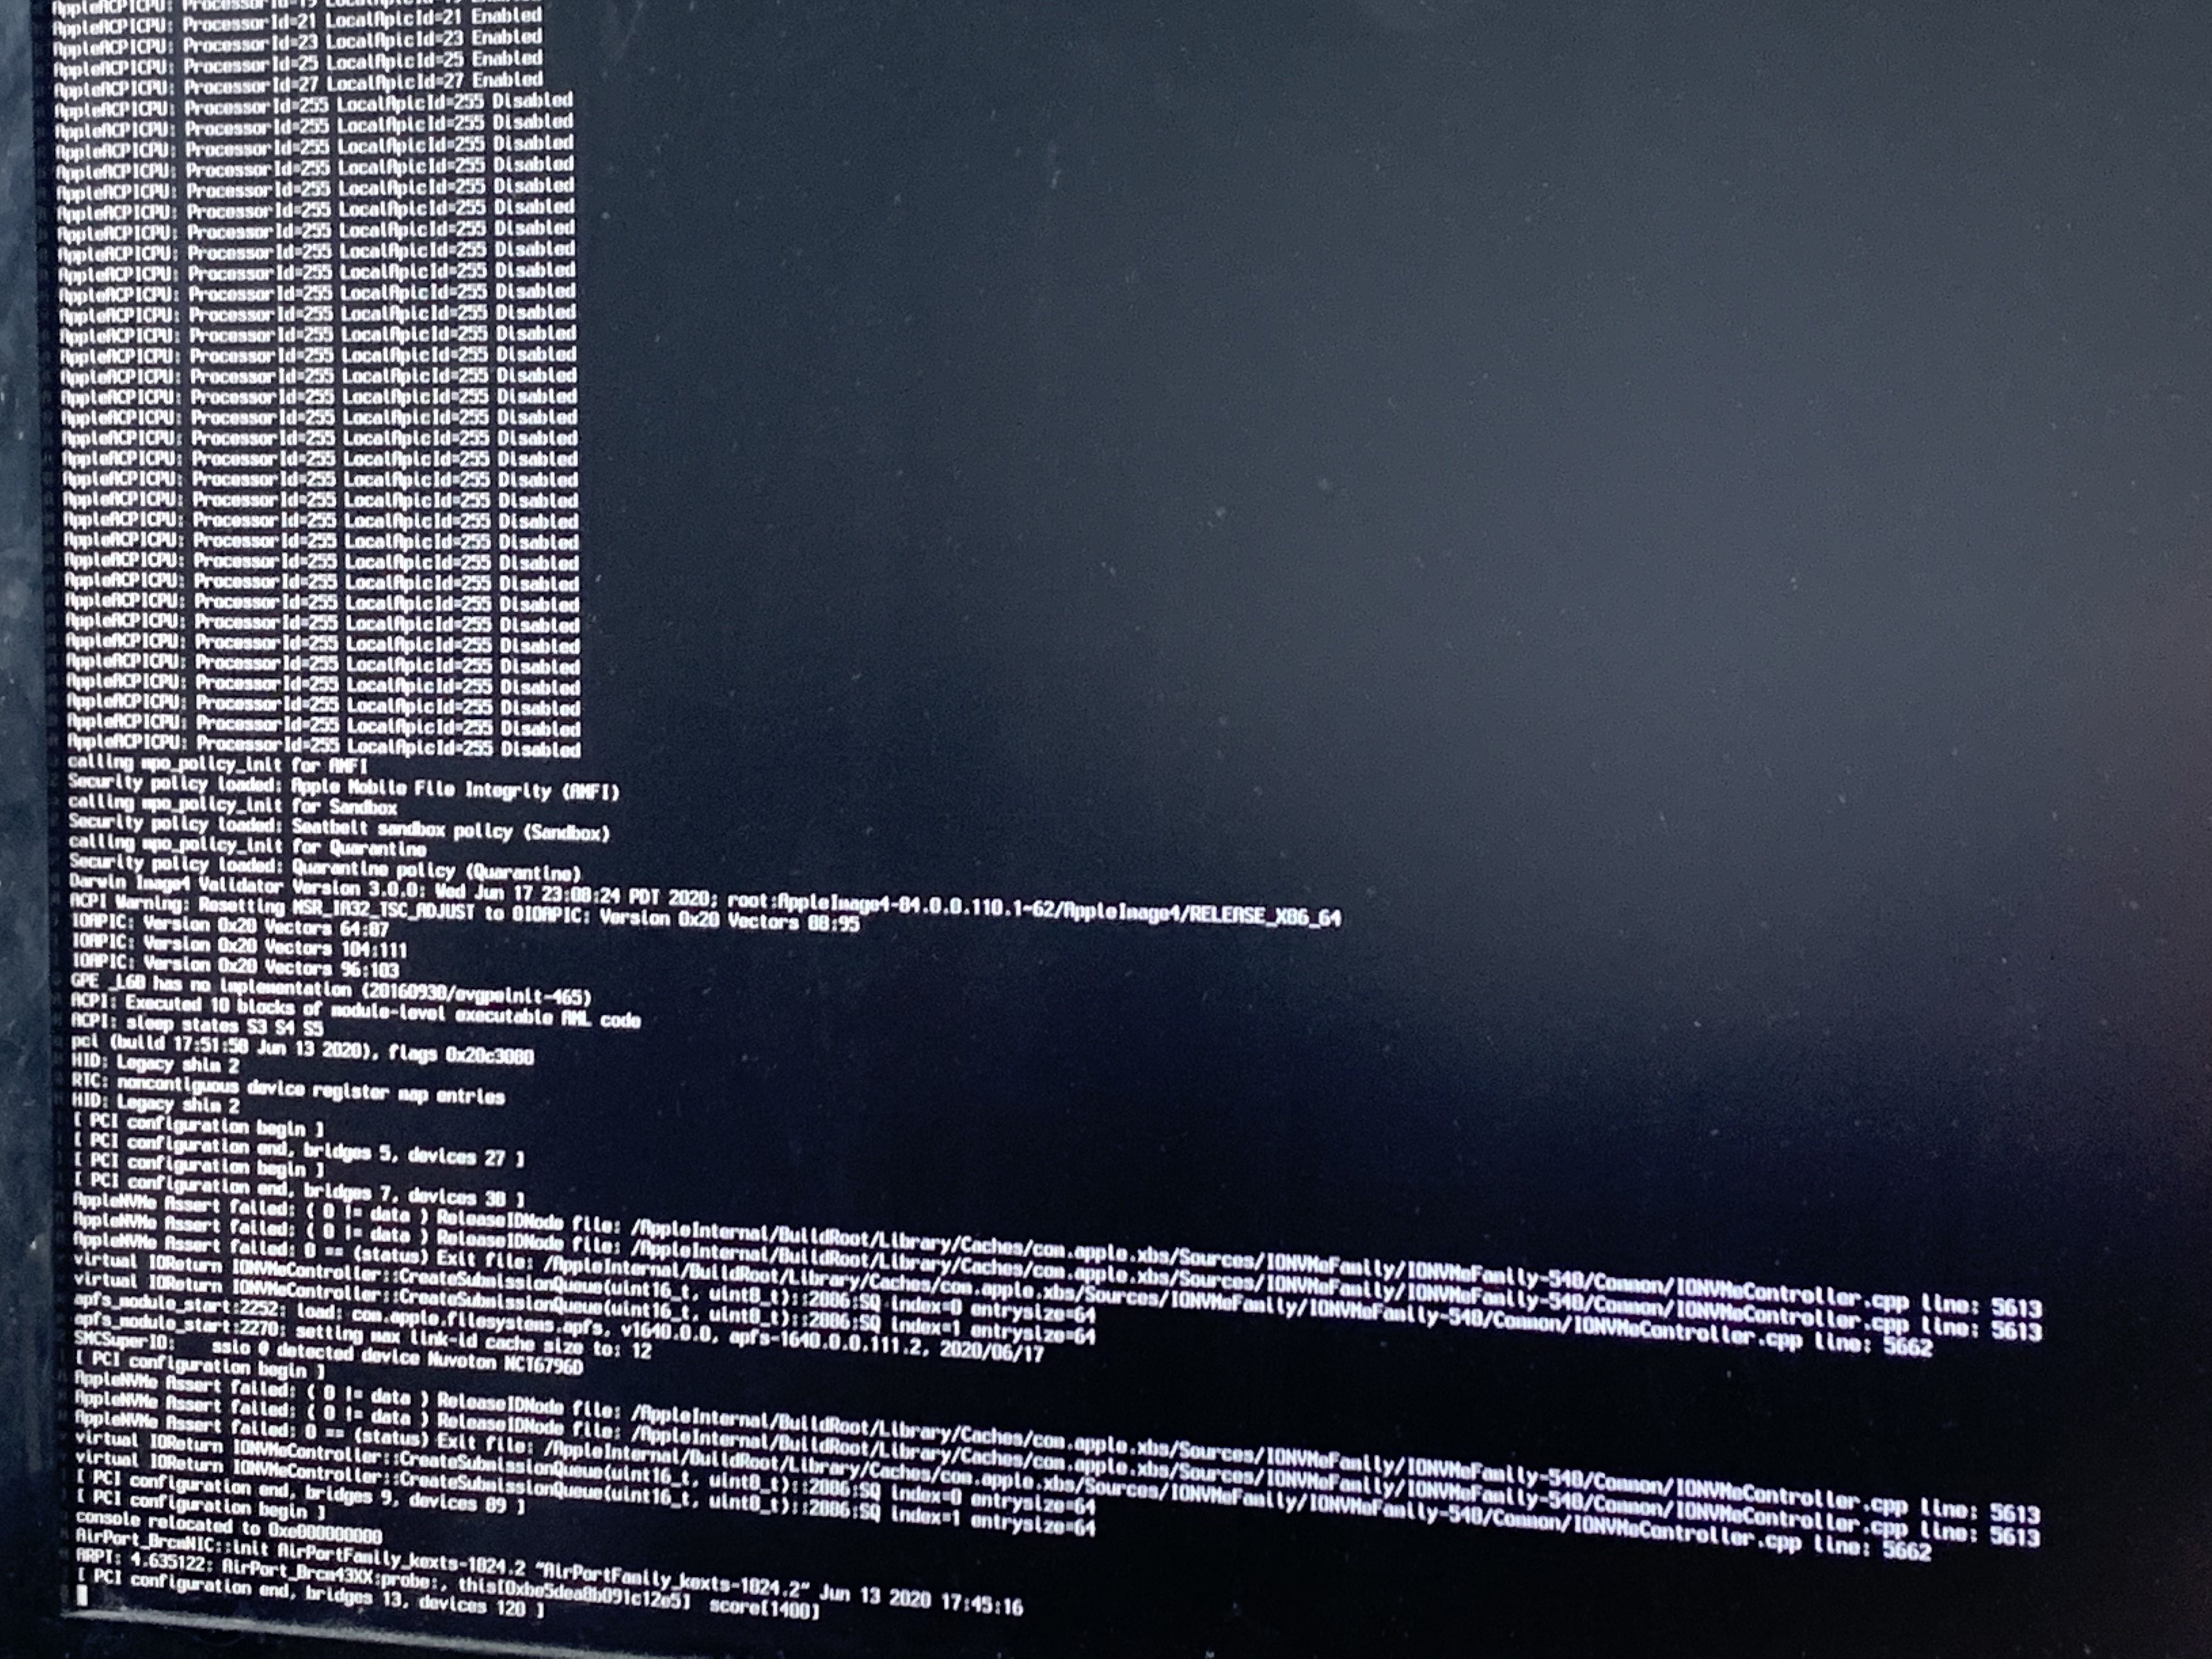
As previously mentioned, Intel HEDT motherboards may have some issues revolving around their RTC device in ACPI. To resolve, you’ll need to look at your RTC device and see which regions are missing. For more information, see here: SSDT-RTC0-RANGE.dsl
# Stuck on ramrod (^^^^^^^^^^^^^)
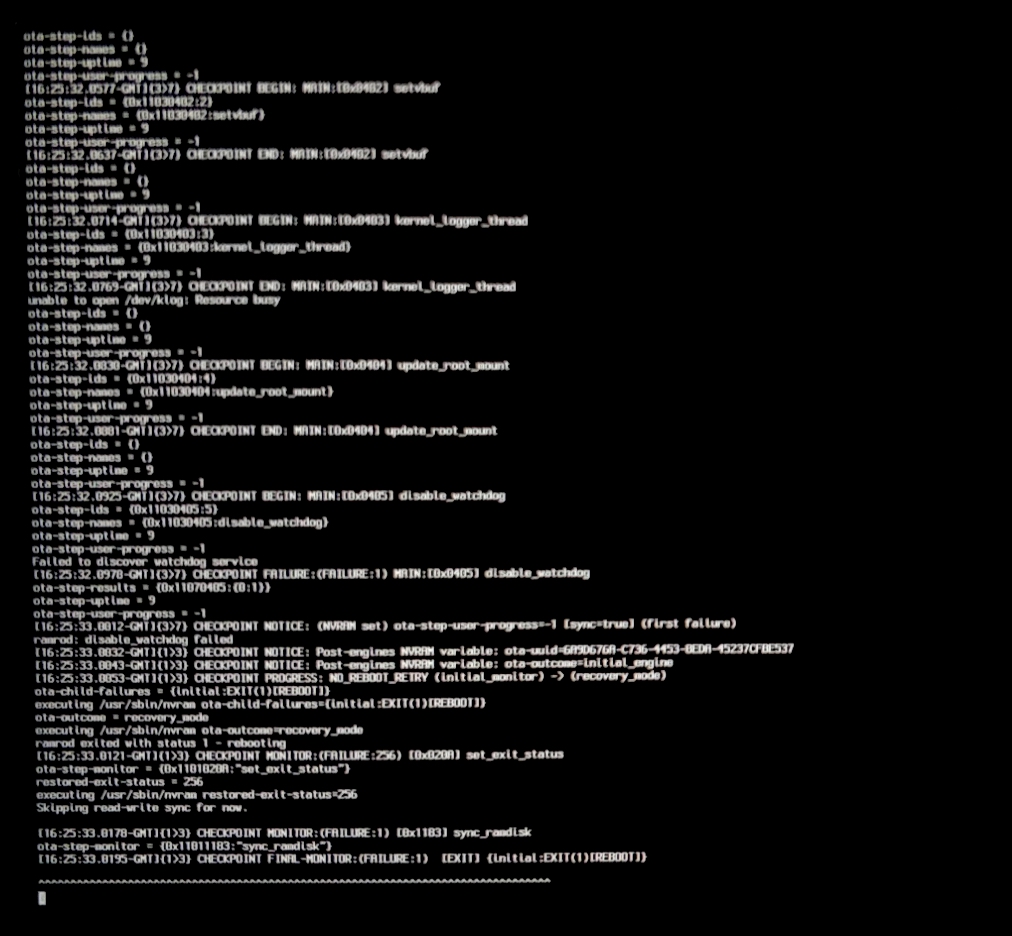
If you get stuck around the ramrod section (specifically, it boots, hits this error, and reboots again back into this, causing a loop), this hints that your SMC emulator is broken. To fix this, you have 2 options:
- Ensure you’re using the latest builds of VirtualSMC and Lilu, with the vsmcgen=1 boot-arg
- Switch over to Rehabman’s FakeSMC
(opens new window) (you can use the MinKernel / MaxKernel trick mentioned above to restrict FakeSMC to Big Sur and up)
And when switching kexts, ensure you don’t have both FakeSMC and VirtualSMC enabled in your config.plist, as this will cause a conflict.
# X79 and X99 Kernel Panic on IOPCIFamily
This is due to an unused uncore PCI Bridges being enabled in ACPI, and so IOPCIFamily will kernel panic when probing unknown devices. To resolve, you’ll need to add SSDT-UNC
# DeviceProperties injection failing
With Big Sur, macOS has become much pickier with devices being present in ACPI. Especially if you’re injecting important properties for WhateverGreen or AppleALC, you may find they’re no longer applying. To verify whether your ACPI defines your hardware, check for the acpi-path property in IORegistryExplorer
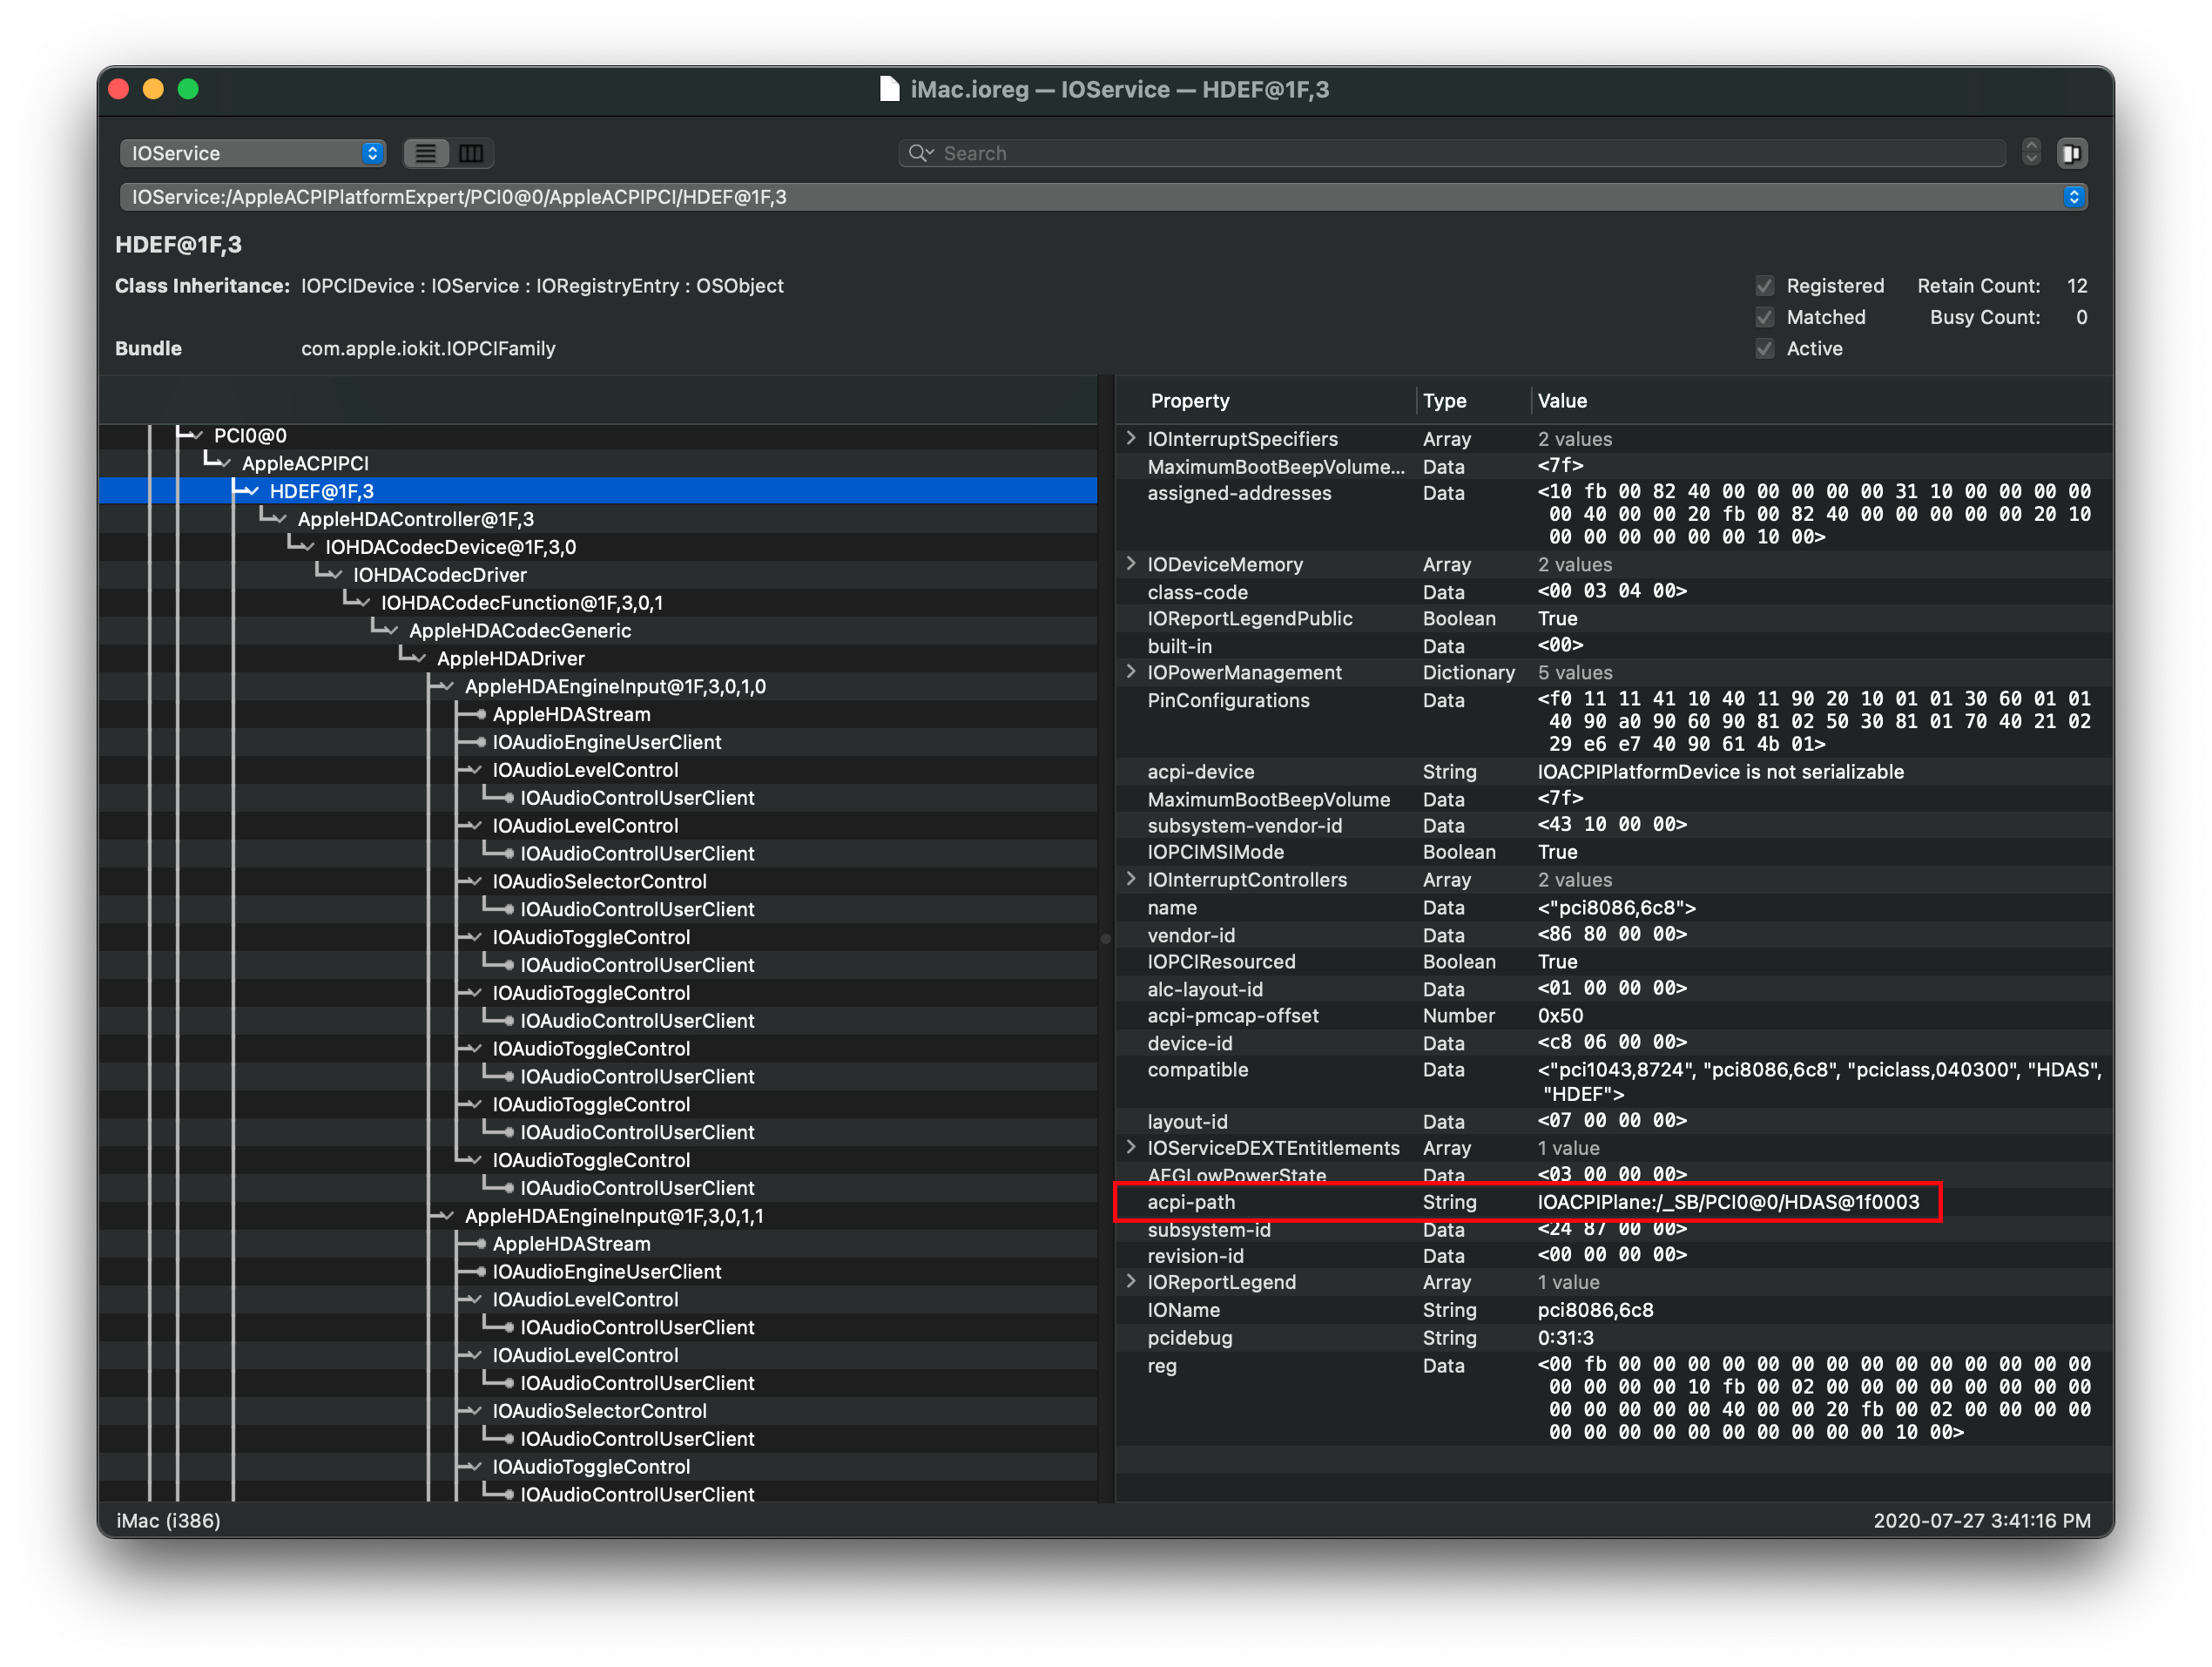
If no property is found, you’ll need to create an SSDT that provides the full pathing as you likely have a PCI Bridge that is not documented in your ACPI tables. An example of this can be found here: SSDT-BRG0
- Note: This issue may also pop up in older versions of macOS, however Big Sur is most likely to have issues.
# Keyboard and Mouse broken
For certain legacy systems, you may notice that while the USB ports work your HID-based devices such as the keyboard and mouse may be broken. To resolve this, add the following patch:
config.plist -> Kernel -> Patch:
| Key | Type | Value |
|---|---|---|
| Base | String | _isSingleUser |
| Count | Integer | 1 |
| Enabled | Boolean | True |
| Find | Data | |
| Identifier | String | com.apple.iokit.IOHIDFamily |
| Limit | Integer | 0 |
| Mask | Data | |
| MaxKernel | String | |
| MinKernel | String | 20.0.0 |
| Replace | Data | B801000000C3 |
| ReplaceMask | Data | |
| Skip | Integer | 0 |
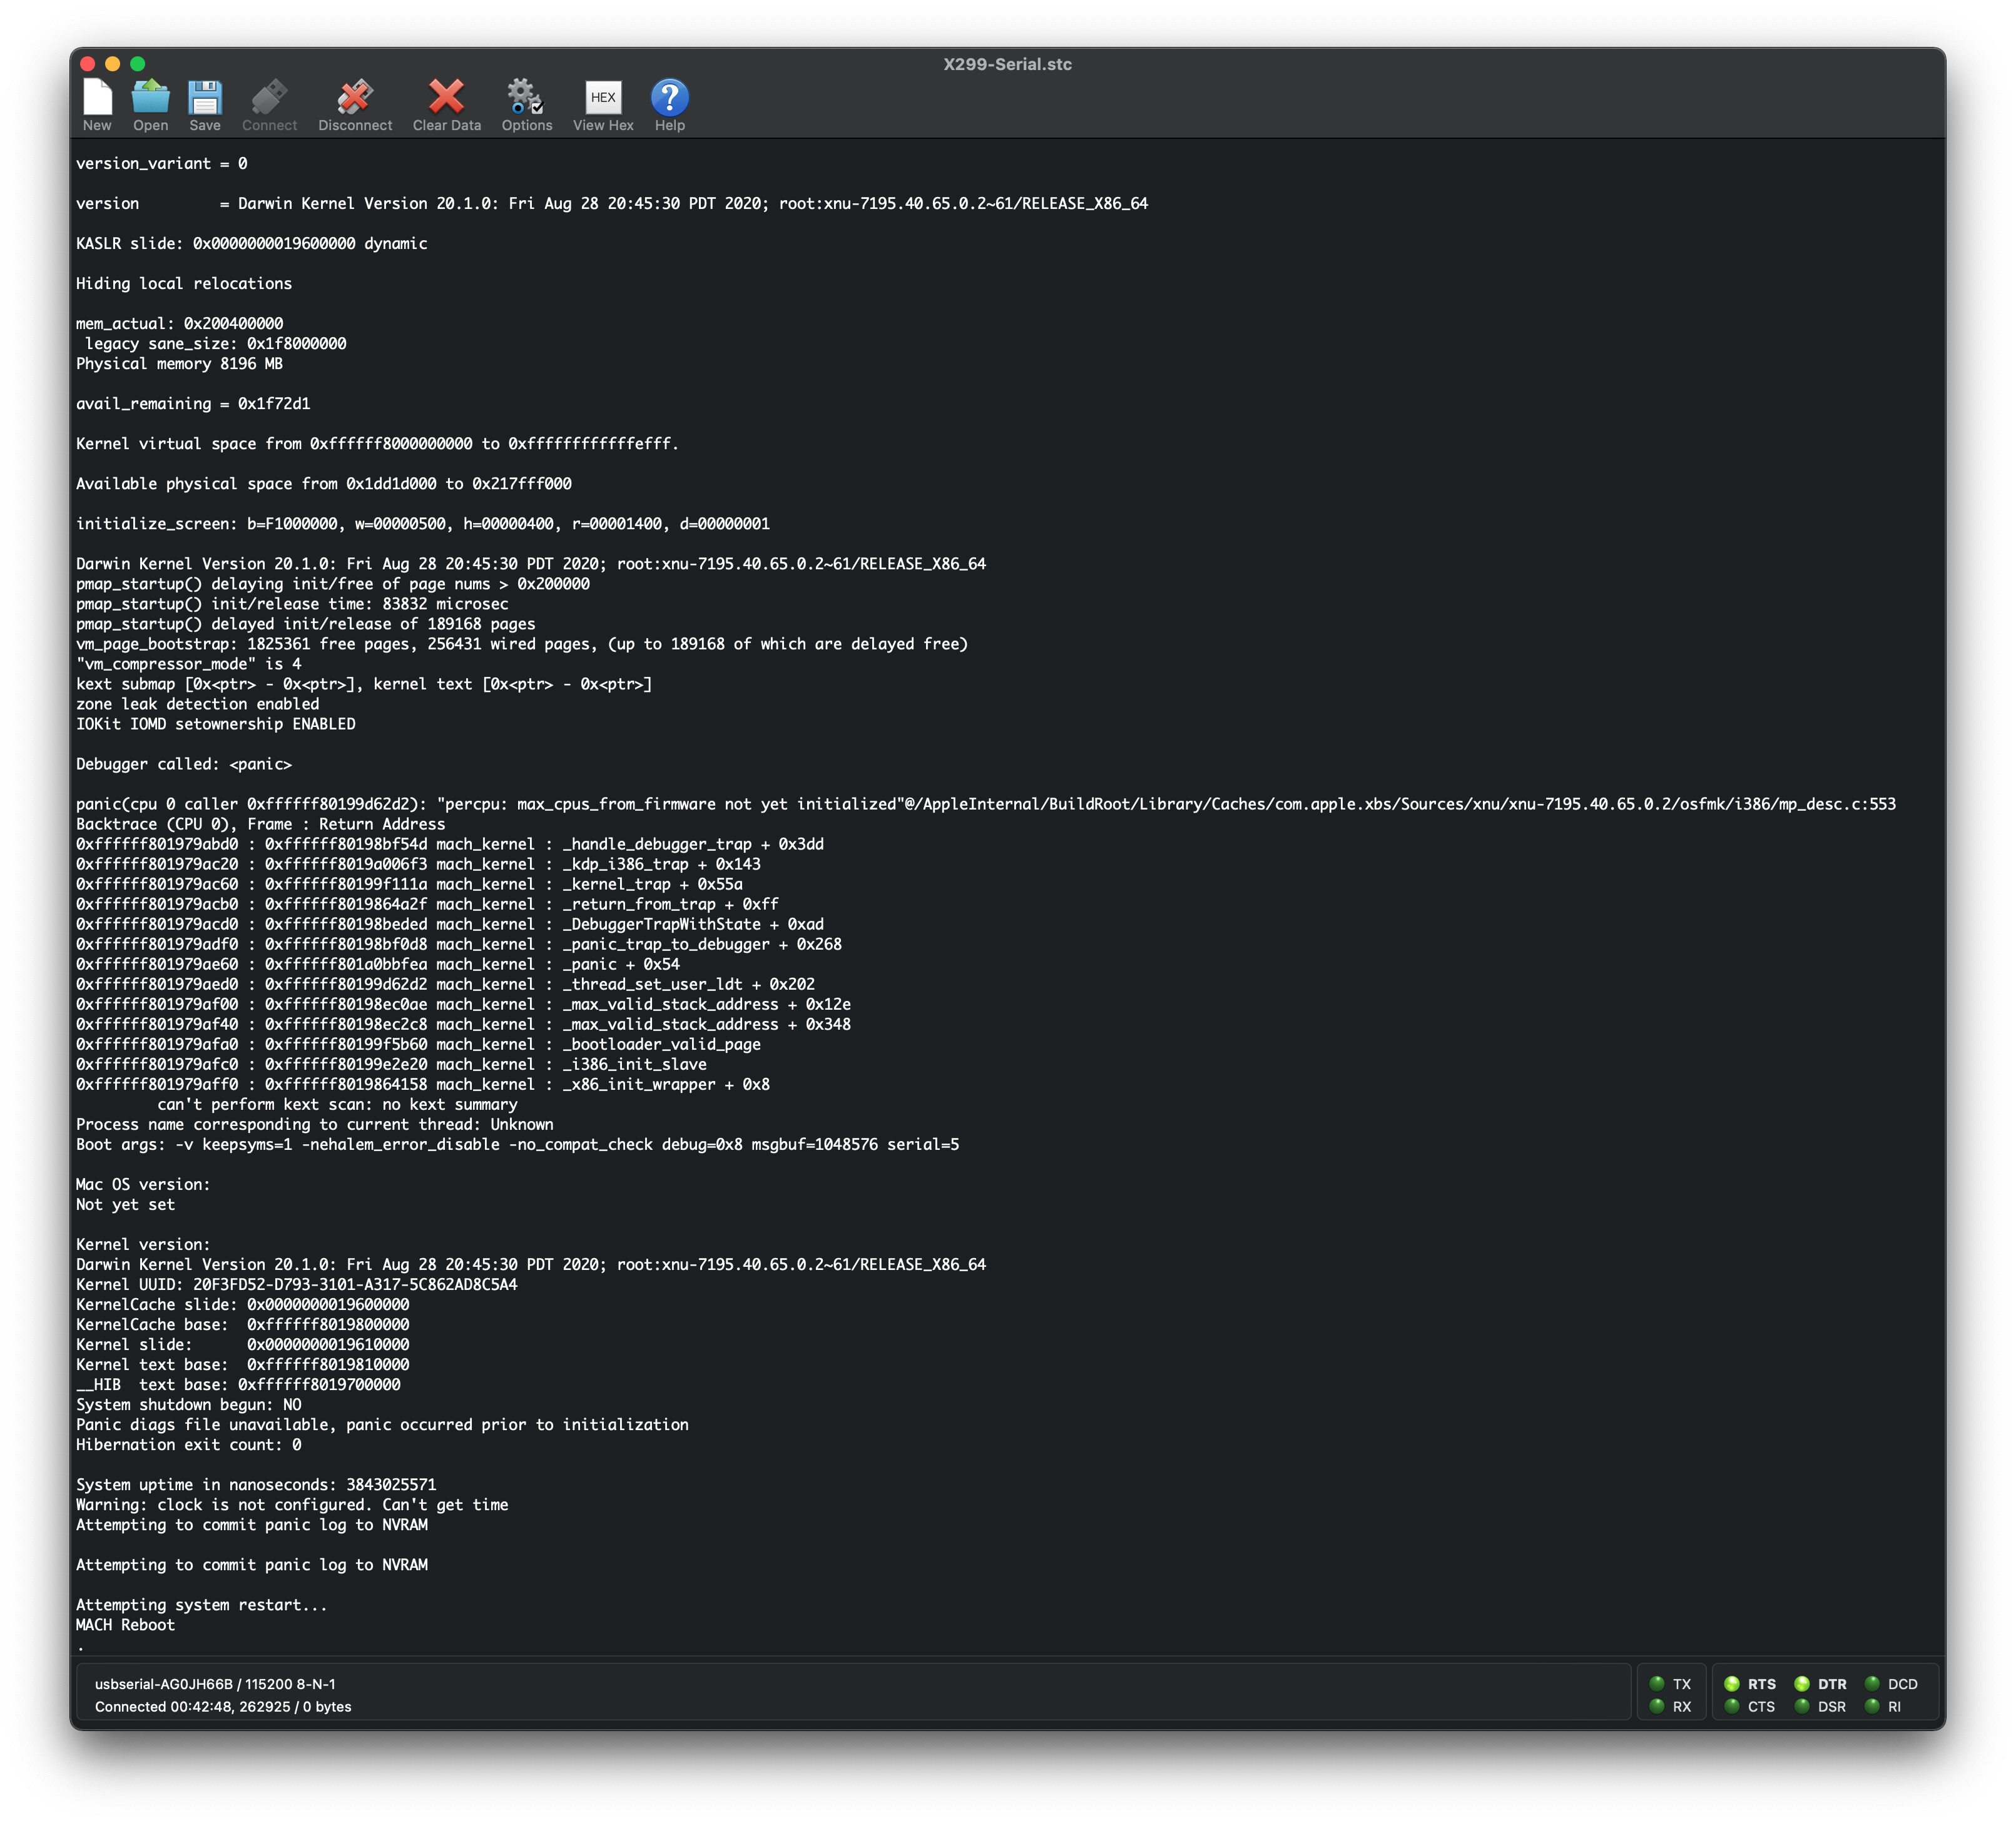
# Early Kernel Panic on max_cpus_from_firmware not yet initialized
If you receive an early kernel panic on max_cpus_from_firmware not yet initialized , this is due to the new acpi_count_enabled_logical_processors method added in macOS Big Sur’s kernel. To resolve, please ensure you’re on OpenCore 0.6.0 or newer with the AvoidRuntimeDefrag Quirk enabled.
- Note: Due to how early this kernel panic happens, you may only be able to log it either via serial or rebooting in a known working install of macOS and checking your panic logged in NVRAM.
- Most users will see this panic simply as [EB|#LOG:EXITBS:START]
Example Kernel Panic
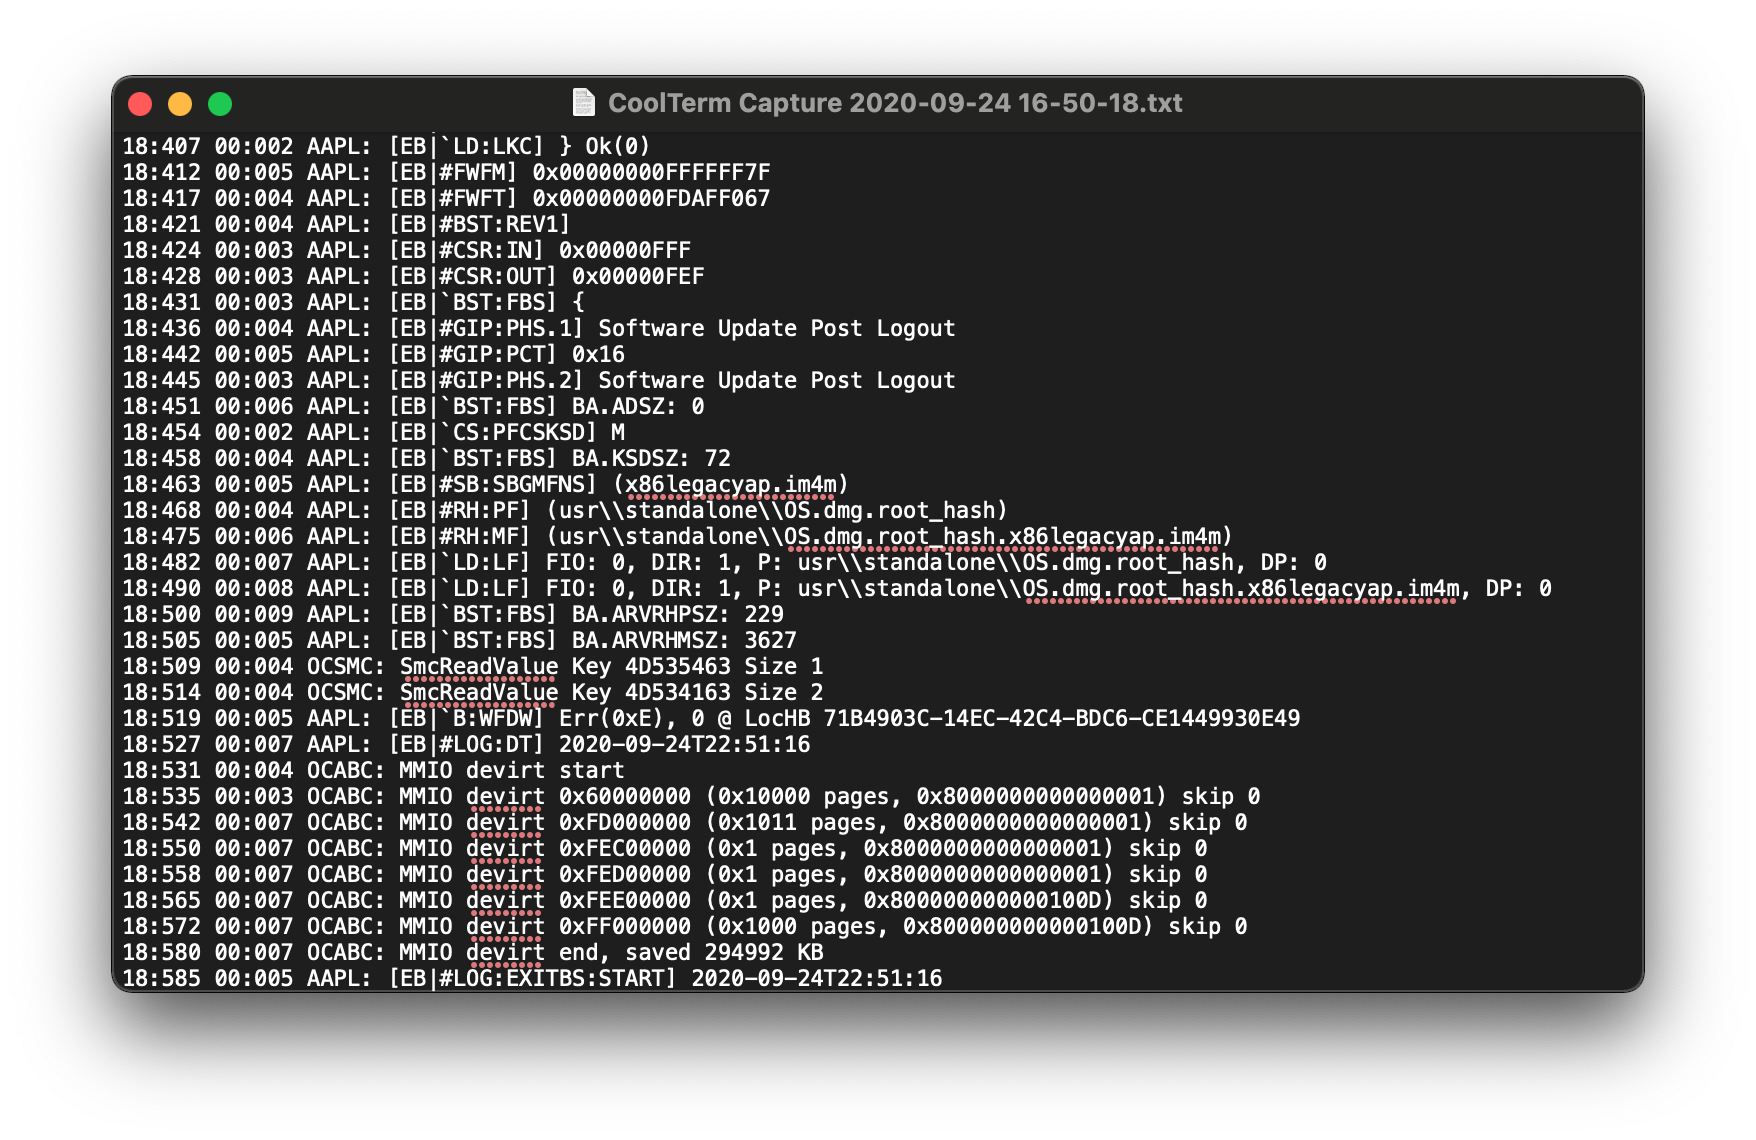
Via serial logging or NVRAM:
Legacy Edge Case
On certain hardware, mainly the HP DC7900, the kernel still can’t determine exactly how many threads your hardware supports. This will result in the aforementioned kernel panic and so we need to hard code the CPU core’s value.
To do this, Add the following patch(replacing the 04 from B8 04 00 00 00 C3 with the amount of CPU threads your hardware supports):
| Key | Type | Value |
|---|---|---|
| Base | String | _acpi_count_enabled_logical_processors |
| Count | Integer | 1 |
| Enabled | Boolean | True |
| Find | Data | |
| Identifier | String | Kernel |
| Limit | Integer | 0 |
| Mask | Data | |
| MaxKernel | String | |
| MinKernel | String | 20.0.0 |
| Replace | Data | B804000000C3 |
| ReplaceMask | Data | |
| Skip | Integer | 0 |
# Cannot update to newer versions of Big Sur
Generally there’s 2 main culprits:
# Broken Update Utility
Generally seen with every beta cycle, simply unenroll and enroll again:
Then check back with settings, and it should pop up. If not, run the following:
This should help kick the update utility back into gear. If you still have issues, check the Broken Seal section.
# Broken Seal
With Apple’s new snapshotting for the system drive, they now depend heavily on this for OS updates to apply correctly. So when a drove’s seal is broken, macOS will refuse to update the drive.
To verify yourself, check that Snapshot Sealed returns as YES:
If it returns Snapshot Sealed: Broken , then you’ll want to go through the following:
- Update to OpenCore 0.6.4 or newer
- Specifically commit ba10b5d
(opens new window) or newer is required
- Mainly for those who have tampered with the system volume
- See here how to revert: Rolling back APFS Snapshots
# Kernel Panic on Rooting from the live fs
This is due to issues around Secure Boot boot being enabled in Beta 10 with older versions of OpenCore. Simply update to 0.6.4 to resolve
# Asus Z97 and HEDT(ie. X99 and X299) failing Stage 2 Installation
With Big Sur, there’s a higher reliance on native NVRAM for installation otherwise the installer will get stuck in a reboot loop. To resolve this you’ll need to either:
- Install Big Sur on another machine, then transfer the drive
- Fix the motherboard’s NVRAM
- mainly applicable with Asus’s Z97 series
# Laptops kernel panicking on cannot perform kext scan
This is due to multiple copies of the same kext being in your kernel cache, and to be more specific having multiple copies of VoodooInput. Look over your Kernel -> Add and verify you only have 1 copy of VoodooInput enabled.
- Note: Both VoodooI2C and VoodooPS2 have a bundled copy of VoodooInput, which you disable is up to personal preference


