- Зашифруйте USB-накопитель с помощью BitLocker To Go в Windows 10
- Что такое BitLocker To Go?
- Используете ли вы BitLocker To Go для шифрования USB-накопителей?
- BitLocker Overview and Requirements FAQ
- How does BitLocker work?
- Does BitLocker support multifactor authentication?
- What are the BitLocker hardware and software requirements?
- Why are two partitions required? Why does the system drive have to be so large?
- Which Trusted Platform Modules (TPMs) does BitLocker support?
- How can I tell if a TPM is on my computer?
- Can I use BitLocker on an operating system drive without a TPM?
- How do I obtain BIOS support for the TPM on my computer?
- What credentials are required to use BitLocker?
- What is the recommended boot order for computers that are going to be BitLocker-protected?
- Overview of BitLocker Device Encryption in Windows 10
- Prepare for drive and file encryption
- TPM pre-provisioning
- Deploy hard drive encryption
- BitLocker Device Encryption
- Used Disk Space Only encryption
- Encrypted hard drive support
- Preboot information protection
- Manage passwords and PINs
- Configure Network Unlock
- Microsoft BitLocker Administration and Monitoring
Зашифруйте USB-накопитель с помощью BitLocker To Go в Windows 10
Карты памяти USB, а также внешние жесткие диски и флэш-накопители являются удобными средствами передачи данных. Они позволяют вам переносить что угодно, включая видео, документы, презентации, приложения, средства восстановления системы и даже операционные системы. К сожалению, тот факт, что они переносимы, также делает их склонными к потере, что может подвергнуть риску любую конфиденциальную информацию, которую вы сохранили на них. Чтобы защитить свои данные и себя, вы можете использовать BitLocker To Go , инструмент Windows, который шифрует ваши данные для предотвращения несанкционированного просмотра. Без вашего пароля, смарт-карты или ключа восстановления ваши данные не будут расшифрованы для любого, кто найдет (или похитит) ваш USB-накопитель. Вот как использовать BitLocker To Go в Windows 10 для шифрования любого USB-накопителя:
Что такое BitLocker To Go?
BitLocker To Go — это инструмент от Microsoft, основанный на BitLocker , который позволяет шифровать съемные диски. Другими словами, вы можете использовать его для шифрования и защиты данных, которые вы храните на USB-накопителях, внешних жестких дисках и твердотельных дисках, SD-картах и любых других типах портативных накопителей. BitLocker To Go может шифровать съемные диски с данными, отформатированные с использованием файловых систем NTFS, FAT32, FAT16 или exFAT.
BitLocker To Go доступен в выпусках Windows 10 Pro, Enterprise и Education, но его нет в Windows 10 Home. Если вы не знаете, какую версию Windows 10 вы используете, вот как проверить версию Windows 10, сборку ОС, редакцию или тип.
Как использовать BitLocker To Go в Windows 10 для шифрования USB-накопителя
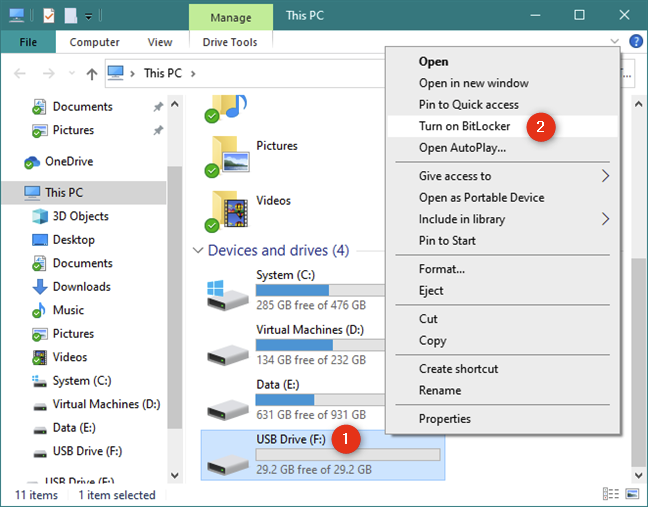
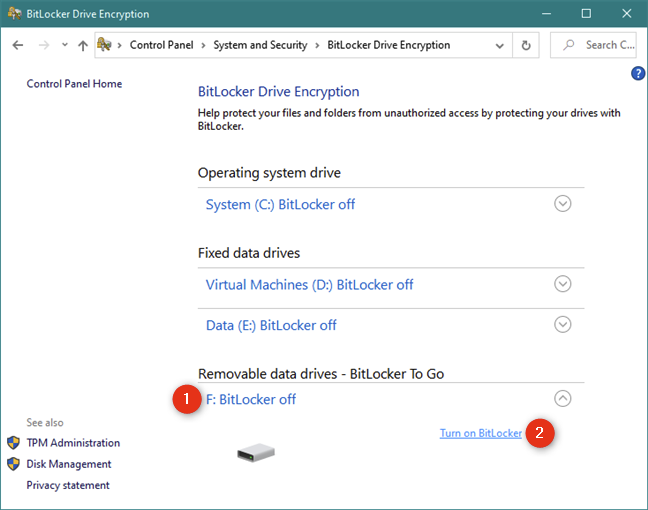
Чтобы зашифровать USB-диск в Windows 10, необходимо запустить мастер шифрования диска BitLocker , который можно открыть либо из проводника, либо из панели управления. Если вы решите использовать Проводник, перейдите на этот компьютер, щелкните правой кнопкой мыши или нажмите и удерживайте нажатой на USB-накопителе, который вы хотите зашифровать, и выберите «Включить BitLocker».
Если вы предпочитаете использовать панель управления , откройте ее , перейдите в раздел «Система и безопасность», а затем нажмите или нажмите на «Шифрование диска BitLocker».
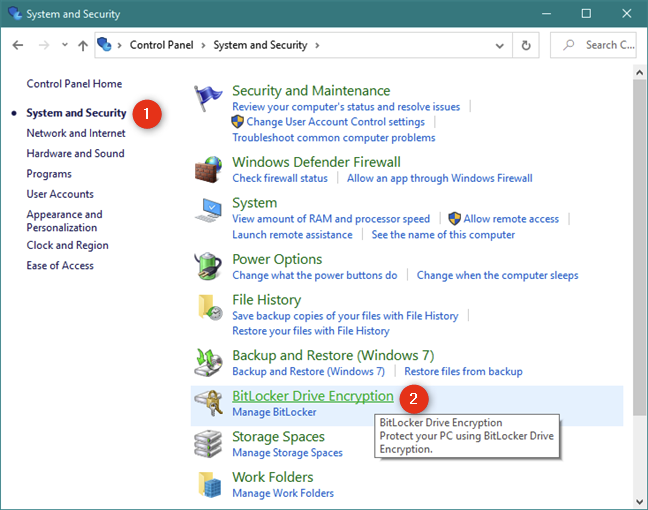
В окне «Шифрование диска BitLocker» щелкните или нажмите «Включить BitLocker» рядом со съемным USB-накопителем, который необходимо зашифровать.
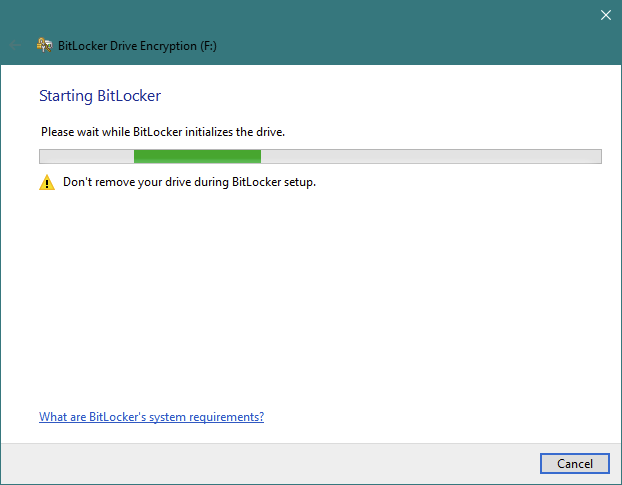
Независимо от того, как вы решили запустить мастер шифрования диска BitLocker — через проводник или из панели управления — теперь он открыт. Первое, что он делает, это просит вас: «Пожалуйста, подождите, пока BitLocker инициализирует диск».
В зависимости от скорости вашего ПК с Windows 10 и вашего USB-накопителя, это может занять несколько минут. Будьте осторожны, чтобы не отключить съемный диск во время этого шага. В противном случае данные на нем могут быть повреждены.
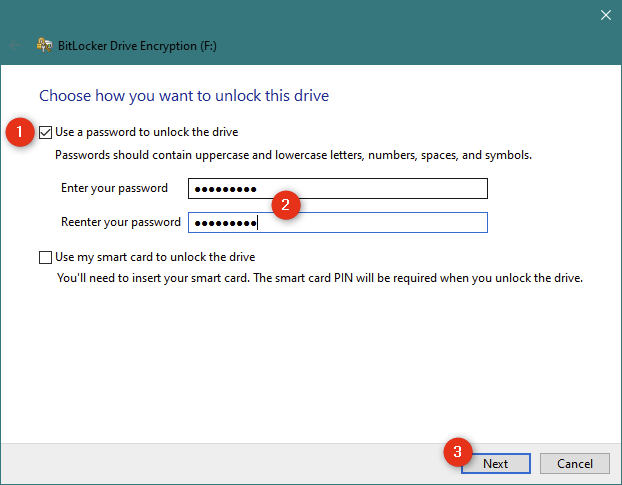
После того, как BitLocker инициализирует USB-накопитель, вы можете «выбрать, как вы хотите […] разблокировать его после его шифрования. Вы можете использовать либо пароль, либо смарт-карту. Поскольку большинство людей не владеют смарт-картами (которые в основном используются в компаниях), вам следует выбрать «Использовать пароль для разблокировки диска». После выбора этой опции введите пароль, который вы хотите использовать, и подтвердите его. Затем нажмите Далее.
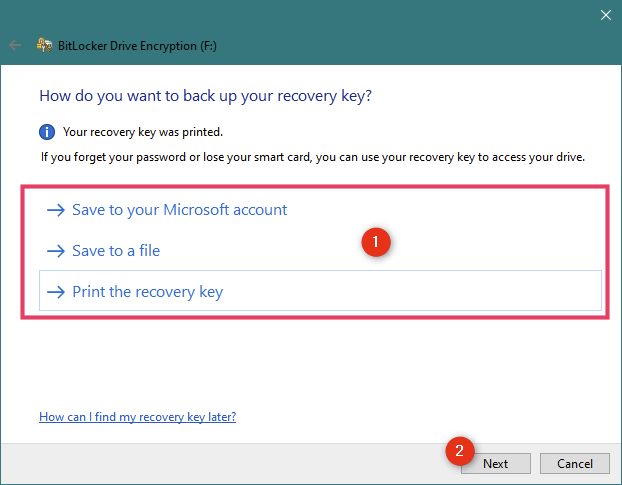
BitLocker требует от вас выбрать место для резервного копирования ключа восстановления для зашифрованного USB-накопителя. Вы можете использовать этот ключ для восстановления данных на съемном диске, если вы забудете пароль или потеряете смарт-карту, выбранную на предыдущем шаге. Без этого ваши данные будут потеряны навсегда. Вы можете выбрать:
- сохраните файл на вашем компьютере с Windows 10 — BitLocker генерирует текстовый файл и просит вас выбрать, где его сохранить
- распечатайте его и сохраните для своих записей — распечатайте страницу с уникальным идентификатором для вашего зашифрованного устройства и уникальным ключом восстановления
- сохраните ключ восстановления в своей учетной записи Microsoft — загрузите в свою учетную запись Microsoft резервную копию ключа BitLocker, которую можно найти по этой ссылке
Мы рекомендуем использовать все параметры, чтобы не потерять ключ восстановления. Затем нажмите Далее.
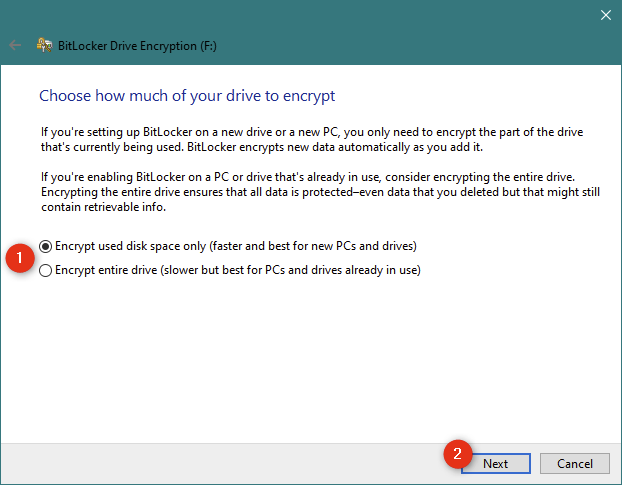
Выберите, хотите ли вы зашифровать весь USB-накопитель или только объем памяти, используемый файлами на нем. Как вы можете видеть на следующем скриншоте, Microsoft рекомендует:
- «шифровать только дисковое пространство (быстрее)» — если вы используете новый съемный диск без данных на нем
- «зашифровать весь диск (медленнее)» — если на нем уже хранятся данные.
После того, как вы сделаете свой выбор, нажмите Далее.
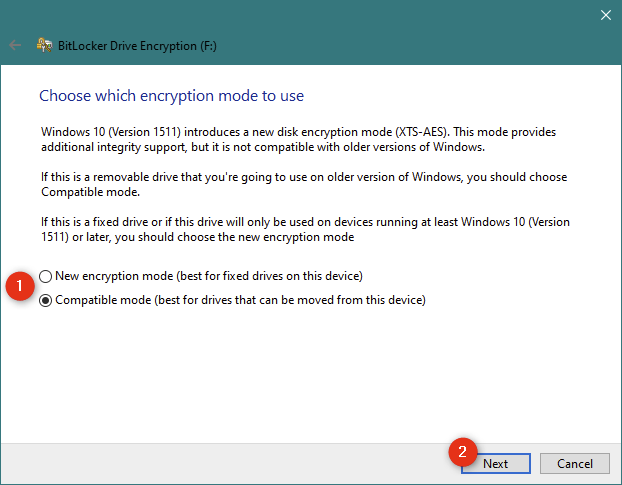
Затем Windows 10 попросит вас выбрать тип шифрования BitLocker, который вы предпочитаете использовать. Вы можете выбрать между:
- Новый режим шифрования , который является более безопасным режимом шифрования и называется XTS-AES, но несовместим со старыми версиями Windows 10 (до версии 1511, выпущенной в ноябре 2015 года).
- Режим совместимости — это традиционный режим шифрования BitLocker , совместимый с другими (более старыми) версиями Windows. Выберите этот режим, если вы хотите использовать зашифрованный USB-накопитель на компьютерах и устройствах под управлением Windows 7 или Windows 8.1.
После того, как вы сделали свой выбор, нажмите Далее.
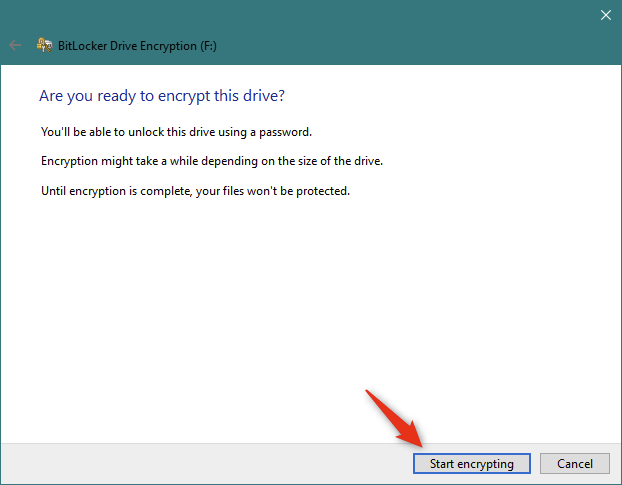
На данный момент вам остается только зашифровать диск с помощью BitLocker To Go. Нажмите на Начать шифрование.
Шифрование USB-накопителя с помощью BitLocker To Go , особенно большого, может занять некоторое время.
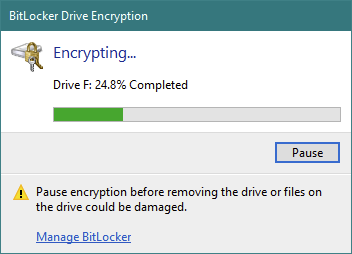
ПРИМЕЧАНИЕ. Если вам необходимо извлечь диск во время процесса шифрования, нажмите «Пауза» в окне «Шифрование диска BitLocker», прежде чем продолжить, чтобы не повредить данные на нем. Когда вы будете готовы возобновить процесс шифрования, вставьте съемный диск обратно в один из USB-портов ПК с Windows 10. Введите пароль диска, и BitLocker To Go продолжает шифровать диск USB с того места, где вы остановились.
Когда ваш диск полностью зашифрован, вы получите быстрое всплывающее окно, которое необходимо закрыть, чтобы завершить процесс.
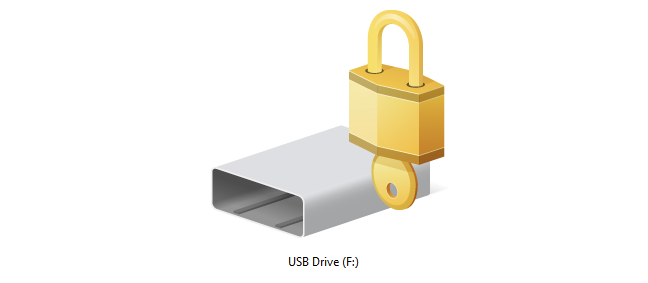
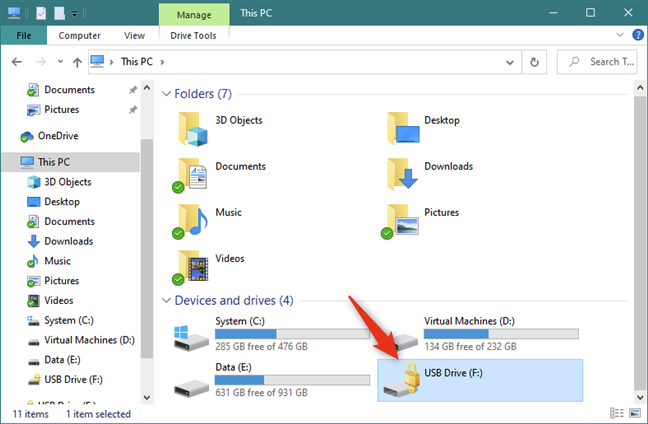
Ваш USB-накопитель теперь зашифрован с помощью BitLocker To Go и, таким образом, защищен от несанкционированного доступа. Отныне значок USB-накопителя в проводнике отличается. Он имеет небольшой замок, чтобы подчеркнуть тот факт, что он зашифрован.
Если позже вы захотите изменить настройки BitLocker To Go на своем зашифрованном USB-накопителе, прочитайте это руководство: Управление зашифрованной флэш-памятью BitLocker To Go. В нем мы расскажем о том, как изменить пароль BitLocker на диске и как включить или отключить функцию автоматической разблокировки BitLocker в Windows 10.
Используете ли вы BitLocker To Go для шифрования USB-накопителей?
Если вы работаете с конфиденциальными или личными данными, вам следует рассмотреть возможность использования BitLocker To Go . Он предлагает один из лучших и самых простых способов шифрования USB-накопителей, флэш-накопителей и любых других USB-накопителей в Windows 10. Прежде чем закрыть эту статью, дайте нам знать, используете ли вы BitLocker To Go в Windows 10 и каков ваш опыт с шифрованием съемных носителей.
BitLocker Overview and Requirements FAQ
Applies to
How does BitLocker work?
How BitLocker works with operating system drives
You can use BitLocker to mitigate unauthorized data access on lost or stolen computers by encrypting all user files and system files on the operating system drive, including the swap files and hibernation files, and checking the integrity of early boot components and boot configuration data.
How BitLocker works with fixed and removable data drives
You can use BitLocker to encrypt the entire contents of a data drive. You can use Group Policy to require that BitLocker be enabled on a drive before the computer can write data to the drive. BitLocker can be configured with a variety of unlock methods for data drives, and a data drive supports multiple unlock methods.
Does BitLocker support multifactor authentication?
Yes, BitLocker supports multifactor authentication for operating system drives. If you enable BitLocker on a computer that has a TPM versionВ 1.2 or later, you can use additional forms of authentication with the TPM protection.
What are the BitLocker hardware and software requirements?
Dynamic disks are not supported by BitLocker. Dynamic data volumes will not be displayed in the Control Panel. Although the operating system volume will always be displayed in the Control Panel, regardless of whether it is a Dynamic disk, if it is a dynamic disk it cannot be protected by BitLocker.
Why are two partitions required? Why does the system drive have to be so large?
Two partitions are required to run BitLocker because pre-startup authentication and system integrity verification must occur on a separate partition from the encrypted operating system drive. This configuration helps protect the operating system and the information in the encrypted drive.
Which Trusted Platform Modules (TPMs) does BitLocker support?
BitLocker supports TPM version 1.2 or higher. BitLocker support for TPM 2.0 requires Unified Extensible Firmware Interface (UEFI) for the device.
TPM 2.0 is not supported in Legacy and CSM Modes of the BIOS. Devices with TPM 2.0 must have their BIOS mode configured as Native UEFI only. The Legacy and Compatibility Support Module (CSM) options must be disabled. For added security Enable the Secure Boot feature.
Installed Operating System on hardware in legacy mode will stop the OS from booting when the BIOS mode is changed to UEFI. Use the tool MBR2GPT before changing the BIOS mode which will prepare the OS and the disk to support UEFI.
How can I tell if a TPM is on my computer?
Beginning with Windows 10, version 1803, you can check TPM status in Windows Defender Security Center > Device Security > Security processor details. In previous versions of Windows, open the TPM MMC console (tpm.msc) and look under the Status heading.
Can I use BitLocker on an operating system drive without a TPM?
Yes, you can enable BitLocker on an operating system drive without a TPM version 1.2 or higher, if the BIOS or UEFI firmware has the ability to read from a USB flash drive in the boot environment. This is because BitLocker will not unlock the protected drive until BitLocker’s own volume master key is first released by either the computer’s TPM or by a USB flash drive containing the BitLocker startup key for that computer. However, computers without TPMs will not be able to use the system integrity verification that BitLocker can also provide. To help determine whether a computer can read from a USB device during the boot process, use the BitLocker system check as part of the BitLocker setup process. This system check performs tests to confirm that the computer can properly read from the USB devices at the appropriate time and that the computer meets other BitLocker requirements.
How do I obtain BIOS support for the TPM on my computer?
Contact the computer manufacturer to request a Trusted Computing Group (TCG)-compliant BIOS or UEFI boot firmware that meets the following requirements:
- It is compliant with the TCG standards for a client computer.
- It has a secure update mechanism to help prevent a malicious BIOS or boot firmware from being installed on the computer.
What credentials are required to use BitLocker?
To turn on, turn off, or change configurations of BitLocker on operating system and fixed data drives, membership in the local Administrators group is required. Standard users can turn on, turn off, or change configurations of BitLocker on removable data drives.
What is the recommended boot order for computers that are going to be BitLocker-protected?
You should configure the startup options of your computer to have the hard disk drive first in the boot order, before any other drives such as CD/DVD drives or USB drives. If the hard disk is not first and you typically boot from hard disk, then a boot order change may be detected or assumed when removable media is found during boot.В The boot order typically affects the system measurement that is verified by BitLocker and a change in boot order will cause you to be prompted for your BitLocker recovery key. For the same reason, if you have a laptop with a docking station, ensure that the hard disk drive is first in the boot order both when docked and undocked.В
Overview of BitLocker Device Encryption in Windows 10
Applies to
This topic explains how BitLocker Device Encryption can help protect data on devices running Windows 10. For a general overview and list of topics about BitLocker, see BitLocker.
When users travel, their organization’s confidential data goes with them. Wherever confidential data is stored, it must be protected against unauthorized access. Windows has a long history of providing at-rest data-protection solutions that guard against nefarious attackers, beginning with the Encrypting File System in the Windows 2000 operating system. More recently, BitLocker has provided encryption for full drives and portable drives. Windows consistently improves data protection by improving existing options and by providing new strategies.
Table 2 lists specific data-protection concerns and how they are addressed in WindowsВ 10 and WindowsВ 7.
Table 2. Data Protection in WindowsВ 10 and WindowsВ 7
| WindowsВ 7 | WindowsВ 10 |
|---|---|
| When BitLocker is used with a PIN to protect startup, PCs such as kiosks cannot be restarted remotely. | Modern Windows devices are increasingly protected with BitLocker Device Encryption out of the box and support SSO to seamlessly protect the BitLocker encryption keys from cold boot attacks. Network Unlock allows PCs to start automatically when connected to the internal network. |
| When BitLocker is enabled, the provisioning process can take several hours. | BitLocker pre-provisioning, encrypting hard drives, and Used Space Only encryption allow administrators to enable BitLocker quickly on new computers. |
| There is no support for using BitLocker with self-encrypting drives (SEDs). | BitLocker supports offloading encryption to encrypted hard drives. |
| Administrators have to use separate tools to manage encrypted hard drives. | BitLocker supports encrypted hard drives with onboard encryption hardware built in, which allows administrators to use the familiar BitLocker administrative tools to manage them. |
| Encrypting a new flash drive can take more than 20 minutes. | Used Space Only encryption in BitLocker To Go allows users to encrypt removable data drives in seconds. |
| BitLocker could require users to enter a recovery key when system configuration changes occur. | BitLocker requires the user to enter a recovery key only when disk corruption occurs or when he or she loses the PIN or password. |
| Users need to enter a PIN to start the PC, and then their password to sign in to Windows. | Modern Windows devices are increasingly protected with BitLocker Device Encryption out of the box and support SSO to help protect the BitLocker encryption keys from cold boot attacks. |
Prepare for drive and file encryption
The best type of security measures are transparent to the user during implementation and use. Every time there is a possible delay or difficulty because of a security feature, there is strong likelihood that users will try to bypass security. This situation is especially true for data protection, and that’s a scenario that organizations need to avoid. Whether you’re planning to encrypt entire volumes, removable devices, or individual files, Windows 10 meets your needs by providing streamlined, usable solutions. In fact, you can take several steps in advance to prepare for data encryption and make the deployment quick and smooth.
TPM pre-provisioning
In WindowsВ 7, preparing the TPM for use offered a couple of challenges:
- You can turn on the TPM in the BIOS, which requires someone to either go into the BIOS settings to turn it on or to install a driver to turn it on from within Windows.
- When you enable the TPM, it may require one or more restarts.
Basically, it was a big hassle. If IT staff were provisioning new PCs, they could handle all of this, but if you wanted to add BitLocker to devices that were already in users’ hands, those users would have struggled with the technical challenges and would either call IT for support or simply leave BitLocker disabled.
Microsoft includes instrumentation in WindowsВ 10 that enables the operating system to fully manage the TPM. There is no need to go into the BIOS, and all scenarios that required a restart have been eliminated.
Deploy hard drive encryption
BitLocker is capable of encrypting entire hard drives, including both system and data drives. BitLocker pre-provisioning can drastically reduce the time required to provision new PCs with BitLocker enabled. With WindowsВ 10, administrators can turn on BitLocker and the TPM from within the Windows Preinstallation Environment before they install Windows or as part of an automated deployment task sequence without any user interaction. Combined with Used Disk Space Only encryption and a mostly empty drive (because Windows is not yet installed), it takes only a few seconds to enable BitLocker. With earlier versions of Windows, administrators had to enable BitLocker after Windows had been installed. Although this process could be automated, BitLocker would need to encrypt the entire drive, a process that could take anywhere from several hours to more than a day depending on drive size and performance, which significantly delayed deployment. Microsoft has improved this process through multiple features in WindowsВ 10.
BitLocker Device Encryption
Beginning in WindowsВ 8.1, Windows automatically enables BitLocker Device Encryption on devices that support Modern Standby. With WindowsВ 10, Microsoft offers BitLocker Device Encryption support on a much broader range of devices, including those that are Modern Standby, and devices that run Windows 10 Home edition.
Microsoft expects that most devices in the future will pass the testing requirements, which makes BitLocker Device Encryption pervasive across modern Windows devices. BitLocker Device Encryption further protects the system by transparently implementing device-wide data encryption.
Unlike a standard BitLocker implementation, BitLocker Device Encryption is enabled automatically so that the device is always protected. The following list outlines how this happens:
- When a clean installation of WindowsВ 10 is completed and the out-of-box experience is finished, the computer is prepared for first use. As part of this preparation, BitLocker Device Encryption is initialized on the operating system drive and fixed data drives on the computer with a clear key (this is the equivalent of standard BitLocker suspended state). In this state, the drive is shown with a warning icon in Windows Explorer. The yellow warning icon is removed after the TPM protector is created and the recovery key is backed up, as explained in the following bullet points.
- If the device is not domain joined, a Microsoft account that has been granted administrative privileges on the device is required. When the administrator uses a Microsoft account to sign in, the clear key is removed, a recovery key is uploaded to the online Microsoft account, and a TPM protector is created. Should a device require the recovery key, the user will be guided to use an alternate device and navigate to a recovery key access URL to retrieve the recovery key by using his or her Microsoft account credentials.
- If the user uses a domain account to sign in, the clear key is not removed until the user joins the device to a domain and the recovery key is successfully backed up to Active Directory Domain Services (AD DS). You must enable the Computer Configuration\Administrative Templates\Windows Components\BitLocker Drive Encryption\Operating System Drives Group Policy setting, and select the Do not enable BitLocker until recovery information is stored in AD DS for operating system drives option. With this configuration, the recovery password is created automatically when the computer joins the domain, and then the recovery key is backed up to AD DS, the TPM protector is created, and the clear key is removed.
- Similar to signing in with a domain account, the clear key is removed when the user logs on to an Azure AD account on the device. As described in the bullet point above, the recovery password is created automatically when the user authenticates to Azure AD. Then, the recovery key is backed up to Azure AD, the TPM protector is created, and the clear key is removed.
Microsoft recommends that BitLocker Device Encryption be enabled on any systems that support it, but the automatic BitLocker Device Encryption process can be prevented by changing the following registry setting:
- Subkey: HKEY_LOCAL_MACHINE\SYSTEM\CurrentControlSet\Control\BitLocker
- Value: PreventDeviceEncryption equal to True (1)
- Type: REG_DWORD
Administrators can manage domain-joined devices that have BitLocker Device Encryption enabled through Microsoft BitLocker Administration and Monitoring (MBAM). In this case, BitLocker Device Encryption automatically makes additional BitLocker options available. No conversion or encryption is required, and MBAM can manage the full BitLocker policy set if any configuration changes are required.
BitLocker Device Encryption uses the XTS-AES 128-bit encryption method. In case you need to use a different encryption method and/or cipher strength, the device must be configured and decrypted (if already encrypted) first. After that, different BitLocker settings can be applied.
Used Disk Space Only encryption
BitLocker in earlier Windows versions could take a long time to encrypt a drive, because it encrypted every byte on the volume (including parts that did not have data). That is still the most secure way to encrypt a drive, especially if a drive has previously contained confidential data that has since been moved or deleted. In that case, traces of the confidential data could remain on portions of the drive marked as unused. But why encrypt a new drive when you can simply encrypt the data as it is being written? To reduce encryption time, BitLocker in WindowsВ 10 lets users choose to encrypt just their data. Depending on the amount of data on the drive, this option can reduce encryption time by more than 99 percent. Exercise caution when encrypting only used space on an existing volume on which confidential data may have already been stored in an unencrypted state, however, because those sectors can be recovered through disk-recovery tools until they are overwritten by new encrypted data. In contrast, encrypting only used space on a brand-new volume can significantly decrease deployment time without the security risk because all new data will be encrypted as it is written to the disk.
Encrypted hard drive support
SEDs have been available for years, but Microsoft couldn’t support their use with some earlier versions of Windows because the drives lacked important key management features. Microsoft worked with storage vendors to improve the hardware capabilities, and now BitLocker supports the next generation of SEDs, which are called encrypted hard drives. Encrypted hard drives provide onboard cryptographic capabilities to encrypt data on drives, which improves both drive and system performance by offloading cryptographic calculations from the PC’s processor to the drive itself and rapidly encrypting the drive by using dedicated, purpose-built hardware. If you plan to use whole-drive encryption with Windows 10, Microsoft recommends that you investigate hard drive manufacturers and models to determine whether any of their encrypted hard drives meet your security and budget requirements. For more information about encrypted hard drives, see Encrypted Hard Drive.
Preboot information protection
An effective implementation of information protection, like most security controls, considers usability as well as security. Users typically prefer a simple security experience. In fact, the more transparent a security solution becomes, the more likely users are to conform to it. It is crucial that organizations protect information on their PCs regardless of the state of the computer or the intent of users. This protection should not be cumbersome to users. One undesirable and previously commonplace situation is when the user is prompted for input during preboot, and then again during Windows logon. Challenging users for input more than once should be avoided. Windows 10 can enable a true SSO experience from the preboot environment on modern devices and in some cases even on older devices when robust information protection configurations are in place. The TPM in isolation is able to securely protect the BitLocker encryption key while it is at rest, and it can securely unlock the operating system drive. When the key is in use and thus in memory, a combination of hardware and Windows capabilities can secure the key and prevent unauthorized access through cold-boot attacks. Although other countermeasures like PIN-based unlock are available, they are not as user-friendly; depending on the devices’ configuration they may not offer additional security when it comes to key protection. For more information, see BitLocker Countermeasures.
Manage passwords and PINs
When BitLocker is enabled on a system drive and the PC has a TPM, you can choose to require that users type a PIN before BitLocker will unlock the drive. Such a PIN requirement can prevent an attacker who has physical access to a PC from even getting to the Windows logon, which makes it virtually impossible for the attacker to access or modify user data and system files.
Requiring a PIN at startup is a useful security feature because it acts as a second authentication factor (a second “something you know”). This configuration comes with some costs, however. One of the most significant is the need to change the PIN regularly. In enterprises that used BitLocker with Windows 7 and the Windows Vista operating system, users had to contact systems administrators to update their BitLocker PIN or password. This requirement not only increased management costs but made users less willing to change their BitLocker PIN or password on a regular basis. Windows 10 users can update their BitLocker PINs and passwords themselves, without administrator credentials. Not only will this feature reduce support costs, but it could improve security, too, because it encourages users to change their PINs and passwords more often. In addition, Modern Standby devices do not require a PIN for startup: They are designed to start infrequently and have other mitigations in place that further reduce the attack surface of the system. For more information about how startup security works and the countermeasures that Windows 10 provides, see Protect BitLocker from pre-boot attacks.
Configure Network Unlock
Some organizations have location-specific data security requirements. This is most common in environments where high-value data is stored on PCs. The network environment may provide crucial data protection and enforce mandatory authentication; therefore, policy states that those PCs should not leave the building or be disconnected from the corporate network. Safeguards like physical security locks and geofencing may help enforce this policy as reactive controls. Beyond these, a proactive security control that grants data access only when the PC is connected to the corporate network is necessary.
Network Unlock enables BitLocker-protected PCs to start automatically when connected to a wired corporate network on which Windows Deployment Services runs. Anytime the PC is not connected to the corporate network, a user must type a PIN to unlock the drive (if PIN-based unlock is enabled). Network Unlock requires the following infrastructure:
- Client PCs that have Unified Extensible Firmware Interface (UEFI) firmware version 2.3.1 or later, which supports Dynamic Host Configuration Protocol (DHCP)
- A server running at least Windows Server 2012 with the Windows Deployment Services role
- A server with the DHCP server role installed
For more information about how to configure Network Unlock, see BitLocker: How to enable Network Unlock.
Microsoft BitLocker Administration and Monitoring
Part of the Microsoft Desktop Optimization Pack, MBAM makes it easier to manage and support BitLocker and BitLocker To Go. MBAM 2.5 with Service Pack 1, the latest version, has the following key features:
- Enables administrators to automate the process of encrypting volumes on client computers across the enterprise.
- Enables security officers to quickly determine the compliance state of individual computers or even of the enterprise itself.
- Provides centralized reporting and hardware management with Microsoft Microsoft Endpoint Configuration Manager.
- Reduces the workload on the help desk to assist end users with BitLocker recovery requests.
- Enables end users to recover encrypted devices independently by using the Self-Service Portal.
- Enables security officers to easily audit access to recovery key information.
- Empowers Windows Enterprise users to continue working anywhere with the assurance that their corporate data is protected.
- Enforces the BitLocker encryption policy options that you set for your enterprise.
- Integrates with existing management tools, such as Microsoft Endpoint Configuration Manager.
- Offers an IT-customizable recovery user experience.
- Supports WindowsВ 10.
For more information about MBAM, including how to obtain it, see Microsoft BitLocker Administration and Monitoring on the MDOP TechCenter.


