- Block Windows 10 Upgrade using GWX Control Panel
- Как открыть панель управления в Windows (в т.ч. в Windows 10, где убрали ссылки на нее)
- Как войти в панель управления / Control Panel
- Способ 1: универсальный (для Windows 7, 8, 10)
- Способ 2: через Power Shell / Командную строку (универсальный)
- Способ 3: с помощью созданного ярлыка на рабочем столе
- Способ 4: с помощью поиска Windows
- Способ 5: через параметры отображения значков рабочего стола (Windows 10)
- How to Block Access to Windows 10 Settings and Control Panel
- Disable all Control Panel and Settings Access
- Disable Control Panel for Windows 10 Home Users
- Hide Specific Control Panel Items
- Summary
Block Windows 10 Upgrade using GWX Control Panel
 I’ve been asked many times by Windows 7 and Windows 8.1 users, how to block an unsolicited upgrade to Windows 10. At least I found a third party tool, that assist users to block a Windows 10 upgrade on Windows 7 / Windows 8.1.
Only owners of Windows 7/8.1 Professional and Enterprise (or Windows 7 Ultimate) are able to use group policies to block Windows 10 upgrade. For users of Windows 7 Home Premium or Windows 8 core, there is no easy solution available. You need to do some registry hacks, because Microsoft refuses till now, to give us a reliable Windows 10 upgrade blocker tool.
Gladly somebody wrote GWX Control Panel, a tool to do the registry stuff for you and block Windows 10 upgrade. The author of GWX Control Panel just released version 1.4, which was enhanced to hide Get Windows 10-App, block Windows 10 upgrade in Windows Update and also wipe downloaded files.

GWX Control Panel may downloaded for free from this web site. After downloading, the tool can be used without installing – it only needs administrator rights. Then a window (shown above) allows to switch each option on and off. The screenshot shown above was taken on a Windows 8.1 Core system, where I have blocked Windows 10 upgrade, using the .reg-file described here Windows 10: Upgrade per .reg-Datei blocken in my German blog. (via)
Как открыть панель управления в Windows (в т.ч. в Windows 10, где убрали ссылки на нее)

Недавно заметил, что по клику правой кнопки мышки по ПУСК, больше не появляется привычного меню: в нем нет ссылки на командную строку и на панель управления (что в первую очередь нужно!). В самом меню ПУСК — тоже нет на нее ссылки. Как ее открыть-то? Может быть я подцепил вирус?
PS Установлена Windows 10, последняя обновленная версия на сегодняшний день (то бишь на 20 мая 2018г.).
Доброго времени суток!
Да, похоже от этой классической панели разработчики Windows хотят со временем отказаться совсем.
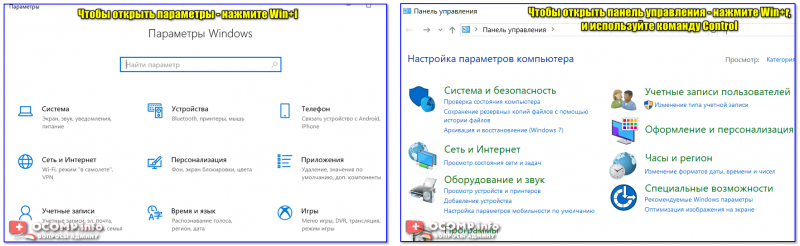
Новые параметры в Windows 10 и классическая Control Panel / Кликабельно
Но на сегодняшний день, всё же, в нее пока еще достаточно часто требуется заходить для изменения множества параметров и настроек. В этой справочной статье покажу несколько способов, как ее можно открыть (часть из способов универсальны и работают в разных ОС Windows).

Как войти в панель управления / Control Panel
Способ 1: универсальный (для Windows 7, 8, 10)
- нажмите сочетание кнопок Win+R (должно появиться окно «Выполнить» в углу экрана);
- впишите команду » Control » (без кавычек, см. на скрин ниже);
- нажмите OK или Enter. Собственно, и всё, всего 3 действия!

Win+R — открываем панель управления (команда control)
Кстати, хочу обратить внимание, что вместо команды » Control » можно использовать и » Control Panel » (полный вариант).
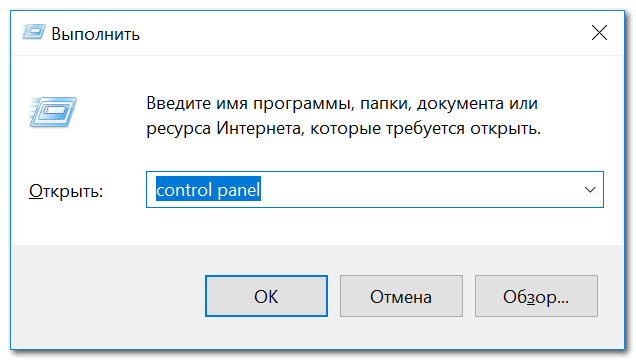
Control Panel — так тоже допускается
Также есть еще один альтернативный вариант:
- нажмите сочетание клавиш Ctrl+Shift+Esc (или Ctrl+Alt+Del ) — нам нужно открыть диспетчер задач;
- далее нажмите по меню «Файл/Новая задача»;
- в строку «Открыть» впишите команду «Control Panel» (пример см. ниже).
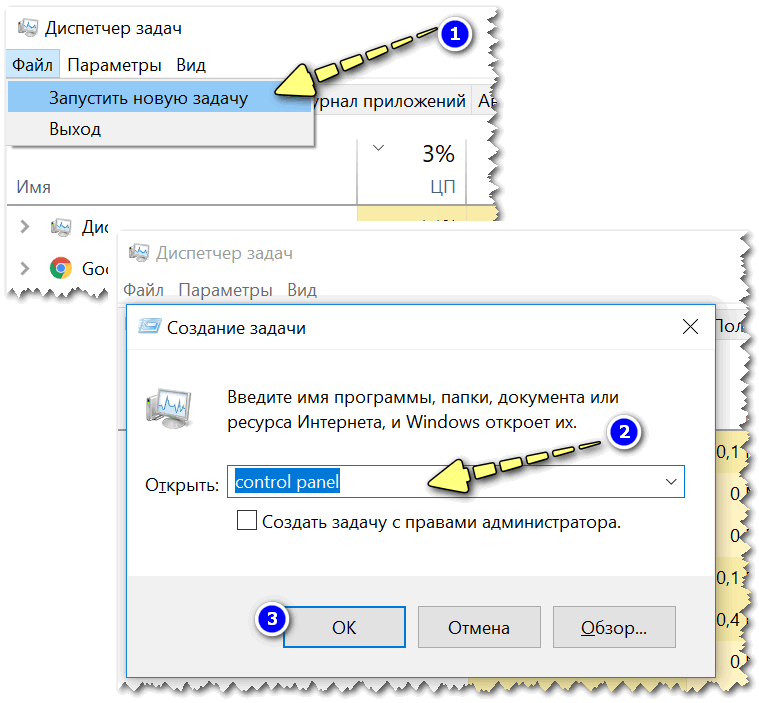
Открывает Control Panel через диспетчер задач
Способ 2: через Power Shell / Командную строку (универсальный)
Панель управления также можно открыть через командную строку. Для этого в ней нужно вписать всего одну команду » Control » и нажать на Enter.
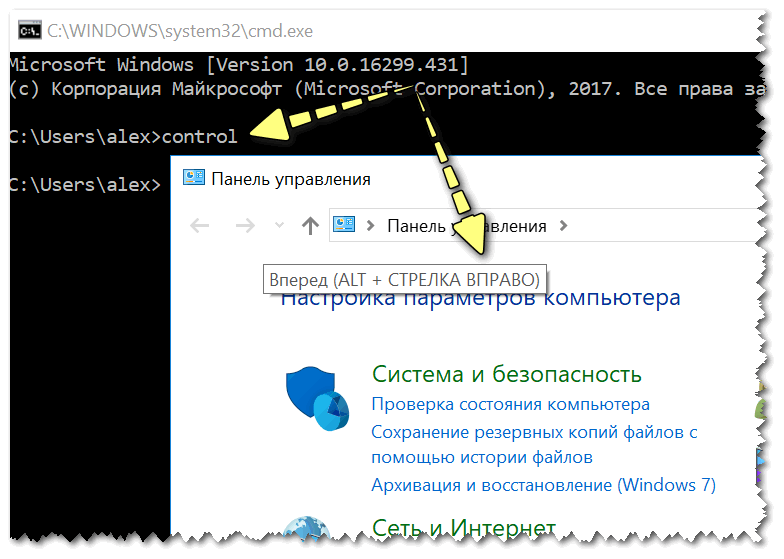
Открываем панель управления через командную строчку
Кстати, что касается Windows 10 — то в обновленных версиях при нажатии на Win+X (или правой кнопкой мышки по ПУСК) — в меню быстрого вызова нет командной строки, но есть Power Shell. Для открытия панели управления можно воспользоваться и им.
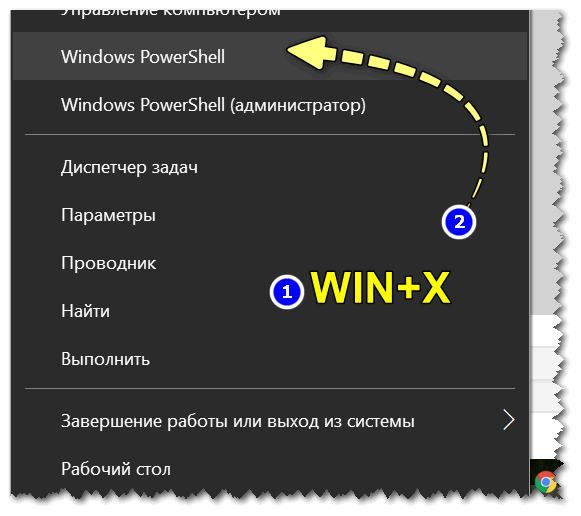
Win+X — меню быстрого вызова
В Power Shell достаточно ввести ту же команду Control и нажать на Enter. Пример продемонстрирован чуть ниже.

Power Shell — мощная замена командной строке.
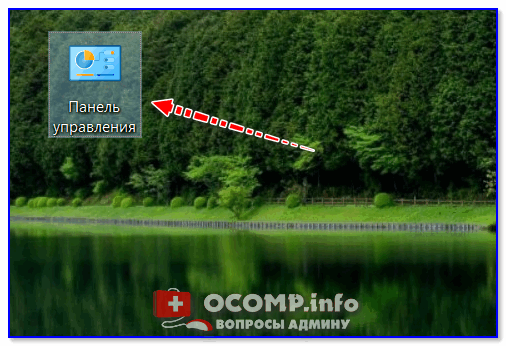
Способ 3: с помощью созданного ярлыка на рабочем столе
Еще один очень удобный способ — это создать спец. значок на рабочем столе, с помощью которого вы всегда сможете в 1 клик мышки получать доступ к панели управления.
Чтобы его сделать : кликните правой кнопкой мышки в любом месте рабочего стола, в появившемся меню выберите «Создать -> ярлык» (см. пример ниже).
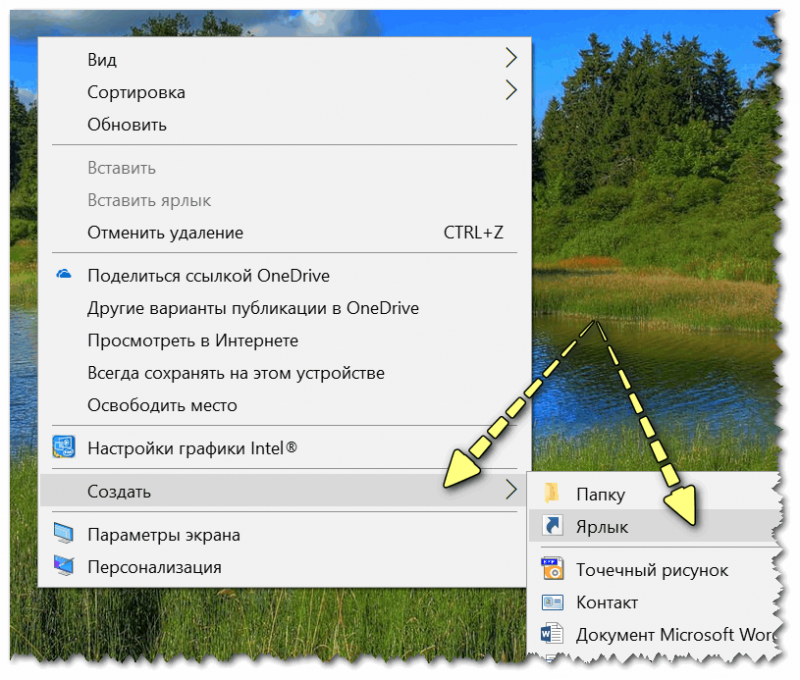
Далее в строку расположения укажите вместо пути просто команду Control Panel (как примере ниже). Кстати, имя ярлыку можете задать любое.
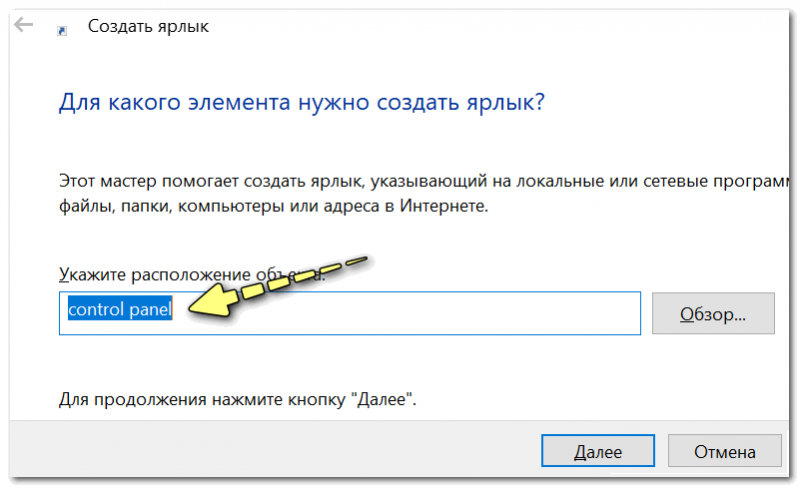
в путь ярлыка пишем команду Control
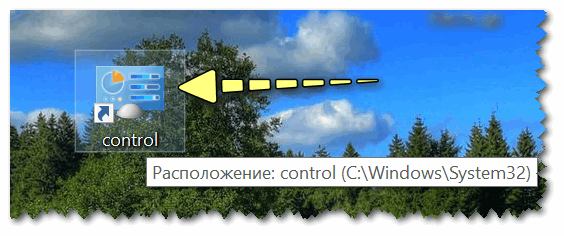
В итоге на рабочем столе появится ярлык (как на скрине ниже) для быстрого запуска панели управления.
Способ 4: с помощью поиска Windows
В Windows 10, кстати говоря, рядом с меню ПУСК есть очень «умная» поисковая строка (по крайней мере, значок с лупой там присутствует в настройках по умолчанию) .
Так вот, достаточно щелкнуть по этому значку (1), и вписать в строку поиска «панель» (2), как Windows предложит вам наиболее соответствующий вариант (3) — то бишь в данном случае «Панель управления». Как и показано на скрине ниже.
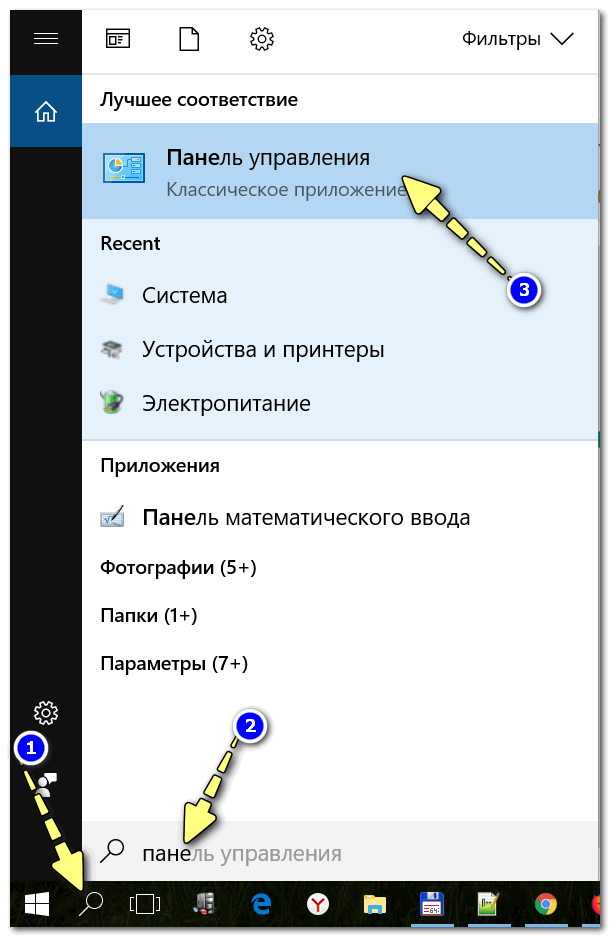
Поисковая строка в Windows 10
Кстати, чтобы каждый раз не искать панель управления , ее можно закрепить на пели задач. Для этого достаточно щелкнуть правой кнопкой мышки по значку открытой панели и выбрать функцию «Закрепить» (как показано на скрине ниже).
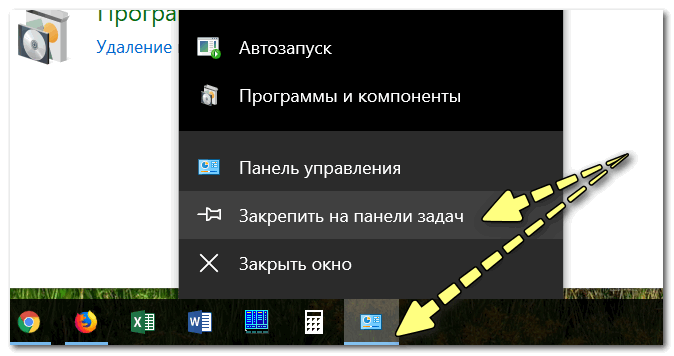
Закрепить панель на панели задач (извиняюсь за тавтологию)
Как это будет выглядеть в итоге можете увидеть из моем примера (1 клик — и вы уже в Control Panel) .

Моя панель задач: калькулятор + панель управления основные атрибуты
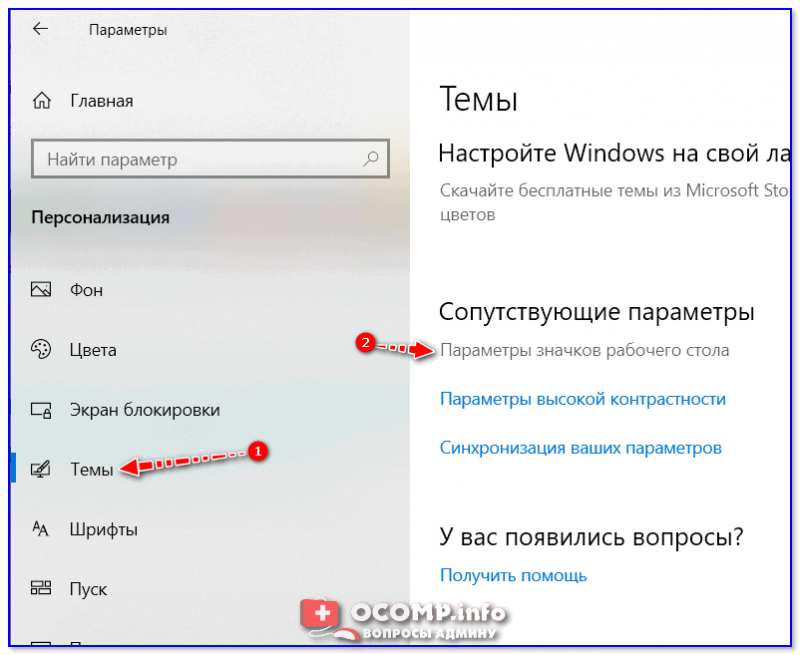
Способ 5: через параметры отображения значков рабочего стола (Windows 10)
Сначала нужно открыть параметры Windows (можно через ПУСК, можно с помощью сочетания Win+i ) и перейти в раздел: «Персонализация / темы / параметры значков рабочего стола» (см. скриншот ниже).
Далее поставить галочку рядом с отображением значка «Панель управления» , и сохранить настройки.
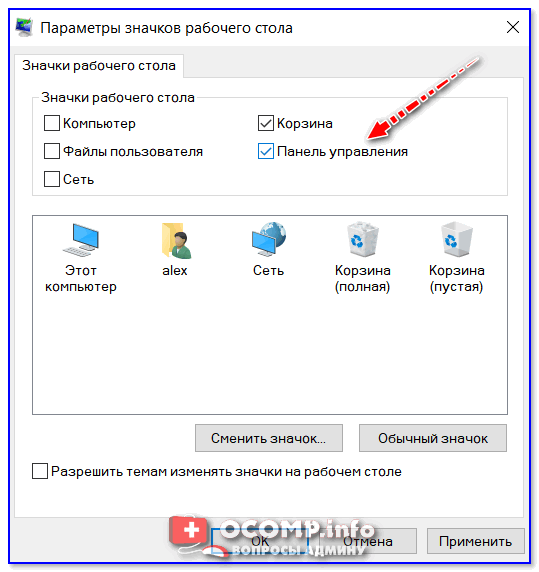
Собственно, почти сразу же у вас на рабочем столе появится панель управления — теперь можно быстро открывать ее без всяких дополнительных команд.
Думаю, что предложенных способов должно быть достаточно.
How to Block Access to Windows 10 Settings and Control Panel
Prevent other users from messing with your stuff
When you are running a network of computers, for example, at a school or in an enterprise setting, it’s important to know how to block access to the Windows 10 settings menu and control panel.
If you keep access to these pages available, it becomes easier for users to uninstall programs, mess with system settings, and potentially cause issues for other users that will access that computer at a later point.
You can follow our guide below to learn how to disable the control panel and settings, or limit what is and isn’t available in the control panel.
If you want to go further, read our other articles on using Group Policy to block access to the command prompt and prevent shutdown of a PC.
Disable all Control Panel and Settings Access
There are two methods available for disabling control panel and settings access on Windows 10. The first method is the easiest, so we’ll explain that to begin with. This method requires you to be running Windows 10 Pro or Enterprise. If you are running Windows 10 Home, don’t worry, you can try the second method instead.I
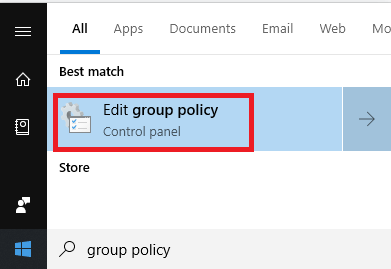
First, press the Windows key and then type Group policy – click on Edit group policy when it appears.
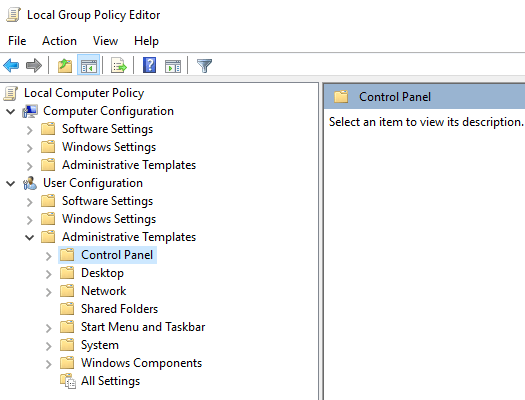
On the left side, click to open Administrative templates under the User Configuration section. Next, click on Control Panel.
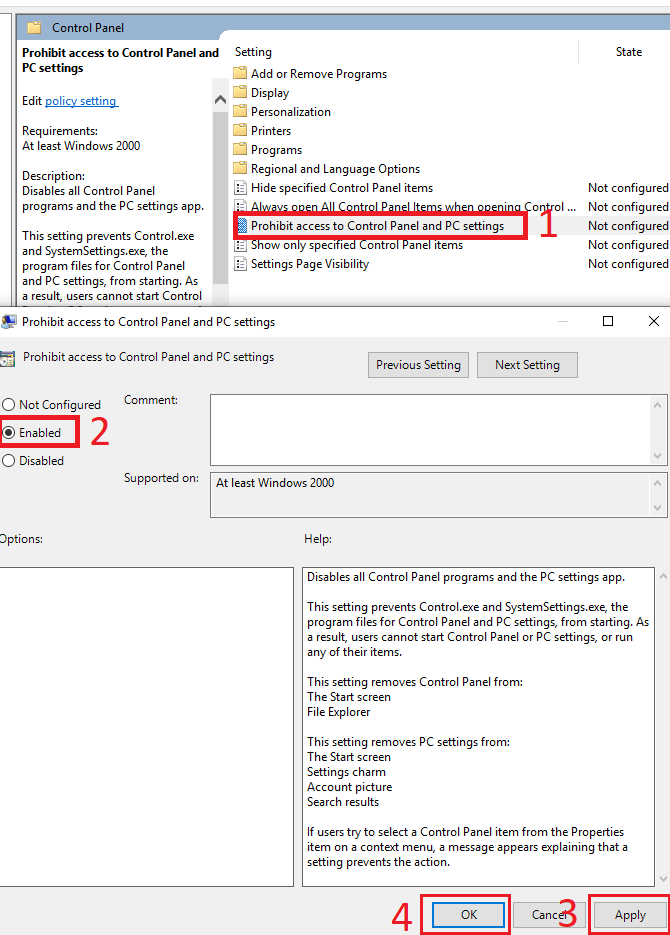
On the right side panel, double click Prohibit access to Control Panel and PC settings. Next, click Enabled. Then, click Apply. Finally, click OK.
You must change this account to a standard user after making this change. Without changing to a standard user, you can remove it at any point by following the steps above, but by choosing ‘Not Configured’.
Disable Control Panel for Windows 10 Home Users
If you are on Windows 10 Home, you can use the method we have explained below instead. This method involves using a registry change, so make sure you follow the steps carefully.
For Windows 10 Home users, first you need to turn the account you’d like to make the changes to into an administrator account. Once you’ve followed through with the steps below, you can then switch it back to a standard account.
Press the Windows key and type registry. Next, click on Registry Editor in the search results.
On the left side, click to open HKEY_CURRENT_USER, then follow the path below.
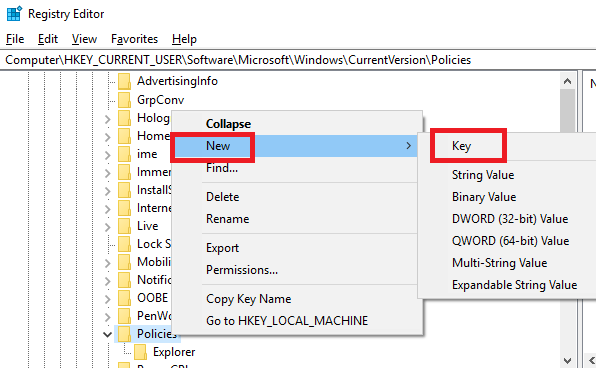
Don’t see the Explorer folder in Policies? You can right click it and click New, then click Key. Once the new folder has been created, rename it to Explorer, then click away from the folder to finalize the name.
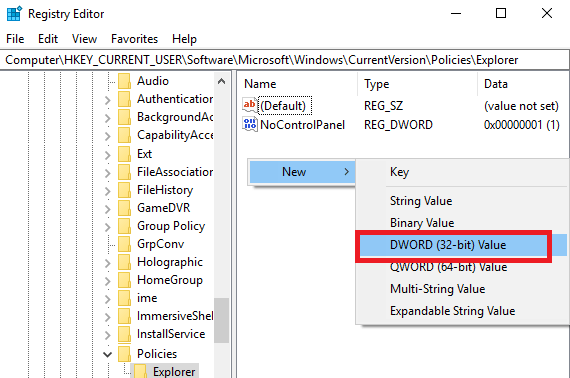
Next, click on the Explorer folder. After, right click an empty space on the right side of the registry editor. Then, click New, then click DWORD (32-bit) Value.
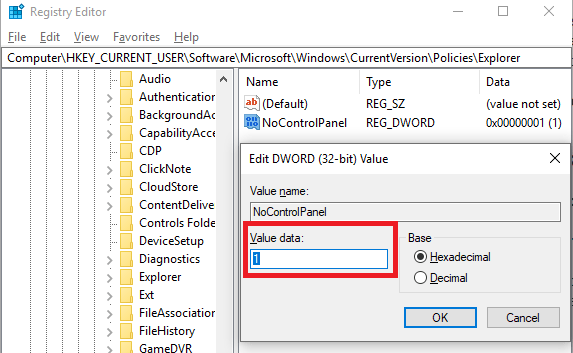
Where it says ‘New Value #1’, type NoControlPanel then press enter. After that, double click NoControlPanel and change the value data from 0 to 1. Click OK.
That’s it! Now, restart your PC and test to see if the settings menu and control panel are blocked. If they are, you can revert the account back to a standard account so that the setting cannot be removed.
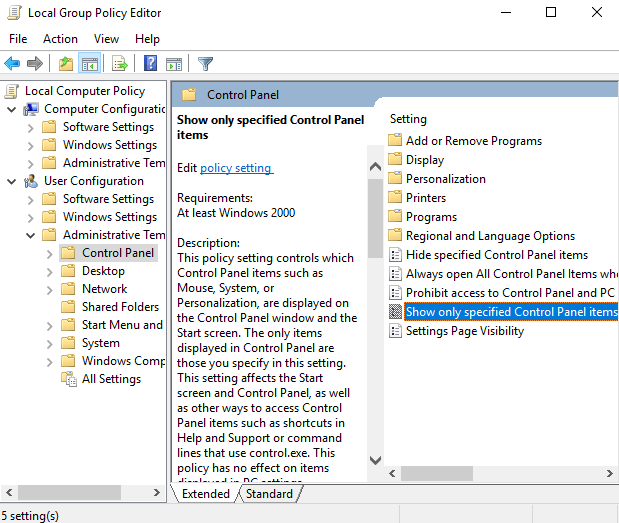
Hide Specific Control Panel Items
The two methods above explain how to completely disable both the control panel, what if you only want to limit certain control panel elements? With the method below, you can do exactly that.
First, press the Windows key and type Group Policy. Click on the Edit Group Policy option that appears.
- Next, click User Configuration on the left.
- Then, click to expand the Administrative Templates folder.
- After, click on Control Panel.
- Finally, on the right, double click on Show only specified Control Panel items.
On the next window, click on Enabled. After this, you can click Show. From here, you can manually enter each control panel item that you would like a user to have access to. If it’s not included on this list, it will not appear!
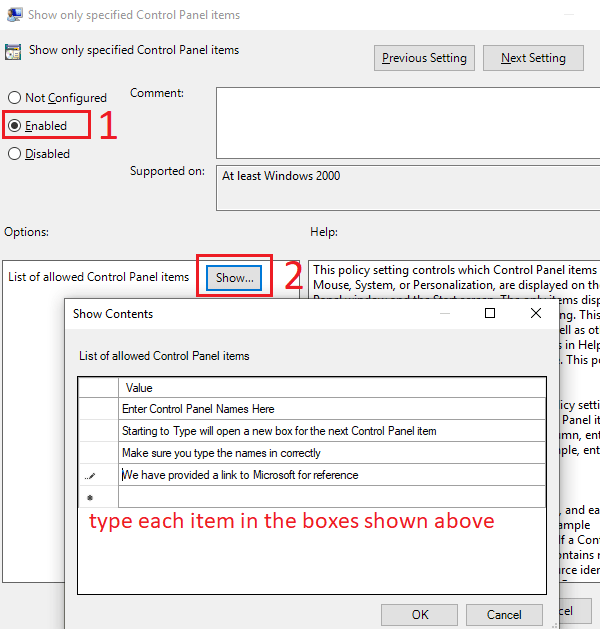
This means you’ll need to carefully pick and type out each Control Panel item you’d like to include. You can find the names of all Control Panel items on Microsoft’s website.
At any time, you can follow the steps above, but choose the ‘disabled’ the option to re-enable all control panel items.
Summary
I hope that this guide has proven to be useful. Have any questions about the three methods I’ve included? If you do, please leave a comment below and I’ll happily get back to you when I can.
Ollie stumbled upon writing online whilst participating in a mobile network forum back in 2011. Since then, he has developed an incredible passion for writing about all sorts of tech from smartphones, PC hardware, software, and everything in between. Read Ollie’s Full Bio


