- How to temporarily prevent a driver update from reinstalling in Windows 10
- Rolling back a device driver
- How to Block Specific Driver or Patch Updates in Windows 10
- How to block Windows 10 from auto updating specific drivers
- How do I fix the auto-updating drivers in Windows 10?
- 1. Use the Group Policy Editor
- DriverFix
- 2. Prevent auto-updating on a metered Wi-Fi connection
- 3. Block auto-updating on a metered Ethernet connection
- Run a System Scan to discover potential errors
- 4. The Show or Hide updates tool hides troublesome drivers
- 5. Uninstall malfunctioning drivers
How to temporarily prevent a driver update from reinstalling in Windows 10
In Windows 10, your device is always kept up-to-date with the latest features and fixes. Drivers are installed automatically so that you don’t have to select which updates are needed. In rare cases, a specific driver might temporarily cause issues that affect your device. In this situation, you can prevent the problematic driver from reinstalling automatically the next time Windows Updates are installed.
Rolling back a device driver
If a driver that you are offered is causing system crashes or instability, and if Windows was operating correctly before that change, you can use this method to roll back the driver to the previous version.
The appropriate steps to roll back a driver installation depend on the version of Windows 10 that you have installed. We recommend that you update to the latest version of Windows 10 before you try to uninstall any drivers because this may resolve the issue. You can use Windows Update to check for the latest update by selecting the Start button, then selecting Settings > Update & security > Windows Update , and then Check for updates. Or you can install the latest version of Windows by going to Download Windows 10, and then selecting Update Now.
If you aren’t sure which version of Windows 10 you have, select the Start button, and then select Settings > System > About.
Start Device Manager. To do this, in the search box on the task bar type device manager, and then select Device Manager.
Locate and right-click the device that has the problem driver installed, and then select Properties.
Select the Driver tab, and then select Roll Back Driver.
Important If you don’t have the latest version of Windows 10, we recommend that you update now. To update to the latest version, go to Download Windows 10, and select Update Now.
Start Device Manager. To do this, in the search box on the task bar type device manager, and then select Device Manager.
Locate the category of device and right-click the device that has the problem driver installed, select Properties, and then choose the Driver tab.
In the Confirm Device Uninstall dialog box, select the Delete the driver software for this device check box.
Choose your automatic updates
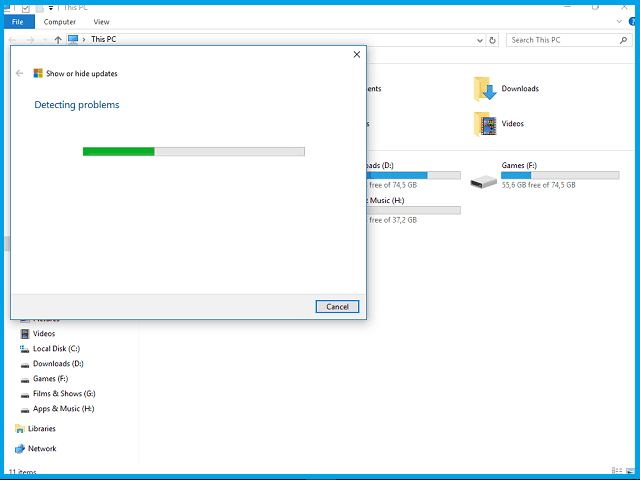
To prevent the driver from being reinstalled by Windows Update, use the “Show or Hide Updates” troubleshooter to hide the driver. Window Update won’t install hidden drivers or updates.
Download the troubleshooter from the Microsoft Download Center:
How to Block Specific Driver or Patch Updates in Windows 10

With the release of Windows 10, Microsoft has taken an aggressive approach to driver, functionality and security updates to simplify maintaining an up-to-date PC. One of Microsoft’s biggest headaches are the millions of Windows PCs that are missing patching resulting in a bad user experience and major security issues. With Windows 10, Microsoft is automatically installing all patches and users can’t easily defer or stop an update form happening. The approach has been met with a lot of coverage from the press, but this really is no different than what has been going on for years in the mobile space. There is one aspect of the controversy that actually has some legs to stand on. This is around driver updates as most of the time they are completely harmless and beneficial, but sometimes a new driver can bring system stability problems or even cause Windows to refuse to boot.
If you ever suffer form a bad driver update, Microsoft has a solution. First you will need to revert back to an earlier state by using recovery tools or simply uninstalling the update. Then, Microsoft has a special tool available that will block the bad update from getting installed automatically again.
The Windows Update Show Hide troubleshooting package form KB article 3073930 was created exactly for this purpose. Simply download the file and double click to launch the troubleshooter.
Click Next on the welcome screen.

The utility will be scanning for available updates to block.

Select the Hide Updates button. You can also un-hide previous updates with the second option if you want to reverse any actions you have previously taken.

Check the box next to the update you want to hide and click Next.
How to block Windows 10 from auto updating specific drivers

- Windows 10 has a lot of valuable features, but the automatic Windows Update won’t let users adjust it.
- Not all updates improve performance, especially t he automatic drivers’ update.
- Take a look at our Windows 10 Hub to get the best out of your PC and programs.
- To find more easy-to-apply tips, just like the ones below, you can check out our How-To section.

- Download DriverFix now for free (secured download)
- Launch the program and press the Scan icon
- Wait for the scan to finish and start installing the needed drivers
- DriverFix has been successfuly downloaded by 0 readers this month.
Many users are determined to prevent Windows 10 from automatically updating drivers, even if Microsoft stated that this is a positive feature, primarily for security reasons.
The drivers are installed without users confirmation and that can lead to all kinds of issues, like unusable hardware, all-around underperformance and, eventually, to the Blue Screen of Death.
So, we’ve prepared some temporary workarounds that will let you surpass the automatic drivers’ update. For more info on how to do that, check the solutions below.
How do I fix the auto-updating drivers in Windows 10?
1. Use the Group Policy Editor
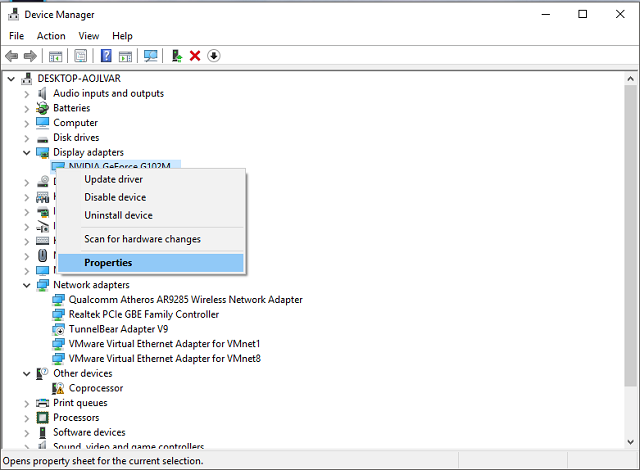
- Right-click on Start, and choose Device Manager.
- Find the wanted device and open Properties.

- Go to the Details tab.
- In the Property drop-down menu select Hardware Id.
- Select all I ds , copy + paste in any text editor (be sure to save it).
- In the Search Windows type gpedit.msc, and choose Run as administrator.
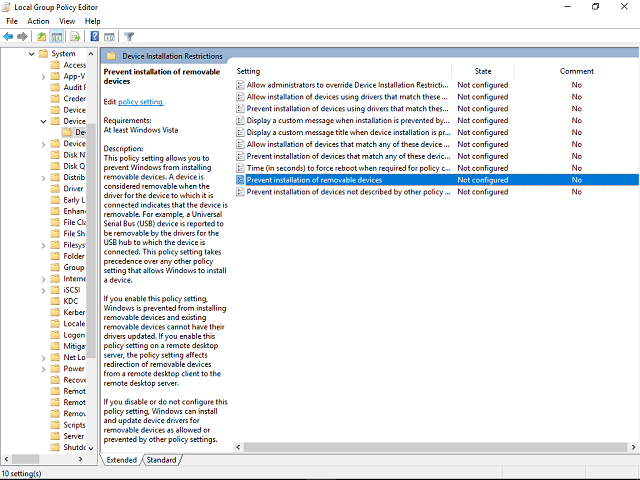
- In the left sidebar follow this path: Computer Configuration Administrative Templates System Device InstallationDevice Installation Restrictions
- On the right side open Prevent installation of devices that match any of these devices IDs.
- In the Policy window, click Enable, and then Show.
- Copy Ids one by one from the saved document and paste them in separate Volume columns.
- Save changes and exit Group Policy Editor.
- At the next update, you should be prompted with an error. That is the confirmation that the tweaks were successful. Selected drivers won’t install anymore.
This is a complex workaround that won’t work on Home edition of Windows 10. You’ll need Professional, Enterprise or Educational version in order to access Group Policy Editor.
If you fulfill these requirements, you could try it out. Have in mind that it is not advisable to make rush moves since this is a quite powerful tool.
The main advantage is that the update is still enabled. Namely, Windows Update will still download drivers but it won’t install them. You’ll first need to find hardware ID for a wanted driver.
Keep in mind that updating your drivers is an advanced procedure. If you’re not careful you can cause permanent damage to your system by downloading the wrong driver versions.

We strongly recommend DriverFix to automatically download all the outdated drivers on your PC.
This great tool was developed so that you do not have to worry about manually downloading and installing your drivers yourself.
Already installed drivers can also be stored in an archive and used, for example, when the system is restored.
DriverFix
2. Prevent auto-updating on a metered Wi-Fi connection
- Open Start and click Settings on the left.
- Go to Network & Internet.
- Choose Wi-Fi on the left side-panel and click Manage Known Networks.
- Select your Wi-Fi network and click Properties.
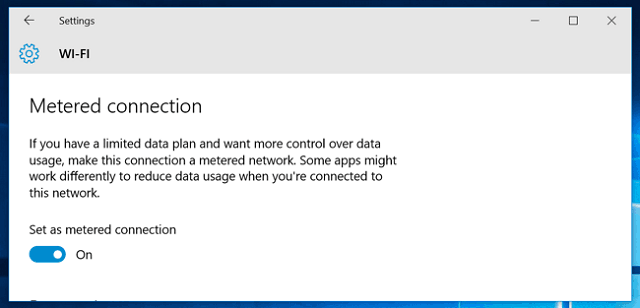
- Enable Set as metered connection.
- If you are using more wireless networks, you’ll have to set them up individually.
Since Microsoft forgot to implement standard selection, we must use tricks. This is a simple workaround that will prevent Windows 10 from updating.
Have in mind that this shuts down the update completely , so you’ll skip on various security and stability updates. This makes it a temporary solution.
While a metered connection is enabled, PC updates are on hold. Consequently, your system assumes that you are using an alternative connection like phone tethering or another limited data package.
Windows automatically sets limited connections to metered, but you can do it with your Wi-Fi, too.
3. Block auto-updating on a metered Ethernet connection
Run a System Scan to discover potential errors


- Open Search, and type Regedit.
- Right-click on it, and choose Run as administrator.
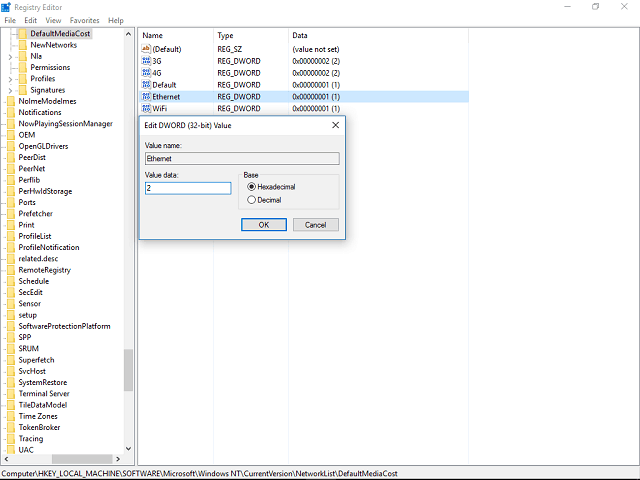
- In the left sidebar follow this path: HKEY_LOCAL_MACHINESOFTWAREMicrosoftWindowsNTCurrentVersionNetworkListDefaultMediaCost
- Right-click on DefaultMediaCost, and choose Permissions.
- Select Advanced, and click Change at the top.
- Type your Microsoft account e-mail address in the Enter the object name box.
- Click Check name and confirm.
- In the Permissions for the DefaultMediaCost window select Users group.
- Check the Full Control box, and confirm.
- Right-click Ethernet and choose Modify.
- In the Value Data box type 2 instead of 1.
- Save the settings.
When it comes to the Ethernet connection, things are not as simple as this. Apparently, Microsoft thought that all the Ethernet connections have unlimited data, and we know that is not the case.
In order to tweak wired connection, you’ll have to use a registry edit. Have in mind that Registry Editor misuse can cause all kinds of trouble, so use it carefully.
Additionally, you’ll have to tweak permissions in order to make changes.
4. The Show or Hide updates tool hides troublesome drivers
- Download the Troubleshooting tool.
- Let the tool scan for the available updates.
- If there are available updates, you can choose whether you want to hide them or not.
- Hide unwanted updates and confirm.
- When the next update occurs, selected updates will be skipped.
Since even Microsoft is aware of possible driver malfunctions that may occur after updates, they prepared a downloadable tool. You can’t block updates with built-in software, so this is a viable solution.
Microsoft presents this tool as a temporary solution, but we think you can use it as long as you want.
You should use this troubleshooter software before you install updates, so it is worth to use it as often as you can in order to hide unwanted updates.
5. Uninstall malfunctioning drivers
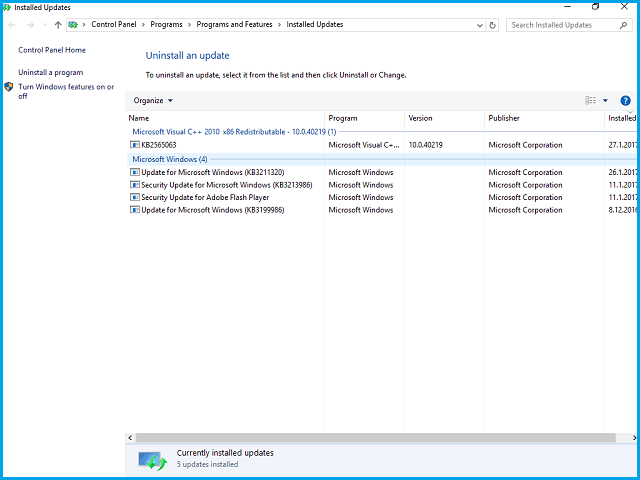
- Open Search, and type Windows Update Settings.
- In the right section, click View Update History.
- Select Uninstall updates.
- Find the unwanted ones and uninstall them.
Moreover, you can additionally try and roll-back drivers from Device Manager. This way you’ll retrieve the older, functioning version of the driver.
- Right-click Start and open Device Manager.
- Find a faulty device driver.
- Right-click it and open Properties.
- Open Driver tab.
- Click Roll Back Driver.

If everything is as should be, you’ll get the pre-update version.
Therefore, we strongly advise you to ignore all Windows generic drivers and obtain drivers from the official site of the device producer. That is the best way.
Microsoft insists on automatic Windows Update no matter what the users say. However, there is a positive side to this.
People were ignoring updates to previous Windows versions too often. And, in some cases, their system security and all-around stability suffered because of that.
That’s about it, if you have any comments, questions or suggestions, just let us know in the comments section below.


