- Как установить Bodhi Linux 6.0
- Требования к установке Bodhi Linux 6.0
- Основные особенности Bodhi Linux
- Установка Bodhi Linux 6.0
- Внимание:
- Заключение: Мысли о Bodhi Linux 6.0
- Configuring a New Bodhi Installation
- Install Software Updates
- Date and Time
- Themes
- Moksha Themes
- GTK Themes
- Icon Themes/Sets
- Wallpapers
- Managing Startup Applications
- Default Language
- Installing Additional Software
- Bodhi’s DuckDuckGo Browser Search
- Further Configuration Settings
Как установить Bodhi Linux 6.0
Bodhi GNU/Linux — это дистрибутив на который построен на базе Ubuntu. Разработанный специально для настольных компьютеров и известен своей элегантной и легкой темой. Философия дистрибутива заключается в том, чтобы обеспечить минимально систему, в которую можно установить приложениями по выбору пользователя.
Базовая система включает в себя только те приложения, которые необходимы пользователю, а именно PCManFM, GNOME Web, Terminal emulator, ePhoto и leafpad. Apt или AppCenter можно использовать для загрузки и установки приложений.
Стандартный Bodhi Gnu/Linux предназначен для Intel — совместимого процессора с альфа-версией выпуска для ARM — процессора (планшетных вычислений) на базе Debian GNU/Linux. Версия процессора ARM Bodhi больше официально не поддерживается из-за нехватки времени.
Построенный на основе выпуска долгосрочной поддержки Ubuntu, Bodhi ежедневно выпускает исправления безопасности в течение 5 лет. Наиболее примечательным моментом является то, что Бодхи не освобождается от краткосрочной поддержки. Для обновления Bodhi можно использовать менеджер пакетов или командную строку.
Требования к установке Bodhi Linux 6.0
- ОПЕРАТИВНАЯ ПАМЯТЬ: 512 МБ и выше
- Жесткий диск : 5 ГБ места на жестком диске
- ПРОЦЕССОР: 500 МГц и выше
- Архетиктура: i386 и AMD64
Основные особенности Bodhi Linux
- Нет необходимости в высококлассной машине для запуска Bodhi GNU/Linux.
- Построенный из репозитория разработки, делает его легко настраиваемым, придает ему более высокий уровень модульности и разнообразие тем.
- Коллекция легких приложений.
- Большинство разработанных приложений написаны на C и Python.
- Стандартная система работает так быстро, что загрузка происходит за 10 секунд.
- Для Установки Bodhi из Live distro выполняется за несколько щелчков мыши.
12 мая 2021 года вышла новая версия Bodhi Linux 6.0, основанная на базе Ubuntu 20.04.2 LTS (Focal Fossa). Теперь приступим к загрузке и установки Bodhi Linux 6.0.
Установка Bodhi Linux 6.0
1. Сначала перейдите на официальную страницу Bodhi Linux и скачайте Bodhi Linux 6.0.0 для своей системной архитектуры. Теперь создайте загрузочный UDB-диск с помощью Unetbotoin или команды dd, далее перезагрузите систему.
2. После перезагрузки системы вам будет представлено меню загрузки Bodhi Linux.
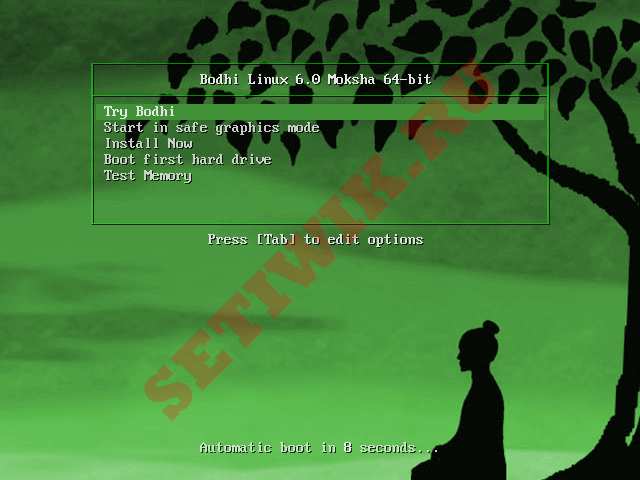 Меню загрузки Bodhi Linux
3. Загрузка Bodhi Linux.
 Запуск Bodhi Linux
4. Выберите нужный язык и нажмите кнопку Продолжить.
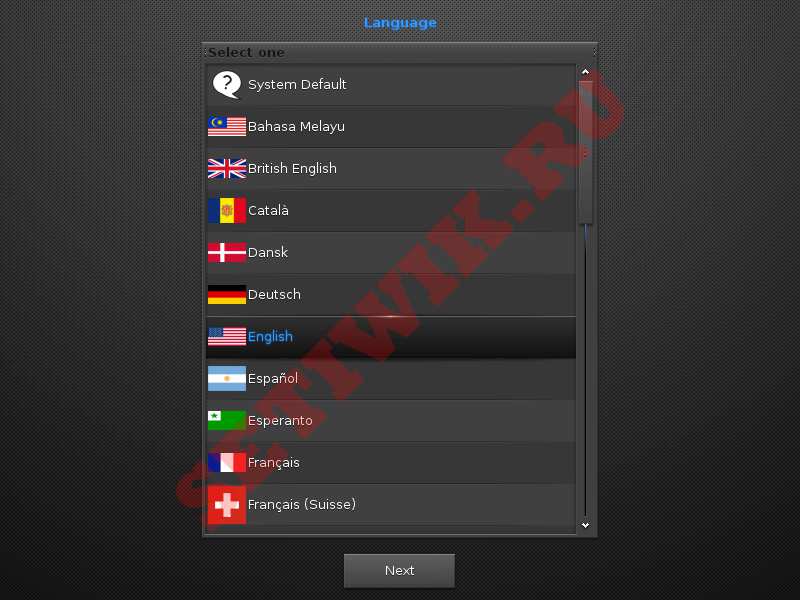 Выбор языка при установке Bodhi Linux
5. Рабочий стол по умолчанию. Среда рабочего стола.
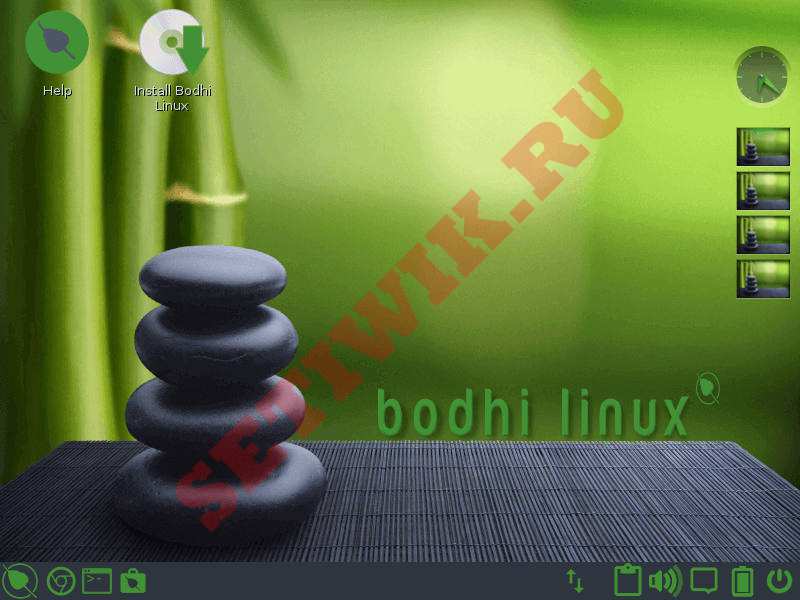 Рабочий стол Bodhi Linux
6. На главном рабочем столе Bodhi Live найдите и нажмите кнопку Установить Bodhi Linux (Install Bodhi Linux). Затем выберите нужный вам язык и нажмите кнопку Продолжить
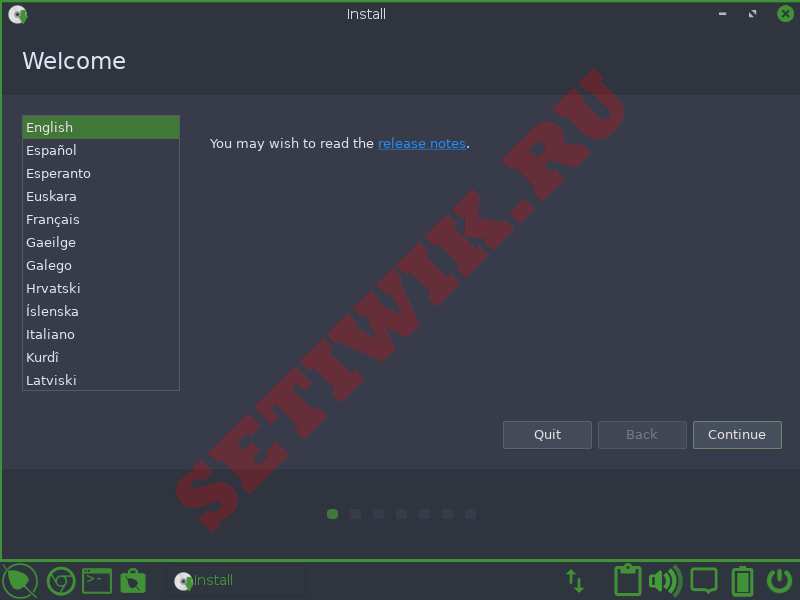 Выберите язык Bodhi Linux
7. Выберите раскладку клавиатуры из списка слева, затем выберите конкретную раскладку из списка справа.
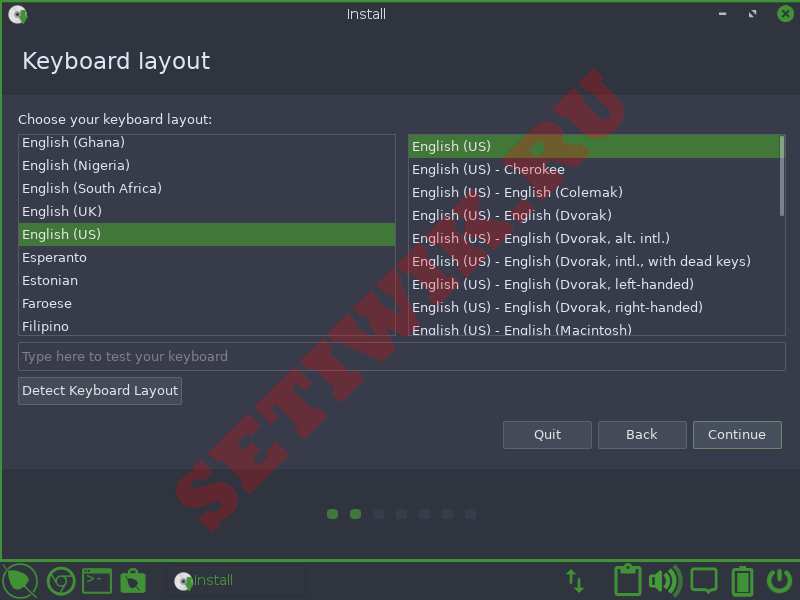 Выбор раскладки клавиатуры Bodhi Linux
8. Далее вам нужно установить настройки обновления программного обеспечения:
- Загружайте обновления во время установки Bodhi (по умолчанию: выбрано).
- Установите сторонние обновления программного обеспечения для видеокарт и оборудования Wi-Fi (по умолчанию: не выбрано).
Внимание:
ПРИМЕЧАНИЕ: Для ПК с низкими параметрами снимите флажок “Загружать обновления во время установки Bodhi”, так как это увеличивает требования к памяти установщика.
9. Далее выберите Тип установки Bodhi Linux:
- Если вы устанавливаете Bodhi Linux на машину, где это будет единственная операционная система, выберите Стереть диск и установите Bodhi.
- Если установщик обнаружит другую ОС, вы увидите опции “установить вместе…”. Например, установите Bodhi вместе с Windows.
- Если вы хотите получить полный контроль над установкой, то выберите опцию пункт “Что-то еще“.
Я выбрал Стереть диск и установить Бодхи.
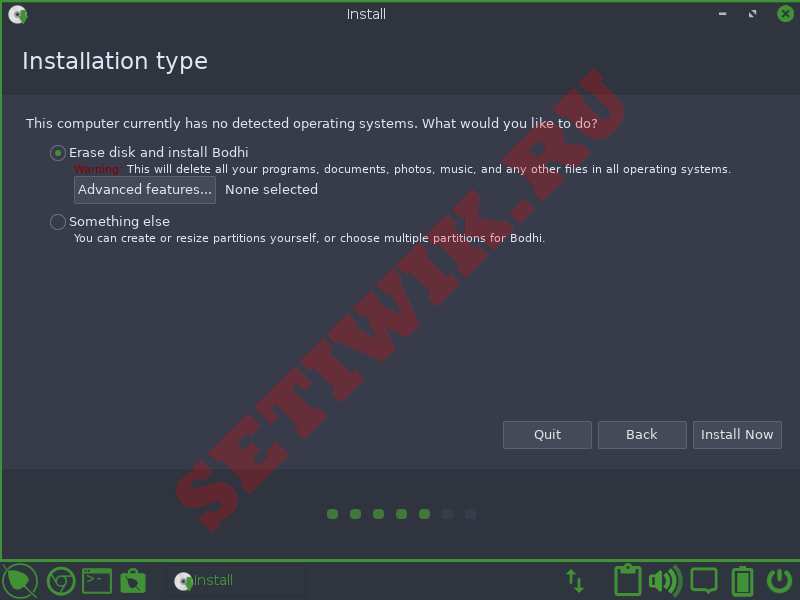 Выберите Тип Установки Bodhi Linux
10. Записать изменения на диск?: Какой бы вариант вы не выбрали, вы получите этот экран подтверждения. Вернитесь назад, если вы не уверены в своих изменениях; в противном случае нажмите кнопку «Продолжить».
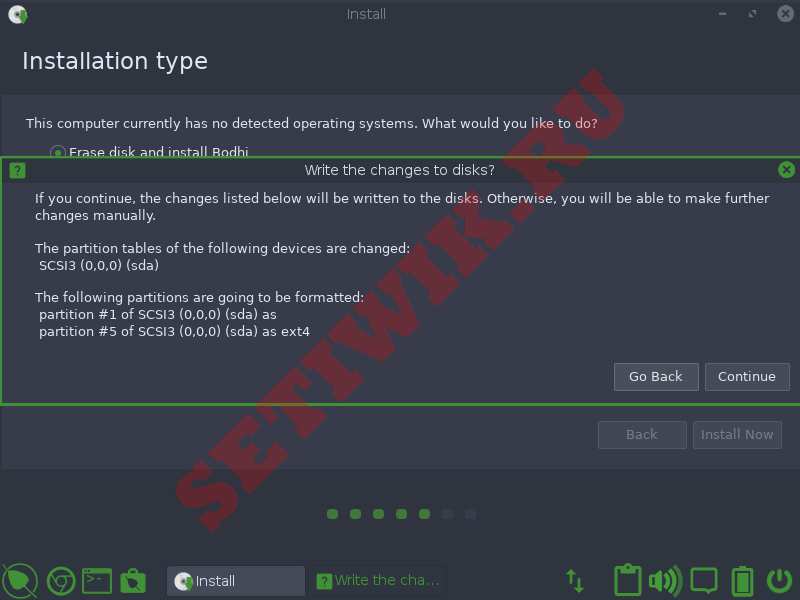 Записать изменения Bodhi Linux на диск
11. Теперь выберите часовой пояс в зависимости от вашего географического положения.
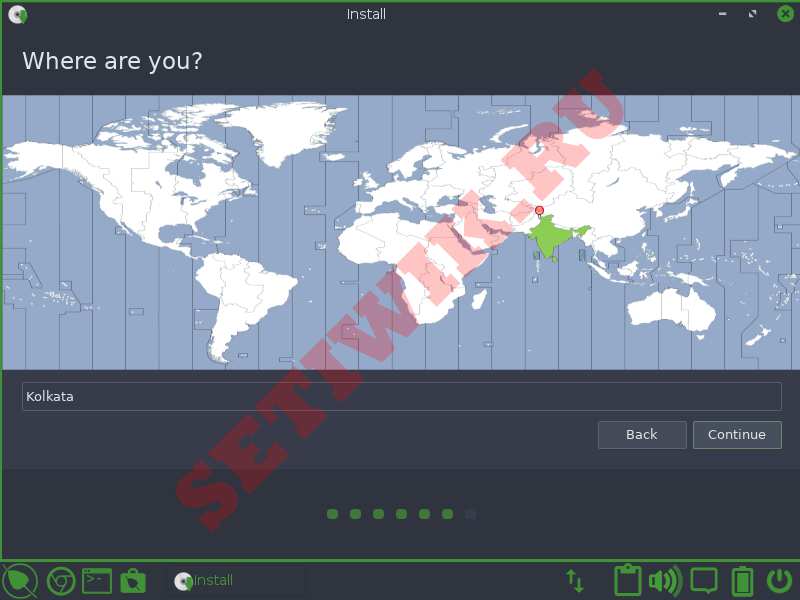 Выберите часовой пояс Bodhi Linux
12. Создайте новую учетную запись пользователя, введя свое имя, имя компьютера, имя пользователя и пароль. Вы можете войти в систему автоматически.
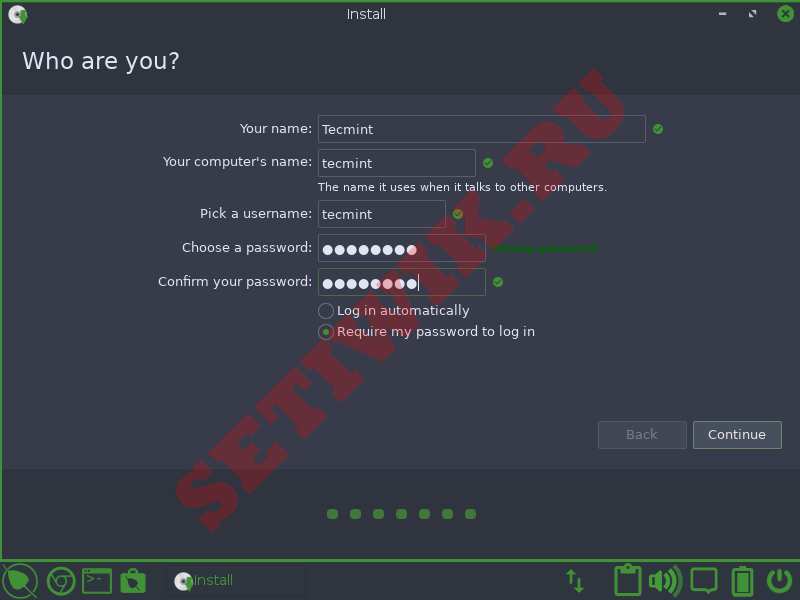 Учетная запись Bodhi Linux
13. Копирование файлов займет некоторое время в зависимости от параметров вашего компьютера.
 Копирование Установочных Файлов Bodhi
14. Наконец, установка закончена. Пора перезагрузить машину. Вы можете продолжить тестирование и выбрать перезагрузку позже.
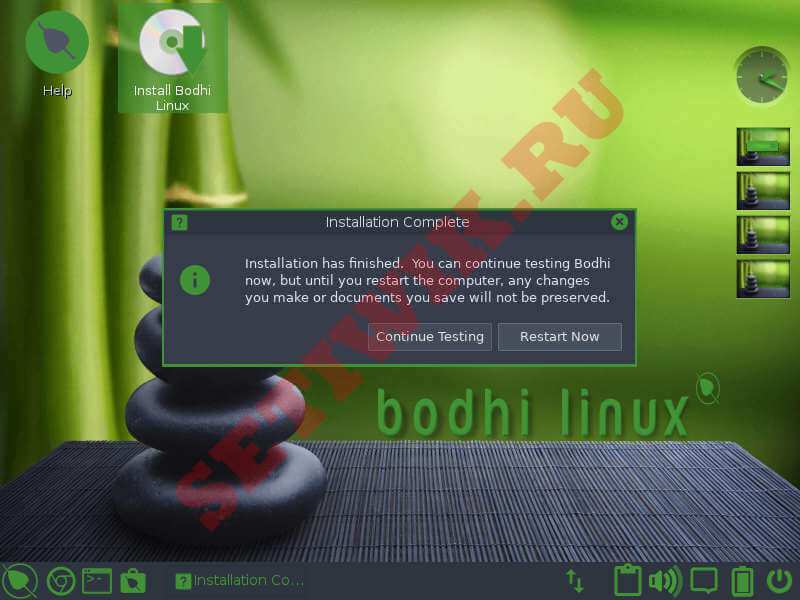 Установка Bodhi Linux Завершена
15. Экран входа в систему. Введите свой пароль.
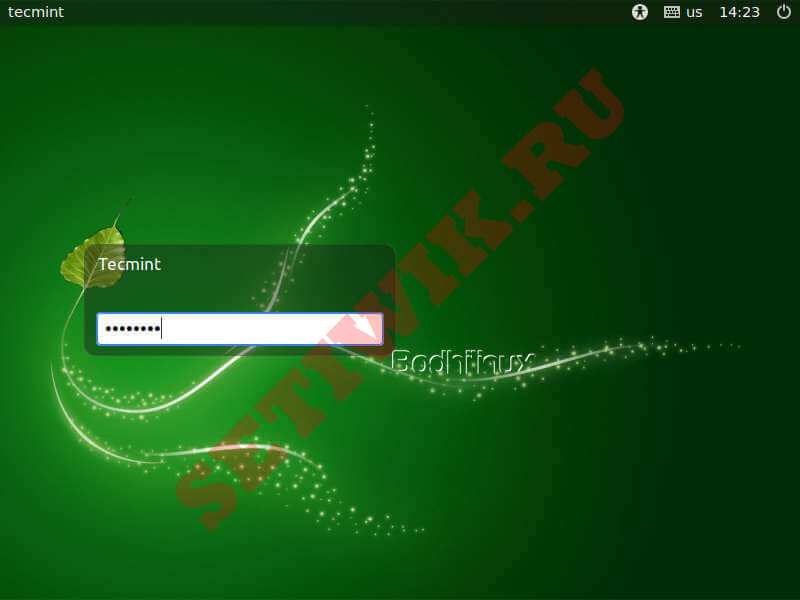 Вход в систему Bodhi Linux
16. Наконец — то интерфейс рабочего стола Bodhi Linux.
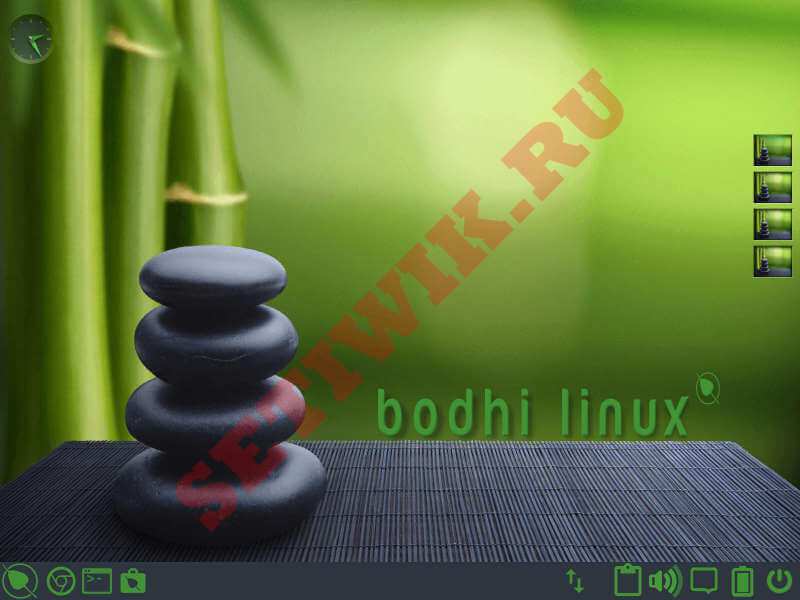 Рабочий стол Bodhi Linux
Заключение: Мысли о Bodhi Linux 6.0
Bodhi Linux — это легкий и надежный дистрибутив. Визуальные эффекты действительно привлекательны. Кажется, во время тестирования ничего не сломалось :). Я буду рекомендовать этот дистрибутив каждому поклоннику Ubuntu.
Если у вас есть старый компьютер и ваш текущий дистрибутив вас не устраивает. Тогда вы должны попробовать Bodhi Linux. ISO-образ весит почти 800 МБ, и его установка очень проста.
Источник
Configuring a New Bodhi Installation
February 12, 2015
This article describes the initial tweaks you might make to a newly-installed Bodhi system. These include setting up your date/time, keyboard (if you live outside the US), selecting a theme that suits your tastes, changing the wallpaper, and managing startup applications.
To make further changes, follow the links at the end of this article; they lead to other Bodhi Wiki articles describing how to configure shelves, iBars, and virtual desktops, how to set up key bindings/edge bindings, and change the default system language.
Install Software Updates
Bodhi Linux and its associated software packages are continuously updated (security/feature improvements). Since the creation of the Bodhi LIVE ISO there will have been many many updates. The strong recommendation is to run updates immediately after the initial installation and regularly thereafter. NOTE the first update after installation could be lengthy.
For details on how to perform this, see: Keeping Bodhi Linux Up-to-date.
Date and Time
Date and Time settings can be configured in Clock Settings. Left-click the time in the shelf (bottom right of screen) and select the Settings to open the Clock Settings. From here you can switch between 12/24 hour display, analog or digital amongst other settings. Be sure to hit Apply Changes when you have completed your changes.
Themes
Moksha Themes
Moksha themes control the appearance of your desktop and its various components, including shelves, menus, icons, and dialog boxes. If you wish to change the Moksha theme that greets you on a new installation open the Theme Selector, this can be achieved using a number of methods:
- Quick Launcher: Open the Quick Luanch (WinKey + ) and type theme and press
- Main Menu: go to Menu > Settings > Theme;
With the Theme Selector open, if the window is not maximized maximize it now, click the System radio button. A list of themes available on your system will be displayed – in a new Bodhi 6.x installation, the only themes are ‘default‘ and ‘MokshaArcGreen‘
More Moksha themes are available for download/installation via the AppCenter. When you download these, they will be automatically added to the System category in the Theme Selector. 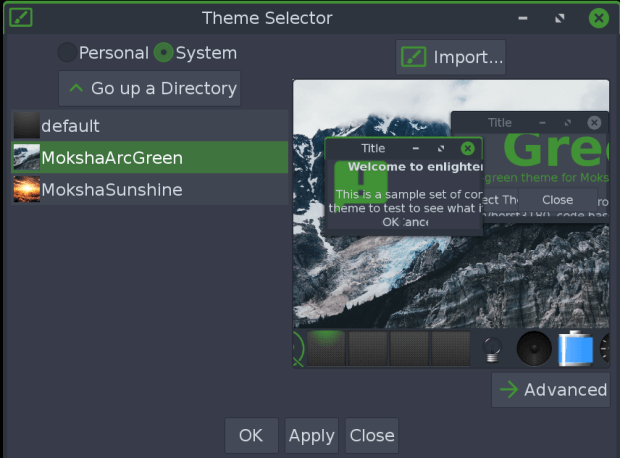
To try a theme, simply highlight it in the list and click Apply, then check how the shelf and the menus look. Try others, and when you have made your final choice click OK. A visualization of this step can be seen within the wiki page: Changing Themes.
Note: Moksha themes do not control the appearance of application windows, i.e. such things as their scroll bars and menus. GTK themes control these (see below).
GTK Themes
The GTK theme is the overall theme that handles stuff like the panel color, the backgrounds for windows and tabs, how an application will look when it is active vs. inactive, buttons, check-boxes, etc. Ideally, you should select a GTK theme that matches your chosen Moksha theme. To do this open the Application Theme:
- Quick Launcher: (WinKey + ): Type Application Theme and hit
- Main Menu: Menu > Settings > Settings Panel > Look > Application Theme
With the Application Theme window open (on the GTK Applications tab) make your choice. For example, if you have chosen the Radiance Moksha theme, choose the GTK theme of the same name. Further visualizations of this step can be this wiki page: Changing Themes.

If you wish to try other GTK themes to see how they look, select them at this dialog box, click Apply, then open an application (such as your file manager) and check the appearance of its scroll bars and menus. Click OK at your final choice.
Icon Themes/Sets
Icons Themes (or Icon Sets if you prefer), can be changed away from the icons bundled within your Moksha Theme (see above for more detail on Moksha Themes). This will change all display icons, such as those found on Shelves and in Menus, File Manager, etc. If you wish to change your Icon set open the Application Theme Settings, this can be achieved using a number of methods:
- Quick Launcher: (WinKey + ): Type Application Theme and hit
- Main Menu: Menu > Settings > Settings Panel > Look > Application Theme
With the Application Theme Settings window open (on the Icons tab) make your choice from the list of icon sets and click Apply. A visualization of this can be seen in the wiki page named: Changing Icon Themes.
More Icon sets are available for download/installation via the AppCenter. When you download and install these, you will have to close and reopen Application Theme Settings to view/select.
Wallpapers
To change the wallpaper, go to Menu > Settings > Wallpaper; this opens the Wallpaper Settings dialog box, where you can choose a wallpaper from the list or click Use Theme Wallpaper to apply the wallpaper provided by the theme. Further visualizations of this step can be seen within the wiki page: Changing Themes. 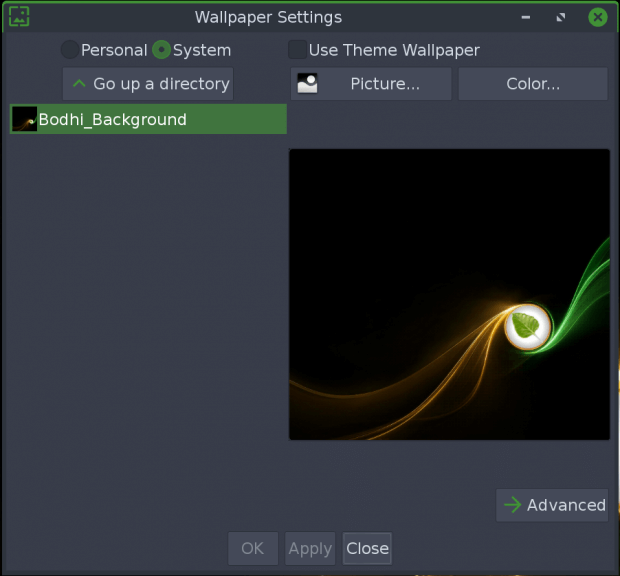
Note: you can have different wallpapers on different virtual desktops – click the Advanced button to reach the dialog box that allows this (you can also set this up at the Virtual Desktop Settings dialog box, as described here.)
Managing Startup Applications
This area will let you add programs to your startup using the Startup Application panel. You can open Startup Applications using a number of methods:
- Quick Launcher (WinKey + ): Type Startup Applications and hit
- Main Menu: Menu > Settings > Settings Panel > Aps > Startup Applications
With the Startup Applications window open (on the Applications tab) highlight any installed apps you’d like to run on startup, click Add, repeat as necessary and finally click Apply.
Default Language
Language packages should have been installed when you correctly specified your location during the installation process, but you need to tell Moksha which language to use. Follow this link to change your default language.
Installing Additional Software
Now that you have configured your new Bodhi installation, are you ready to add some sweet software? Click here for an in-depth view of the various methods to install software/applications. Alternatively, you can see what software is available in our AppCenter which can be installed directly from your browser.
Bodhi’s DuckDuckGo Browser Search
Bodhi Linux has a partnership with the wonderful folks at DuckDuckGo that helps generate some revenue to support our project.
The default browser (Chromium) that ships with Bodu Linux 6.0.0 can be defaulted to use the partnered DuckDuckGo search engine. Additionally, if you have chosen a different default browser you can continue to support Bodhi Linux by configuring your preferred browser to use the Bodhi Linux DuckDuckGo search.
Further Configuration Settings
This article has described only a tiny fraction of the multitude of configuration settings that you might apply to your new Bodhi installation. Moksha is a tweaker’s paradise, and the articles listed below will introduce you to further possibilities.
Источник


