- Клон OSX и Windows в Bootcamp на SSD с HDD
- 2 ответов
- Как установить Windows 10 на внешний диск из macOS Catalina
- Как подготовить Mac с чипом T2
- Как подготовить съемный накопитель
- Что нужно скачать перед установкой
- Как установить Windows 10 на внешний накопитель
- How to run Windows 10 on Mac using an external SSD [Video]
- Windows external SSD on Mac
- Hardware you’ll need
- Download the following to the Downloads folder:
- Video tutorial: How to install Windows 10 on a Mac external drive
- Download the Windows Support Software
- Format your external drive in macOS
- Install a Windows virtual machine
- Install Windows on the external drive using WinToUSB
- Disable secure boot and boot into the Windows installer
- Installing Windows using Windows Installer
- Install Boot Camp drivers
- Install Boot Camp Software update
- Manually install additional drivers
- Run Windows Update
- 9to5Mac’s Take
Клон OSX и Windows в Bootcamp на SSD с HDD
Я отчаянно нуждаюсь в помощи
мое состояние-установлен ssd в машину (слот оптического привода) — стерт ssd
теперь я хочу, чтобы клонировать все, что на моем жестком диске, чтобы мой sdd. Я запустил carbon copy cloner, а затем понял, что могу клонировать только MAC OSX или bootcamp. Не оба!
кто-нибудь знает, что лучший подход, чтобы клонировать весь жесткий диск на ssd, включая MAX OSX и window Bootcamp paritions.
2 ответов
насколько мне известно,Paragon Hard Disk Manager это единственное приложение, которое может выполнить эту задачу.
TwoCanoe по winclone по может сделать раздел Boot Camp, но не обрабатывает разделы Mac.
Paragon дороже, но иногда вы можете найти его в этих онлайн-пакетных сделках. Я получил свой примерно за 15 долларов, а также целую кучу других вещей, которые мне не нужны, и в обмен они спамят меня 4 раза в год с тем, что еще у них есть на предложение.
Лично я называю это справедливым свопом; -)
CCC отлично подходит для разделов Mac, но не Boot Camp. Это требует, чтобы у вас уже была специализированная структура секционирования-см. BOMBICH KB:может ли CCC создать резервную копию раздела BootCamp (Windows)?
я владею всеми тремя, но не связан ни с одной из рекомендаций
Если вы используете linux, команда ‘dd’ должна вам помочь. Клонирование дисков может быть затруднено, если вы используете разные драйверы, данные записываются в цилиндры и блоки, которые могут быть разных размеров или не существует от одного типа диска к другому. Это повлияет на способ распределения данных на устройстве и способ создания разделов. Попробуйте создать разделы того же размера перед клонированием (раздел на вашем sdd = или > по размеру как раздел MAC OSX и другой размер >= как bootcamp, и обрабатывать каждый раздел, как если бы это был один диск. Другим решением было бы создание имиджа (.iso, например) разделов (ps: вы не можете загрузиться из файла образа, если это не виртуальная машина). надеюсь, это поможет
Как установить Windows 10 на внешний диск из macOS Catalina
Многим владельцам компьютеров Apple иногда приходится запускать операционную систему Windows для работы, игр или других задач. Встроенный в macOS механизм для быстрой и простой установки сторонней ОС подойдет для этого далеко не всегда.
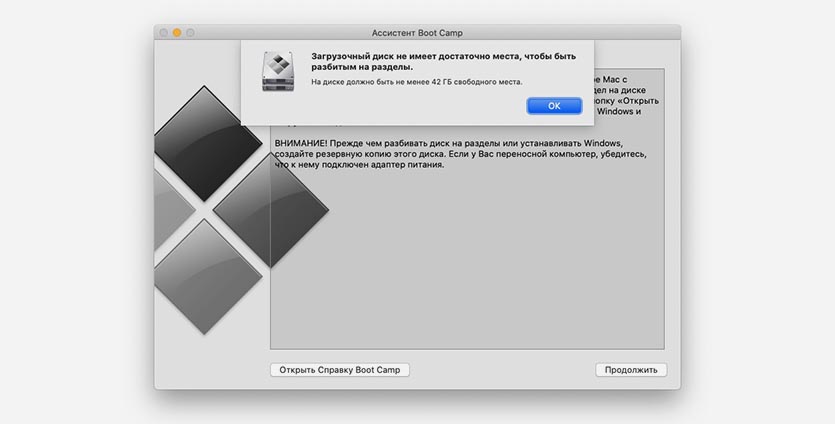
Если попытаться установить Windows через Boot Camp на компьютерах со 128 ГБ накопителем, утилита вежливо попросит освободить минимум 42 ГБ! Следуя такой логике, для установки второй ОС нужно удалить все приложения и данные из первой.
Можно попытаться установить систему на внешний накопитель, но в последних версиях macOS это невозможно.
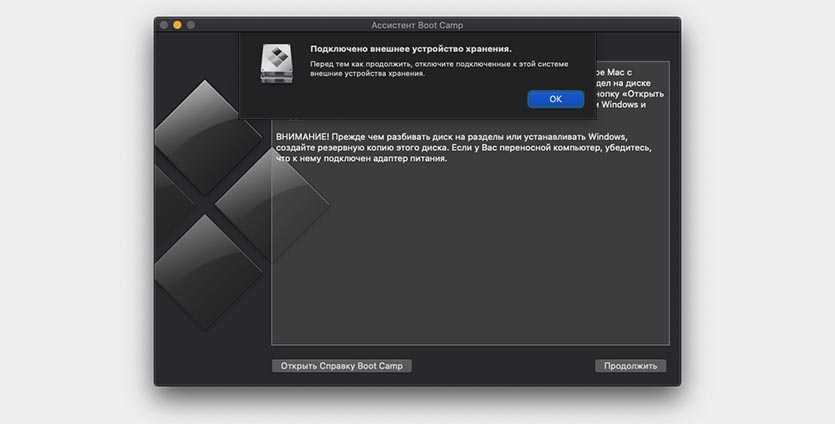
BootCamp в macOS Catalina даже не запустится, если к Mac подключен внешний диск.
Есть не самый простой, но рабочий способ установить Windows 10 на внешний накопитель, для этого нам понадобится еще один Windows (в виртуальной машине).
? Спасибо re:Store за полезную информацию. ?
Для всех манипуляций потребуется минимум 30 ГБ свободного пространства. Чуть более 20 ГБ потребуется для временной установки виртуальной машины, а еще 5-6 ГБ займет образ Windows и сопутствующие файлы.
Процесс установки не самый интуитивный и некоторые шаги, которые не требовались раньше, придется проделать. Так выглядит общий алгоритм установки:
На все это уйдет не больше часа времени.
Как подготовить Mac с чипом T2
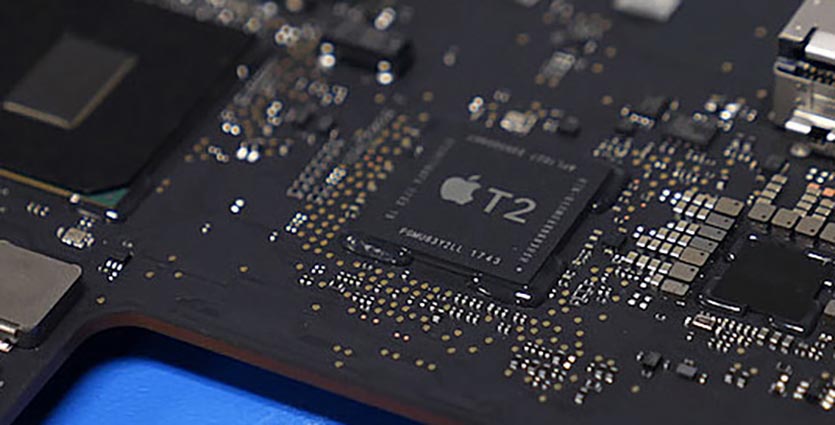
Новые модели компьютеров Apple комплектуются специальным чипом T2, одной из особенностей которого является предотвращение загрузки компьютера с внешнего накопителя. Подобной штукой оснащают эти модели Mac:
▪️ iMac Pro
▪️ Mac mini (2018 г.)
▪️ MacBook Air (2018 г. и более поздние модели)
▪️ MacBook Pro (2018 г. и более поздние модели)
▪️ Mac Pro (2019 г.)
Выход есть, достаточно перезагрузится в режиме восстановления и разрешить загрузку с внешних накопителей.
Подробно об этом мы уже писали в данной статье.
Как подготовить съемный накопитель
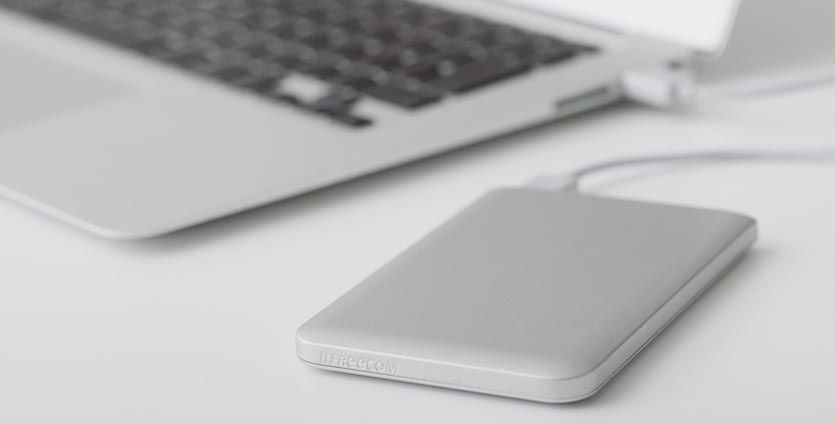
Подойдет любой диск объемом от 16ГБ. В зависимости от задач, можете установить Windows хоть на флешку. Скорости USB 3.0 будет достаточно для работы в несложных приложениях.
Диск, на который будет производиться установка системы, изначально нужно отформатировать в exFAT формате. Это необходимо, чтобы до записи Windows с ним могли взаимодействовать обе операционные системы.
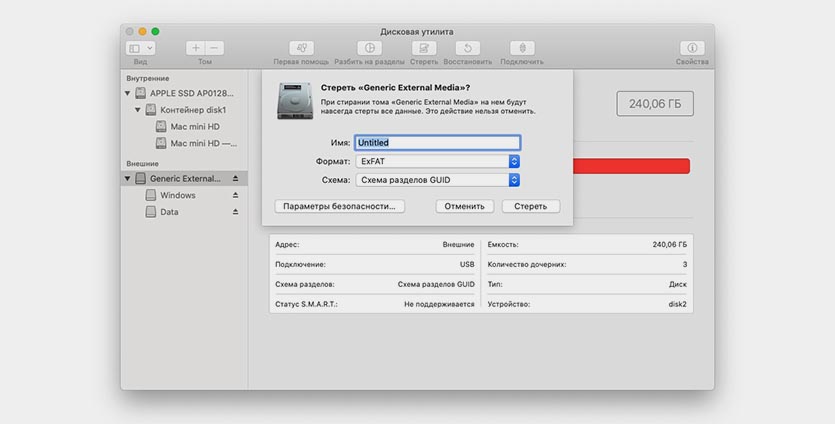
Внимание! Все данные на съемном диске будут удалены. Позаботьтесь о резервном копировании, если это необходимо.
▸ Запускаем приложение Дисковая утилита
▸ В боковом меню выбираем накопитель
▸ Нажимаем кнопку Стереть и указываем нужную файловую систему
После окончания процедуры накопитель готов к установке Windows.
Что нужно скачать перед установкой
Как уже говорилось выше, установка буде происходить не самым привычным способом. Вот, что потребуется скачать предварительно:
▸ Установочный образ Windows 10 берем с сайта Microsoft
▸ Скачиваем бесплатную пробную версию приложения Parallels Desktop
▸ Загружаем программу WinToUSB с сайта разработчика
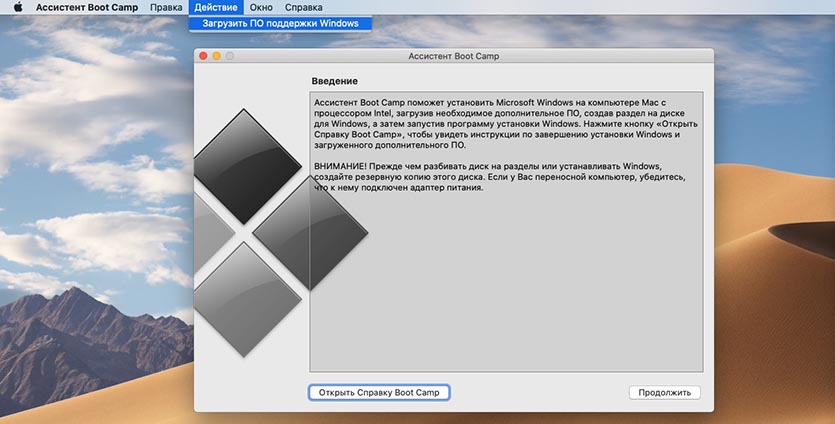
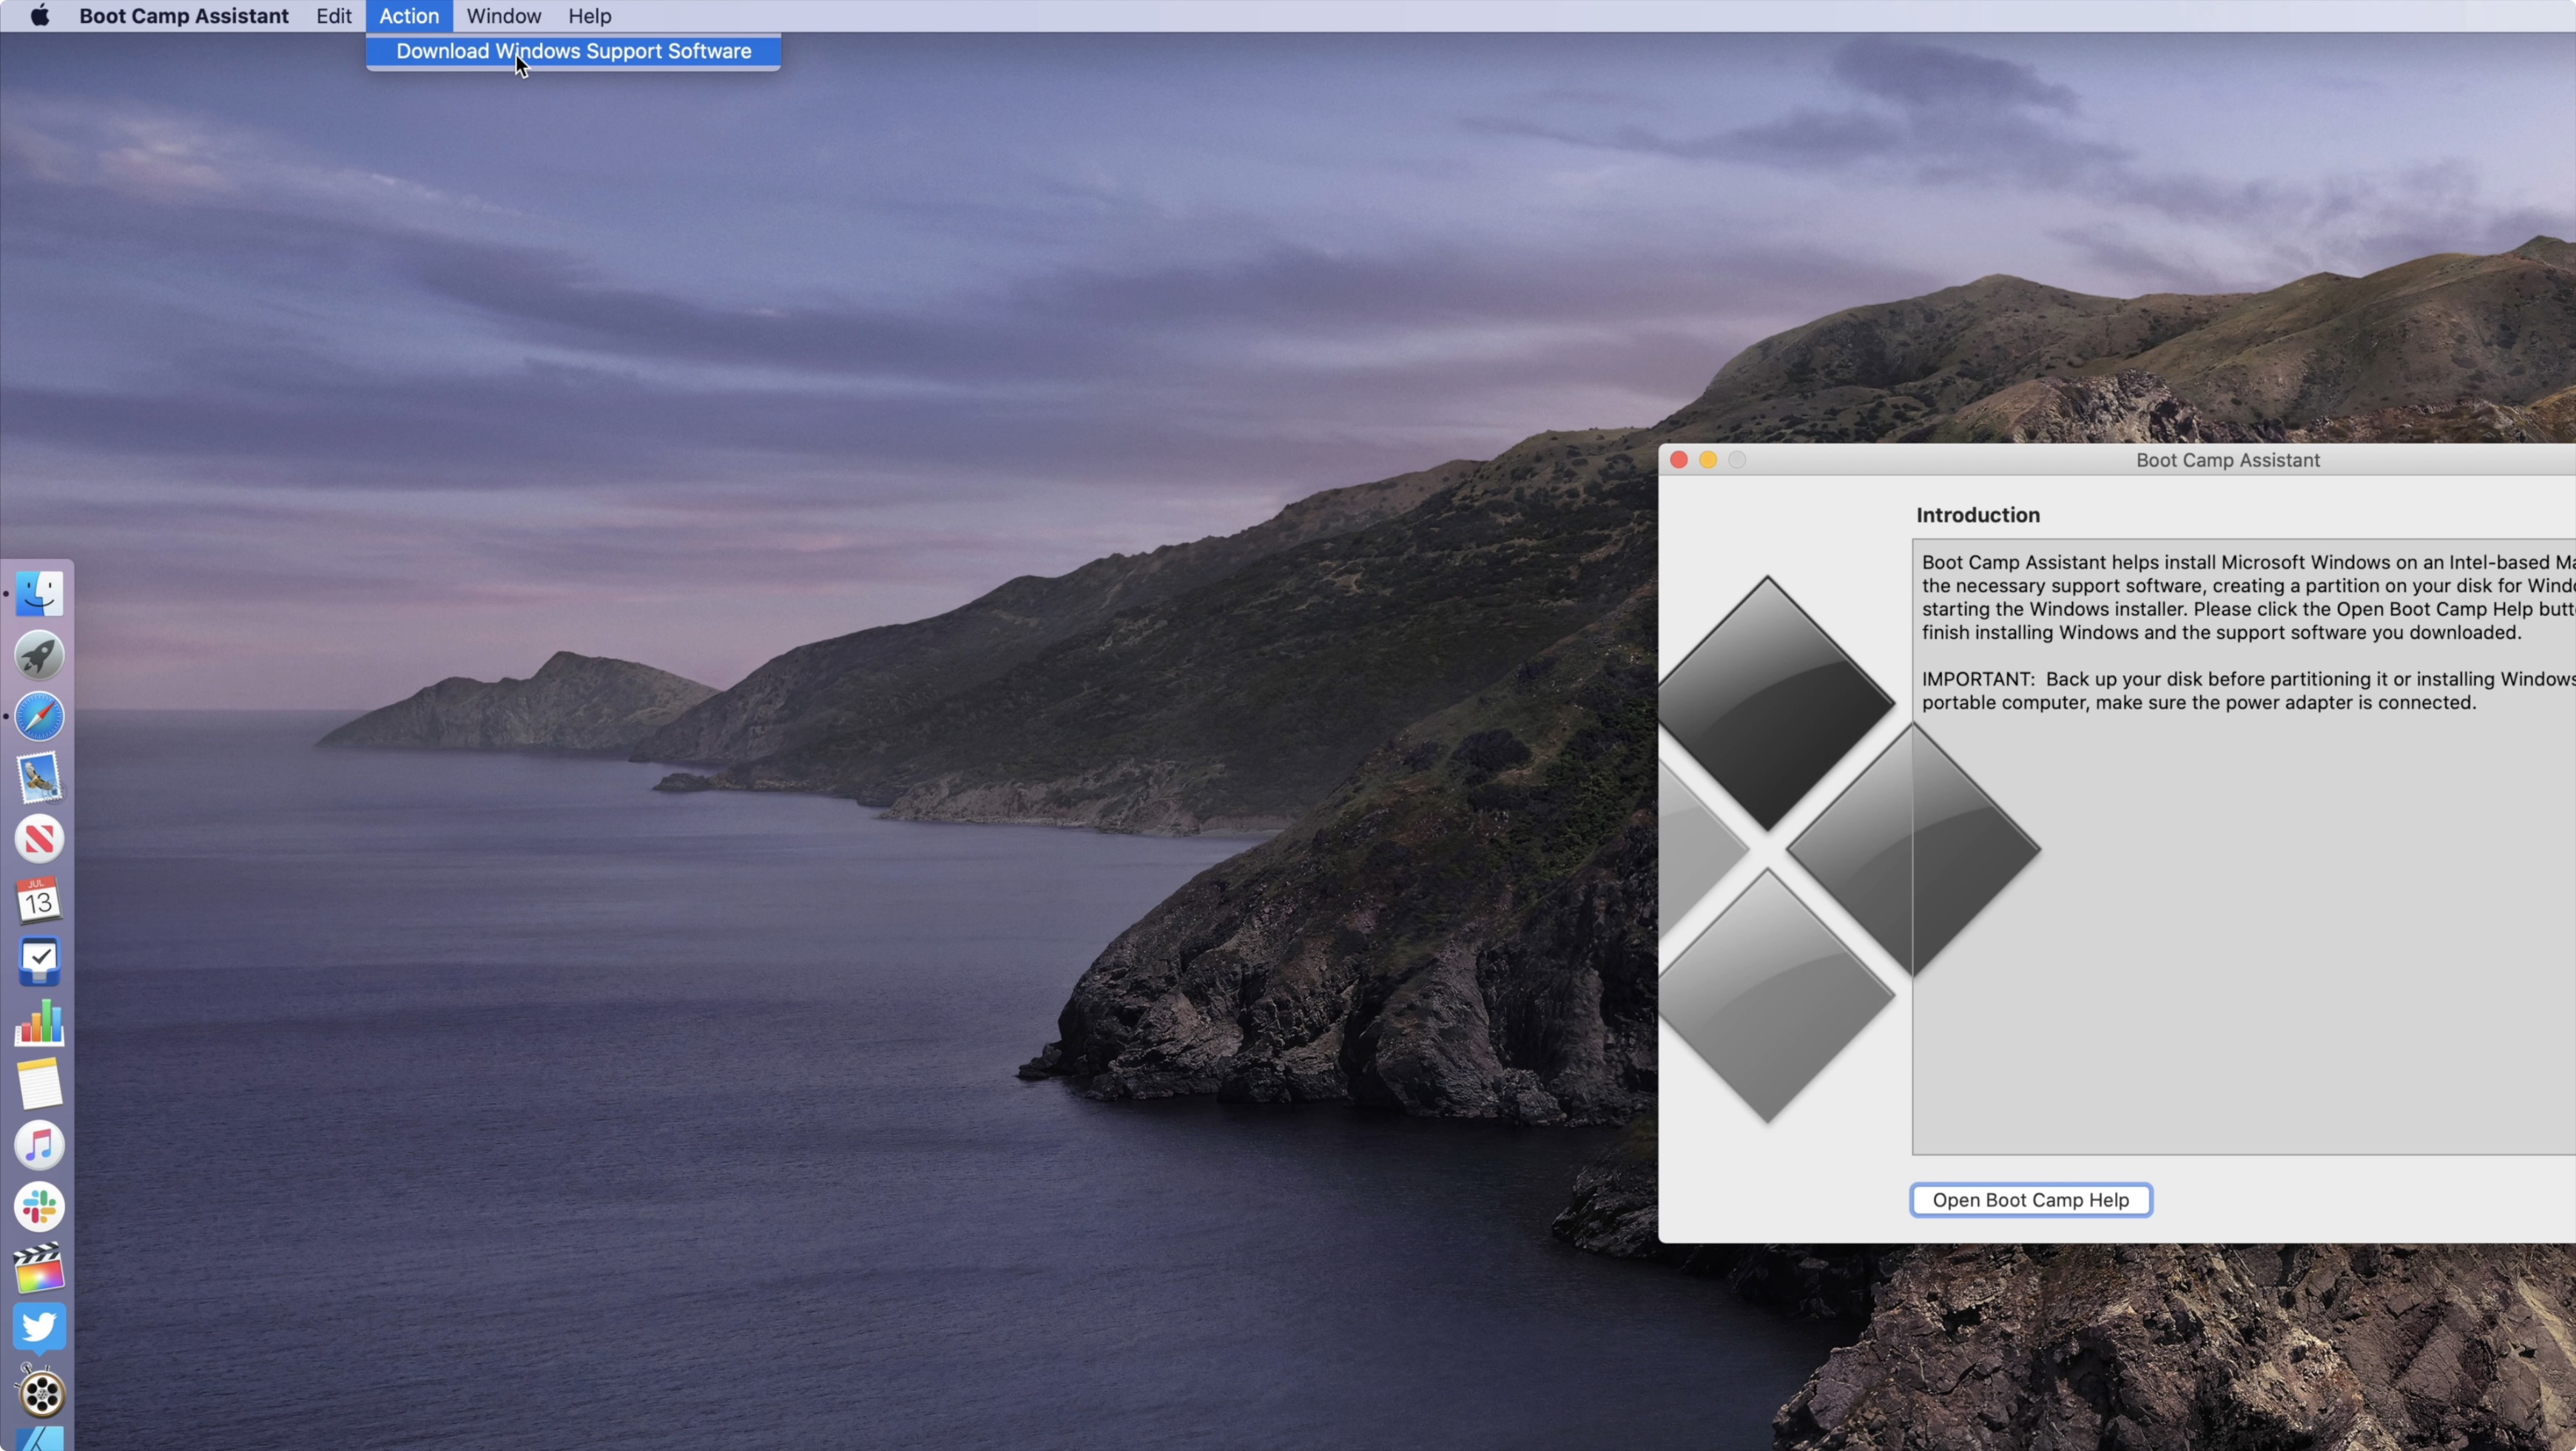
▸ Не забываем скачать драйвера и дополнительные файлы для работы всех компонентов Mac на Windows. Сделать это можно при помощи стандартной утилиты Ассистент Boot Camp. В строке меню выбираем пункт Действие – Загрузить ПО поддержки Windows.
Когда все данные загружены, можем приступать.
Как установить Windows 10 на внешний накопитель
1. В MacOS устанавливаем приложение Parallels Desktop.
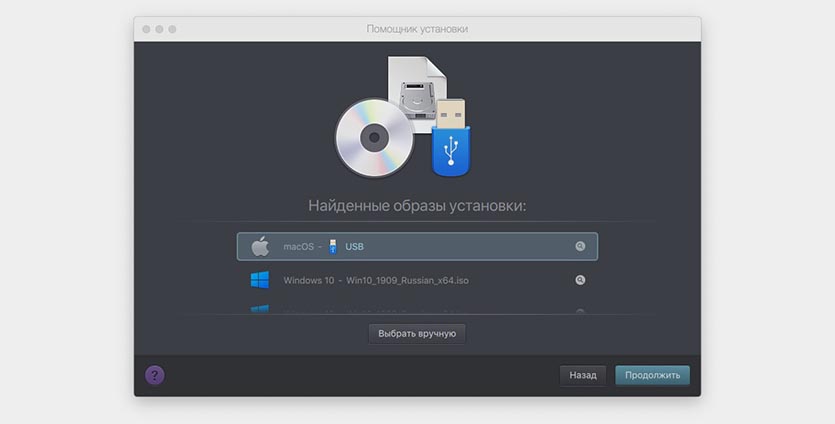
2. В программе создаем новую виртуальную машину при помощи скачанного образа Windows 10.
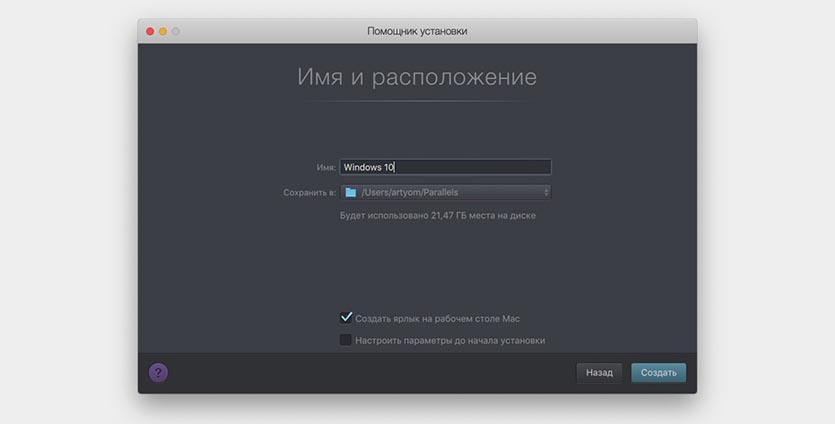
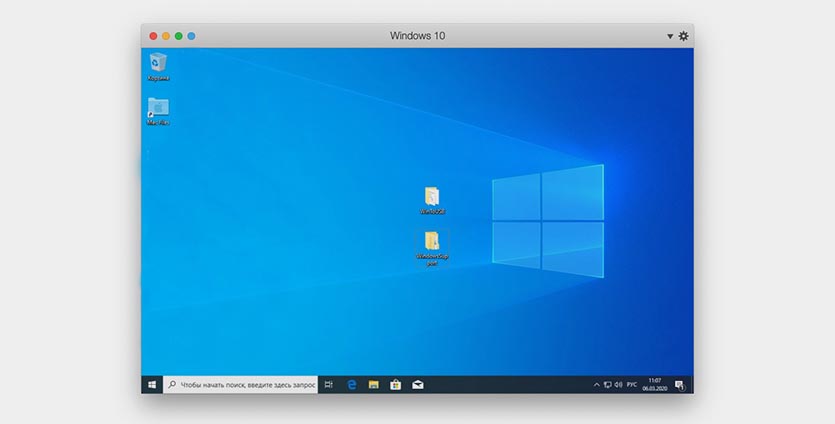
3. Производим процесс первоначально настройки и ждем окончания загрузки Windows на виртуальную машину.
4. Когда Windows будет запущен, переносим в виртуальную машину загруженные данные (приложение WinToUSB и файлы из Ассистента Boot Camp).
5. В Windows-среде устанавливаем программу WinToUSB.
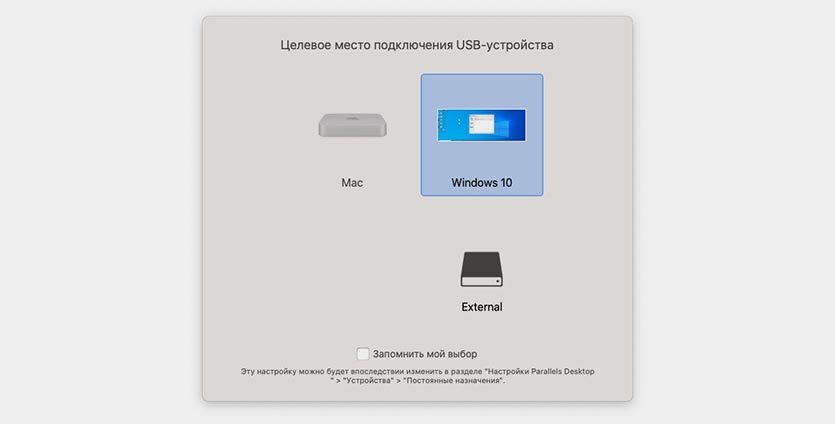
6. Подключаем внешний накопитель к компьютеру и в диалоговом окне Parallels Desktop перенаправляем его в Windows.
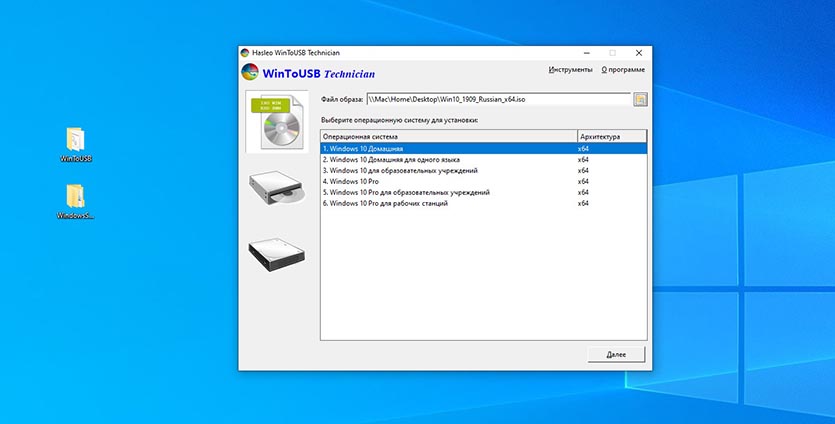
7. В меню WinToUSB указываем образ Windows 10 (это тот же образ, из которого мы создавали виртуальную машину, его можно скопировать в Parallels Desktop или открыть через общую папку).
8. В качестве целевого диска указываем подключенный накопитель.
9. Ждем около 15-20 минут до окончания установки Windows на внешний накопитель.
10. После установки копируем файлы из Ассистента Boot Camp в корневую папку внешнего диска с установленной Windows 10.
11. Завершаем приложение Parallels Desktop и перезагружаем Mac.
12. Во врем загрузки компьютера удерживаем клавишу Option (Alt), чтобы попасть в меню выбора накопителей.
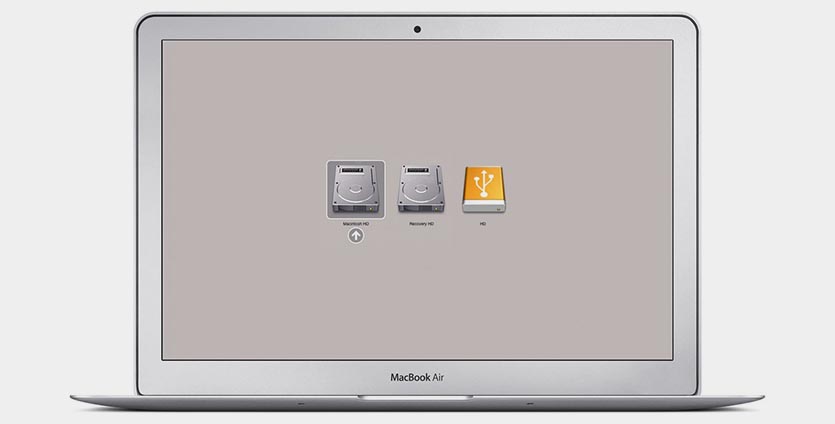
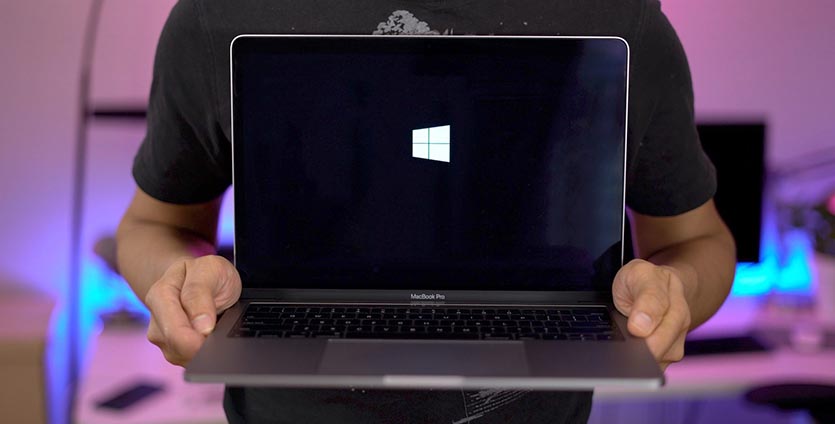
13. Указываем внешний диск и запускаем Windows 10.
14. Во время запуска производим первоначальную установку системы. В зависимости от используемой модели Mac вам могут потребоваться проводные USB клавиатура и мышь.
15. После первого запуска производим установку драйверов и сопутствующего по из скопированных файлов Ассистента Boot Camp.
Поздравляем! Вы получили установленную операционную систему Windows 10 на внешнем диске. Накопитель можно запросто подключить к другому Mac и загрузиться с него (не забудьте отключить защиту на моделях с чипом T2).
Теперь в MacOS можно удалить виртуальную машину и приложение Parallels Desktop.
Вот так приходится выкручиваться из ситуации, в которую загоняют пользователей разработчики из Купертино.
How to run Windows 10 on Mac using an external SSD [Video]
— Jul. 14th 2020 9:24 am PT
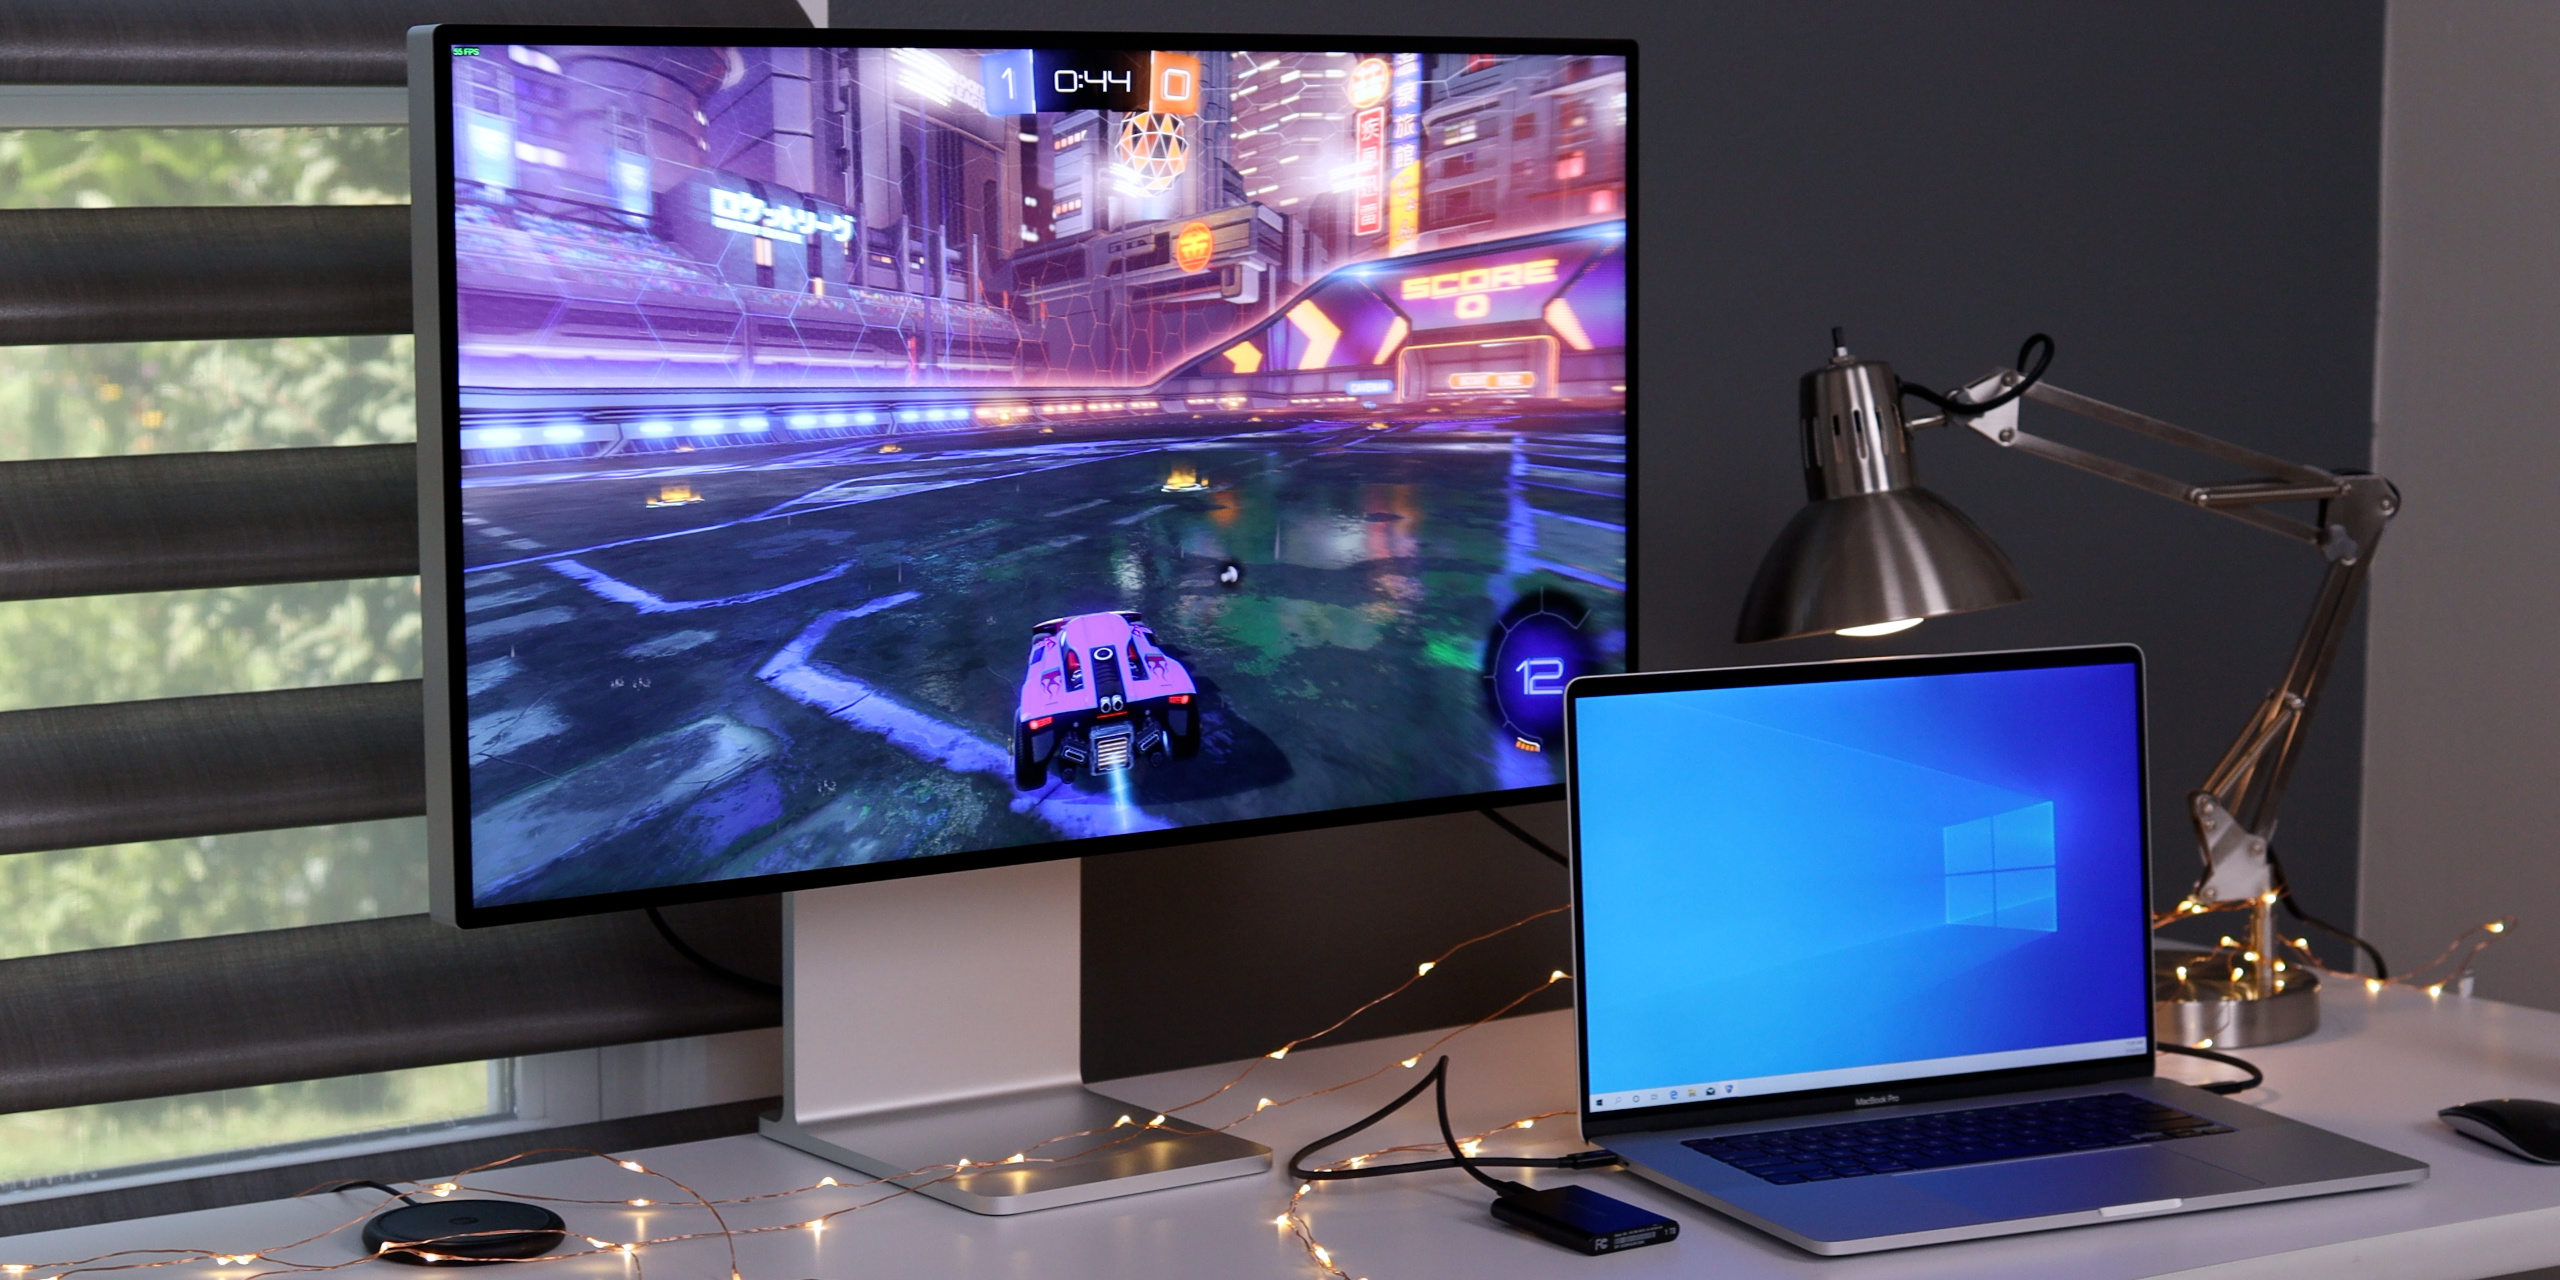
Traditional Boot Camp installations can take up a lot of storage space on your Mac. Considering that many Macs out there have relatively minuscule amounts of onboard storage, installing Boot Camp to run Windows isn’t always a feasible option. With this in mind, setting up an external Windows drive on your Mac might prove to be handy.
In this video walkthrough, I show you step-by-step how to deploy a Windows installation using Boot Camp drivers on an external drive connected to your Mac. Be sure to subscribe to 9to5Mac on YouTube for more handy tutorials like this.
Windows external SSD on Mac
This is a much-requested follow up to our original Windows 10/external drive tutorial posted back in 2017. This tutorial has been streamlined and updated to be more clear and understandable, uses the latest version of Windows, etc.
Hardware you’ll need
- A Mac
- External SSD, I recommend the Samsung T5 or Samsung T7 external SSD
- External USB keyboard/USB mouse/trackpad
Download the following to the Downloads folder:
Video tutorial: How to install Windows 10 on a Mac external drive
Download the Windows Support Software
In order to download the needed Windows Support Software that contains necessary drivers, you’ll need to perform the following steps on the Mac that you plan on using to run Windows:
Step 1: Remove any external drives that are connected to your Mac.
Step 2: Launch Boot Camp Assistant in /System/Applications/Utilities/
Step 3: Click Action in the menu bar and select Download Windows Support Software.
Step 4: Save the Windows Support Software to the Downloads folder.
Step 5: Once the download is completed, macOS will prompt you to enter your administrator password in order to save the WindowsSupport folder.
Step 6: Quit Boot Camp Assistant.
Format your external drive in macOS
Step 1: Connect your external SSD to your Mac via USB and use Finder to ensure that there’s nothing on it that you need. Keep in mind that the entire contents of the drive will be erased.
Step 2: Launch Disk Utility in /System/Applications/Utilities/
Step 3: Click the View button and select Show All Devices.
Step 4: Select your external SSD and click Erase.
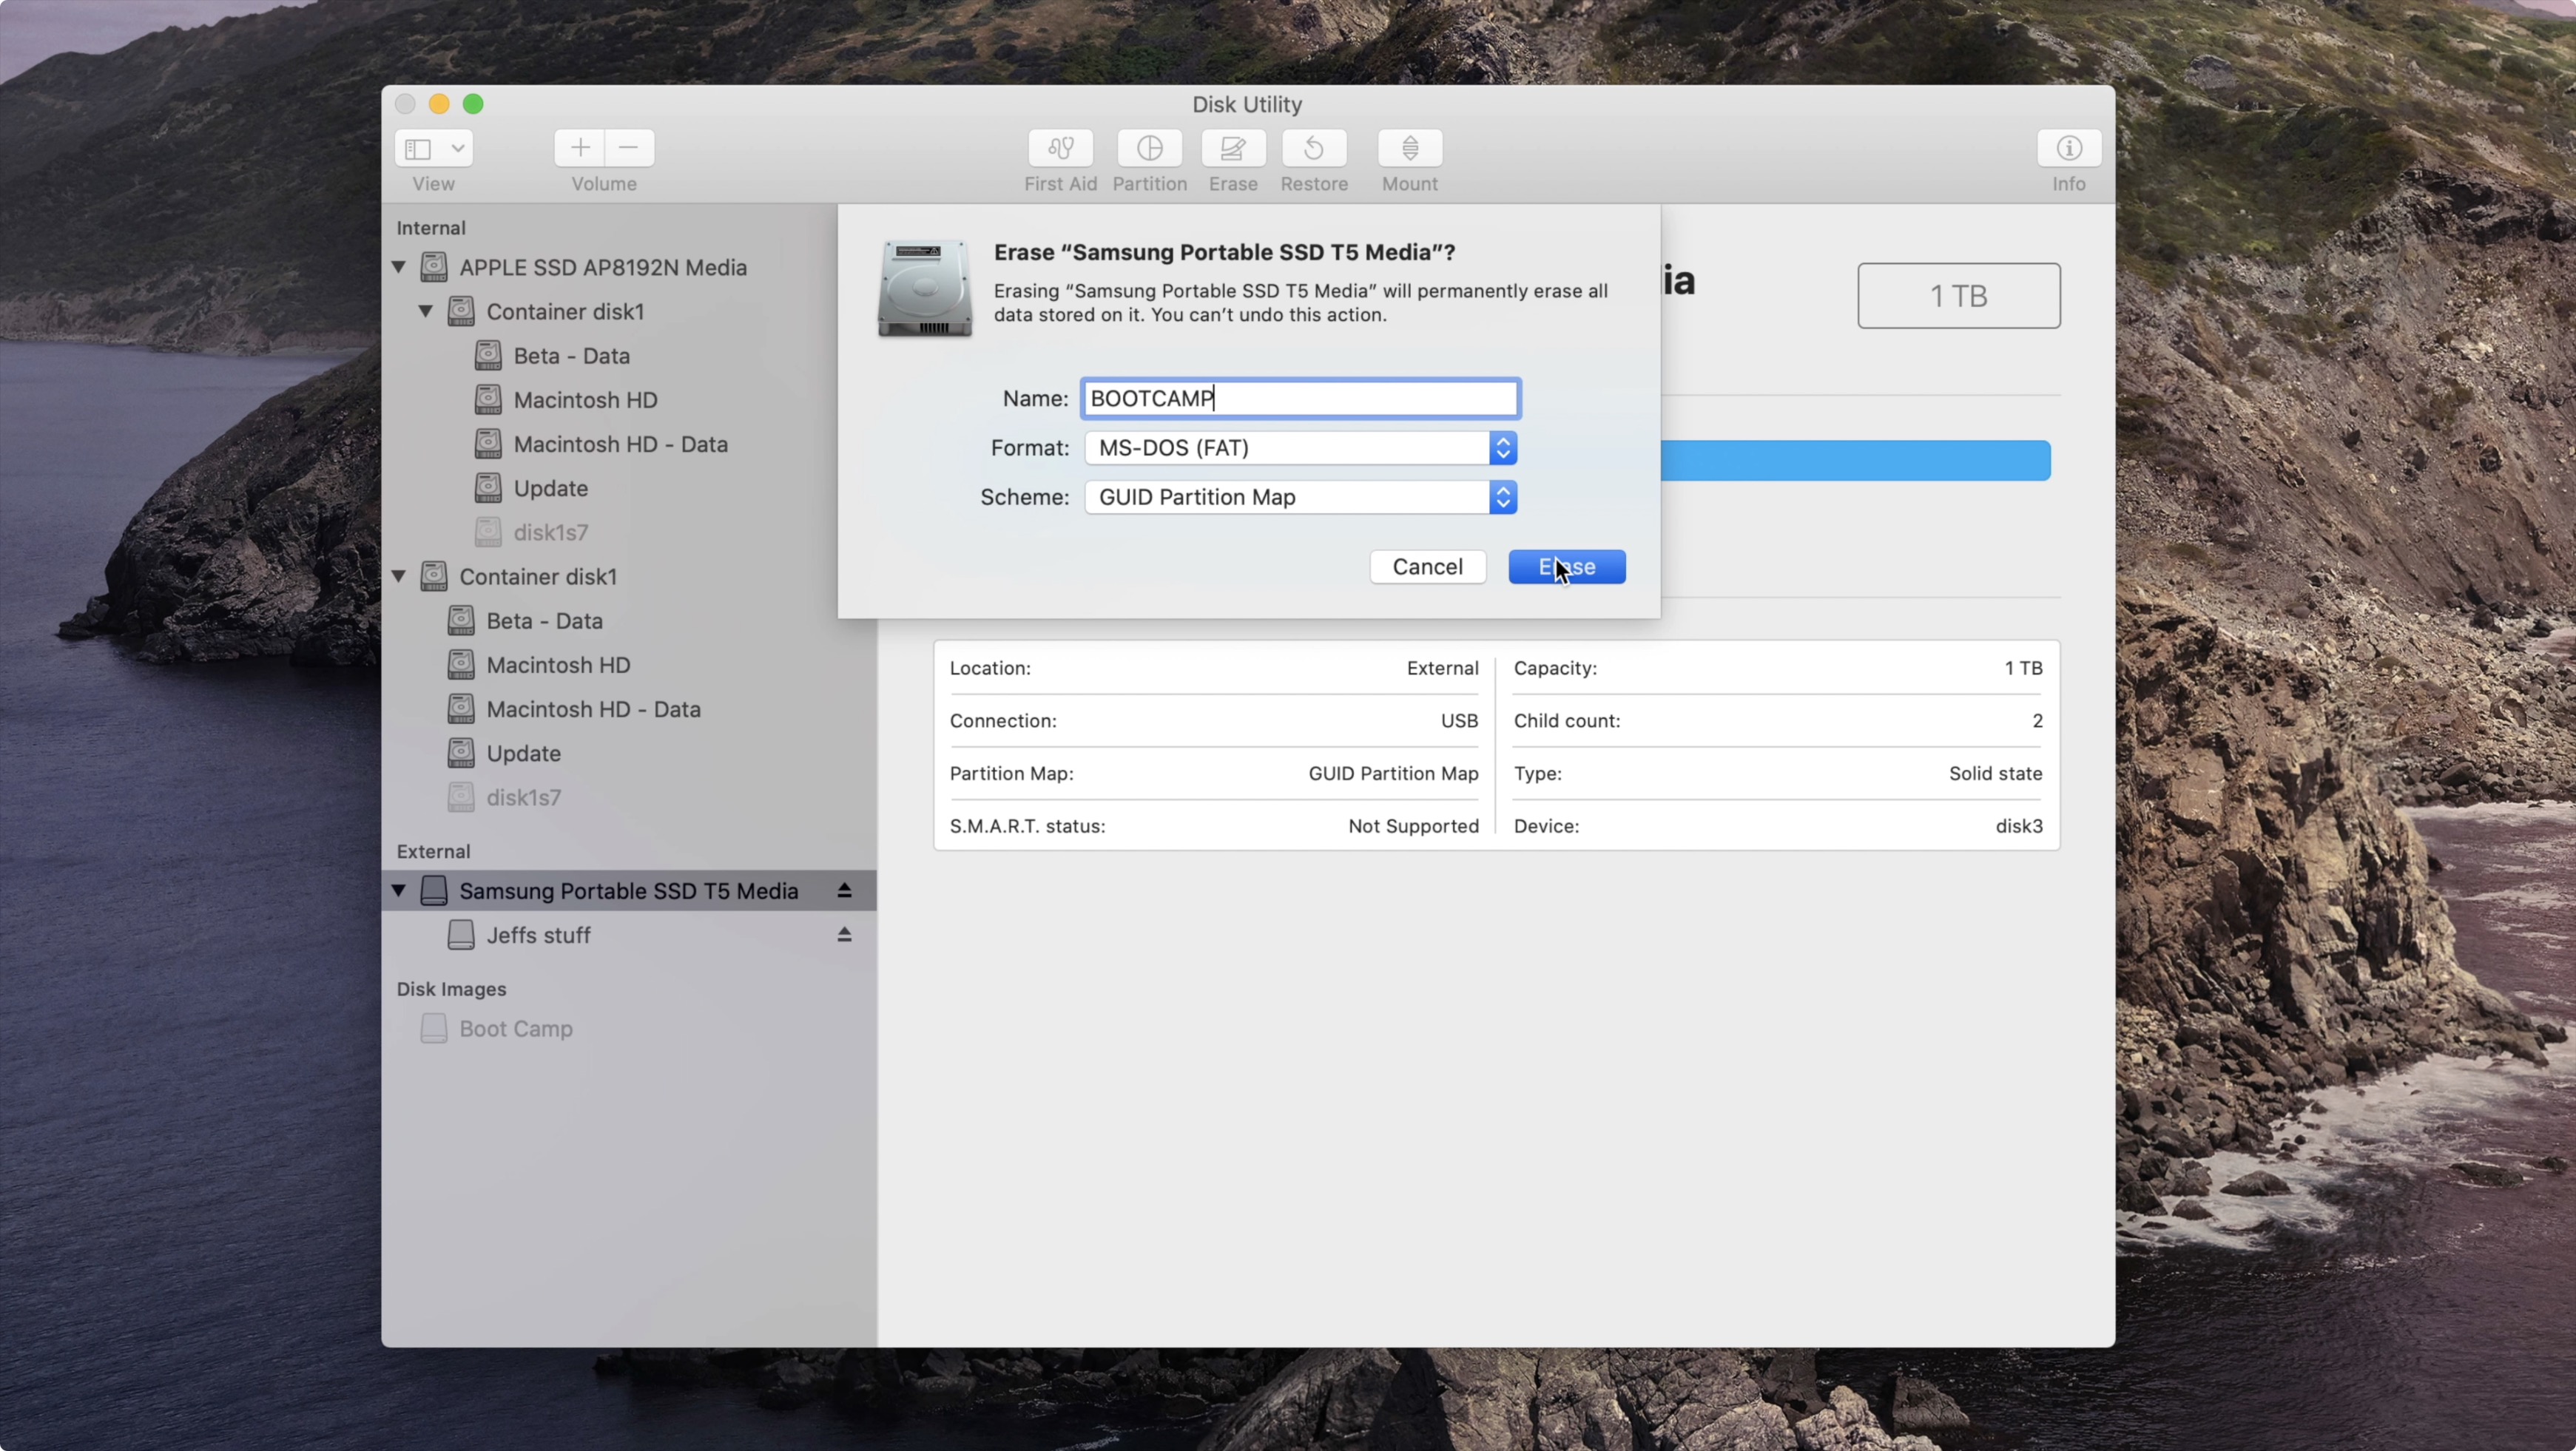
Step 5: Select the following parameters and click the Erase button:
- Name: BOOTCAMP
- Format: MS-DOS (FAT)
- Scheme: GUID Partition Map
Step 6: Once the format is complete, quick Disk Utility.
Install a Windows virtual machine
Step 1: Double-click the VMware Fusion.dmg that you downloaded earlier and double-click the VMware Fusion installer that appears. Click Open, followed by entering your Administrator password to start the install process.
Step 2: Drag the Windows ISO that you downloaded earlier to the designated area within VMWare Fusion and click Continue.
Step 3: Click the drop-down list, select Windows 10 Home for your Windows version, and click Continue.
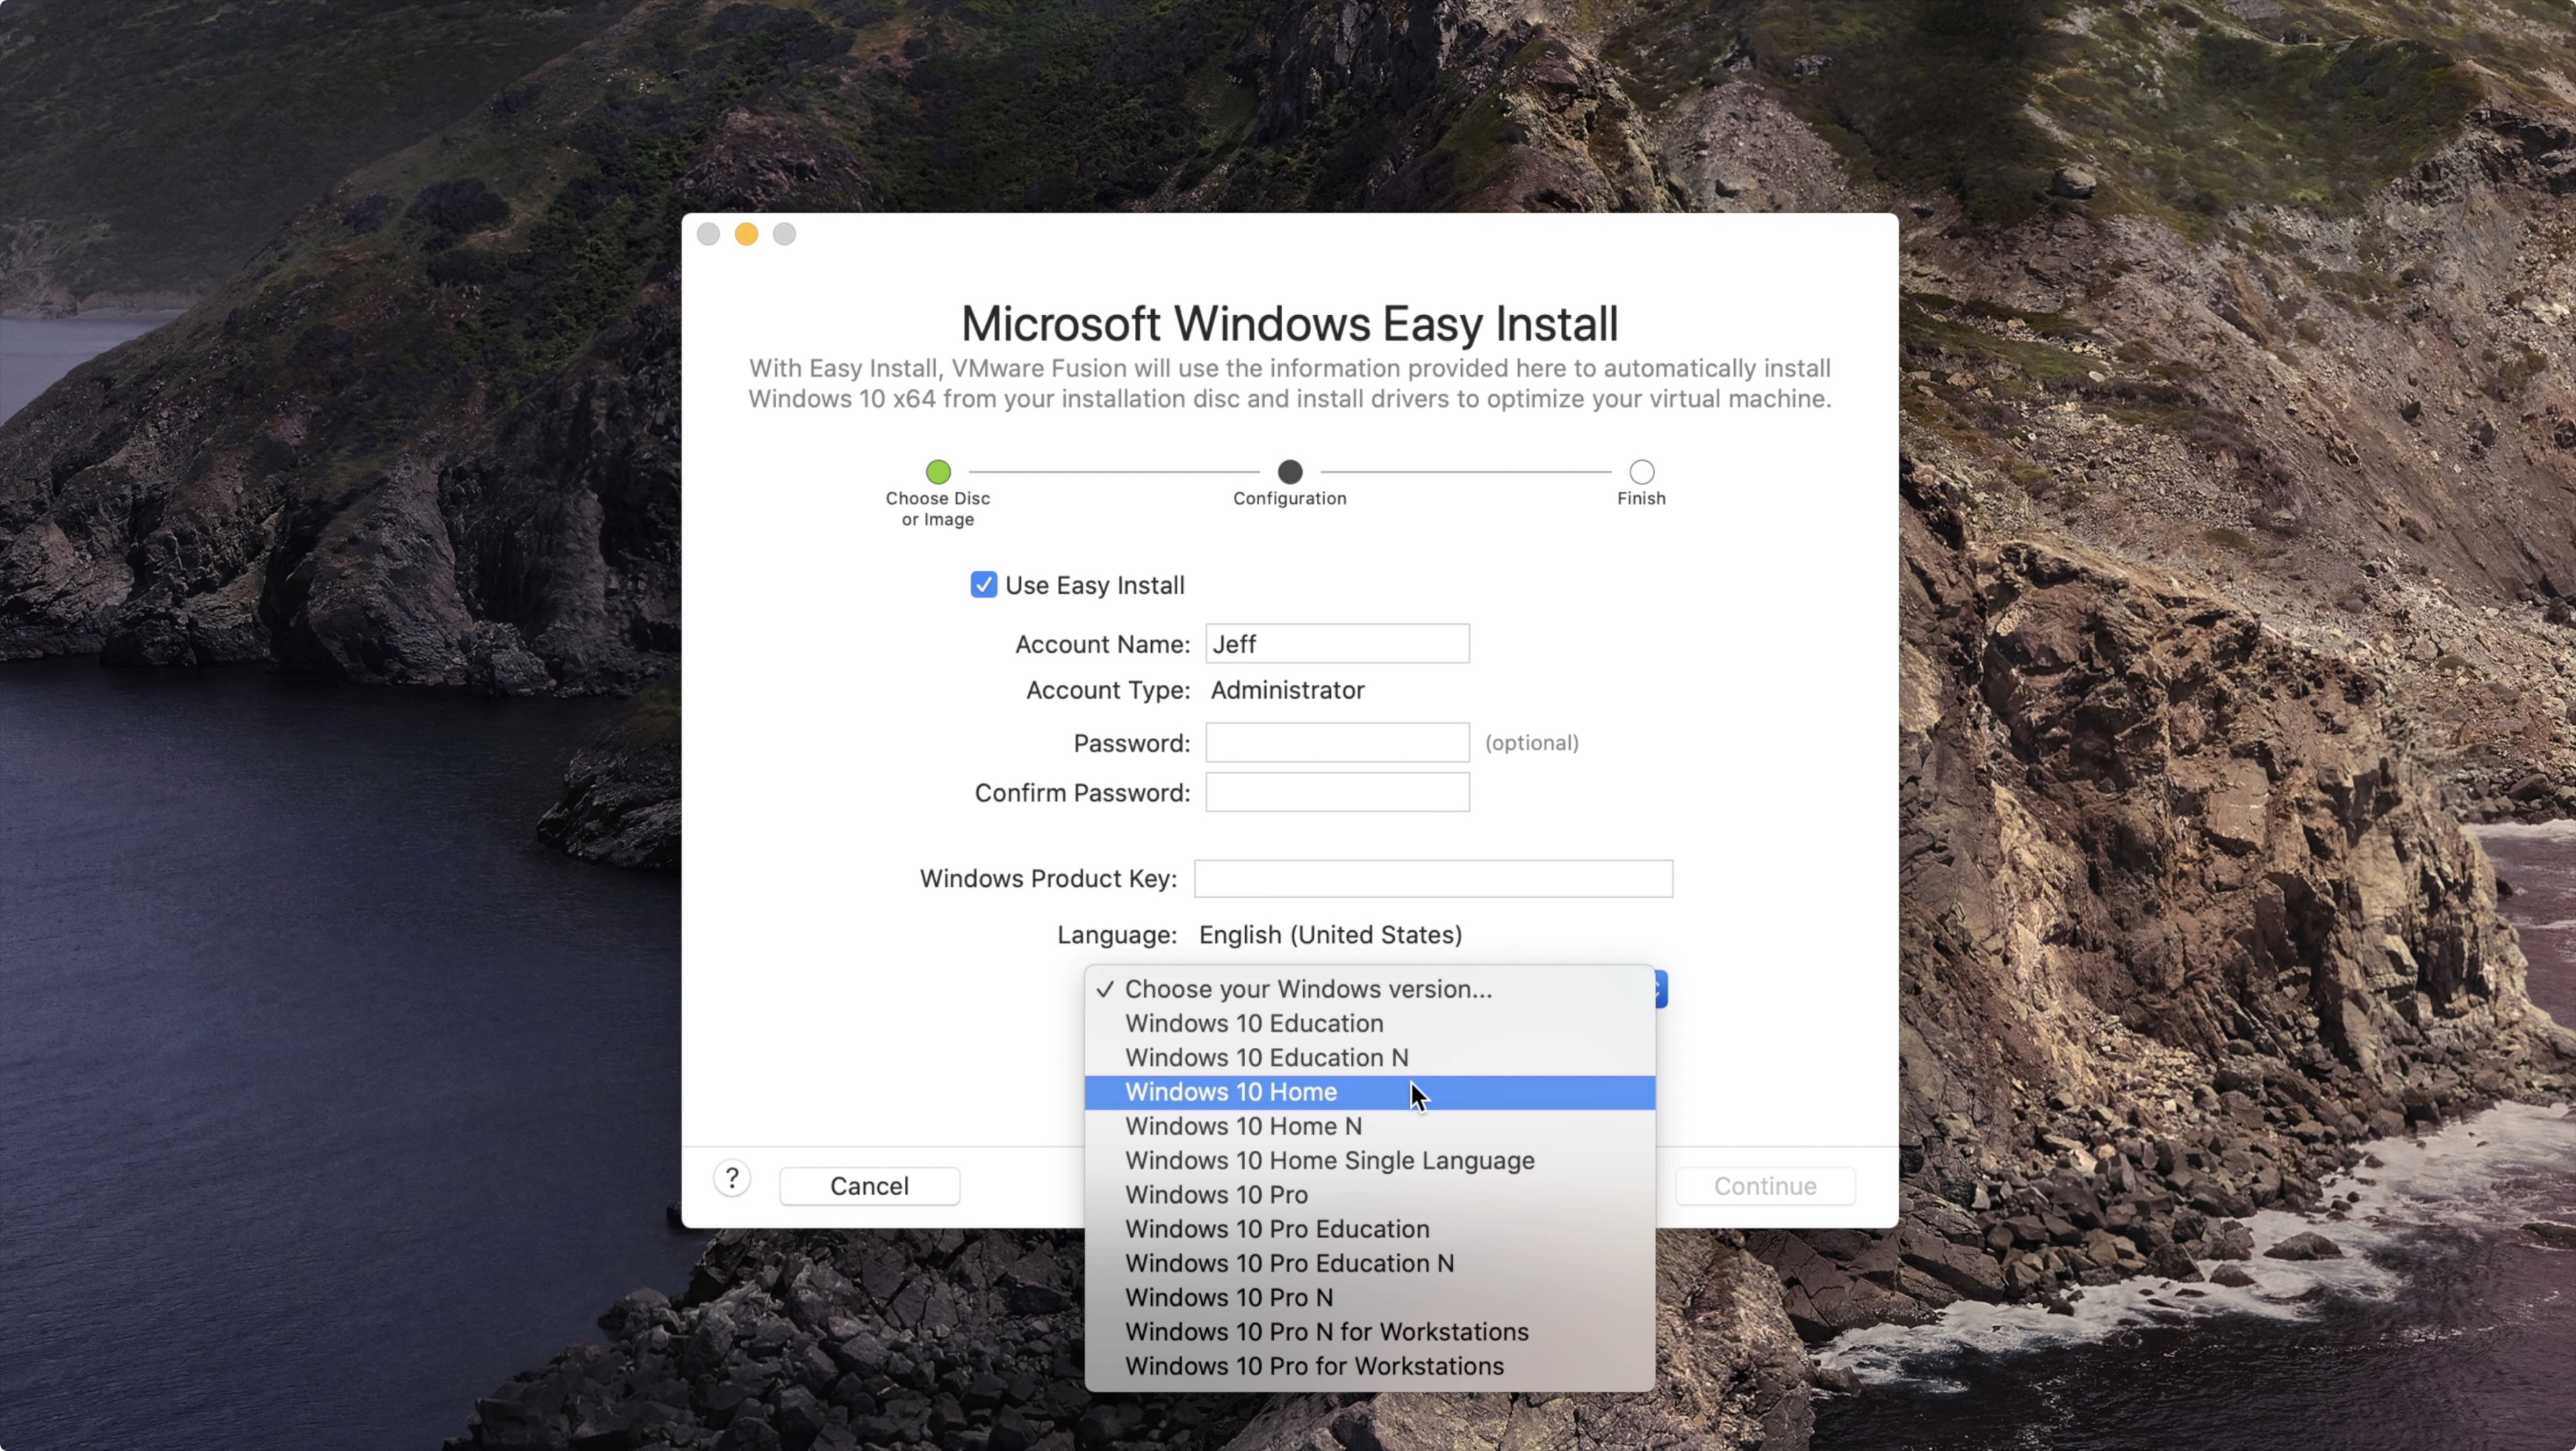
Step 4: Click Continue Without Key (you can enter a Windows Product key later if you purchased Windows).
Step 5: On the Integration page, select More Isolated, and click continue.
Step 6: On the Finish page, click Customize Settings, and click Save to save the Windows virtual machine configuration.
Step 7: On the Windows 10 x64 Settings page, use the Processors & Memory option to provide extra resources to the virtual machine. You can always skip this option and leave the settings as default, but if you have resources to spare, adding more RAM or CPU cores will speed up your virtual machine. Close the Settings page once finished with allocating resources.
Step 8: Click the Play button to begin the Windows virtual machine installation. The installation will take a while, but you shouldn’t have to configure any settings prior to arriving at the desktop.

Step 9: On the Networks slide over click Yes to allow your PC to be discoverable by other PCs and devices on the same network.
Install Windows on the external drive using WinToUSB
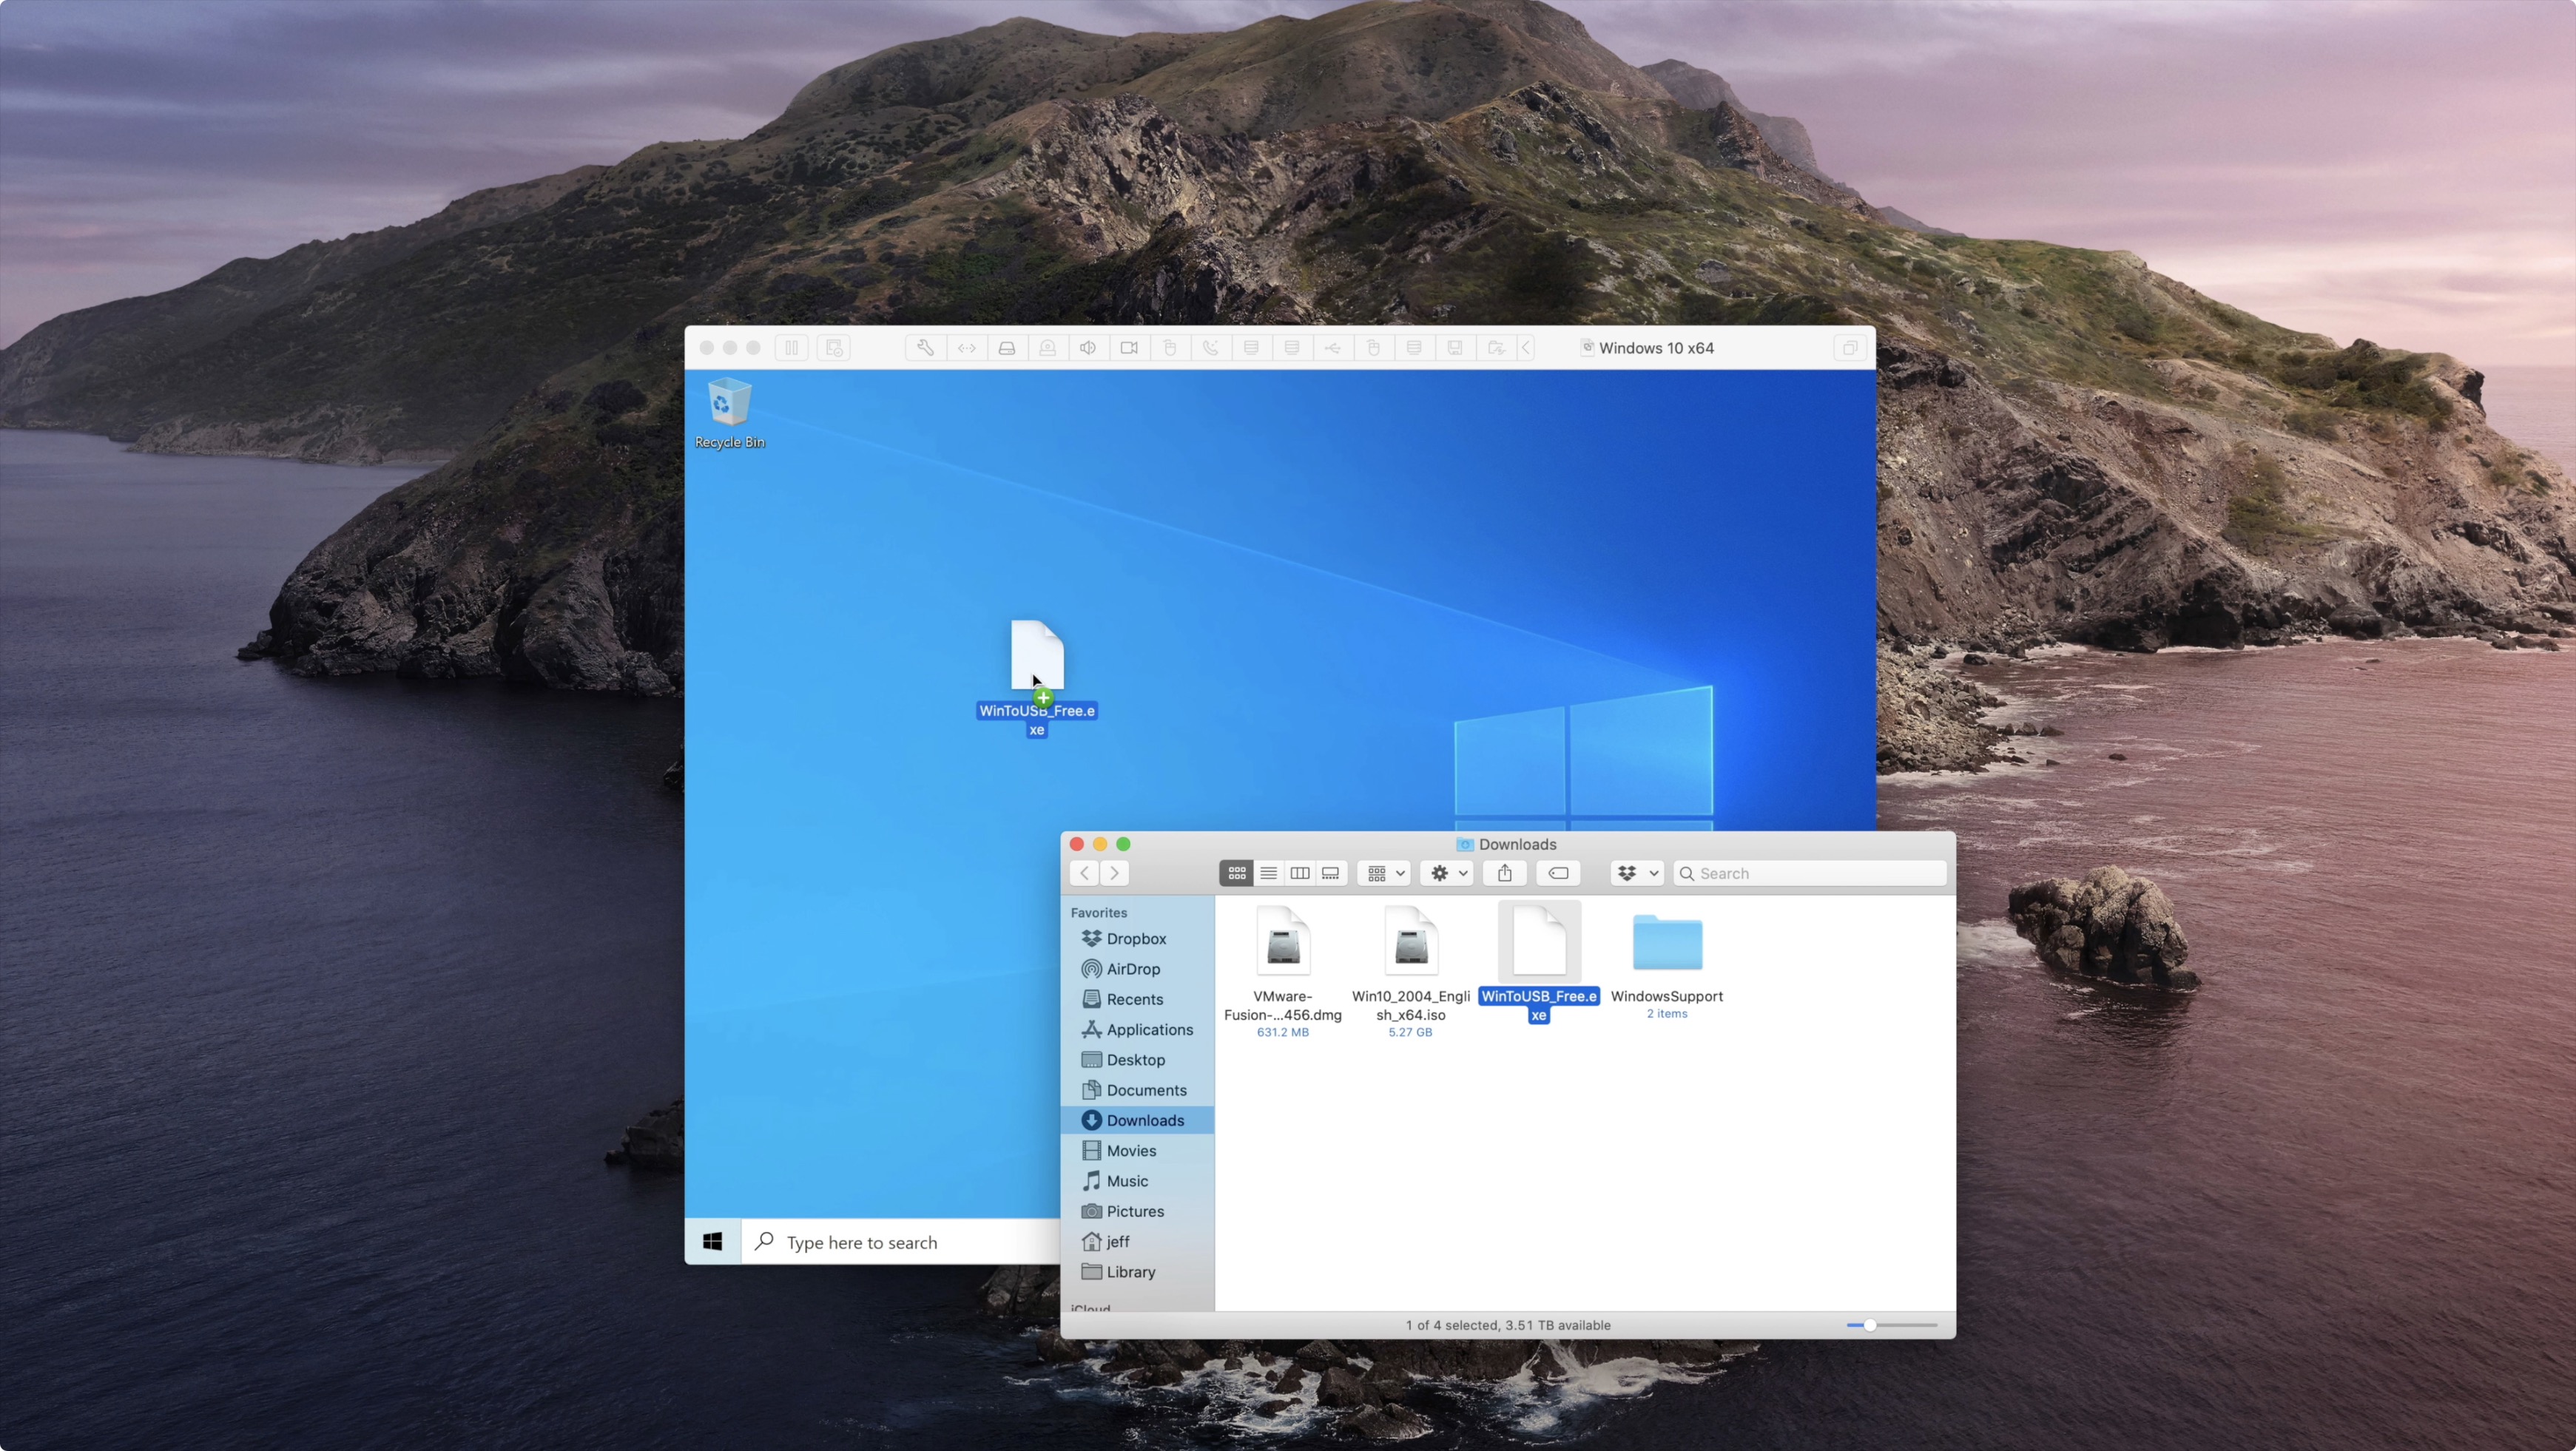
Step 1: Drag the WinToUSB installer and the WindowsSupport folder from your Mac’s desktop to the virtual machine Windows desktop.
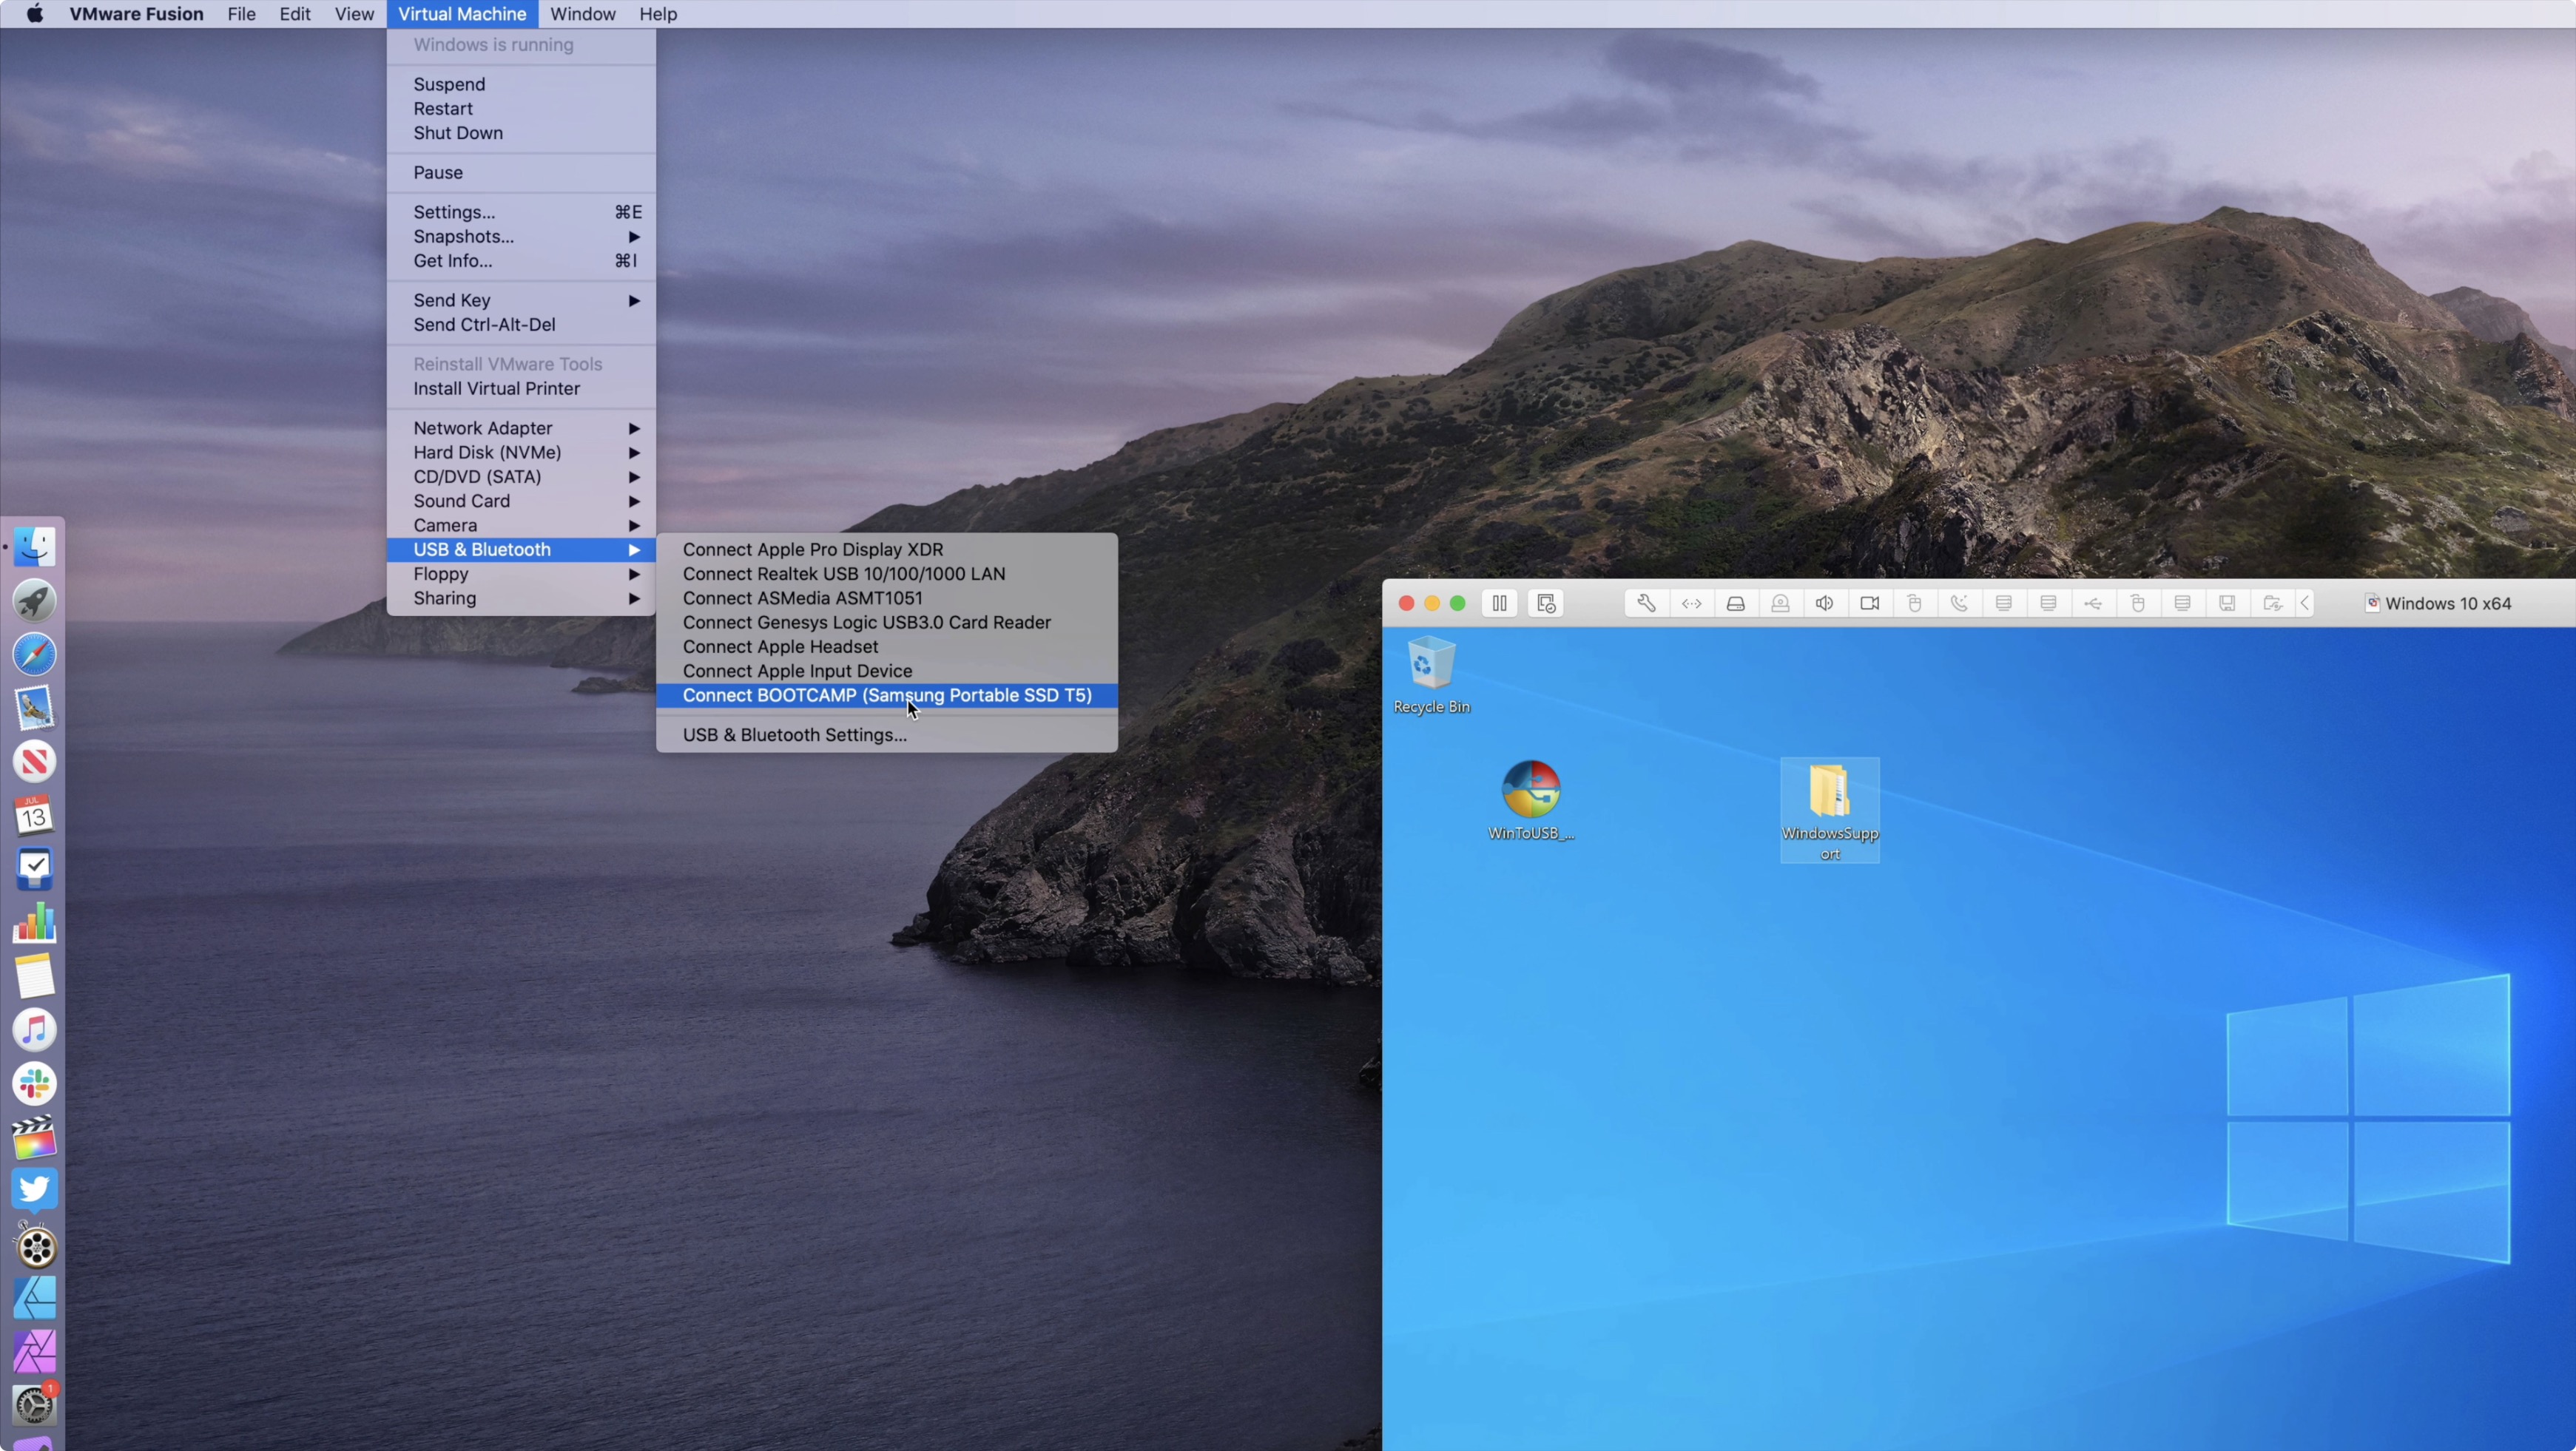
Step 2: With VMWare open, in the menu bar click Virtual Machine → USB & Bluetooth and select the BOOTCAMP external SSD that you created earlier with Disk Utility in macOS. This will mount the SSD to the virtual machine installation, and allow the virtual machine to write to the drive.
Step 3: In the menu bar click Virtual Machine → CD/DVD (SATA) → Choose Disc or Disc Image. Select the Windows 10 ISO on your macOS desktop and click Open.
Step 4: Click Virtual Machine → CD/DVD (SATA) → Connect CD/DVD to mount the Windows ISO. This will mount the Windows ISO so that you can use it to install Windows on the external SSD.
Step 5: Install and run WinToUSB.
Step 6: Click the CD ROM drive icon, and select the Windows 10 disk from the CD/DVD drop-down menu. The disc may be named something like CCCOMA_X64FRE_EN-US-DV9 depending on the version of Windows ISO that you used.
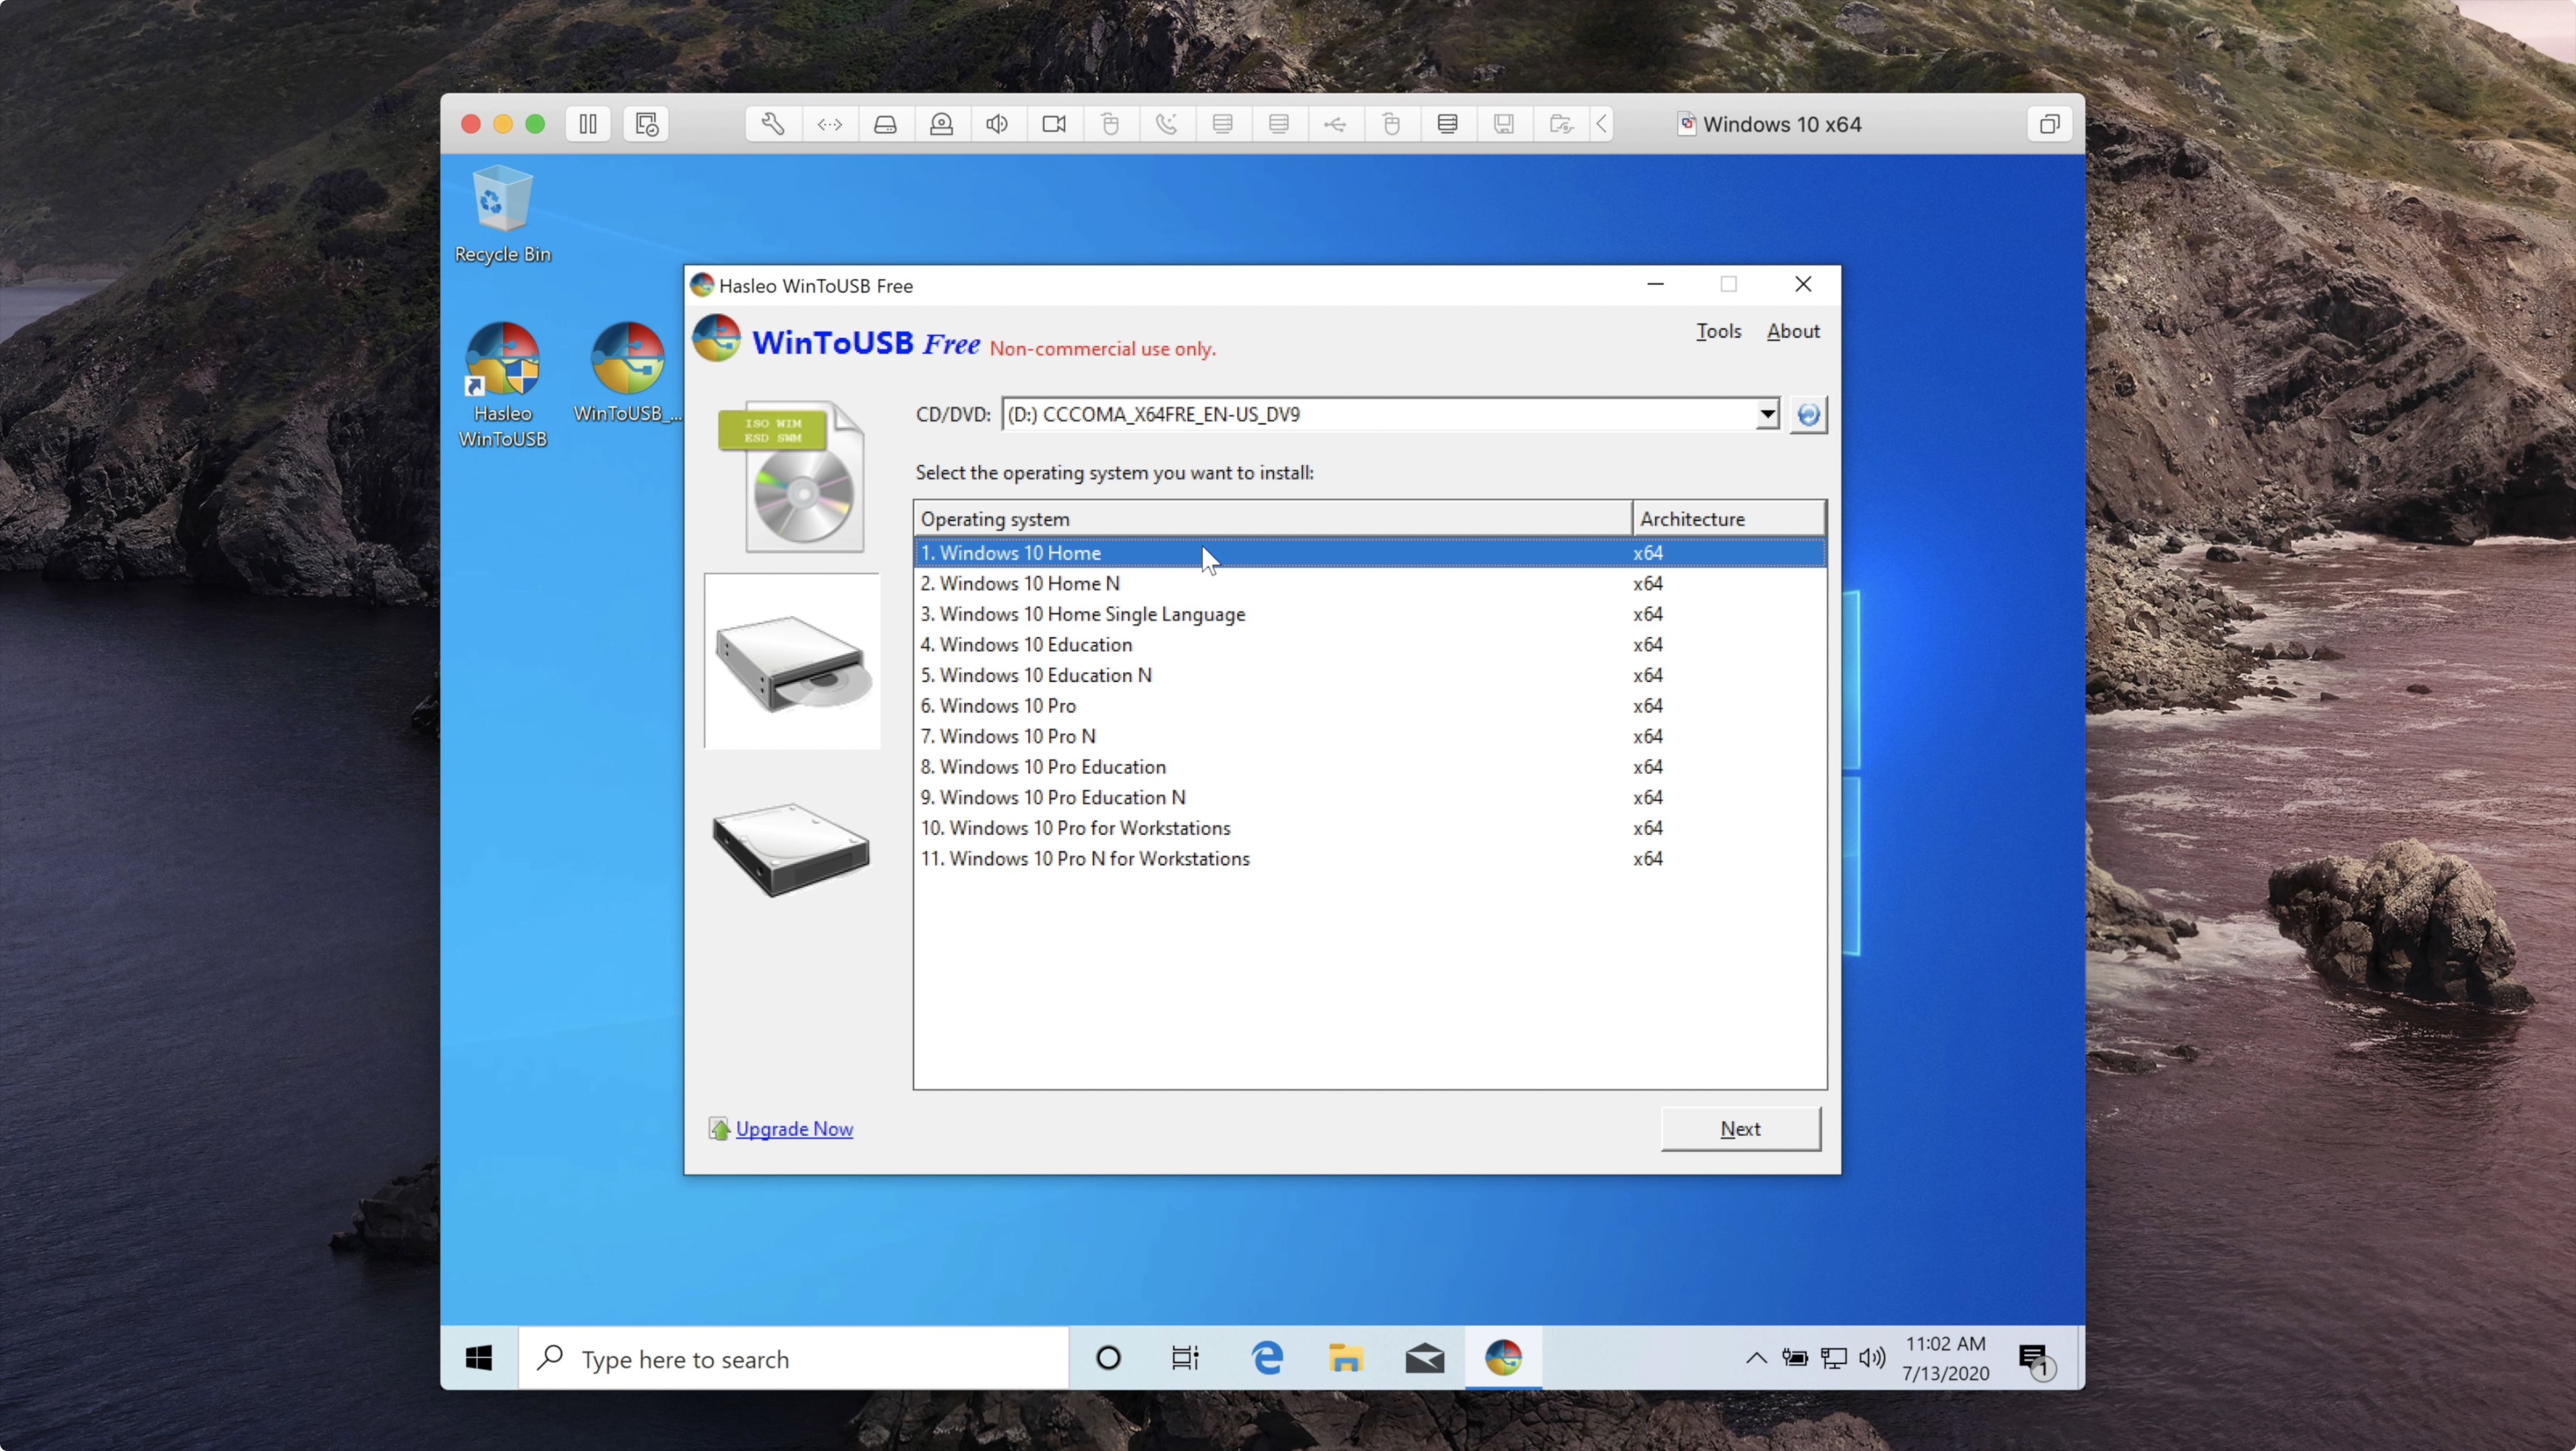
Step 7: In the Operating system list, select Windows 10 Home and click Next.
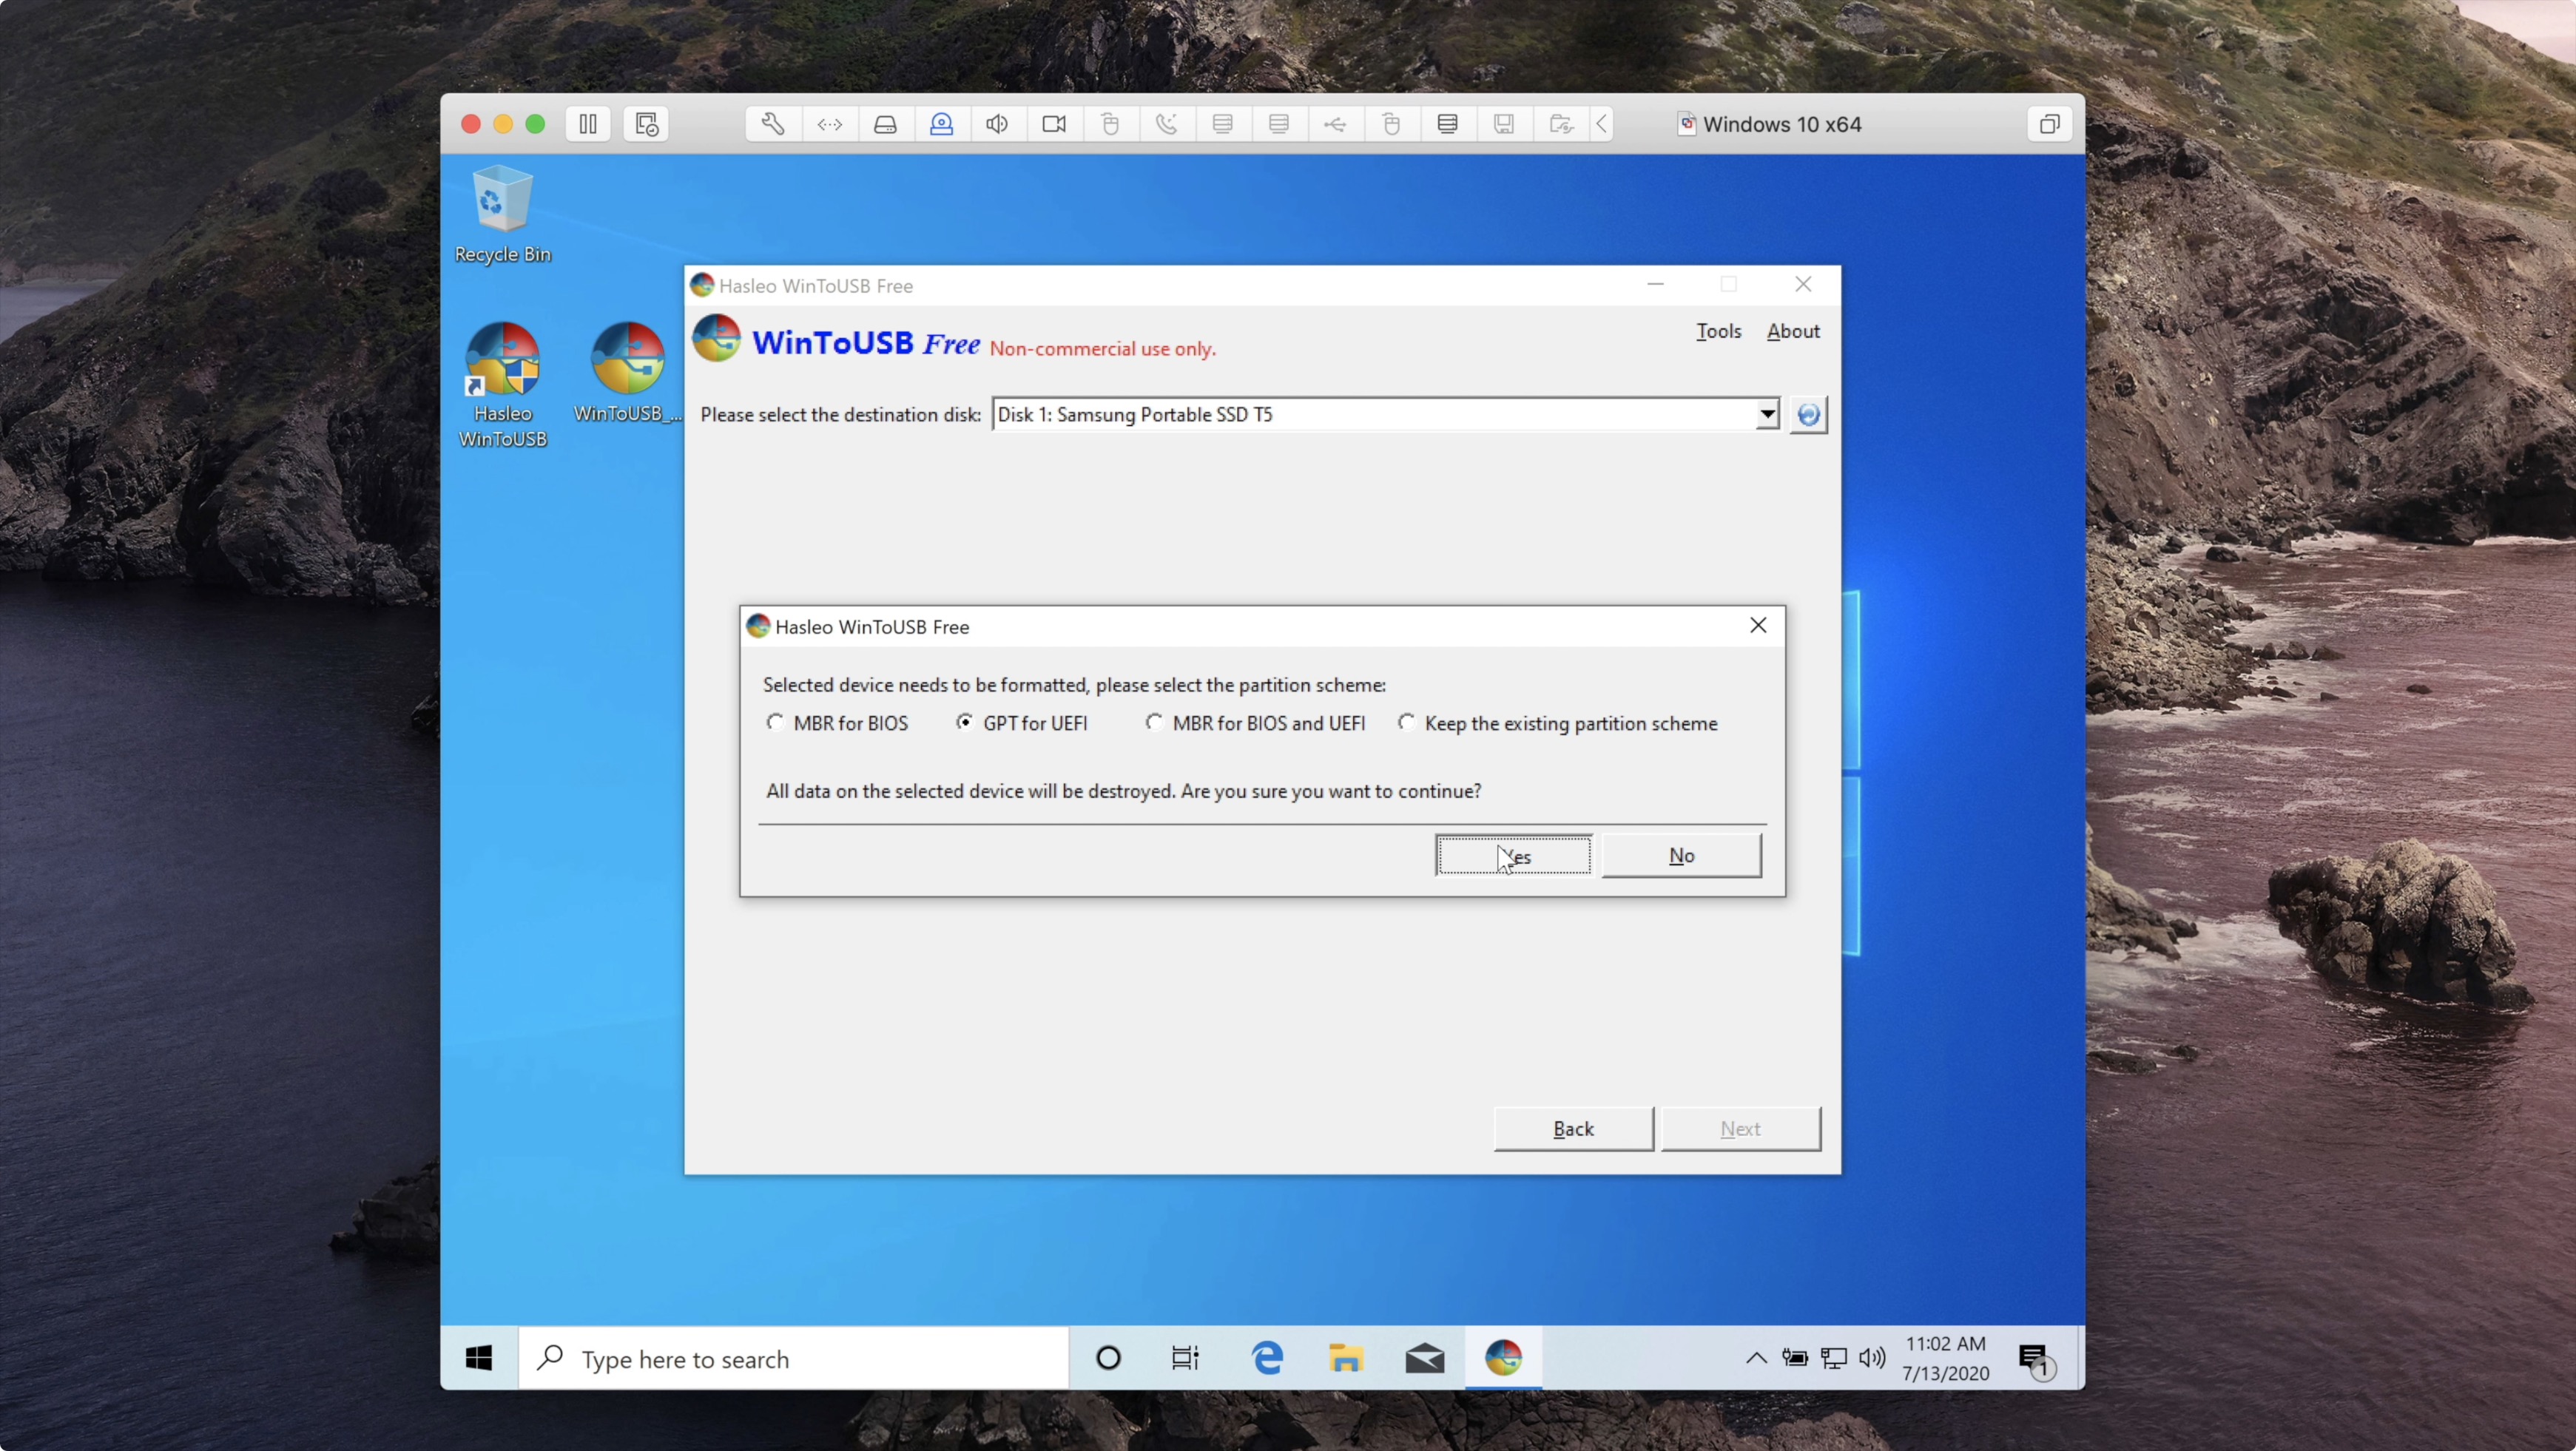
Step 8: In the destination disk drop-down menu, select your external SSD. In the format box that appears, choose the GPT for UEFI radio button and click Yes to format the drive for Windows.
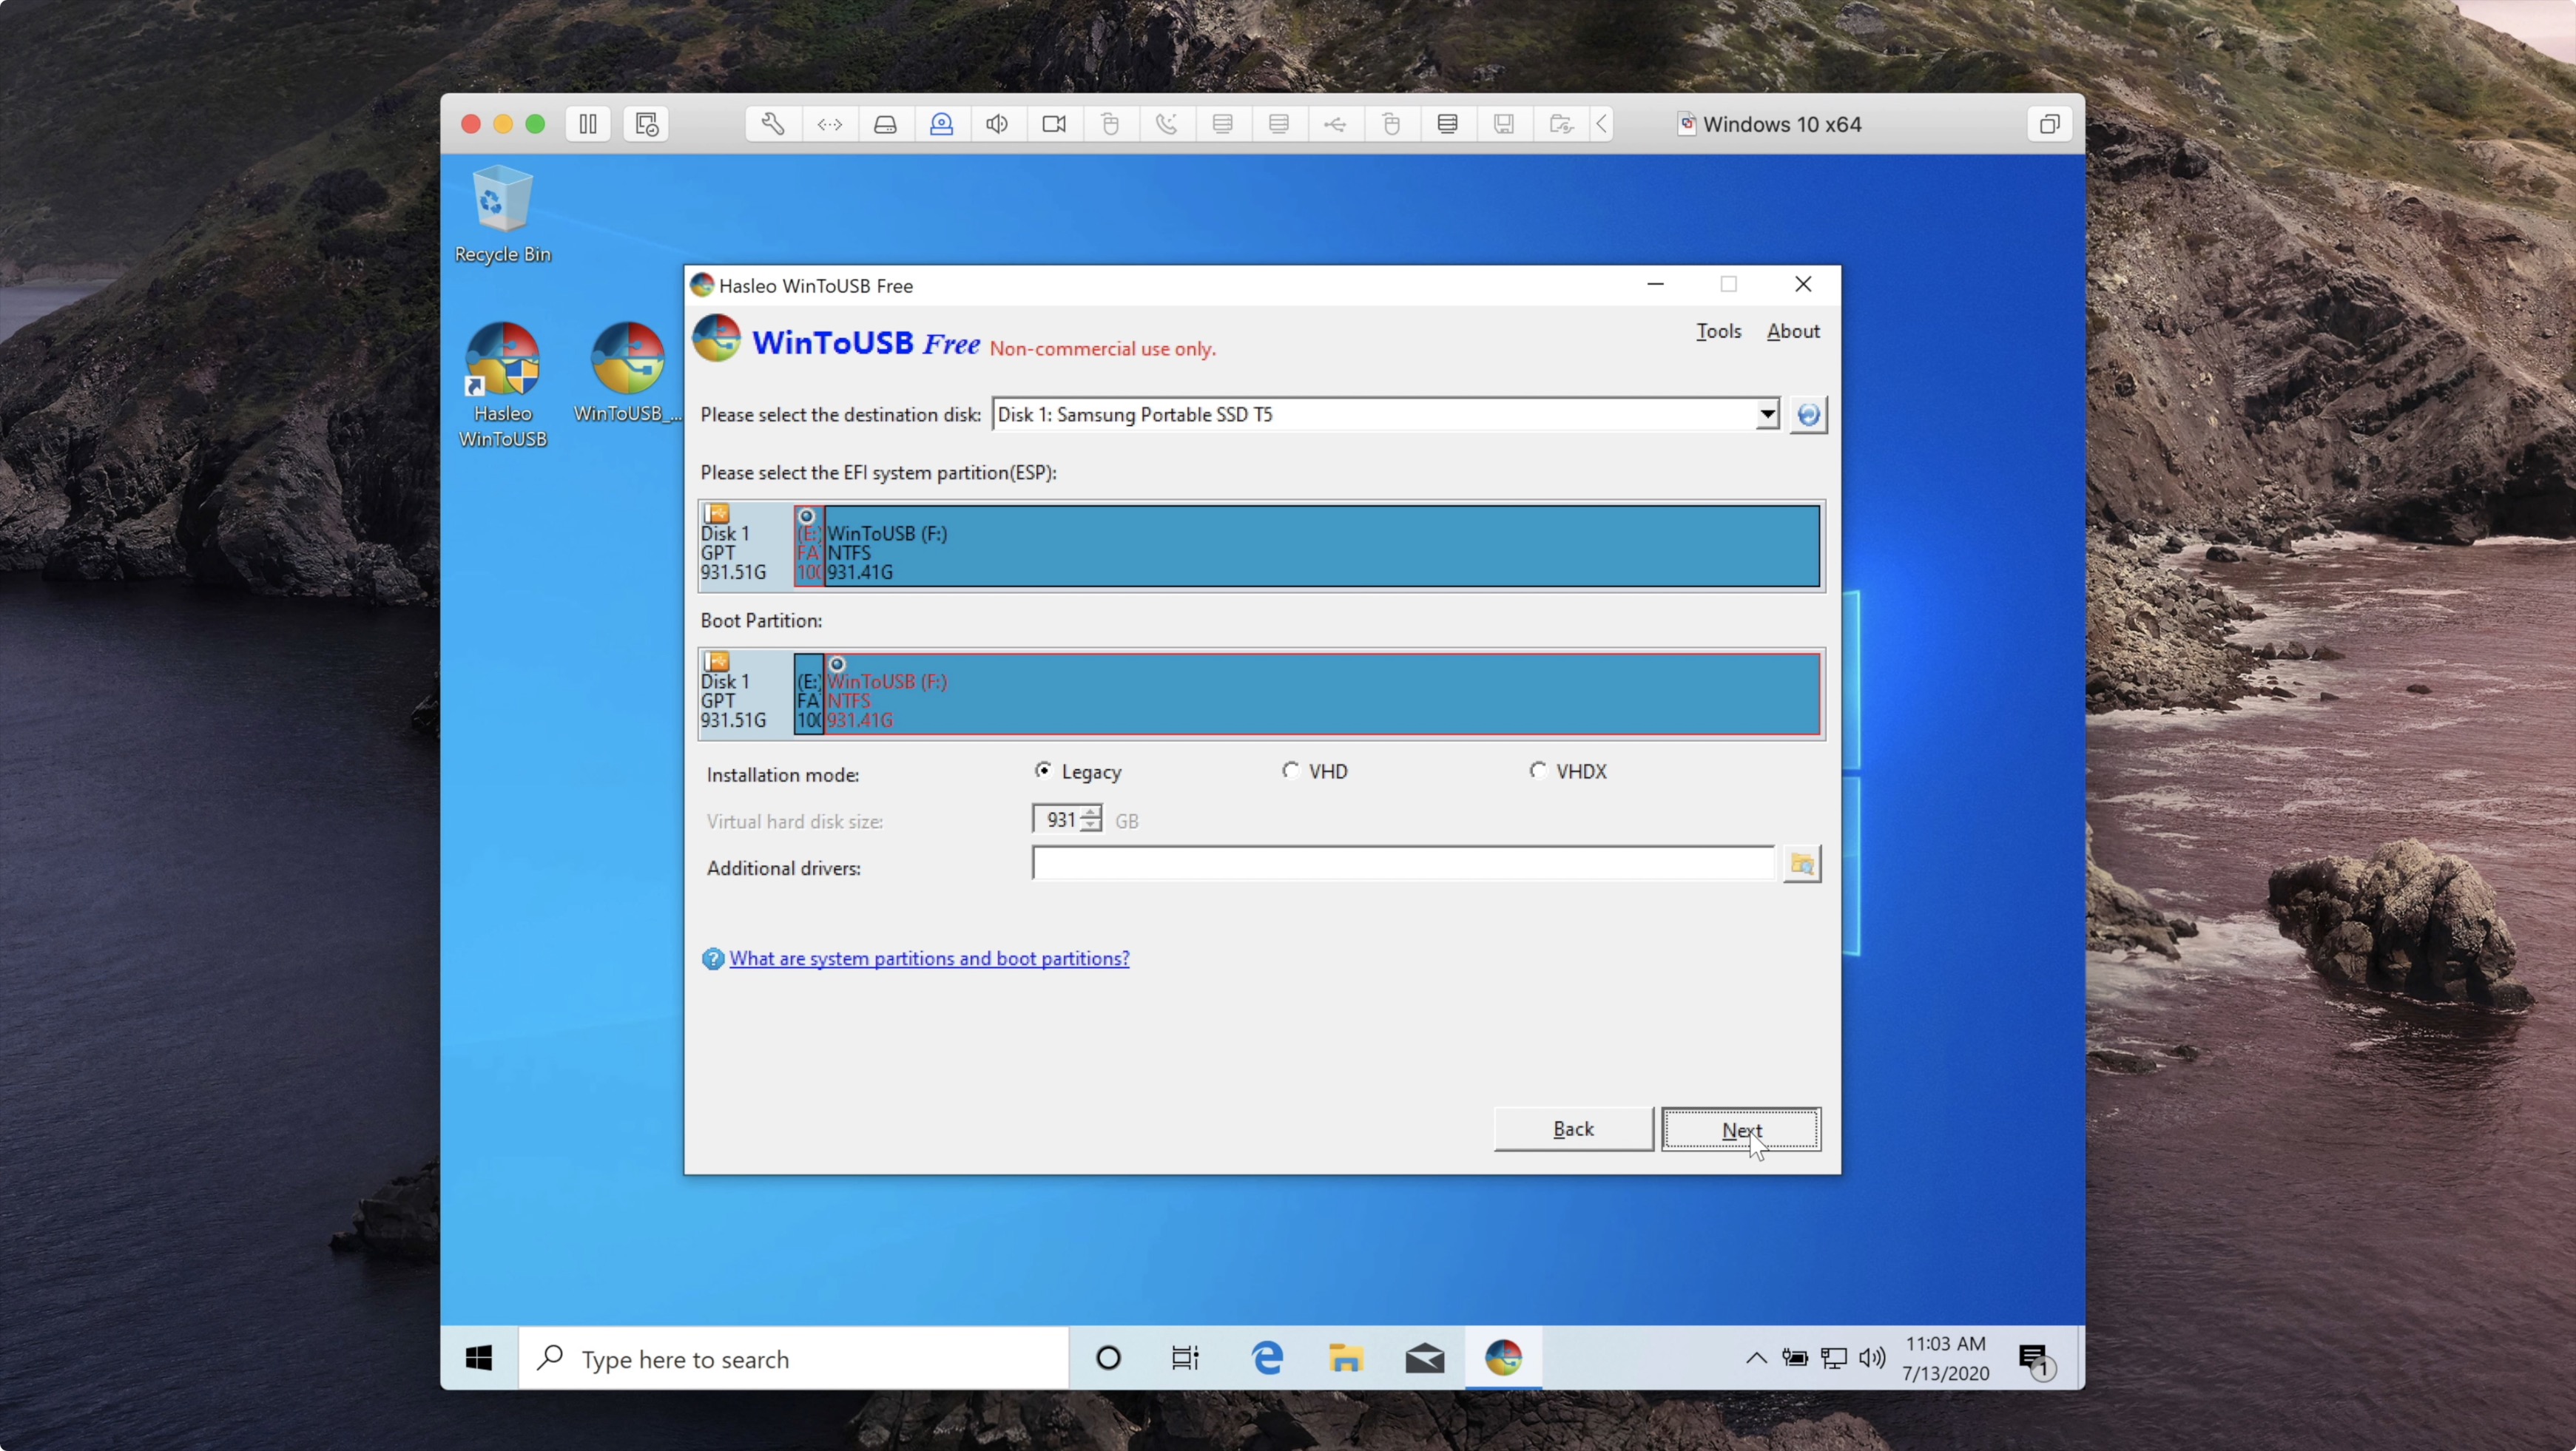
Step 9: Ensure that the first radio button is selected for the EFI system partition, and the second radio button for WinToUSB is selected for the Boot Partition. Everything on this screen should usually be left as default. Click Next to proceed with the installation process.
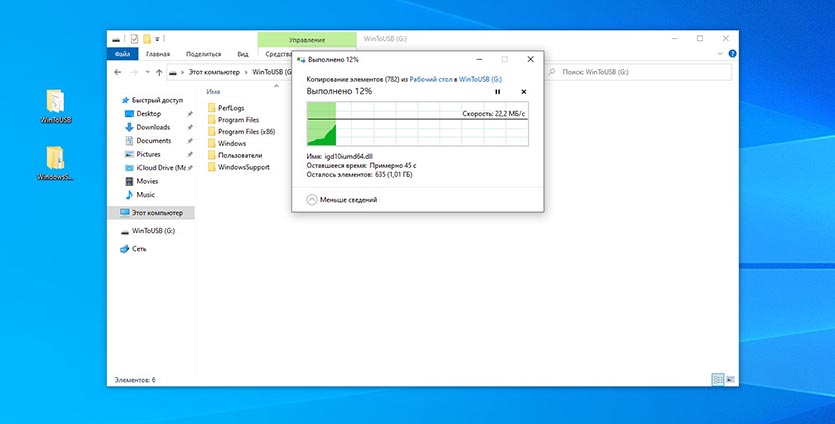
Step 10: The install process will take several minutes depending on the speed of your drive, virtual machine, and host computer. Be patient, as the installation progress will stay stuck on 0% for a few minutes at the beginning of the installation.
Step 11: Once the installation is completed at 100%, click the Exit button and click Yes to quit WinToUSB.
Step 12: Finally, drag the WindowsSupport folder from the desktop to the root of the external drive, which should now be named WinToUSB.
Step 13: Shut down your Windows virtual machine and Quit VMware Fusion.
Disable secure boot and boot into the Windows installer
Step 1: Reboot your Mac and press and hold the Command + R keys on your keyboard until the Apple logo and loading indicator appear to boot your Mac into macOS Recovery mode.
Step 2: Authenticate with your Mac by clicking on your user avatar and clicking Next. Enter the password for the user you selected and click Continue.

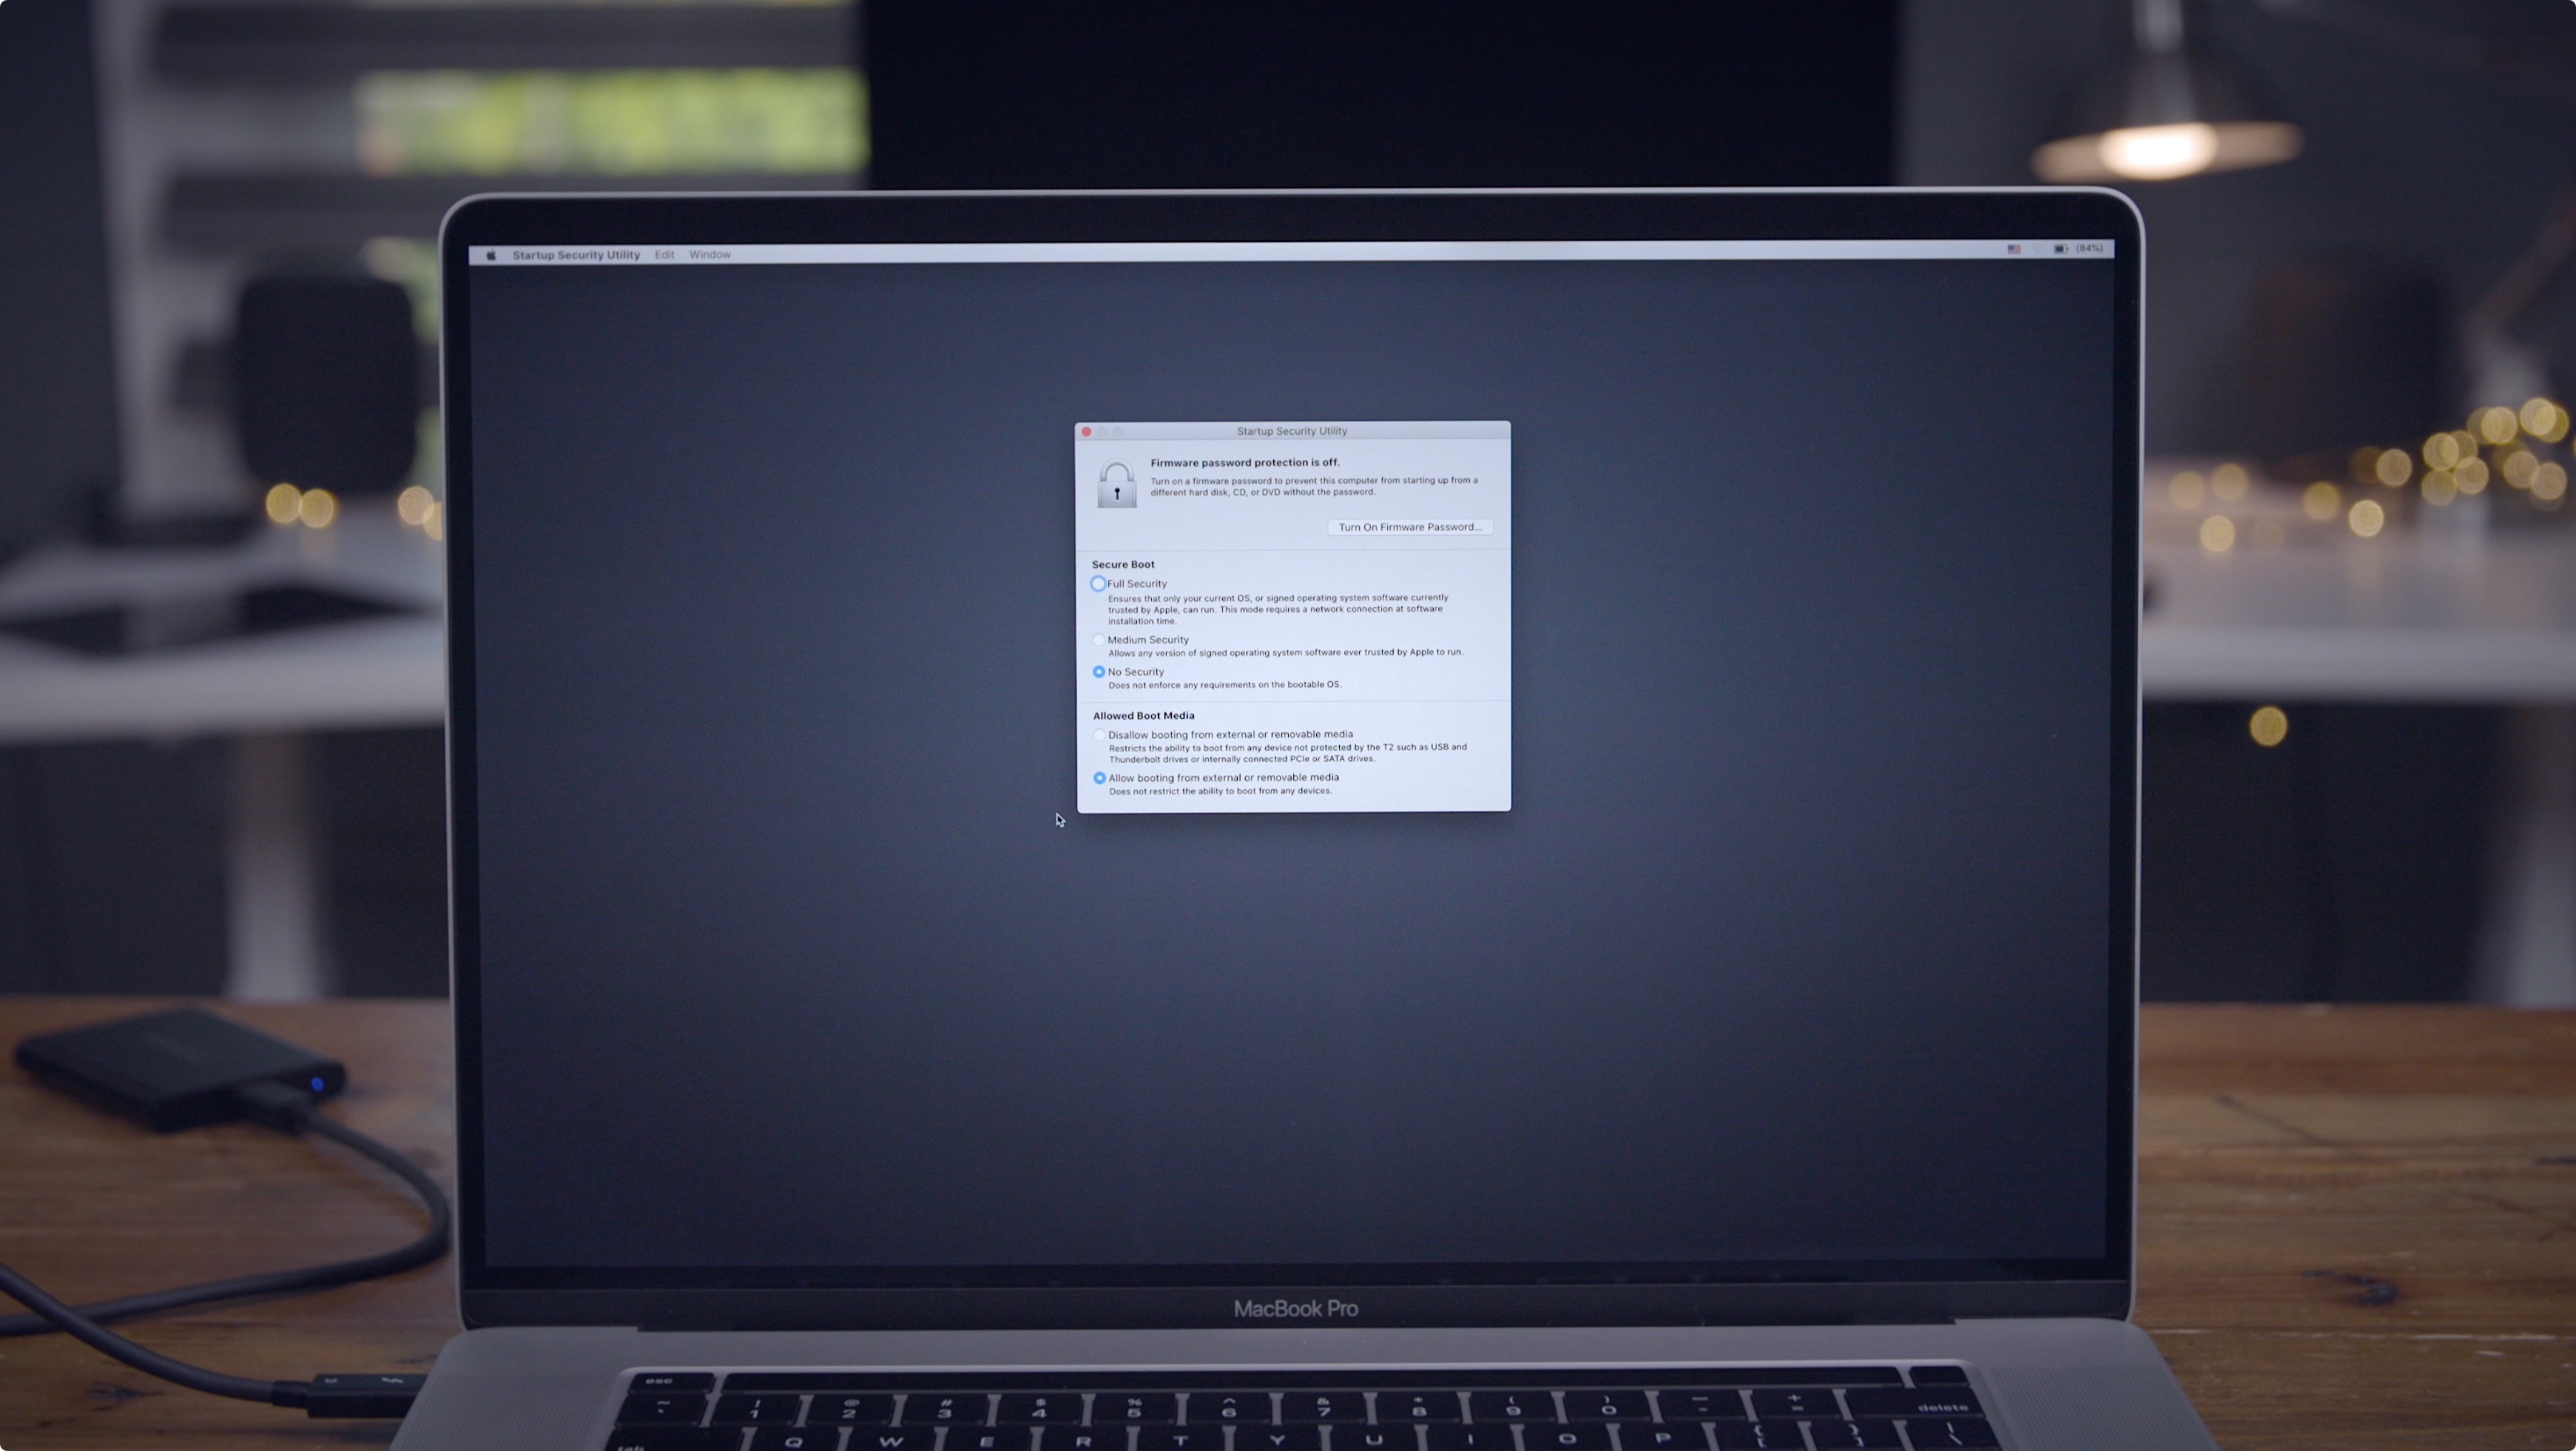
Step 3: In the menu bar click Utilities → Startup Security Utility and click Enter macOS Password. Enter the password for the selected user, and click OK.
Step 4: Under the Secure Boot heading, select the No Security option.
Step 5: Under the Allow Boot Media heading, select the Allow booting from external or removable media option.
Step 6: Close the Startup Security Utility and close the macOS Utilities panel. Click Choose Startup Disk, select the WinToUSB Windows option (your external SSD), and click the Restart button and confirm by clicking Restart again.

Installing Windows using Windows Installer
Your Mac will now boot into the Windows installer and you should see the Windows logo appear. This process will take a few minutes to complete, so you’ll once again need to be patient.

Since Boot Camp drivers aren’t yet installed, you’ll need to use a USB-connected external keyboard or mouse to navigate through the Windows setup. I opt to use a Magic Keyboard connected via a Lightning to USB cable, and simply use the on-screen keyboard option when it’s time to enter my username. Everything else during setup I decline/turn off.
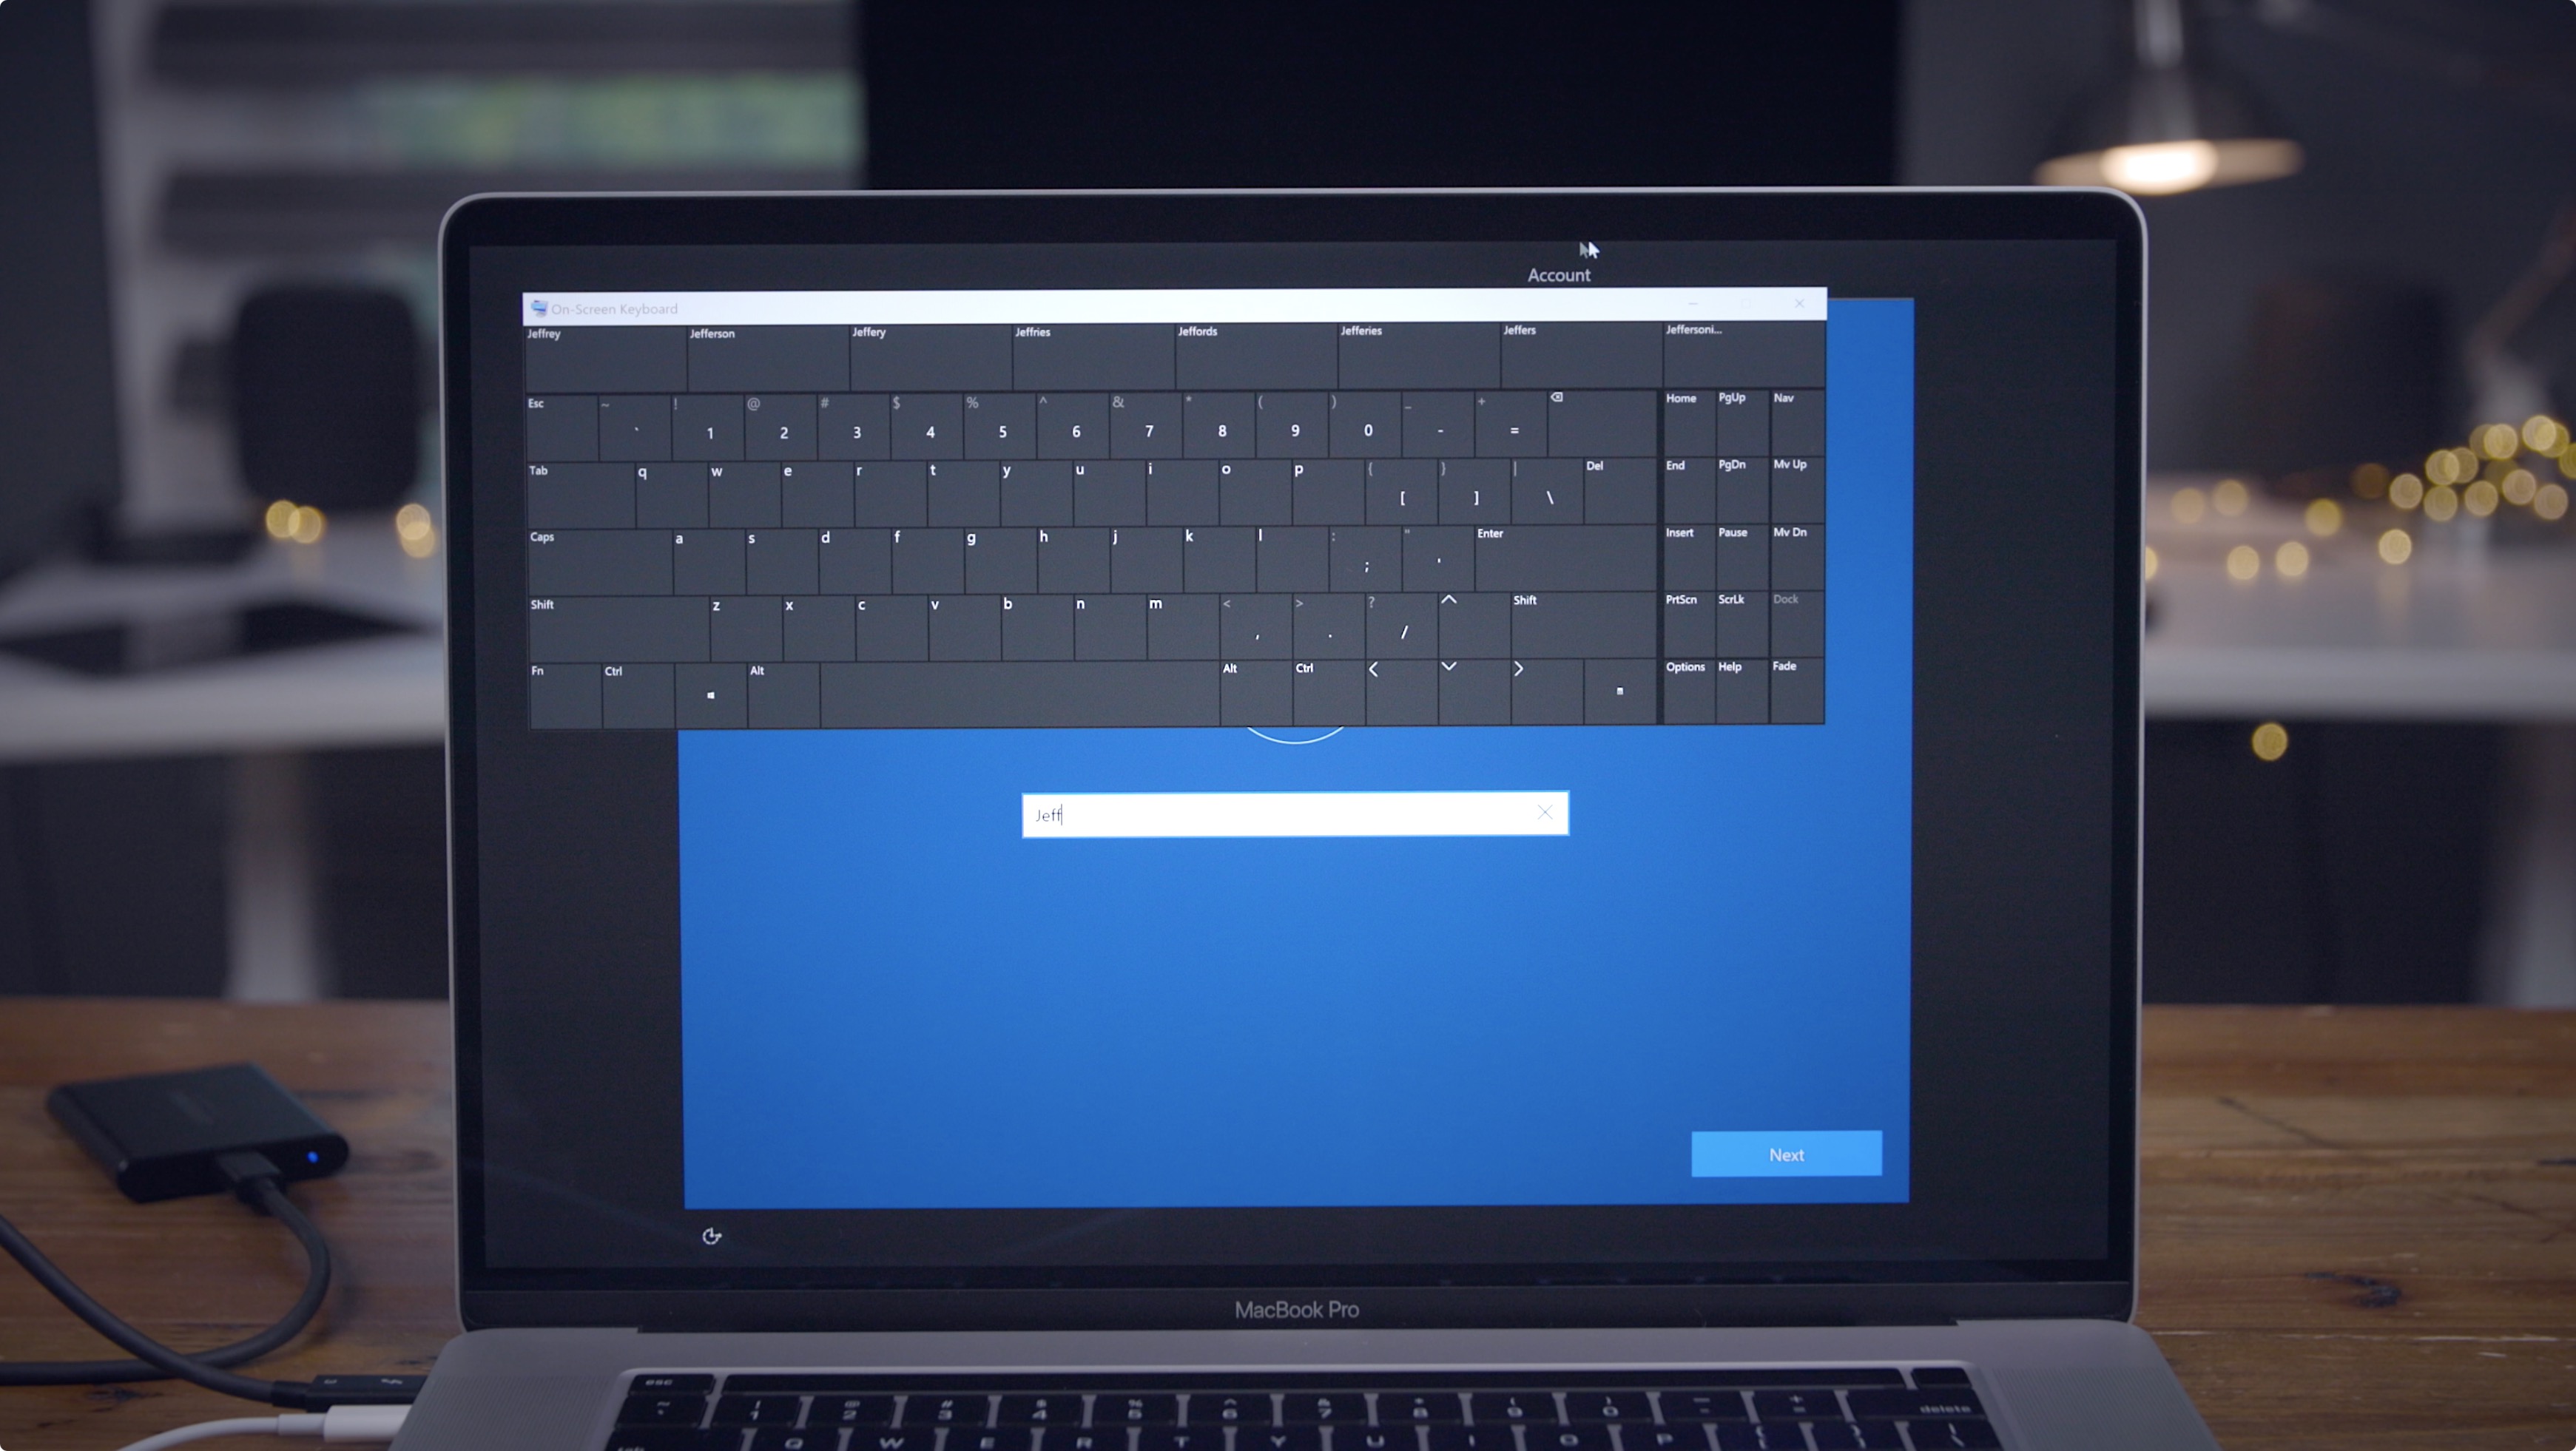
Keep in mind that you’ll need to select the I don’t have Internet option during setup since the needed wireless network drivers are not yet installed. Watch my hands-on video embedded above for a step-by-step walkthrough that showcases everything.
Install Boot Camp drivers
Once the Windows installation is completed, you will be placed on the Windows desktop. The first thing you’ll need to do is install the necessary Boot Camp drivers to gain access to Internet connectivity, built-in keyboard, and trackpad (assuming you’re a MacBook user).

Step 1: Open Windows Explorer and go to This PC → WinToUSB → WindowsSupport → BootCamp and double click Setup. Select Yes on the User Account Control pop up to launch the Boot Camp installer.
Step 2: Click Next → I accept the terms in the license agreement → Install.
You will notice your screen flicker as the needed graphics drivers are installed. The installation will take a few minutes, so you’ll need to be patient.
Step 3: Click the Finish button and Windows will restart.
Install Boot Camp Software update
If you’re on a laptop, your trackpad, keyboard, and Wi-Fi should now be fully functioning. If you haven’t already connected to the Internet, you’ll need to do so now by clicking the Network option in the System Tray and selecting your Wi-Fi network to connect.
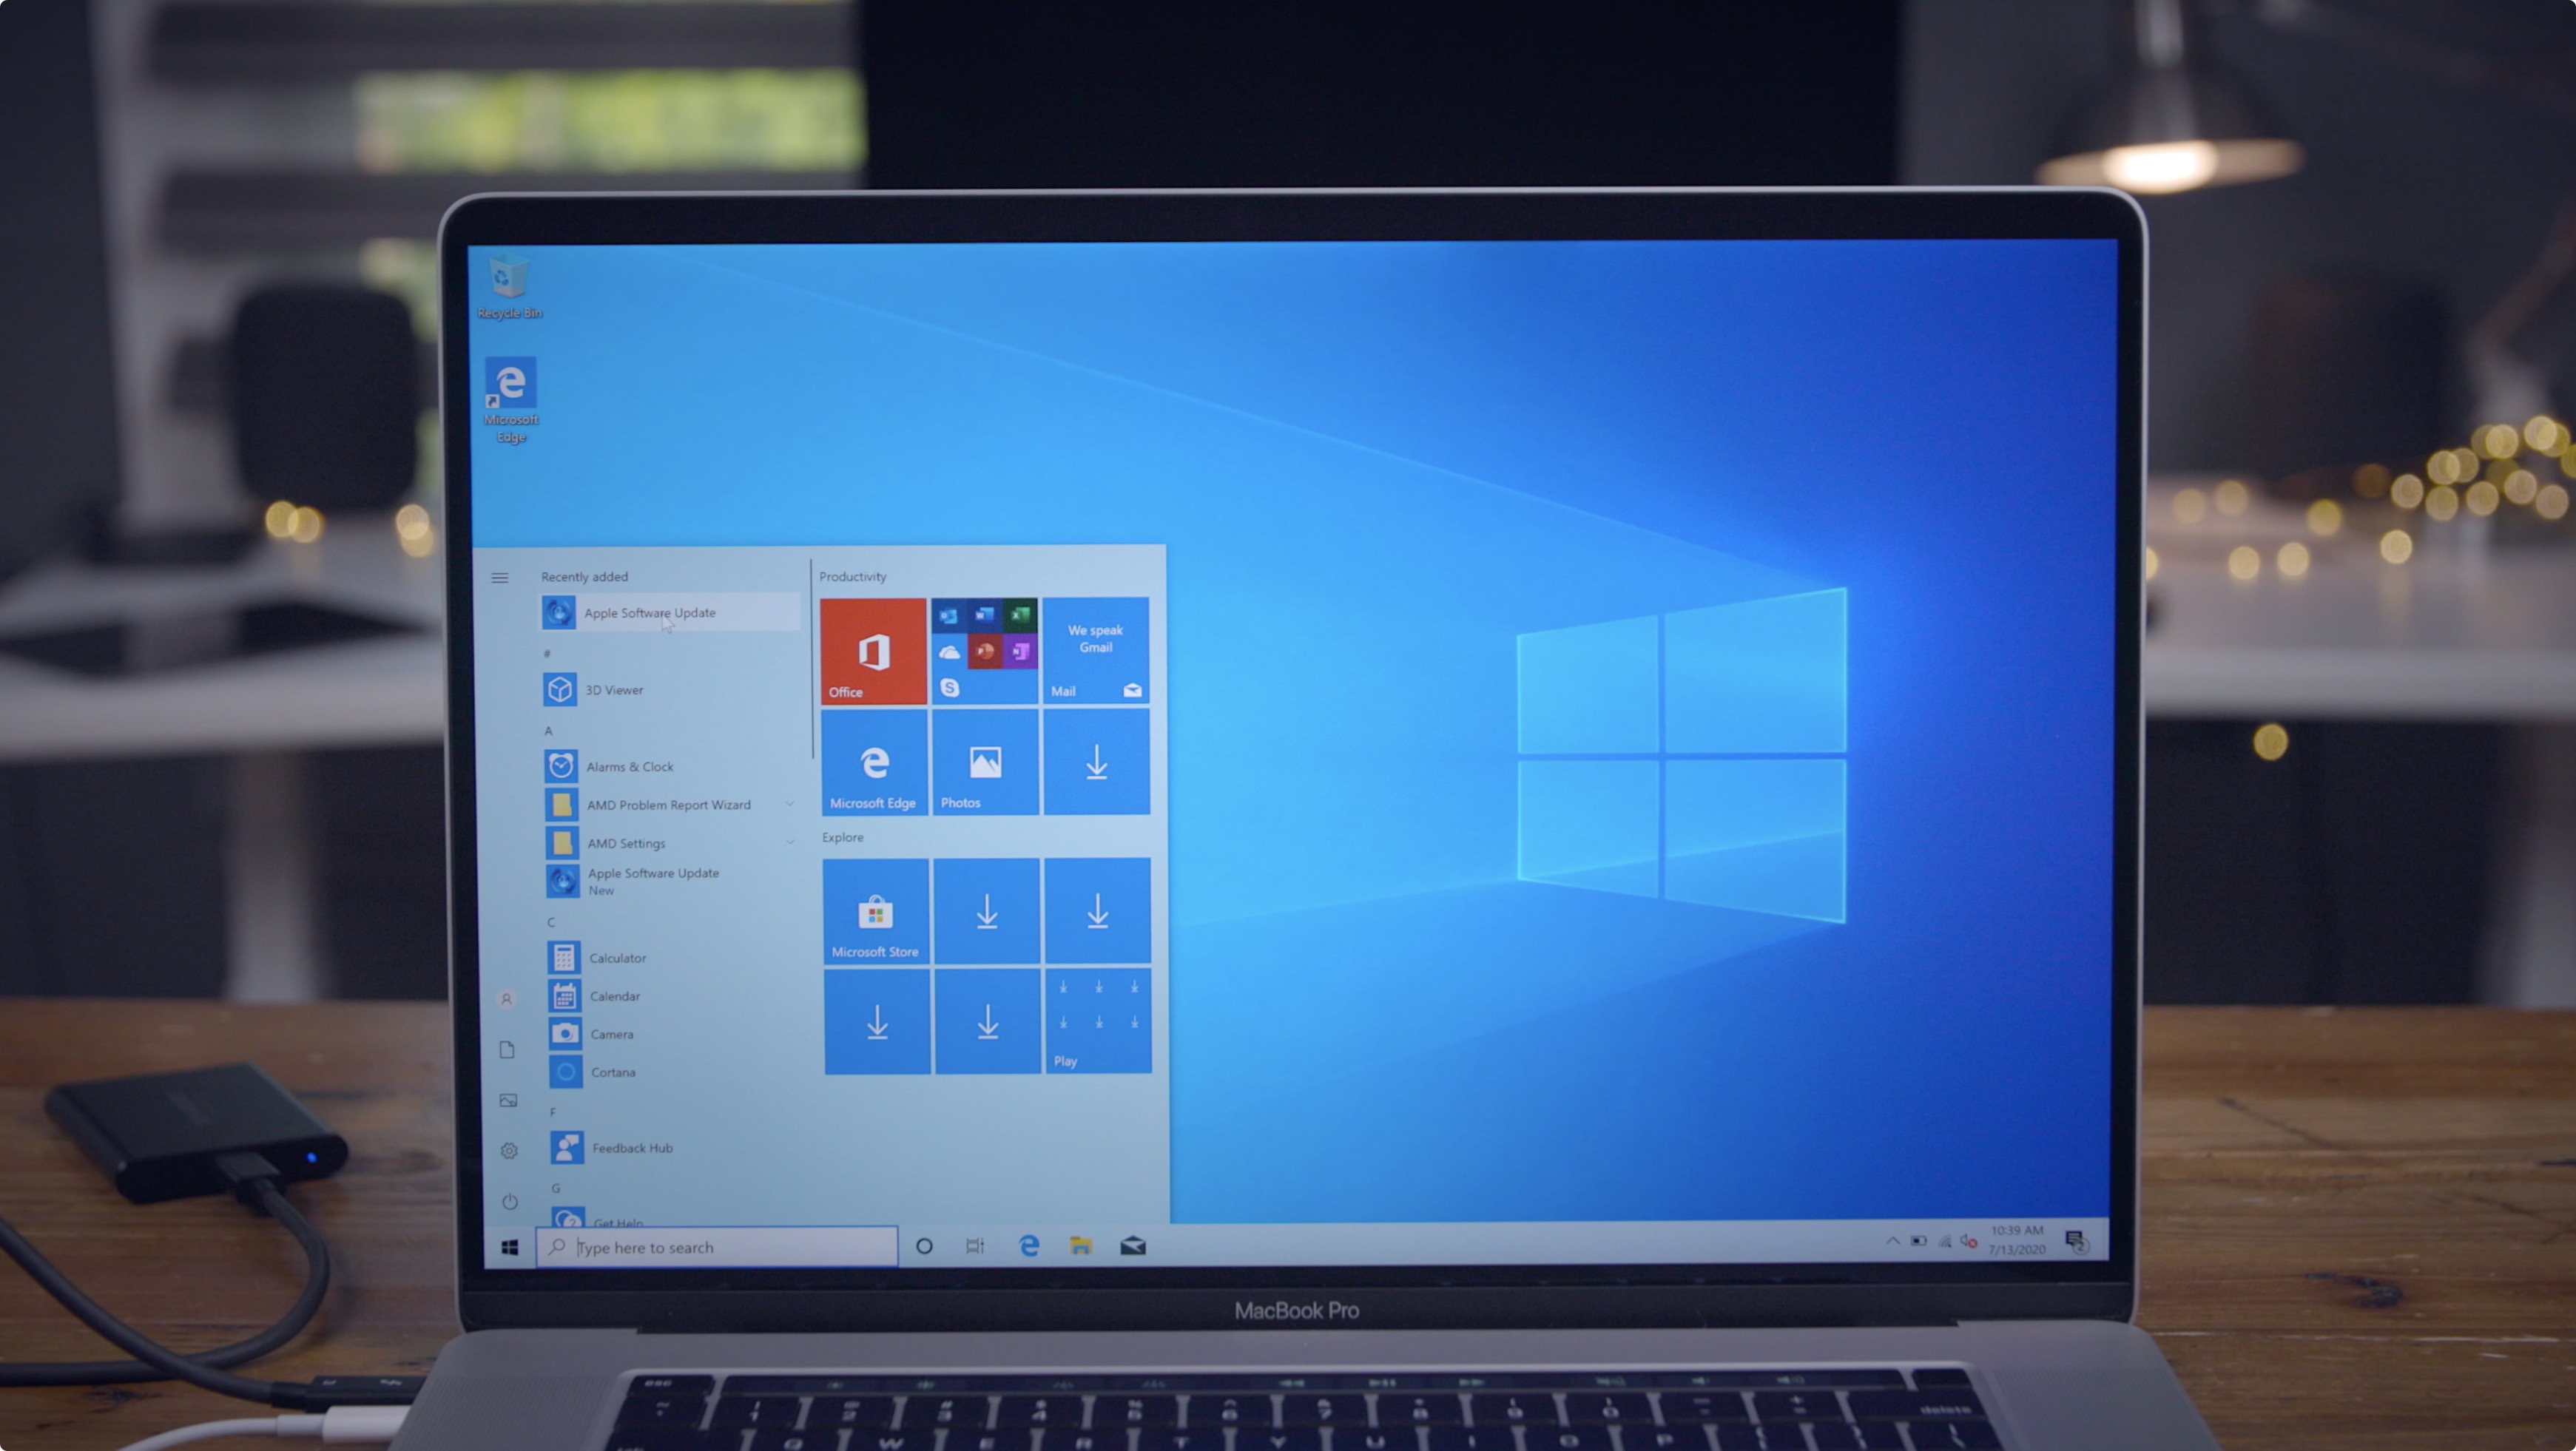
Step 1: Once connected to the Internet, click the Start Menu and click Apple Software Update.
Step 2: After checking for updates, you’ll see available new updates in the list. Ensure that the available updates are checked, click the Install button, and select Yes on the User Account Control window.
Step 3: Once the installation is completed, click Yes to reboot and apply the updates.
Manually install additional drivers
If your Mac’s built-in speaker audio isn’t working after performing the Boot Camp updates, do the following.
Step 1: Right click on the Start Menu and select Device Manager.
Step 2: Click the disclosure triangle next to Sound, video and game controllers.
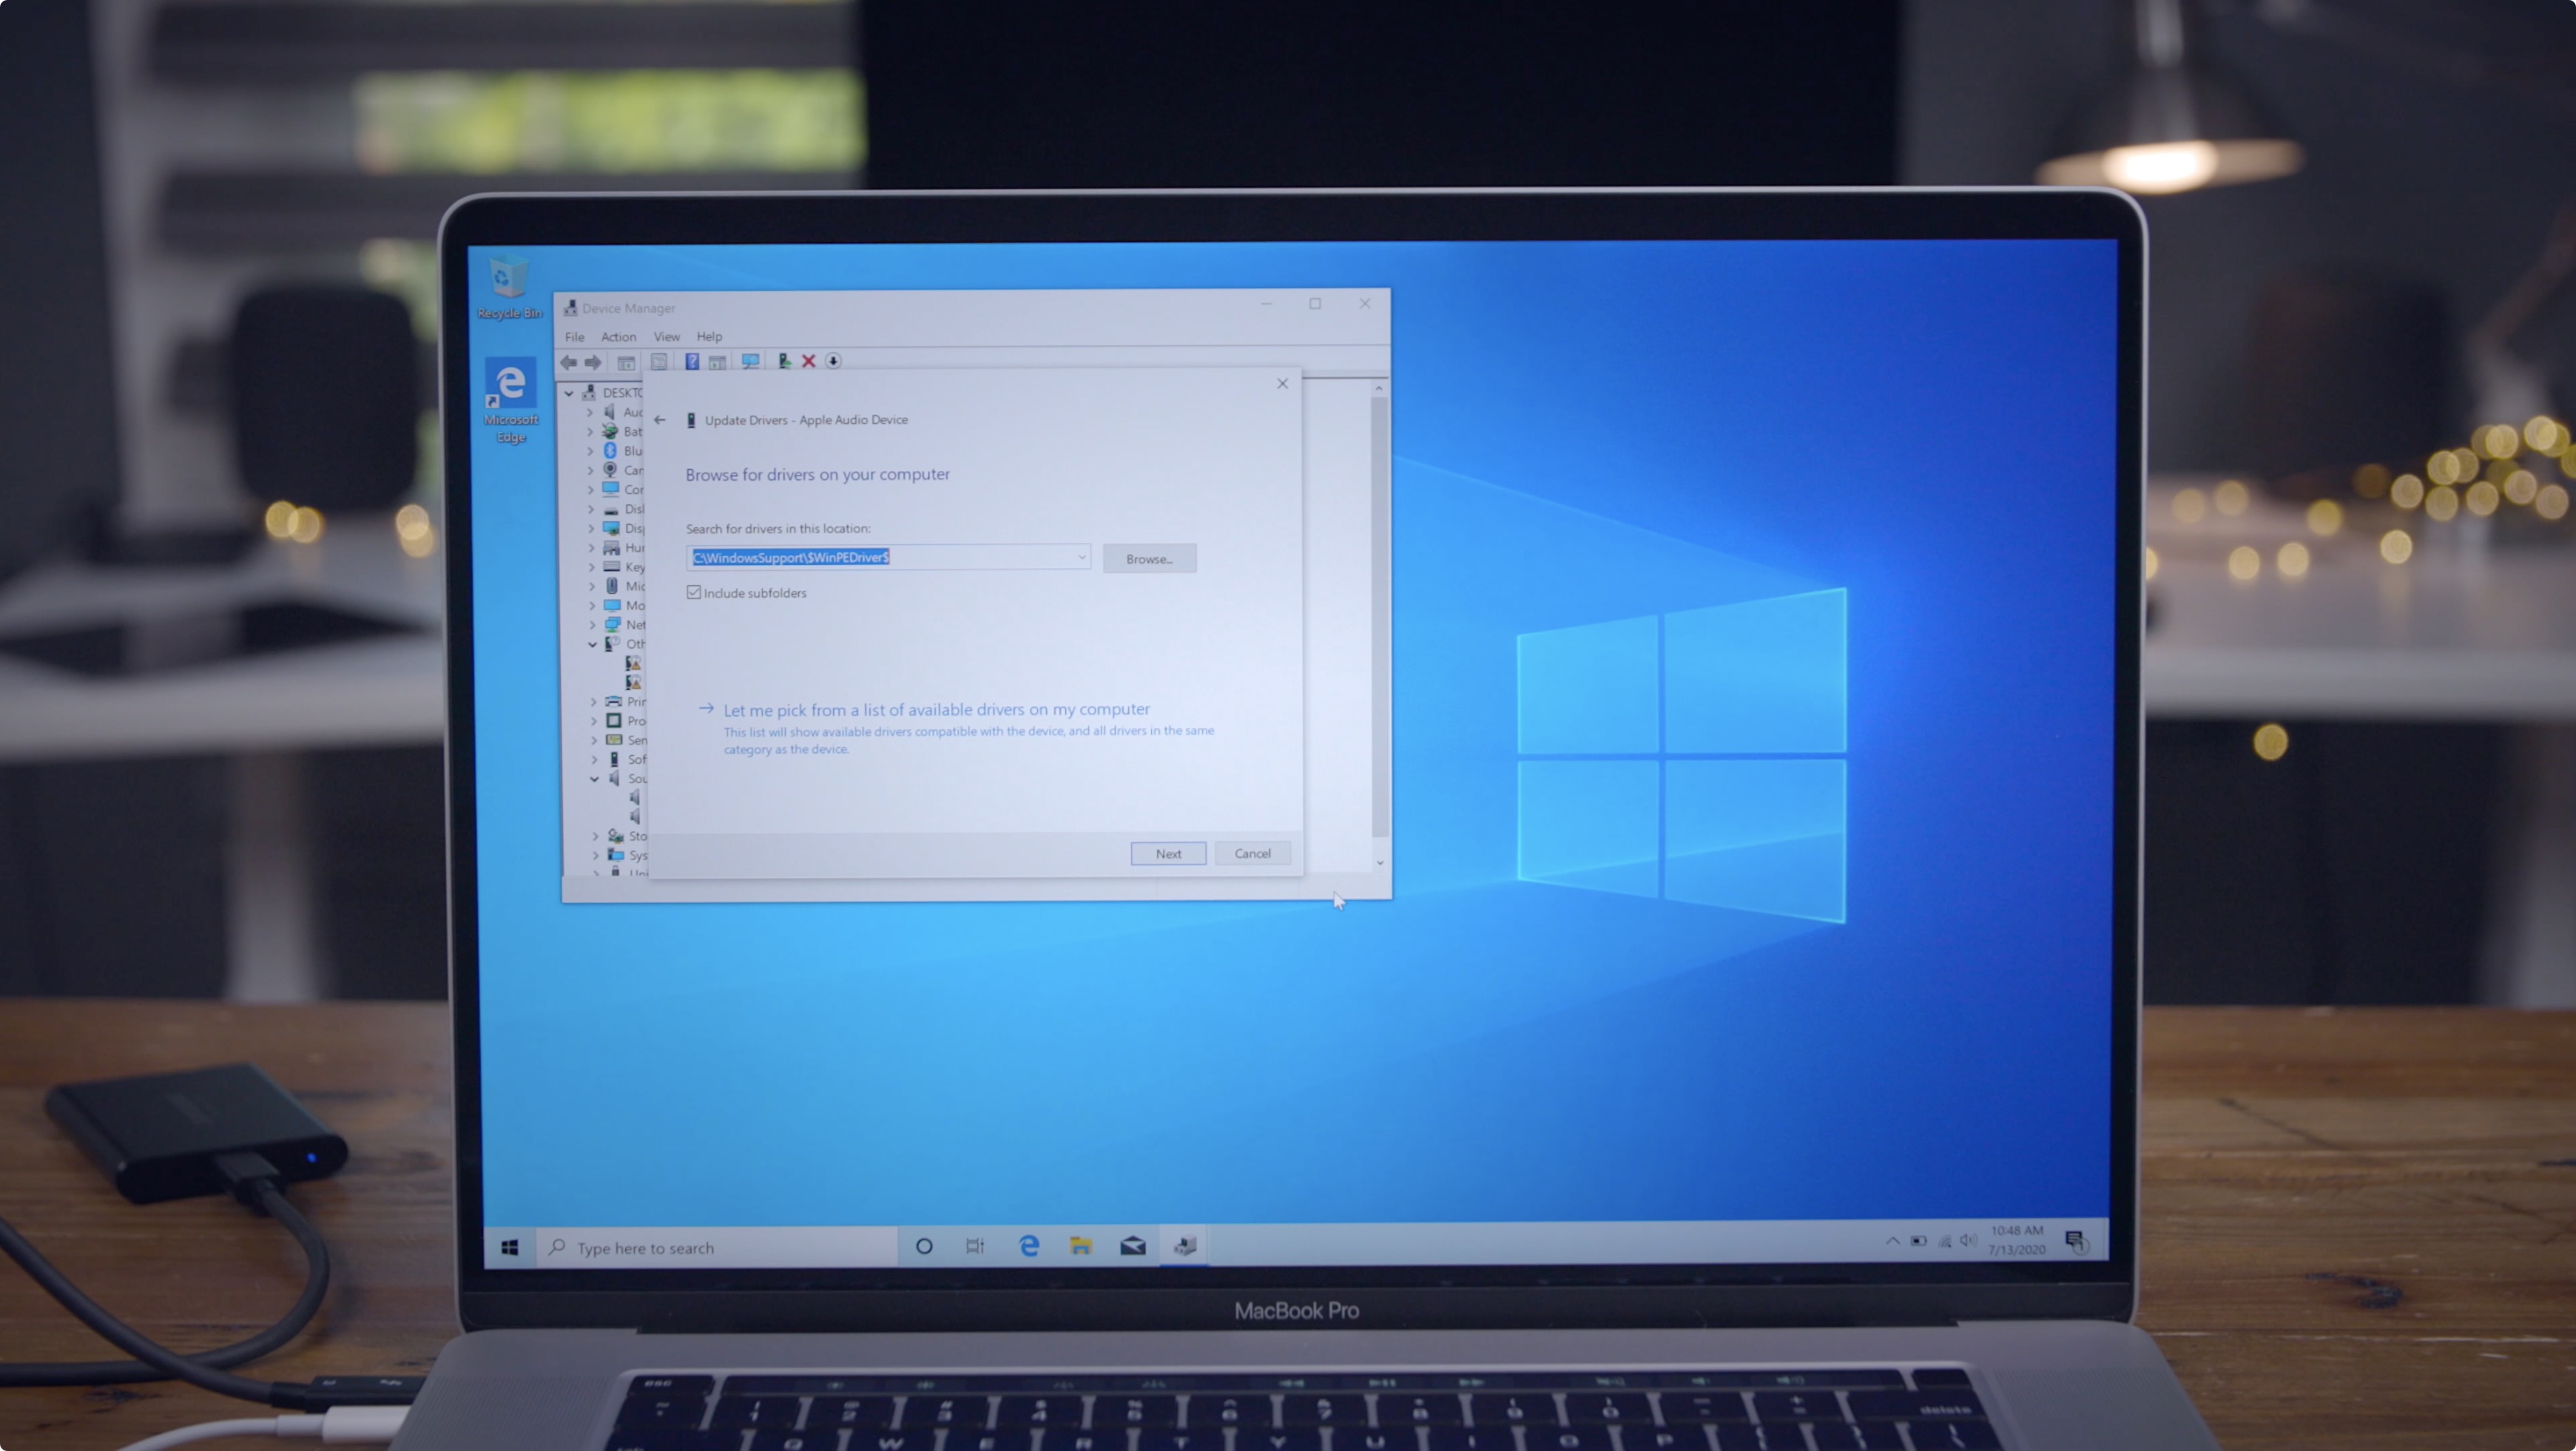
Step 3: Right click on Apple Audio Device and click Update driver.
Step 4: Click Browse my computer for drivers and click the Browse button. Navigate to WinToUSB → WindowsSupport →$WinPEDriver$ and select Apple Audio. Click OK and then click Next to install the Apple Audio driver.
IMPORTANT: You’ll want to do this step for any remaining devices that have exclamation points (!) on them. This will install any remaining drivers that the initial Boot Camp utility did not cover. This is an important step to ensure that your Mac will work as well as possible running Windows from the external SSD.
Step 5: Close Device Manager and test out the sound and other devices to make sure it works.
Run Windows Update
Now it’s just a matter of installing all of the available Windows updates.
Click the Start Menu → Settings → Update & Security and click Check for updates. Windows will install available updates and prompt you to restart when necessary. Repeat this process again to ensure that all of the latest updates are installed.
9to5Mac’s Take
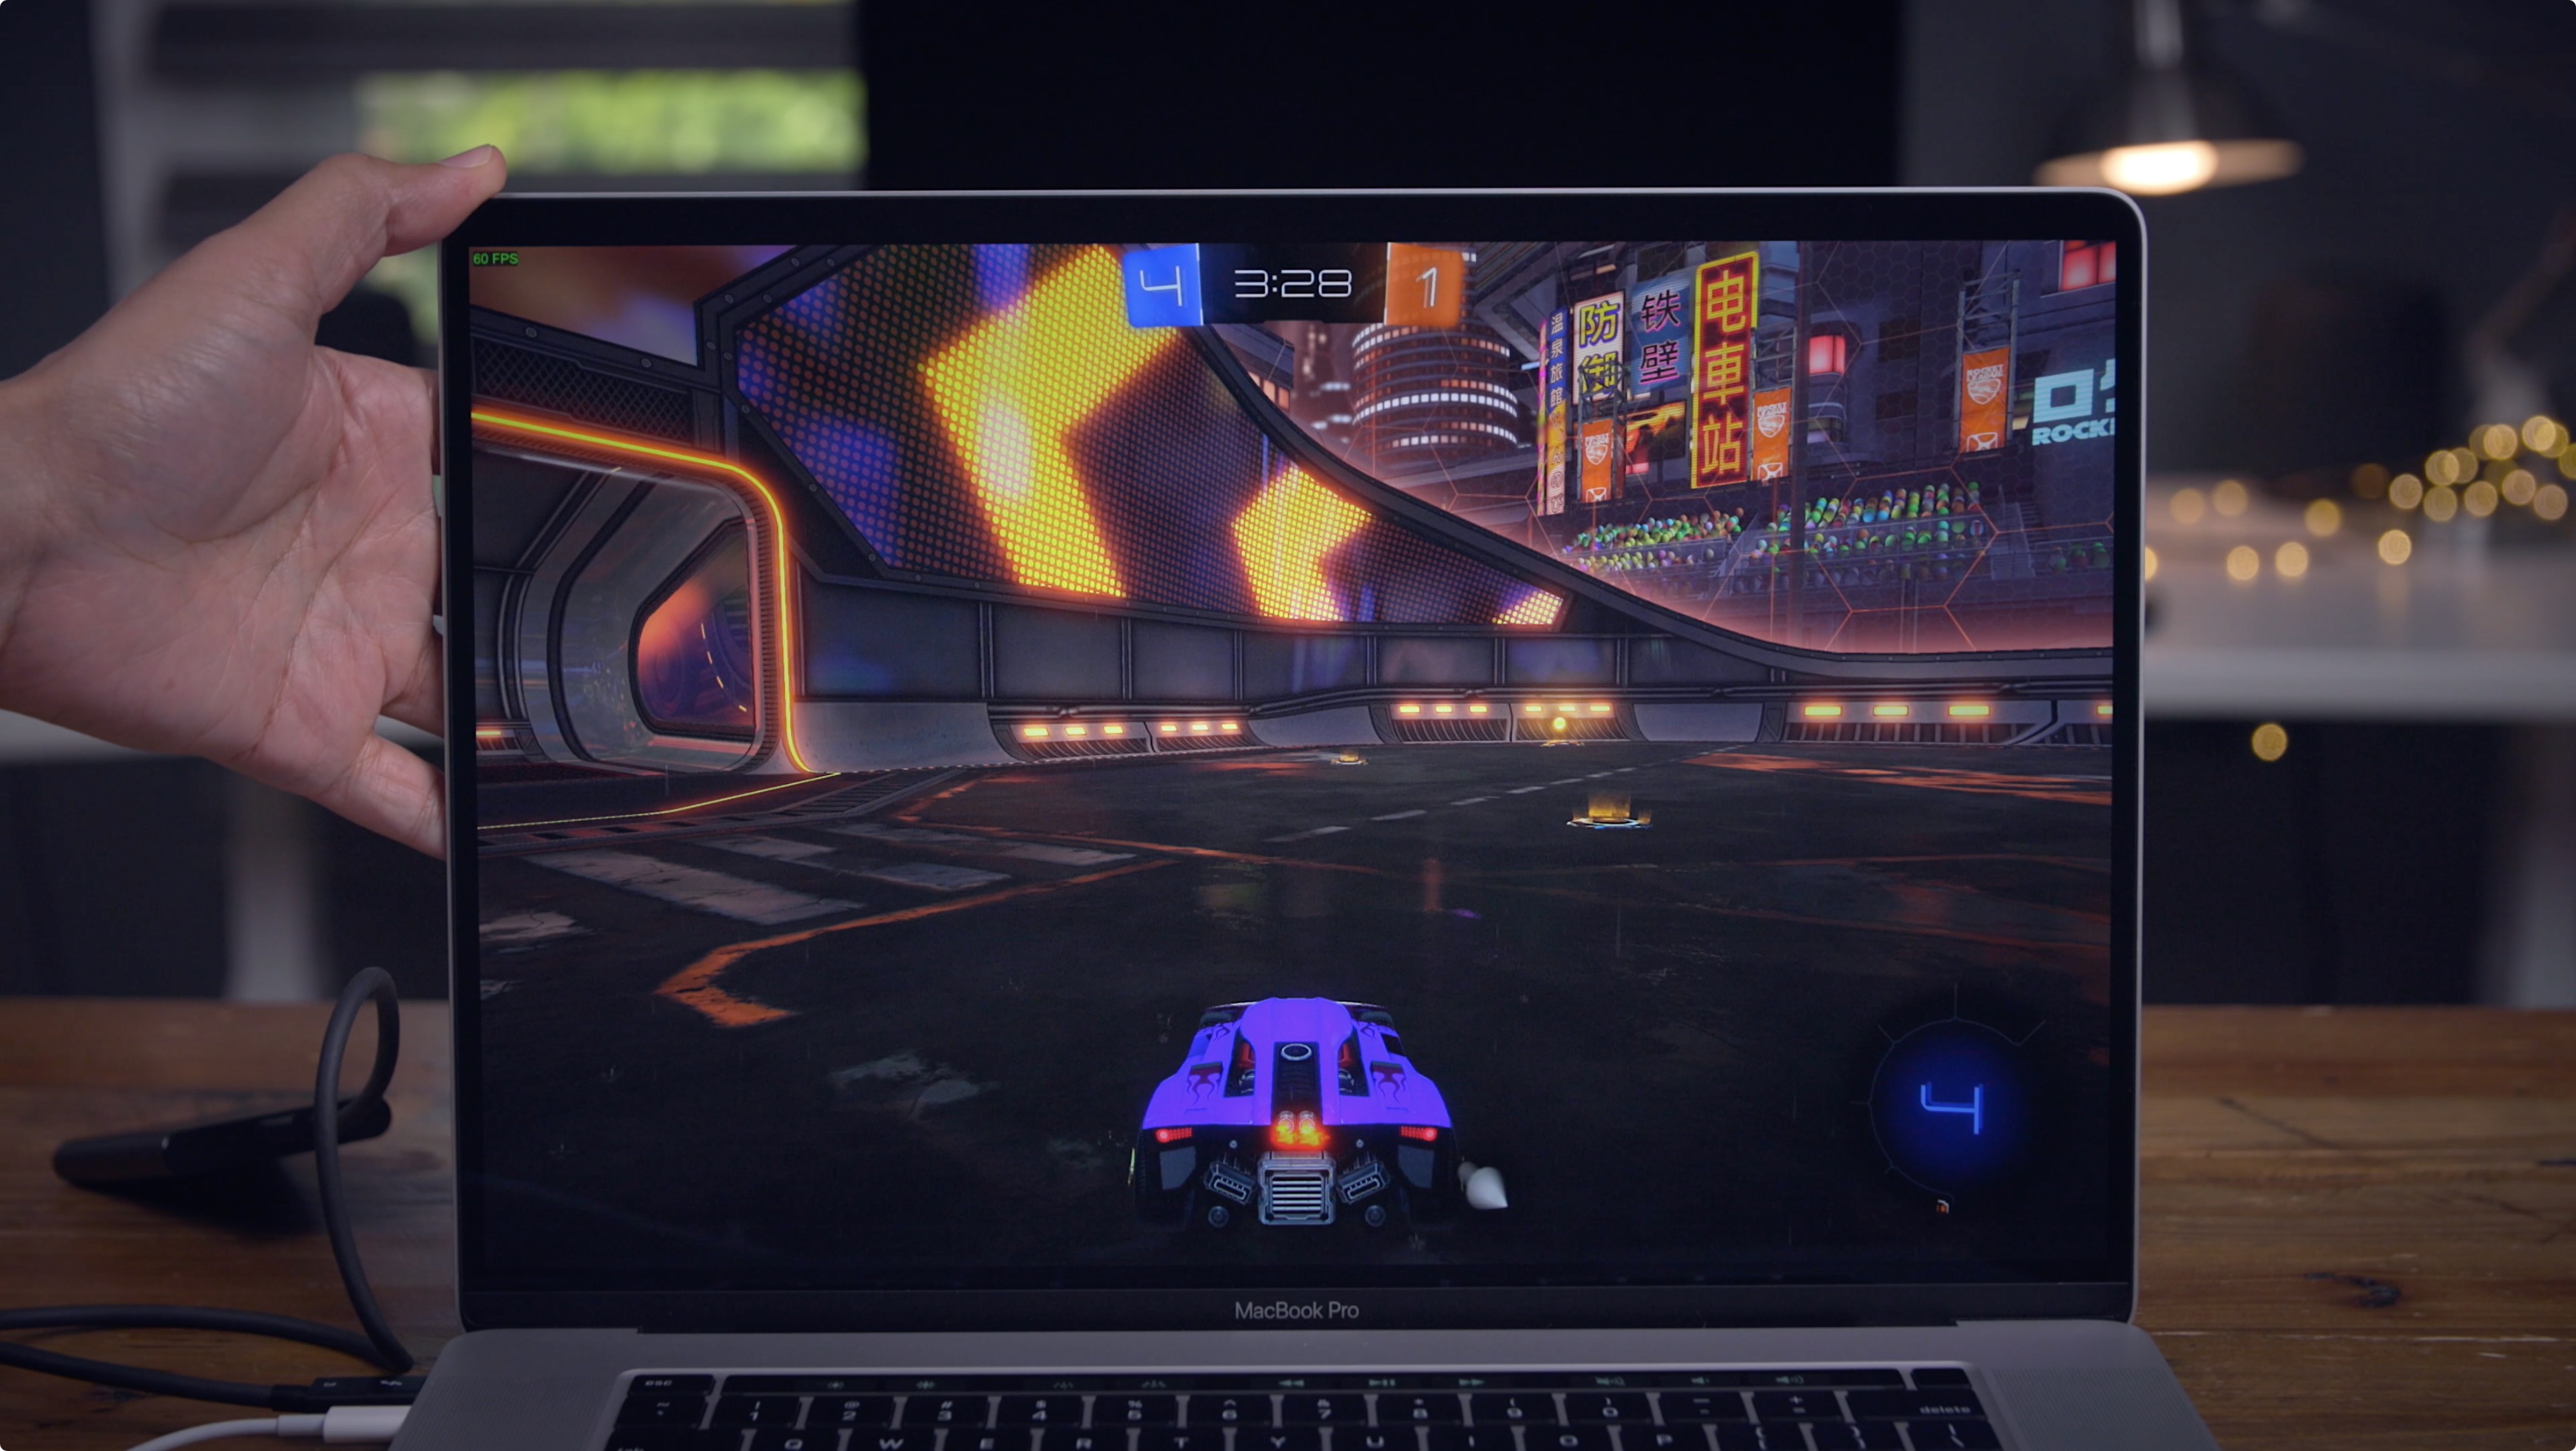
Installing Windows on an external drive takes quite a few steps, but the process is very straightforward and can be done in less than an hour. If you have a Mac with a less-than-ideal amount of internal storage, this may be the better way to go rather than a traditional internal Boot Camp installation. Please share your thoughts down below in the comments section.
FTC: We use income earning auto affiliate links. More.


