- Start booting from USB device что делать?
- Почему появляется дисфункция при установке ОС?
- Как исправить «Start booting from USB device»
- Заключение
- How to Boot From a USB Device
- Make your PC boot from a USB flash drive or external hard drive
- How to Boot From a USB Device
- What to Do When the USB Device Won’t Boot
- How to Boot From a USB Drive or CD on Any Computer
- On a Windows PC
- Restart your computer
- Wait a second
- Select ‘Boot Device’
- Choose the right drive
- Exit the BIOS
- Reboot
- On a Mac
Start booting from USB device что делать?
При попытке установить операционную систему с флеш-накопителя пользователь может столкнуться с появлением на экране надписи «Start booting from USB device…», после чего система зависает и далее ничего не происходит. Обычно это связано с ситуацией, когда загрузочная флешка с операционной системой не была корректно создана пользователем, потому система испытывает проблемы в установке новой версии ОС с данного устройства. В данном материале я расскажу, в чём суть проблемы, каковы её причины, и как избежать её появления на вашем ПК.

Почему появляется дисфункция при установке ОС?
В переводе данный текст звучит как «Начало загрузки с устройства USB…», обычно появляясь при загрузке установочной версии ОС Windows с ЮСБ-устройства.
Причинами «зависания» данной надписи обычно являются некорректно созданная установочная флешка, а также неверно указанные настройки в БИОСе пользовательского ПК.
Как исправить «Start booting from USB device»
Для устранения дисфункции рекомендую выполнить следующее:
- Проверьте, загрузочное ли ваше ЮСБ-устройство. Для этого рекомендую использовать программный инструмент «MobaLiveCD», который проверит загрузочный статус вашей флешки. Данная программа не требует установки, работает сразу после запуска, довольно легка и удобна в использовании.
Способ 1.Для работы с «MobaLiveCD» скачайте и запустите данную программу с правами администратора. На главном экране кликните на кнопку «Run the Live USB», укажите программе путь к вашей флешке. Если программа спросит вас «Do you want to create a hard disk image for your virtual machine?» — выберите «No». Программа произведёт эмуляцию запуска системы с вашей флешки, и вы воочию увидите результат.
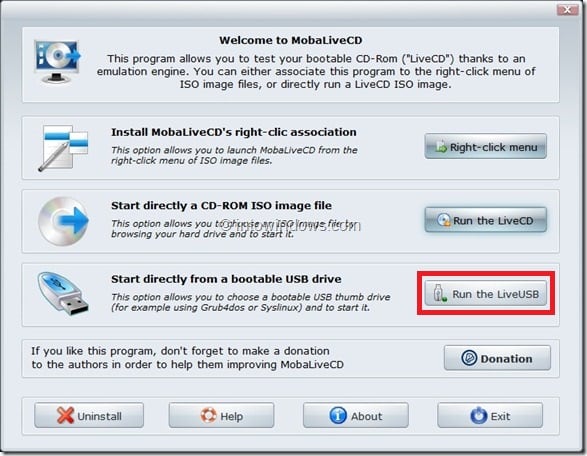
Для выхода с программы нажмите клавиши Ctrl+Alt.
- Проверьте, поддерживает ли ваш компьютер загрузку с USB. Далеко не все ПК поддерживают данную функцию (особенно это касается устаревших версий материнских плат), потому вам необходимо или просмотреть характеристики вашей материнской платы относительно поддержки ею загрузки с ЮСБ, или непосредственно перейти в БИОС и просмотреть, имеется ли в нём соответствующая опция;
- Настройте ваш ПК для загрузки с флеш-накопителя. Перейдите в БИОС и установите там соответствующие опции, в частности, в последовательности загрузочных дисков установите флеш-накопитель первым для загрузки;
 Выберите флеш-накопитель
Чтобы проверить файловую систему вашей флешки подключите её к компьютеру, в проводнике кликните на флеш-накопителе правой клавишей мыши, в появившемся меню выберите «Свойства».
- Попробуйте изменить значение некоторых параметров БИОСа. Перейдите в ваш БИОС, и поменяйте значение опции «Legacy» с «Enabled» на «Disabled» (или наоборот). Сохраните настройки, перезагрузите компьютер, и попробуйте вновь установить систему с флеш-накопителя;
Способ 2. Если предыдущий способ не помог исправить Start booting from USB device, попробуйте выполнить следующее. Перейдите в БИОС, во вкладке «Boot» установите значение параметра «Secure Boot» на «Disabled» (если появится предупреждение, смело жмите на «Ок»). Появится дополнительная опция «ОS Mode Selection», выберите здесь «UEFI and Legacy OS» (если появится предупреждение, тогда вновь нажимаем на «ОК»). Вновь жмём на F10, затем на «Yes», дожидаемся перезагрузки ноутбука.
Затем вновь переходим в БИОС, во вкладке «Boot» выбираем опцию «Boot device priority», в первом пункте выбираем нашу флешку как загрузочное устройство. Вновь жмём на F10 и «Yes». Перезагружаем наш ПК и пробуем загрузиться с нашего флеш-накопителя.
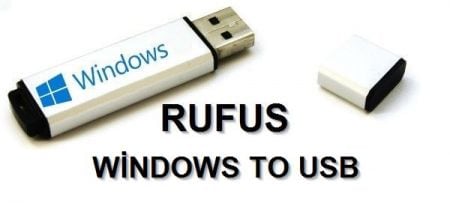
- Для создания загрузочной флешки используйте зарекомендовавший себя софт (например, Rufus).

Заключение
Рассматриваемая проблема может быть вызвана рядом причин, начиная от неправильной настройки БИОСа, и заканчивая некорректным созданием загрузочной флешки. Чтобы избавиться от сообщения Start booting from USB device» рекомендую воспользоваться приведёнными выше советами, это позволит провести нормальную инсталляцию Виндовс с помощью флеш-накопителя на вашем ПК.
How to Boot From a USB Device
Make your PC boot from a USB flash drive or external hard drive
:max_bytes(150000):strip_icc()/tim-fisher-5820c8345f9b581c0b5a63cf.jpg)
:max_bytes(150000):strip_icc()/ryanperiansquare-de5f69cde760457facb17deac949263e-180a645bf10845498a859fbbcda36d46.jpg)
There are lots of reasons you might want to boot from a USB device, like an external hard drive or a flash drive, but it’s usually so you can run special kinds of software.
When you boot from a USB device, what you’re doing is running your computer with the operating system installed on the USB device. When you start your computer normally, you’re running it with the operating system installed on your internal hard drive—Windows, Linux, etc.
Time Required: Booting from a USB device usually takes 10–20 minutes, but it depends a lot on if you have to make changes to how your computer starts up.
How to Boot From a USB Device
Follow these easy steps to boot from a flash drive, an external hard drive, or some other bootable USB device.
:max_bytes(150000):strip_icc()/how-to-boot-from-a-usb-device-2626091-D-v1-5b1183bd04d1cf00371e7aeb.png)
If the USB boot option is not first in the boot order, your PC will start «normally» (i.e., boot from your hard drive) without even looking at any boot information that might be on your USB device.
The BIOS on most computers lists the USB boot option as USB or Removable Devices, but some confusingly list it as a Hard Drive option, so be sure to dig around if you’re having trouble finding the right one to choose.
After setting your USB device as the first boot device, your computer will check it for boot information each time your computer starts. Leaving your computer configured this way shouldn’t cause problems unless you plan on leaving the bootable USB device attached all the time.
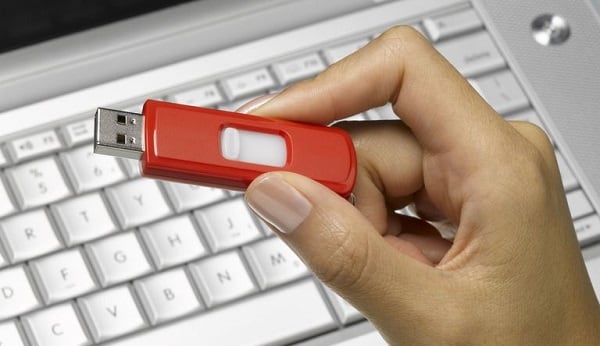
Attach the USB device to your computer via any available USB port.
:max_bytes(150000):strip_icc()/usb-plug-5c433f4546e0fb0001f804f1.jpg)
Creating a bootable flash drive or configuring an external hard drive as bootable is a task in itself. Chances are you made it to these instructions here because you know whatever USB device you have should be bootable after properly configuring BIOS.
See our How to Burn an ISO File to a USB Drive tutorial for general instructions on doing exactly that, which tends to be the reason most people need to figure out how to boot from one.
Since you’re not actually inside of the operating system at this point, restarting isn’t the same as using normal restart buttons. Instead, BIOS should explain which key to press—such as F10—to save the boot order changes and restart the computer.
Watch for a Press any key to boot from external device. message.
:max_bytes(150000):strip_icc()/boot-from-usb-message-57c76dae3df78c71b65d7c9e.png)
You may be prompted with a message to press a key on some bootable devices before the computer boots from the flash drive or another USB device.
If this happens, and you do nothing, your computer will check for boot information on the next boot device in the list in BIOS (see Step 1), which will probably be your hard drive.
Most of the time, when trying to boot from a USB device, there is no key-press prompt. The USB boot process usually starts immediately.
Your computer should now boot from the flash drive or USB based external hard drive.
What happens now depends on what the bootable USB device was intended for. If you’re booting from Windows 10, Windows 8, or Windows 7 installation files on a flash drive, the operating system setup will begin. If you’re booting from a DBAN flash drive you created, it will start. You get the idea.
What to Do When the USB Device Won’t Boot
If you tried the above steps, but your computer didn’t boot from the USB device, check out some of the tips below. There are several places that this process can get hung up at.
Recheck the boot order in BIOS (Step 1). The number one reason a bootable flash drive or another USB device won’t boot is that BIOS isn’t configured to check the USB port first.
Didn’t find a «USB Device» boot order listing in BIOS? If your computer was manufactured around 2001 or before, it might not have this ability.
If your computer is newer, check for some other ways that the USB option might be worded. In some BIOS versions, it’s called «Removable Devices» or «External Devices.»
Remove other USB devices. Other connected USB devices, like printers, external media card readers, etc., could be consuming too much power or causing some other problem, preventing the computer from booting from a flash drive or another device. Unplug all other USB devices and try again.
Or, if you have multiple bootable devices plugged in at once, the computer might simply be booting to the wrong device, in which case the easiest fix would be to remove all USB storage devices but the one you want to use right now.
Copy the files to the USB device again. If you created the bootable flash drive or external hard drive yourself, which you probably did, repeat whatever steps you took again. You may have made a mistake during the process.
See How to Burn an ISO File to USB if you started with an ISO image. Getting an ISO file onto a USB drive, like a flash drive, isn’t as easy as just expanding or copying the file there.
Switch to another USB port. The BIOS on some motherboards only checks the first few USB ports. Switch to another USB port and restart your computer.
Update your motherboard’s BIOS. If your computer is ancient, the BIOS version running on the motherboard may not support booting directly from a USB device. Try flashing the BIOS and checking again for this feature.
How to Boot From a USB Drive or CD on Any Computer
When you’re troubleshooting your computer or installing a new operating system, you may need to “boot from a disc” or USB device (like an external hard drive or flash drive). Here’s what that means—and how to do it.
When you press the power button on your computer, it boots up from its internal hard drive, where your operating system (usually Windows or macOS) is stored. But sometimes you need to boot into something different. Maybe you need to boot from your Windows installation disc to reinstall Windows, or perhaps you need to boot from a system rescue disc to solve a problem with your machine. You may simply want to run a different operating system on your computer.
On a Windows PC
Every Windows PC is different. Some PCs are already set up to search for a USB option before defaulting to the operating system on the internal hard disk. But once you get into your system’s boot menu, you should be able to find what you’re looking for.
Here’s how to boot from a CD or USB drive on a PC:
Restart your computer
Restart your computer and wait for that first screen to pop up. Often, it’ll say something like “Press F12 to Choose Boot Device” somewhere on the screen—the requested function key could vary depending on your machine. Press that key now.
Wait a second
Give it a moment to continue booting, and you should see a menu pop up with a list of choices on it. Highlight your preferred CD or USB drive and press Enter.
Alternatively, you can set your computer to always check for a bootable CD or USB drive and change the boot order. That way, when you have an external disc inserted, your machine will boot from it automatically, and when you don’t, it’ll head into your regular operating system. To set this up, follow these instructions.
Restart your computer and watch for the first screen that shows up when you boot. You should see a message like “Press DEL to enter SETUP” or something similar (the requested key may vary depending on your machine). Press the noted key on your keyboard and wait for setup to start.
Select ‘Boot Device’
You should see a new screen pop up, called your BIOS. This is where you set a lot of low-level settings for your computer. BIOS menus are configured differently across machines, but you should see instructions for how to navigate yours (i.e., which keystrokes to use) somewhere in the window.
Using those instructions, look through your menu options (be careful not to change anything else) for a setting called “Boot Device,” “Boot Order,” or something similar. Select that option.
Choose the right drive
From the menu that pops up, choose your computer’s disc drive and press Enter. If you’re trying to boot from a USB drive, choose that option. It might be listed on its own or under a sub-menu like “Removable Devices.” Press Enter. Depending on your BIOS, you may need to use the Page Up and Page Down or +/- keys to move your selection to the top of a list instead. Again, use the directions listed on your specific machine.
Exit the BIOS
Follow instructions to exit out of your BIOS and save your changes. Usually, this option is under “Exit” or “Save and Exit” on the main menu or available via a keyboard shortcut listed somewhere on your screen. Depending on your BIOS, you may have to confirm your selection again.
Reboot
Your computer should restart automatically. Make sure your CD or USB drive is in your computer. If you’re prompted to “Press any key to boot from external device,” do so. Your computer should boot into the CD or USB drive instead of your normal operating system.
From there, you can follow the on-screen instructions to install Windows, troubleshoot issues, or do whatever else it is you need to do.
On a Mac
Booting from a USB or CD is very, very easy on a Mac. One way to do this is to open System Preferences > Startup Disk. You’ll see your built-in hard disk as well as any compatible operating systems and external drives.
Click the lock icon at the bottom-left corner of the window, enter your admin password, select the startup disk you want to boot from, and hit Restart. This method will save your startup disk preference until you go through this process again to choose a different option.
To do a one-off boot from a USB, you’ll use the Startup Manager instead. Here’s how it works:


