- Bootable linux usb from mac
- Apple hardware considerations
- 2. Requirements
- 3. Prepare the USB stick
- 4. Install and run Etcher
- 5. Etcher configuration
- 6. Write to device
- 7. Boot your Mac
- Finding help
- How to: Create an Ubuntu Bootable USB on Mac, Windows or Ubuntu
- Using a Live USB drive
- Creating a Bootable Linux USB drive
- Method 1: Creating a Bootable USB Drive on Windows
- Method 2: Creating a Bootable USB Drive from Mac
- Method 3: Creating a Bootable USB Drive from Ubuntu
Bootable linux usb from mac
With a bootable Ubuntu USB stick, you can:
- Install or upgrade Ubuntu, even on a Mac
- Test out the Ubuntu desktop experience without touching your PC configuration
- Boot into Ubuntu on a borrowed machine or from an internet cafe
- Use tools installed by default on the USB stick to repair or fix a broken configuration
Creating a bootable USB stick is very simple, especially if you’re going to use the USB stick with a generic Windows or Linux PC. We’re going to cover the process in the next few steps.
Apple hardware considerations
There are a few additional considerations when booting the USB stick on Apple hardware. This is because Apple’s ‘Startup Manager’, summoned by holding the Option/alt (⌥) key when booting, won’t detect the USB stick without a specific partition table and layout. We’ll cover this in a later step.
2. Requirements
- A 2GB or larger USB stick/flash drive
- An Apple computer or laptop running macOS
- An Ubuntu ISO file. See Get Ubuntu for download links
3. Prepare the USB stick
To ensure maximum compatibility with Apple hardware, we’re going to first blank and reformat the USB stick using Apple’s ‘Disk Utility’. But this step can be skipped if you intend to use the USB stick with only generic PC hardware.
- Launch Disk Utility from Applications>Utilities or Spotlight search
- Insert your USB stick and observe the new device added to Disk Utility
- Select the USB stick device (you may need to enable the option View>Show All Devices) and select Erase from the tool bar (or right-click menu)
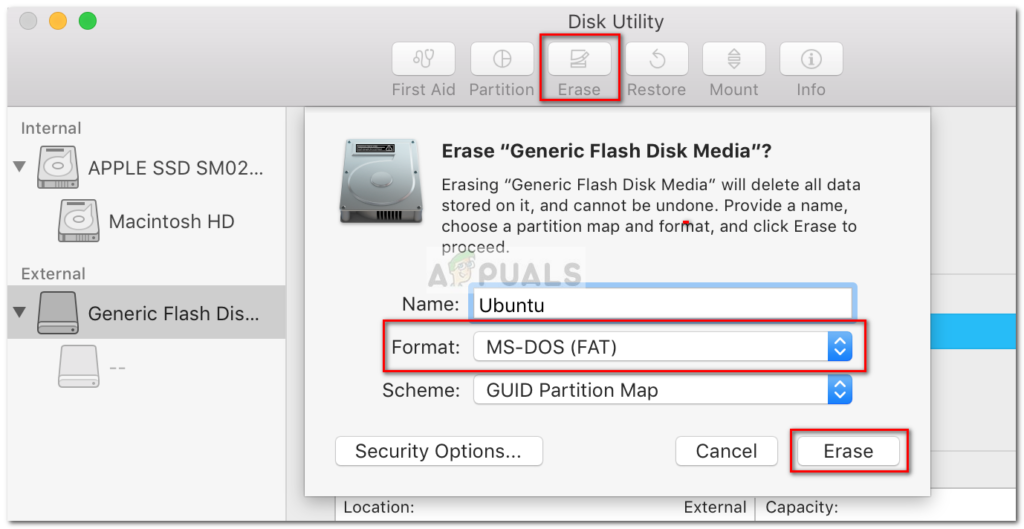
- Set the format to MS-DOS (FAT) and the scheme to GUID Partition Map
- Check you’ve chosen the correct device and click Erase

Warning: Disk Utility needs to be used with caution as selecting the wrong device or partition can result in data loss.
4. Install and run Etcher
To write the ISO file to the USB stick, we’re going to use a free and open source application called Etcher. After downloading this and clicking to mount the package, Etcher can either be run in-place or dragged into your Applications folder.
By default, recent versions of macOS block the running of applications from unidentified developers. To side-step this issue, enable ‘App Store and identified developers’ in the ‘Security & Privacy’ pane of System Preferences. If you are still warned against running the application, click ‘Open Anyway’ in the same pane.

5. Etcher configuration
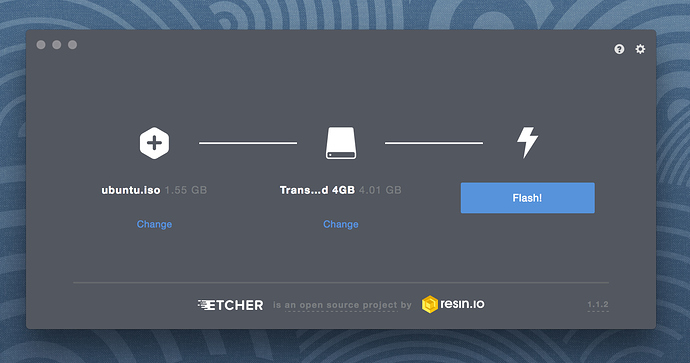
Etcher will configure and write to your USB device in three stages, each of which needs to be selected in turn:
Select image will open a file requester from which should navigate to and select the ISO file downloaded previously. By default, the ISO file will be in your Downloads folder.
Select drive, replaced by the name of your USB device if one is already attached, lets you select your target device. You will be warned if the storage space is too small for your selected ISO.
Flash! will activate when both the image and the drive have been selected. As with Disk Utility, Etcher needs low-level access to your storage hardware and will ask for your password after selection.
6. Write to device
After entering your password, Etcher will start writing the ISO file to your USB device.
The Flash stage of the process will show progress, writing speed and an estimated duration until completion. This will be followed by a validation stage that will ensure the contents of the USB device are identical to the source image.
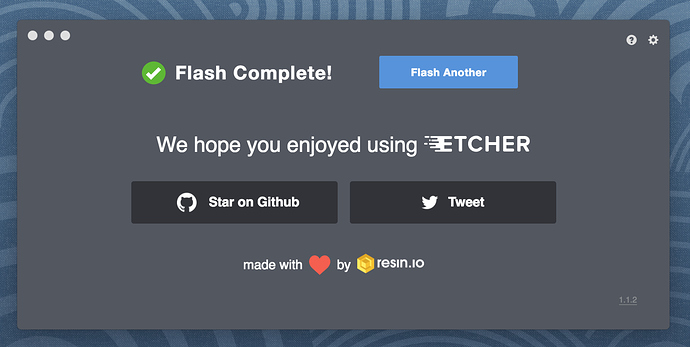
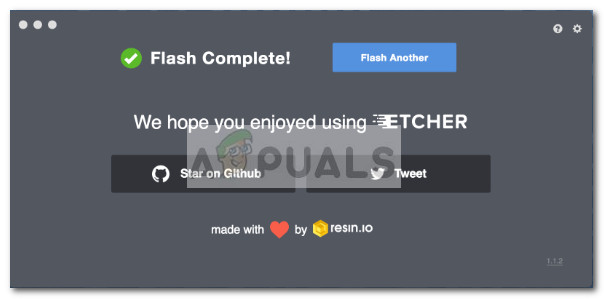
When everything has finished, Etcher will declare the process a success.
Congratulations! You now have Ubuntu on a USB stick, bootable and ready to go.
Warning: After the write process has completed, macOS may inform you that ‘The disk you inserted was not readable by this computer’. Don’t select Initialise. Instead, select Eject and remove the USB device.
7. Boot your Mac
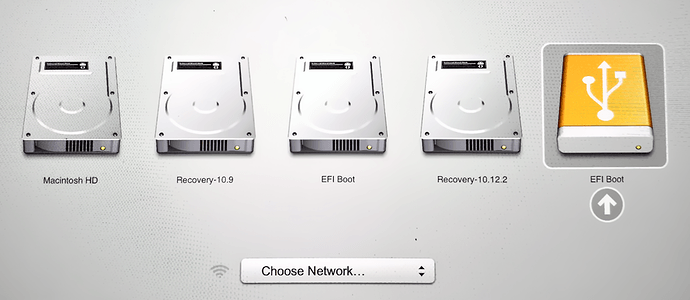
If you want to use your USB stick with an Apple Mac, you will need to restart or power-on the Mac with the USB stick inserted while the Option/alt (⌥) key is pressed.
This will launch Apple’s ‘Startup Manager’ which shows bootable devices connected to the machine. Your USB stick should appear as gold/yellow and labelled ‘EFI Boot’. Selecting this will lead you to the standard Ubuntu boot menu.
Finding help
If your Mac still refuses to boot off your USB stick you may find it easier to boot and install off an Ubuntu DVD instead. See our How to burn a DVD on macOS for further details.
Alternatively, if you feel confident using the macOS command line, see the community documentation on How to install Ubuntu on MacBook using USB Stick for a more manual approach.
If you want to install Ubuntu, follow our install Ubuntu desktop tutorial.
Finally, if you get stuck, help is always at hand:
Источник
How to: Create an Ubuntu Bootable USB on Mac, Windows or Ubuntu
Ubuntu is always a good first choice if you’re looking to get into the Linux environment. Of all the popular Linux distributions, Ubuntu has one of the most solid graphical interface – which makes it a good choice for people that aren’t that comfortable with working exclusively from a terminal.
Although the are multiple ways that you can use to install the Ubuntu distribution, using a bootable USB drive is one of the most accessible ways to do it. But since Ubuntu (and most of the other Linux distributions) will only offer an ISO disc image for download, we’ll need a third-party tool capable of transforming the ISO file into an accessible bootable USB drive.
Using a Live USB drive
I know that some of you aren’t yet convinced whether you want to make the switch to Linux and leave Windows or macOS behind. To counter this potential inconvenient, we are going to run Ubuntu from a live USB drive – so you can test Ubuntu and see whether it’s something you would want without touching your current operating system.
If you end up falling in love with Ubuntu (like many other users that made the transition from Windows and Mac), you can then make it the primary operating system or set up a dual-boot scenario.
Creating a Bootable Linux USB drive
Whether you’re trying to create a live Ubuntu bootable USB from a Windows PC or from a Mac, we got you covered.
If you’re on Windows, please follow Method 1 for instructions on how to download the Ubuntu ISO file and convert it into a Live USB drive.
If you’re using a Mac, follow Method 2 for steps on using the terminal to create a Live USB Drive.
In the event that you’re already using Ubuntu but you’re looking to create a Live USB Drive for someone else to try, follow Method 3 for instructions on using the Startup Disk Creator to set up a Live USB Drive.
Method 1: Creating a Bootable USB Drive on Windows
Windows is not capable of converting an ISO file to a bootable USB drive natively, so we’ll need to use a third-party tool. Now there are quite a lot of tools that we can use to do this, but we recommend using Rufus – it’s faster and more dependable than most of the other options.
Note: Another solid tool that you can use to create a bootable USB drive is Universal USB Installer. But keep in mind that the guide below will be using Rufus.
When you are ready, follow the instructions now below to create a bootable USB drive of Ubuntu and use it as a live USB drive:
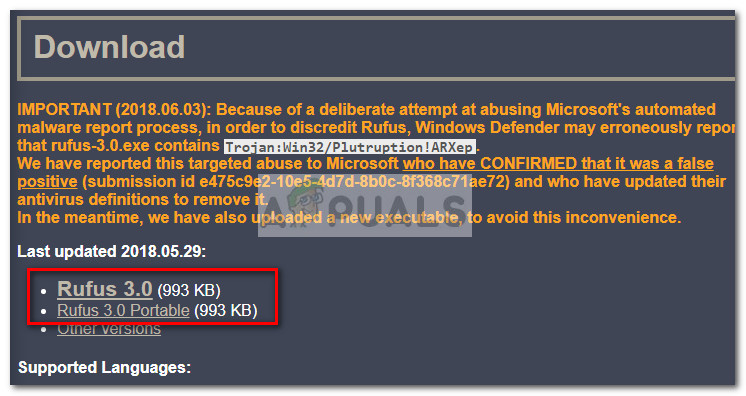
- Visit this link (here), scroll down to the Download section and download the latest version of Rufus. You can also download the portable version so you don’t have to install it on your system.
 Note: If you downloaded the normal version, go through with the installation process.
 - Next, we need to download the Ubuntu ISO image. Naturally, you can do this from a couple of different locations, but we recommend going the official route and visiting Ubuntu’s official download page. Next, download the latest available LTS version.
- Once the ISO file of Ubuntu is downloaded open Rufus and connect a USB drive with at least 2GB of free space. We highly encourage you to make sure that you don’t leave any important files on the disk since the entire content of the drive will be erased.
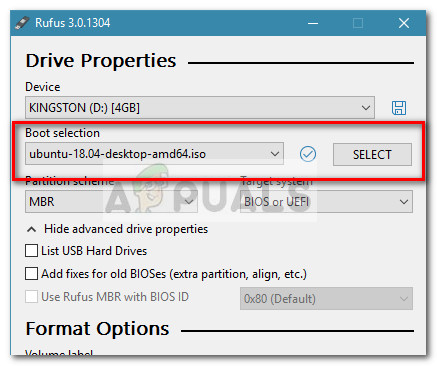
- Then, click the Device drop-down menu in Rufus and make sure that the proper USB drive is selected.
- Next, under Boot selection, select Disk or ISO image. Then, hit the Select button and navigate to the location where you previously downloaded the ISO file, select it and hit the Open button.
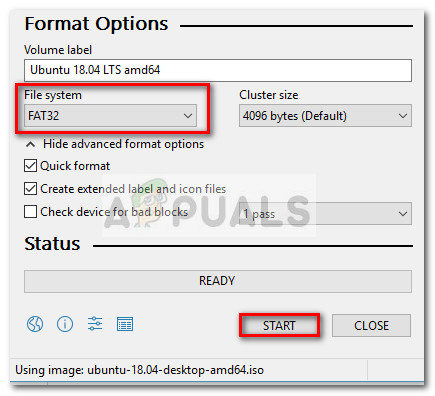
- Next, scroll down to Format Options and make sure that the File system is set to FAT32. Once all the options are in order, hit the Start button to begin creating the Ubuntu bootable USB drive.
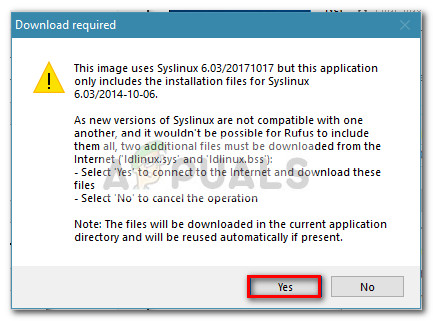
- If prompted by the Syslinux prompt, hit Yes to initiate the download.
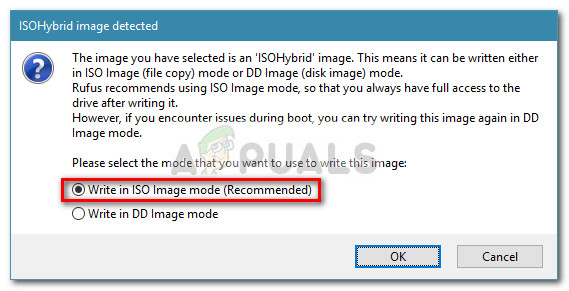
- At the ISOHybrid image detected prompt, select Write in ISO Image Mode (Recommended) and hit OK to commence the creation of the image.
- Hit OK at the final prompt to confirm the deletion of the data present on the USB flash drive. Depending on your systems specifications and the distribution that you’re using, this might take a little over 2 minutes. When the process is complete, you can close Rufus.
- Now that the bootable USB disk is created, leave the USB plugged in and reboot your computer. In case you’re using it on a different computer, plug the bootable USB into the other computer and start the computer.
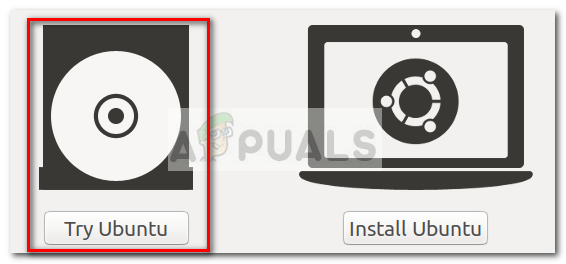
- At boot time, press the key associated with the boot menu (F2, F10, F8 or F12 on most computers). Then, select the USB disk that you’ve just created and start using Ubuntu without installing it – to use the Live USB feature, click on Try Ubuntu.
 Note: If you downloaded the normal version, go through with the installation process.
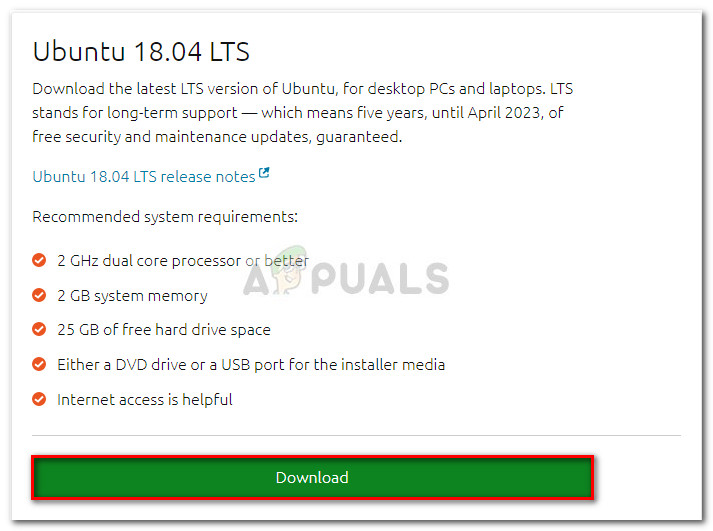
Method 2: Creating a Bootable USB Drive from Mac
If you need to create a bootable USB Drive with the Ubuntu distribution from a Mac, there’s no other native way to do it than from using the Terminal. However, we’re going to show you a much simpler way to do this. But before we get around to do this, it’s important to make sure that the USB stick is properly prepared.
Follow the guide down below to create a bootable USB stick from a MAC:
- Make sure that you prepare a USB flash drive with at least 2GB of space and backup any important information away from it since it will be re-formatted. Then, visit this official link (here) and download the Ubuntu ISO file to your Mac.
- Next, we’ll need to reformat the USB stick with the Disk Utility software. To do this, click the Spotlight icon (top-right corner) and search for Disk Utility. Once you open Disk Utility, make sure that the USB stick is properly connected. Once it becomes available inside Disk Utility, select it and click the Erase button at the top of the window. Then, set the Format to MS-DOS (FAT) and click the Erase button to re-format the USB drive.
- Now, we’ll need to install and open Etcher for macOS – a free, open source application that is capable to write the ISO file to the USB stick with minimal hassle. Note: By default, all recent macOS versions are blocked from running applications from unidentified developers. To get around this issue, we need to go to System Preferences > Security & Privacy and click the Open Anyway button associated with Etcher.
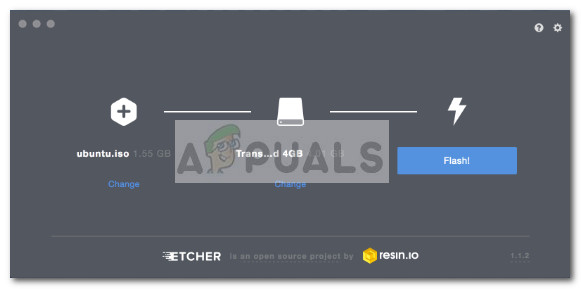
- In Etcher, click on Select image and navigate to the location of the ISO file that you previously downloaded. If you didn’t specify a custom location, you will be able to find it in the Downloads folder. Once the ISO file is selected, click the Select drive button and select the USB device that you previously reformatted.
- Next, kick-start the re-flashing process by clicking the Flash! button.
- Before starting the process, Etcher will ask you to input your administrator password. Once you do so and the process starts, wait until you see the “Flash Complete!” message. Note: When the flash is complete, your macOS might display a message saying that “The disk you inserted is not readable by this computer”. Don’t worry about it and don’t click on Initialise. Instead, click on Eject and remove the USB device.
- In case you want to use the Ubuntu Live USB stick on a MAC, insert the USB stick and restart (or power on) your Mac while holding the Option key. This will launch the Startup manager which will show all the available bootable devices connected to the machine. The live Ubuntu USB disk that you’ve just created will appear as a yellow hard disk named “EFI Boot”. Opening it will bring you to the Standard Ubuntu boot menu, where you can choose Try Ubuntu to launch a live image.
 Note: When the flash is complete, your macOS might display a message saying that “The disk you inserted is not readable by this computer”. Don’t worry about it and don’t click on Initialise. Instead, click on Eject and remove the USB device.
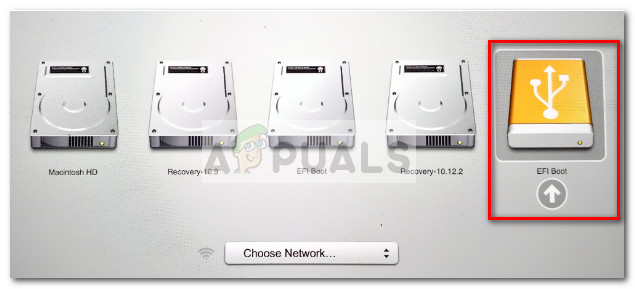
Method 3: Creating a Bootable USB Drive from Ubuntu
If you’re already on Ubuntu, you don’t need a Windows or Mac computer to create a bootable USB drive with Ubuntu – you can do it straight from your current OS.
The Ubuntu distribution includes an extremely helpful tool called Startup Disk Creator – this will allow you to create a bootable USB drive from an ISO file.
Note: Most Linux distributions have a tool similar to Startup Disk Creator, but some have a different name. If you are running a different Linux distribution, check your Dash for a similar tool.
Here’s a quick guide to creating a bootable USB drive on Ubuntu:
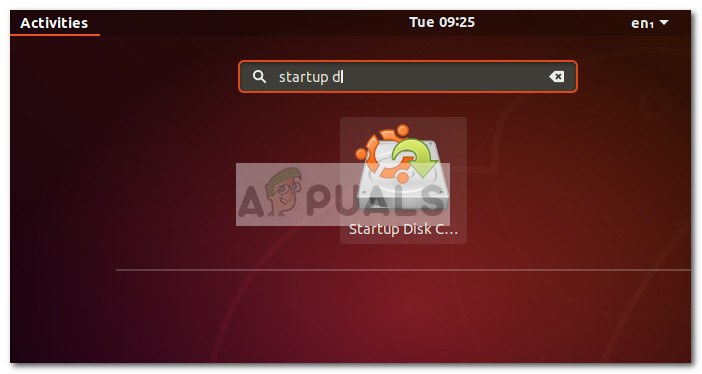
- In Ubuntu, click on the Show Application button and then use the search function to search for Startup Disk. Then, double-click Startup Disk Creator to open the application.
- Next, insert the USB driver that will act as the Live drive. Then, click the Other button and load up the Ubuntu ISO.
- Once the disk is loaded and the ISO image selected, click on the Make Startup Disk and wait for the process to complete.
- Once the Live USB bootable disk is created, insert into the computer that you wish to run Ubuntu on and boot from the USB drive. Then, click on Try Ubuntu to launch a live image.
Источник


