- Как исправить PROCESS1_INITIALIZATION_FAILED в Windows 7/8/10?
- Решаем сбой PROCESS1_INITIALIZATION_FAILED
- Метод №1 Удаление файла Bootcat.cache
- Метод №2 Копирование Bootcat.cache с другого компьютера
- Метод №3 Удаление файла COMPONENTS
- Метод No4 Установка Windows 7 SP1
- Метод No5 Удаление Roxio GoBack
- Метод №6 Восстановление Windows с помощью утилиты DISM
- Метод №7 Исключить папку от сканирований
- Метод №8 Использование утилиты CHKDSK
- Сообщение об ошибке «Stop error code 0x0000006B PROCESS1_INITIALIZATION_FAILED» во время запуска компьютера, работающего под управлением Windows 7 или Windows Server 2008 R2
- Проблема
- Причина
- Решение
- Временное решение
- Статус
- Дополнительная информация
- FIX: PROCESS1_INITIALIZATION_FAILED
- Method 1: Delete Bootcat.cache file
- Method 2: Copy Bootcat.cache file from another computer
- Method 3: Copy ntdll.dll file from another computer
- Method 4: Delete file COMPONENTS
- Method 5: Install Windows 7 SP1
- Method 6: Uninstall Roxio GoBack
- Method 7: Repair a Windows Image using DISM
- Method 8: Exclude a folder from scans
- Method 9: Remove malware
- Method 10: Restore your operating system from backup
- Method 11: System restore
- Method 12: Disconnect UPS devices
- Method 13: Change CD or DVD
- Method 14: CHKDSK /R
- Method 15. Change HDD or SSD
- Method 16: Change RAM module
- SOLUTION FOR SMARTPHONES
- Method 1: Reset Windows Phone
Как исправить PROCESS1_INITIALIZATION_FAILED в Windows 7/8/10?
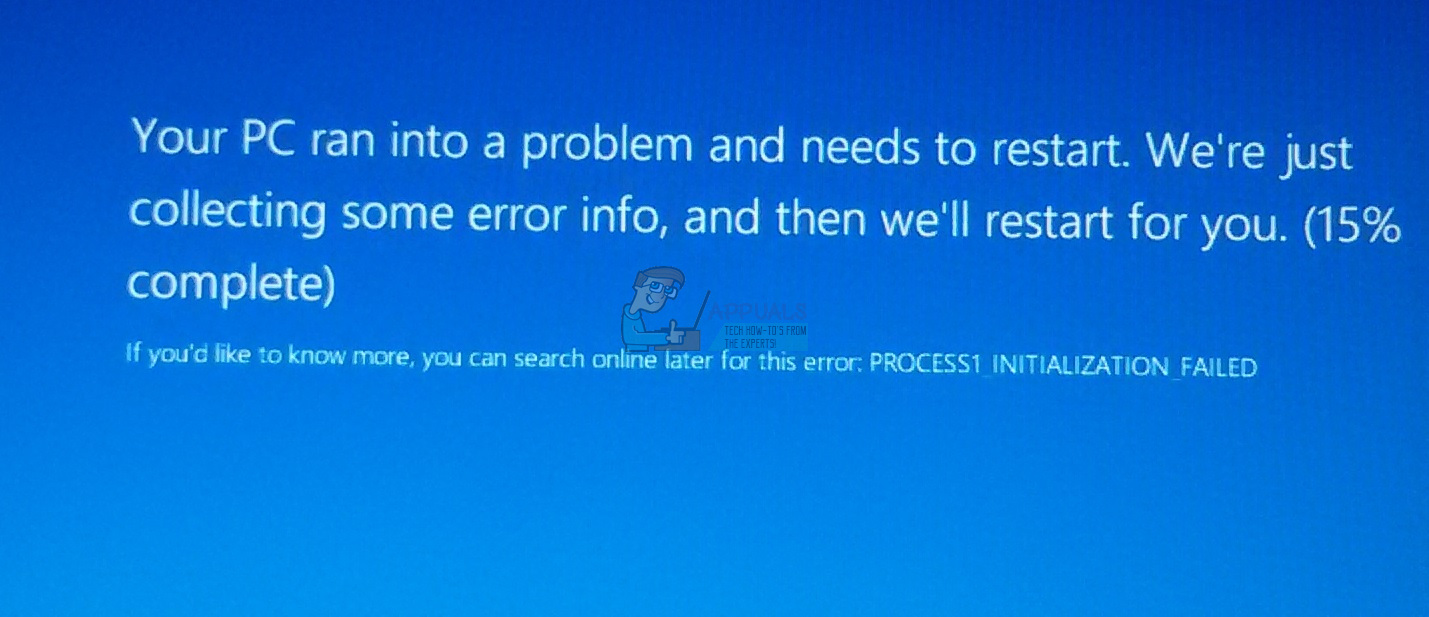
В данной статье мы с вами будем рассматривать синий экран смерти, который именуется PROCESS1_INITIALIZATION_FAILED и имеет номер 0x0000006B. Что сами Майкрософт говорят по поводу этой проблемы? Они говорят вот что: «Данная проблема появляется вследствие повреждения файла Bootcat.cache или же из-за изменения размера этого файла». Из этого мы точно можем утверждать, что проблема заключается в файле Bootcat.cache. Также нельзя исключать таких вещей, как повреждения системных файлов, аппаратных компонентов, кабелей или прочее. Синий экран смерти PROCESS1_INITIALIZATION_FAILED может проявлять себя на большинстве версий операционной системы Windows.
В сообщении этого критического сбоя присутствует следующая информация:
STOP: 0x0000006B (Параметр1, Параметр2, Параметр3, Параметр4)
Заметка: эти четыре параметра могут меняться в зависимости от конфигурации компьютера пользователя.
Помимо прочего, этот синий экран смерти можно увидеть даже на клиентах, серверных машинах и смартфонах. В данной статье мы опишем целых 8 методов, которые помогут разрешить вам эту непростую ситуацию.
Решаем сбой PROCESS1_INITIALIZATION_FAILED

Метод №1 Удаление файла Bootcat.cache
Следуя из сообщения Майкрософт, первым вашим шагом станет удаление файла Bootcat.cache из папки CodeIntegrity. Данный файл располагается в директории C:\Windows\System32\Codeintegrity. Вам понадобится загрузить компьютер через диск восстановления системы Windows. Если вы не знаете, как создать этот диск, то пройдите по этой ссылке на сайт Майкрософт , где написаны точные инструкции по его созданию. Создав этот диск, сделайте следующее:
- Вставьте диск или же флеш-носитель в свой компьютер.
- Перезапустите компьютер.
- Загрузите систему через диск восстановления Windows.
- Выберите предпочитаемый язык и другие параметры, а затем нажмите «Далее» для продолжения.
- Кликните на кнопку «Восстановление системы».
- Далее пройдите путем «Диагностика→Дополнительные параметры→Командная строка»
- Выберите пункт «Командная строка».
- Впишите в нее команду diskpart.
- Впишите list volume и нажмите Enter.
- Запомните в каком разделе находится ваша ОС, затем впишите Exit и нажмите Enter.
- Впишите C:(укажите тот раздел, в котором находится ваша ОС) и нажмите Enter.
- Впишите cd windows\system32\codeintegrity и нажмите Enter.
- Впишите del bootcat.cache и нажмите Enter.
- Закройте Командную строку.
- Перезагрузите свой компьютер, а затем попытайтесь зайти в систему обычным путем.
Метод №2 Копирование Bootcat.cache с другого компьютера
Если первый метод вам не помог в решении проблемы с синим экраном смерти PROCESS1_INITIALIZATION_FAILED, то вы должны попробовать этот метод, который включает в себя копирование файла Bootcat.cache с другого компьютера, подразумевая, что тот работает там корректно. Также как и в предыдущем методе, вам снова придется загрузить свою систему через диск восстановления.
- Найдите другой компьютер и зайдите в его операционную систему.
- Вставьте в флеш-устройство в компьютер.
- Нажмите Windows+E чтобы открыть Проводник Windows.
- Пройдите в директорию C:\Windows\System32\Codeintegrity.
- Копируйте файл Bootcat.cache к себе на флеш-устройство.
- Вставьте флеш-хранилище в компьютер, у которого проблемы с синим экраном смерти PROCESS1_INITIALIZATION_FAILED.
- Запустите проблемный компьютер через диск восстановления Windows и доберитесь до Командной строки, как это было показано в предыдущем методе.
- Открыв Командную строку, впишите в нее команду diskpart.
- Впишите list volume и нажмите Enter.
- Запомните в каком разделе находится ваша ОС, затем впишите Exit и нажмите Enter.
- Впишите C:(укажите тот раздел, в котором находится ваша ОС) и нажмите Enter.
- Впишите cd windows\system32\codeintegrity и нажмите Enter.
- Впишите copy E:\bootcat.cache(впишите ту букву, под которой выступает ваше флеш-хранилище) и нажмите Enter.
- Закройте Командную строку.
- Перезагрузите свой компьютер.
Метод №3 Удаление файла COMPONENTS
Итак, если ничего из вышеперечисленного не помогло, а такое вполне возможно, то давайте двигаться дальше. На этот раз мы с вами попробуем сделать кое-что другое – удаление файла COMPONENTS из директории windows\system32\config. Данное действие также зарекомендовало себя отличным способом по борьбе с синим экраном смерти PROCESS1_INITIALIZATION_FAILED.
- Снова запустите свою ОС через диск восстановления.
- Пройдите весь путь до Командной строки, как это было уже показано в предыдущих методах.
- Впишите команду diskpart и нажмите Enter.
- Впишите list volume и нажмите Enter.
- Впишите Exit и нажмите Enter.
- Впишите cd windows\system32\config и нажмите Enter.
- Впишите del components и нажмите Enter.
- Закройте Командную строку.
- Перезагрузите свой компьютер.
Ну что, ваша система все еще загружается с синим экраном смерти PROCESS1_INITIALIZATION_FAILED? Ок, тогда давайте двигаться далее.
Метод No4 Установка Windows 7 SP1
Если вы используете Windows 7 без SP1, то вам нужно попробовать установить этот сервисный пакет для вашей операционной системы. Все что вам нужно сделать, так это пройти в Центр загрузок Майкрософт и скачать от туда необходимый сервисный пакет. Однако, будьте внимательно, что именно вы скачивайте. Обязательно отталкивайтесь от того, какой разрядностью обладает ваша система, т.е. 32-битная или 64-битная. Загрузите Windows 7 SP1, установите его и перезагрузите систему. Затем проверьте, появляется ли синий экран смерти PROCESS1_INITIALIZATION_FAILED.
Метод No5 Удаление Roxio GoBack
Если вы используете программное обеспечение Roxio GoBack, то вам нужно попробовать удалить его, чтобы проверить, не вызывает ли ли оно уже оговоренный синий экран смерти. Удаляется Roxio GoBack довольно просто через Программы и компоненты.
- Нажмите на клавиатуре Windows+R.
- Впишите appwiz.cpl и нажмите Enter.
- Выберите Roxio GoBack и удалите ее.
- Перезагрузите компьютер.
- Протестируйте систему на стабильность.
Возможно, что именно эта утилита и стояла за таким серьезным сбоем в системе, как PROCESS1_INITIALIZATION_FAILED. Однако, если ничего не изменилось, то давайте двигаться дальше по нашему списку методов.
Метод №6 Восстановление Windows с помощью утилиты DISM
Для выполнения этого метода, нам потребуется использовать утилиту под названием DISM. DISM – это команда, которая позволяет вам монтировать образ Windows(install.wim) и выполнять такие действия, как установку, удаление, настройку и обновление операционной системы. DISM является компонентом комплекта средств для развертывания и оценки Windows(Windows ADK), который можно загрузить по этой ссылке . Итак, чтобы восстановить Windows с помощью утилиты DISM, вам потребуется сделать следующее:
- Для начала загрузите Windows ADK, а затем установите DISM.
- Нажмите на Пуск и впишите в поисковик запрос «Система обслуживания образов развертывания и управления ими».
- Нажмите на найденный результат ПКМ и выберите Запустить от Администратора.
- Впишите в нее DISM /image:D:\ /cleanup-image /revertpendingactions и нажмите Enter.
- После выполнения команды, перезагрузите свой компьютер, а затем протестируйте систему на наличие синего экрана смерти PROCESS1_INITIALIZATION_FAILED.
Метод №7 Исключить папку от сканирований
Антивирусное программное обеспечение также может стоять у истоков проблемы с появлением оговоренного синего экрана смерти. Чтобы исправить это, вам нужно исключить папки CodeIntegrity и catroot от сканирования антивирусом. Сейчас мы покажем вам как это делать на примере Защитника Windows. Если вы используете иной антивирус, то это не беда, так как там, скорее всего, будут применимы эти шаги.
- Кликните на Пуск и впишите в поисковик запрос «Защитник Windows».
- Нажмите на найденный результат ПКМ и выберите «Запустить от имени Администратора».
- Перейдите во вкладку «Параметры».
- Кликните на «Добавить исключение».
- Кликните на «Исключить папку».
- Пройдите в директорию C:\Windows\System32\CodeIntegrity.
- Кликните «Исключить эту папку».
- Кликните на «Исключить папку» еще один раз.
- Пройдите в директорию C:\Windows\System32\catroot.
- Кликните «Исключить эту папку».
- Еще раз хорошенько проверьте, исключили ли вы нужные вам папки.
Возможно, синий экран смерти PROCESS1_INITIALIZATION_FAILED появлялся в случае сканирования этих папок. По крайней мере, так утверждают некоторые пользователи в Интернете. Ну что, проблема все еще преследует вас?
Метод №8 Использование утилиты CHKDSK
Когда ваш жесткий диск не работает как надо, то на нем могут появиться поврежденные данные или же плохие сектора. В этом случае вам поможет довольно неплохая системная утилита CHKDSK, которая поможет найти вам бэдблоки и исправить их, но только если это будет возможно.
- Нажмите ПКМ на Пуск и выберите «Командная строка(администратор)».
- Впишите chkdsk /r и нажмите Enter.
- Далее напишите Y и нажмите Enter, чтобы принять перезагрузку компьютера.
- Подождите, пока утилита завершит починку файловой системы на компьютере. Должны завершиться все пять стадий операции.
Мы надеемся, что данная статья помогла вам преодолеть проблему в виде синего экрана смерти PROCESS1_INITIALIZATION_FAILED. Если же он так и продолжает постоянно проявляться, то вы также можете еще попробовать выполнить восстановление системы с помощью ранее созданной точки или через бэкап. Если и это не помогло, то это может означать, что у вас присутствуют проблемы аппаратного характера, например, виновниками могли стать ваш HDD/SSD или же оперативная память.
Сообщение об ошибке «Stop error code 0x0000006B PROCESS1_INITIALIZATION_FAILED» во время запуска компьютера, работающего под управлением Windows 7 или Windows Server 2008 R2
Не уверены, что решение правильное? Мы добавили эту неполадку к нашей , которую можно провести.
Проблема
Ваш компьютер работает под управлением Windows 7 или Windows Server 2008 R2. Однако он аварийно завершает работу во время запуска перед запросом учетных данных пользователя. Кроме того, появляется такое сообщение о STOP-ошибке:
STOP: 0x0000006B ( Parameter1, Parameter2, Parameter3, Parameter4)
PROCESS1_INITIALIZATION_FAILED
Примечание. Названия четырех параметров в сообщении о STOP-ошибке могут зависеть от конфигурации компьютера.
Причина
Неполадка возникает из-за повреждения файла Bootcat.cache или вследствие изменения его размера после последнего успешного запуска.
Примечание. Файл Bootcat.cache расположен по адресу %SystemRoot%\system32\codeintegrity.
Решение
Чтобы решить эту проблему, установите пакет обновления 1 для Windows 7 и Windows Server 2008 R2. Майкрософт не предоставляет поддерживаемое исправление для этой проблемы. Чтобы получить дополнительные сведения об этом пакете обновления, щелкните номер следующей статьи в базе знаний Майкрософт:
Сведения о пакете обновления 1 для Windows 7 и Windows Server 2008 R2
Временное решение
Чтобы обойти эту неполадку, запустите компьютер с жесткого диска или USB-накопителя с помощью установочного носителя Windows. Удалите файл Bootcat.cache, и перезапустите компьютер.
Статус
Майкрософт подтвердила наличие этой проблемы в ее продуктах, перечисленных в разделе «Применимость».
Дополнительная информация
Чтобы получить дополнительные сведения о терминологии обновления программного обеспечения, щелкните номер следующей статьи в базе знаний Майкрософт:
Описание стандартной терминологии, используемой для описания обновлений программного обеспечения Майкрософт
FIX: PROCESS1_INITIALIZATION_FAILED
When Windows detects hardware or software problem, Windows generate error code which identifies what is happening on your computer, notebook, tablet or smartphone. One of these errors is named Blue Screen Of Death (BSOD). End users do not like BSOD because BSOD is stopping our daily work. Every BSOD includes error name and an error code which help us to identify the possible issue. One of the BSOD which will be the topic of this article is PROCESS1_INITIALIZATION_FAILED, error code 0x0000006B. What Microsoft said about error code 0x0000006B? Microsoft said: “This issue occurs because of the Bootcat.cache file is corrupted or because of the size of the Bootcat.cache file is changed since the last successful start.” We can confirm this problem with Bootcat.cache, and add another reasons including corrupted files, bad hardware, bad or incorrect cables and others. BSOD 0x0000006B occurs on operating system from Windows 2000 to Windows 10, and Windows Server 2008, too.
This is error code:
STOP: 0x0000006B (Parameter1, Parameter2, Parameter3, Parameter4)
PROCESS1_INITIALIZATION_FAILED
NOTE: The four parameters in the Stop error message may vary, depending on the configuration of the computer.
This error occurs on client and server machines, and on smartphones, too. In 16 methods we will show you how to solve issues on client and server machines, and the last one method will show you how to solve issues on your Windows Phone smartphone.
So what is the best solution for this problem? We will show you all solutions through 17 methods.
Method 1: Delete Bootcat.cache file
As Microsoft said, the first solution is to delete Bootcat.cache file from a CodeIntegrity folder, so, we will start with deleting this file from CodeIntegrity . Bootcat.cache file is a file located at following location C:\Windows\Ssystem32\Codeintegrity. By default, Windows is installed on C: partition and default name is a Local Disk (C:). We will show you how to delete Bootcat.cache file on Windows 7 Enterprise x64. If you are using another operating system, from Windows 2000 to Windows 10, you can follow the same procedure to solve issues with BSOD 0x0000006B. You will need to boot your computer to proper Windows operating system. You can boot your computer using DVD or USB flash drive. You should burn Windows ISO file to DVD or USB Flash drive. If you do not know how to burn ISO file to your USB flash drive, please read instructions on this LINK.
- Insert the Windows 7 installation DVD disk or USB flash drive
- Restart your Windows
- Boot your computer from the DVD drive or USB flash drive
- Enter your language and other preferences and click Next to continue

- Click Repair your computer
- Under System Recovery Options click Windows 7 and then click Next
- Click CommandPrompt
- Type diskpart. Diskpart is a command line disk partitioning utility integrated into Windows. Diskpart will provide more information about available volumes on our computer.
- Type list volume and press Enter.
- Type Exit to leave Diskpart
- Type D: to open our system partition, because Windows is installed on D: partition
- Type cd windows\system32\codeintegrity and press Enter
- Type del bootcat.cache and press Enter
- Close Command prompt
- Restart your computer
- Test your computer


Method 2: Copy Bootcat.cache file from another computer
If the first method did not solve your problem, you should try this method, which includes copying Bootcat.cache file from another operating system which is working without any problems. If you have a problem with Windows 7 x64, you need to copy Bootcat.cache file from the same Windows, but a different computer. For this method, you will need USB flash disk with minimal capacity because Bootcat.cache is approximately 5 MB. Also, you will need Windows 7 x64 installation disk, which can be burned to DVD or USB flash disk. We will show you how to copy Bootcat.cache on Windows 7 x64. The first step is copying Bootcat.cache file to USB flash drive, and second step is to paste copied Bootcat.cache file to CodeIntegrity folder.
- Log on another machine
- Insert USB flash drive to working computer
- Hold Windows logo and press E to open Windows Explorer or File Explorer
- Navigate to following location C:\Windows\System32\Codeintegrity
- Right click on Bootcat.cache file and choose Copy
- Open your USB flash disk
- Right click and select Paste
- Eject USB flash drive from machine
- Insert USB flash drive into machine with BSOD issue
- Insert the Windows 7 installation DVD disk or USB flash disk
- Restart your Windows
- Boot your computer from the DVD drive or USB flash disk
- Enter your language and other preferences and click Next to continue
- Click Repairyourcomputer
- Under System Recovery Options click Windows7 and then click Next
- Click CommandPrompt
- Type diskpart. Diskpart is a command line disk partitioning utility integrated into Windows. Diskpart will provide more information about available volumes on our computer.
- Type list volume and press Enter.
- Type Exit to leave Diskpart
- Type D: to open our system partition, because Windows is installed on D: partition
- Type cd windows\system32\codeintegrity and press Enter
- Type copy E:\bootcat.cache and press Enter, because E: is USB flash disk
- Close Command prompt
- Restart your computer
- Test your computer


Method 3: Copy ntdll.dll file from another computer
If the first two methods did not solve your problem, you will need to copy another file, named ntdll.dll, from one to another machine. If you have a problem with Windows 10 x64, you should copy ntdll.dll from the computer which uses the same operating system edition. Again, we will show you how to do it on Windows 7 x64. The procedure is simple as copying Bootcat.cache file. Regardless, we will show you the whole procedure. For this method, you will need USB flash disk with minimal capacity because ntdll.dll is approximately 1.6 MB. Also, you will need Windows 7 x64 installation disk, which can be burned to DVD or USB flash disk. We will show you how to copy ntdll.dll on Windows 7 x64. The first step is copying ntdll.dll file to USB flash drive, and second step is to paste copied ntdll.dll file to a System32 folder.
- Log on another machine
- Insert USB flash drive to working computer
- Hold Windows logo and press E to open Windows Explorer or File Explorer
- Navigate to following location C:\Windows\System32
- Right click on ntdll.dll file and choose Copy
- Open your USB flash disk
- Right click and select Paste
- Eject USB flash drive from machine
- Insert USB flash drive into machine with BSOD issues
- Insert the Windows 7 installation DVD disk or USB flash disk
- Restart your Windows
- Boot your computer from the DVD drive or USB flash disk
- Enter your language and other preferences and click Next to continue
- Click Repairyourcomputer
- Under System Recovery Options click Windows7 and then click Next
- Click CommandPrompt
- Type diskpart. Diskpart is a command line disk partitioning utility integrated into Windows. Diskpart will provide more information about available volumes on our computer.
- Type list volume and press Enter.
- Type Exit to leave Diskpart
- Type D: to open our system partition, because Windows is installed on D: partition
- Type cd windows\system32 and press Enter
- Type copy E:\ntdll.dll and press Enter, because E: is USB flash disk
- Close Command prompt
- Restart your computer
- Test your computer


Method 4: Delete file COMPONENTS
If deleting and copying Bootcat.cache and ntdll.dll did not solve your problem, next method will include working with file named COMPONENTS. You need to delete file COMPONENTS through Command Prompt. We will show you how to do it on Windows 7 x64. You will need Windows 7 x64 installation disk, which can be burned to DVD or USB flash disk.
- Insert the Windows 7 installation DVD disk or USB flash disk
- Restart your Windows
- Boot your computer from the DVD drive or USB flash disk
- Enter your language and other preferences and click Next to continue
- Click Repairyourcomputer
- Under System Recovery Options click Windows7 and then click Next
- Click CommandPrompt
- Type diskpart. Diskpart is a command line disk partitioning utility integrated in Diskpart will provide more information about available volumes on our computer.
- Type list volume and press Enter.
- Type Exit to leave Diskpart
- Type D: to open our system partition, because Windows is installed on D: partition
- Type cd windows\system32\config and press Enter
- Type del components and press Enter
- Close Command prompt
- Restart your computer
- Test your computer

Method 5: Install Windows 7 SP1
If you are using Windows 7 without SP1, you will need to download SP1 for your Windows 7. If you are using Windows 7 x86, you will need to download and install Windows 7 SP1 x86, if you are using Windows 7 x64, you will need to download and install Windows 7 SP1 x64. Windows 7 SP1 is available on Microsoft Download Center.
- Open Internet browser (Google Chrome, Mozilla Firefox, Edge or other)
- Open web site on this LINK
- Download proper architecture version of Windows 7 SP1
- Install Windows 7 SP1
- Restart your Windows
- Test your computer
Method 6: Uninstall Roxio GoBack
If you are using Roxio GoBack software, you will need to uninstall software and enjoy working on your computer, without boring BSOD error. So, what is Roxio? Roxio GoBack is disk utility developed by Norton which provides recording up to 8 GB of disk changes. If you are not using Roxio GoBack software, then you need to read another method. We will show you how to remove Roxio GoBack software from your computer. We are using Windows 7 x64 and Roxio GoBack Deluxe Edition.
- Hold Windowslogo and press R
- Type appwiz.cpl and press Enter
- Select RoxioGoBackDeluxeEdition software
- Right click on Roxio GoBack Deluxe Edition software and choose Uninstall
- Follow the procedure to uninstall RoxioGoBackDeluxeEdition software
- Restart your Windows
- Test your computer

Method 7: Repair a Windows Image using DISM
For this method, we will need to use a tool named DISM (Deployment Image Servicing and Management). The DISM is command line tool which allows you to mount Windows image file (install.wim) and do image servicing including installing, uninstalling, configuring and Windows update. DISM is a part of Windows ADK (Windows Assessment and Deployment Kit) which you can download on this LINK. The procedure of repairing Windows image is the same for operating systems Windows 7 to Windows 10.
- Open Internet browser (Google Chrome, Mozilla Firefox, Edge or other)
- Open website on this LINK to download Windows ADK
- Run Windows ADK
- Choose DISM (Deployment Image Servicing and Management) and click Install
- Click Startmenu and type DeploymentImageServicingandManagement
- Right click on Deployment Image Servicing and Management and choose Run as Administrator
- Click Yes to accept running DISM as Administrator
- Type DISM /image:D:\ /cleanup-image /revertpendingactions and press Enter
- Restart your Windows
- Test your computer

Method 8: Exclude a folder from scans
The cause of the BSOD problem can be Antivirus, too. To alleviate the problems, you should exclude CodeIntegrity and catroot folders from antivirus scanning. We will show you how to exclude both folders on Windows Defender which is by default integrated into Windows 10. If you are using another antivirus, you should exclude CodeIntegrity and catroot from the scan. If you do not have experience with configuration of antiviruses, please read user manual of antivirus you are using. Terminology is the same, only user experience could be different.
- Click on Startmenu and type WindowsDefender
- Rightclick on WindowsDefender and choose RunasAdministrator
- Click Yes to confirm running Windows Defender as Administrator
- Click Settings at the top right corner
- Click Addandexclusion under Exclusions
- Click Excludeafolder
- Navigate to folder CodeIntegrity on following location C:\Windows\System32\CodeIntegrity
- Click Exclude this folder
- Click Excludeafolder, again
- Navigate to folder catroot on following location C:\Windows\System32\catroot
- Click Exclude this folder
- Check are folders added well
- Test your computer


Method 9: Remove malware
You should be careful when you are browsing the Internet. There are a lot of malware which will try to attack your computer, destroy your operating system, application or your data. BSOD occurs because malware infects your computer and make some damage. The first step you should do is scan your hard disk with Antivirus. If you are home users, you can download freeware antivirus including Avira, Avast, AVG, and others. In case you are using Windows 8 and Window 10, you can use Windows Defender, which is integrated into your operating system. After you remove all malware, you need to restart your Windows. If malware infected some files and your antivirus can not remove malware from file, files will be moved to quarantine or delete from your hard disk. If malware infects Bootcat.cache or ntdll.dll, you should remove that files and copy the same files from another computer. How you will do it? Please read first four methods. To be more secure, we are recommending you to update your operating system, applications and drivers.
Method 10: Restore your operating system from backup
A lot of users are ignoring doing a backup and restore. One of the most important steps in business, and in your home environment is to implement backup and restore strategies. There are few backup tasks you can do including creating a system image, turning on system restore and backup of your data. In the case of failure, you can revert your operating system to the previous state when everything worked without any problems. Few users solved problem with BSOD by doing system image restore.
Method 11: System restore
Sometimes after Windows update or some system changes, computer stops to work. The solution for this to revert your Windows to the previous state, before that update or system changes. One of the steps end users are ignoring is creating a system restore checkpoints. If you are not one of the users who ignored this, we are recommending you to restore your Windows to the previous state using System Restore. If you know when computer worked without problems, revert your Windows to that date. If System Restore is not enabled on your computer, then you need to read Method 9. We are recommending you to enable System Restore, by reading this LINK.
- Hold Windowslogo and press Enter
- Type rstrui.exe and press Enter
- Click Choose a different restore point and click Next
- Choose proper checkpoint and click Next
- Click Finish
- Restart your Windows and wait until Windows finished system restore
- Test your computer

Method 12: Disconnect UPS devices
Microsoft said: “If you have an uninterruptible power supply (UPS) connected to your destination computer, disconnect the serial cable before installing the Service Pack. Setup automatically attempts to detect devices that are connected to serial ports, and UPS equipment can cause issues with the detection process. You can leave your computer connected to a UPS for power as long as the UPS itself is plugged in. However, you should make sure that you have enough power for the entire installation, which can take a long time.”
Based on that we are recommending you to disconnect UPS device from your server machine or client machines, install SP1 (method 5) and eliminate BSOD issue. Few users solved issue on their server by using this method.
Method 13: Change CD or DVD
Sometimes, you can not install an operating system from CD or DVD, because you are using scratched CD or DVD. We are recommending you to burn another CD or DVD, or to burn operating system to USB flash drive. If this did not solve the problem, next step is to change cables and CD or DVD disk. If you are using ATA drive (old computers) you should buy ATA CD or DVD drive, and if you are using SATA drive, you should buy SATA CD or DVD drive. Please note that you can not install ATA CD or DVD drive to SATA port, and vice versa.
Method 14: CHKDSK /R
When your HDD is not working good because of file corruption or bad sectors, you should do a check disk. Check disk is a utility which will help you to find bad sectors, and fix them in case there are fixable. You will do it through Command prompt.
- Click on Start menu and type Command prompt
- Right click on Command prompt and choose Run as Administration
- Click Yes to confirm running Command prompt as Administrator
- Type chdksk /r and press Enter. Because you want to check system partition you will need to restart your computer.
- Type Y and press Enter to accept resetting your computer
- Restart your Windows
- Please wait until Windows finished repairing file system on computer. There are 5 stages which should be finished.
- Test your computer


Method 15. Change HDD or SSD
When there is no problem with software, next step will be changing hardware components. HDDs are SSDs are storing our operating systems, drivers, application, and data. When software troubleshooting is not giving a good result, next step should be changing hardware components. You will need to change your HDD or SSD. Be careful when purchasing HDD. There are two different types of HDDs, ATA and SATA. You can not install SATA HDD to ATA port, and vice versa. Also, there are different SATA standards, including SATA I, SATA II, SATA III and SATA 3.1. Different standards provide different transfer rates. If you are using motherboard which supports only SATA I, you do not need to buy HDD SATA III, because HDD SATA III will work as SATA I HDD, because of port limitation. All SSDs are using SATA connectors. Some of HDD’s and SSD’s manufacturer are WD, Seagate, Samsung, Kingston, Adata, and others.
Method 16: Change RAM module
Sometimes because of faulty RAM, Windows’s or application’s instructions can not be stored in RAM address pool, and because of that, you will see BSOD on your monitor. Few users solved their problem by changing RAM module. How will you do it? If you are using more RAM modules, you should try to unplug one by one and test is there a problem with RAM module. Also, if you are planning to purchase another RAM module, you should check which generation of RAM memory is using your motherboard. As always, we are recommending you to check the technical documentation of your motherboard and based on that you can purchase proper RAM module for your computer or notebook. We will show you how to check which RAM module is using notebook HP 2000-2b09WM.
- Open Internetbrowser (Google Chrome, Mozilla Firefox, Edge or other)
- Open HP’s website on this LINK. We will open HP Support site because we are using HP notebook
- Navigate to Memory section. In our example. HP 2000 is using DDR3 RAM, and there are 2 memory slots available, for maximum 8 GB RAM.
- Purchase RAM module
- Install RAM module
- Test your computer

SOLUTION FOR SMARTPHONES
Method 1: Reset Windows Phone
If you are using Windows Phone, you can see PROCESS1 INITIALIZATION FAILED. It is not weird, because Windows Phone is using Windows 8, Windows 8.1 or Windows 10 operating system. You tried to update your Windows Phone, and update process stopped because of BSOD. What should you do?
- Shutdown your phone
- Hold Volume down and Power button
- Finish updating your smartphone


