- Ubuntu Documentation
- Introduction
- Back Up Your Data
- Have a Windows recovery CD/DVD available
- Getting Recovery Media
- Install Ubuntu after Windows
- Install Ubuntu
- Automatic partition resizing (not recommended)
- Manual partitioning
- Master Boot Record and Boot Manager
- Installing Windows After Ubuntu
- Recovering GRUB after reinstalling Windows
- Master Boot Record backup and replacement
- Also see
- How to Dual Boot Windows 10 and Linux Starting with Windows or Linux
- Dual Boot Linux with Windows 10 – Linux Installed First
- Create Bootable Windows 10 Install Media Using Unetbootin
- Create Bootable Windows 10 Install Media Using Brasero
- Dual Boot Linux with Windows 10 – Windows Installed First
Ubuntu Documentation
Introduction
This page describes how to set up your computer in order to dual boot Ubuntu and Windows. While there are some benefits to dual-booting (e.g. better performance for a native install), it is not recommended. Instead, it is best to do a native install of Ubuntu, and then virtualize the other operating system.
Back Up Your Data
Although this may seem obvious, it is important to back up your files to an external backup medium before attempting a dual-boot installation (or any other hard drive manipulation), in case your hard drive becomes corrupted during the process. External hard drives, USB flash drives, and multiple DVDs or CDs are all useful for this purpose.
Have a Windows recovery CD/DVD available
Some computer manufacturers that pre-install Windows provide a Windows recovery/re-installation CD or DVD with the computer. However, many companies no longer ship a physical disc but instead create a hidden partition on the hard drive in which the recovery-disk information is stored. A utility is then usually provided which allows the user to burn a recovery/re-installation CD or DVD from it. If you are buying a new computer and intend on dual-booting, make sure you have (or can make) a physical Windows recovery/re-installation CD or DVD. If neither a CD/DVD nor a recovery partition/burning utility is provided by your computer manufacturer, you may need to contact your vendor and ask for a CD or DVD (to which you are normally entitled under the Windows EULA).
Getting Recovery Media
You may need to request a physical recovery/re-installation CD or DVD directly from your computer manufacturer. See WindowsRecoveryCd.
Once you have created a physical backup disc from a restore-image partition on the hard-drive, the restore-image partition can either be removed or left in place. Ubuntu can be installed with it intact without problems.
Install Ubuntu after Windows
A Windows OS should be installed first, because its bootloader is very particular and the installer tends to overwrite the entire hard drive, wiping out any data stored on it. If Windows isn’t already installed, install it first. If you are able to partition the drive prior to installing Windows, leave space for Ubuntu during the initial partitioning process. Then you won’t have to resize your NTFS partition to make room for Ubuntu later, saving a bit of time.
When a Windows installation already occupies the entire hard drive, its partition needs to be shrunk, creating free space for the Ubuntu partition. You can do this during the Ubuntu installation procedure, or you can see How to Resize Windows Partitions for other options.
If you have resized a Windows 7 or Vista partition and cannot boot up Windows, you can use the instructions from WindowsRecovery to fix it.
Install Ubuntu
Download an Ubuntu LiveCD image (.iso) from Ubuntu Downloads and burn it to a disc (see BurningIsoHowto).
Automatic partition resizing (not recommended)
- Choose the first option, which should say «Install them side by side, choosing between them each startup».
- Specify the size of the new partition by dragging the slider at the bottom of the window.
- Click on «Forward».
Manual partitioning
- Choose «Manually edit partition table».
- Listed will be your current partitions.
- Select the partition you want to resize and press Enter.
- Select «Size:», press Enter.
- Select Yes, press Enter.
- Type in a new size in gigabytes for your partition, it’s recommended you free up at least 10 GB of free space for your Ubuntu install. Press Enter when happy with your changes. It may take some time to apply the changes.
Create a swap partition of at least your amount of RAM (if you don’t know, 8000 MB is a good value).
Create a partition for your Ubuntu installation.
Create other partitions if necessary: see DiskSpace
Master Boot Record and Boot Manager
GRUB2 is the boot manager installed in Ubuntu by default. GRUB2 is an open source boot manager that install the main parts of the boot loaders inside Ubuntu. This means Ubuntu is independent and avoids any need for writing to other operating systems. To accomplish this, the only thing in your computer outside of Ubuntu that needs to be changed is a small code in the MBR (Master Boot Record) of the first hard disk, or the EFI partition. The boot code is changed to point to the boot loader in Ubuntu. You will be presented with a list of operating systems and you can choose one to boot. If you do nothing the first option will boot after a ten second countdown. If you select Windows then GRUB or LILO will chain-load Windows for you at the Windows boot sector, which is the first sector of the Windows partition.
Windows Vista no longer utilizes boot.ini, ntdetect.com, and ntldr when booting. Instead, Vista stores all data for its new boot manager in a boot folder. Windows Vista ships with an command line utility called bcdedit.exe, which requires administrator credentials to use. You may want to read http://go.microsoft.com/fwlink/?LinkId=112156 about it.
Using a command line utility always has its learning curve, so a more productive and better job can be done with a free utility called EasyBCD, developed and mastered during the times of Vista Beta. EasyBCD is very user friendly and many Vista users highly recommend it.
Installing Windows After Ubuntu
There are two different approaches:
Recovering GRUB after reinstalling Windows
Please refer to the Reinstalling GRUB2 guide.
Master Boot Record backup and replacement
This method does not work for computers with UEFI boot. In consequence, it won’t work for pre-installed Windows 8 and some pre-installed with Windows 7.
Back-up the existing MBR, install Windows, replace your backup overwriting the Windows boot code:
- Create an NTFS partition for Windows (using fdisk, GParted or whatever tool you are familiar with)
Backup the MBR e.g. dd if=/dev/sda of=/mbr.bin bs=446 count=1
Install Windows
Boot into a LiveCD
Mount your root partition in the LiveCD
Restore the MBR e.g. dd if=/media/sda/mbr.bin of=/dev/sda bs=446 count=1
Also see
MultiOSBoot — How to boot more than two operating systems from a single hard drive.
WindowsDualBoot (последним исправлял пользователь tobefree 2015-06-29 08:09:22)
The material on this wiki is available under a free license, see Copyright / License for details
You can contribute to this wiki, see Wiki Guide for details
Источник
How to Dual Boot Windows 10 and Linux Starting with Windows or Linux


Running Windows 10 and Linux on the same computer is easier than ever. Here’s how to do it.
A computer that boots both Windows 10 and Linux can easily be the best of both worlds. Having easy access to either of the operating systems lets you enjoy the benefits of both. You can hone your Linux skills and enjoy the free software only available for Linux platforms. Or, you can switch back to Windows 10 to use apps like Photoshop, AutoCAD or Microsoft Office. The beauty of dual booting is that it lets each operating system take full advantage of the hardware resources of your computer. While virtual machines and the Windows Subsystem for Linux can give you a taste of the Linux experience, dual booting lets you tap its full potential.
The good news is that Windows 10 and Linux live in harmony better than ever these days. Dual booting Windows 10 and Linux used to be a precarious process that could wreck your Windows installation, your Linux installation or both. While the process isn’t quite a smooth as dual booting macOS and Windows with Boot Camp, it comes close. In this article, we’ll show you how to safely install Windows 10 and Linux on the same hard drive. It doesn’t matter if you’re starting with Linux or starting with Windows—dual booting is easy to set up either way.
Dual Boot Linux with Windows 10 – Linux Installed First
Let’s start with the (slightly) harder way first; you already have a copy Linux installed and you want to install Windows on a partition. The first step is to create the partition where Windows 10 will be installed. We have covered how to create partitions in Linux, so, start by reviewing our article on how to do that.
Once you have your partition set up, you will need to purchase Windows 10, download the ISO file then create a bootable copy. Creating a bootable copy of Windows 10 on Linux can be done using the free Unetbootin (USB thumb drive) or Brasero software if you are installing from a DVD.
Create Bootable Windows 10 Install Media Using Unetbootin
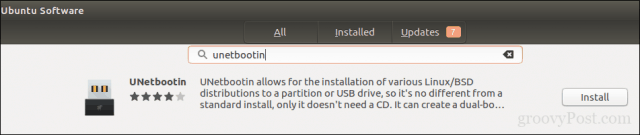
Unetbootin can be downloaded from the Software Center in Ubuntu. Once you have it up and running, launch it. Make sure you are using a thumb drive with at least 8 GBs of free space.
Select the Disk Image radio box, click the browse button (represented by an ellipsis …), browse to the ISO file then click Open. Chose the medium from the Type list box—in this case, your USB drive. Click on the drive list box then select your USB thumb drive.
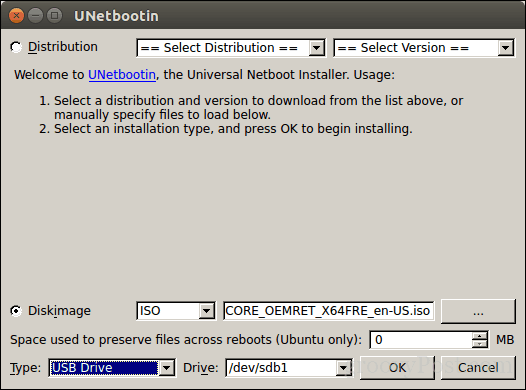
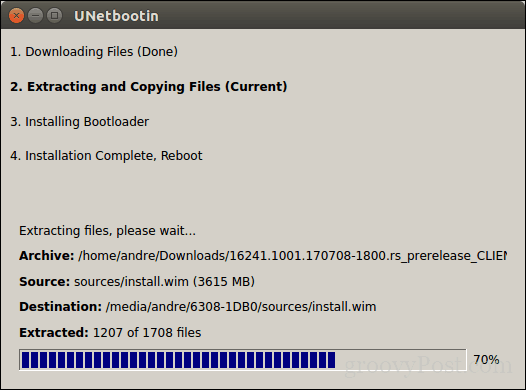
Click OK, then wait while the bootable copy is created.
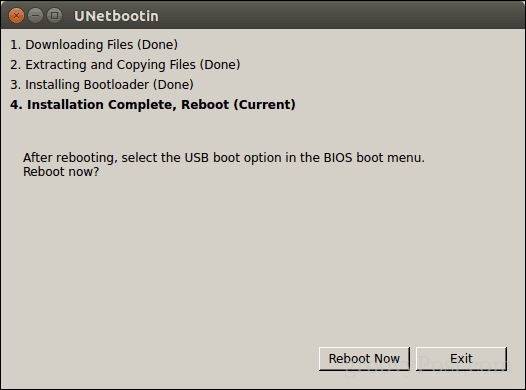
When complete, click Exit.
Create Bootable Windows 10 Install Media Using Brasero
If you already made a bootable USB with Unetbootin, you can skip this part. If you are still using an old school system with a DVD drive, you can use the Brasero DVD Burning software, which you can download from the Software Center also. Please keep in mind, Windows 10 ISO files are getting larger beyond the standard 4.7 GB DVDs. So, in some cases, it’s best you use 8.5 GB dual-layer DVDs if supported by your drive. If you can’t, then it’s best you use a USB thumb drive.
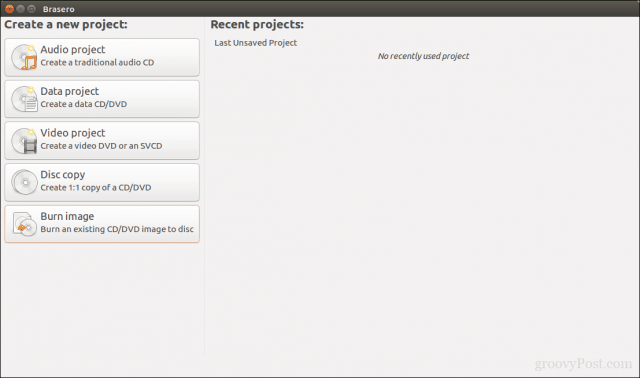
In Brasero, click Burn Image.
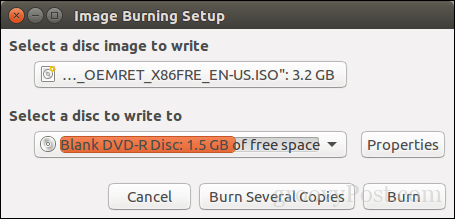
Select your disc image, make sure a blank DVD disc is inserted then click Burn.
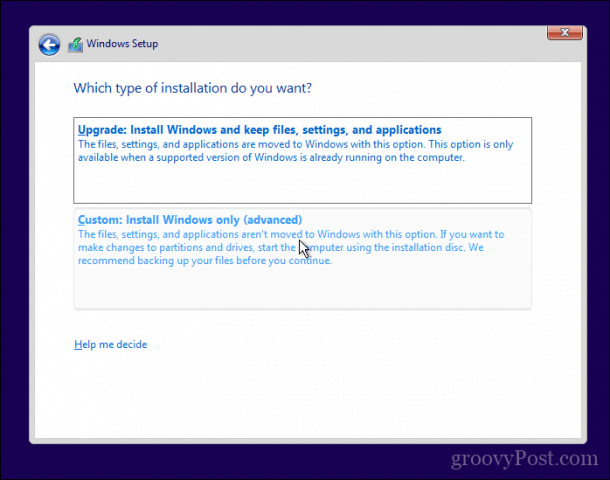
After preparing your install media, insert it or connect it. Reboot your computer, then configure your BIOS to boot from the drive. Windows 10 will boot into setup as it normally does. After you arrive at the setup screen, click Custom: Install Windows only (advanced).
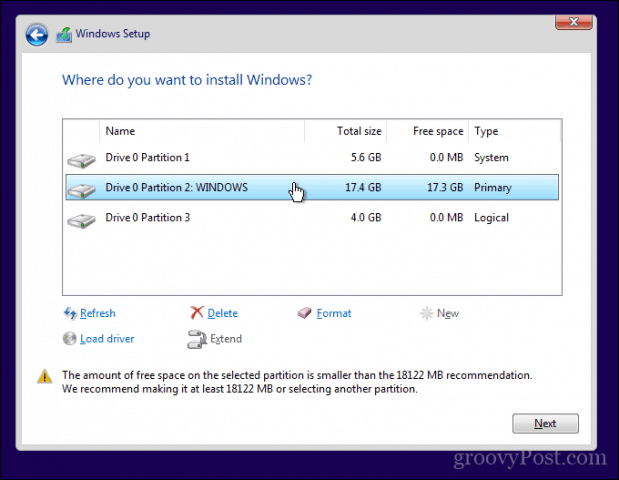
Make sure you select the right partition; don’t wipe out your Linux installation. Click Next then wait while Windows 10 Setup copies files to the drive. Your computer will be rebooted several times.
When setup is complete, follow the instructions to complete the out of box experience.
After that’s complete, you might notice the obvious—there is no way to boot into Linux anymore. Here is how you fix that. Download a free utility called EasyBCD from Neosmart Technologies. Proceed to install EasyBCD then launch it. Select the Linux/BSD tab. Click in the type list box, select Ubuntu; enter the name of the Linux distribution, choose automatically locate and load then click Add Entry. Reboot your computer.
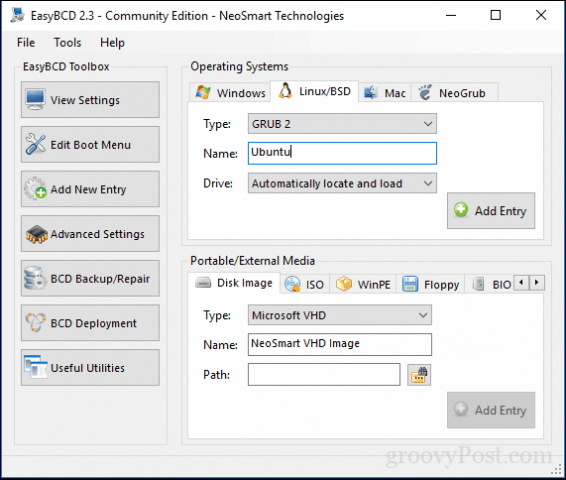
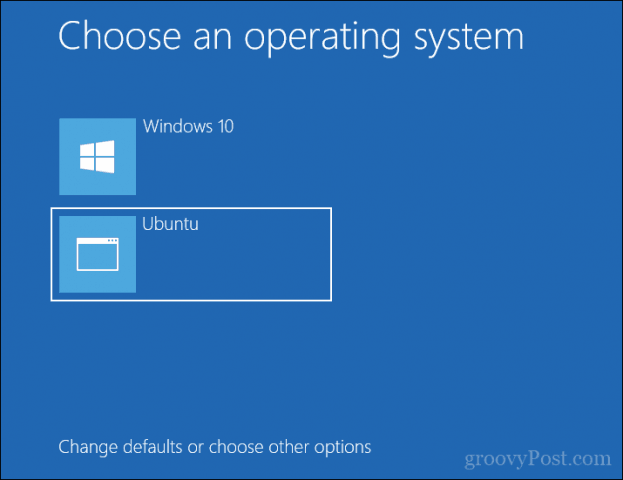
You will now see a boot entry for Linux on the Windows graphical boot manager.
Dual Boot Linux with Windows 10 – Windows Installed First
For many users, Windows 10 installed first will be the likely configuration. In fact, this is the ideal way to dual boot Windows and Linux. Again, I will be using the Ubuntu Linux distribution. You can download the Ubuntu Linux ISO image from Canonical’s web page then create a bootable copy using Unetbootin for Windows or burn to a blank DVD using disc image in Windows 10.
After creating your install media, configure your BIOS to boot from it. Ubuntu’s installation wizard intelligently detects existing Windows installations. It will ask you if you would like to install Ubuntu alongside Windows.
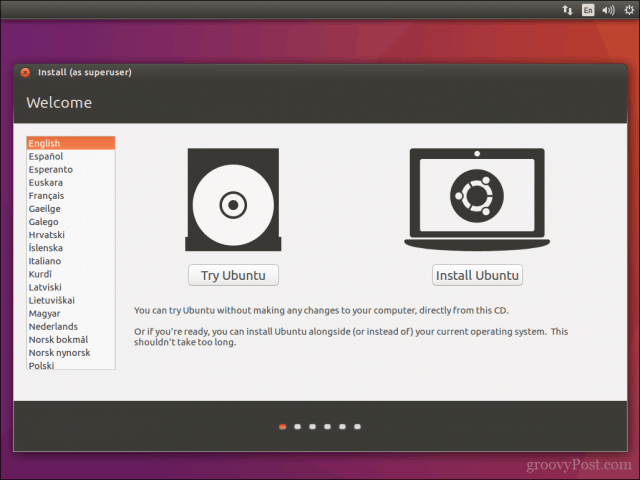
At the Ubuntu install screen, click Install Ubuntu.
Choose whether you want to download and install updates and third-party drivers and codecs then click Continue.

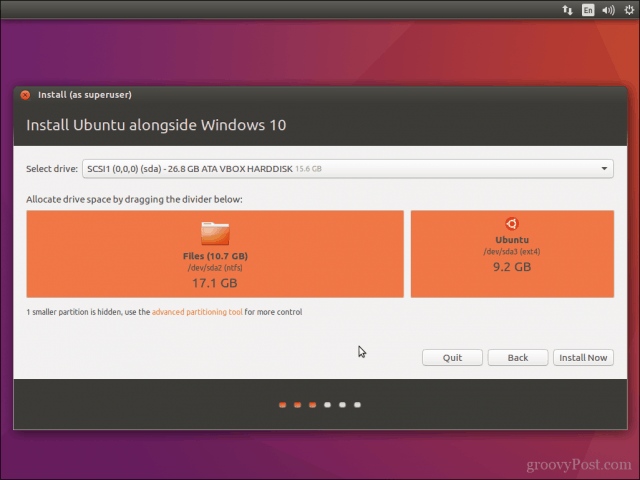
Select the option Install Ubuntu alongside Windows 10 then click Continue.
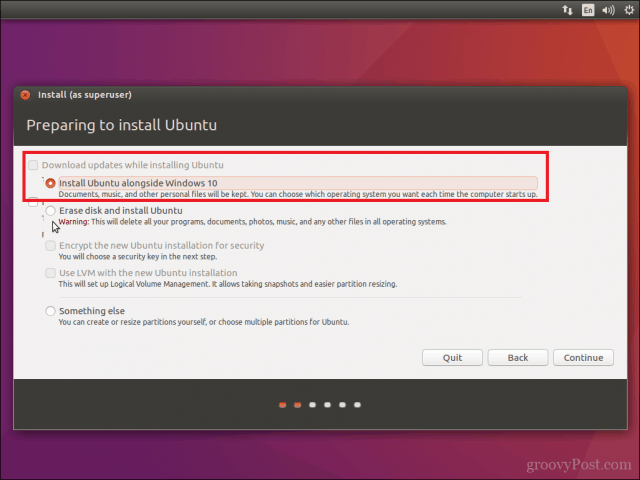
Ubuntu’s installer will set a default allocation of space for the installation. If you have enough space, you can resize the partition by placing your mouse between the divider then drag it left or right to make adjustments. Once you are satisfied with the allocated amount for your Ubuntu installation, click Install Now.
Click Continue to confirm changes.
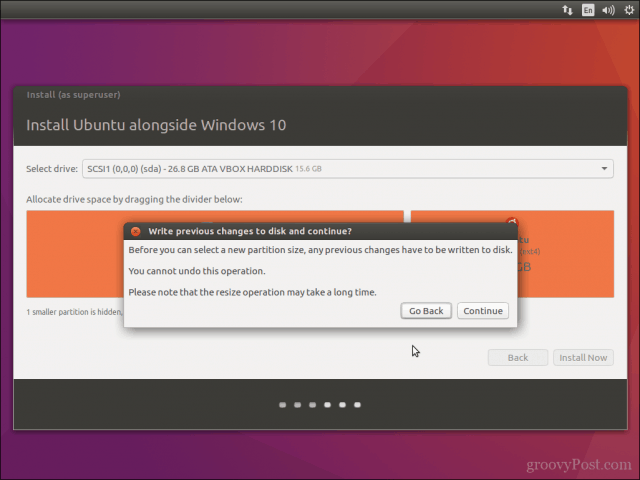
Click Continue again.
Enter your time zone then click Continue.

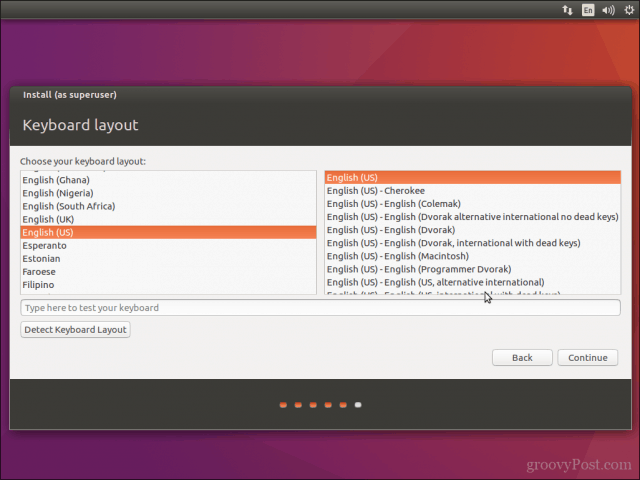
Select your keyboard layout, click Continue.
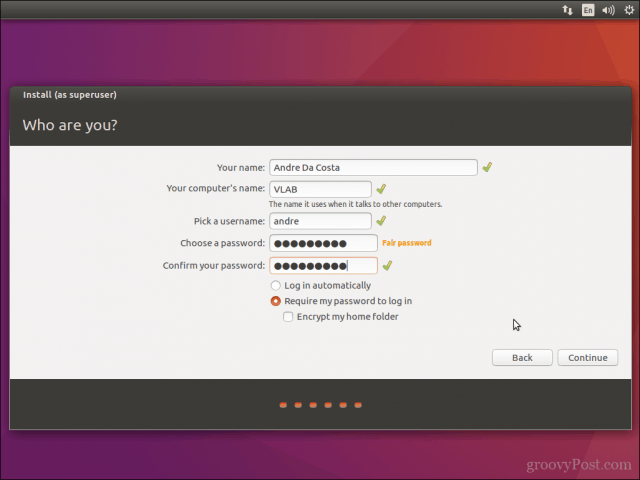
Create your user account by providing your full name, computer name, login name, and password. Choose whether you want to log in automatically or be prompted for a password. You can also encrypt your home folder for extra security. Click Continue.
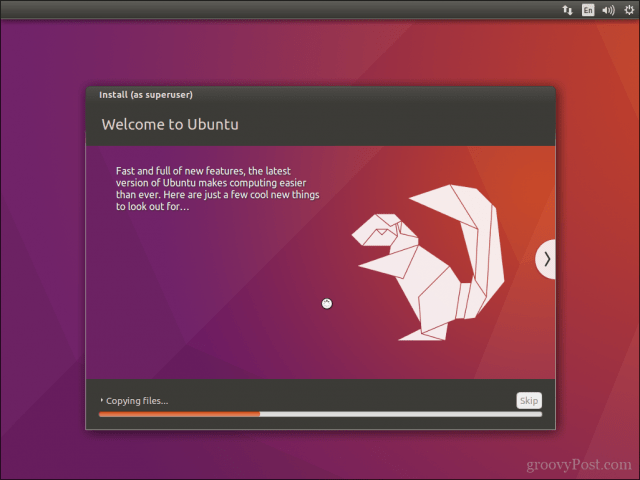
Wait while Ubuntu copies files.
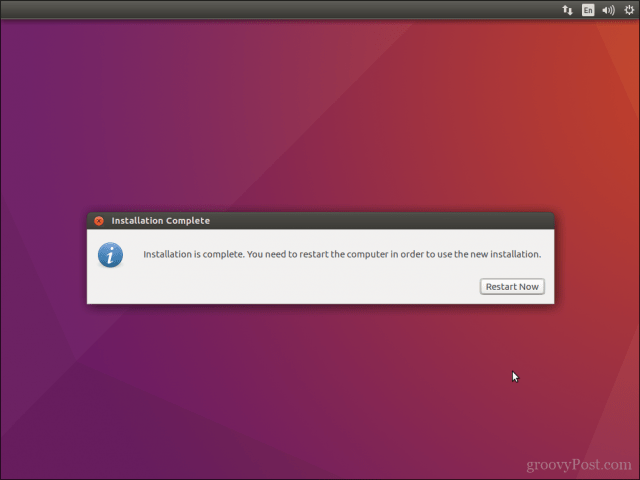
When complete, click Restart Now.
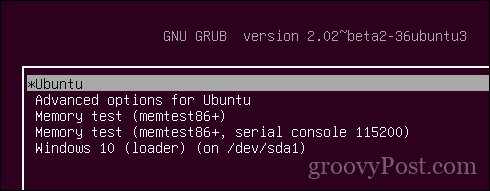
Ubuntu will add a boot entry for Windows 10 to the GRUB boot manager, which you can select using the up or down arrow then hitting Enter.
That’s it, Windows 10 and Ubuntu is now set up on your computer.
Let us know what you think. If you have done this before, share some of your tips with us. By the way, what’s your favorite distro?
Источник


