- Восстановление загрузчика Windows 10 через «Командную строку»
- Способ 1: Автоматическое восстановление
- Способ 2: Ручное восстановление загрузчика
- Способ 3: Ручное альтернативное восстановление
- Способ 4: Восстановление после удаления Linux
- Windows 7 Boot Repair via Command Prompt (5 Ways and 2 Tips included)
- What are the boot sector and master boot record?
- Five efficient ways to run Windows 7 boot repair
- Way 1: Startup Repair with Windows installation media
- Way 2: Windows 7 boot repair from Command Prompt
- Way 3: Repair boot sector in Windows 7
- Way 4: Rename and rebuild BCD via Command Prompt
- Way 5: Windows 7 boot repair without disk
- Extra tips for Windows 7 boot repair
- Summary
Восстановление загрузчика Windows 10 через «Командную строку»
Способ 1: Автоматическое восстановление
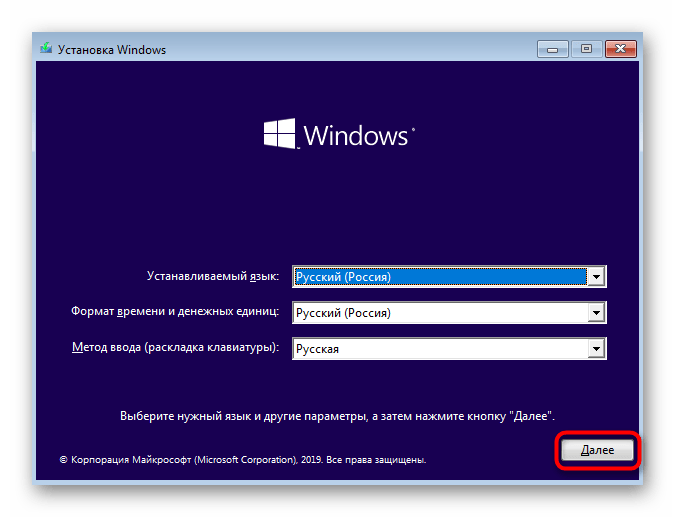
Первый метод никак не связан с «Командной строкой», поскольку восстановление загрузчика происходит в автоматическом режиме, но запускается оно через тот же установочный образ Windows 10, о создании которого мы поговорим немного позже. Поэтому мы решили все же рассказать о данном варианте более детально, чтобы упростить вам процесс восстановления, если вы не знали о наличии такой функции. В том случае, когда она уже была опробована и не принесла никаких результатов, можете сразу переходить ко второму способу.
- Для реализации этого и всех последующих способов придется записать установщик Windows 10 на флешку, чтобы после загрузить оснастку восстановления системы. Более детально об этом процессе читайте в другом материале на нашем сайте, перейдя по указанной далее ссылке.
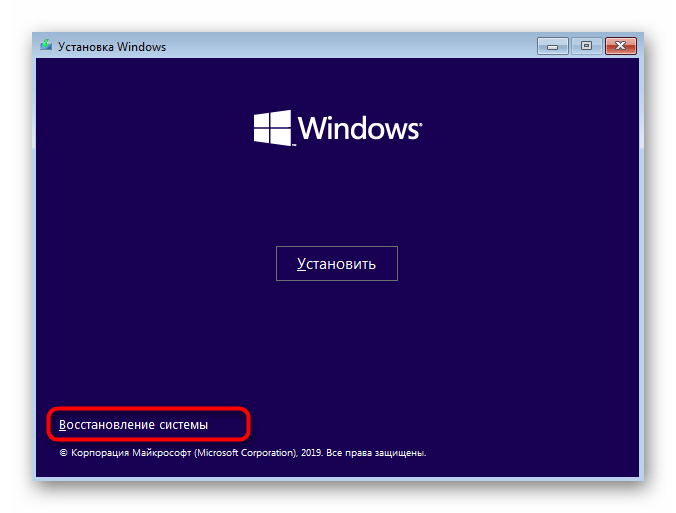
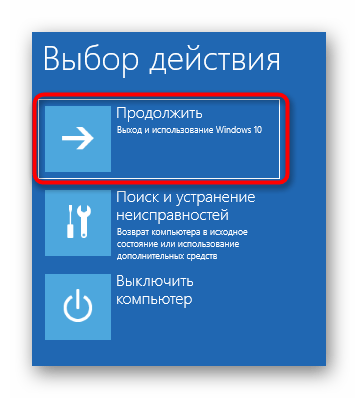
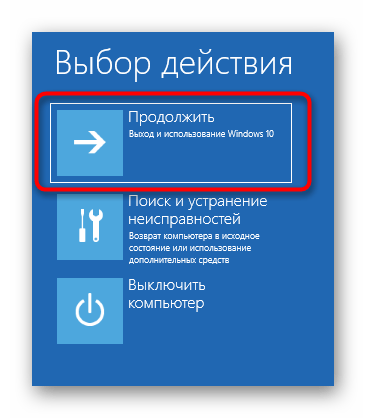
Перейдите в раздел «Восстановление системы», щелкнув по соответствующей кнопке слева внизу.

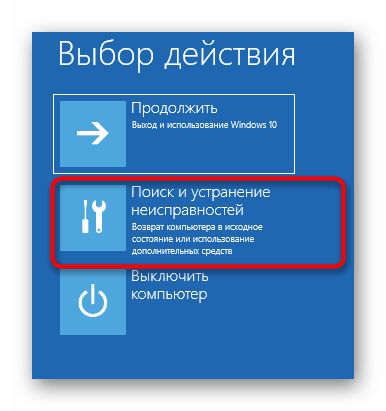
Здесь вас интересует пункт «Поиск и устранение неисправностей».

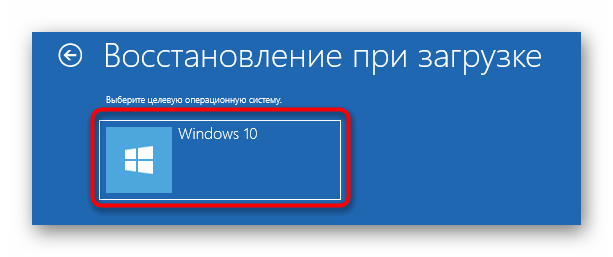
Укажите целевую операционную систему, чтобы запустить этот процесс.
Дождитесь окончания диагностики компьютера. Если какие-то ошибки будут найдены и исправлены, вы получите соответствующее уведомление.
Этот метод далеко не всегда оказывается действенным, однако он самый простой в реализации, поэтому мы и решили ознакомить вас с ним перед тем, как перейти к использованию «Командной строки» для восстановления Виндовс 10. Если произведенные действия не принесли никакого результата, стоит ознакомиться с одним из следующих вариантов.
Способ 2: Ручное восстановление загрузчика
Принцип ручного восстановления заключается в перезаписи основных файлов, отвечающих за работоспособность загрузчика. Для этого придется указать диск с операционной системой при запуске специализированной утилиты.
- При запуске образа с ОС снова перейдите в раздел «Восстановление системы».
Здесь требуется нажать на ту же плитку «Поиск и устранение неисправностей».

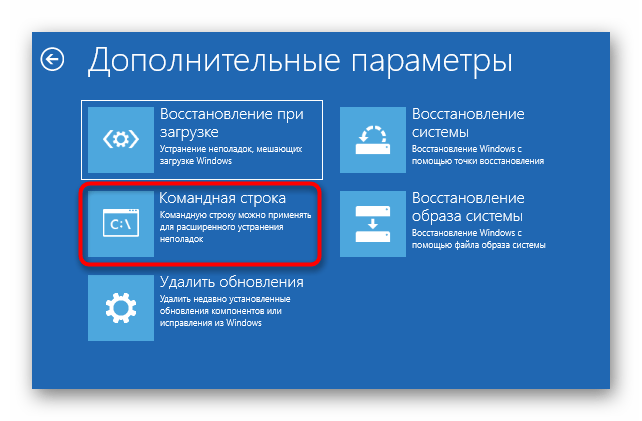
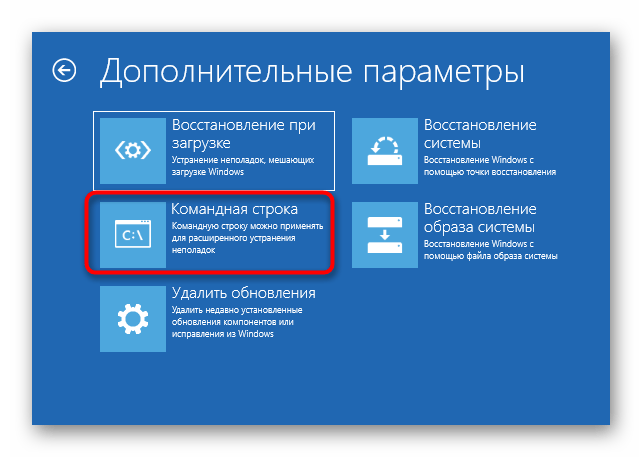
Запустите отсюда «Командную строку», кликнув по соответствующей надписи.
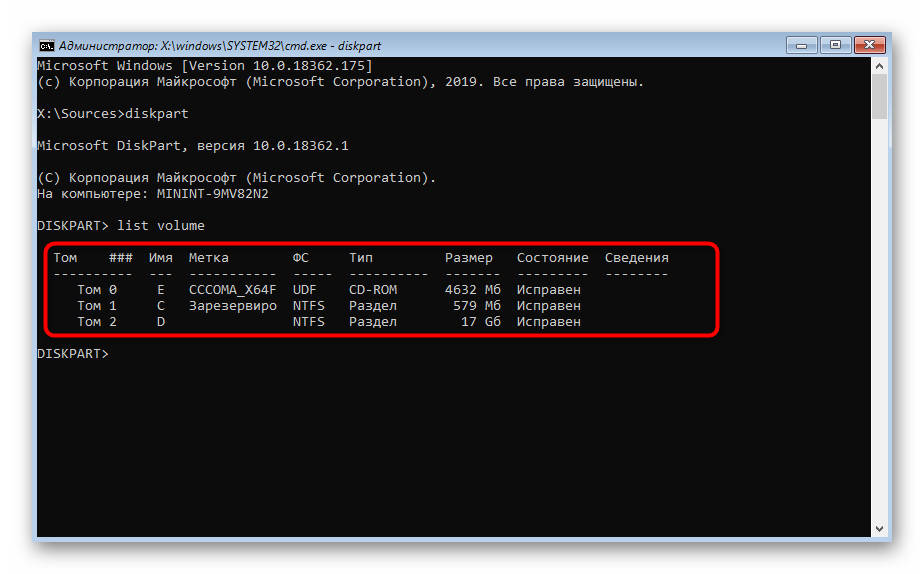
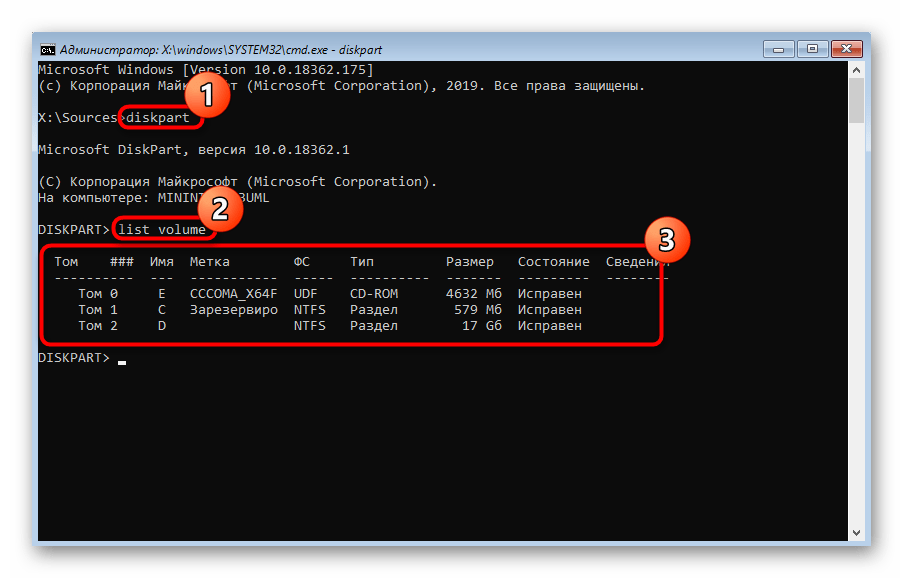
Сейчас потребуется запустить оснастку diskpart, чтобы узнать информацию о дисках. Введите название этой утилиты в строке и нажмите на Enter.

Отобразим список подключенных разделов через list volume .

Теперь изучите отобразившиеся сведения. Здесь понадобится запомнить имя того логического тома, который выступает основным для хранения файлов Windows 10.
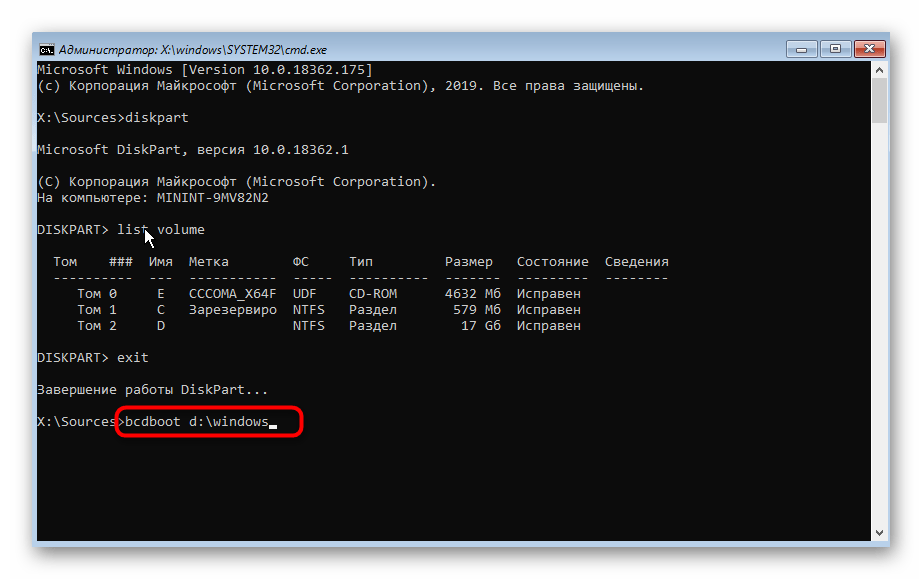
На этом взаимодействие с diskpart закончено, следует покинуть ее, введя exit .
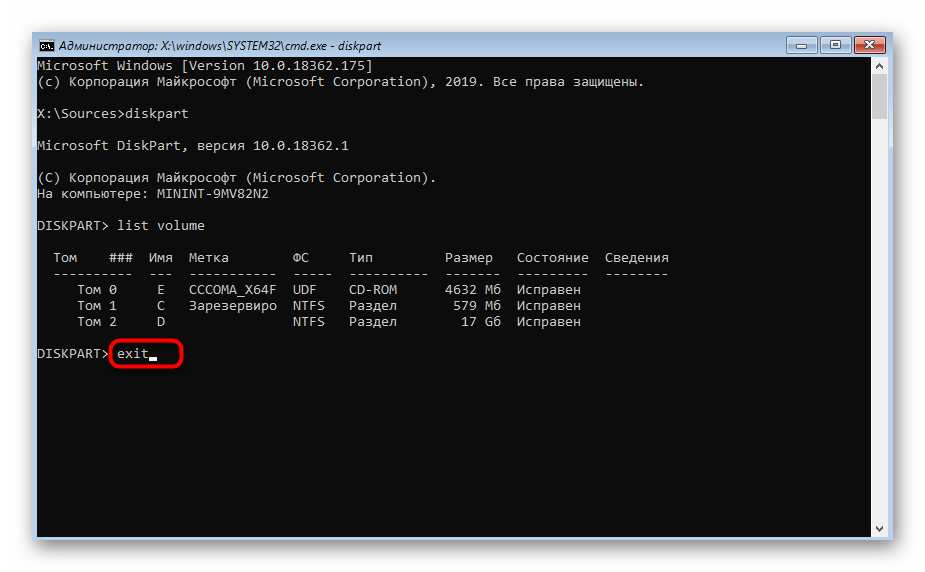
Используйте команду bcdboot c:\windows , заменив букву диска на определенную ранее, чтобы восстановить загрузчик.
Вы будете уведомлены о создании специальных файлов, отвечающих за дальнейшую загрузку ОС. Это значит, что все шаги были выполнены правильно.

Закройте консоль и продолжите стандартную загрузку ОС.

Этот метод не такой сложный в исполнении, но является довольно эффективным: в большинстве ситуаций после его выполнения загрузчик ОС успешно восстанавливается и со входом в Виндовс не возникает никаких проблем. Если решить проблему так и не удалось, советуем обратить внимание на альтернативный вариант.
Способ 3: Ручное альтернативное восстановление
Второй вариант заключается в использовании скрытого тома, который резервируется системой и задействуется в качестве загрузчика. Сейчас следует обнаружить его и произвести определенные манипуляции. Эта операция так же осуществляется в режиме восстановления, поэтому предварительно загрузитесь с созданного ранее носителя.
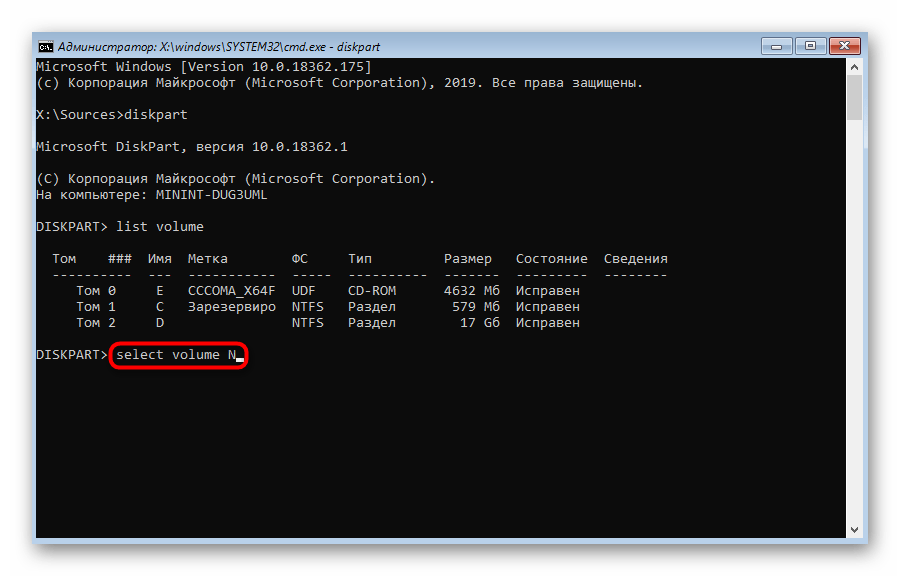
- После этого снова запустите оснастку diskpart , выведите список разделов через list volume и отыщите скрытый том, размер которого варьируется от 99 до 600 мегабайт, в зависимости от используемого загрузчика. В случае с MBR (BIOS) он будет иметь файловую систему NTFS, а при GPT (UEFI) — FAT32.
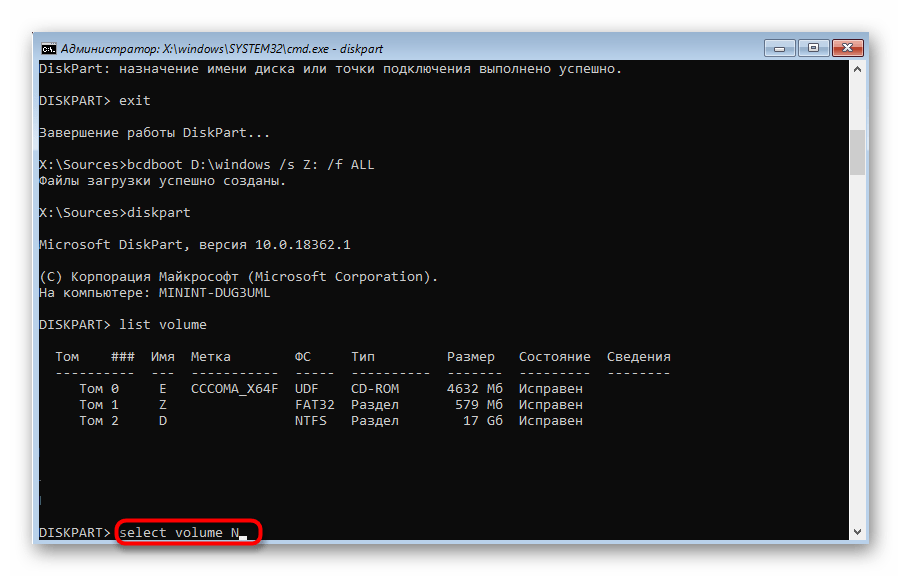
Не покидайте текущую оснастку и здесь же введите select volume N , где вместо N укажите номер определенного ранее раздела.
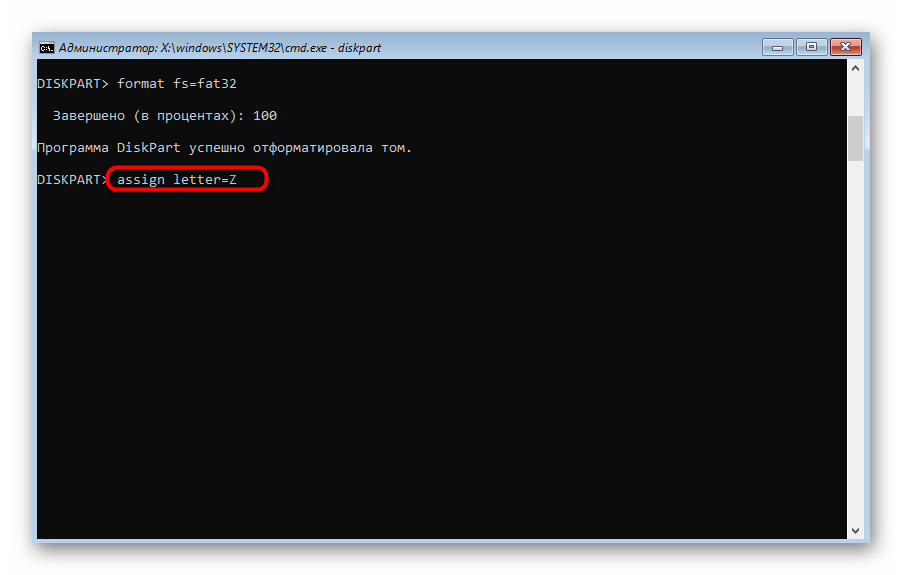
Форматируйте его в FAT32 или в NTFS, отталкиваясь от того, какая файловая система установлена на текущий момент.

Ожидайте окончания этой процедуры — она может занять несколько минут.

Присвойте ему букву Z, написав assign letter=Z .
Закройте текущую оснастку через exit .
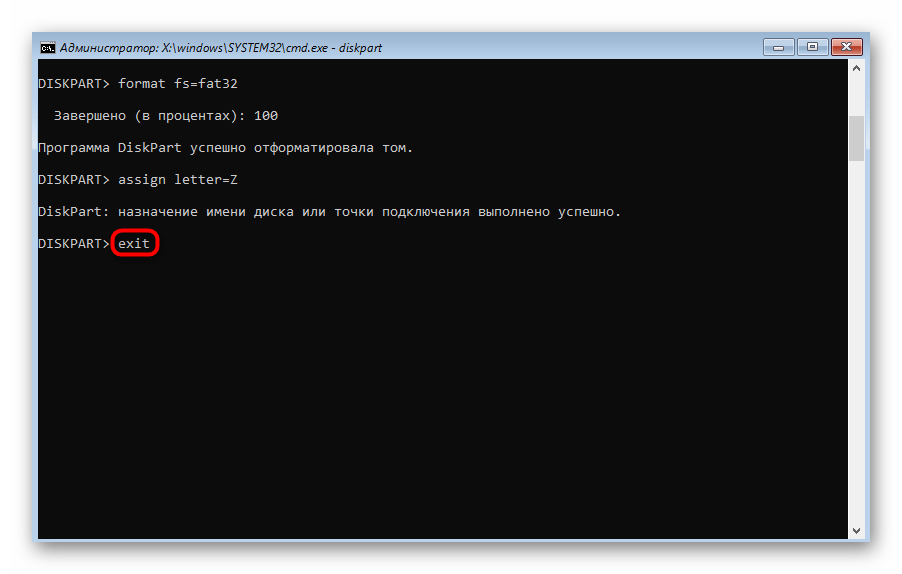
Для восстановления файлов загрузчика используйте команду bcdboot D:\Windows /s Z: /f ALL , заменив D на букву раздела с ОС.

Снова введите diskpart .
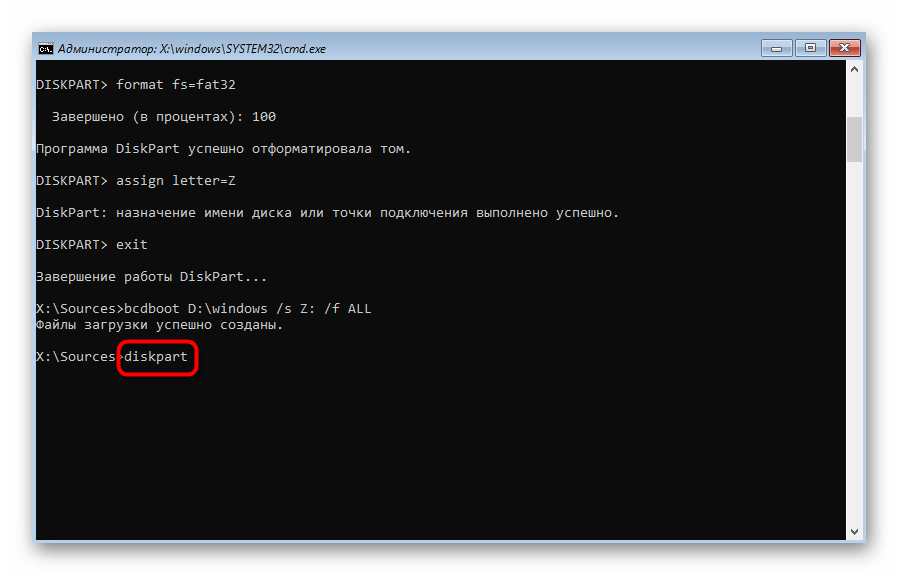
Откройте список дисков через list volume .
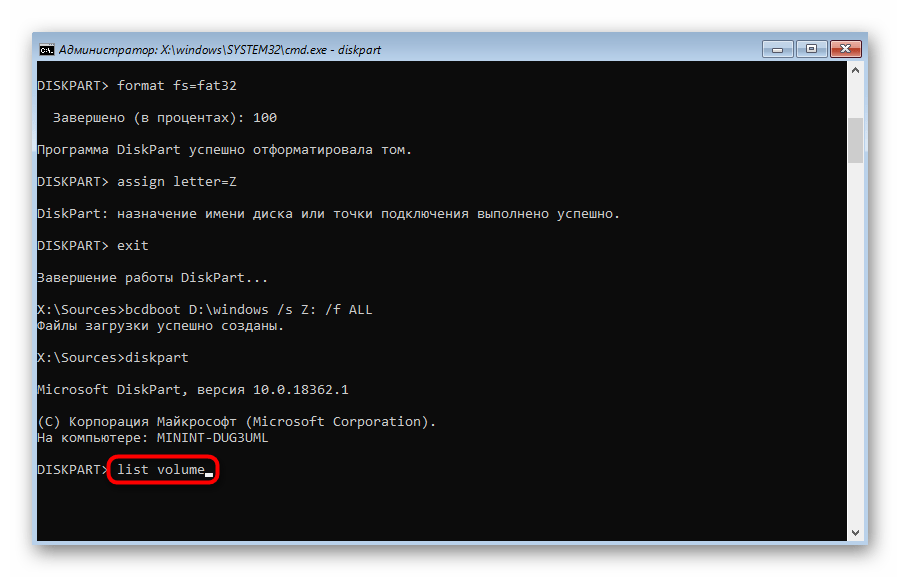
Выберите диск select volume N (тот, которому была присвоена буква Z).
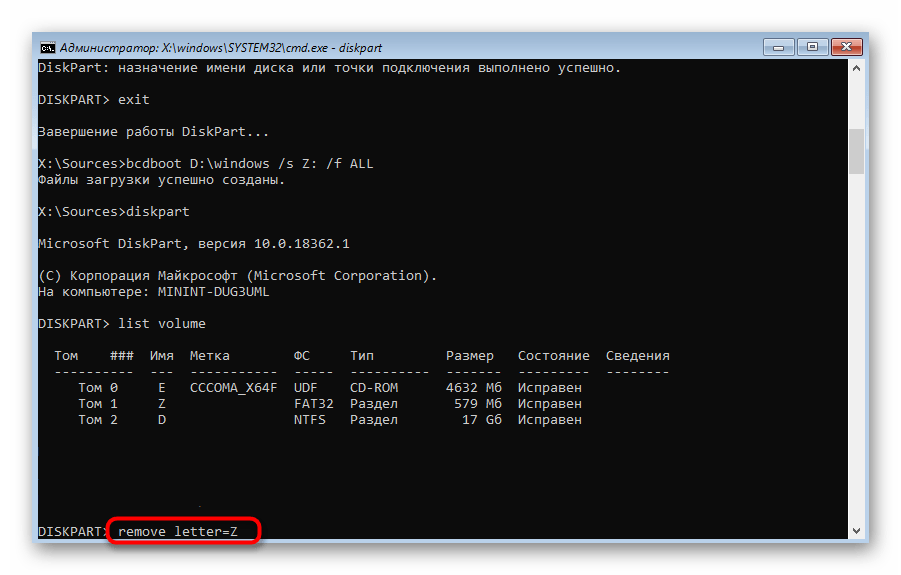
Удалите букву через remove letter=Z , чтобы в будущем она не мешала взаимодействию с системой.
Перезагрузите ПК, чтобы проверить результативность.
Вы можете быть уверены в том, что один из приведенных выше методов точно поможет восстановить загрузчик Windows 10, если, конечно, проблема с загрузкой не была вызвана другими проблемами. В таких ситуациях мы рекомендуем изучить дополнительные материалы по теме исправления подобных неполадок, воспользовавшись указанной ниже ссылкой.
Способ 4: Восстановление после удаления Linux
Последний способ, на который мы хотим обратить внимание в рамках сегодняшней статьи, связан с восстановлением загрузчика Windows 10 после удаления стоящего рядом дистрибутива Linux. Как известно, в таких ситуациях в роли основного загрузчика выступает GRUB, но потом он удаляется, что приводит к поломкам компонентов Виндовс. Решается такая задача не так, как это было описано в способах выше, а намного проще.
- В режиме восстановления, переход в который был осуществлен через установочный образ операционной системы, запустите «Командную строку».
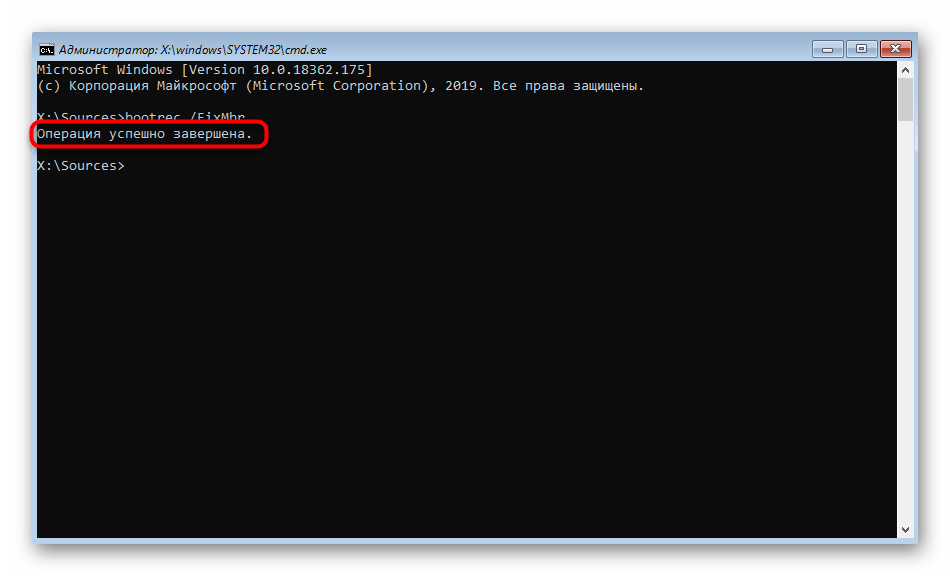
Здесь введите bootrec /FixMbr и нажмите на Enter.

Вы будете уведомлены о том, что операция выполнена успешно.
Закройте консоль и перезагрузите компьютер, чтобы начать корректное взаимодействие с системой.
Это были все способы восстановления загрузчика Windows 10 через «Командную строку». Как видите, каждый пользователь сможет найти оптимальный для себя вариант или воспользоваться альтернативой, если выбранный метод не принес никакого результата.
Windows 7 Boot Repair via Command Prompt (5 Ways and 2 Tips included)
Want to fix Windows 7 boot problems? You can see this article and learn Windows 7 boot repair via Command Prompt.

By Ivy  / Last Updated October 9, 2020
If you have Windows 7 boot problems, the boot sector or master boot record on your system partition may be damaged, corrupted, or has missing files. And you will receive an error message like the following before Windows actually begins to load.
Missing operating system
Reboot and select proper boot device
Invalid partition table
Bootmgr is missing
FATAL: No bootable medium found! System halted.
Then, what are the boot sector and master boot record exactly?
What are the boot sector and master boot record?
The boot sector is a small section at the beginning of a hard drive. It’s created when you format the hard drive.
The boot sector contains some code and data that helps BIOS hand off the startup process to Windows. It also hosts the Master Boot Record (MBR), which contains the disk signature, partition table for the disk, and a small bit of code called the master boot code.
When a PC starts, the BIOS will load the master boot code into the PC’s RAM. Then it will scan the partition table, determine the active partition, load a copy of the boot sector into the PC’s RAM, and hand off the startup process.
If you backup MBR in advance, you can use it to restore your computer and make it work as normal. If not, you can see the next part and learn to repair boot with command prompt in Windows 7.
Five efficient ways to run Windows 7 boot repair
Way 1: Startup Repair with Windows installation media
If your boot sector or MBR runs into problems, you cannot start Windows normally. That’s to say, you need a bootable media to boot your computer. You can choose to create the Windows installation media or create a repair disk on a working computer.
Start with the detailed steps:
Step 1. Create Windows 7 installation media on a working computer. You can download ISO image files from Microsoft Store and burn the ISO image files to a USB drive or CD/DVD via Windows 7 USB DVD download tool.
Step 2. Plug the USB drive into your computer.
Step 3. Start your computer and press the corresponding key to go to BIOS.
Step 4. Set boot priority to your drive in the Boot option.
Step 5. Restart your computer and press any key to boot from it.
Step 6. Wait for Windows 7 installation files to load.
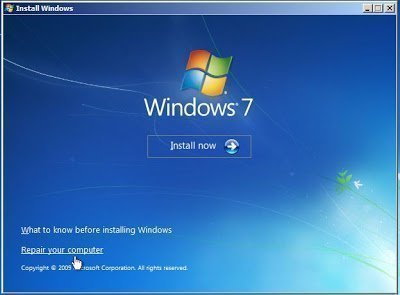
Step 7. Click Repair your computer in the initial Windows installation screen.
Step 8. Select the operating system in the window and click Next.
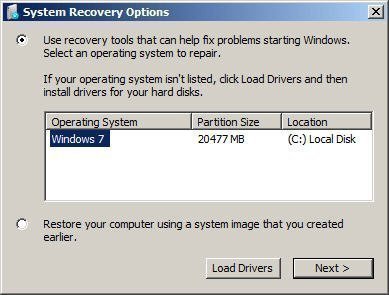
Step 9. Select Startup Repair in the System Recovery Options and it will automatically start to repair boot sector or MBR in Windows 7. Just wait patiently until the process is completed and click Finish.
If the startup repair not working in Windows 7, you still can click View advanced options for system recovery and support in the last page and back to the System Recovery Options page. Then, try command prompt in Windows 7 to repair boot.
Way 2: Windows 7 boot repair from Command Prompt
Step 1. Click Command Prompt in the System Recovery options
Step 2. Fix MBR in Windows 7. You can type the following command and hit Enter.
bootrec /fixmbr
Note: This command can write a new Windows-compatible MBR based on the version of your Windows to the boot sector. And it does not overwrite the existing partition table.
Step 3. Repair boot sector in windows 7. You can type the command below and hit Enter.
bootrec /fixboot
Note: This command can write a new boot sector to the system partition. And it does not overwrite the current partition table. If you install multiple operating systems on this computer, you need to reconfigure the boot options.
Step 4. Fix bootmgr is missing in windows 7 via command prompt. You can type the below command and press Enter.
bootrec /scannos
Step 5. Rebuild your BCD and get the missing Windows installations back. You can type the following command and press Enter to run it.
bootrec /rebuildbcd
Step 6. Rebuild the boot sector for Windows. You can type the following command and press Enter to start it.
bootsect.exe /nt60 all /force
The /nt60 parameter applies the master boot code that is compatible with BOOTMGR. The /all argument updates the master boot code on all partitions.
The /force parameter forcibly dismounts the volume(s) during the boot code update so that the Bootsect.exe tool does not gain exclusive volume access.
Way 3: Repair boot sector in Windows 7
If the bootrec /fixmbr and bootrec /fixboot doesn’t work, you can try to restore the boot sector code of your Windows 7 with steps below.
Step 1. Go to Command Prompt in the System Recovery Options and then type the following commands to find the drive letter of your installation media. Just see “Type” column which contains the word “CD-ROM”.
diskpart
select disk 0
list volume
Step 2. Take D: as an example and type commands below. If not, you can replace it.
d:
cd boot
dir
step 3. Type bootsect /nt60 SYS /mbr and hit Enter to restore boot sector code.
Step 4. Remove the installation media and restart your computer.
Way 4: Rename and rebuild BCD via Command Prompt
If the above command prompt does not work for you, you still can try to backup and rename BCD first and then rebuild it via CMD.
Step 1. Select Command Prompt in the System Recovery Options and type bcdedit /export C:\BCD_Backup command to create a backup for BCD.
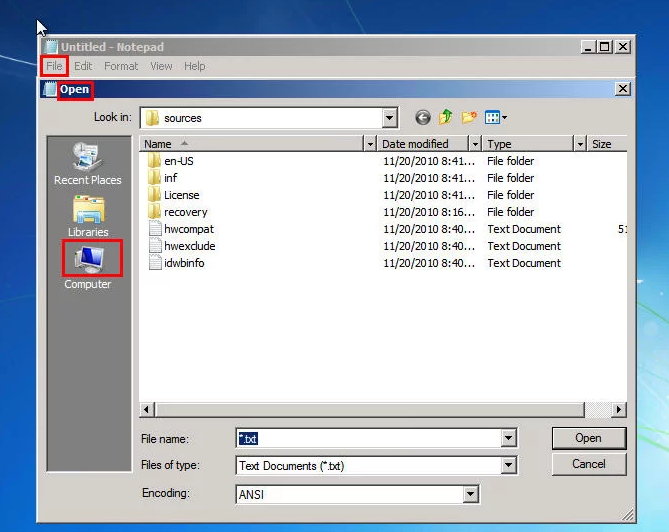
Step 2. Type notepad in the command prompt and then click File > Open > Computer, find the file BCD in the corresponding drive, rename it as BCD.old, and then save the change and exit this window.
Step 3. Type bootrec /rebuildbcd in the command prompt window and input Yes when prompt.
Step 4. Type bcdedit /enum all in the window.
Step 5. Type exit and reboot your computer.
If you want to rebuild BCD without notepad, you can choose to type the following commands and hit Enter in order.
bcdedit /export C:\BCD_Backup
c:
cd boot
attrib bcd -s -h -r
ren c:\boot\bcd bcd.old
bootrec /RebuildBcd
Note: cпјљrefers to the location of your Windows.
Way 5: Windows 7 boot repair without disk
Step 1. Turn on your computer, press and hold the F8 key to go to the Advanced Boot Options screen, then choose Safe Mode with Command Prompt.
Step 2. You can try command prompt for Windows boot repair above and see if it works.
Extra tips for Windows 7 boot repair
1. Scan the integrity of your file system and hard drive and run Windows startup repair command prompt via chkdsk.
Aside by problem of boot sector itself, the physical problem of your hard drive can also damage the boot sector and MBR. Thus, you need to rule out this possibility.
2. Backup your computer with a free backup software.
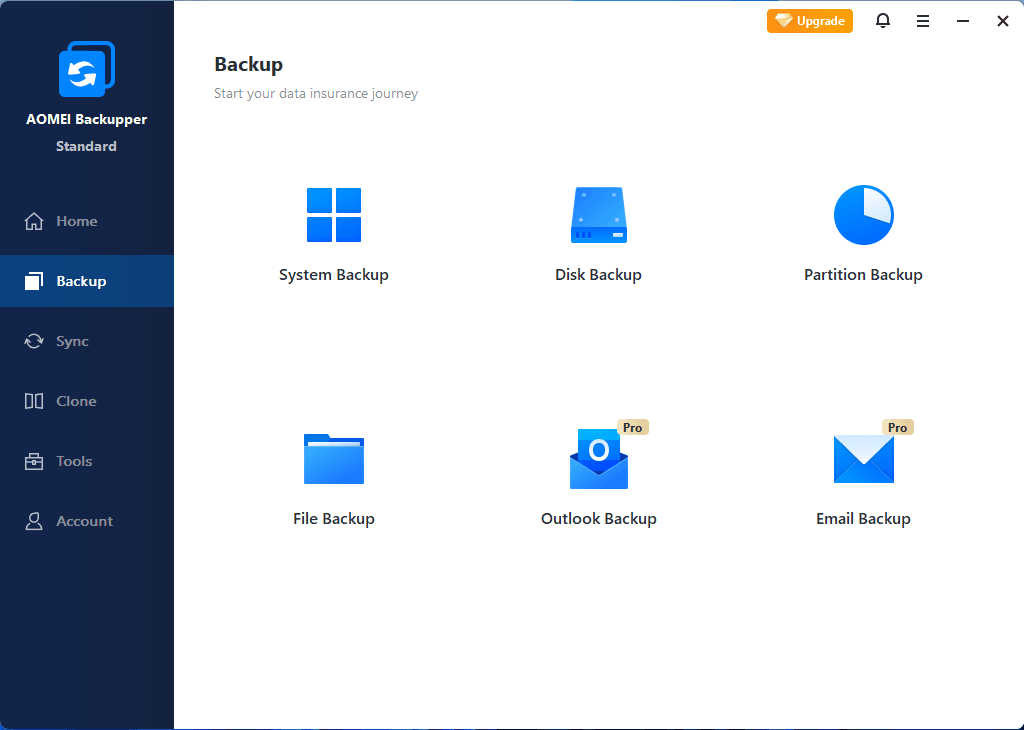
No one dares to say that you can recover your computer all the time. Once the recovery fails, you can only reinstall your computer and all the apps. What’s more, you will lose your files forever. Thus, you need to create a backup for your computer or files. With one or more backup in hand, you can restore it whatever happens. To backup your computer, you need a proper software. I recommend you the free backup software — AOMEI Backupper Standard.
With this software, you can backup system, disk, partition, even a single file. You can use email notification to get to know whether your backup is completed successfully or not. Also, you can create a Windows 7 schedule backup at an interval date, such as daily, weekly, monthly.
And you can manage backup disk space via Backup Scheme. But this feature is only available on the paid-version. If you want to free up disk space, you need to upgrade to AOMEI Backupper Professional. If you use server-based computer, you can directly download AOMEI Backupper Server edition.
If you want to protect unlimited PCs and servers within your company, you may choose AOMEI Backupper Technician Plus. It offers unlimited billable technical services to clients. It also enables you to copy installation directory for portable version creation.
To backup your computer, you can download the backup software and open it. Then, click Backup and select the Backup type in the list. At last, follow the corresponding article to finish the backup.
To restore your backup, you can click Restore and complete the rest of step via on-screen instructions.
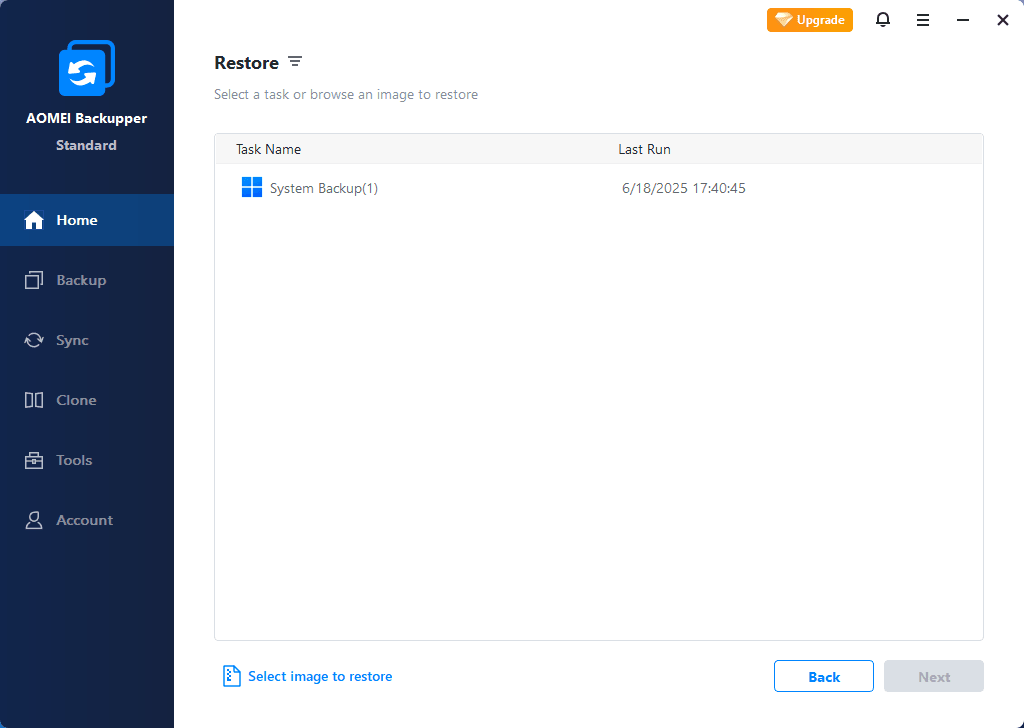
If your computer cannot boot, you can create a bootable media on a working computer and boot the computer having trouble. Also, you can use PXE boot tool to boot the unbootable computer.
Summary
If you receive the above mentioned error message, the boor sector or MBR may be corrupted or damaged. You can use installation disk to run Startup Repair or do Windows 7 boot repair via Command Prompt.
If you can repair boot with command prompt in Windows 7, you are very luck. But, sometime, you will fail to repair startup issue. To ensure the security of your data and your computer, you’d better to create a backup in advance. With a backup in hand, you can restore it at any time.


