- Install Windows from a USB Flash Drive
- What you need
- Step 1 — Format the drive and set the primary partition as active
- Step 2 — Copy Windows Setup to the USB flash drive
- Step 3 — Install Windows to the new PC
- If your Windows image is larger than 4GB
- Создание установочного носителя для Windows
- How do I create a bootable usb drive with an iso image of Windows 7?
- Top 5 Bootable USB Tools For Windows Operating System
- Top 5 bootable USB tools for Windows operating system:
- Rufus
- WinSetupFromUSB
- UNetbootin
- Universal USB Installer
- Windows 7 USB/DVD Download Tool
- Pros, Cons, and Conclusion
- How to create bootable USB media from ISO for Windows 10
- Create bootable USB media from ISO for Windows 10
Install Windows from a USB Flash Drive
Here’s how to create a bootable Windows installation USB drive starting with a Windows .iso file or a Windows Setup DVD.
If you’re looking for an easy way to create a bootable USB Windows installation drive, use the media creation tool.
What you need
- Windows 10 install .iso or DVD
- USB flash drive with at least 5GB free space. This drive will be formatted, so make sure it doesn’t have any important files on it.
- Technician PC — Windows PC that you’ll use to format the USB flash drive
- Destination PC — A PC that you’ll install Windows on
Step 1 — Format the drive and set the primary partition as active
Connect the USB flash drive to your technician PC.
Open Disk Management: Right-click on Start and choose Disk Management.
Format the partition: Right-click the USB drive partition and choose Format. Select the FAT32 file system to be able to boot either BIOS-based or UEFI-based PCs.
Set the partition as active: Right-click the USB drive partition and click Mark Partition as Active.
If Mark Partition as Active isn’t available, you can instead use diskpart to select the partition and mark it active.
Step 2 — Copy Windows Setup to the USB flash drive
Use File Explorer to copy and paste the entire contents of the Windows product DVD or ISO to the USB flash drive.
Optional: add an unattend file to automate the installation process. For more information, see Automate Windows Setup.
Step 3 — Install Windows to the new PC
Connect the USB flash drive to a new PC.
Turn on the PC and press the key that opens the boot-device selection menu for the computer, such as the Esc/F10/F12 keys. Select the option that boots the PC from the USB flash drive.
Windows Setup starts. Follow the instructions to install Windows.
Remove the USB flash drive.
If your Windows image is larger than 4GB
Windows USB install drives are formatted as FAT32, which has a 4GB filesize limit. If your image is larger than the filesize limit:
Copy everything except the Windows image file (sources\install.wim) to the USB drive (either drag and drop, or use this command, where D: is the mounted ISO and E: is the USB flash drive.)
Split the Windows image file into smaller files, and put the smaller files onto the USB drive:
Создание установочного носителя для Windows
Вы можете использовать установочный носитель (USB-устройство флэш-памяти или DVD-диск) для установки новой копии Windows, выполнения чистой установки или переустановки Windows 10.
Чтобы создать установочный носитель, перейдите на веб-сайт скачивания ПО, где вы найдете пошаговые инструкции. На этом веб-сайте вы можете выбрать версию Windows и создать собственный установочный носитель с помощью USB-устройства флэш-памяти или DVD-диска. Чтобы перейти непосредственно к одной из версий, выберите одну из следующих ссылок:
Windows 10 (Затем выберите Скачать средство сейчас.)
Важно: Создайте резервную копию файлов перед установкой и переустановкой Windows на компьютере. Узнайте, как это сделать для Windows 10 или для Windows 7 и Windows 8.1.
Чтобы создать установочный носитель, необходимо следующее:
Компьютер с надежным подключением к Интернету. Время скачивания зависит от скорости подключения к Интернету.
USB-устройство флэш-памяти или DVD-диск. Необходимо пустое USB-устройство флэш-памяти с 8 ГБ свободного места или пустой DVD-диск (и устройство записи DVD). Рекомендуем использовать чистый носитель, поскольку все его содержимое будет удалено. Если при записи DVD-диска из ISO-файла отображается сообщение о том, что файл образа диска слишком большой, необходимо использовать DVD-носитель с двумя слоями (DL).
Ключ продукта. 25-значный ключ продукта (не требуется для цифровых лицензий). Если вам требуется помощь, см. раздел Как найти ключ продукта Windows.
После создания установочного носителя вы можете сбросить или переустановить Windows. Дополнительные сведения см. в разделе Параметры восстановления в Windows 10.
How do I create a bootable usb drive with an iso image of Windows 7?
Which web site is this?
You need to convert those three files into a bootable .ISO file, the following article will show you how:
After you have converted it to a .ISO file, you need to burn it to a blank DVD disc as a disc image, then proceed to install:
ImgBurn — In addtion to supporting the creation of CD’s from .ISO files,
it supports a wide range of other image file formats, and it’s free.
(BIN, CUE, DI, DVD, GI, IMG, MDS, NRG, PDI and ISO)
Download and install Gear ISO burn (Free):
Note: Always use the slowest burn speed (4x or 2x) if offered a choice.
You should have the option to download the .ISO file from the Microsoft Store and simply burn it to a blank DVD as a disc image. Much easier to work with than the box files.
If you downloaded your copy of Windows 7 from the Microsoft Store, try redownloading it again:
1. Login to your Microsoft Store account ( http://store.microsoft.com ) to view your purchase history
2. Look for your Windows 7 purchase.
3. Next to Windows 7, there is an «Additional download options» drop-down menu.
4. In the drop-down menu, select «32 or 64-bit ISO.»
Download the ISO Image of Windows 7
Windows 7 Professional x64 (64-bit)
Windows 7 Professional x86 (32-bit)
Windows 7 Home Premium x64 (64-bit)
ImgBurn — In addtion to supporting the creation of CD’s from .ISO files,
it supports a wide range of other image file formats, and it’s free.
(BIN, CUE, DI, DVD, GI, IMG, MDS, NRG, PDI and ISO)
http://www.imgburn.com/
Note: Always use the slowest burn speed (4x or 2x) if offered a choice.
How to make a bootable USB thumb drive:
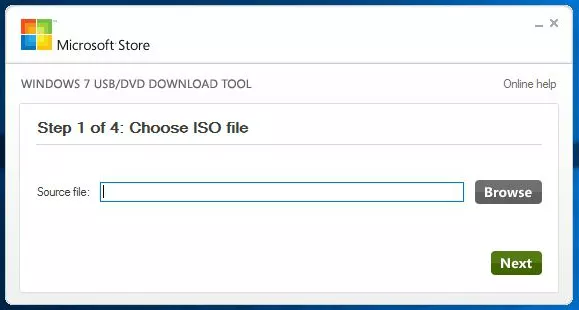
you will have to use a tool such as the Windows 7 USB/DVD Download Tool (http://store.microsoft.com/Help/ISO-Tool)
This simple tool will help you convert the same image file into to a USB thumb drive. For installation purposes, you should get a thumb drive that’s at least 4 GBs in size to store the installation files. Browse to where the Windows 7 Image is stored, open it.
Select the USB device where you want to have the backup stored to for installation.
Once the USB device has been identified, click the Begin copying button.
And that’s it, the next step now is to boot your computer, from the thumb drive, make sure the thumb drive you will be installing Windows 7 from is plugged into the USB port. This might vary by manufacturer, but the usual one to try is F12, start your computer and press F12 repeatedly until a screen is displayed giving you the option to boot from a USB Memory device, select that and press Enter on your keyboard.
Top 5 Bootable USB Tools For Windows Operating System
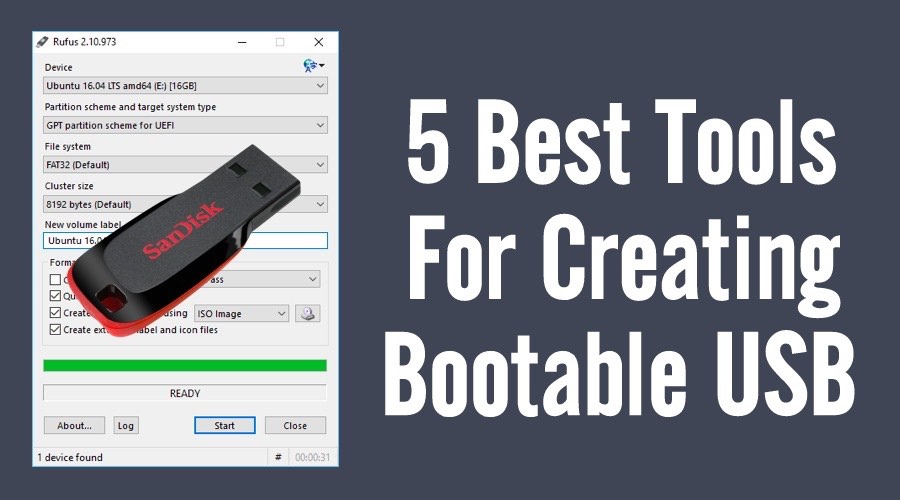 Short Bytes: In this article, we have created a list of the top 5 bootable USB tools for Windows operating system. You can create ISO files for different Windows operating systems, Linux distros, and also make Linux Live USB drives. All these bootable USB tools have their advantages and disadvantages.
O ne of the most common methods of installing an operating system on a computer is to create a bootable media. We can also install an OS using the inbuilt features, for instance, the Reset option present in Microsoft Windows 8 and later. For that, an already running operating system on your machine is a pre-requisite. On the other hand, that’s not the case with the bootable media, you can use it even if your computer doesn’t have any operating system installed at all.
Primarily, we create a bootable media using a CD/DVD or a USB drive. However, the former one has become obsolete because it is technologically backward than the USB drive-based bootable media. Now, there are many tools available to create these bootable USB drives using the ISO image file of the desired operating system.
Top 5 bootable USB tools for Windows operating system:
Rufus
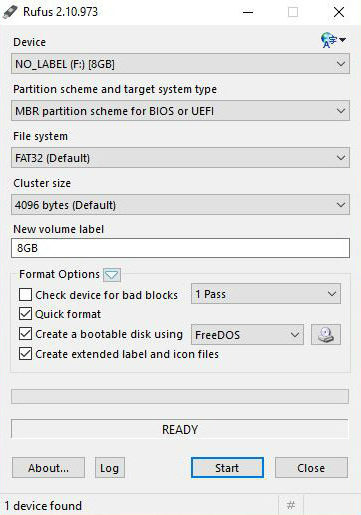 Rufus is a tiny bootable media creator. Yet, it is multilingual and packs many features which can make your bootable USB flash drive creation process more effective. You can create your bootable USB media for both MBR and GPT partition schemes. Rufus facilitates options to install your desired operating system on a UEFI firmware enabled machine. You can install Windows XP in UEFI mode due to OS limitations.
It doesn’t matter what ISO you’re using. It can be Windows 7, 8, 10, any Linux distro, or ISO file of any other operating system. You can choose whether to use the FAT32, NTFS, exFAT, or UDF file systems for the bootable USB media. One thing that helps Rufus stand out in the crowd is that it takes less time to create the bootable USB drive.
WinSetupFromUSB
You might have thought, we forgot to add spaces in the title of WinSetupFromUSB, but it is written like this because its makers chose to do so. The biggest advantage of using WinSetupFromUSB is that you can put multiple ISO files on one flash drive and create a multiboot USB. This will allow you to have a choice of more than one operating system at the time of installation. Just like Rufus, it has many features and allows you to create a bootable USB media for different types of operating system.
UNetbootin
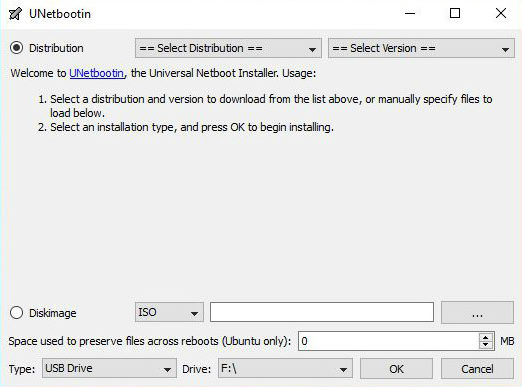 This simple to use tool, not equipped with many options, can create a bootable USB drive easily. The main reason for its existence is that it can be used to create Live USB drives for Linux distros. It offers inbuilt support for many of the popular Linux distros and other open source operating systems like FreeBSD. After connecting your USB drive, you need to select your desired (supported) distribution or antivirus rescue disk and UNetbootin will automatically download the ISO file from the internet and make the Live USB for you. In the case of bootable USB or an unsupported Linux distro, you’ll have to supply the ISO file.
Universal USB Installer
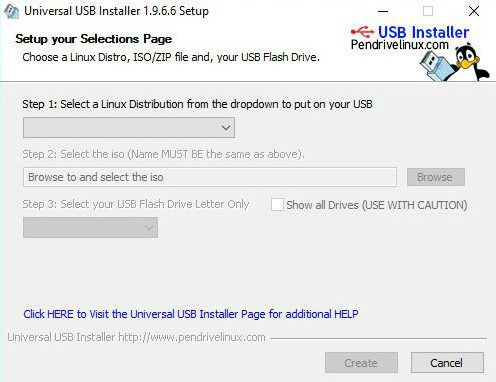
It is a good tool for creating bootable USB drive. Just like UNetBootin, it is used to make Live USB for Linux distros. It supports a few extra ISOs but it doesn’t offer an automatic download option. Instead, it gives you the link to the download page of the distro. But we don’t think that would cause much trouble.
Windows 7 USB/DVD Download Tool

This bootable USB drive creation tool is made by Microsoft. Although it is known as Windows 7 USB/DVD Download Tool, it works for other versions of Windows also. As far as its usability is concerned, it should be at the top position. If you have the USB drive and the ISO file, you only need to make a few clicks and you’re done.
Also, it is a Microsoft product so it only supports ISO files of Microsoft products like Windows, Visual Studio, etc. Microsoft has stopped its development because with the launch of Windows 8 their new Media Creation Tool was also released.
Pros, Cons, and Conclusion
All these bootable USB tools have their own pros and cons. One may have less or almost nil features, like Windows 7 USB/DVD Download Tool. Another may have a plethora of options. More features are advantageous but they would make the bootable USB tool more complex for novice users. The type of USB flash drives you’re using to create the bootable USB also has some contribution. For instance, the bootable USB tool would take less time to create bootable media on a USB 3.0 pen drive in comparison to USB 2.0 pen drive. So, we would recommend you to try these bootable USB tools and decide which one is the best for you.
If you have something to add, tell us in the comments below.
How to create bootable USB media from ISO for Windows 10
While most of us may have reserved a copy of the free Windows 10 upgrade for our computers, there may be some who may want to go for a clean install, using a Windows 10 ISO image. In this post, we will see how to download the ISO image, burn it to a USB drive, and create a bootable USB media from ISO for Windows 10 installation.
First of all, you will have to download the Windows 10 ISO from the official link at Microsoft. We will update this link once the final version is released.
Create bootable USB media from ISO for Windows 10
Once you have done this, you can use it to create a bootable USB or Flash Drive. To do this, you will have to take help of some software like Windows USB/DVD Download Tool, Rufus, ABUSB , ESET SysRescue Live, WinToFlash, Windows USB Installer Maker or Windows Installation Media Creation Tool.
In this post, I am using Rufus as an example. It also offers a portable version, which I have used. After you have downloaded this freeware, insert your USB and then click on Rufus to open its main window. Do note that, you will require a 4 GB USB for the 32-bit version and a 8 GB for the 64-bit version of Windows 10.
You may give a New volume label and browse to the location of your downloaded Windows 10 ISO image. To browse to the location, under Format Options, you will see Create a bootable disk using option. Click on the small icon on the right side and browse to the folder, and select the ISO file.
The rest of the options, you may leave at their default values. When you use MBR partition scheme for BIOS or UEFI, under Partition scheme and target system type, the bootable USB will be suitable for devices using BIOS as well as UEFI.
Once you have done this, simply click on Start and wait for the process to get over. Remember that when you click Start, all data preset on this USB will be deleted, so if you need to, you may back up your data first before using it.
Once the process is completed, you will have a bootable Windows 10 installation USB media in your hands, which you can use to install Windows 10. If you feel the need, you may check if the USB is bootable.
You can also use the Windows 10 Media Creation Tool to create Installation media.


