- Установка и настройка Pуthon, Django и virtualenv на Mac OS
- Основные шаги:
- Установка Homebrew
- Установка Python3
- Установка virtualenv
- Создание изолированного окружения для проекта
- Запуск изолированного окружения
- Установка Django
- Создание проекта
- Запуск проекта
- Как скачать и установить Python на Mac OC X
- Какая версия python установлена по умолчанию
- Установка Xcode и Homebrew
- Установка Python 3 на MAC OC X
- [Бонус] Первый код в IDLE python для новичков
- Installing Python 3 on Mac OS X
- Doing it Right
- Working with Python 3
- Pipenv & Virtual Environments
- O’Reilly Book
- How to Install Python 3 on Mac – Brew Install Update Tutorial
- A Single Command to Run Python 3
- How to Install Homebrew on Mac
- How to Install pyenv to Manage Your Python Versions
- How to Use pyenv to Install Python or Update Your Python Version
- Troubleshooting pyenv Installation
- How to Set Up Your MacOS PATH for pyenv (Bash or ZSH)
- How to Set a Version of Python to Global Default (Bash or ZSH)
- The Final Step: Close Your Terminal and Restart it
Установка и настройка Pуthon, Django и virtualenv на Mac OS

Apr 22, 2020 · 3 min read
Я начал изучать возможности Django. Но раньше я работал только с DLE CMS и WordPress. Поэтому решил почитать инструкции по установке и настройке Джанго, с учетом того, что у меня Mac OS.
Стоит немного остановиться на том, что такое Django. Это достаточно мощный и уважаемый среди разработчиков фреймворк для создания сайтов, написанный на Python. Django считается очен быстрым и безопасным фреймворком, а благодаря своей модульности он очень гибкий и хорошо масштабируется.
Есть очень много р азных туториалов по установке, настройке и запуску Django. Но часть из них или достаточно объемные, или упускают какие-то важные вещи. В этой статье я постараюсь описать основные шаги, необходимые для запуска проекта на Python-Django под Mac OS.
Основные шаги:
- Установка Homebrew.
- Установка Python 3.
- Установка virtualenv.
- Создание изолированного окружения для проекта.
- Запуск изолированного окружения.
- Установка Django.
- Создание проекта.
- Запуск проекта!
Установка Homebrew
Homebrew — бесплатная открытая система управления программными проектами, которая упрощает установку программного обеспечения на операционную систему Mac OS. Homebrew использует Github для расширения поддержки пакетов, за счет вклада пользователей.
Если у вас не установлен Hombrew, необходимо запустить в терминале команду:
Установка Python3
Изначально Mac OS имеет предустановленный python версии 2. Поэтому, послу установки 3 версии питона, для доступа именно к python3 необходимо запускать его из терминала с командой python3.
Чтобы проверить версию python, надо запустить в терминале команду
Вы должны получить сообщение с версией установленного python.

Установка virtualenv
virtualenv — инструмент для создания изолированного виртуального окружения Python. Благодаря этому инструменту можно создать несколько разных проектов python, с разным набором библиотек на одном устройстве. Например, если вы захотите использовать разные версии одного и того же модуля в разных проектах.
После установки virtualenv мы установим все другие пакеты, в том числе и django в изолированные окружения.
Создание изолированного окружения для проекта
Создаем папку, в которой будет храниться проект. Пример команды в терминале.
И переходим в нее:
Создаем виртуальное окружение для проекта:
Где “ptest” — это название изолированного окружения, на ваше усмотрение.
Запуск изолированного окружения
После создания окружения, необходимо его активировать, чтобы установить все необходимые модули. Для этого запускаем в терминале команду:
Чтобы определить, в каком окружении вы находитесь, посмотрите на префикс в терминале, в круглых скобках будет указано название.

Так как изолированное окружение создавалось при помощи python3, в этом окружении можно запускать команды сразу через python, а не python3, так же как и pip, вместо pip3.
Чтобы завершить работу изолированного окружения, достаточно написать команду
Установка Django
Снова запустим изолированное окружение и через pip установим django.
Где “2.2” — необходимая версия джанго.
Создание проекта
Все готово для создания проекта. Достаточно написать в терминале (с запущенной виртуальной средой):
Поздравляю, вы создали свой первый проект на Django. Структура папок будет такой:
- project_test —домашняя папка проекта
- project1 — папка проекта django
- project1 — корневая папка
- ptest — виртуальная среда проекта
Запуск проекта
В Django встроен простой виртуальный веб-сервер. Не надо устанавливать никаких других программ на локальной машине. Чтобы его проверить, запустите в терминале команду:
Осталось проверить что сервер запущен, для этого в браузере открываем адрес http://127.0.0.1:8000.

Поздравляю, вы запустили свой первый проект на Django!
Источник
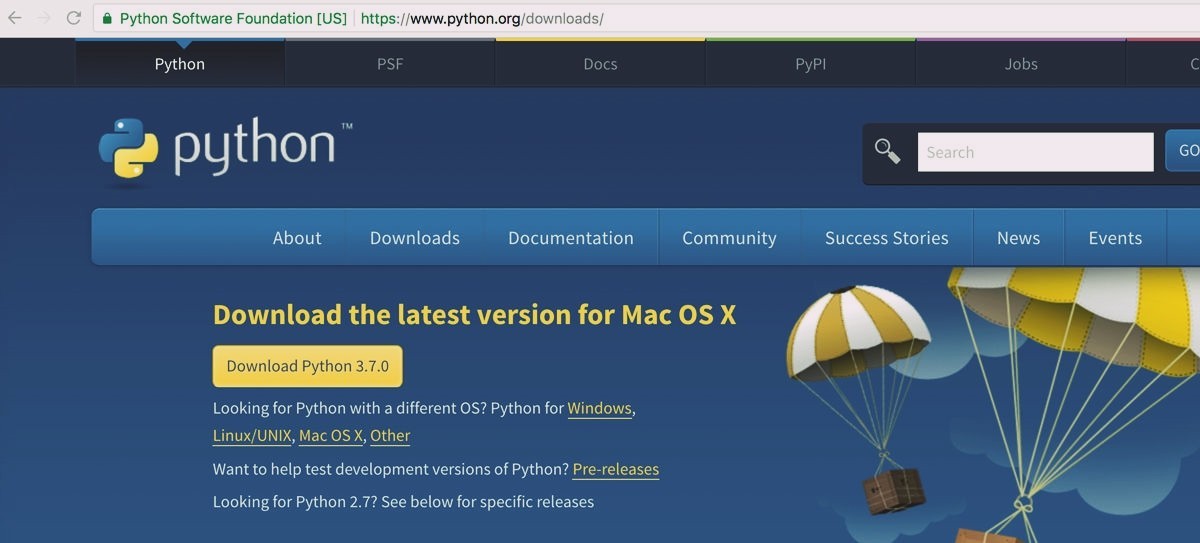
Как скачать и установить Python на Mac OC X
Это краткий туториал покажет вам, как правильно установить Python 3 на Mac OS X. Существует несколько способов установки Python 3, включая скачивание с [официального сайта Python] (https://www.python.org/downloads/), однако я настоятельно рекомендую вместо этого использовать менеджер пакетов, такой как Homebrew для управления всеми вашими зависимостями в будущем. Это сделает вашу жизнь намного проще.
Какая версия python установлена по умолчанию
Хотя Python 2 установлен по умолчанию на компьютерах Apple, Python 3 — нет. Вы можете проверить это, набрав в Терминале python —version и нажав return:
Чтобы проверить, установлен ли Python 3, попробуйте запустить команду python3 —version . Скорее всего, вы увидите сообщение об ошибке, но стоит проверить. Даже если у вас есть версия Python 3, мы обновим ее до самой последней версии, которая на данный момент в 2019 году 3.7.2.
Установка Xcode и Homebrew
Мы будем использовать менеджер пакетов Homebrew для установки Python 3 — это общая практика. Homebrew необходим пакет Xcode Apple, поэтому для его установки выполните следующую команду:
Нажимайте далее или подтвердить (Xcode — большая программа, ее установка может занять некоторое время).
Далее установите Homebrew:
Чтобы проверить правильность установки Homebrew, выполните следующую команду:
Установка Python 3 на MAC OC X
Чтобы скачать и установить последнюю версию Python, выполните следующую команду:
Подождите пока установятся все зависимости и сам python 3
Теперь давайте подтвердим, какая версия установилась:
Что бы писать код Python 3 из командной строки, введите python3:
Если вы хотите выйти, введите exit() и return или Ctrl-D (одновременно клавиши Control и D).
Что бы запустить оболочку Python 2, просто вводите python :
[Бонус] Первый код в IDLE python для новичков
Теперь Python 3 установлен на ваш Mac, пора приступить к конкретному написанию первого кода. В Python большинство команд основано на контекстных словах в английском языке. Если в C# потребовалось бы ввести команду Console.WriteLine , чтобы вывести запись на экран, в Python это простая команда print .
Я покажу 3 простые задачи, которые есть в каждом коде:
- вывод данных
- операция сложения
- использование условного оператора if
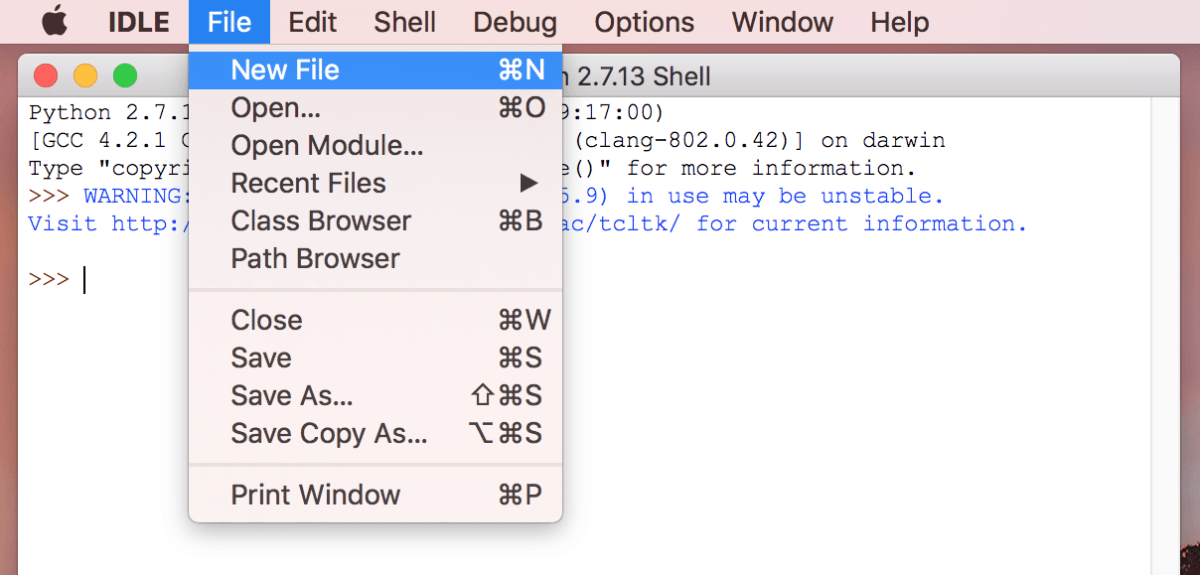
Для нашей первой задачи мы будем использовать IDLE. Это простой редактор кода, поставляется вместе с Python при его установке. Воспользуйтесь поиском и откройте IDLE.
Откроется окно, которое мы называем “оболочкой”. Там отображается результат выполнения кода, но писать код мы будем отдельно. Для этого нам нужно создать новый файл. Мы можем сделать это, нажав File > New File в верхнем меню. Откроется новый пустой файл.
Сохраните файл. Выберите File > Save As , затем сохраните его как helloworld.py . Обычно, в качестве первой программы используют вывод «Hello World» на экран.
Команда, которую мы собираемся использовать, является командой вывода данных в оболочку. Эта команда выглядит следующим образом. В скобках в кавычках находится текст, который мы выведем на экран.
После того, как вы ввели этот код в файл , выберите File > Save в меню, чтобы сохранить обновленную программу, а затем нажмите Run > Run Module из меню. Ваш вывод появится в окне оболочки. Это должно выглядеть примерно так.

Попробуйте распечатать разные фразы на экране, чтобы привыкнуть к коду.
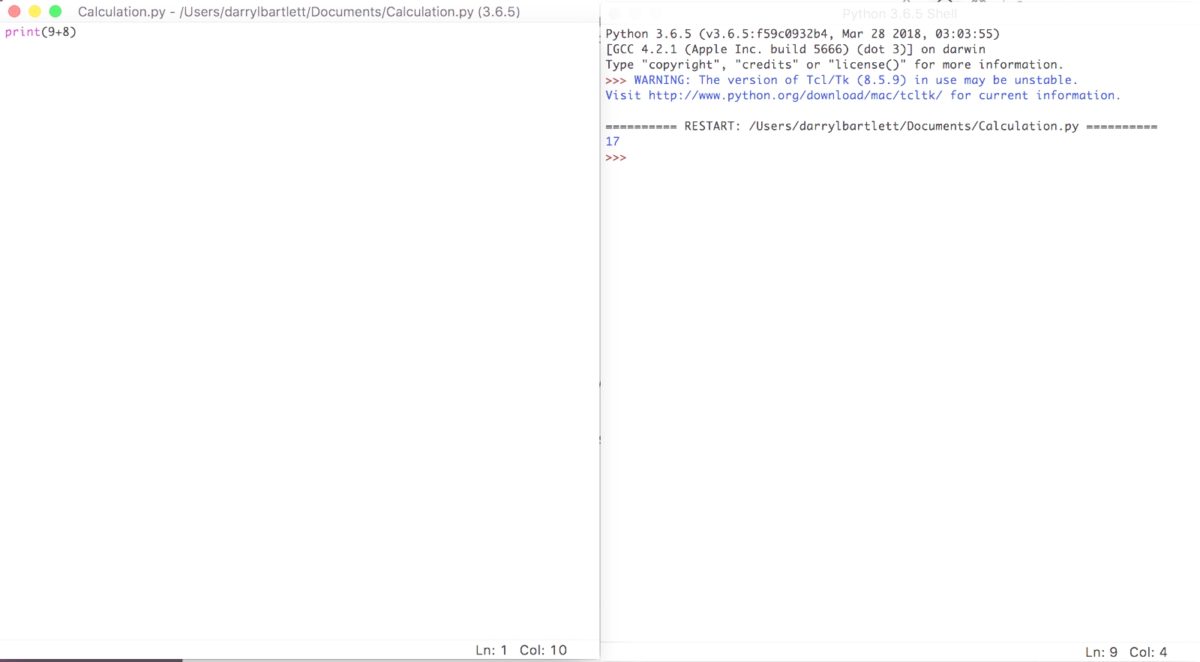
Наша вторая задача — заставить Python считать за нас. Создайте новый файл Calculation.py. На этот раз мы выведем результат сложения двух чисел. Прибавим 9 к 8, для этого нам нужно ввести в наш новый файл команду print , которая выглядит следующим образом.
Как только вы это сделаете, нужно сохранить и затем запустить программу, нажав Run > Run Module . В оболочке появится результат вычислений, вот так:
Попробуйте различные вычисления, чтобы привыкнуть, помните, что вокруг чисел не нужны кавычки. Если вы еще не знакомы с операторами python, рекомендую прочить эту статью.
Наконец, мы создадим еще одну базовую программу, которая будет выводить результат в зависимости от входных данных, с помощью оператора if . Давайте снова откроем новый файл и выпишем следующий синтаксис:
Здесь мы объявляем переменную my_number равную 100, затем создаем конструкцию if-else , чтобы проверить, больше ли my_number числа 50. Если утверждение верно, мы получим «Это большое число», в противном случае мы увидим «Это небольшое число». ». Не забудьте сохранить и запустить программу, как вы это делали в предыдущих примерах.
Вы заметите, что программа печатает «Это большое число», потому что наш номер превышает 50. Попробуйте поменять номер и посмотрите, какой результат получите. Например, что выведет скрипт, если my_number = 50 ?
Источник
Installing Python 3 on Mac OS X
Mac OS X comes with Python 2.7 out of the box.
You do not need to install or configure anything else to use Python 2. These instructions document the installation of Python 3.
The version of Python that ships with OS X is great for learning, but it’s not good for development. The version shipped with OS X may be out of date from the official current Python release, which is considered the stable production version.
Doing it Right
Let’s install a real version of Python.
Before installing Python, you’ll need to install GCC. GCC can be obtained by downloading Xcode, the smaller Command Line Tools (must have an Apple account) or the even smaller OSX-GCC-Installer package.
If you already have Xcode installed, do not install OSX-GCC-Installer. In combination, the software can cause issues that are difficult to diagnose.
If you perform a fresh install of Xcode, you will also need to add the commandline tools by running xcode-select —install on the terminal.
While OS X comes with a large number of Unix utilities, those familiar with Linux systems will notice one key component missing: a package manager. Homebrew fills this void.
To install Homebrew, open Terminal or your favorite OS X terminal emulator and run
The script will explain what changes it will make and prompt you before the installation begins. Once you’ve installed Homebrew, insert the Homebrew directory at the top of your PATH environment variable. You can do this by adding the following line at the bottom of your
If you have OS X 10.12 (Sierra) or older use this line instead
Now, we can install Python 3:
This will take a minute or two.
Homebrew installs pip pointing to the Homebrew’d Python 3 for you.
Working with Python 3
At this point, you have the system Python 2.7 available, potentially the Homebrew version of Python 2 installed, and the Homebrew version of Python 3 as well.
will launch the Homebrew-installed Python 3 interpreter.
will launch the Homebrew-installed Python 2 interpreter (if any).
will launch the Homebrew-installed Python 3 interpreter.
If the Homebrew version of Python 2 is installed then pip2 will point to Python 2. If the Homebrew version of Python 3 is installed then pip will point to Python 3.
The rest of the guide will assume that python references Python 3.
Pipenv & Virtual Environments
The next step is to install Pipenv, so you can install dependencies and manage virtual environments.
A Virtual Environment is a tool to keep the dependencies required by different projects in separate places, by creating virtual Python environments for them. It solves the “Project X depends on version 1.x but, Project Y needs 4.x” dilemma, and keeps your global site-packages directory clean and manageable.
For example, you can work on a project which requires Django 1.10 while also maintaining a project which requires Django 1.8.
This page is a remixed version of another guide, which is available under the same license.
This opinionated guide exists to provide both novice and expert Python developers a best practice handbook to the installation, configuration, and usage of Python on a daily basis.
O’Reilly Book
This guide is now available in tangible book form!
All proceeds are being directly donated to the DjangoGirls organization.
Источник
How to Install Python 3 on Mac – Brew Install Update Tutorial
MacOS comes with Python pre-installed. But it’s Python Version 2.7, which is now deprecated (abandoned by the Python developer community).
The entire Python community has now moved on to using Python 3.x (the current version as of writing this is 3.9). And Python 4.x will be out soon, but it will be completely backward compatible.
If you try to run Python from your MacOS terminal, you’ll even see this warning:
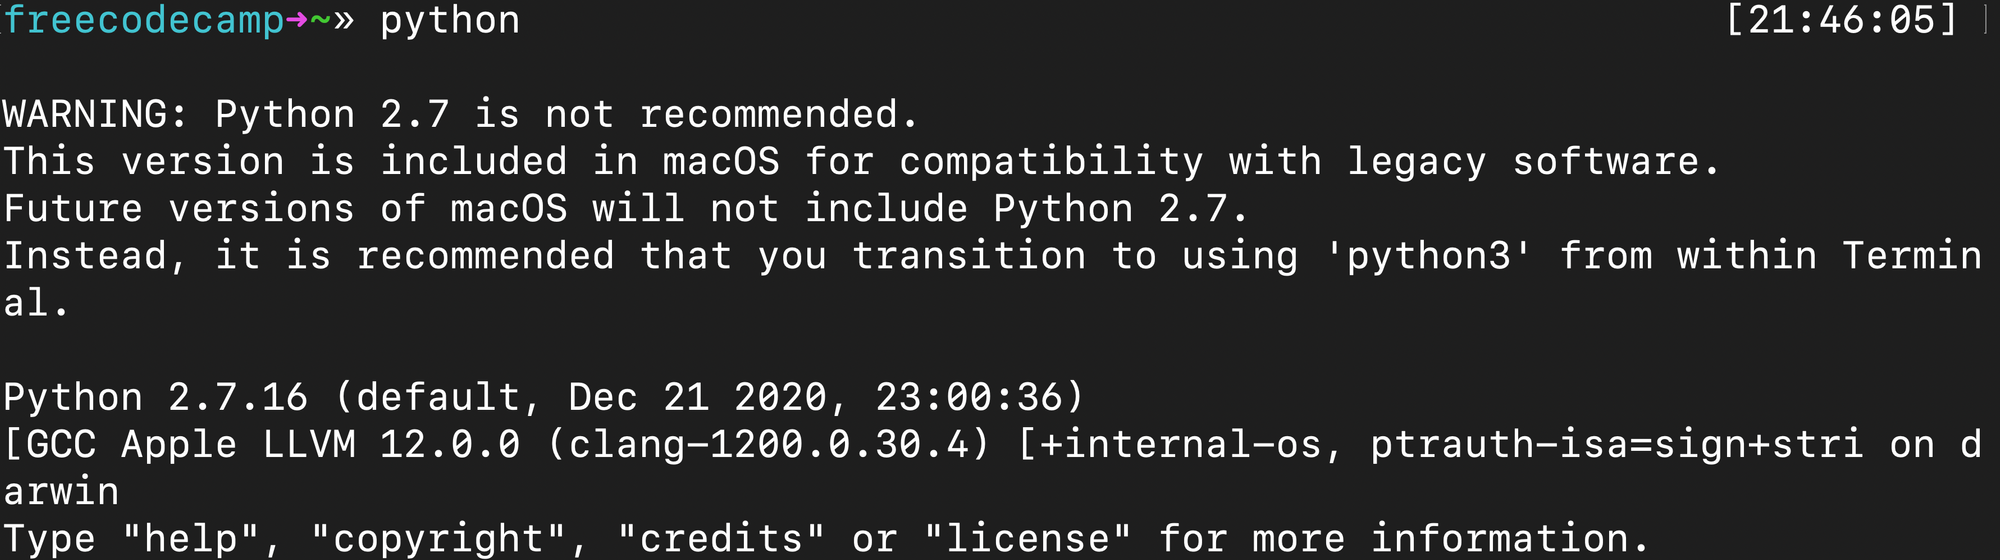 WARNING: Python 2.7 is not recommended. This version is included in macOS for compatibility with legacy software. Future versions of macOS will not include Python 2.7. Instead, it is recommended that you transition to using ‘python3’ from within Terminal.
Until Apple decides to set Python 3.x, as the default you’re going to have to install it yourself.
A Single Command to Run Python 3
For some of you reading this, this command may be enough. You can run Python 3 using this command (with the 3 at the end).
If that’s all you came for, no worries. Have a fun day and happy coding.
But if you want a proper Python version control system to keep track of various versions – and have fine-grain control over which version you use – this tutorial will show you exactly how to accomplish this.
 By the way, if you’re wondering why I keep referring to Python 3.x – the x is a stand-in for sub-versions (or point releases as developers call them.) This means any version of Python 3.
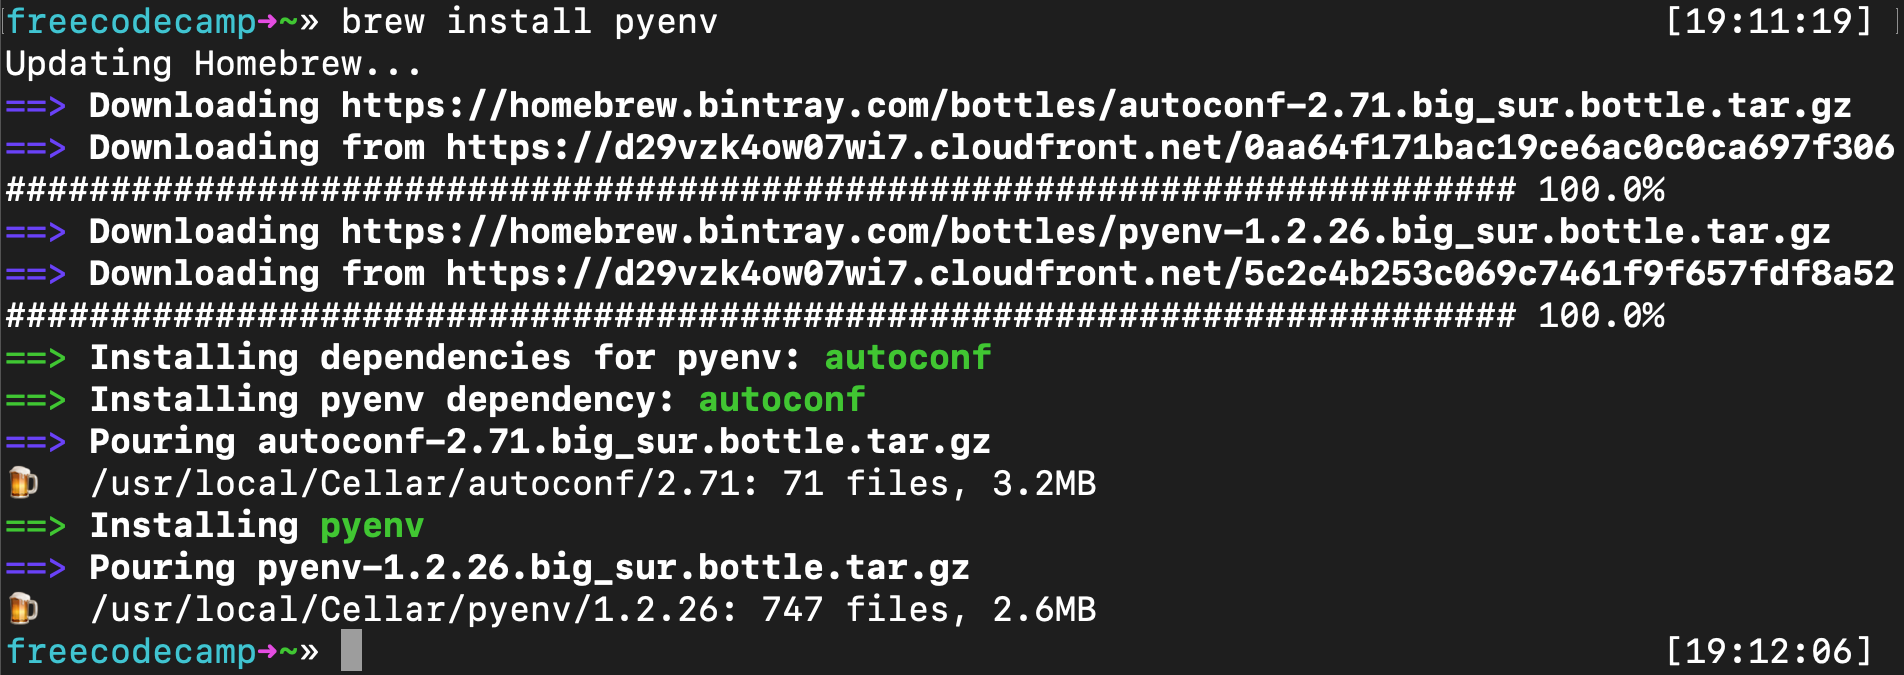
How to Install Homebrew on Mac
First you need to install Homebrew, a powerful package manager for Mac.
Open up your terminal. You can do this by using MacOS spotlight (command+space) and typing «terminal».
Now that you’re in a command line, you can install the latest version of Homebrew by running this command:
Your terminal will ask for Super User-level access. You will need to type your password to run this command. This is the same password you type when you log into your Mac. Type it and hit enter.
 A screenshot of my heavily customized terminal. Your terminal will probably look different from this.
Homebrew will ask you to confirm you want to install the following. You have to press enter to continue. (Or press any other key if you get cold feet.)

How to Install pyenv to Manage Your Python Versions
Now let’s take a moment to install PyEnv. This library will help you switch between different versions of Python (in case you need to run Python 2.x for some reason, and in anticipation of Python 4.0 coming).
Run this command:
 PyEnv installing
Now you can install the latest version of Python.
How to Use pyenv to Install Python or Update Your Python Version
Now you just need to run the following command:
Note that you can substitute 3.9.2 for whatever the latest version of Python is. For example, once Python 4.0.0 comes out, you can run this:
Troubleshooting pyenv Installation
If you encounter an error that «C compiler cannot create executables» then the simplest way to solve this is to reinstall Apple’s Xcode.
Xcode is a tool created by Apple that includes all the C libraries and other tools that Python uses when it runs on MacOS. Xcode is a whopping 11 gigabytes, but you’ll want to be up-to-date. You may want to run this while you’re sleeping.
You can get the latest version of Apple’s Xcode here. I had to do this after upgrading to MacOS Big Sur, but once I did, all the following commands worked fine. Just re-run the above pyenv install 3.9.2 and it should now work.
How to Set Up Your MacOS PATH for pyenv (Bash or ZSH)
First you need to update your Unix path to pave a way for PyEnv to be able to interact with your system.
This is a long explanation of how PATH works in MacOS (and Unix), straight from the pyenv GitHub repo.
When you run a command like python or pip , your operating system searches through a list of directories to find an executable file with that name. This list of directories lives in an environment variable called PATH , with each directory in the list separated by a colon:
Directories in PATH are searched from left to right, so a matching executable in a directory at the beginning of the list takes precedence over another one at the end. In this example, the /usr/local/bin directory will be searched first, then /usr/bin , then /bin .
And here is their explanation of what a Shim is. I’m quoting them at length again because I really can’t explain this better myself.
pyenv works by inserting a directory of shims at the front of your PATH :
Through a process called rehashing, pyenv maintains shims in that directory to match every Python command across every installed version of Python— python , pip , and so on.
Shims are lightweight executables that simply pass your command along to pyenv.
Here’s how to update your .bash_profile in Bash (which is installed in MacOS by default):
Or if you’ve installed ZSH (or OhMyZSH) like I have, you’ll want to edit the .zshrc file instead:
Then you want to add PyEnv Init to your terminal. Run this command if you’re using Bash (again, this is the default with MacOS):
Or run this command if you’re using ZSH:
Now reset your terminal by running this command:
How to Set a Version of Python to Global Default (Bash or ZSH)
You can set the latest version of Python to be global, meaning it will be the default version of Python MacOS uses when you run Python applications.
Run this command:
Again, you can replace 3.9.2 with whatever the latest version is.
Now you can verify that this worked by checking the global version of Python:
You should see this output:
 The * means that version is now the global default
The Final Step: Close Your Terminal and Restart it
Once you’ve restarted your browser, you run the python command and you’ll launch the new version of Python instead of the old one.
 Yay. Python 3.9.2 and no deprecation warnings
Congratulations. Thank you for reading this, and happy coding.
The teacher who founded freeCodeCamp.org.
If you read this far, tweet to the author to show them you care. Tweet a thanks
Learn to code for free. freeCodeCamp’s open source curriculum has helped more than 40,000 people get jobs as developers. Get started
freeCodeCamp is a donor-supported tax-exempt 501(c)(3) nonprofit organization (United States Federal Tax Identification Number: 82-0779546)
Our mission: to help people learn to code for free. We accomplish this by creating thousands of videos, articles, and interactive coding lessons — all freely available to the public. We also have thousands of freeCodeCamp study groups around the world.
Donations to freeCodeCamp go toward our education initiatives and help pay for servers, services, and staff.
Источник


